
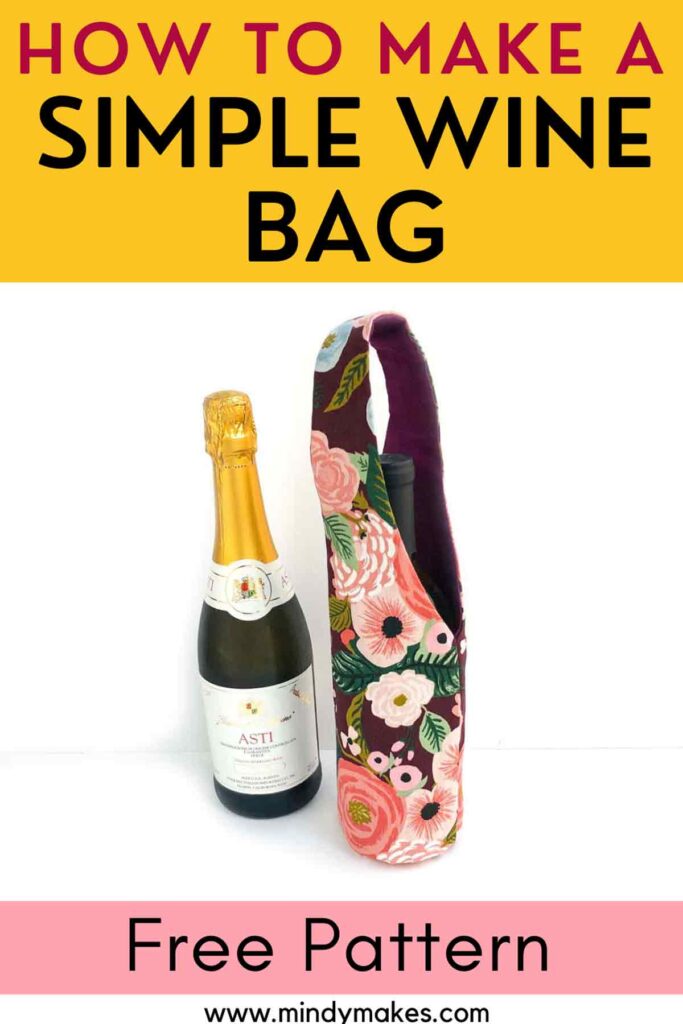
How to Make a Round-Bottom Wine Bag (Free PDF Pattern)
This post may contain affiliate links. Please read my disclosure policy for details. As an Amazon Associate, I earn from qualifying purchases.
Always wanted to know How to make a Wine Bottle Carrier out of fabric? Look no further! This step-by-step tutorial will show you exactly how to make a Wine Bottle Bag so you can safely and stylishly transport that special bottle to the next festive occasion!
Recently a friend came over for dinner with a bottle of wine. Since no one in our family could appreciate this gift, we insisted that our guest bring it home. However, after digging through my bag stash, we failed to fine a suitable carrier for safe transportation. As a result, we left it on a small side table for our friend to grab on her way out. Needless to say, she forgot her wine!
In this case, a wine bottle tote would have been the perfect solution! Not just for bringing forgotten wines back to their owners…but also as gifts bags to carry wines and champagnes for holiday gatherings and other festive celebrations!
How do you SEW A WINE BOTTLE BAG?
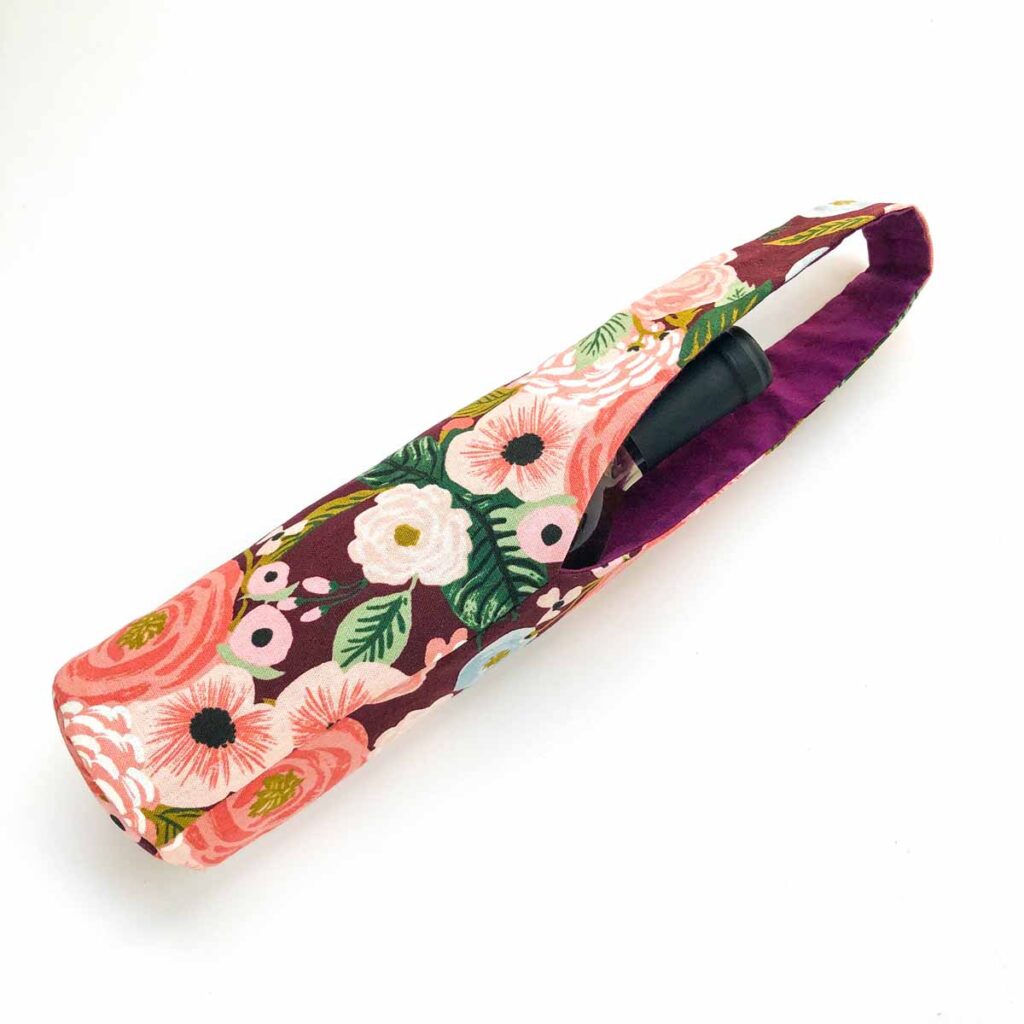
There are several wine bottle bag pattern out there with a rectangular bottom. While this makes for faster sewing, I much prefer the round bottom design. It just fits the wine bottle perfectly and looks so (much more) sleek to carry!
In the tutorial below, I go over a few tips and tricks to effortlessly sew a circle to a rectangle. This can be a little tricky if you’ve never done it before, since circle-shaped fabrics will stretch as you sew (due to parts of the circle being on the bias). However, with my step-by-step tutorial and detailed instructions, I am confident you will succeed!
It may feel really slow at first, but I promise the results (of a round bottom wine bottle bag) is so worth it! The bag just looks so much nicer compared with a rectangular bottom! Trust me on this!
Simple Wine Bag with PDF Pattern
The printable PDF Pattern comes in just 3 pieces: Two side pieces that include the handle, and one round bottom piece. You will cut out the exactly pattern on an exterior fabric and one on lining fabric. The finished wine bottle bag is fully lined and reversible.
The Regular Wine Bag PDF Pattern is available in our Free MindyMakes Resource Library, listed under section “W” as Wine Bottle Bag. Subscribe here to get the password.
The ad-free, printer-friendly PDF version of this step-by-step sewing tutorials is available for purchase in our SHOP. PDF tutorial also includes additional color block pattern not available in our free resource library. Print a copy today to keep next to your sewing machine for easy reference!
What size is a wine bottle bag?
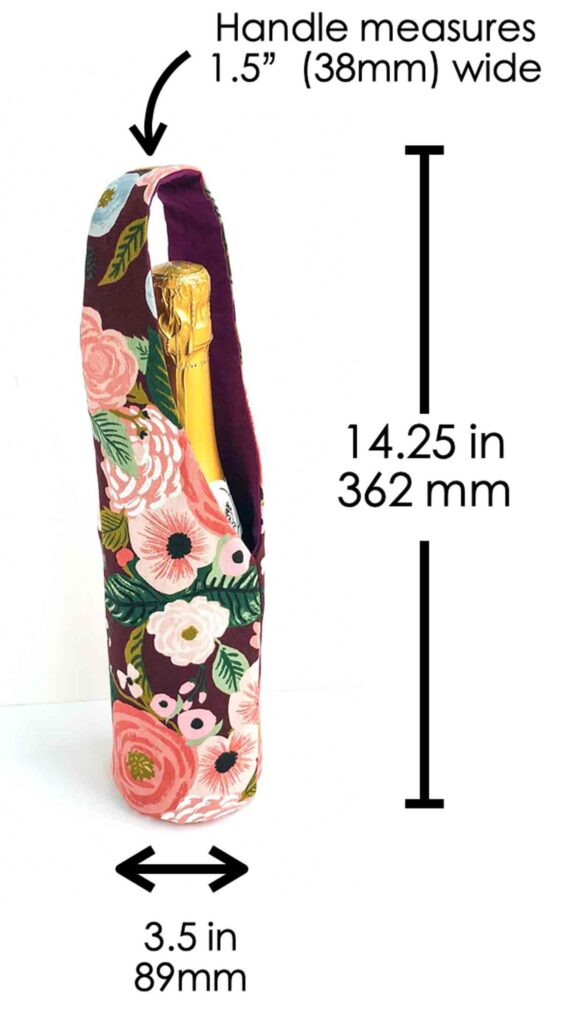
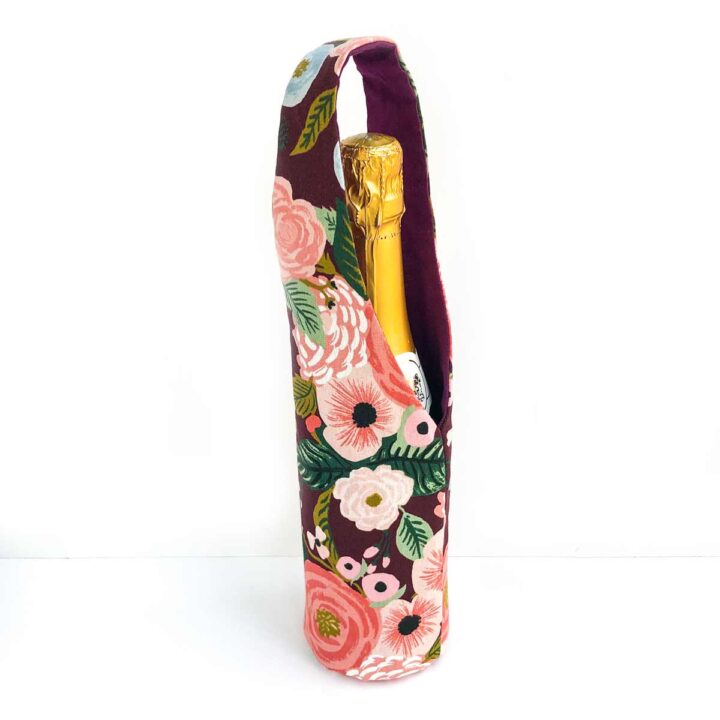
This Wine bottle tote measures approximately 3.5” (89mm) wide at the round bottom and is 14.25” (362mm) tall. The handle measures 1.5” (38mm) wide.
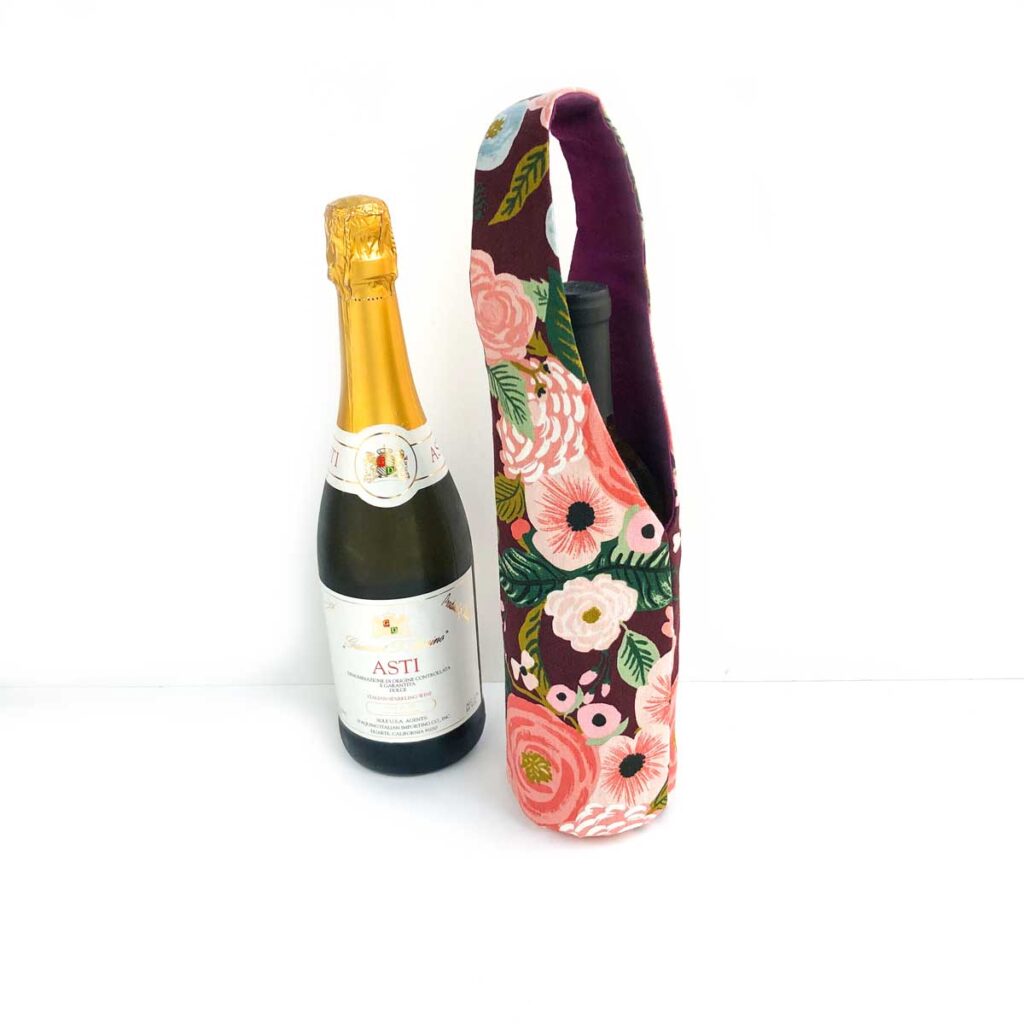
Depending on the height of your bottle, there will be 2-3 inches of “carrying space”, measured from the top of the wine bottle to the top of the handle.
How do you make a tote wine bag?
First, gather all the materials necessary for this sewing project. You can also add fusible interfacing to the exterior fabric if you want a little extra stiffness to your bag. Whether or not you decide to interface the bag portion, I highly recommend interfacing both round bottom pieces as this prevents the circular fabric from stretching (while you sew).
Next, you sew the handles of the exterior fabrics together and the handles of the lining fabrics together. Third, you sew part of the curve of the exterior fabric to the lining fabric and turn the bag to the right side. Next, finish sewing the curve of the bag together. Fourth, sew the side seams of the bag together. Finally, sew the circle bottom to the wine tote and you are finished!
For detailed instructions with pictures, jump to the step-by-step tutorial.
Materials:
- EXTERIOR FABRIC – 1/2 yard
- LINING FABRIC – 1/2 yard
- FUSIBLE INTERFACING (optional) – 1/2 yard
TOOLS:
- SEWING MACHINE
- FABRIC SCISSORS – these Ginghers are my favorite.
- CLEAR RULER – I have the DRITZ See-Through Sewing Ruler
- SEWING PINS
- MATCHING THREAD
Wine Bottle Bag Pattern
Printable PDF Wine Bag Pattern is available in the Free MindyMakes Resource Library. Subscribe here to get the password.
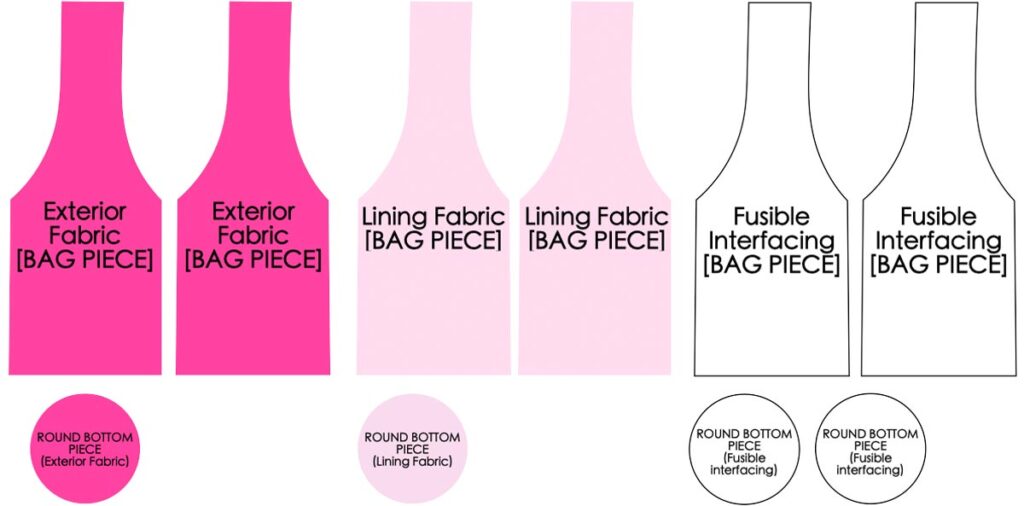
For this simple wine bottle bag, you will need to cut out the following pattern pieces:
- EXTERIOR FABRIC:
- BAG PIECE (x2)
- ROUND BOTTOM PIECE (x1)
- LINING FABRIC:
- BAG PIECE (x2)
- ROUND BOTTOM PIECE (x1)
- FUSIBLE INTERFACING:
- BAG PIECE (x2) – optional, if you want to add stiffness to your bag
- ROUND BOTTOM PIECE (x2) – highly recommend if you consider yourself a beginner. Makes sewing the bottom to the bag much easier!
Step-by-Step Tutorial: How do I make a Fabric Wine bag
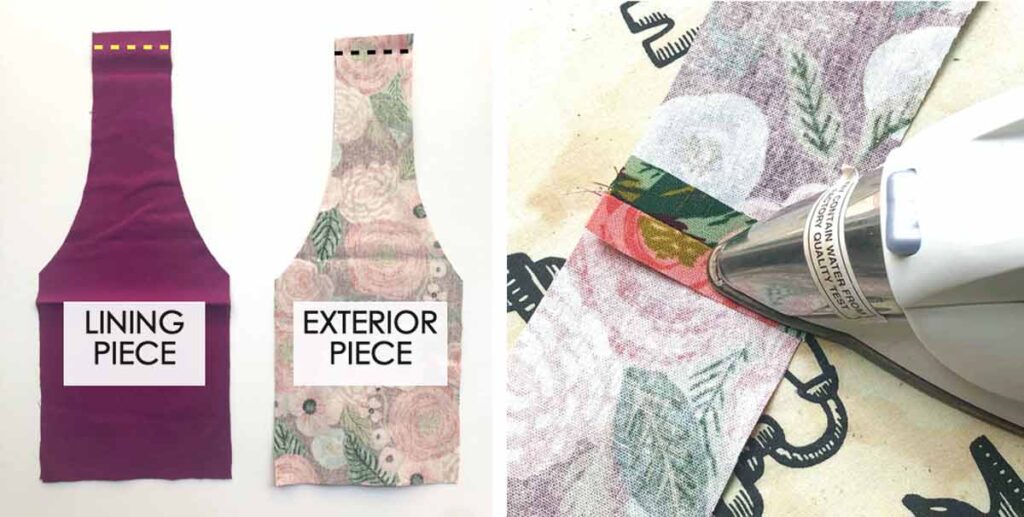
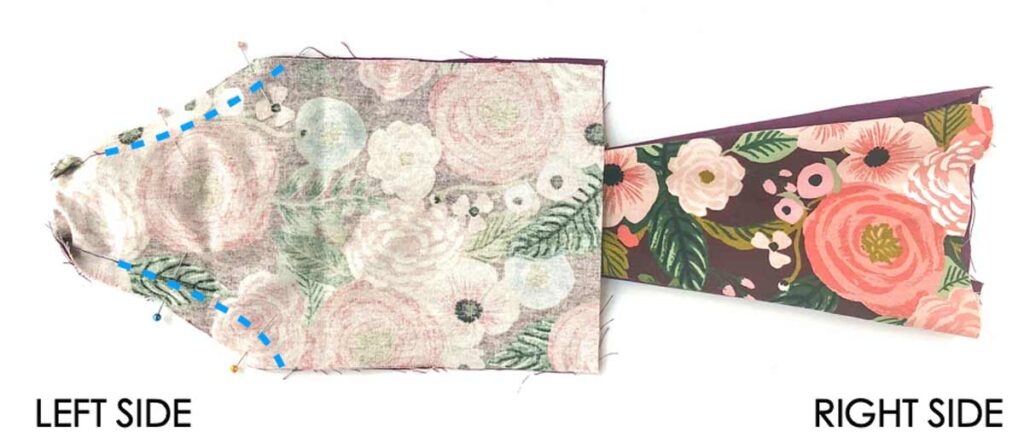
LEFT: Place LINING PIECES right sides together and stitch the top at 1/2” seam allowance (yellow dotted line). Repeat for EXTERIOR PIECE
RIGHT: Press open the seams with iron.
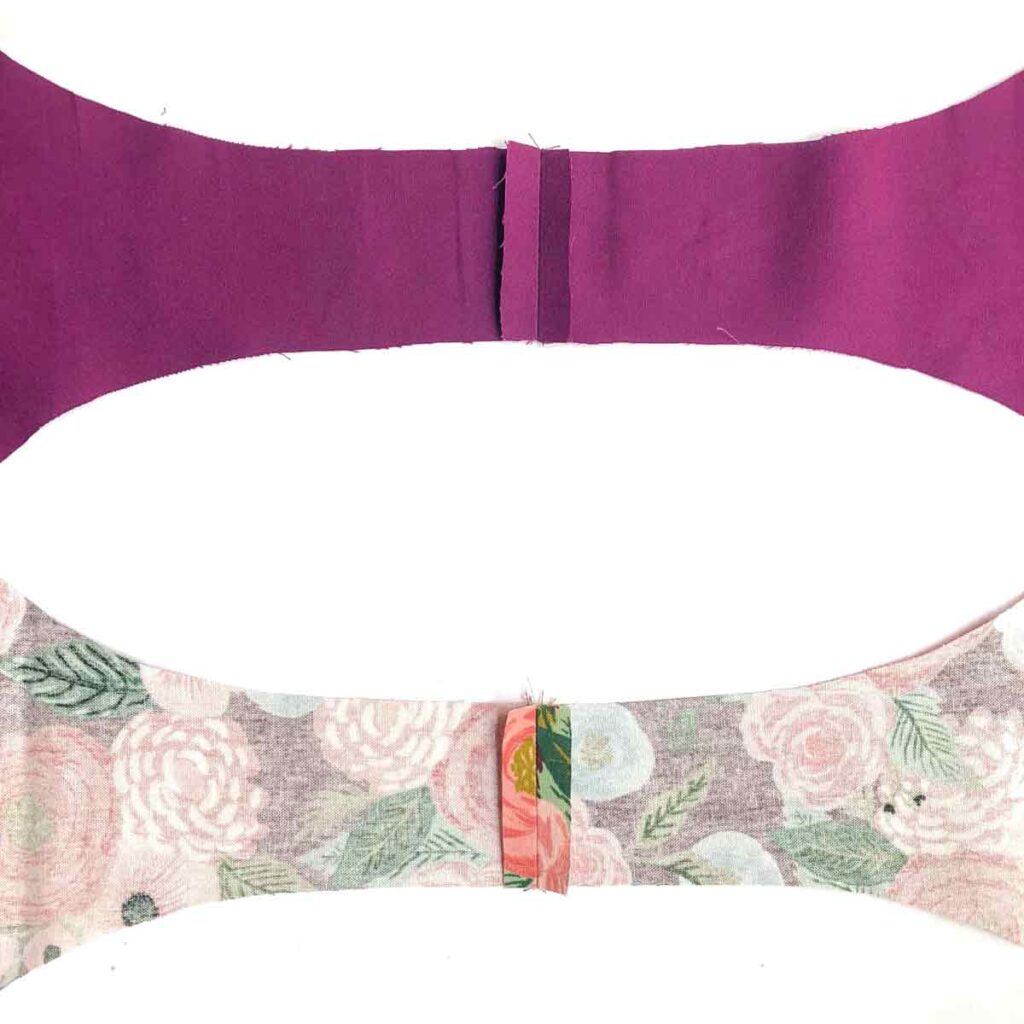
View of LINING PIECE and EXTERIOR PIECE sewn together with top seams pressed opened.
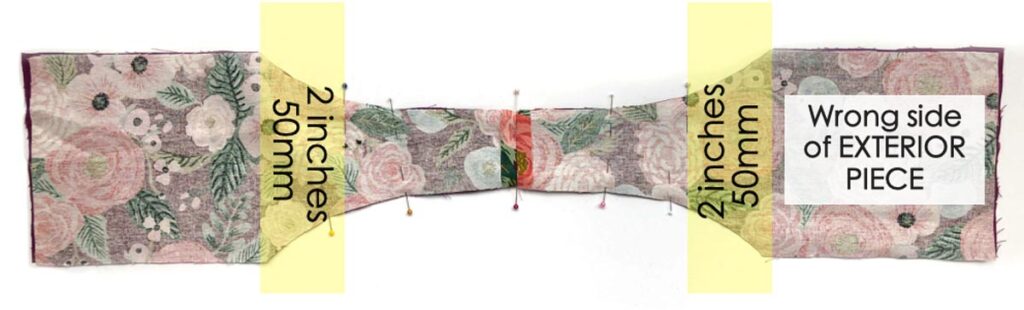
Place EXTERIOR PIECE and LINING PIECE right sides together, and pin on both sides of curve as shown in photo. Stop pinning approximately 2”(50mm) away from where curve ends.
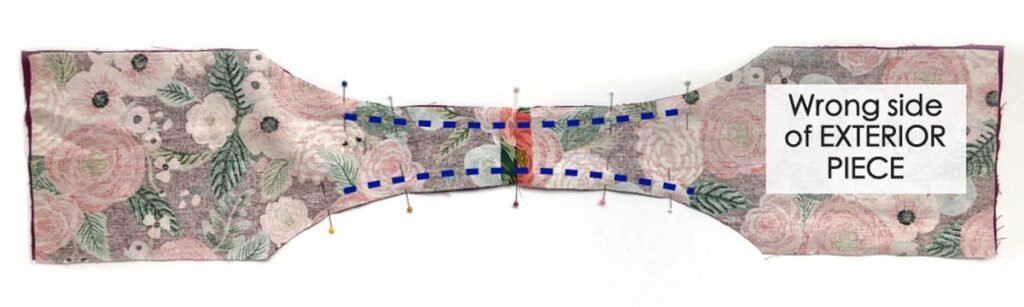
Stitch curve where pins start and stop, making sure to back stitch at both ends.
NOTE:
You can actually stitch the entire curve together without leaving the 2”(50mm) space on both sides if you’d like. However, I find that it is very difficult to turn the fabric to the right side when you stitch the entire curve closed. It is much easier to stitch the middle part of the curve, turn fabric to right side, then stitch the rest of the curve. This is especially true if you decide to interface the bag, or if you use a stiff fabric (such as cork).
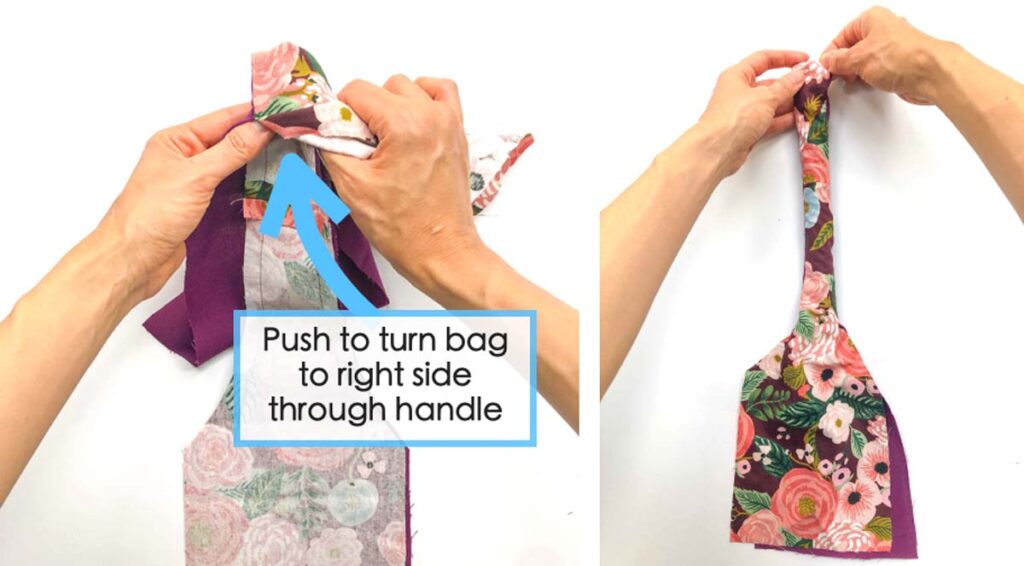
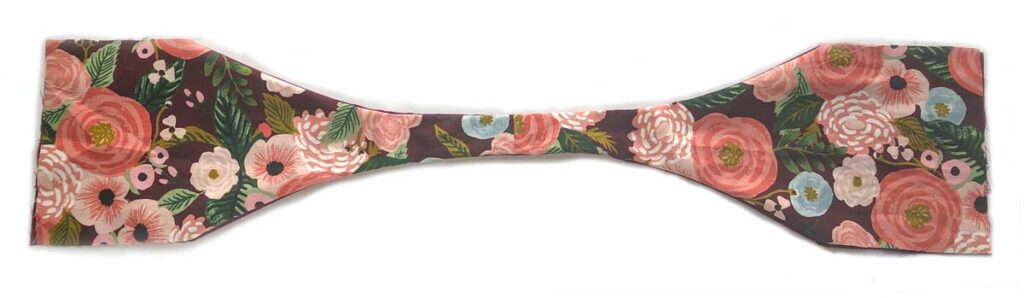
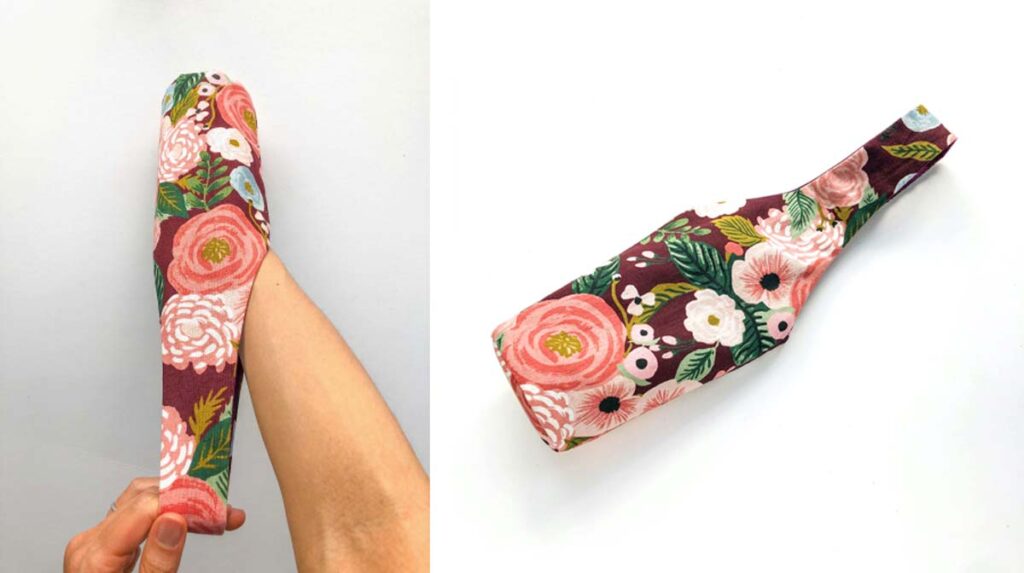
Turn bag to right side.
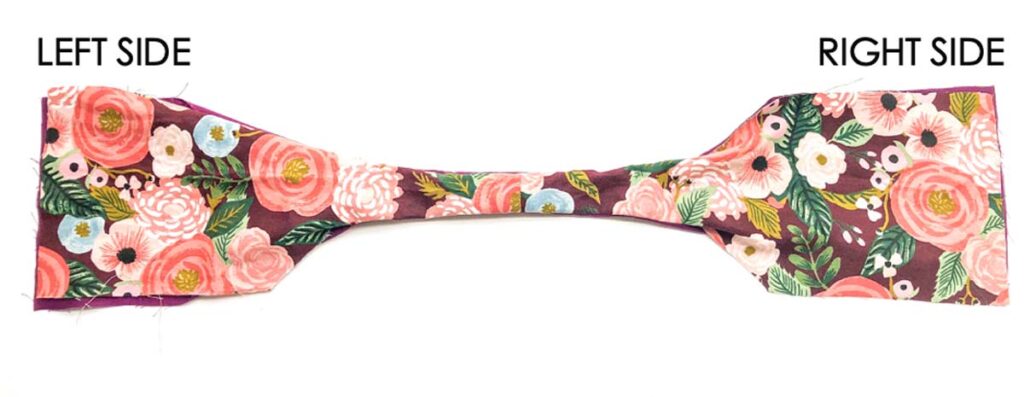
Wine Bottle bag after it’s turned to right side through handle
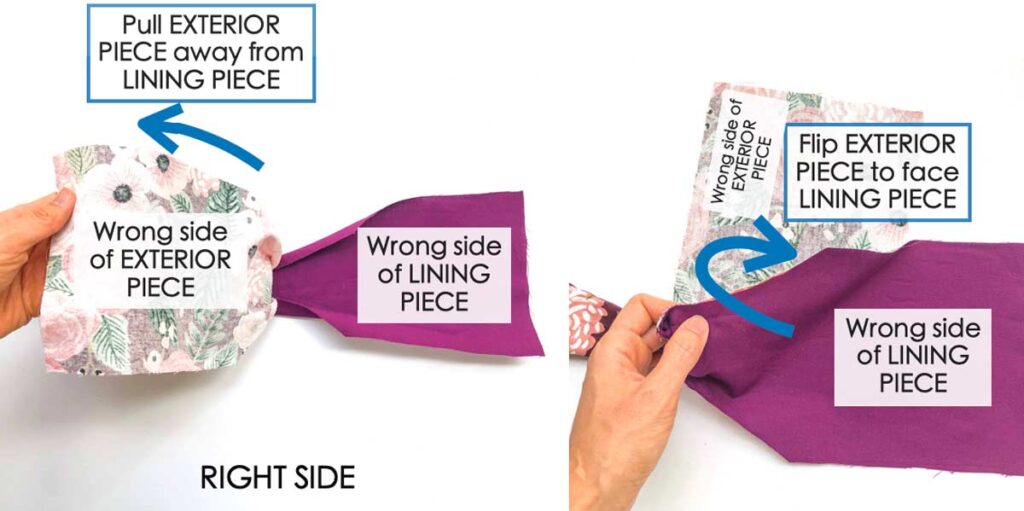
LEFT: Working on the RIGHT SIDE of the bag, first pull EXTERIOR PIECE away from LINING PIECE
RIGHT: Flip EXTERIOR PIECE to face LINING PIECE so that right sides face each other.

Finish stitching rest of the curve together (white dotted lines).
Repeat for LEFT SIDE of bag, finishing stitching the curve (blue dotted line).

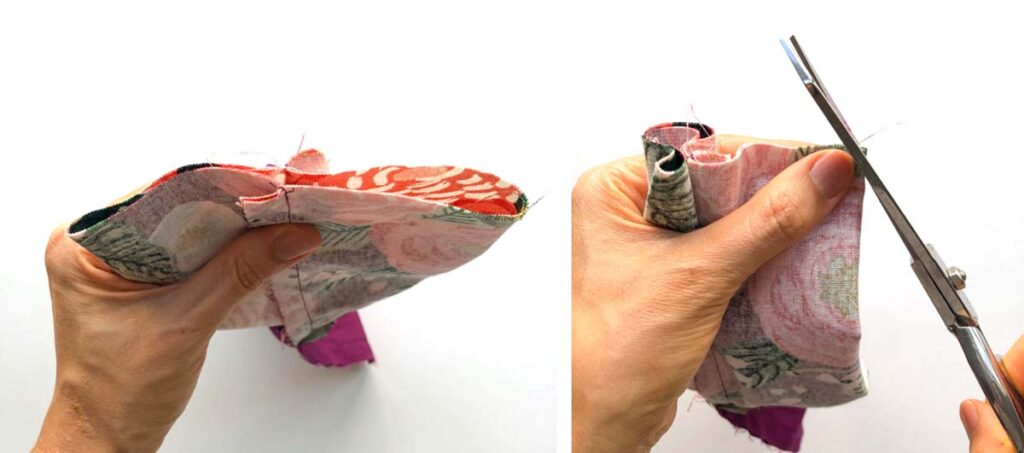
Clip curves. Repeat on both sides of bag (you will clip a total of 4 curves).
Turn bag to right side and give it a good press.

Match side seams of bag each other, EXTERIOR PIECE to EXTERIOR PIECE.
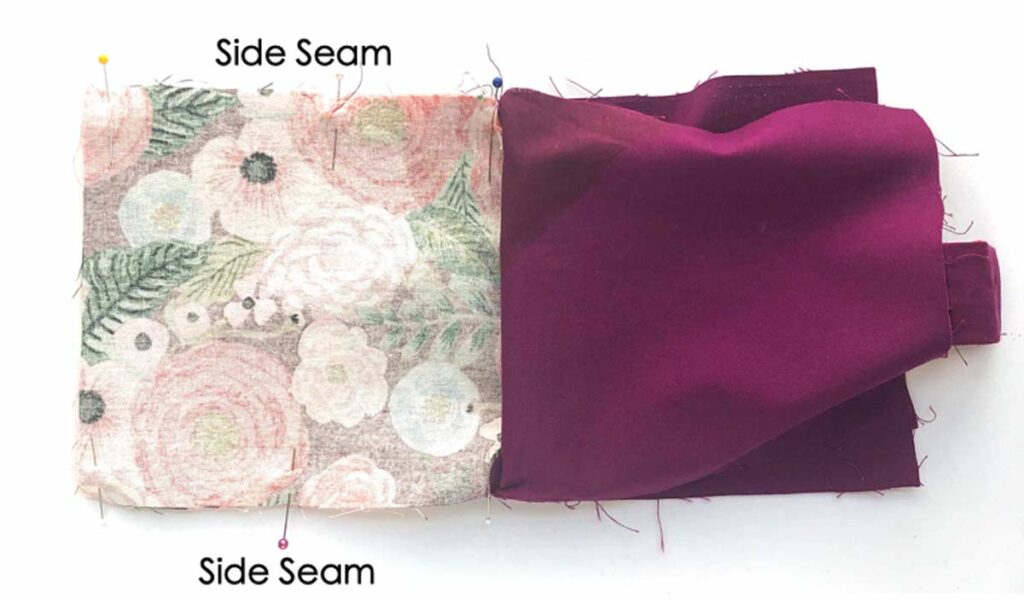
Pin side seams together.
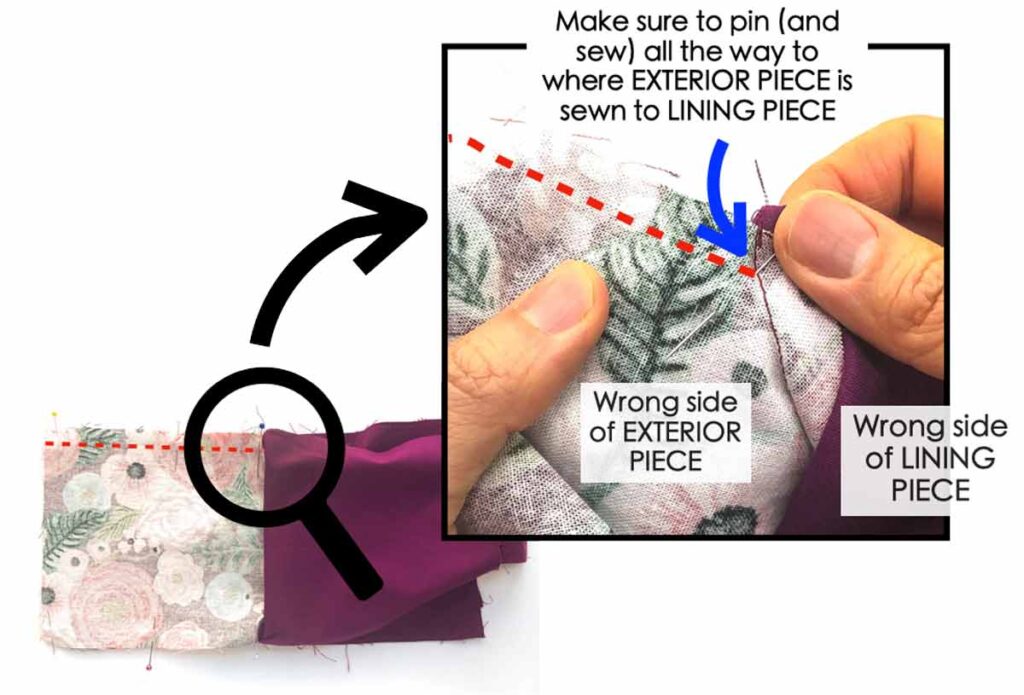
Make sure to pin all the way to where EXTERIOR PIECE meets LINING PIECE. Stitch side seams together at 1/2” seam allowance (red dotted lines)
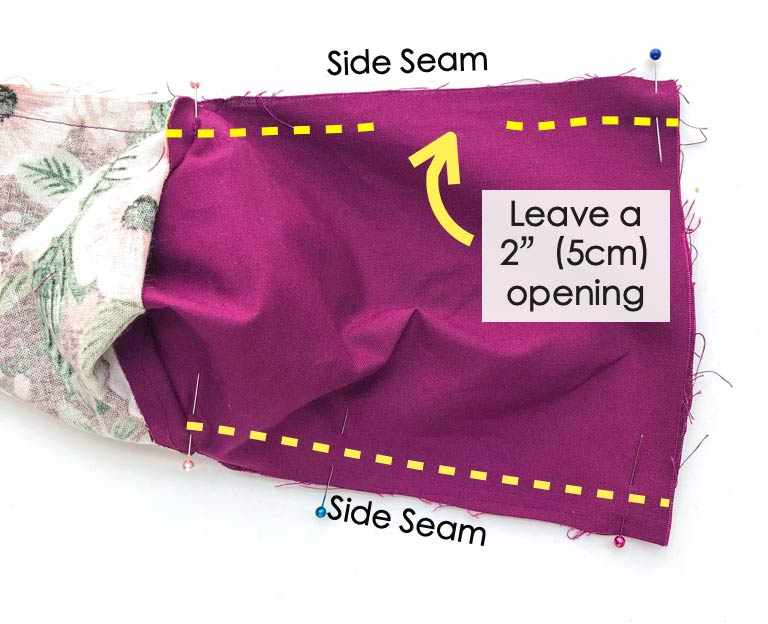
Repeat sewing side seams of LINING PIECE together. Make sure to leave a 2” (5cm) opening on one of the side seams (doesn’t matter which one). Also back stitch on both ends of the opening. This opening is so you can turn the bag to the right side later on.
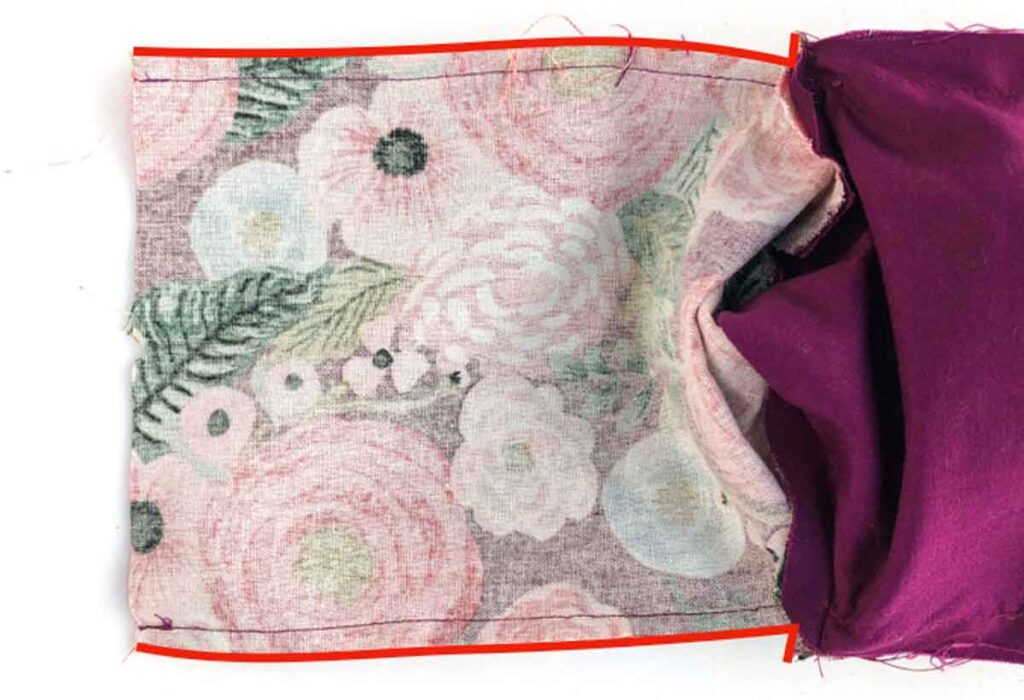
Trim seam allowance to 1/4”on both EXTERIOR PIECE and LINING PIECE. Cut a right angle just before you reach the junction between where EXTERIOR PIECE and LINING PIECE is sewn together (see solid red line).
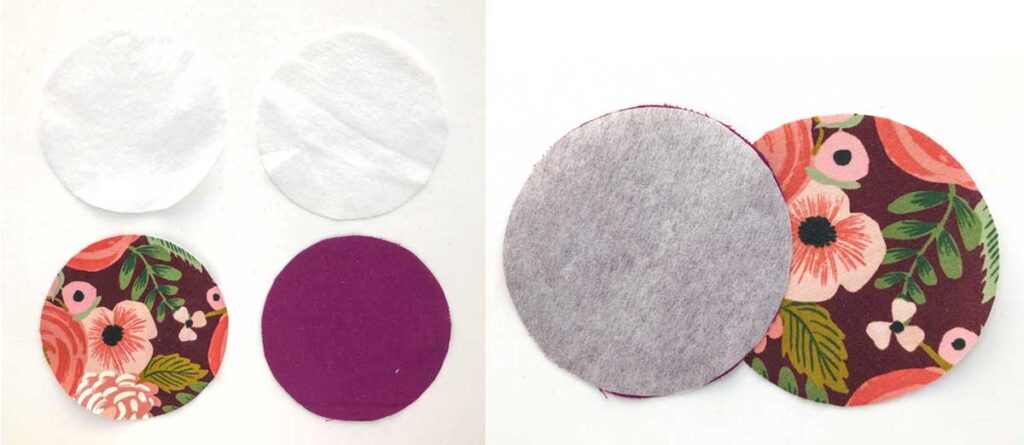
Cut 2 pieces of [BAG BOTTOM] on fusible interfacing and fuse it onto the [EXTERIOR BAG BOTTOM] and [LINING BAG BOTTOM].
NOTE:
It’s completely up to you whether you want to add fusible to the bottom of the bag. However, the fusible will stabilize the circular bottom piece to prevent the fabric from stretching and distorting while you sew. This makes for a much easier sewing experience!
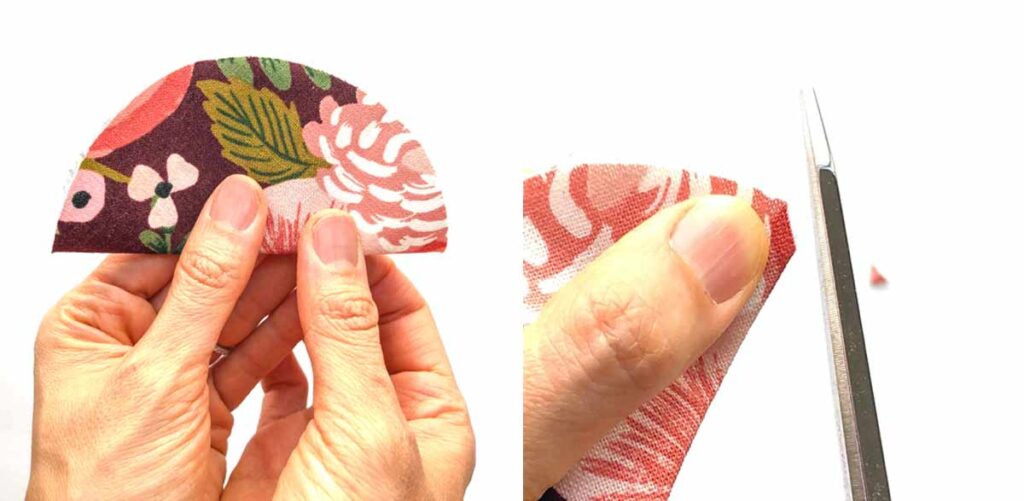
Fold [EXTERIOR BAG BOTTOM] piece in half and make small notches on both sides of the fold
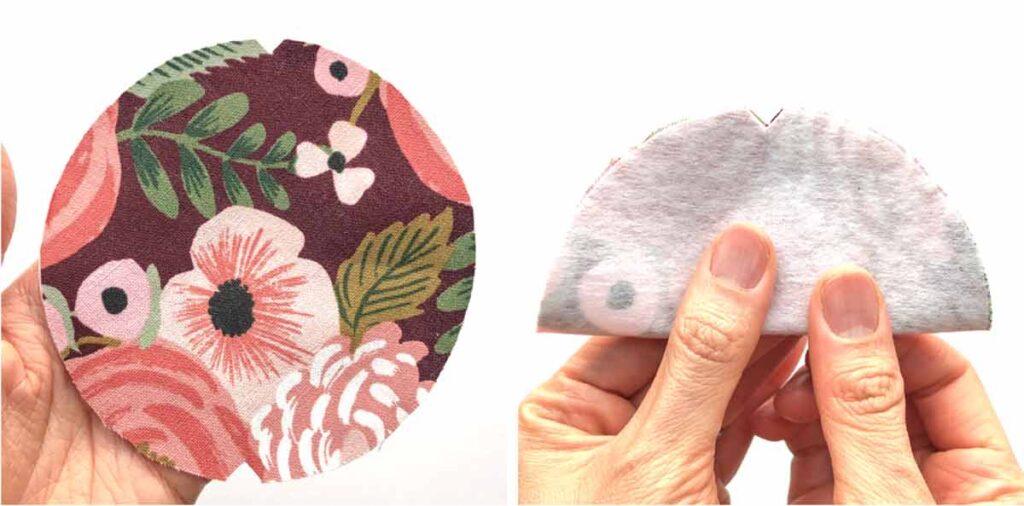
LEFT: Unfold the [EXTERIOR BAG BOTTOM] and you will have two notches where the midpoint is.
RIGHT: Fold [EXTERIOR BAG BOTTOM] in half again in the other direction, matching notches.
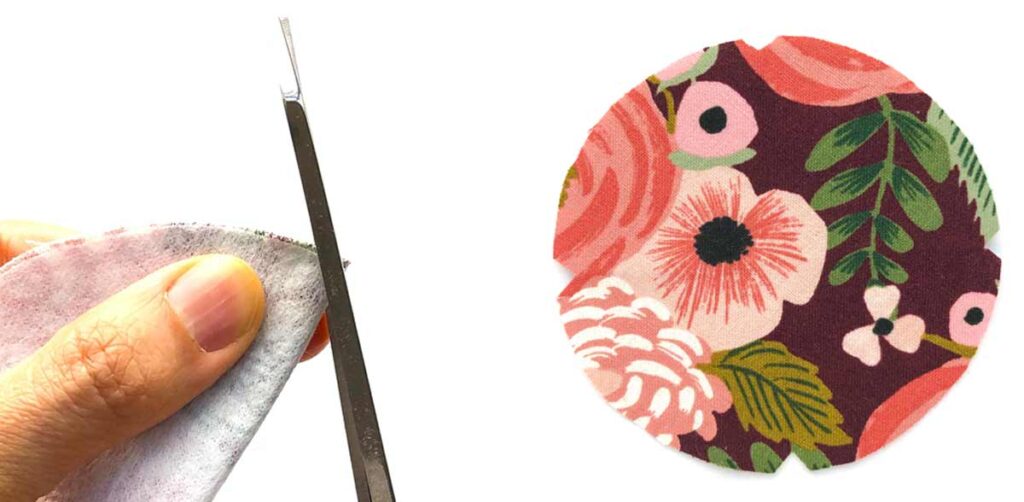
LEFT: Repeat snipping small notches on both sides of the fold.
RIGHT: Unfold and you will have 4 notches. Repeat this process and make notches on [LINING BAG BOTTOM] piece.
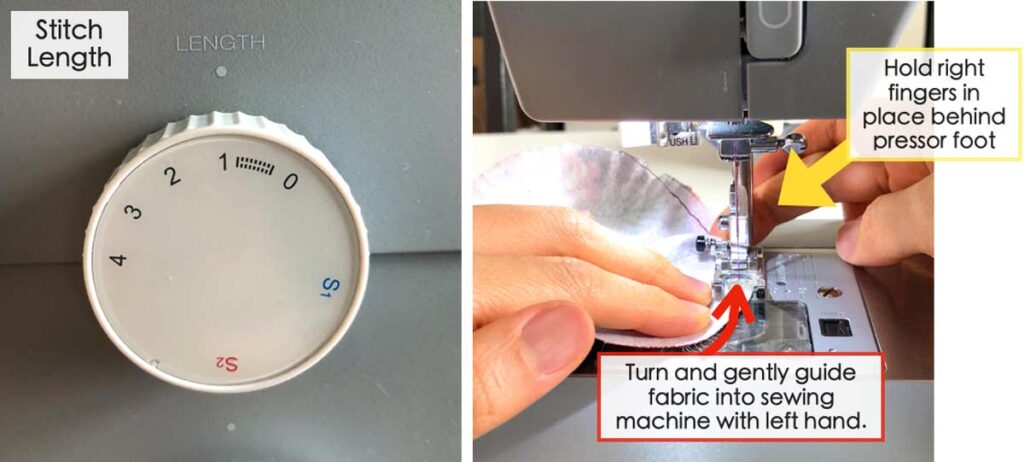
Set your machine to stitch length 1. You will sew a stitch about 1/4”(2.5cm) from edge of circle around the entire [EXTERIOR BAG BOTTOM] piece. As you sew, hold your right finger tight against the back of the pressor foot and don’t let go. With the left hand, gently feed the fabric into the sewing machine.
This will cause the fabric to pucker up behind the pressor foot. When you feel that there’s too many puckers to continue feeding the fabric in, let go of your right finger hold to release the puckers. Move right finger to touch just behind the pressor foot again and repeat this process
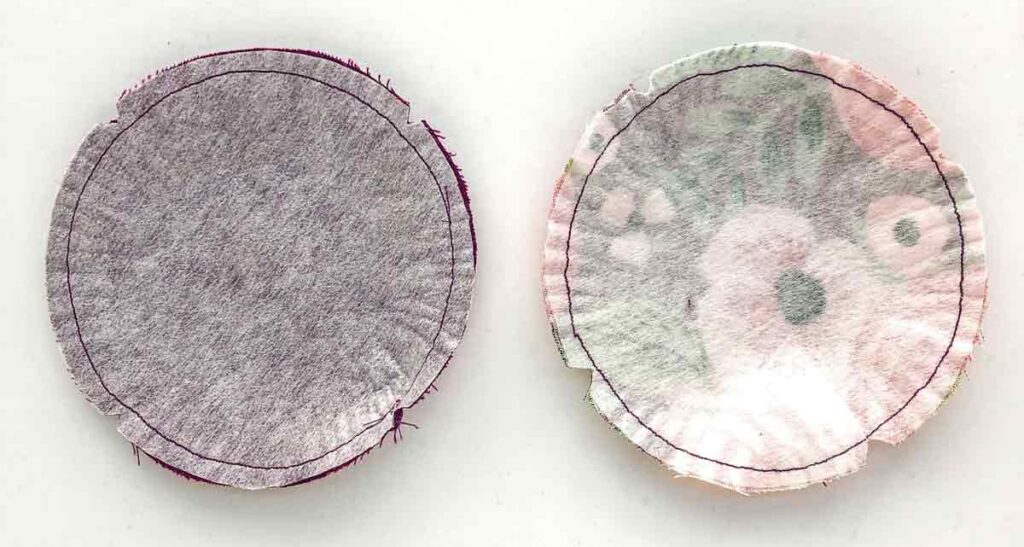
Stop once you’ve stitch around the entire circle. You don’t need to backstitch. See how by doing so you’ve helped to “cinch” the [EXTERIOR BAG BOTTOM] piece in. Notice that this circular piece no longer lays complete flat, but instead scoops up a bit like a shallow bowl. Repeat for [LINING BAG BOTTOM] piece.
Now, we will mark midpoints of the bag in the same way. First, fold the bottom of the bag piece in half by meeting the side seams together. Next, making a notch on both sides of the fold.

Mark notches on LINING PIECE as well
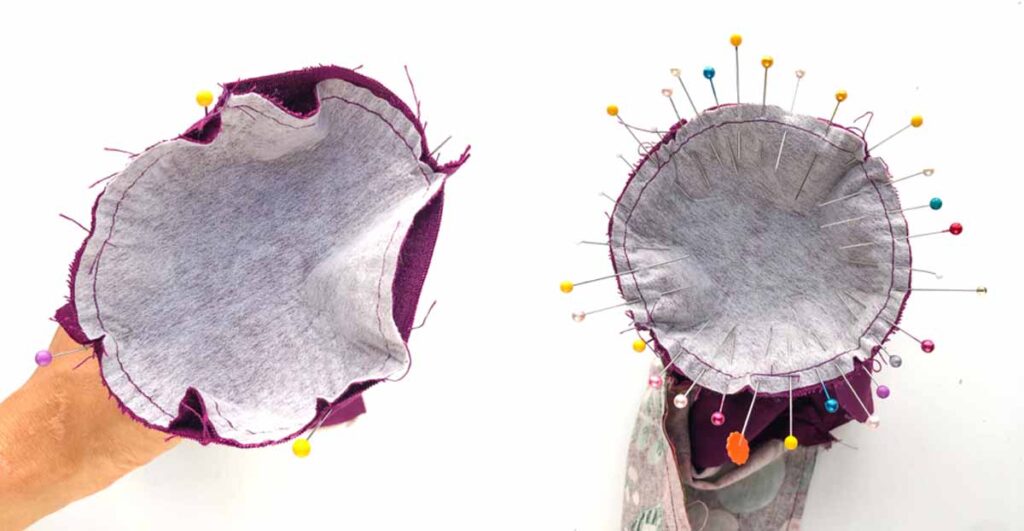
LEFT: Pin ROUND BOTTOM piece to bottom of BAG, right sides together. Do this first by matching the notches together. Then match notches (of ROUND BOTTOM) to seam allowance (of bag) You will end up with 4 pins.
RIGHT: Now ease ROUND BOTTOM piece to BAG by first pinning one quarter section in between the two notches. Next, move on to the next section between the two notches. Continue until you have pinned the entire [ROUND BOTTOM] piece. See how many pins I’ve used!
Sew ROUND BOTTOM piece to BAG LINING at 1/2”(5cm) seam allowance. Once you are done, check your sewing for unsightly puckers.
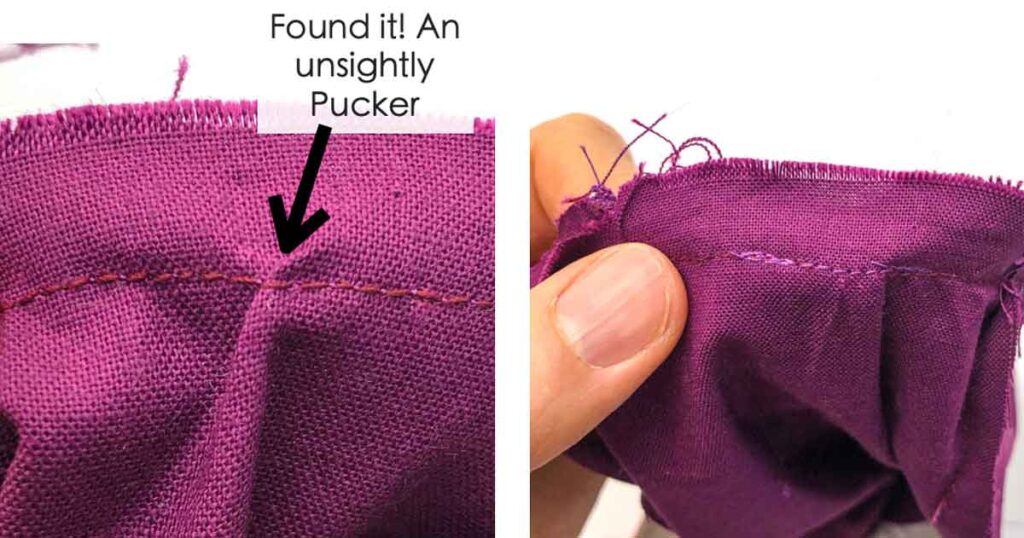
See how I have one here! (RIGHT PHOTO) Don’t worry, just take it out by removing the stitch and a few more stitches on both sides. Redo the stitch by starting and ending a few stitches beyond where you took out. Don’t forget to back stitch.
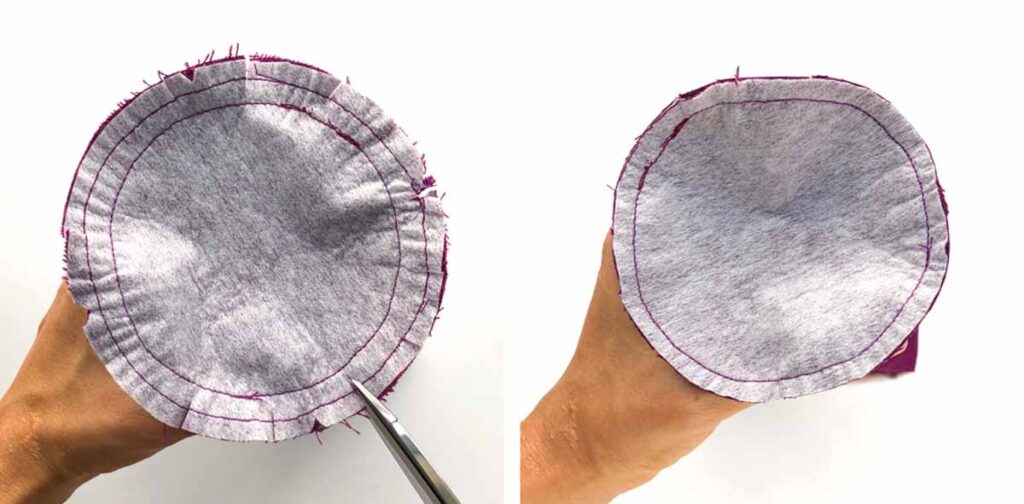
Clip curves and trim seam allowance to about 1/4”(2.5cm). Repeat for BAG EXTERIOR.

Turn wine bottle bag to right side through the opening on the LINING.
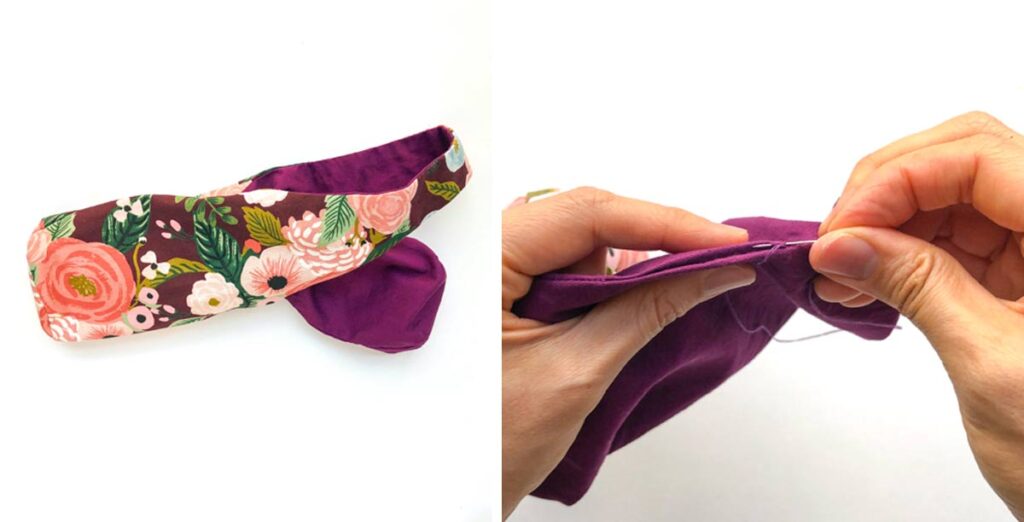
LEFT: Wine bottle bag turned to right side.
RIGHT: Close opening on LINING using invisible ladder stitch. For more information, check out this post on How to Sew the Perfect Ladder Stitch.
Insert LINING into EXTERIOR of bag. Bag is finished!

Don’t these bags make the wine look so nice? Now bring a bottle (or two) to the next celebration in style!
How to Make a Wine Tote Bag
This easy-to-sew wine bottle carrier is the perfect way for bringing your favorite bottle of champagne or wine to your next gathering. Doubles as a great hostess gift!
Materials
- EXTERIOR FABRIC - 1/2 yard cotton
- LINING FABRIC - 1/2 yard cotton
- FUSIBLE INTERFACING (optional) - 1/2 yard
Tools
- SEWING MACHINE
- FABRIC SCISSORS
- CLEAR RULER
- SEWING PINS
- MATCHING THREAD
Instructions
- Cut out all pattern pieces on fabric. Interface fabric if using.
- Place LINING PIECES right sides together and stitch the top at 1/2” seam allowance. Repeat for EXTERIOR PIECE
- Press open the seams with iron.
- Place EXTERIOR PIECE and LINING PIECE right sides together
- Stitch curve on both sides, stopping approximately 2”(50mm) away from where curve ends*. Make sure to back stitch at both ends.
- Turn bag to right side
- Pull EXTERIOR PIECE away from LINING PIECE
- Turn EXTERIOR PIECE to face LINING PIECE so that right sides face each other.
- Finish stitching rest of the curve together
- Repeat for other side of bag and finish stitching the curve.
- Clip curves. Repeat on both sides of bag (you will clip a total of 4 curves).
- Turn bag to right side and give it a good press.
- Match side seams of bag each other, EXTERIOR PIECE to EXTERIOR PIECE
- Pin side seams together** and stitch side seams together at 1/2” seam allowance.
- Repeat sewing side seams of LINING PIECE together. Make sure to leave a 2” (5cm) opening***on one of the side seams (doesn’t matter which one).
- Trim seam allowance to 1/4”on both EXTERIOR PIECE and LINING PIECE.
- Make 4 notches on [EXTERIOR BAG BOTTOM] at 12, 3, 6, and 9 O'clock position of circle. Repeat on [LINING BAG BOTTOM].
- Mark midpoints of wine bag by folding bottom of bag in half and meeting side seams together. Make notches on both sides of fold. Repeat in other direction. Do this for EXTERIOR and LINING PIECE.
- Match 4 notches on [LINING BAG BOTTOM] to 4 notches on bottom of bag lining pin in place****
- Sew ROUND BOTTOM piece to BAG.
- Clip curves and trim seam allowance to about 1/4”(2.5cm). Repeat for BAG EXTERIOR.
- Turn wine bottle bag to right side through the opening on the LINING.
- Close opening with invisible ladder stitch.
- Give your wine bag a good press and you are done.
Notes
*You can actually stitch the entire curve together without leaving the 2”(50mm) space on both sides if you’d like. However, I find that it is very difficult to turn the fabric to the right side when you stitch the entire curve closed. It is much easier to stitch the middle part of the curve, turn fabric to right side, then stitch the rest of the curve. This is especially true if you decide to interface the bag, or if you use a stiff fabric (such as cork).
**Make sure to pin all the way to where EXTERIOR PIECE meets LINING PIECE.
***Back stitch on both ends of the opening.
****Ease ROUND BOTTOM piece to BAG by first pinning one quarter section in between the two notches. Next, move on to the next section between the two notches. Continue until you have pinned the entire ROUND BOTTOM piece.
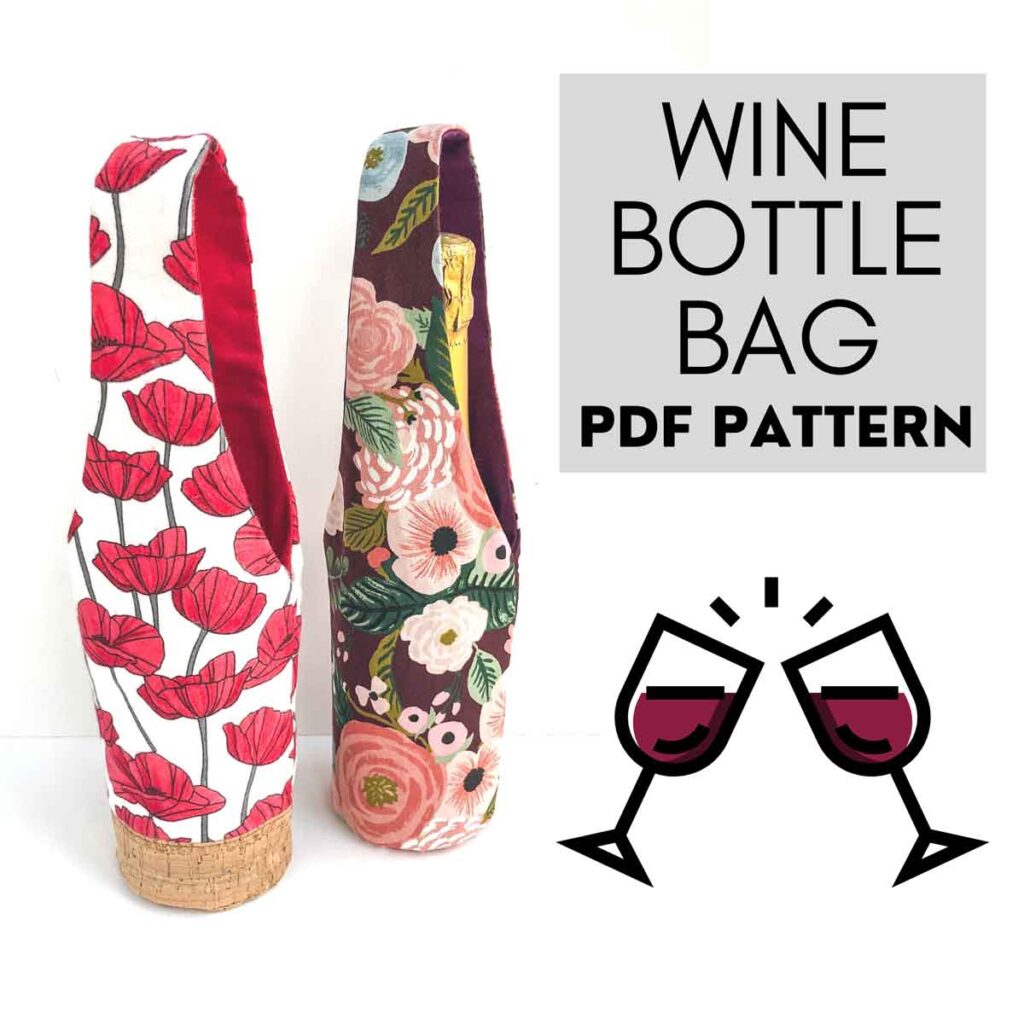
The ad-free, PRINTER-FRIENDLY PDF version of this sewing tutorial with all the step-by-step photos is available for purchase IN OUR SHOP. The sewing tutorial consists of 20 pages of detailed instructions with photos. Additionally, you will also receive PDF Pattern of the Wine bottle bag in the COLOR BLOCK Version (pictured on left). Print a copy today to keep next to your sewing machine for easy reference.
More Useful Sewing Projects You will LOVE:
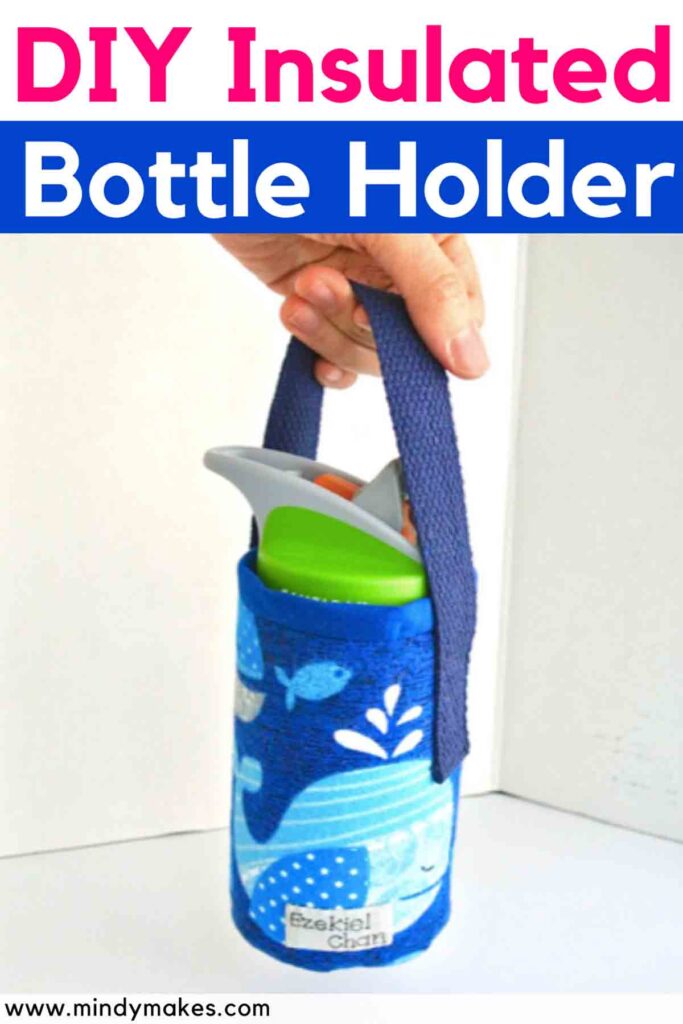
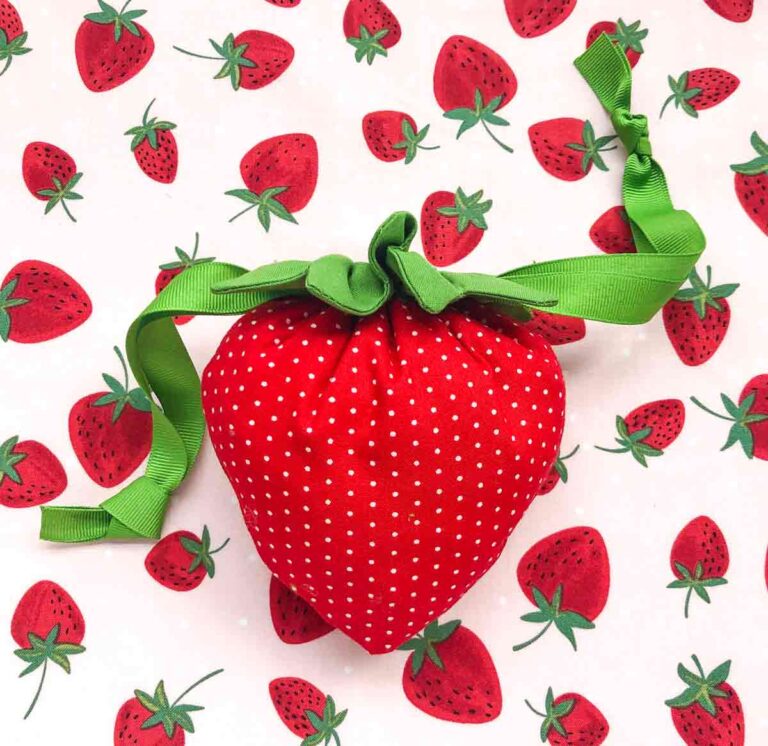
This insulated bottle holder will keep your drinks cold on a hot summer day!
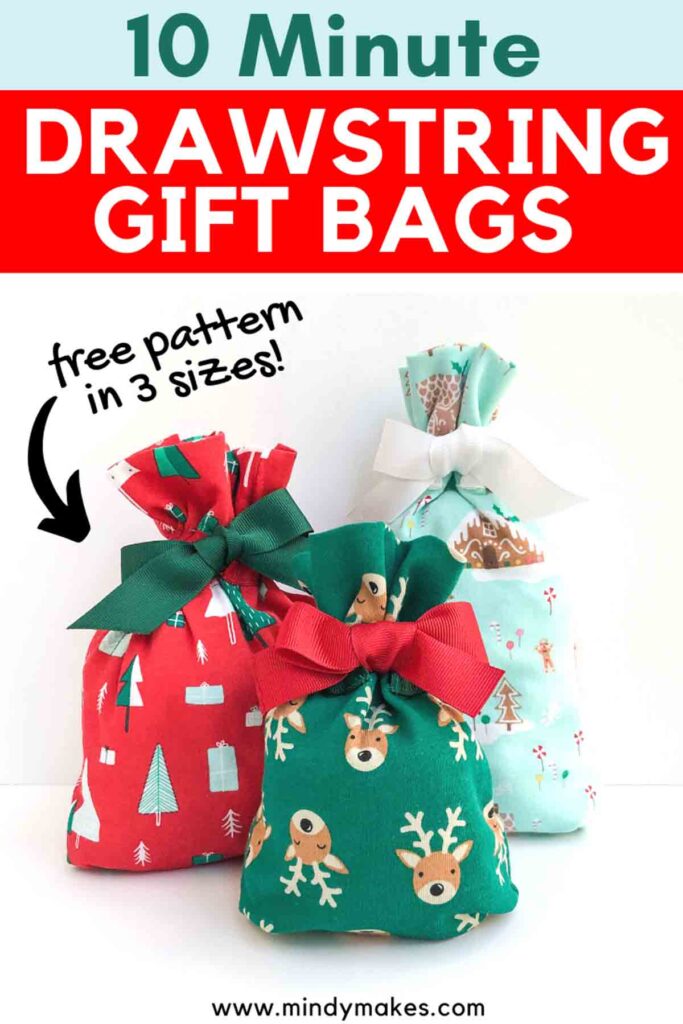
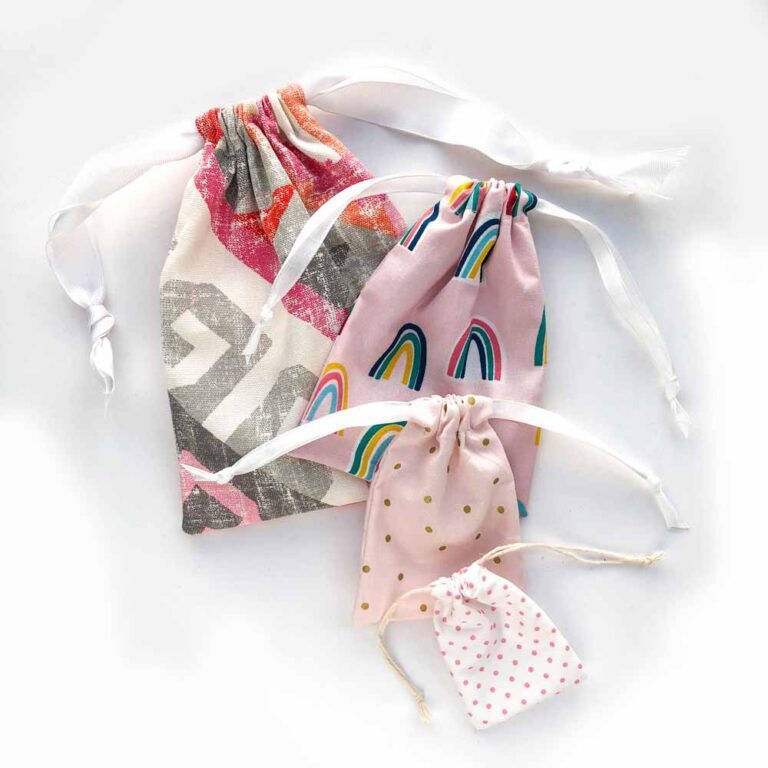
These adorable fabric drawstring gift bags are easy to sew up in a pinch and 100% reusable.
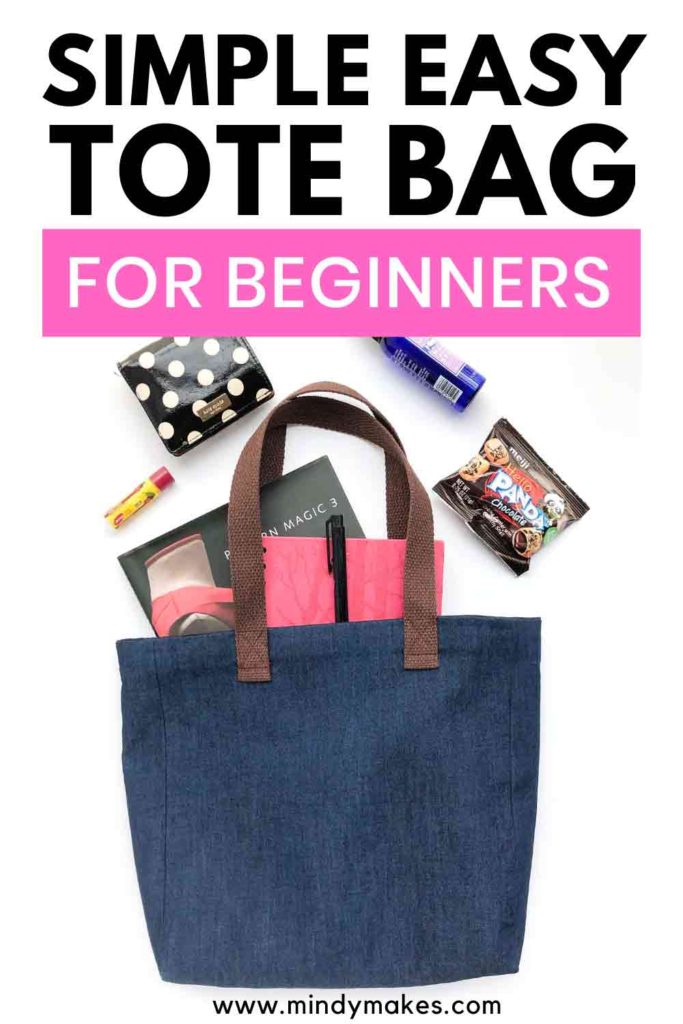
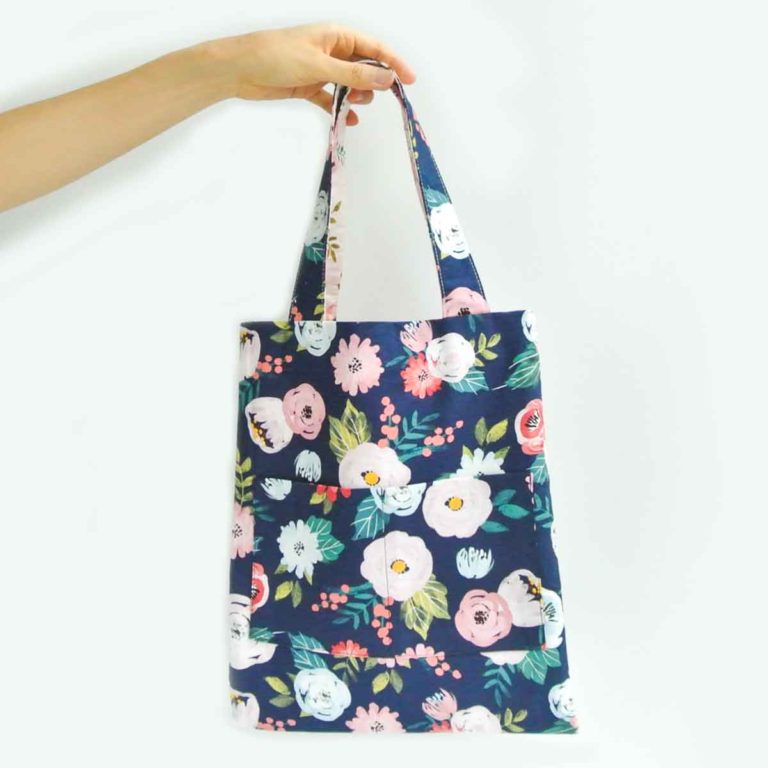
A fully lined tote bag to carry around everything you need for the day.
I’m just about to finish making two of these wine bottle carriers and they’re turning out so, so nice! Thank you for your generosity in sharing this pattern and excellent instructions. It must have taken a load of time to do. Cheers!
You are so welcome! I’m so glad you are enjoying this pattern and tutorial!