Shokupan (Japanese Milk Bread) Recipe
Updated: 2/22/21
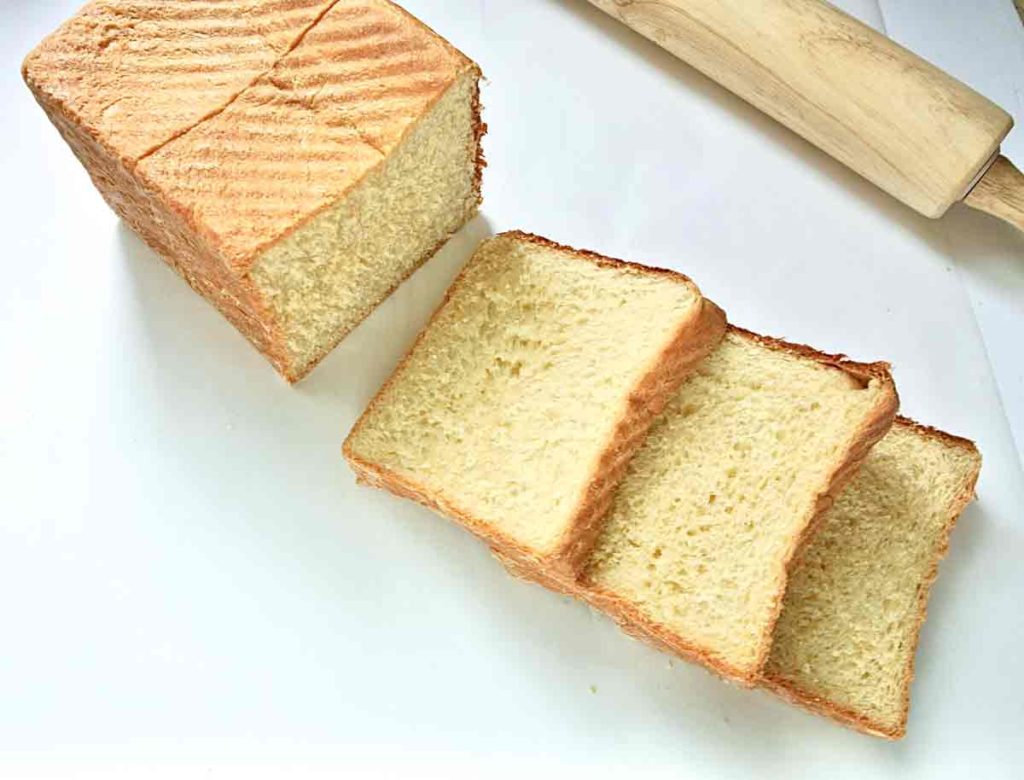
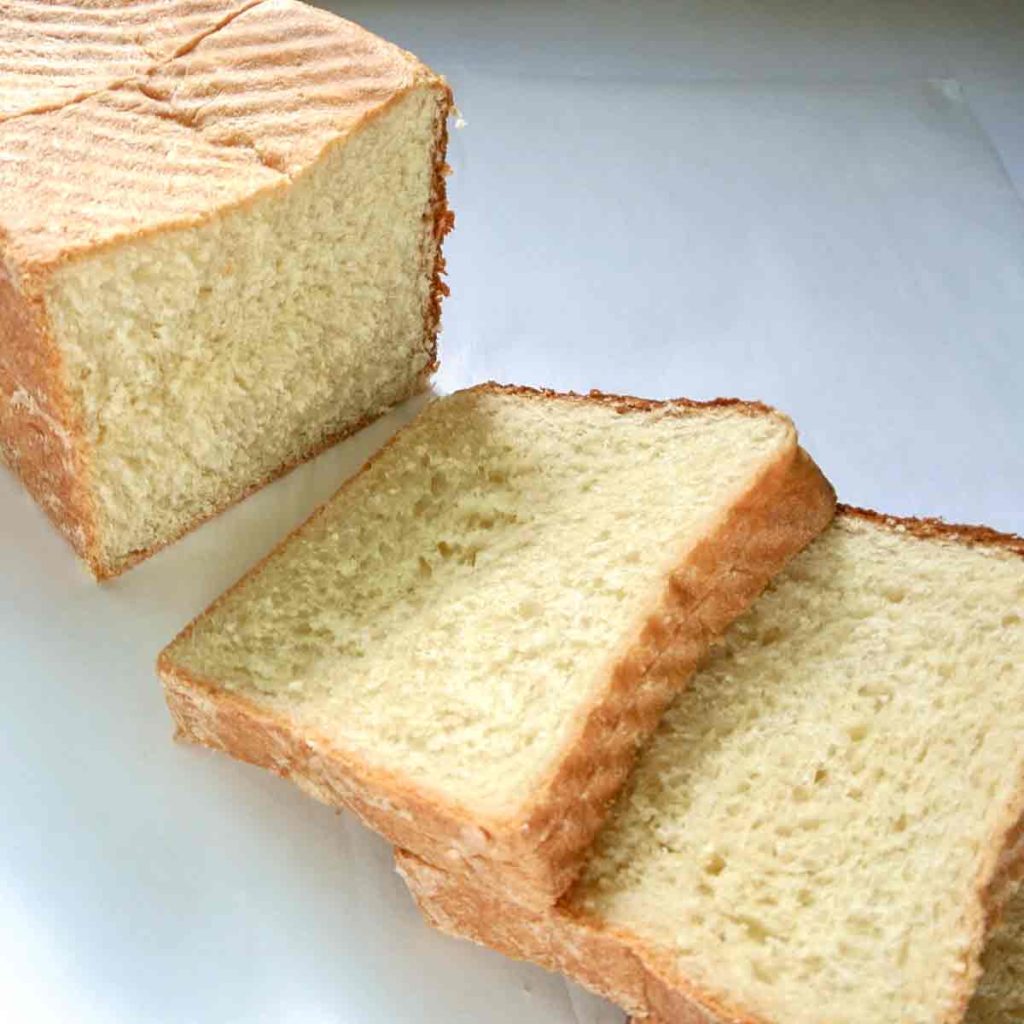
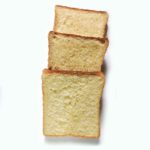
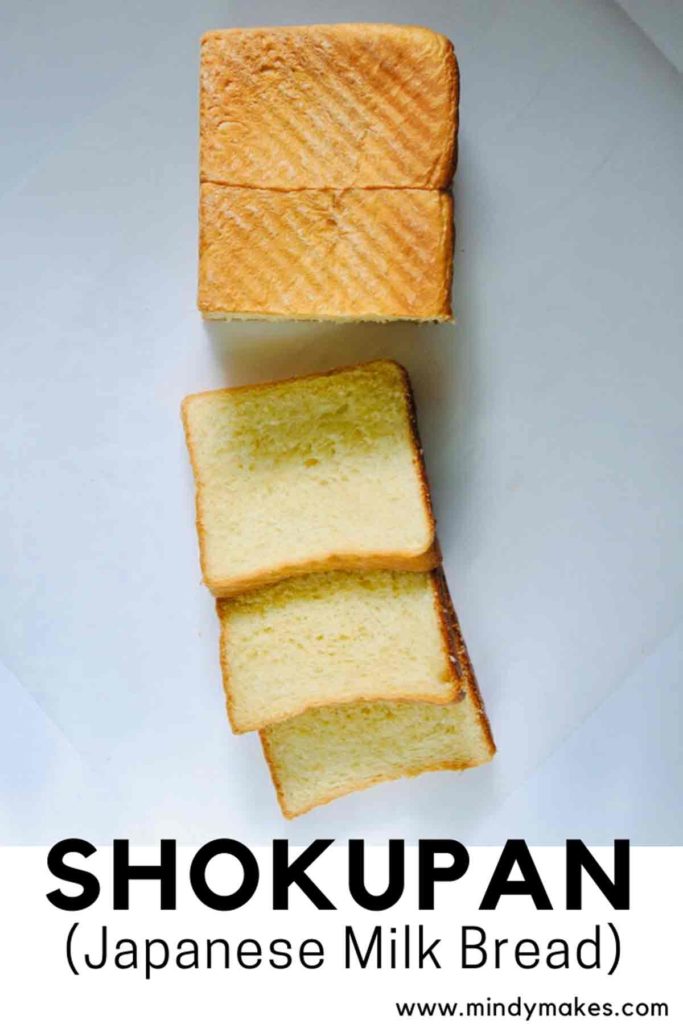
If you have ever visited a Taiwanese or Japanese bakery, you will always find a loaf of white bread packed in a clear plastic bag with a twisty tie on top. Shokupan (食パン) is the Japanese term for this bakery staple and it literally means “eating bread”. The bread is characterized by a soft crust and even softer (yet bouncy) interior, and is usually baked into a rectangular loaf that is then cut into square slices.
In my family, Shokupan somehow became abbreviated to Shopan, which also has the meaning “cheap bread” in Taiwanese. And it was indeed a cheap and easily accessible bread everywhere in Taiwan. For this very reason I always took it for granted.
Nevertheless, after living in the US for so many years, I finally started to appreciate this soft, fluffy bread with a slight bounce and sweetness. I missed it as a sandwich bread and for making Taiwanese brick toast.
Finally this year on my birthday, I requested a Pullman loaf pan, and a friend kindly got me this one. I decided to try the NYT recipe since it had SO many positive reviews, and this recipe is largely based off that recipe. I did a few modifications (for example, reducing the sugar, omitting water in the Tangzhong starter, and adjusting baking time) to fit my taste and oven.
What I love about this recipe is that it’s simple and I get delicious results every single time. Now I am only a few hours away from a loaf of fresh baked Shokupan! I hope you will enjoy this bread as much as I do.
If you don’t own a Pullman loaf pan, you can still make a dome-shaped Shokupan which is equally delicious. I recommend brushing the dome tops with an egg wash (1 egg mixed with 1Tbsp water) right before baking . This helps to achieve a shiny, golden luster.
INSTRUCTIONS:
STARTER (Tangzhong):

In a small saucepan, add 3T (22g) bread flour to 1/4 cup (60mL) milk.
Whisk together until smooth and bring to a simmer over medium-low heat, stirring often.
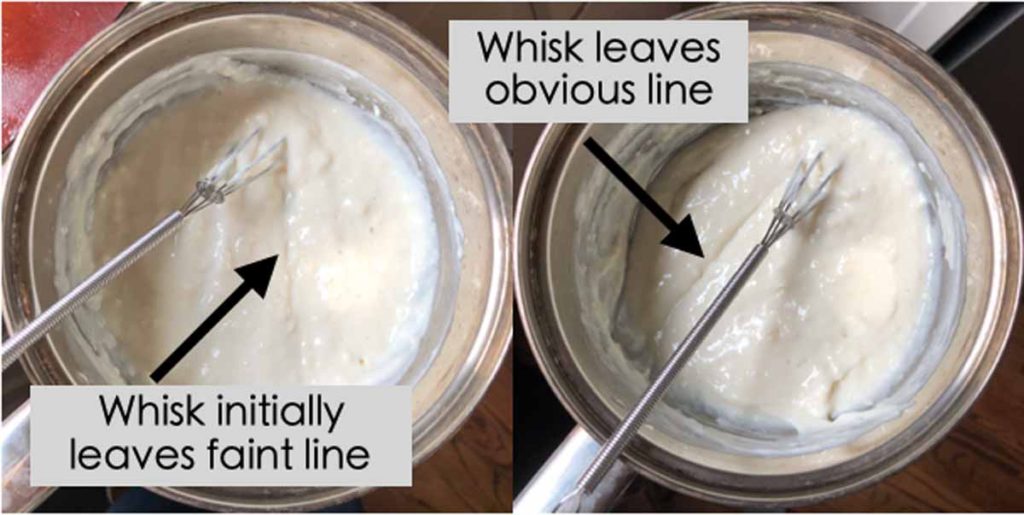
Continue cooking and stirring the tangzhong starter until it thickens. You will notice a faint line initially when you pull the whisk across the tangzhong starter. Tangzhong is done when the whisk leaves a very obvious line that doesn’t disappear.
DOUGH:
Warm 1/2C (120mL) milk to between 100-110F*
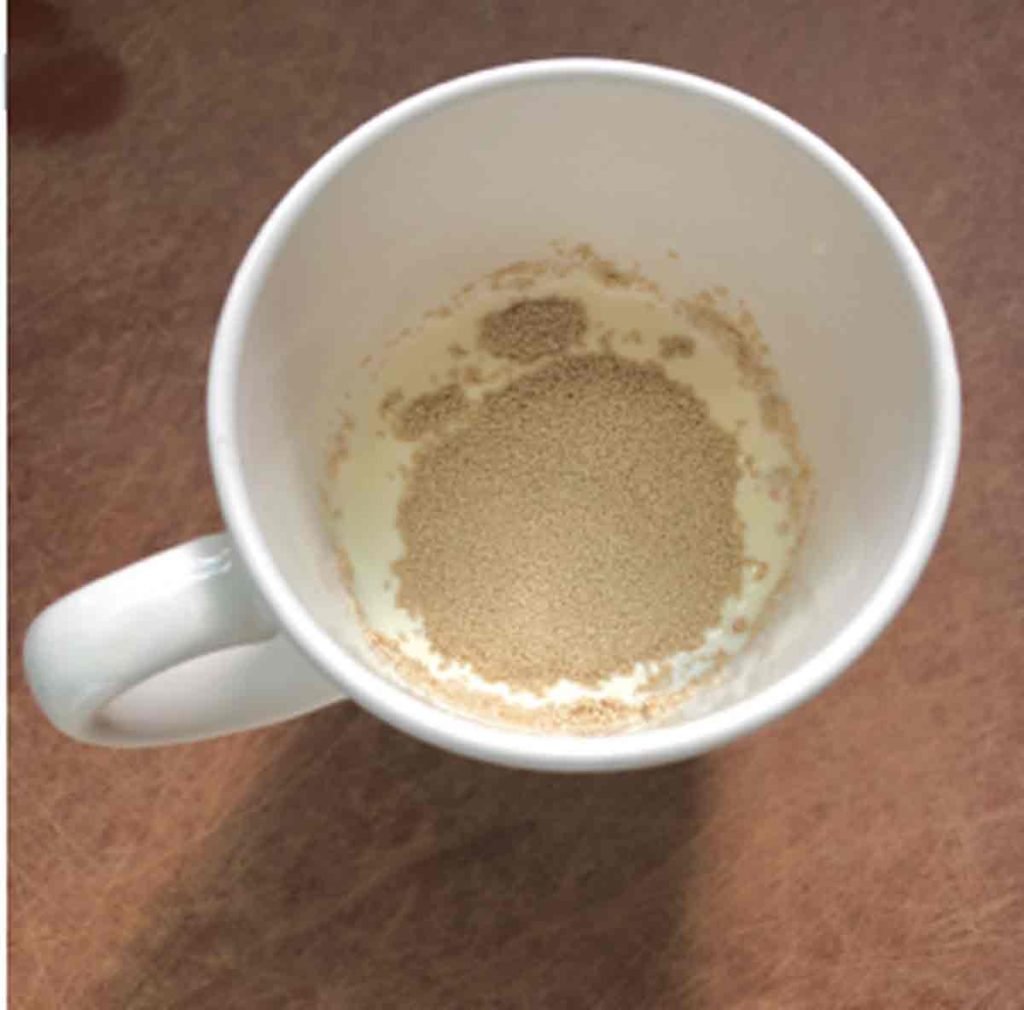
Measure 7g active dry yeast into warmed milk.
*I usually pour cold milk from the fridge into microwavable mug and heat on high for 30s.
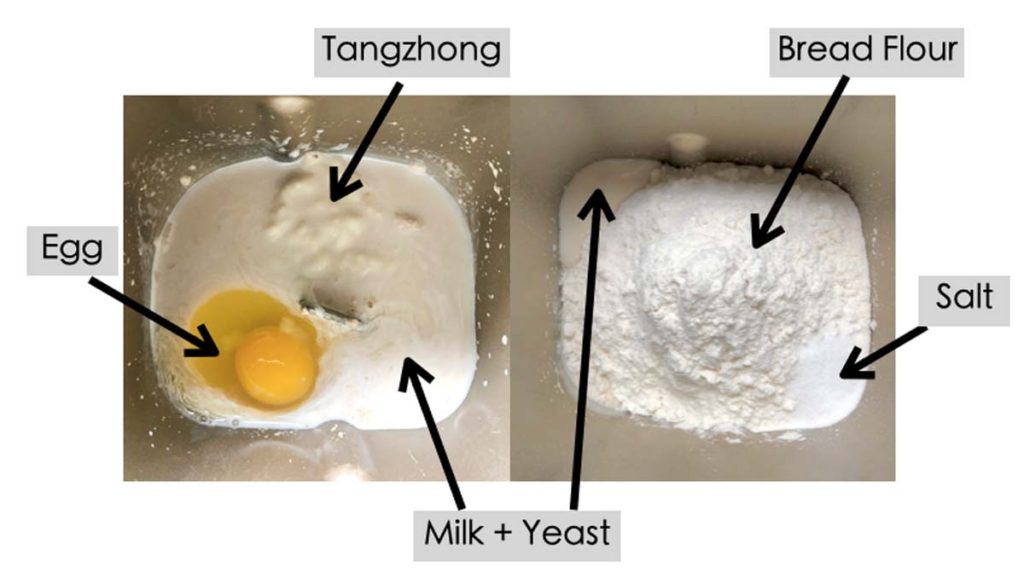
Add wet ingredients to mixing bowl in this order: Milk+Yeast, tangzhong, egg, then add dry ingredients in this order: Sugar, bread flour, salt. Make sure to add salt last, on top of the flour, as you don’t want it touching the yeast in the milk before mixing starts
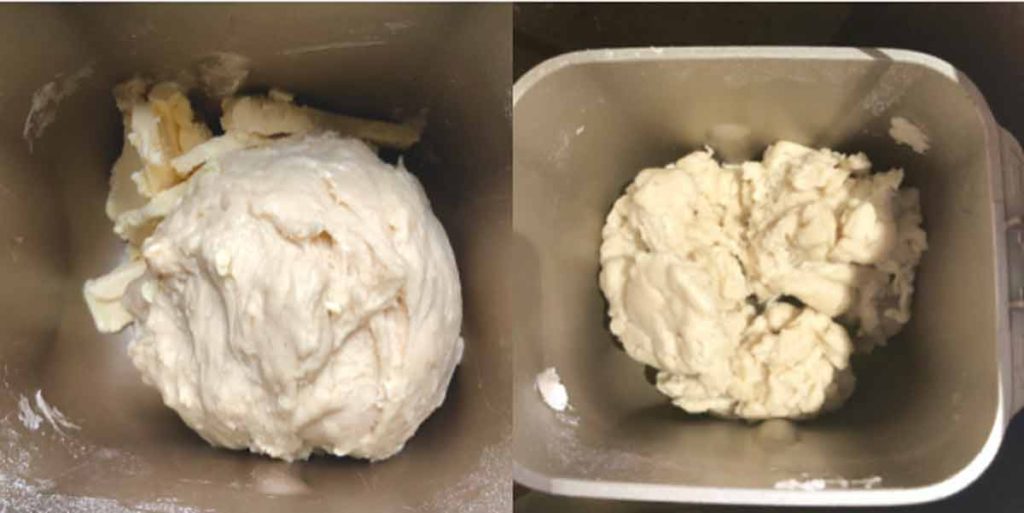
Start mixing dough ingredients until everything comes together (5-10 minutes on “dough” function of bread machine*
Add 4T (60g) butter and continue mixing for another 10 minutes until everything comes together.
*You can also mix by using the dough hook on stand mixer, or by hand (good workout!) don’t want it touching the yeast in the milk before mixing starts
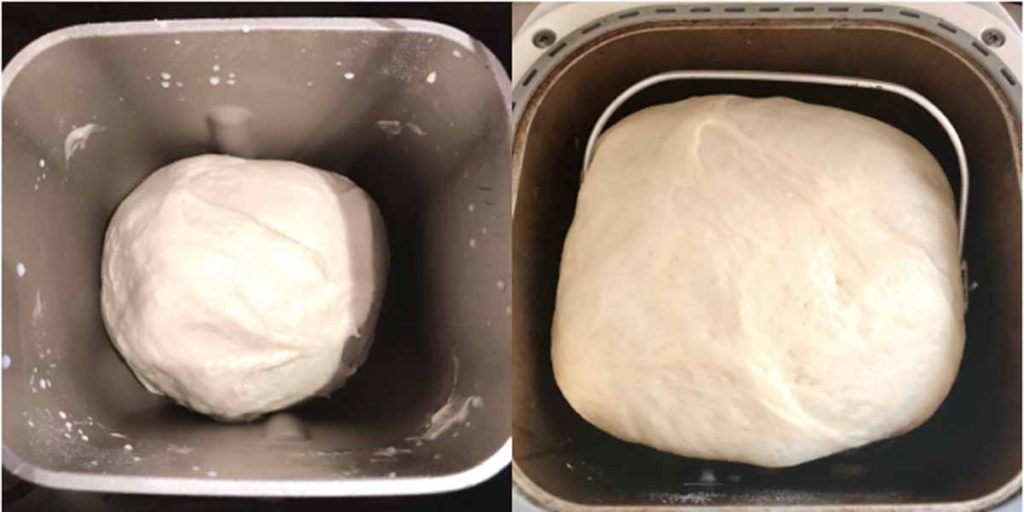
Shape dough into a ball and allow to rise, covered, in a warm place until doubled in size (about 60 minutes). I usually just let the dough rise in my bread machine with the lid covered.
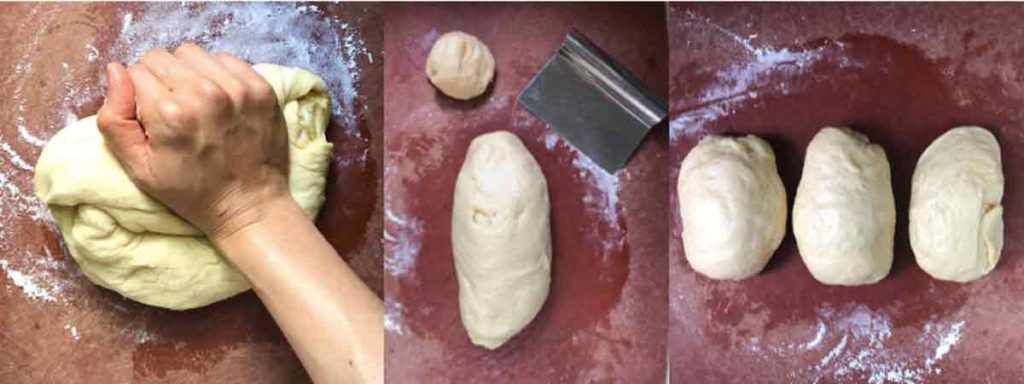
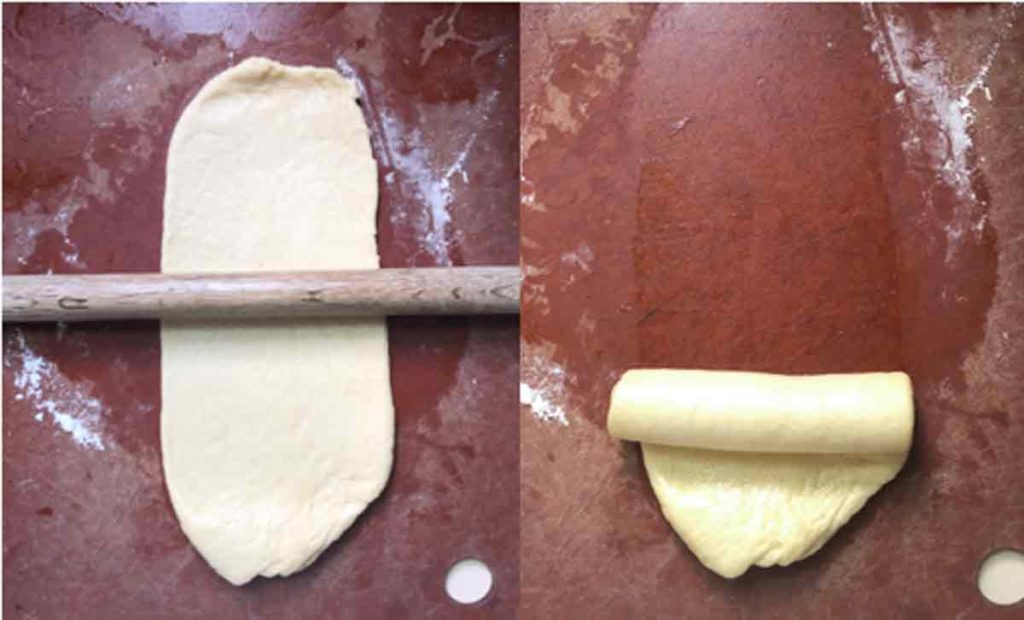
Remove the dough and hand knead it a few times. Using dough cutter, cut the dough into three pieces of equal size.
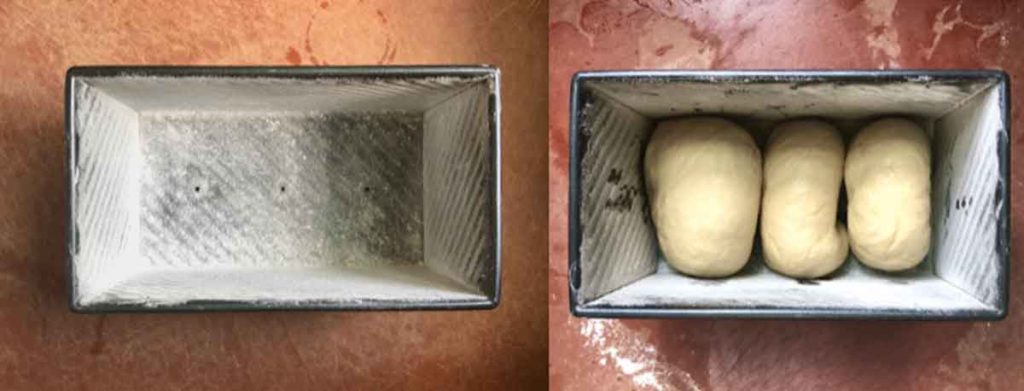
Spread oil evenly on pullman loaf pan and dust flour evenly over the surface. Place the three rolled pieces of dough into the pan. Cover with plastic wrap and allow dough to rise in a warm place, about 30-40 minutes.
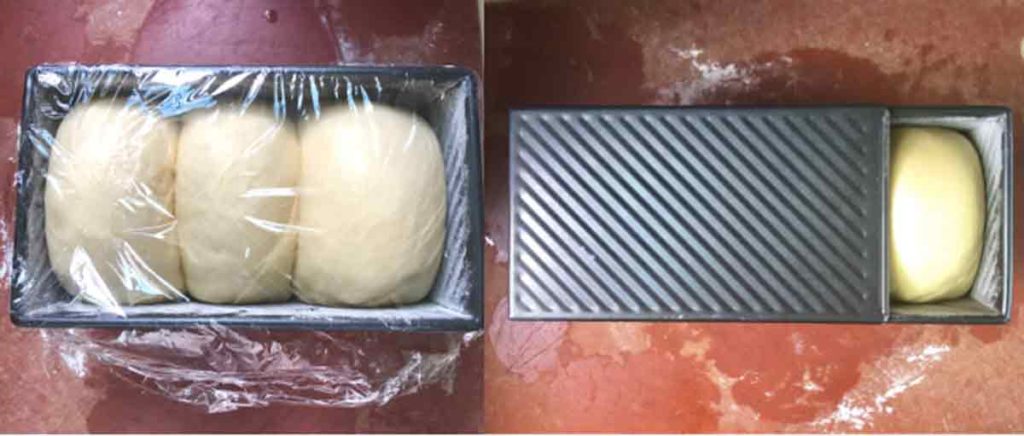
Once dough has risen to about 90% of the pan height, remove plastic wrap and place Pullman loaf pan lid on (don’t forget to oil bottom of the lid where the dough will come in contact with). At this time preheat oven to 350F and allow dough to rise a little more in the pullman pan while oven preheats.
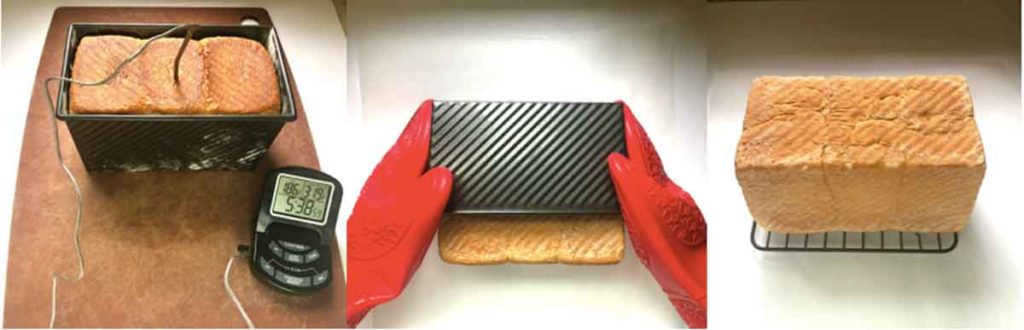
Send bread to oven and bake for 25 minutes. Remove lid and continue baking for another 5-10 minutes until internal temperature reaches 190F. (I took photo after bread has slightly cooled that’s why the thermometer reads “186”. Remove bread from pan with hot hands. Let loaf cool on wire pan for 1 hour before cutting.
Shokupan (Japanese Milk Bread)
Ingredients
For the Tangzhong Starter
- 3 Tbsp/22g Bread Flour
- 1/4 Cup/60 mL Milk (2% or Whole milk)
For the Shokupan Dough
- 2.5 Cups (325g) Bread Flour
- 3 Tbsp (45g) Sugar
- 2 tsp (7g) Active Dry Yeast
- 1 tsp (4g) Salt
- 1 Egg
- 1/2 Cup (120mL) milk (2% or Whole milk)
- 4 Tbsp (60g) Butter
Instructions
Tangzhong Starter
- In a small saucepan, add bread flour to milk. Whisk together until smooth and bring to a simmer over medium-low heat, stirring often.
- Continue cooking and stirring until Tangzhong thickens. You will first notice a faint line initially when you pull the whisk across the tangzhong. Tangzhong is done when the whisk leaves a very obvious line that doesn’t disappear.
- Allow Tangzhong to cool to room temperature before using it in dough.
Shokupan Dough
- Warm 1/2C (120mL) milk to between 100-110F* Measure 7g active dry yeast into warmed milk.
- Add wet ingredients to mixing bowl in this order: Milk+Yeast, tangzhong, egg
- Add dry ingredients to wet ingredients in this order: Sugar, bread flour, salt**
- Start mixing dough ingredients until everything comes together (5-10 minutes on “dough” function of bread machine***
- Add 4T (60g) butter and continue mixing for another 10 minutes until everything comes together.
- Shape dough into a ball and allow to rise, covered, in a warm place until doubled in size (about 60 minutes).
- Remove the dough and hand knead it a few times. Using dough cutter, cut the dough into three pieces of equal size.
- Use a rolling pin, gently flatten each piece of dough into a long flat oval. Roll the dough down from the top to form a log.
- Spread oil evenly on pullman loaf pan and dust flour evenly over the surface. Place the three rolled pieces of dough into the pan.
- Cover with plastic wrap and allow dough to rise in a warm place, about 30-40 minutes.
- Once the dough has risen to about 90% of the pan heigh, remove plastic wrap and place pullman loaf pan lid on (don’t forget to oil bottom of the lid where the dough will come in contact with). At this time preheat oven to 350F and allow dough to rise a little more in the pan while oven preheats.
- Send bread to oven and bake for 25 minutes.
- Remove lid and continue baking for another 5-10 minutes until internal temperature reaches 190F.
- Remove bread from pan with hot hands. Cool loaf on wire rack and allow to cool for at least 1 hour prior to cutting.
Notes
Recipe adapted from “Japanese Milk Bread” by NYT
Don’t forget to pin this image to save it for later 🙂
I made this bread today. Maybe because it is cold and dry here the dough was too dry. I am in the northeast. I made it by hand not with a bread machine. I added one third cup of water to dough and it was still too difficult to knead. I decided to knead it with wet hands. It seems that worked. It is the the third time I have attempted this type of bread. The other times I used other recipes. Anyway it turned out great. We loved it. It was soft, the crust was prefect, just the right amount of chew. Thank you for sharing this. It will be my new go to for sandwich bread.
Hi Stacy!
I’m so glad you enjoyed the bread, and so glad you decided to add more water to the dough as well! Great thinking! Yes, depending on the humidity of where you live, you will need to adjust the amount of liquid the dough needs. Even where I live (Humid Houston), I find that the amount of liquid I need for the same bread recipe differs during the summer months (high humidity) versus the winter months (low humidity). How old your flour is can affect how much liquid you need as well, since flour will tend to absorb moisture if your ambient air is very humid or dry out if the ambient air is very dry. I am curious as to whether you will need less liquid during the summer months in your area, so you may need to account for that when you bake in the summer. Thanks again so much 🙂
Victory! I have been attempting to make the spread for over a month now without success. And today finally I was victorious! Thank you for the recipe
Hi Erica,
I’m so glad to hear that, thanks for sharing!. Hope you and your family got to enjoy your victory 🙂
Th bread turned out delicious albeit lumpy on top since I neglected the final rise (I preheated the oven too early). I live the soft texture and the slight sweetness. I used it to make the spicy chicken katsu sandwiches from Epicurious and they were a smash hit! This recipe will be saved in my regular rotation. Thank you!
I’m so glad to hear the bread turned out well. And I LOVE chicken katsu sandwich! yum yum!