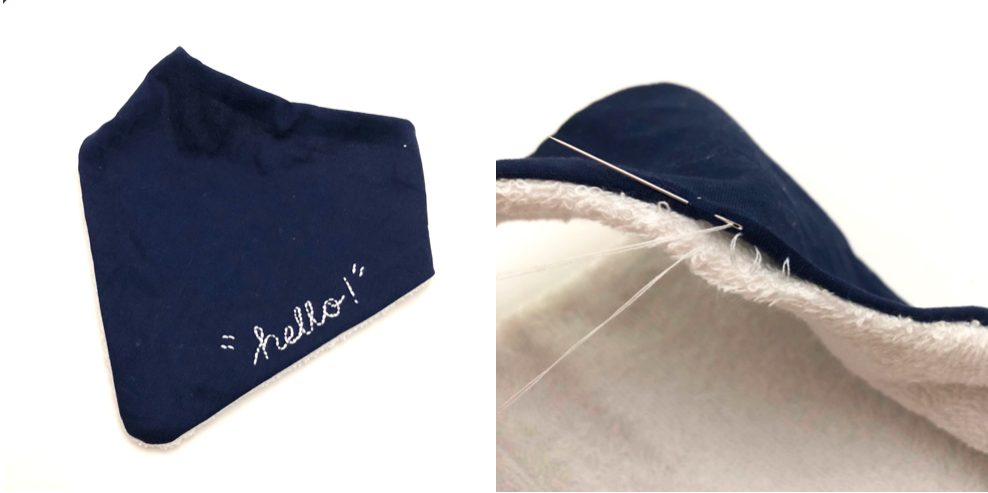
Embroidered Bandana Bib

When I first found out about the bandana bib, I thought they were such a great idea. A fully functional bib disguised as a decorative piece of clothing? Genius!
So around the time my baby was born I sewed a whole stack for him with patterns ranging from plaids to llamas and Kellogg’s corn flakes. Overtime, however, I started noticing that the random pattern of bibs were sometimes hard to match his clothes, and that a plain bib were the ones I would reach for.
During that time I noticed another little boy in his mother’s day out wearing a fancy machine embroidered name bib, and that became my inspiration. A bandana name bib!
This way, his care takers will know his name in case they forgot. It’s pretty much like wearing a name tag.
This bandana bib is such a quick and easy project that I’ve made quite few more as baby gifts. I line the bottom of the bib with terry cloth for extra absorption, although any cotton fabric would work. The ends are closed with Velcro, although you could use baby snaps as well.
I find that I prefer Velcro when putting the bib on versus snaps because there is a larger margin of error whereas snaps you need to find the exact location of the other snap to close. This makes a difference if you have a runaway baby like mine and just need to slap on the bib ASAP!
Materials:
1/3 Yard Cotton Fabric of choice
1/3 Yard White Terry Cloth (I used this from Joanns)
Embroidery Floss
White Thread
Stitch-N-Tear Stabilizer
My free bandana bib pattern (available in my free resource library)
Tools:
Sewing Machine
Fabric Scissors
Fine Pins
Chalk for marking
Ruler
5″ Embroidery Hoop
Embroidery Needles
Instructions:

Fold bib fabric in half and place “On Fold” edge of pattern again fold of the fabric. Do Not Cut.
LEFT: Place embroidery hoop over the right of the pattern (where you will embroider on the bib) and make sure there is enough fabric to go around the hoop.
RIGHT: Use chalk to trace the pattern. Yellow line indicates edge of pattern.
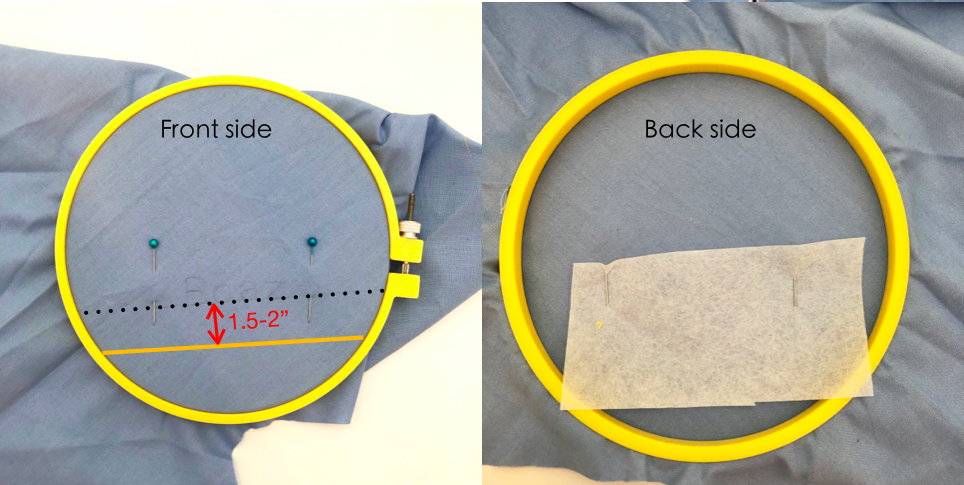
RIGHT: On the back side of the embroidery hoop, place a piece of stabilizer where you will be embroidering. Secure with pins.

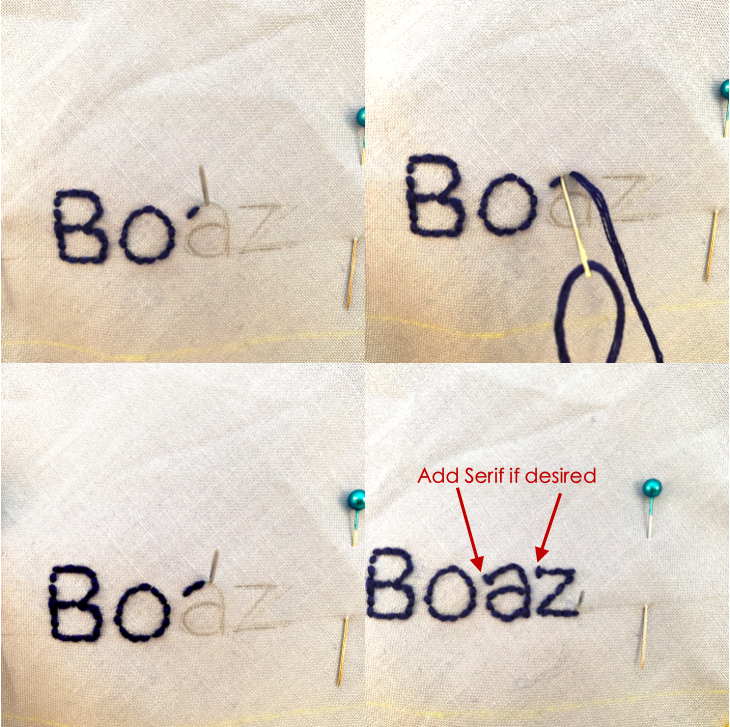
UR: Pull the thread through, then stick the needle right next to end of previous stitch
LL: Pull the needle through and repeat until you reach the end.
LR: I added serif (small line added to the end of a large stroke in fonts) to the ends of the letters.

MIDDLE: Remove pins and cut out bib on fold
RIGHT: Bib after cut out

UR: Sew together at 1/2″ seam allowance (white dotted lines), leaving a 2″ opening
LL: Trim seam allowance to 1/4″
LR: Clip Curves
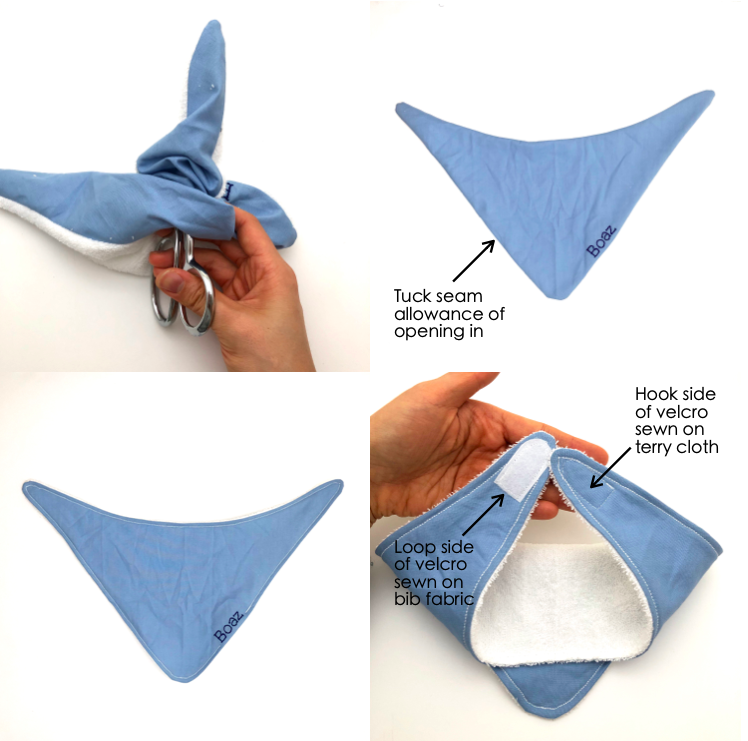
UR: Tuck the seam allowance of opening inwards (between the bib fabric and terry cloth layer).
LL: (Optional) Stitch around the bib approximately 1/4″ from edge of bib. In this case I left the edge where the embroidered name is un-stitched. Alternatively, you can stitch around the entire perimeter of the bib, but you will have to embroider the name/letters further away from the edge of the bib to leave room for the extra stitching.
LR: Sew Velcro on the ends. Hook of Velcro goes on terry cloth side of right end. Eye of velcro goes on bib fabric of left side.


Finished!