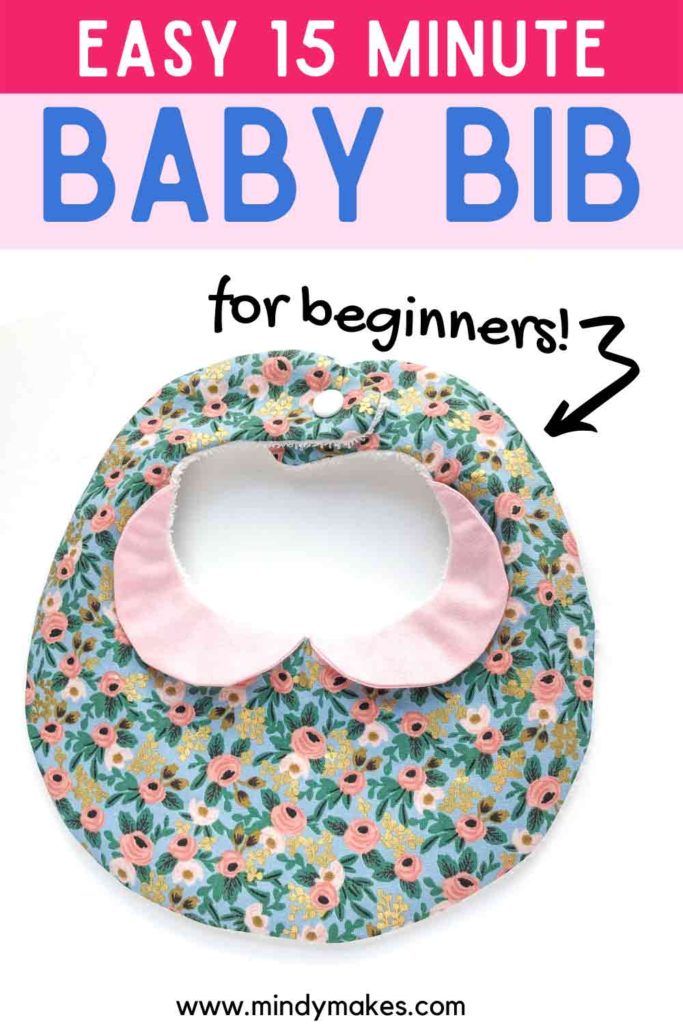
How to Make a Cute Towel Bib With a Collar (Free Pattern)
This simple baby bib with free pattern comes together in just 15 minutes and is a great project for beginners. Add a peter pan collar to make it extra fashionable. Quick and easy DIY gift for that special baby in your life!

Every baby needs bibs. And if you’ve ever had a baby or raised one, you will understand. It’s amazing how such tiny little people can make such MASSIVE messes. ALL THE TIME. They catch everything from drool, snot, spit-ups, you-name it that ALL babies are experts at making.
When my son was a baby, there were times he could go through 5-6 bibs in a day!
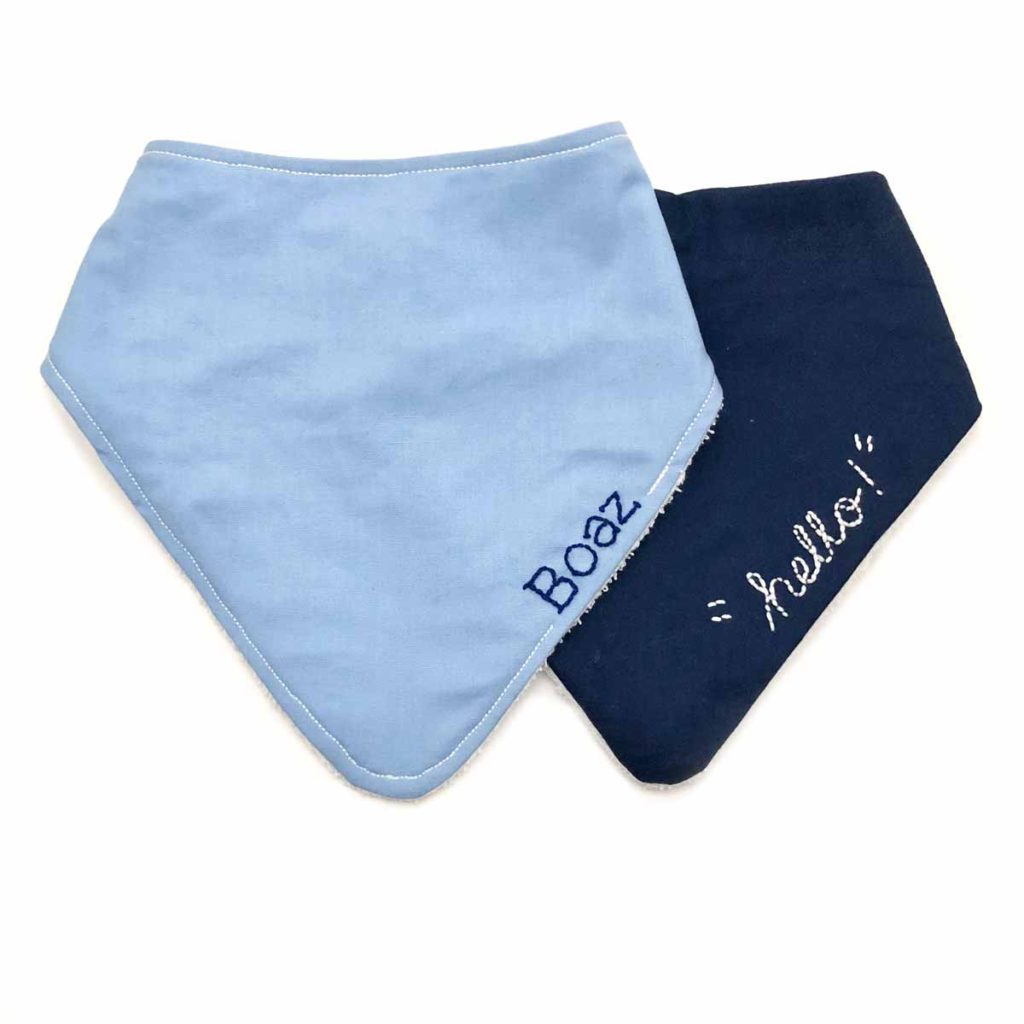
During that time, I sewed a bunch of bandana bibs for him because 1) he needed them and 2) I liked that they disguised themselves as a bandana. That way, it looked like he was wearing a fashionable accessory versus a bib.
If you’d like to learn how to make one, be sure to check out this post: How to Make A Bandana Bib.
Towel bibs: An easy sewing project for beginners
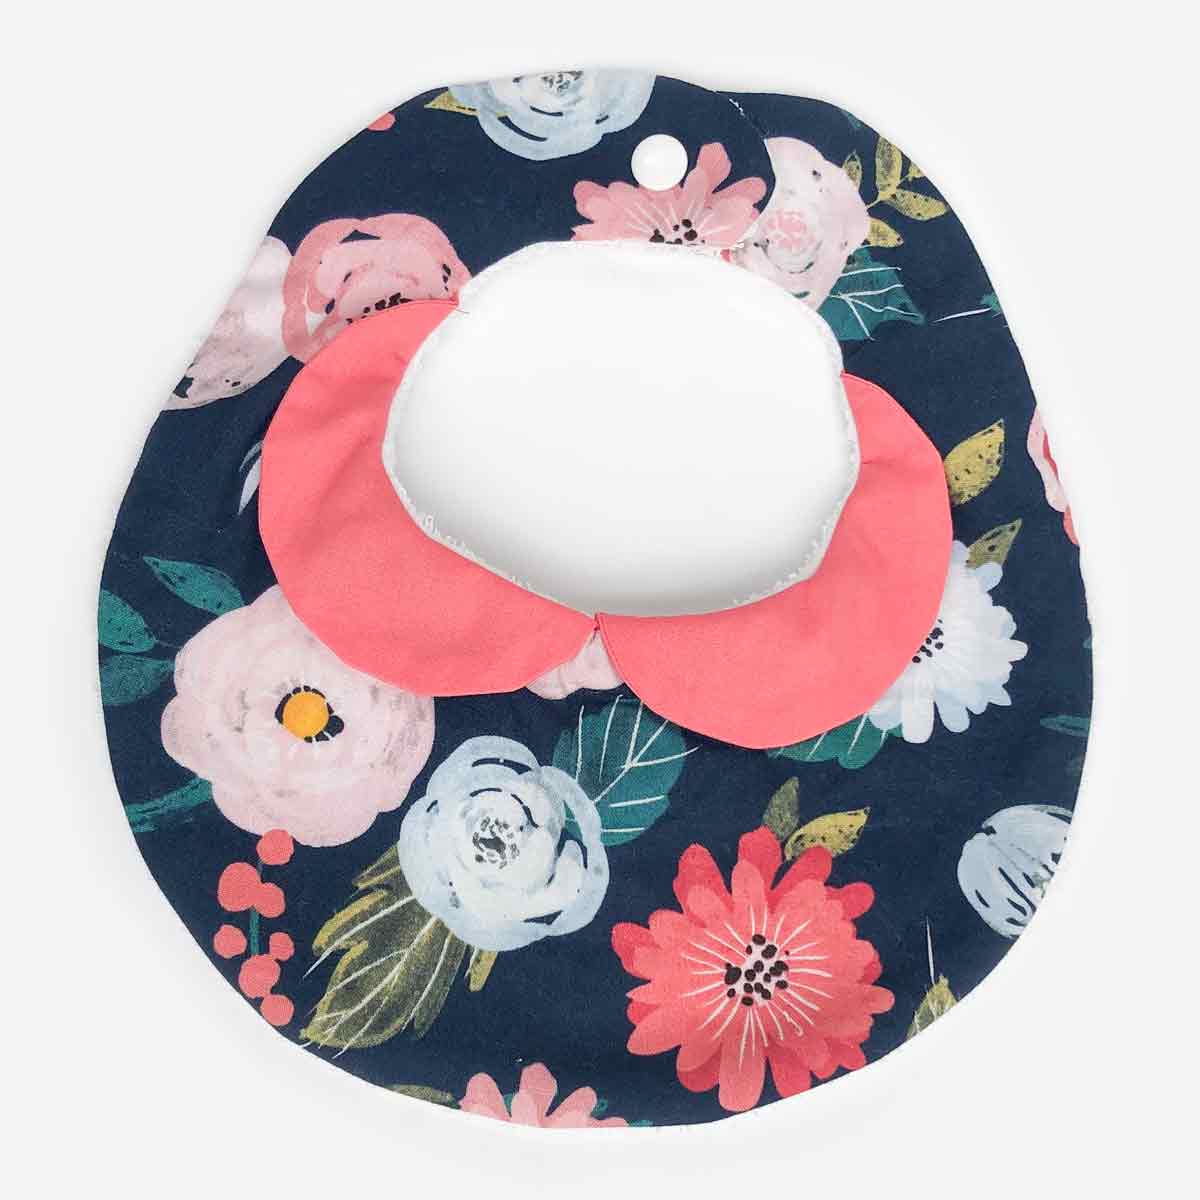
Recently a friend asked if I could teach her 9 year old daughter how to sew a bib for her younger daughter. Since I love the idea of a “bib in disguise”, I decided to add a Peter Pan Collar to a round bib. This way, my friend’s daughter could look like she’s wearing a cute collared shirt instead of a bib.
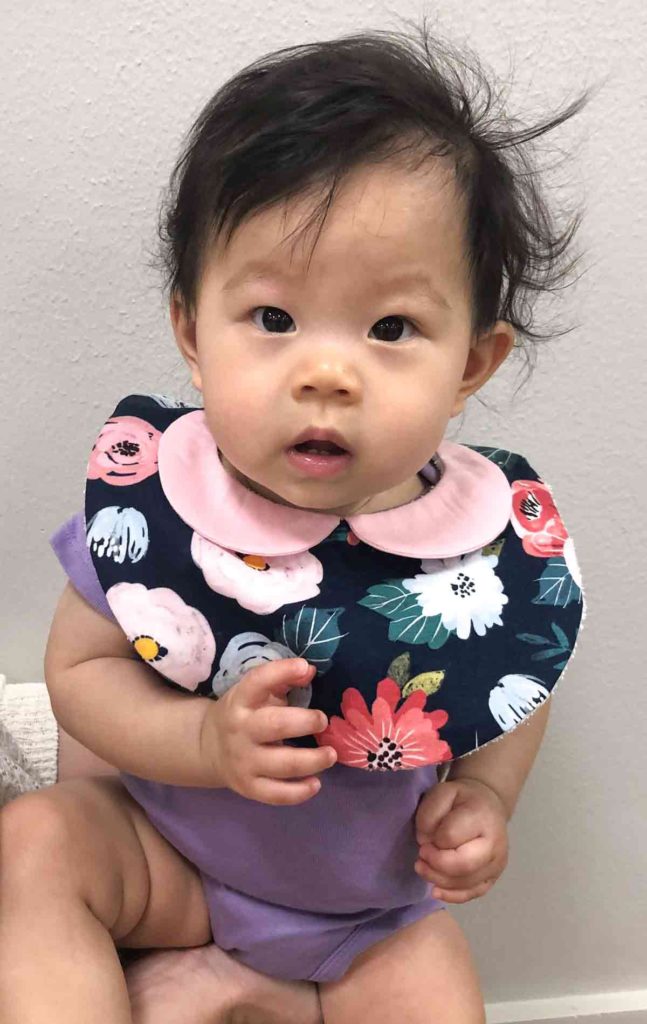
Isn’t she super adorable?
My friend loved the bib for her baby daughter, and so did I! So today, I will be showing you how to make this very easy Peter Pan Collar Bib. Your little one will be the most fashionable baby in town, I promise!
If you don’t want to add the Peter Pan Collar, simply follow along the tutorial and skip the collar making part.
EASY Step-by-STEP SEWING TUTORIALS FOR BEGINNERS
If you consider yourself a beginner, don’t worry! Check out the following posts to get you started:
- How To Thread a Sewing Machine
- How to Wind and Thread a Bobbin
- 10+ Easy Hacks to Thread a Sewing Needle
- 19 Essential Hand Stitches Every Beginner Needs to Know
What fabric should i use to make baby bibs?
Generally speaking, you want to use fabric that is soft, absorbent and can endure multiple washings. For all the bibs I make, I like to use one layer of 100% Cotton Woven or Jersey Knit on the top and Terrycloth (also called Terry Toweling) for the bottom layer.
I find that this combination is the perfect balance between functionality (absorbent) and looks (hello cute cotton prints!).
For more in depth discussion of the best fabric for bibs, check out What is the best fabric for Baby Bibs.
What do I need for baby Bibs?
First, grab the Free Peter Pan Collar Baby Bib Pattern – Available in my Free Resource Library (subscribe to get the password) Listed under the letter “P”
This is how much fabric you will need for a baby bib:
- Main Fabric – 1/4 yard (0.22m) is plenty.
- Terry Cloth – 1/4 yard (0.22m) is plenty. I used these.
- 1/8 Yard (0.11meters) of Matching Fabric – For Peter Pan Collar. I used a solid fabric since my Main Fabric was a print. Small polka dot fabric would also pair nicely with a solid Main fabric. This is my favorite part for any sewing project, matching and choosing fabrics!
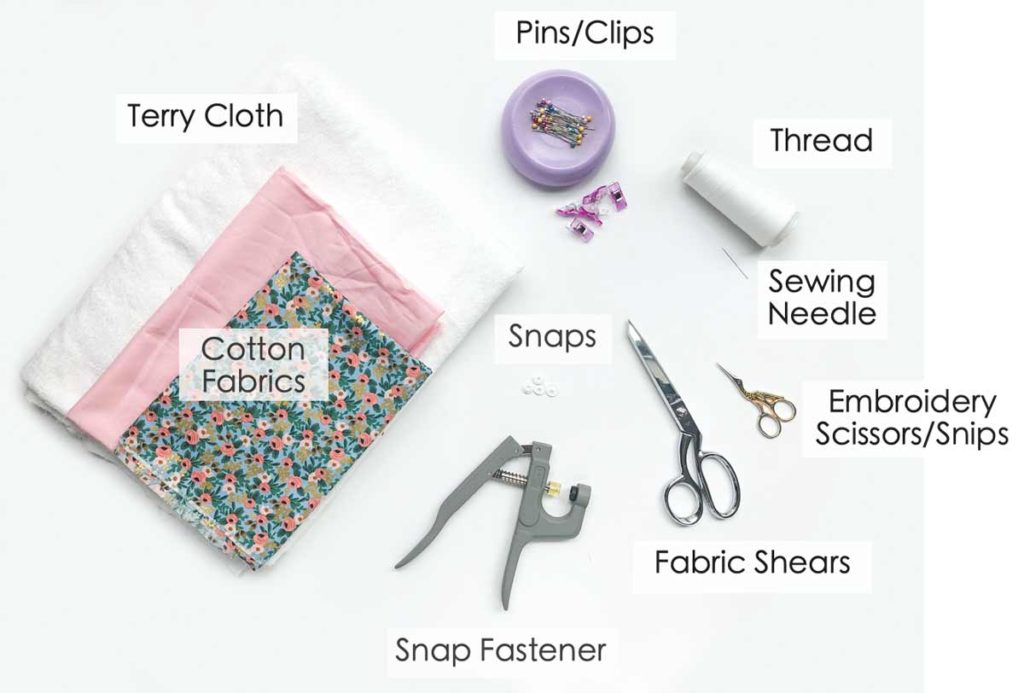
TOOLS for making simple baby bib
- Sewing machine
- Fabric Scissors – these Ginghers are my favorite.
- Pins or Sewing Clips
- Hand Sewing Needles
- Matching Thread
- Plastic Snaps and Snap Pliers – I have the Babyville Boutique Snap Pliers and the White Snaps in Size 20
- Iron
What are the measurements of This SIMPLE Bib?
This round baby bib measures about 8.5″ (21.6 cm) wide and 8.5″ (21.6 cm) in height. The circumference of the neck is about 11″ (28cm).
The peter pan collar measures about 5.75″ (14.6cm) wide and is 1.25″ (3.175cm) deep.
This size fits babies 0-24 months. If you need a bib for an older child, please leave me a comment below!
How do you make a simple baby bib?
Cutting Out Bib Pattern
First, grab the Free Peter Pan Collar Baby Bib Pattern – Available in my Free Resource Library (subscribe to get the password)
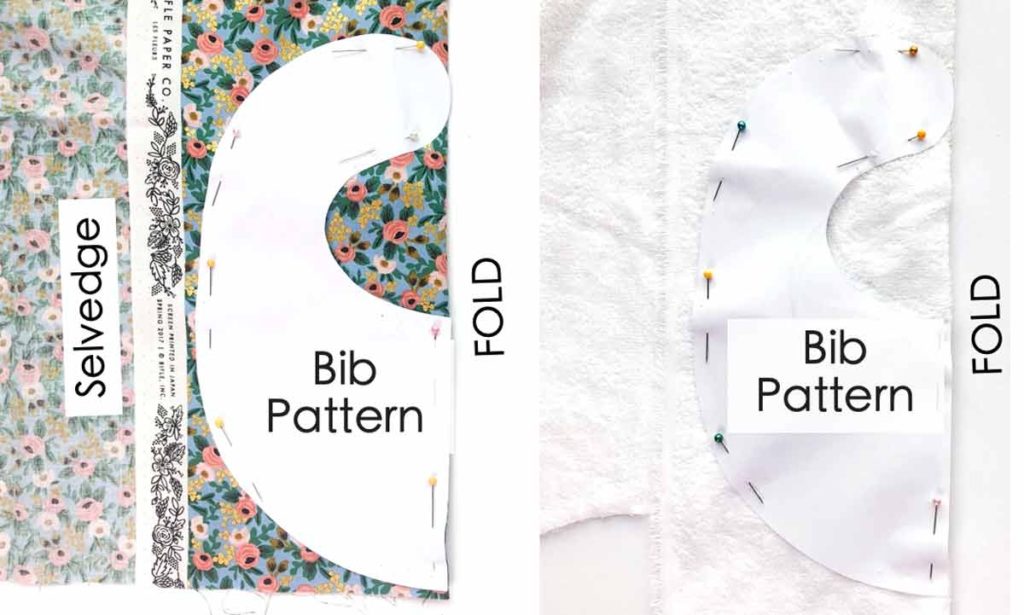
Place bib pattern on fold of front fabric and terry cloth. Make sure the fold is parallel to the selvedge of fabric. Pin pattern to fabric and cut.
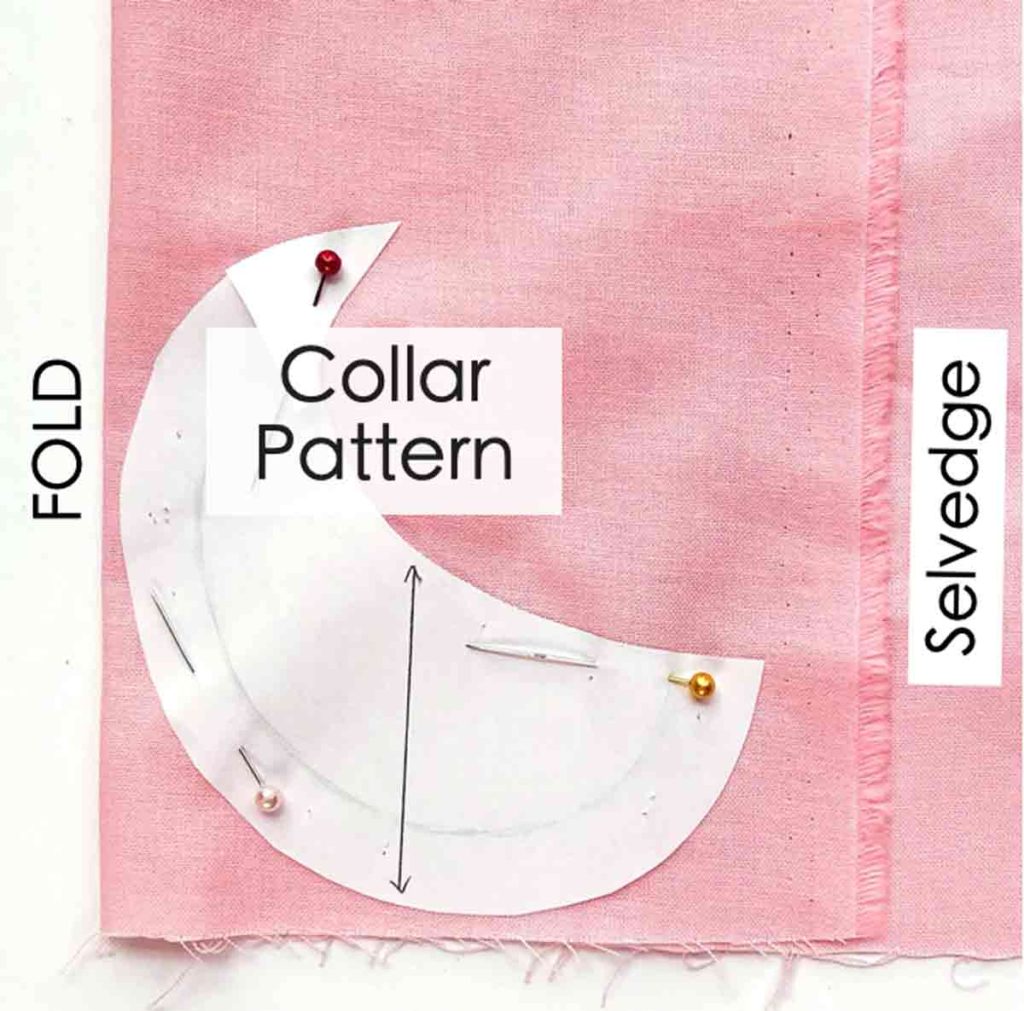
To cut out two collar pieces at once, fold fabric about 4 inches from selvedge. Place collar pattern on fabric, making sure the arrow is parallel to the selvedge.
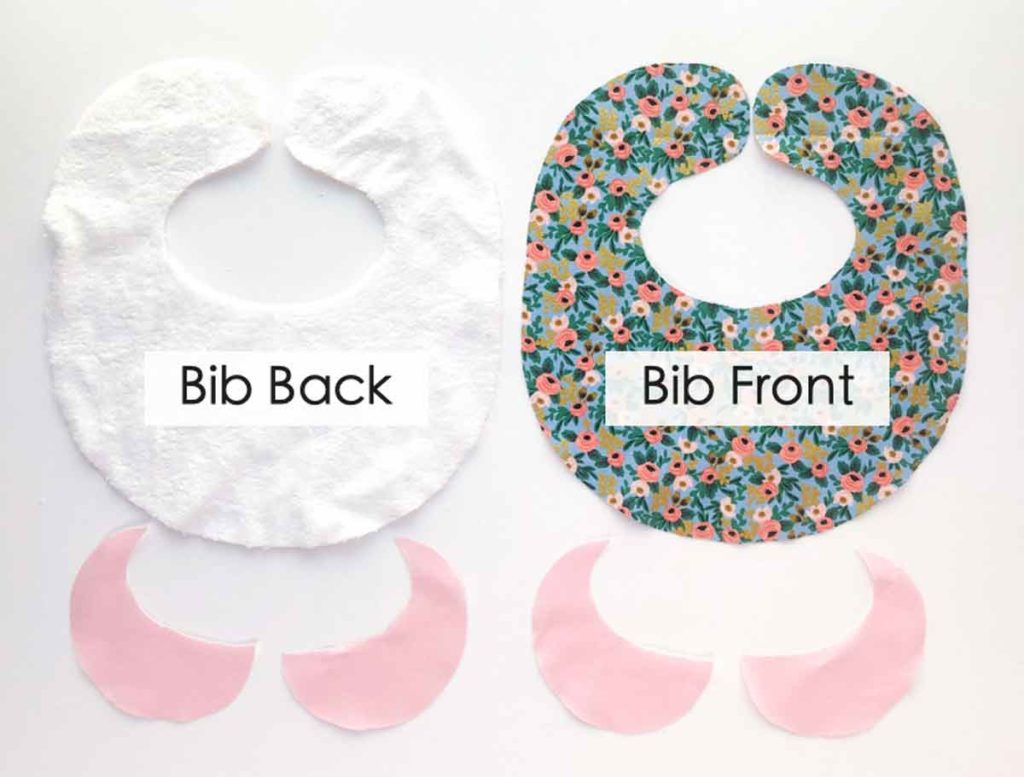
You will have 6 Fabric Pieces once all the patterns are cut out:
- Bib Front (x1)
- Bib Back (x1)
- Collar (x4)
Sewing Peter Pan Collar
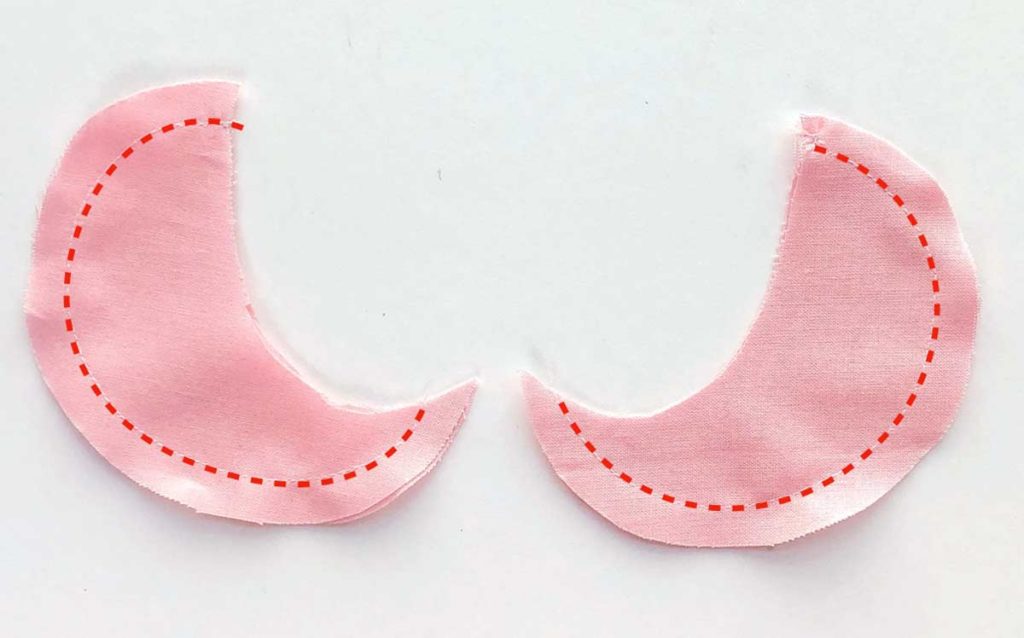
Place collar piece right sides together, pin and stitch at 1/4”(6mm) seam allowance (red dotted line).
Tip: Use a small stitch length (2-3) and sew slowly when sewing curves. This will make the curve more “round” looking when you turn the collar to the right side.
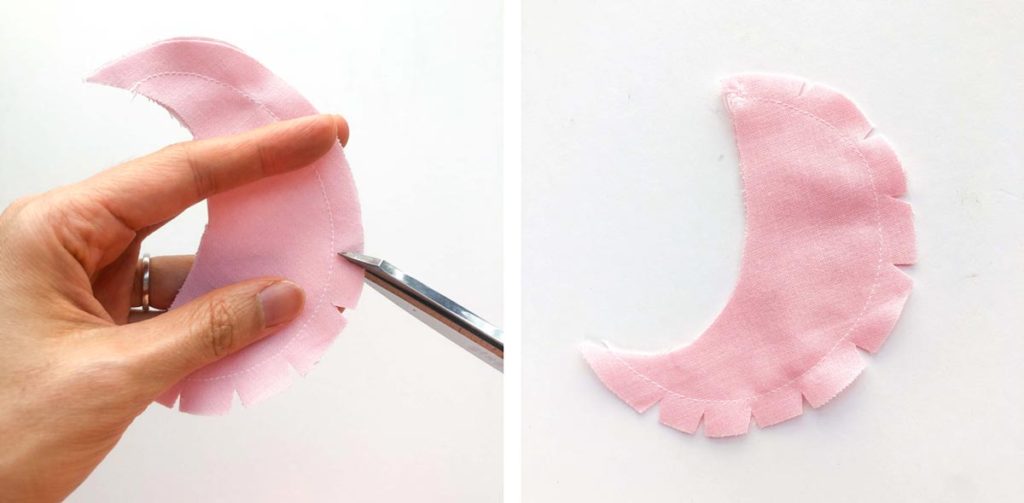
Clip curves. You don’t need to cut notches like I did in the photo. I made notches so I would be easier to see in the photo
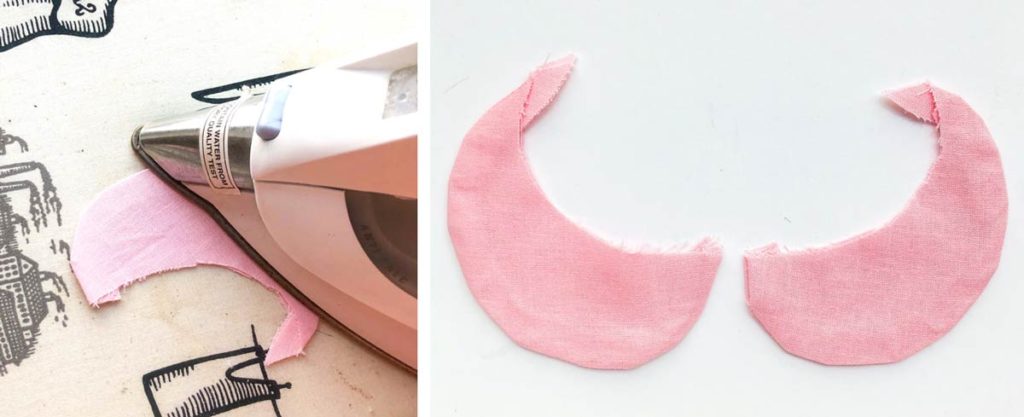
Turn collar to right side and press flat with an iron.
Attaching Collar to Bib
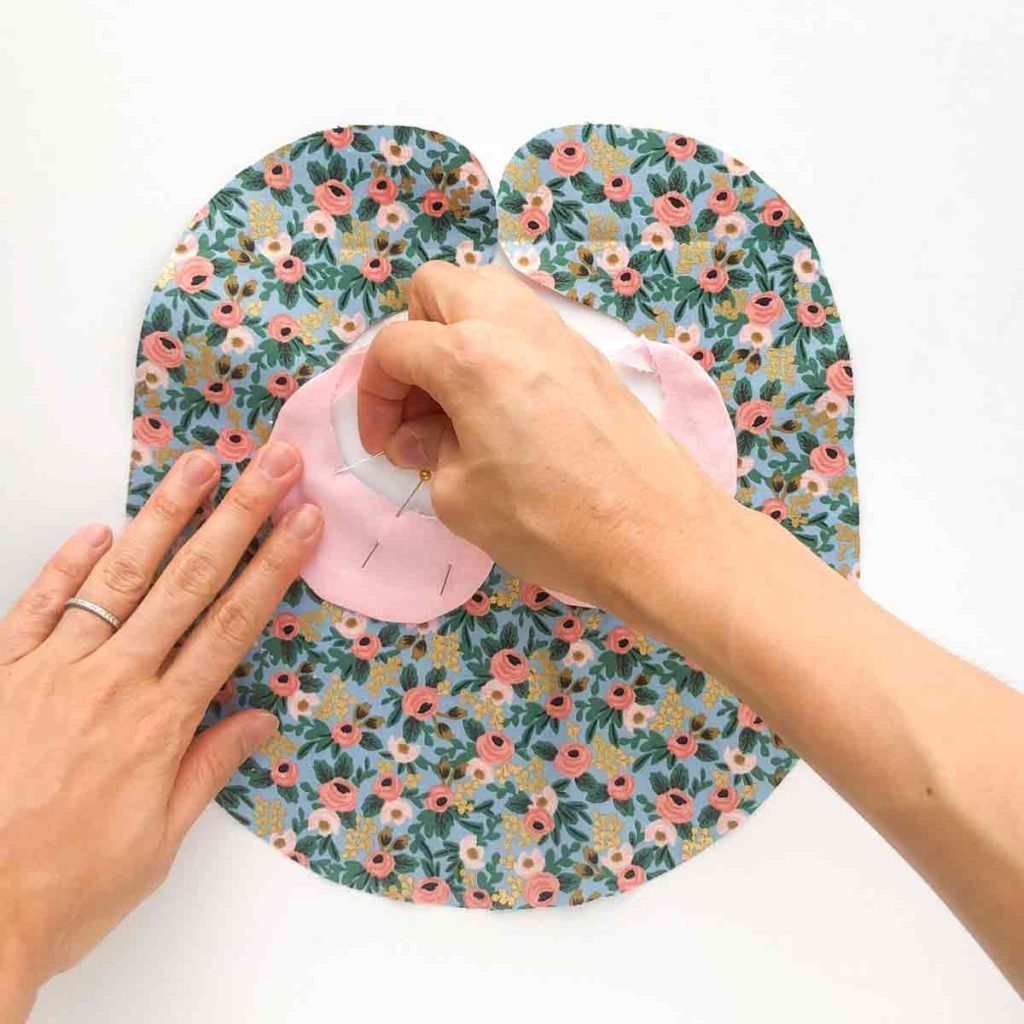
Pin collar to right side of [Bib Front Piece] and baste. To learn more about how to make basting stitches, check out this post.
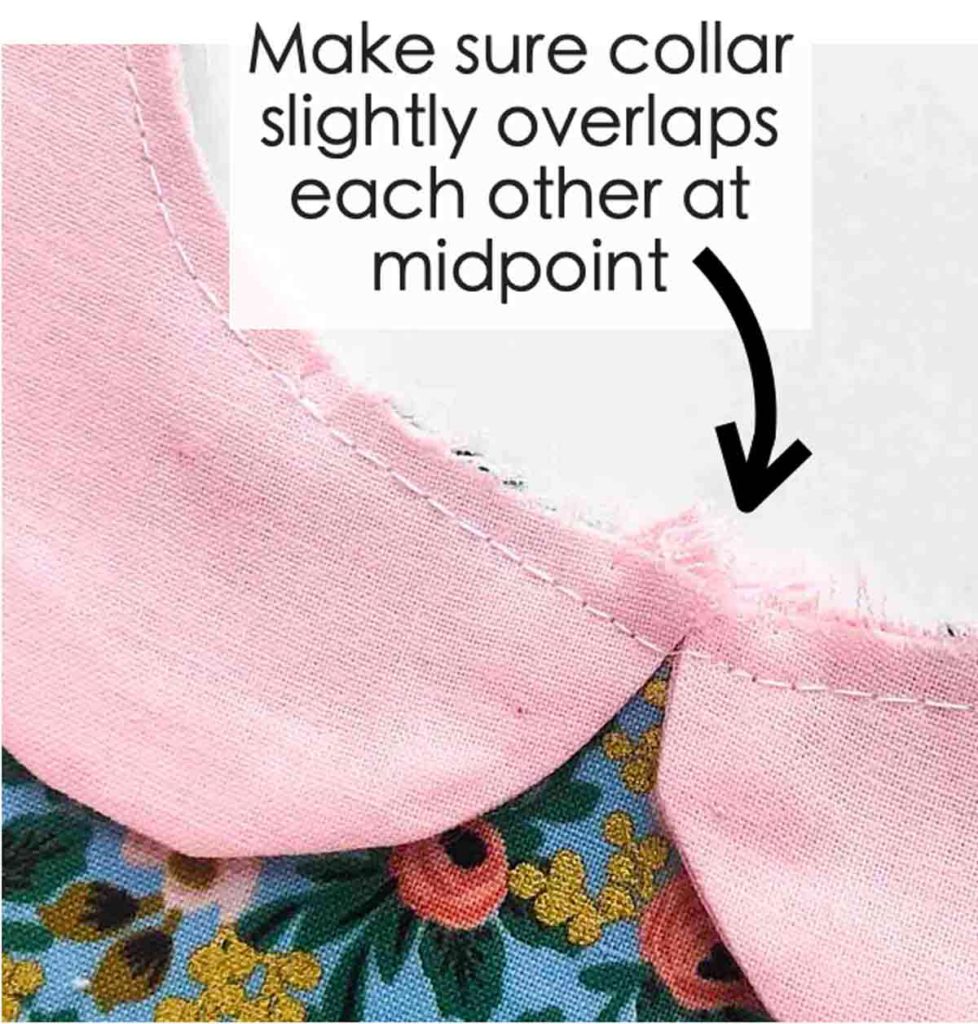
At the mid line make sure the collar pieces slightly overlap each other. This way there won’t be any gap between the collar when you turn the bib to the right side.
Sewing it All Together
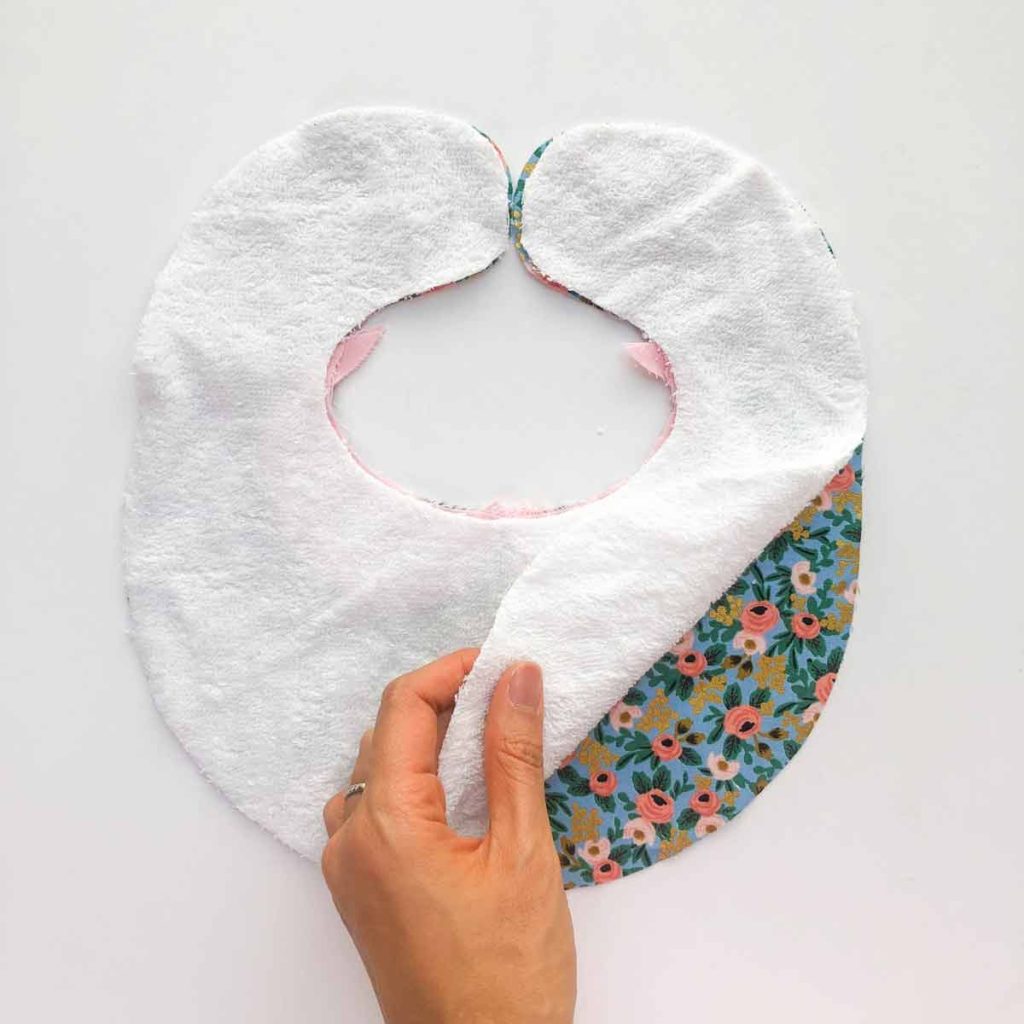
Place [Bib Back Piece] over [Bib Front Piece], right sides together
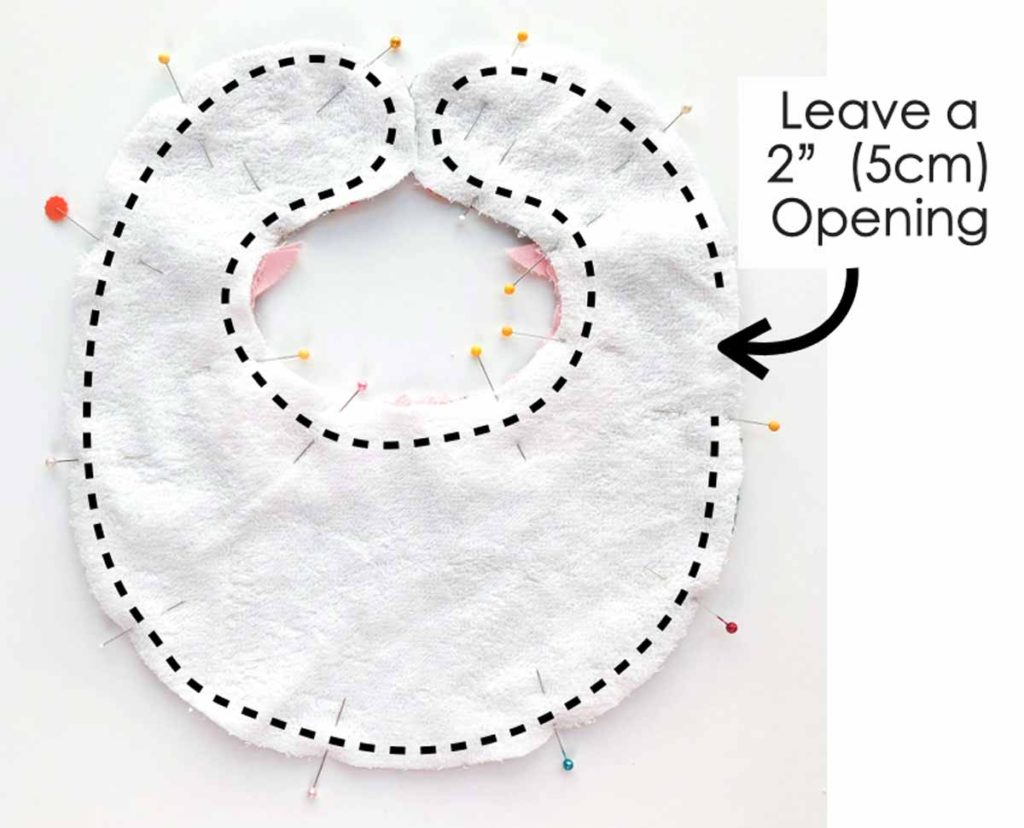
Pin and sew together at 1/4”(6mm) seam allowance (black dotted lines). Leave a 2”(5cm) opening on the side of the bib. Be sure to backstitch at both ends of the opening.
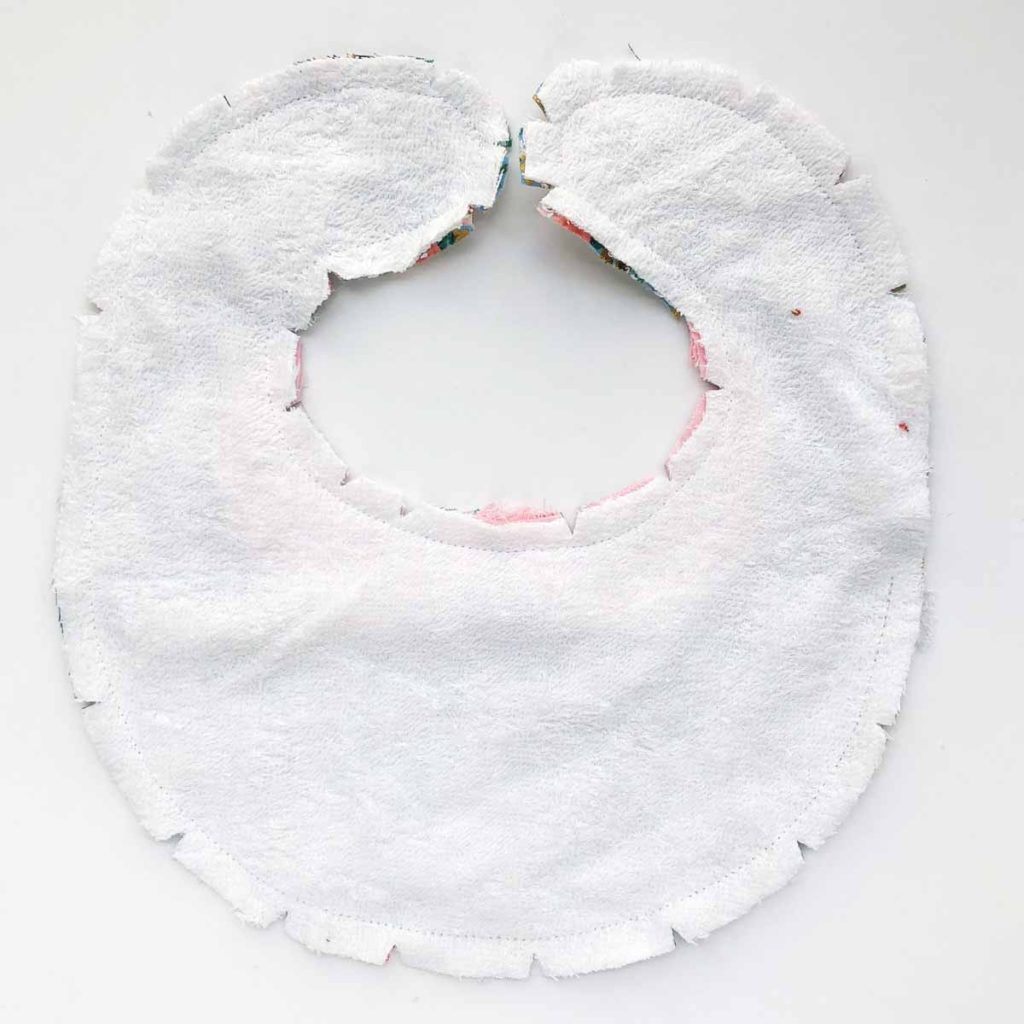
Clip notches around curve. This time I recommend making notches especially if you are using terry cloth (since the fabric is thicker). Notches will make the curved portions look nicer (versus just clipping).
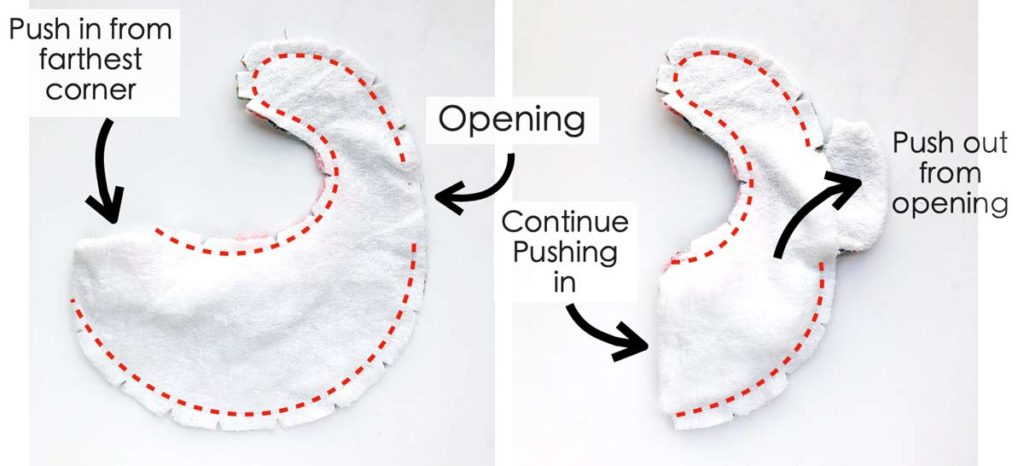
Turn bib to right side through opening. Start by pushing in the from the farthest corner and continue to push out from the opening.
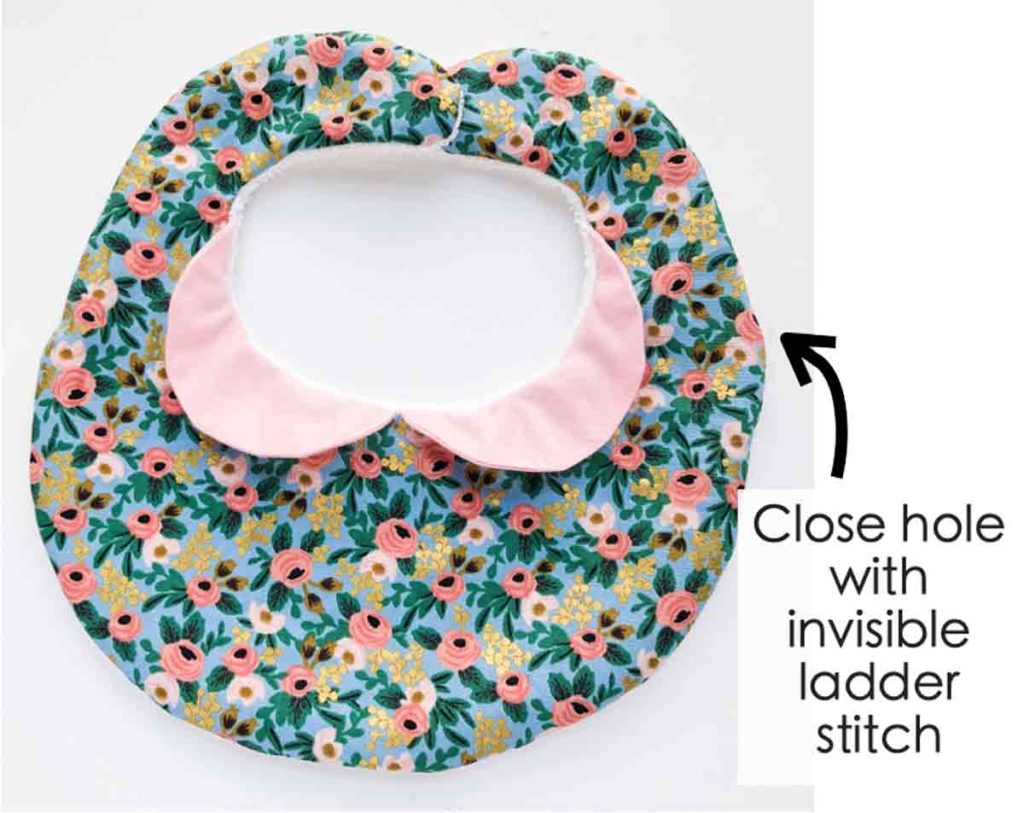
View of bib after it’s turned to the right side. Close the side opening using the invisible ladder stitch.
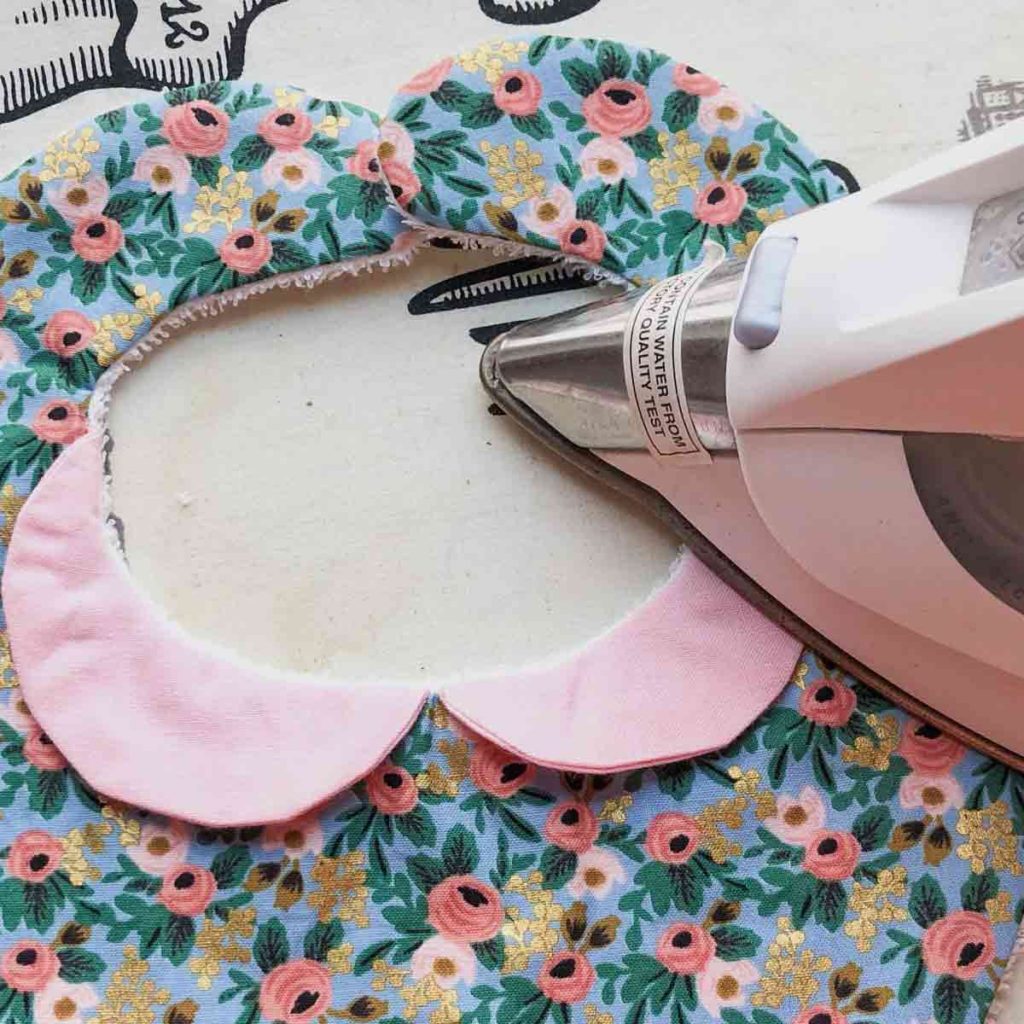
Give the bib a good press.
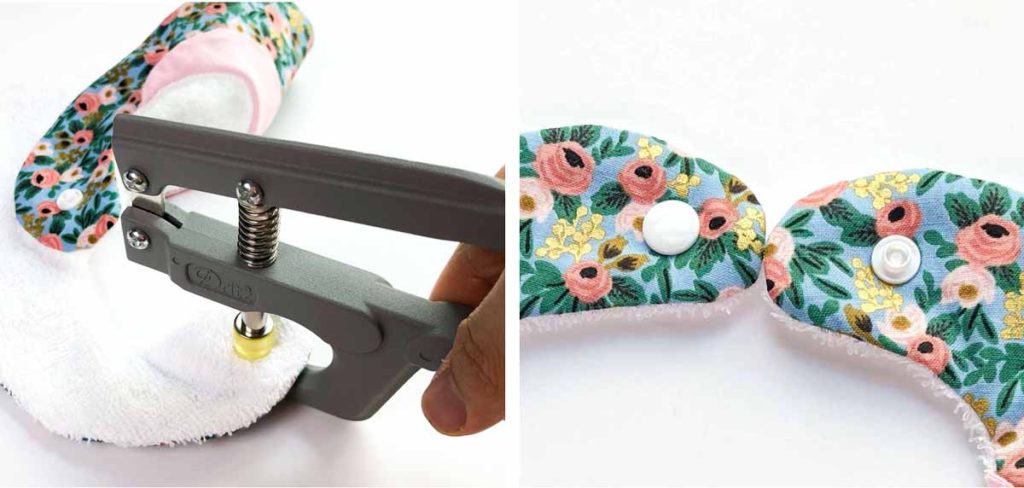
Apply snaps to either end of the bib.

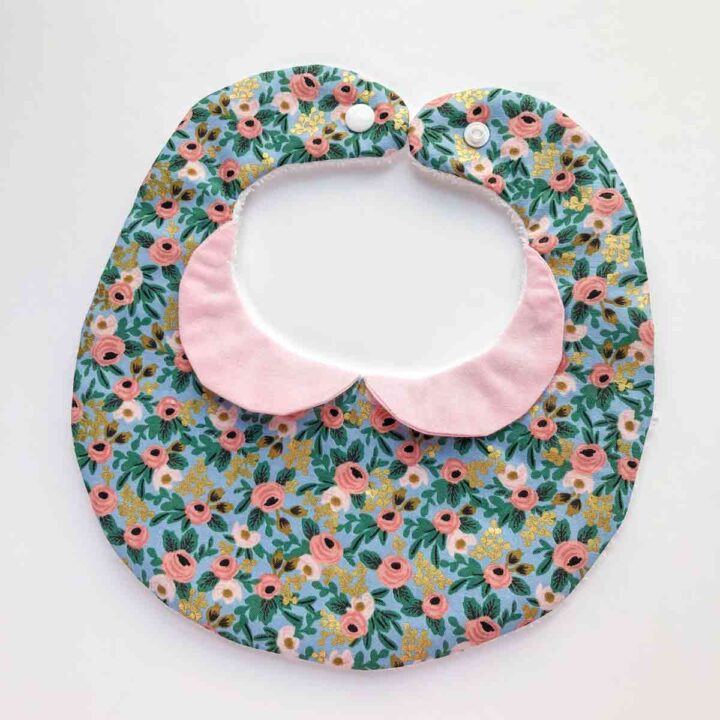
Finished! There’s your bib! Wasn’t that so simple? If this is one of your first times sewing, sit for a minute and admire your handiwork. Take few photos and post it on social. Yup, you made it, all by yourself!
I hope you enjoyed making this project as much as I did. The best part? Gifting it to your mama friend and then taking another 3000 photos of the baby wearing it! Happy sewing!
How to Make a Towel Bib (with Peter Pan Collar)
A simple baby bib that comes together in just 15 minutes and is a great project for beginners. Add a peter pan collar to make it extra fashionable!
Materials
- TOWEL BIB PATTERN
- EXTERIOR FABRIC – 1/4 yard (0.22m) is plenty.
- TERRY CLOTH – 1/4 yard (0.22m) is plenty.
- MATCHING FABRIC (For Peter Pan Collar) - 1/8 Yard (0.11meters)
Tools
- SEWING MACHINE
- FABRIC SCISSORS
- SEWING PINS or SEWING CLIPS
- HAND SEWING NEEDLES
- MATCHING THREAD
- SNAP PLIERS
- PLASTIC SNAPS
- IRON
Instructions
- Place bib pattern on fold of front fabric and terry cloth. (See Note 1)
- Pin pattern to fabric and cut.
- Cut out 4 pieces of collar pattern
- Place collar piece right sides together, pin and stitch at 1/4”(6mm) seam allowance (See Note 2)
- Clip curves.
- Turn collar to right side and press flat with an iron.
- Pin collar to right side of [Bib Front Piece] and baste. (See Note 3)
- Place [Bib Back Piece] over [Bib Front Piece], right sides together.
- Pin and sew together at 1/4”(6mm) seam allowance, leaving a 2”(5cm) opening on the side of the bib. Be sure to backstitch at both ends of the opening.
- Clip notches around curve. (See Note 4)
- Turn bib to right side through opening. Start by pushing in the from the farthest corner and continue to push out from the opening.
- Close the side opening using the invisible ladder stitch.
- Give the bib a good press.
- Apply snaps to either end of the bib. Finished!
SEWING PETER PAN COLLAR
SEWING IT ALL TOGETHER
Notes
- Make sure the fold is parallel to the selvedge of fabric.
- Use a small stitch length (2-3) and sew slowly when sewing curves. This will make the curve more “round” looking when you turn the collar to the right side.
- At the mid line make sure the collar pieces slightly overlap each other. This way there won’t be any gap between the collar when you turn the bib to the right side.
- I recommend making notches especially if you are using terry cloth (since the fabric is thicker). Notches will make the curved portions look nicer (versus just clipping).

Do you have a larger size pattern? If so, can you send it to me?
This is a really cute bib. Thanks for the pattern
Hi Kat,
Unfortunately I do not have a larger size pattern. But what dimension were you looking for? Perhaps you could bring the pattern to the print shop and have them enlarge it for you. Thanks!
Hello Mindy,
I want to try to make this project but when I try to enter your library to download the pattern, it asks for a password.
Hi Mindy,
Sorry for the previous comment, I just noticed that I had to subscribe for the password. Thank you very much for providing this help for beginners like me.
Hi Nishali,
Not a problem. I’m glad you figured it out! Let me know if you have any other questions.
How do you subscribe to get the pattern for the Peter Pan bib? Thank you
Hi Cindy,
This post will show you how to subscribe and access the free pattern. Hope that helps!