Lion Hat Tutorial
A while back while browsing through Joanns (seriously one of my favorite relaxing things to do) I came across this book, “Drawing Cute Animals in colored Pencil” by Ai Akikusa, and it really caught my eye. I loved that it was a book about drawing in colored pencils because unlike watercolor/paint, there is no need for extra materials (brush, water, mixing tray, etc), nor do you need special paper. You just need nice coloring pencils (believe me they do make a difference, crayola versus professional artist grade color pencils) and regular paper. I ended up purchasing the book for my mom because she loves to draw animals!
As I looked through the book several more times, the cute animals inspired me to sew something for Barnaby. Lately he has learned say “ROAAR!” whenever we say “lion!” or “bear!”. The two seem indistinguishable, and he says “ROAR!” for both of them. I decided to make a lion hat first since his “ROAR!” sounds more like that of a Lion’s. Bear hat may be coming soon, but I have to admit the cute Alpaca in the book is calling for me to make it as well!
Originally I wanted to the mane part to be fur, but couldn’t find any suitable fur at Joanns, so I found this tutorial on Youtube about making fur from yarn. Unfortunately, when I tried it out on the yarn I purchased, the resulting fur looked messy and crazy. My guess is I probably need 100% wool yarn to make it look as nice as the one in the tutorial. Nevertheless, I ended up using the tutorial’s technique (chain stitching the yarn strands together) and keeping the yarn intact as opposed to combing it out. I’m pleased with the look of this mane!
Later I also found this tutorial from ANightOwlblog.com that ties the yarn strand together (instead of using crochet needle) specifically for making a lion mane. I think this will work out nicely as well!

This hat uses the chin strap hat pattern purchase here, modified with the Lion Hat Accessories Pattern Download here
MATERIALS:
- 1/3 Yard Mustard fleece (I used Blizzard fleece from Joanns)
- 1/3 Yard White felt
- 1/8 Yard Sandstone felt (I used craft felt from Joanns)
- Scraps of Black felt
- Matching Thread
- 1/2” wide white sew-on velcro
- Thick yarn of appropriate color (I used Lion Brand Wool Ease Thick Yarn in Butterscotch)
- My free lion hat accessories pattern (available in my free resource library)
- Chin Strap Hat Pattern Purchase here
TOOLS:
Sewing Machine with zigzag stitch option
Fine pins
Fabric scissors
Chalk for marking
Sewing needles
Crochet Needle*
NOTES:
1/2” seam allowance is already included in the pattern so you do not need to add seam allowance when sewing. This means that when sewing the pattern pieces together, sew 1/2”in from the edge of the fabric.
Backstitch at the beginning and end of each seam. You do not want your handwork unraveling!
When sewing two pieces of the hat together, ALWAYS makes sure the right sides are facing each other and that you are sewing on the wrong side of the fabric. Later on you will turn the hat inside out so that the sewed part is hidden on the inside.
*I used size F5 because that’s all I had, but recommended size for thick wool-ease yarn is N13
INSTRUCTIONS:
Print Chin Strap Hat Pattern and Lion hat accessories pattern. Piece the hat pattern together as indicated and cut the pattern pieces out on fabric.
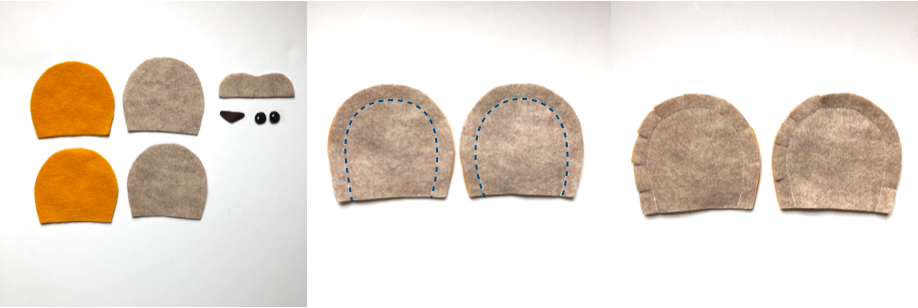
MIDDLE: Stitch ear piece together at 1/2” seam allowance (blue dotted line)
RIGHT: Clip curves
Lion Ears
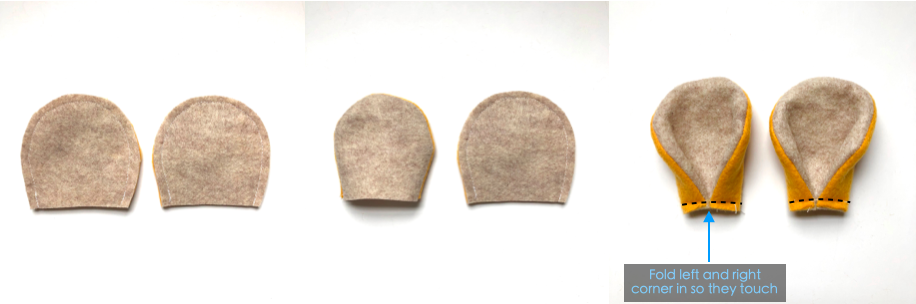
MIDDLE: Flip ears to right side
RIGHT: Fold the sides of the ears in so that they touch at the middle. Baste (black dotted line) at 1/4” away from bottom of ears
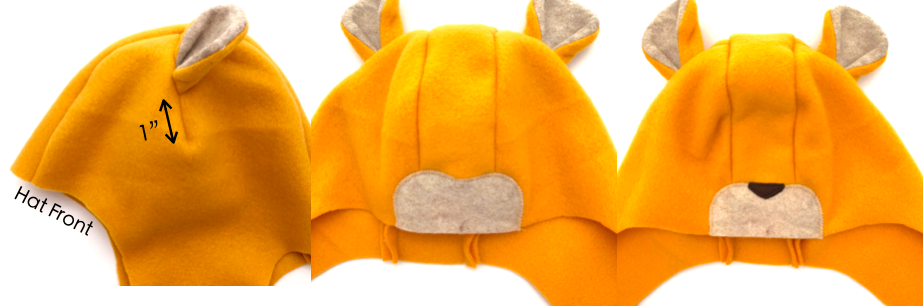
MIDDLE: Glue/pin nose piece onto hat front and zigzag stitch in place
RIGHT: Glue nose onto nose piece and zigzag stitch in place.
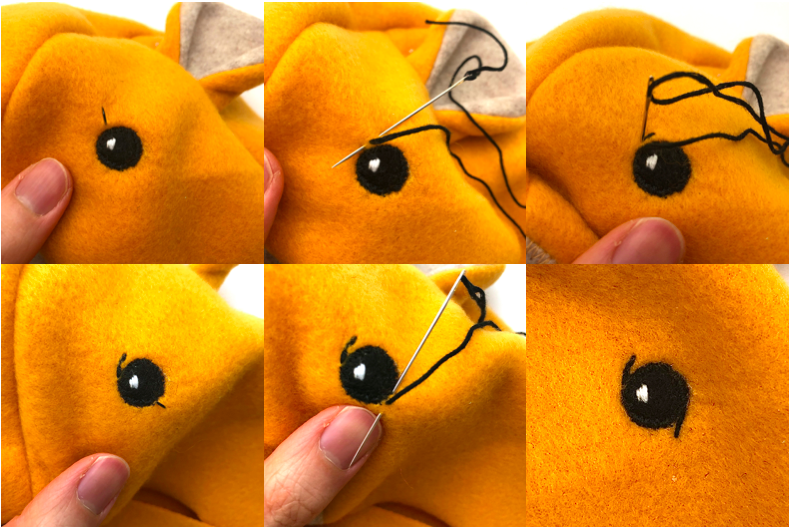
Lion’s Eyes
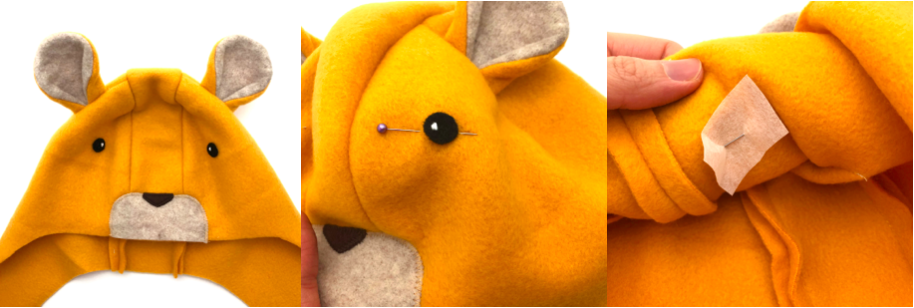
MIDDLE: Pin a piece of interfacing behind the eyes on wrong side of hat. This helps stabilize the eyes when stitching down later.
RIGHT: View of interfacing from wrong side of hat
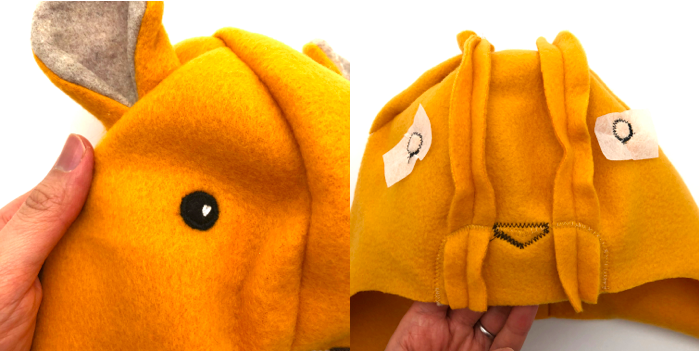
RIGHT: View of wrong side of hat
Lion Mane
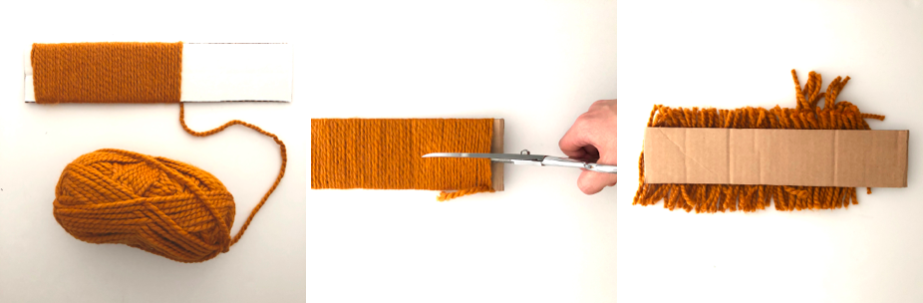
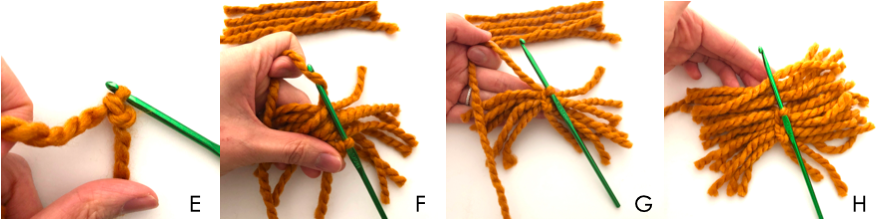
MIDDLE: Cut through the middle of the wrapped yarn
RIGHT: This creates yarn pieces approximately 3” in length. Repeat 3-4 more times.
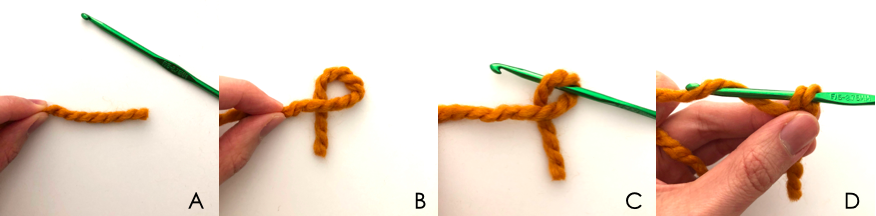
C and D: Place crochet needle through the loop and hook a piece of the yarn (connected to rest of yarn spool)
F: Push the crochet hook through the loop and place about 4-10 strands on top of the yarn connected to the spool. Again, hook the yarn and pull through the loop
G: Tug the yarn connected to the spool to tighten.
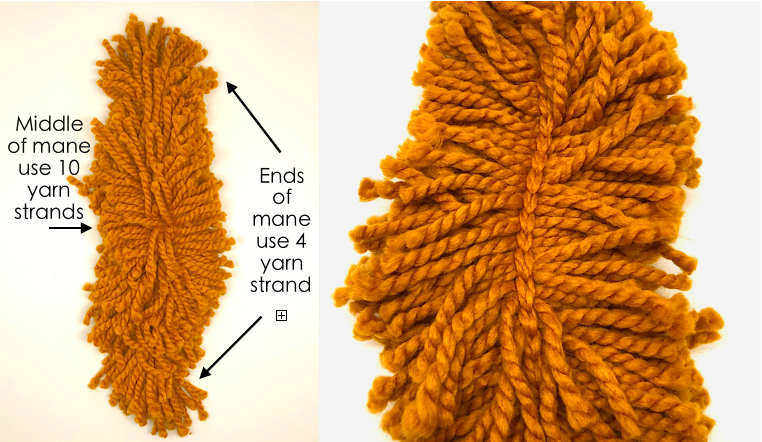
H: Continue placing 4-10 strands of yarn and chain stitch them in place. To create the lion mane, I used approximately 4 strands on the ends (for side of mane) and more strands (10-14) as I got closer the middle of the mane (creates top mane).
RIGHT: Underside view of mane
Attaching Mane to Hat
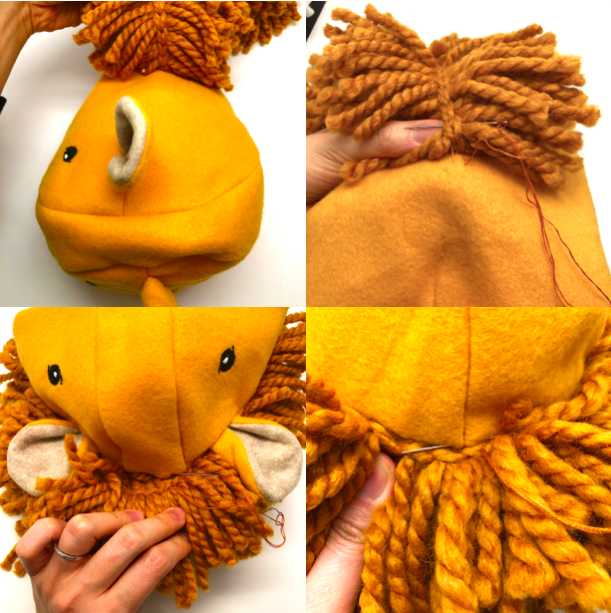

RIGHT: Pull out some yarn strands if you feel the mane is too bulky or adjust accordingly
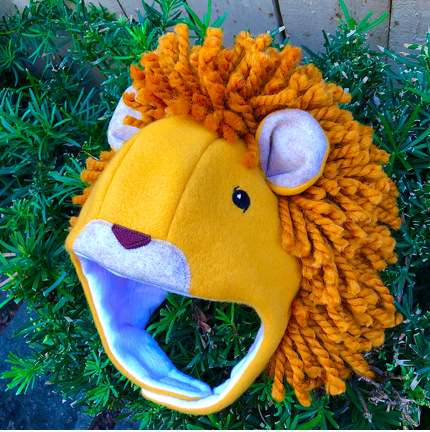


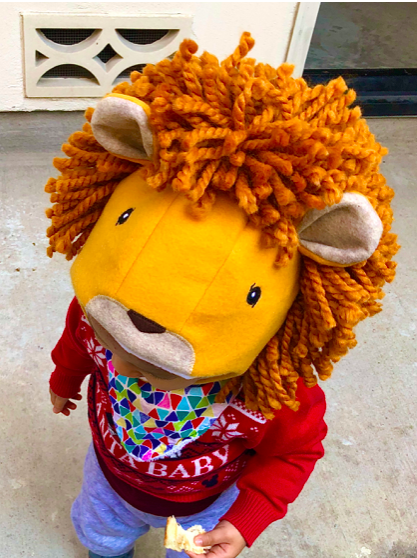
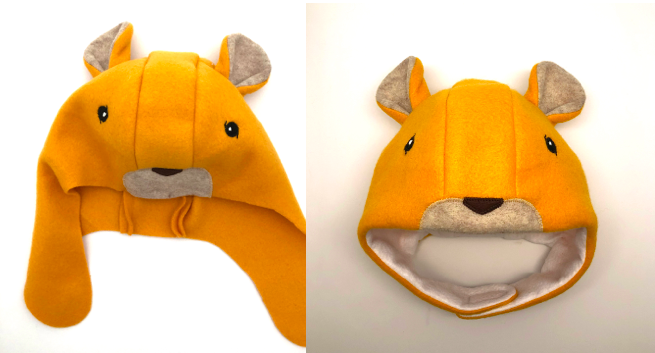
Completed views of Lion hat.
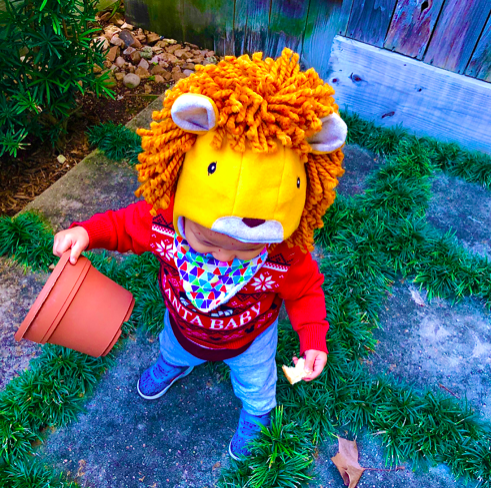
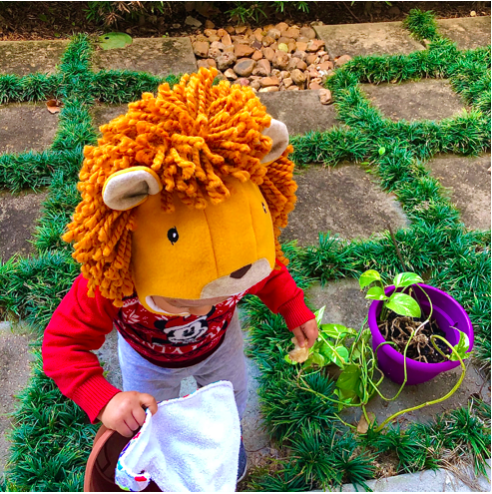
There’s a little lion hard at work in the back patio, ROAAAR! Is he gardening or tearing up the place?
Let me know in the comments below if you tried this project or if there are other tutorials you would like to see. Happy Sewing!