Fried Egg and Bacon Coin Purse
I love food crafts, food toys, food themed bags, food drawings, or actually just plain old food. When Barnaby was still a teeny tiny baby and needed to sleep in a sleep sac, I saw a pizza sleeping bag online, and that inspired me to sew a food themed sleep sac for him, and I decided on a fried egg and bacon sleep sac. Unfortunately, that sewing experiment was a flop, so I was left with all this extra fabric remnant that I didn’t know what to do with. Recently I saw some fried egg plushies on pinterest and the egg and bacon craft fever attacked again. (Every time I browse pinterest I always leave with this itching desire to create something new. It definitely is my go-to place for inspirations!)
Because my leftover fabric scraps were so small, I decided to make something small scale, and a coin purse seemed the perfect idea. This is a great project to practice and learn how to sew a lined zipper pouch with a curved zipper. If you have never sewed a curved zipper, the fried egg is also a great beginner project because it’s so forgiving, since fried eggs are never perfectly round anyway. Also a great gift for the food lovers nearby who are in need of stowing coins, lipstick, charging cords, headphones, and etc!

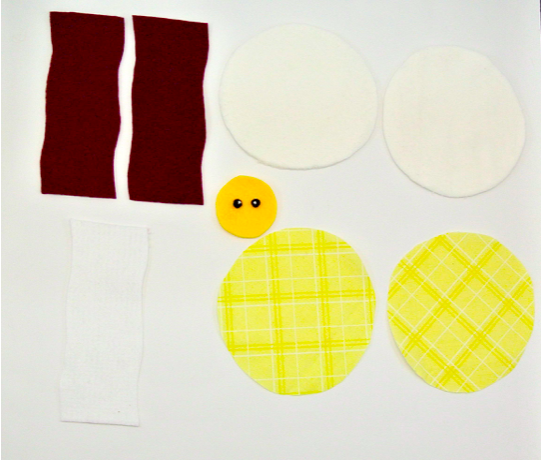
MATERIALS:
1/8 yard of White fleece (I used LUXE FLEECE from Joanns)
Yellow fleece (small piece)
Dark Burgundy fleece (small piece)
White felt (small piece)
Black felt (leftover scraps are fine)
Iron-on Fusible
Cotton Fabric for lining (I used Keepsake Calico from Joanns, but any light weight cotton is fine)
7″ or 9″ zipper*
Matching thread for sewing
My free fried egg coin purse pattern (available in my free resource library)
TOOLS
Sewing machine with zigzag stitch options
Fine Pins
Fabric Scissors
Fabric glue (I use Aleene’s No-Sew Fabric Glue)
Sewing needles
Craft Tweezers
NOTES:
1/2” seam allowance is already included in the pattern so you do not need to add seam allowance when sewing. This means that when sewing the pattern pieces together, sew 1/2”in from the edge of the fabric.
Backstitch at the beginning and end of each seam. You do not want your handwork unraveling!
*I used a 9″ zipper because it’s easier to sew (you can open the zipper all the way to the end, which allows more space to sew), although a 7″ zipper fits better. However, you can actually use any length of zipper longer than 7″ because later on you can create a new zipper stop (which I show in the instructions) and trim off the excess zipper teeth.
INSTRUCTIONS:
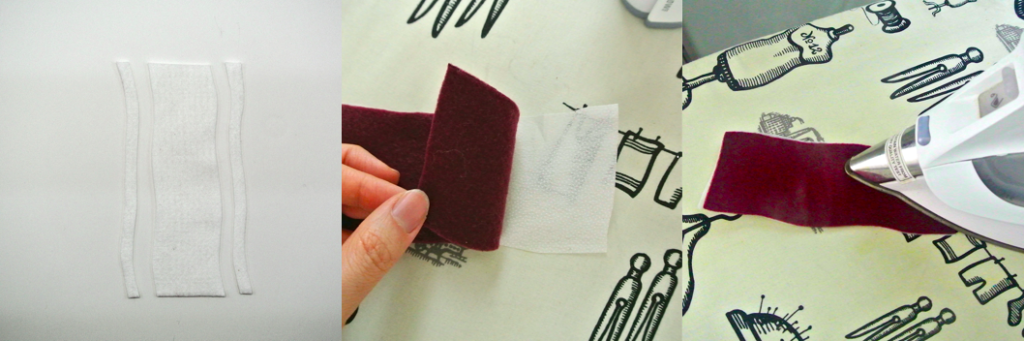
MIDDLE: Place bacon fabric over fusible
RIGHT: Iron fusible on both pieces of bacon fabric (using steam)
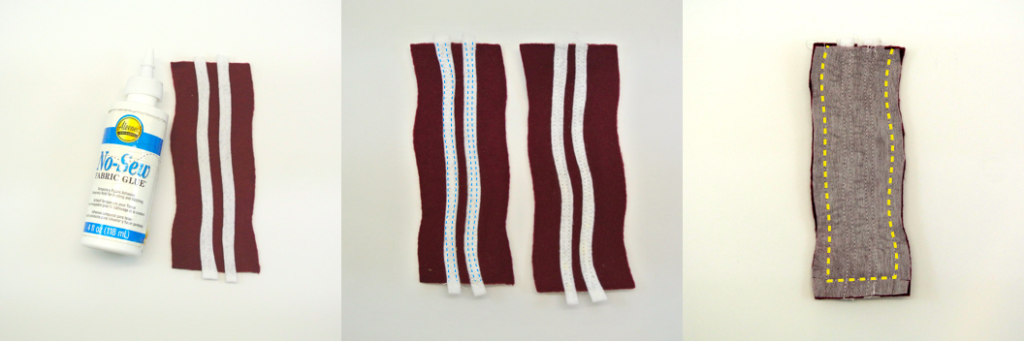
MIDDLE: Sew bacon strips onto bacon fabric along edges (blue dotted line)
RIGHT: Place two bacon strips right sides together and sew (yellow dotted line), leaving top open. Flip to right side.
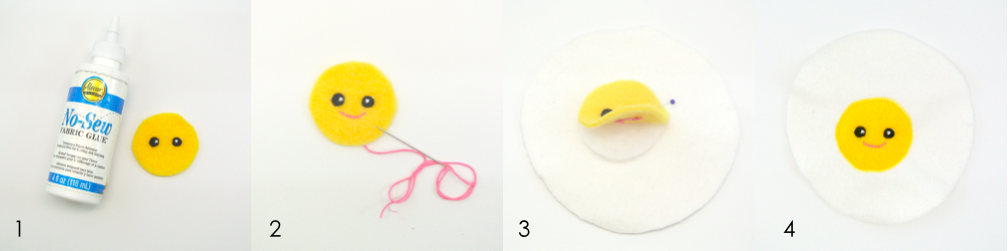
1. Glue eyes (embroider the whites of the eyes on first) onto egg yolk
2. Sew mouth with embroidery floss using backstitch
3. Place layer of felt under egg yolk
4. Zigzag stitch egg yolk in place
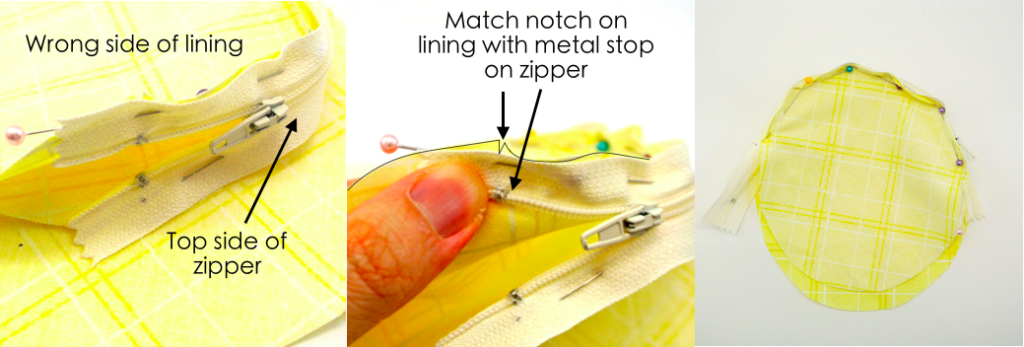
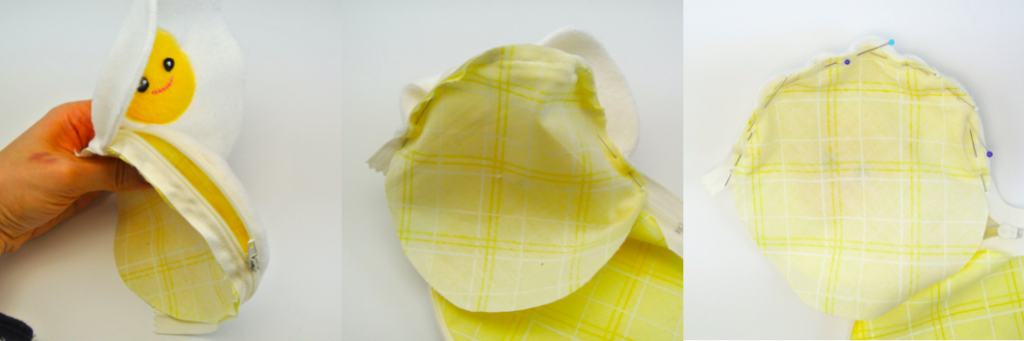
MIDDLE: Start pinning lining to zipper by matching notch on lining to metal stop at the start of the zipper.
RIGHT: Continue pining lining to zipper, stopping at the second notch.
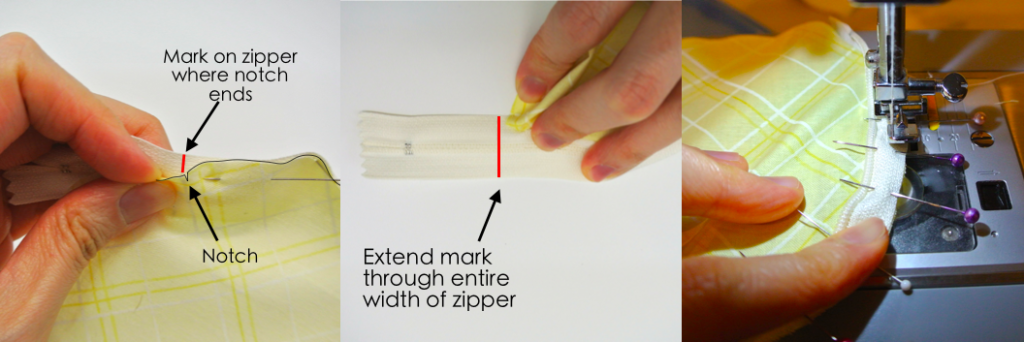
MIDDLE: Extend the mark through entire width of zipper (indicated by red line)
RIGHT: Sew zipper to lining at 1/4” seam allowance, using zipper foot on machine.
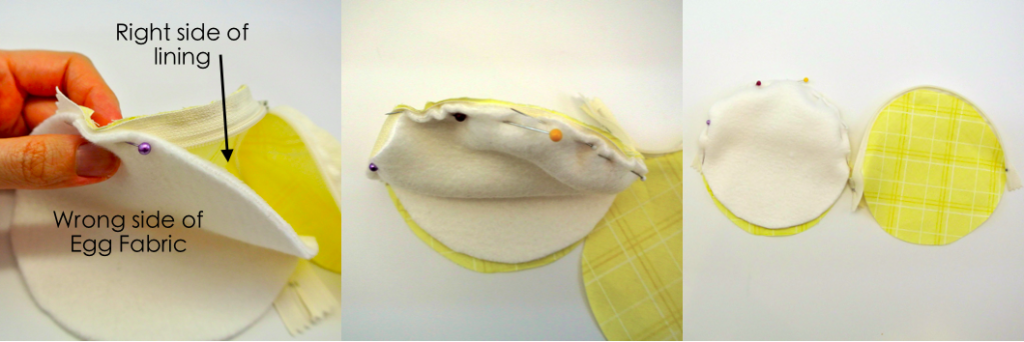
MIDDLE: Continue pinning, making sure to match notches of lining to notches of Egg fabric.
RIGHT: Sew at 1/4” seam allowance. You will sew through 3 layers: egg fabric, zipper, lining.
MIDDLE: Match notches on egg fabric to notches on lining. Pin at both notches, leaving middle unpinned.
RIGHT: Pin rest of the egg fabric (in between notches) to zipper by easing egg fabric into zipper+lining.
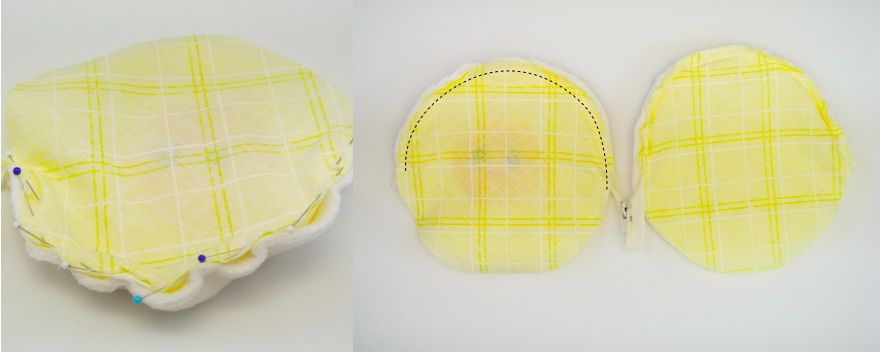
RIGHT: Sew lining+zipper+egg fabric from notch to notch (black dotted lines)

MIDDLE: Pin egg fabric together, starting where zipper line ended (black dotted line)
RIGHT: Black dotted line indicates where lining+zipper+egg fabric was previously sewn (at 1/4” seam allowance). Red dotted line indicates where egg fabric will be sewn together (1/2” seam allowance).
Notice red dotted line is farther away from fabric edge compared to black dotted line.Start and end red dotted line as close to black dotted line as possible, (ok if there is small gap because presence of zipper may prevent sewing any closer to black dotted line).
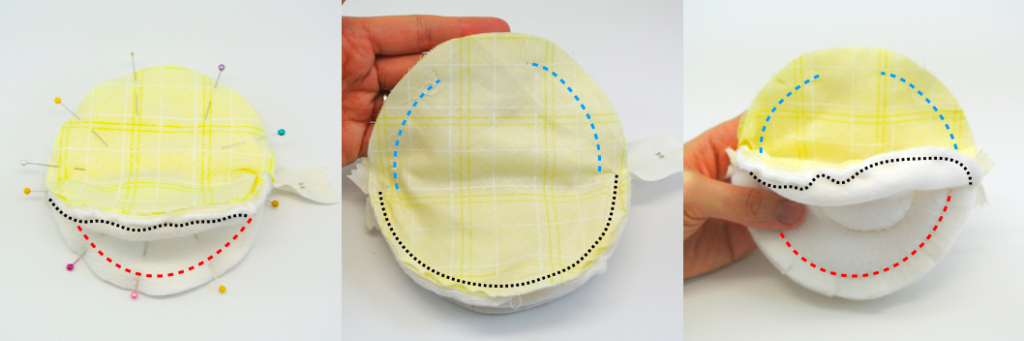
MIDDLE: Sew lining together (blue dotted lines), leaving an opening in the middle (opening will be used to turn coin pouch to right side). Start and end blue dotted line as close as possible to zipper line (black dotted line).
Lining sewn at 1/2” seam allowance, hence farther away from edge of fabric compared to zipper line.
RIGHT: Clip curves.

RIGHT:Cut off extra zipper a little past where zipper stop was made.

MIDDLE: Hand stitch lining opening closed
RIGHT: Finished view of coin pouch interior.
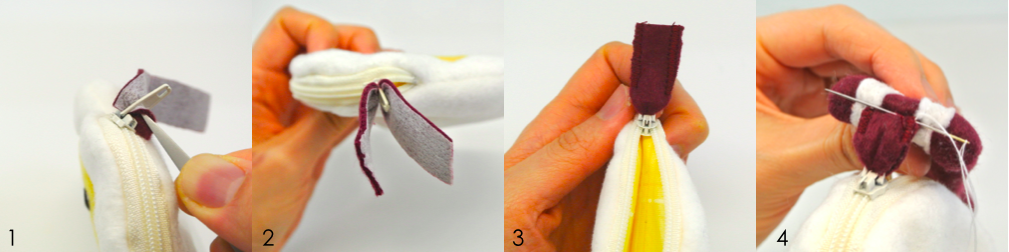
3: Zigzag stitch zipper tab together
4: Hand sew bacon to zipper tab.


Finished views of fried egg coin purse. Nom nom nom! Now I really want to go fry an egg with bacon and eat it! Let me know in the comments if you made this project or if there are other tutorials you would like to see. Happy sewing!