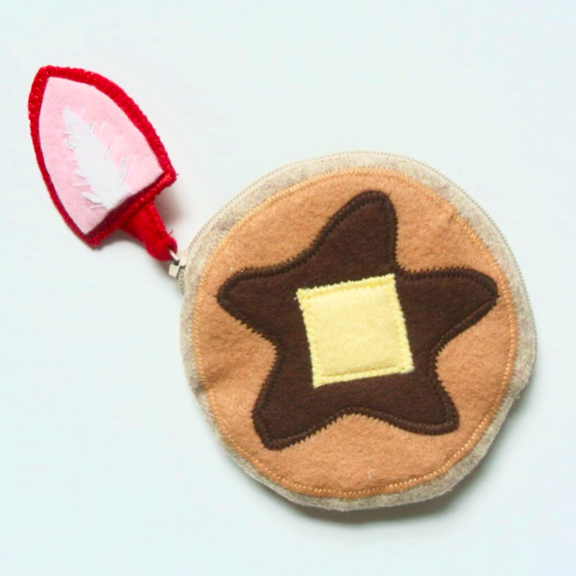
Pancake Coin Purse with Strawberry Zipper Tab
The food sewing frenzy continues! Last week I posted the Fried Egg with Bacon Coin Purse, and after making it, I decided I wanted a thinner coin purse to store my headphones for the gym. My headphones always seem to lay homeless in my carry-all bag and I just stuff it back wherever there’s available space when I’m done. As a result, the headphones are usually a tangled mess whenever I pull them out. This will no longer be the case! As the headphones finally have a permanent home!
Going along the breakfast theme (eggs and bacon), pancakes and strawberries seemed to be the worthy choice. Originally I was going to make a simple unlined coin purse. It would be a quick-and-easy-instant-gratification sewing project. Unfortunately, because I ended up sewing the zipper teeth extremely close to the outer fabric (so it looked more like a pancake), the zipper on the inside stuck out like crazy every time you open the pouch. Luckily, sewing in a lining was also quick and easy, plus I ADORE lined items (clothes/bags/pouches) because it just gives the overall item that finished look. “Looks Expensive” in the words of my fashion professors.
Anyway, this tutorial shows a different method of lining a zippered bag (see Egg Coin Purse tutorial for other method). It does require a bit more of hand sewing, but overall I think it is the easier of the two. Try both methods and see which one you prefer!

MATERIALS:
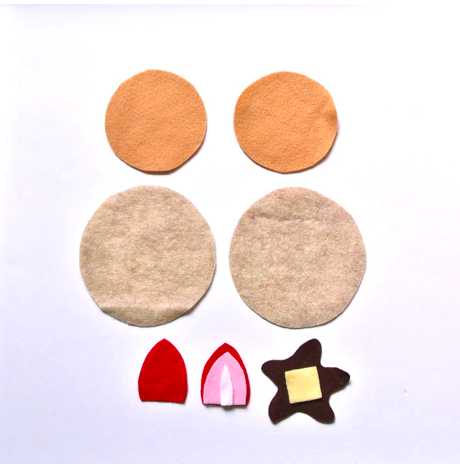
6″ of Sandstone Felt
Tan Felt
Brown Felt
Light Yellow fleece (small piece)
Red, Pink, and white felt (small pieces)
Iron-on Fusible
6″ piece of cotton fabric for lining (I used Keepsake Calico from Joanns, but any light weight cotton is fine)
7″ or 9″ zipper*
Matching thread for sewing
My free pancake coin purse pattern (available in my free resource library)
TOOLS:
Sewing machine with zigzag stitch options
Fine Pins
Fabric Scissors
Fabric glue (I use Aleene’s No-Sew Fabric Glue)
Sewing needles
Craft Tweezers
NOTES:
I got all the felt from Joanns. The smallest increment of fabric you can purchase is 1/8 yard. You can also purchase felt sheets from Joanns and Michaels which is sufficient for this project as well.
1/2” seam allowance is already included in the pattern so you do not need to add seam allowance when sewing. This means that when sewing the pattern pieces together, sew 1/2”in from the edge of the fabric.
Backstitch at the beginning and end of each seam. You do not want your handwork unraveling!
*I used a 9″ zipper because it’s easier to sew (you can open the zipper all the way to the end, which allows more space to sew), although a 7″ zipper fits better.
INSTRUCTIONS:
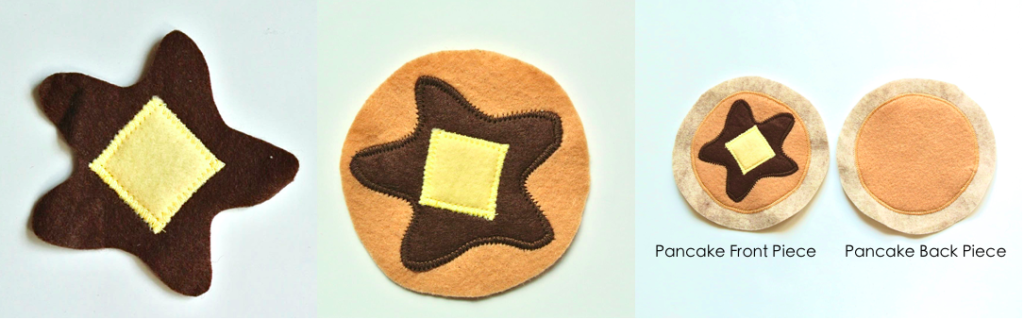
MIDDLE: Zigzag stitch maple syrup patch to brown pancake patch
RIGHT: Zigzag stitch brown pancake patch to outer pancake patch. Repeat on the other side. Names of the pieces are indicated in photo.
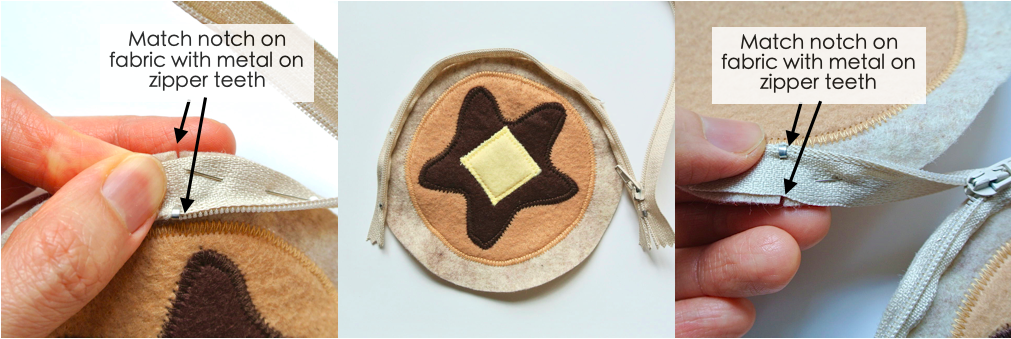
MIDDLE: Pin zipper along [pancake front piece] from notch to notch.
RIGHT: Repeat for [pancake back piece], start by matching notch with metal on zipper teeth.

MIDDLE: Sew zipper 1/4” from edge of zipper teeth, using zipper foot on machine
RIGHT: View of zipper sewn in
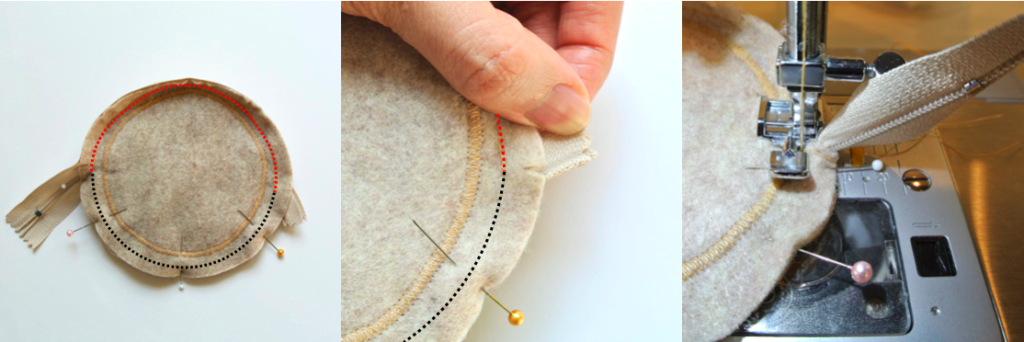
RIGHT: Pull zipper upwards when sewing the bottom of the pancake pieces together.
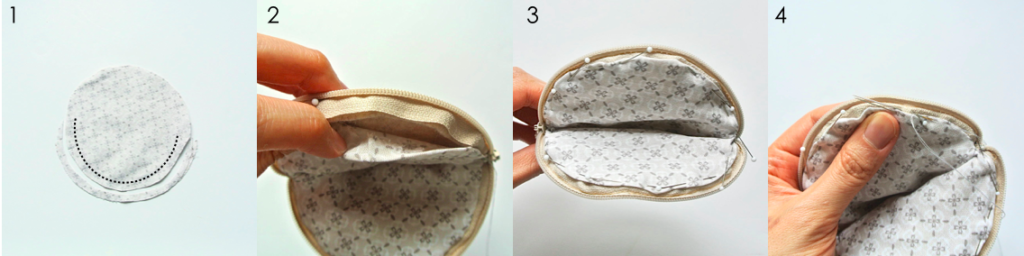
2. Place lining piece inside pancake purse. Fold down top of lining (1/2”) and pin lining in place as shown in photo (3).
4. Hand sew lining in place.
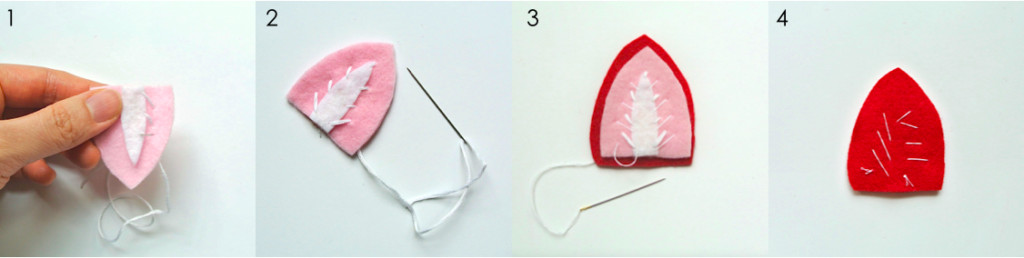
3. Glue pink piece to red strawberry piece and sew four long stitches using 2 strands of thread.
4. View of back of red strawberry piece.
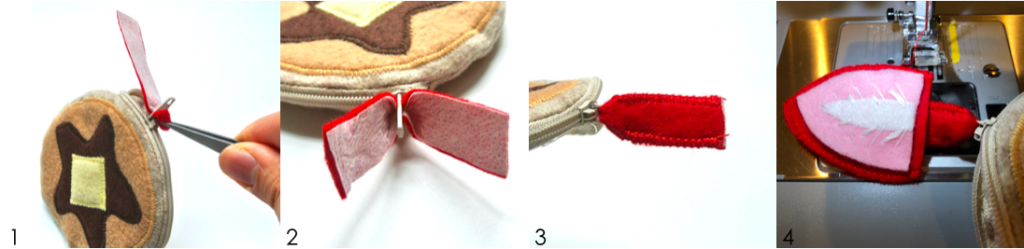
2. View of zipper tab piece pulled through
3. Zigzag stitch side of zipper tab piece.
4. Zigzag stitch strawberry back piece to strawberry front piece, then zigzag stitch to red zipper pull piece.


Finished! Fits all sorts of little knickknacks that would be otherwise floating around your carry all bag. Let me know if you sewed this project and what you put in it. Also, let me know in the comments below if there are other tutorials you would like to see. Happy Sewing!