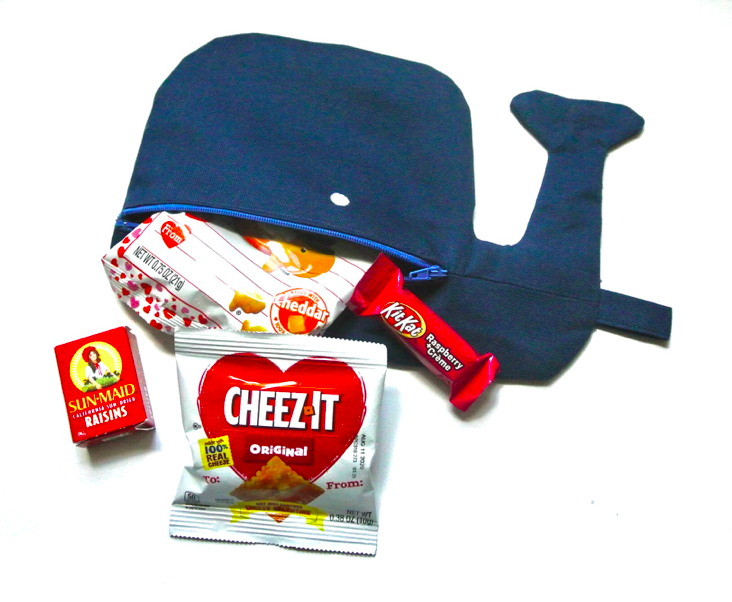
Zippered Whale Snack Pouch
Recently Barnaby and I both came down with some sort of stomach bug or food poisoning. Whatever it was, it was not pretty, and I was one grouchy (and miserable) mama. I’ve always been a grouch when I’m sick, and being a mom has exacerbated that, because I can’t rest when I want to, and that makes me super grouch. My sinful self only wants to serve ME and take care of MY needs when I’m sick. It was definitely un-natural and hard to serve someone else’s needs when yours aren’t being met.
Somewhere in that rough week, Barnaby pulled out one of his little book called “A Whale’s Tale”for me to read. It was about the story of Jonah. If you aren’t familiar with that story, Jonah was called by God to preach to his enemies the Ninevites and he runs away because he didn’t want to obey. As a result, Jonah ends up on a ship which got caught in a horrendous storm that God sent, and he was thrown overboard by the desperate sailors after Jonah told them that his disobedience was the reason for the storm. The storm subsided once Jonah was thrown into the sea, and God sent a fish to swallow Jonah. I don’t know for sure that the fish was a whale, but in children’s bible story books it always depicts a picture of a whale. Regardless, i was encouraged by the story because it reminded me that if God can send a fish to swallow Jonah (to save him from drowning in the sea), then He will provide me the strength to be a good mom to Barnaby even though I didn’t want to be a mom that week. I definitely felt like I was drowning in all the demands a little toddler can make (quite a lot!). That was the inspiration for this whale zipper pouch…and also because I had just purchased a bag of sixty 9” zippers from Amazon for my previous projects…
This whale zipper pouch is extremely easy, and can be made unlined to make the project even simpler (under 1 hour). However, I ended up lining the pouch because I wanted to add a little more stiffness to the pouch (I told you I LOVE lining my projects). You could also fuse iron-on fusible fabric to add the extra stiffness as well. Normally I like to use a print cotton fabric for lining because it gives the pouch a little surprise when you unzip it, but this time I didn’t find any fabric that really matched, and since there was enough fabric for lining as well, I ended up self-lining, and the result was fabulous. Let’s get started!

MATERIALS:
1/3 yard of dark blue home decor fabric (I used this)
White felt scraps
7″ or 9″ zipper
Matching thread for sewing
My free Zipper Whale Snack Bag Pattern (available in my free resource library)
TOOLS:
Sewing machine with zigzag stitch options
Fine Pins
Fabric Scissors
Fabric glue (I use Aleene’s No-Sew Fabric Glue)
Sewing needles
NOTES:
1/2” seam allowance is already included in the pattern so you do not need to add seam allowance when sewing. This means that when sewing the pattern pieces together, sew 1/2”in from the edge of the fabric.
Backstitch at the beginning and end of each seam. You do not want your handwork unraveling!
INSTRUCTIONS:

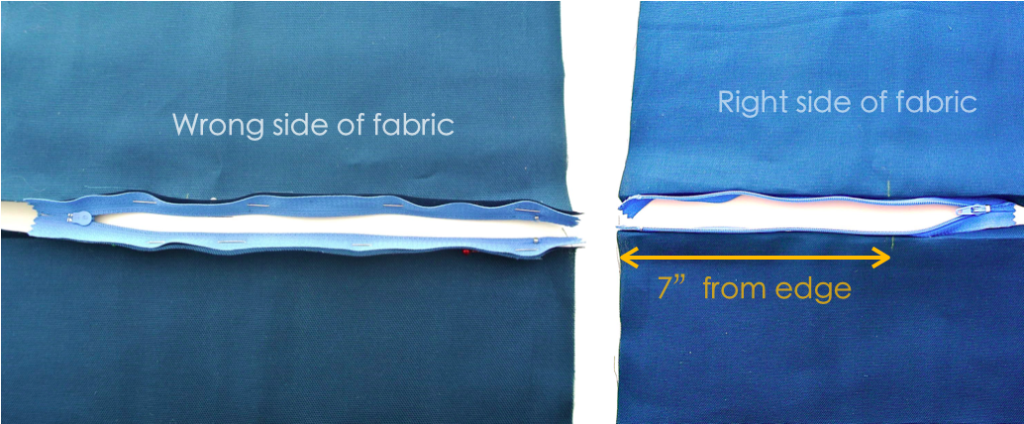
RIGHT: Turn fabric to right side and mark 7”from the left edge of fabric with chalk. The chalk mark indicates stop point of where zipper will be sewn to fabric.
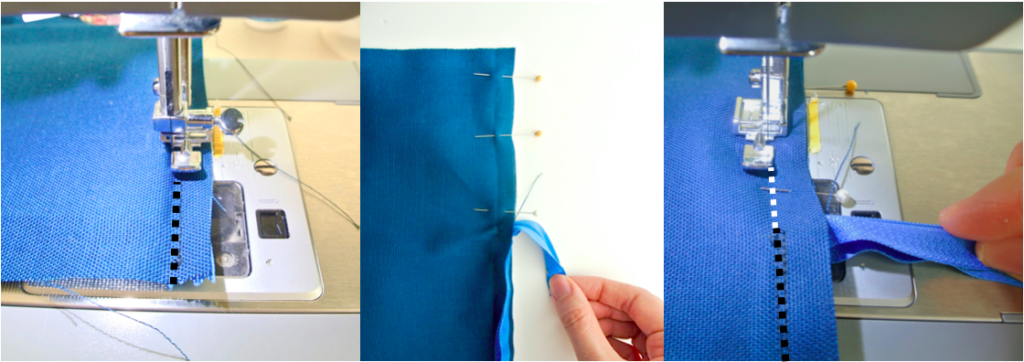
MIDDLE: Pin fabric (above where zipper was sewn) together
RIGHT: Sew pinned fabric together (white dotted line) ending as close to zipper stitch (black dotted line) as possible. When sewing, pull un-sewn portion of zipper away and down from your sewing space.


MIDDLE: Fold [TAB] piece in half and stitch 1/8”from edge (yellow dotted line).
RIGHT: Fold a piece of tab 1.5”in length and cut off excess.
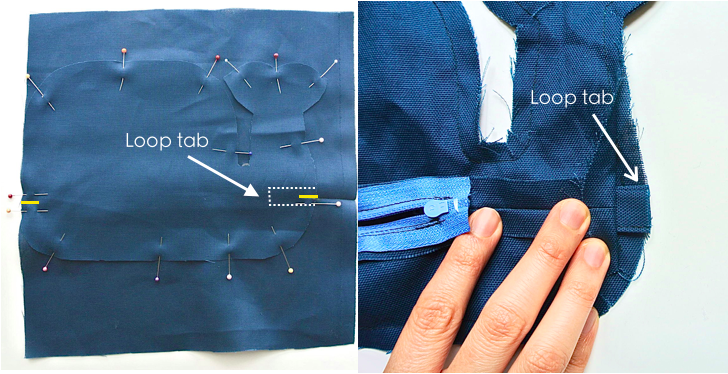
Before stitching together, add loop tab to back of whale. Make sure loop tab points to inside of whale.
RIGHT: Match middle of tab loop to zipper line (yikes! forgot to add loop tab before sewing the whale pouch together. This photo was taken after whale pouch was sewn and seam allowance trimmed, but idea is the same…)

MIDDLE: Using hand needle, make a stop at the end of zipper (if necessary) by looping around zipper teeth several times.
RIGHT: Trim off excess zipper to shorten

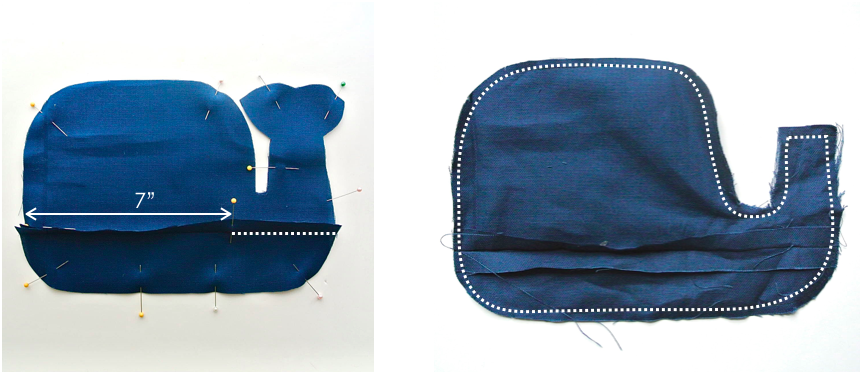
RIGHT: I actually ended up truncating the top part of the whale’s tail in the lining because it was too difficult to match the lining to the outside fabric. Stitch lining pieces together, keeping seam allowance for for zipper open. (white dotted line). Trim seam allowance to 1/4”and clip curves.
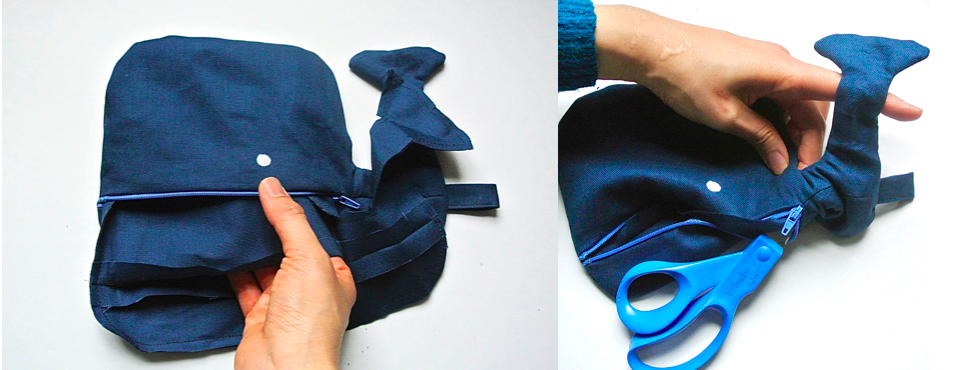
RIGHT: Use blunt scissor to push the tail lining into the tail outer part (you see why I ended up truncating the top of the whale’s tail!)
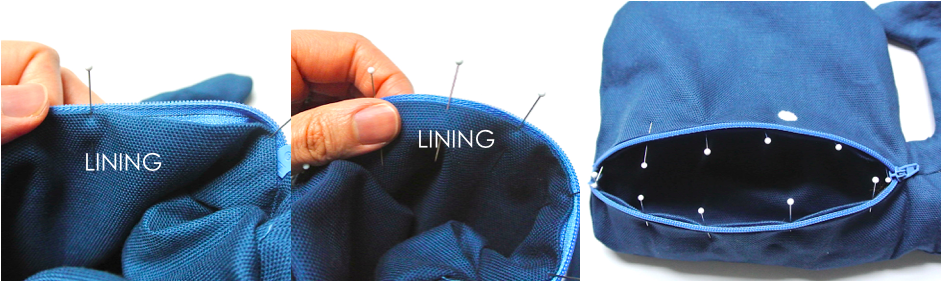
RIGHT: View of lining pinned in
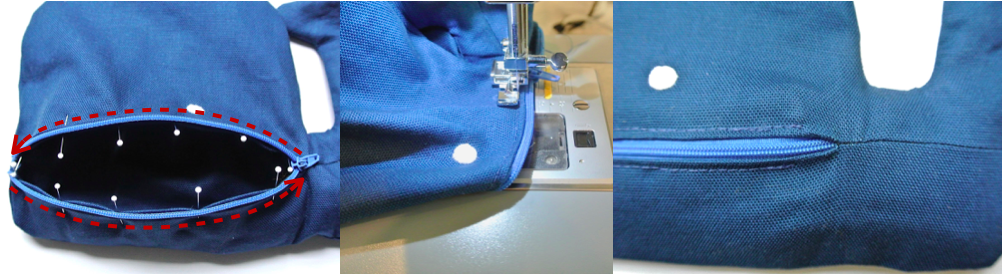
MIDDLE: Stitch with right side of whale pouch facing zipper foot.
RIGHT: You will notice that at back-end of zipper the stitch stops, and that’s ok. Zipper pull prevents you from sewing all the way to the end of the zipper.


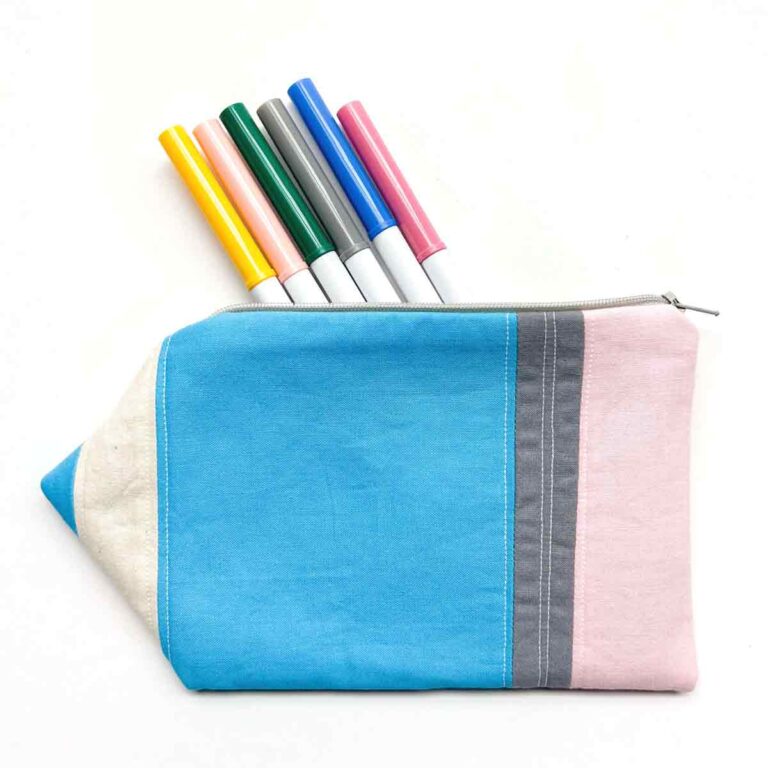
Finished! Use this pouch as a snack bag, pencil case, stationary bag…it’s extremely versatile! Let me know in the comments below if you made this project and what you store in it. Happy Sewing 🙂