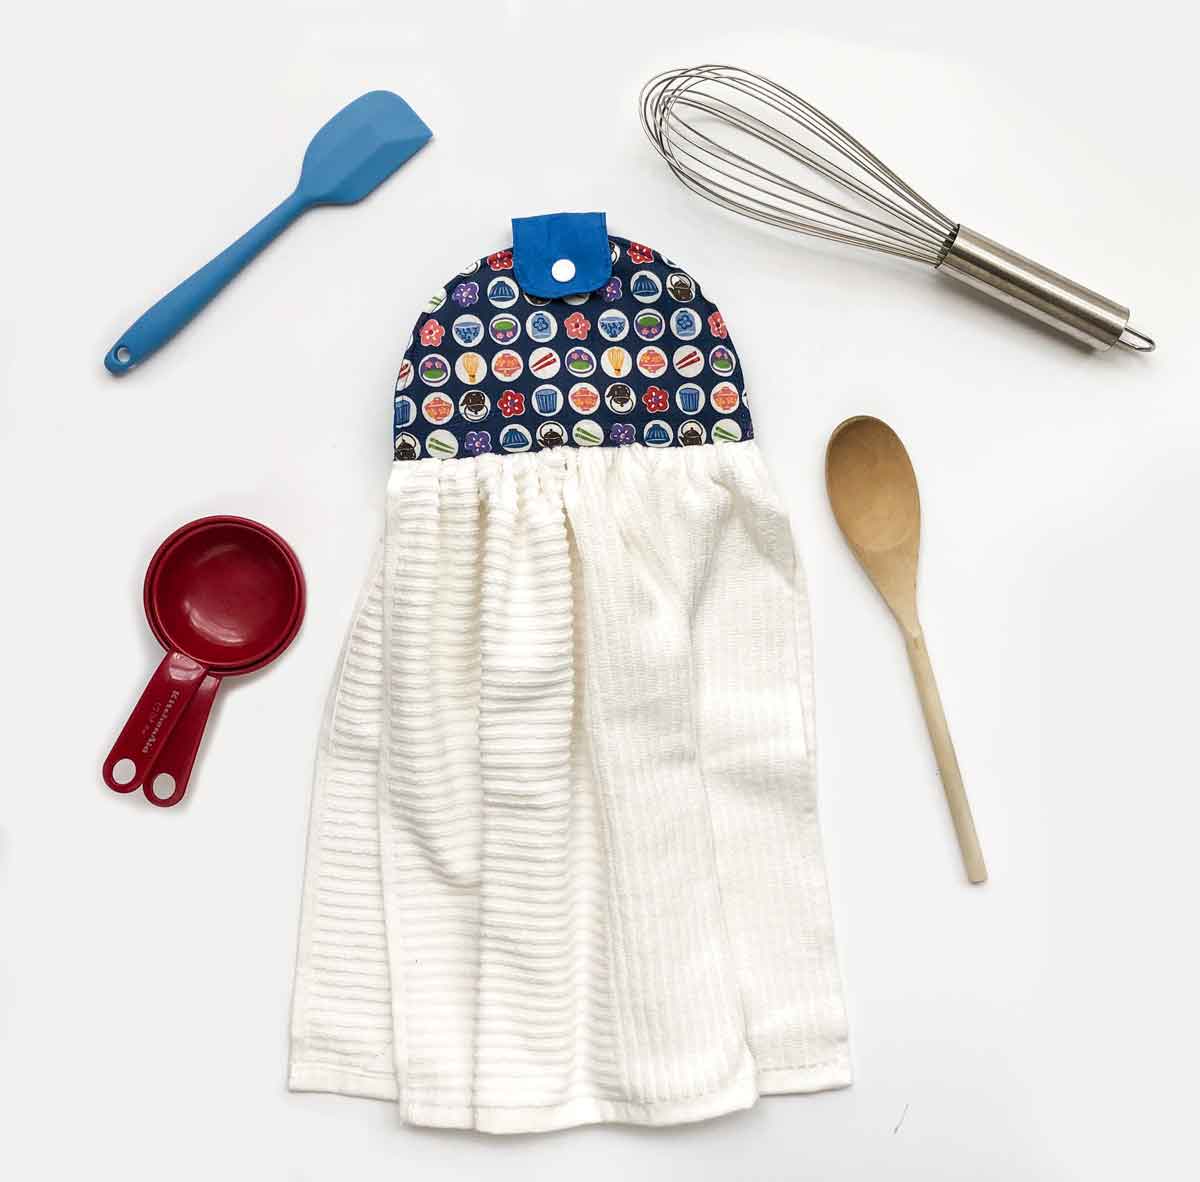
How to Make a Super Simple Hanging Dish Towel (Free Pattern)
Tired of your dish towels always ending up on the floor? Learn to make this quick and easy towel topper to create a hanging dish towel. Great project for all levels of sewing experience. Say bye-bye forever to kitchen towels on the floor!

If your house is anything like mine, I bet you have kitchen towel laying on the floor. Every. Single. Day. Better yet, these dish towels are probably fresh out of the laundry. For some reason the kitchen towels in my house seem to have an affinity for the floor!
I recently saw a sewing project where you sew a hot pad onto the dish towel as the towel topper and add a button to hang over the oven. How brilliant! Unfortunately, the selection of hot pads in the stores weren’t very interesting. They were mostly solid colors and only had a few color selection (red, tan, black, blue). Just looking at them made me bored! So, I decided to sew my own towel topper and that’s how this project came about.

How To Make a Towel Topper
In this tutorial I will show you how to make a towel topper with a snap. You then sew a store bought towel at the bottom to create a hanging dish towel. Easy as that! No more kitchen towels on the floor! I promise!
This project is extremely easy and only takes 30 – 45 minutes depending on your skill level. If you want to add an extra touch, you can always quilt the towel topper, but this is completely optional. The hanging dish towel with the blue towel topper was not quilted and I think it’s very nice looking as well!

This is a great sewing project for all levels of sewing experience. It also makes a great gift for your baking and cooking friends, a housewarming party, or anyone who needs a towel in their kitchen (and really, who doesn’t?).
Hanging DISH Towel Pattern
The HANGING DISH TOWEL SEWING PATTERN is available in our FREE MINDYMAKES LIBRARY. Subscribe to get the password. Don’t worry, I hate spam as much as you do!
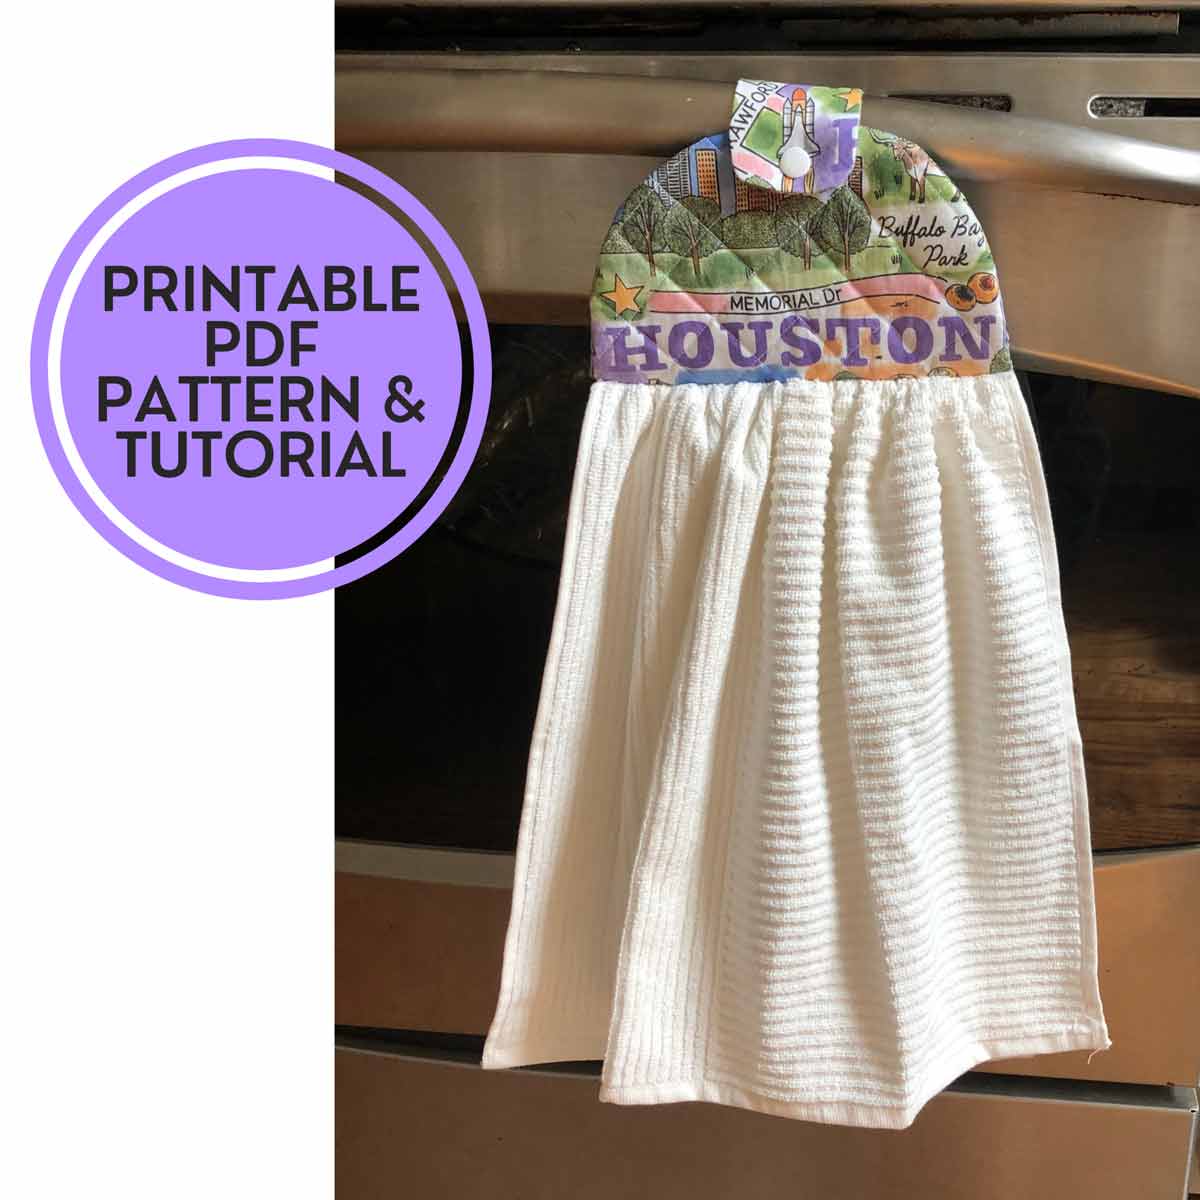
The ad-free, printer-friendly PDF version of this step-by-step Handing Dish Towel Sewing Tutorial is available for purchase in our SHOP. Print a copy today to keep next to your sewing machine for easy reference!
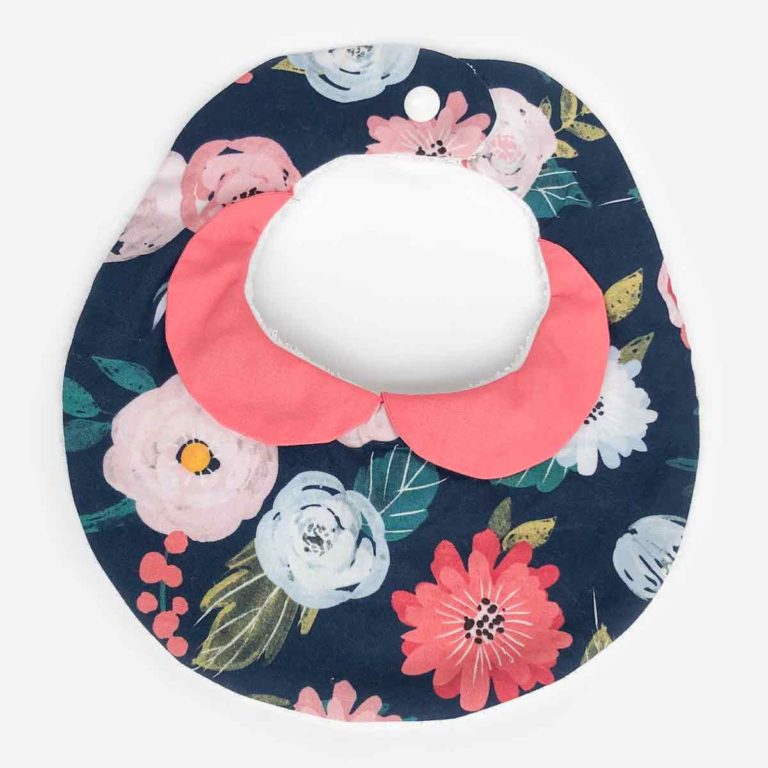
By making your own towel topper, you can customize the look and use a pretty print fabric or your favorite sports team fabric. If you own an embroidery machine, you could even embroider surnames or initials onto the towel topper for an extra personal touch. The options are really endless!
So…let’s get started shall we?
What do I need to Make a Hanging Dish Towel:
MATERIALS:
- PATTERN: Hanging Dish Towel Pattern (available in my free resource library) – comes with two pieces:
- TOWEL TOPPER PIECE
- TAB PIECE
- 100% COTTON FABRIC – Be sure to pre-wash and tumble dry fabric first (same way you would wash and dry your dish towel)
- 1/3 of a yard
- BATTING – I used Extra High-loft batting as I like the thickness it adds:
- 1/3 of a yard
- FUSIBLE INTERFACING – I used Fusible Featherweight Interfacing(Pellon 911FF)
- STORE BOUGHT DISH TOWEL – I got mine from Target
- SNAPS and SNAP PLIERS – alternatively you can also use sew on Velcro, metal snaps, or sew a buttonhole with buttons
TOOLS:
- Sewing machine
- Fabric Scissors – these Ginghers Fabric Shears are my favorite
- Sewing Pins
- Awl (optional) – for making holes prior to applying snaps
- Matching Thread
- Hand sewing needles
- Iron – for pressing
How to Make Hanging Dish Towel: Easy Step-by-Step Tutorial

LEFT: Cut out pattern pieces
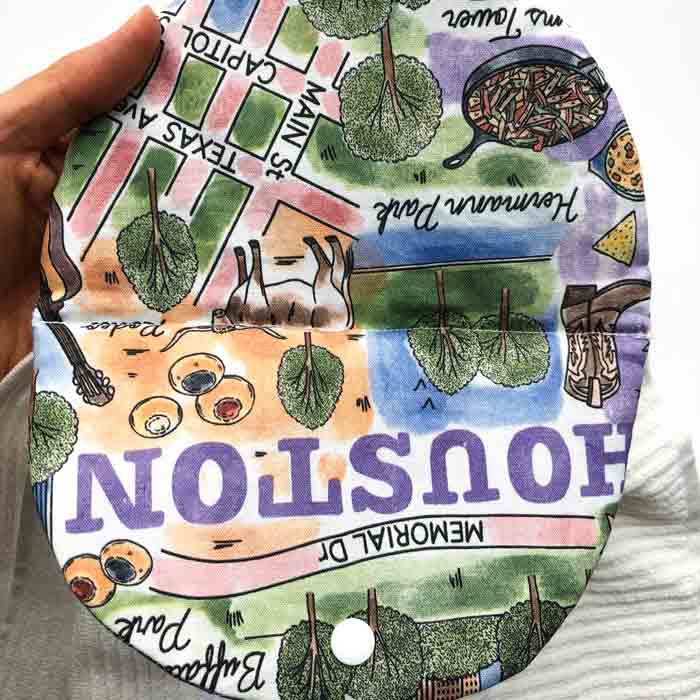
RIGHT: Apply fusible interfacing to the TAB PIECE that will face the outside of towel topper. For this tutorial I wanted the little rocket to be the top of the tab, so I interfaced that piece with the rocket.
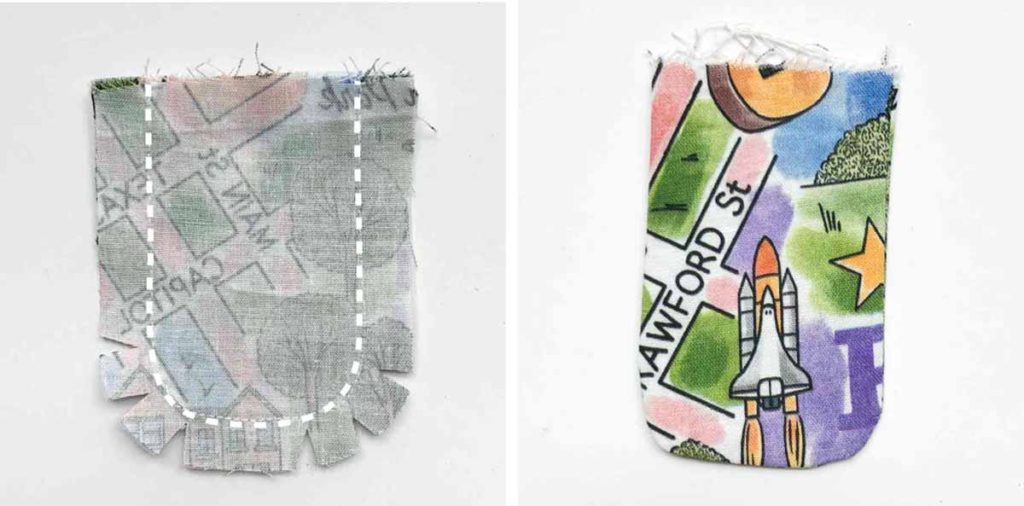
LEFT: With right sides of fabric together, sew [TAB PIECE] together at 1/2”(1.27cm) seam allowance, leaving the top edge open (white dotted lines). Clip curves and trim seam allowance down to 1/4”(6mm).
RIGHT: Turn [TAB PIECE] to right side and press with an iron.
QUILTING TOWEL TOPPER (optional)
(The following steps are optional. If you don’t want to quilt the towel topper, simply jump to the next section SEWING TOWEL TOPPER)
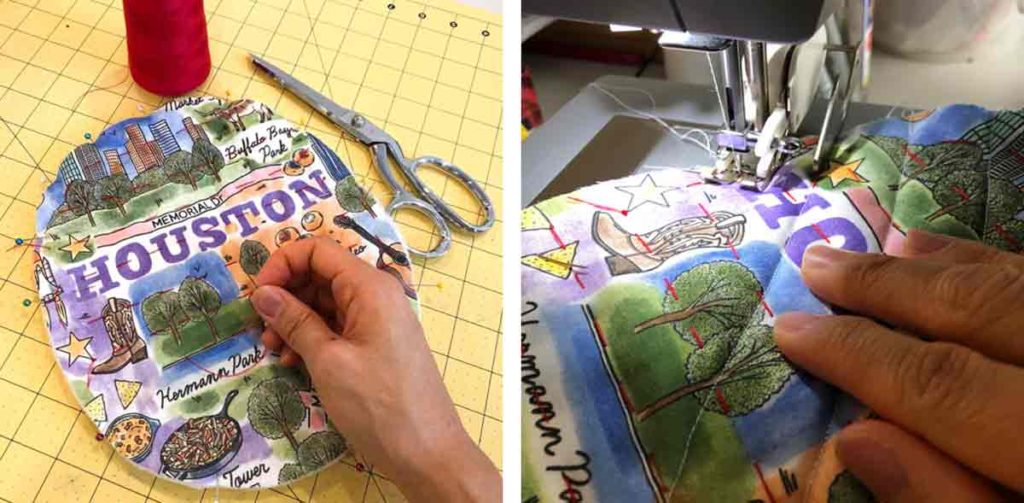
LEFT: Pin and baste (I recommend using a contrasting color thread) front piece of [TOWEL TOPPER] with batting. If using fusible interfacing, iron it on.
RIGHT: Quilt outer fabric to batting in any design you like. For this tutorial I quilted 1” (2.54cm) squares.
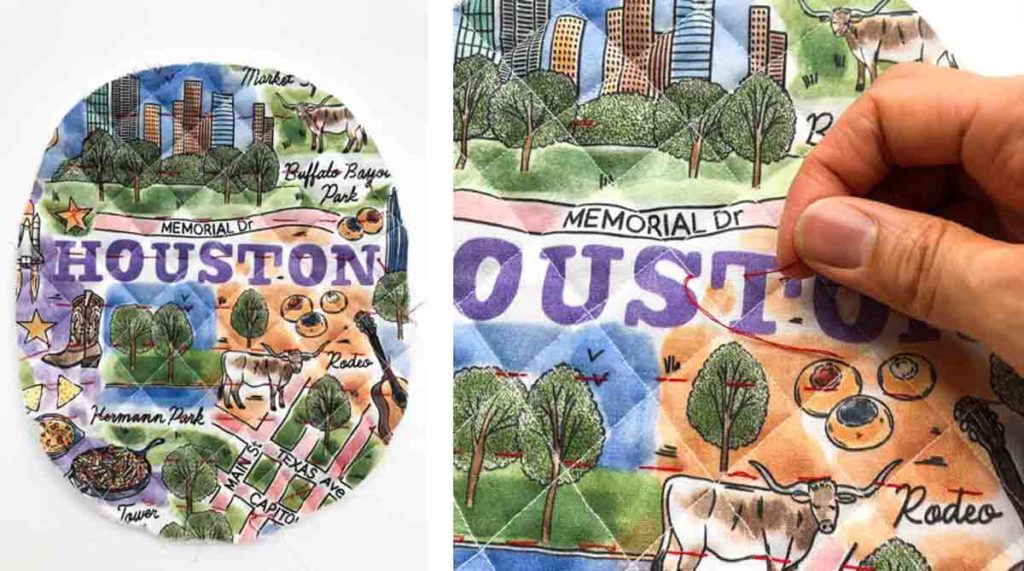
LEFT: View of [TOWEL TOPPER] after quilting is done
RIGHT: Carefully remove basting stitches
SEWING TOWEL TOPPER

LEFT: Pin [TAB PIECE] to front piece of [TOWEL TOPPER] as shown in photo. Make sure the right side of [TAB PIECE] faces right side of [TOWEL TOPPER]. In this tutorial the rocket is facing down as that is the right side of the [TAB PIECE]. If you are using solid color for the [TAB PIECE] then it doesn’t matter which direction it faces.
RIGHT: Place both pieces of [TOWEL TOPPER] together, right sides together
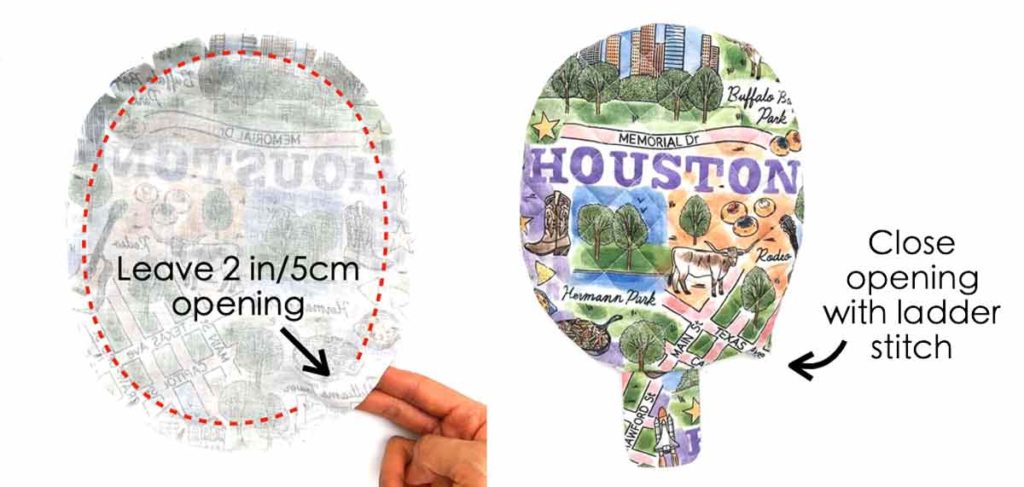
LEFT: Pin, sew at 1/2” (1.27cm) seam allowance (red dotted line), leaving an opening about 2”(5cm). Clip curves and trim seam allowance
RIGHT: Turn to right side and use ladder stitch to close the opening.
APPLYING SNAPS TO HANGING DISH TOWEL
(Alternatively, you can also use sew on Velcro, metal snaps, or make a button hole with buttons)

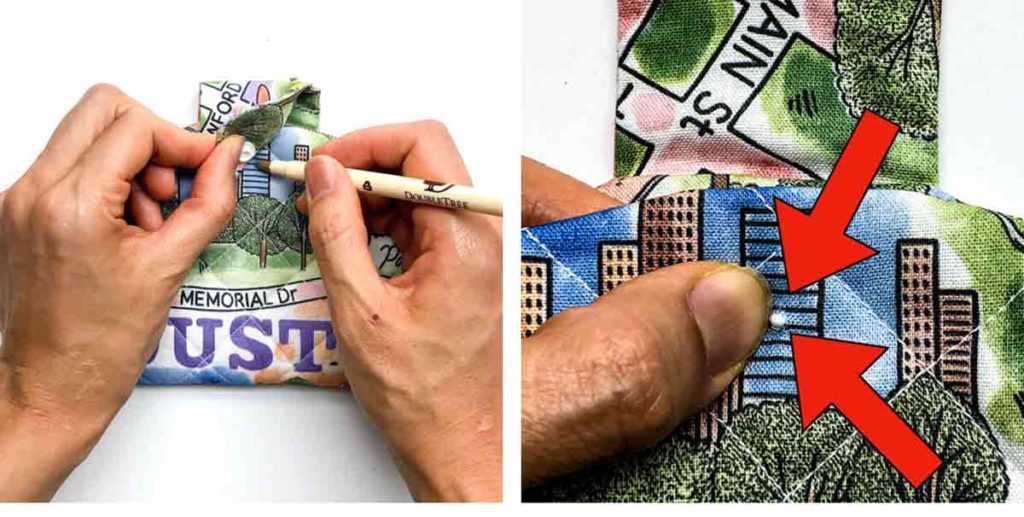
LEFT: Push sharp prong of snap cap through Tab Piece (can also use an awl to poke a hole first then insert snap cap)
RIGHT: Place socket over prong.

LEFT: Position pliers on the snap so the black cap is over snap cap and the rubber is pressing over prong of snap cap. Press down on pliers with firm pressure (I find I have to press really HARD to secure the snaps).
RIGHT: View of snap in place. See how the pointy edge of prong is now flattened.
LEFT: Determine where to place the second snap by pulling TAB PIECE over TOWEL TOPPER and marking with a pen where the hole needs to go
RIGHT: Make a hole with point tip of snap cover (or awl)

LEFT: Place stud over prong
RIGHT: Secure snaps in place using pliers with firm pressure (use those hand muscles!)

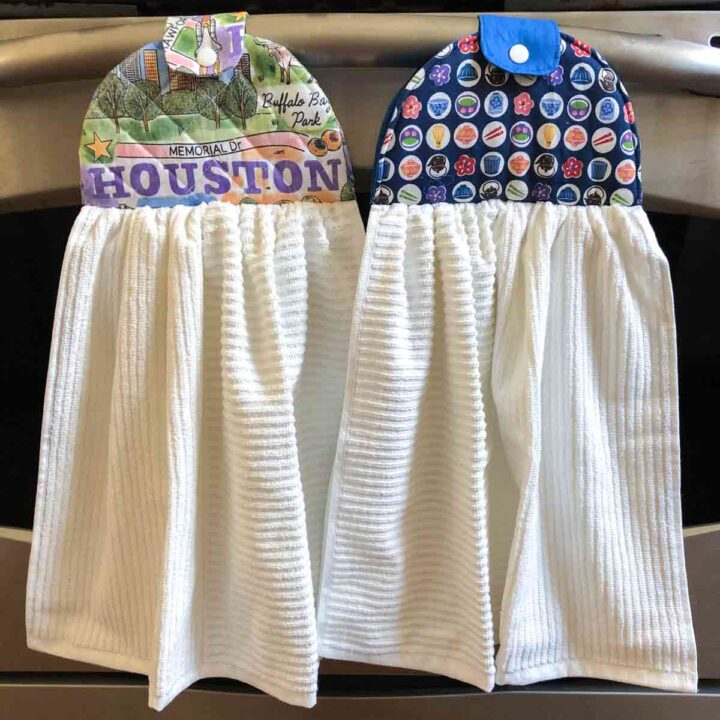
View of snaps in place. Would you look at that! The towel topper portion is done. Now you just need to sew the towel on. You are almost done!
SEWING TOWEL TOPPER TO DISH TOWEL
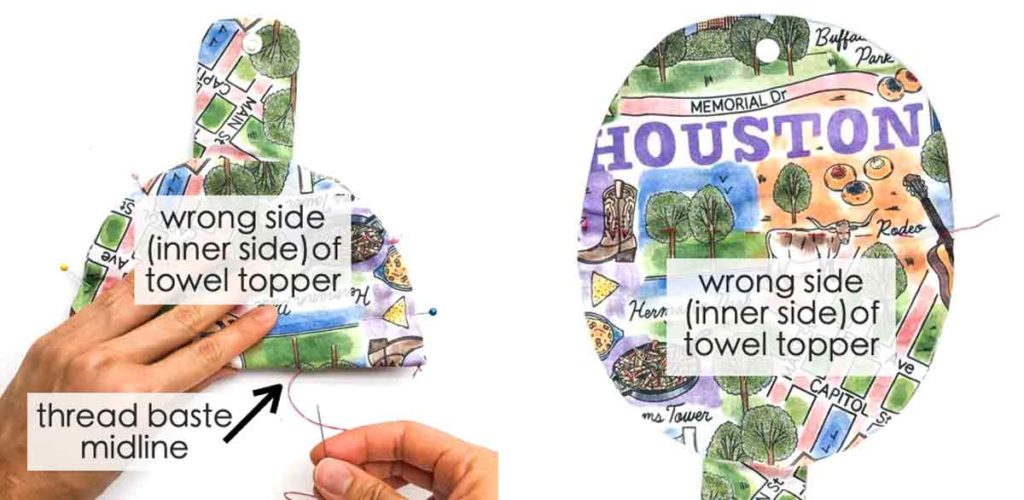
LEFT: Fold towel topper in half with wrong side facing up and pin in place. Mark the mid line using basting stitches. In this tutorial the wrong side is the side that is not quilted.
RIGHT: View of Wrong side of towel topper, mid line marked with red basting stitches.

LEFT: Mark mid line of kitchen towel by folding the towel in half first, then creasing with a hot iron.
RIGHT: Sew two rows of basting stitch (red dotted lines) on both side of the towel mid line, 1/4 in (0.6cm) from mid line. If machine basting, be sure to use the same color thread as the towel. Otherwise basting stitches are hard to remove out of a fluffy towel with many thread loops!
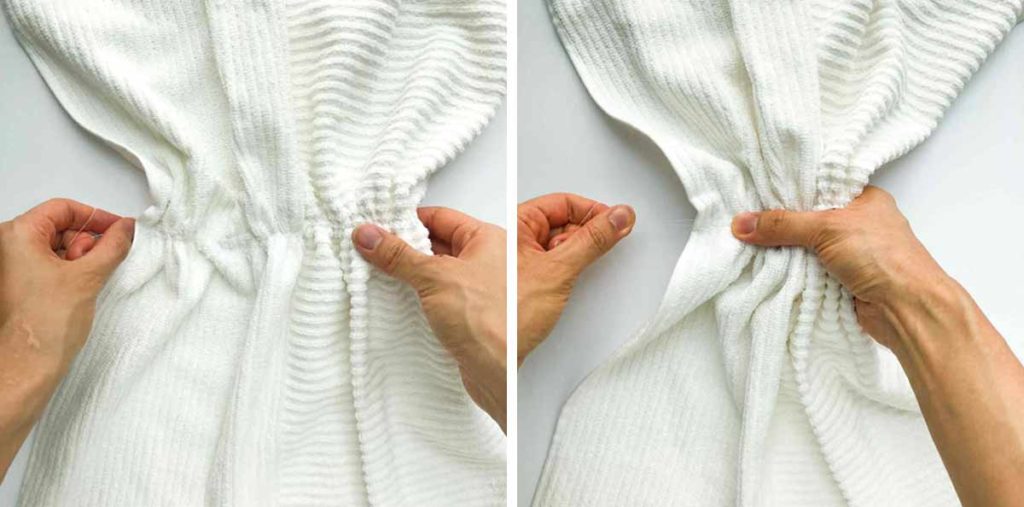
Gather the towel at the mid line by holding on to the two rows of basting stitches with your left hand, while gathering the towel with your right hand.

LEFT: Gather the kitchen towel until the mid line is the same width as the towel topper.
RIGHT: Place towel topper right side (outer side) down over kitchen towel. Pin mid line of towel topper to mid line of kitchen towel.
NOTE: You may not be able to see where the mid line of kitchen towel is once it’s gathered. Don’t worry, just match the mid line of towel topper to somewhere in between the two rows of basting stitch and you’ll be fine.
Sew towel topper to kitchen towel (white dotted line). I recommend using thread color that matches your kitchen towel. Note: if you are using a thick fluffy kitchen towel, use a walking foot for easier sewing.

Finished! You did it! Hooray!!!!!! Now say goodbye to picking up another towel off the kitchen floor again!

The ad-free, printable PDF version of this sewing tutorial is available in our Etsy Store and the MindyMakes Shop. PDF Sewing Pattern includes 10 pages of color tutorial with step-by-step photos and printable pattern. Print a copy to keep next to your sewing machine to follow along as you sew.

Make a whole bunch and gift them away. Your friends and family will thank you very much for saving their backs from repeated picking up of towels off their floors.
I hope you enjoyed this tutorial. As always, happy sewing!
How to Make a Quick and Easy Hanging Dish Towel
Tired of dish towels always ending up on the floor? Learn to make this simle towel topper to create a hanging dish towel. Great project for all levels of sewing experience. No more towels on the floor!
Materials
- HANGING DISH TOWEL FREE PATTERN
- 100% COTTON FABRIC - 1/3 YARD (see note 1)
- BATTING
- FUSIBLE INTERFACING
- STORE BOUGHT DISH TOWEL
- SNAPS
- SNAP PLIERS
Tools
- SEWING MACHINE
- FABRIC SCISSORS
- SEWING PINS
- MATCHING THREAD
- HAND SEWING NEEDLES
- IRON - for pressing
Instructions
- Cut out pattern pieces on fabric.
- Apply fusible interfacing to the TAB PIECE that will face the outside of towel topper.
- With right sides of fabric together, sew TAB PIECE together at 1/2”(1.27cm) seam allowance, leaving the top edge open.
- Clip curves and trim seam allowance down to 1/4”(6 mm).
- Turn TAB PIECE to right side and press with an iron.
QUILTING TOWEL TOPPER (optional) - jump to next section if not quilting
- Pin and baste (I recommend using a contrasting thread color) front piece of TOWEL TOPPER with batting. If using fusible interfacing, iron it on.
- Quilt outer fabric to batting in any design of choice. I quilted 1” (2.54cm) squares.
- Carefully remove basting stitches.
SEWING TOWEL TOPPER
- Pin TAB PIECE to front piece of TOWEL TOPPER. Make sure the right side of TAB PIECE faces right side of TOWEL TOPPER.
- Place both pieces of TOWEL TOPPER together, right sides together.
- Pin and sew at 1/2” (1.27cm) seam allowance, leaving an opening about 2”(5cm).
- Clip curves and trim seam allowance.
- Turn to right side and use ladder stitch to close the opening.
APPLYING SNAPS
- Push sharp prong of snap cap through Tab Piece (can also use an awl to poke a hole first then insert snap cap)
- Place socket over prong.
- Position pliers on the snap so the black cap is over snap cap and the rubber is pressing over prong of snap cap.
- Press down on pliers with firm pressure. I find I have to press really HARD to secure the snaps (see note 2).
- Determine where to place the second snap by pulling TAB PIECE over TOWEL TOPPER and marking with a pen where the hole needs to go
- Make a hole with point tip of snap cover (or awl).
- Place stud over prong.
- Secure snaps in place using pliers with firm pressure (use those hand muscles!)
SEWING TOWEL TOPPER TO DISH TOWEL
- Fold towel topper in half with wrong side facing up and pin in place. Mark the mid line using basting stitches.
- Mark mid line of kitchen towel by folding the towel in half first, then creasing with a hot iron.
- Sew two rows of basting stitch on both side of the towel mid line, 1/4 in (0.6cm) from mid line (see note 3).
- Gather the towel at the mid line by holding on to the two rows of basting stitches with your left hand, while gathering the towel with your right hand.
- Gather the kitchen towel until the mid line is the same width as the towel topper.
- Place towel topper right side (outer side) down over kitchen towel. Pin mid line of towel topper to mid line of kitchen towel (see note 3).
- Sew towel topper to kitchen towel (See note 4). I recommend using thread color that matches your kitchen towel.
- Finished!
Notes
- Prewash and tumble dry fabric first (same way you would wash and dry your dish towel)
- Note that when the snaps are firmly secured in place the pointy edge of prong will be flattened.
- You may not be able to see where the mid line of kitchen towel is once it’s gathered. Don’t worry, just match the mid line of towel topper to somewhere in between the two rows of basting stitch and you'll be fine.
- If your hand towel is extremely thick and fluffy, use a walking foot instead. This makes for easier sewing.
Recommended Products
As an Amazon Associate and member of other affiliate programs, I earn from qualifying purchases.


Cant get the pattern. Its password protected.
Hi Kathleen,
You will get the password for the free resource library once you subscribe. On the top menu bar, click on MINDYMAKES LIBRARY -> GET A PASSWORD
Hope that helps!
Thanks for subscribing me
Hi Liz,
You are very welcome! Let me know if you have trouble accessing the MindyMakes resource library.
How do I get the pattern pieces for the Quick and Easy hanging dish towel?
Hi Carol,
You will receive an email with the password to the FREE Resource Library once you subscribe. However, please be patient and allow 30 – 60minutes for the email to fly through cyberspace and also check your spam mail as it sometimes ends up there. Hope that helps. Thank you!
Great tutorial. Thank you!
You are so welcome!