
How to Make A Plushie: Easy Beginner’s Guide (Free Pattern)
This post may contain affiliate links. Please read my disclosure policy for details. As an Amazon Associate, I earn from qualifying purchases.
Designing and sewing a cute plushie doll is easier than you think! This tutorial will show you the exact steps to design and sew your own custom plush.
- Overview of How to Make a Plushie:
- What Materials Do I need to Make a Plushie?
- What Fabric Can I use to Make Plushies?
- What Do I use to Stuff a Plush?
- What Alternatives Can I use to Stuff a Plush?
- How Long does it take to Make a Plush?
- How Do You Make a Plush Without Sewing?
- Materials
- Tools
- How to Design Plush Pattern
- How to Label Plush Pattern
- Applique Plush Details
- Sewing Plush Together
- Is it Hard to Make Plushies?
I love plushies, and I bet you do too! And did you know they are actually very EASY to make? Yup, you heard me right. They are EASY to make! It was one of the first things I learned to sew as a kid (a heart plush to be exact). So if a fourth grade kid can sew it, you can too!
Overview of How to Make a Plushie:
- Make a sketch of your plush.
- Keep in mind the complexity of the plush when adding details. The more details your plush has (eyebrows, nose, mouth, clothing, accessories etc), the more time it takes to make.
- Note: If you are just starting off, I recommend drawing an outline of the plush you want to make (for example, a cat). Next, add up to 3 details (eyes, nose, blushed cheeks) and just stick with those. As you make more plushies, you will get better and can add more details.
- Decide on the type and color of fabric you will use for your plush body as well as the fabric choices for the details
- You can also play around with using different types of fabrics for the body (for example, a cotton print for the plushie’s clothing and a solid cotton for the arms/legs)
- Draft (make) the pattern for your plush – Once you’ve decided on the design of your plush, enlarge the drawing to the actual size you want to make the plush. You can do this one of 2 ways:
- Take your design to a local print shop and ask them to enlarge the design to your desired size.
- Manually copy your design onto a larger sheet of paper. If you don’t own any large sketching paper, you can cut open a large paper bag or use the back side of wrapping paper.
- Cut out the pattern on the fabric and sew sew sew!
What Materials Do I need to Make a Plushie?
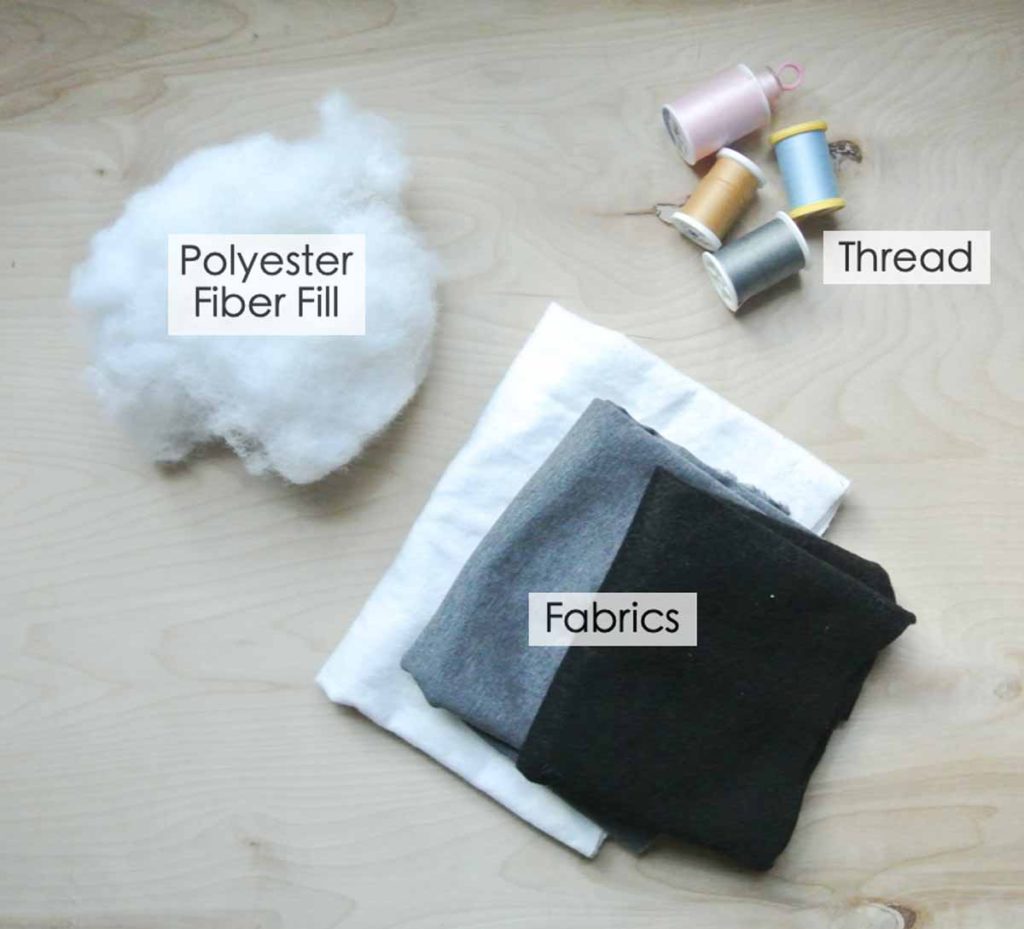
Basic Materials:
- Fabric
- Thread
- Polyester Fiber Fill
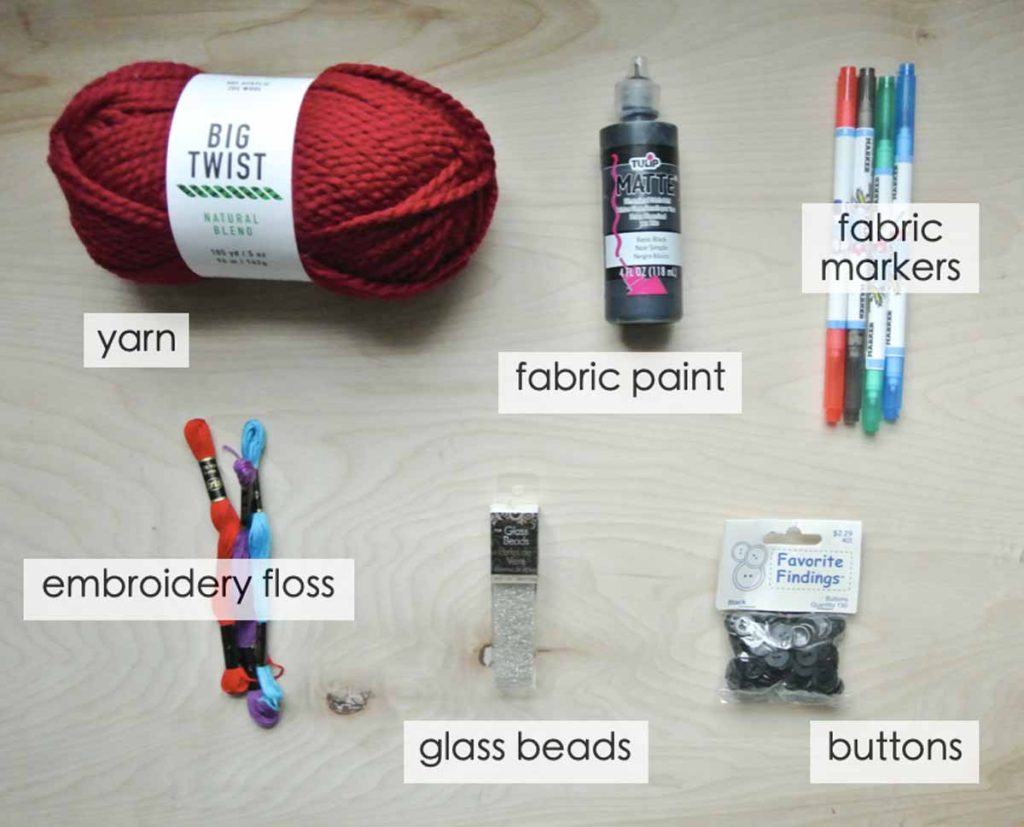
Other Materials:
- yarn
- beads/sequence
- plastic eyes and nose
- embroidery floss
- fabric paint and fabric markers
What Fabric Can I use to Make Plushies?
You can pretty much any fabric to make plushies. Mixing and matching fabric is also another great way to make a unique plushie. When it comes to fabric color, choice, and prints, the sky really is the limit!
Common (Recommended) Fabrics for Plush Making:
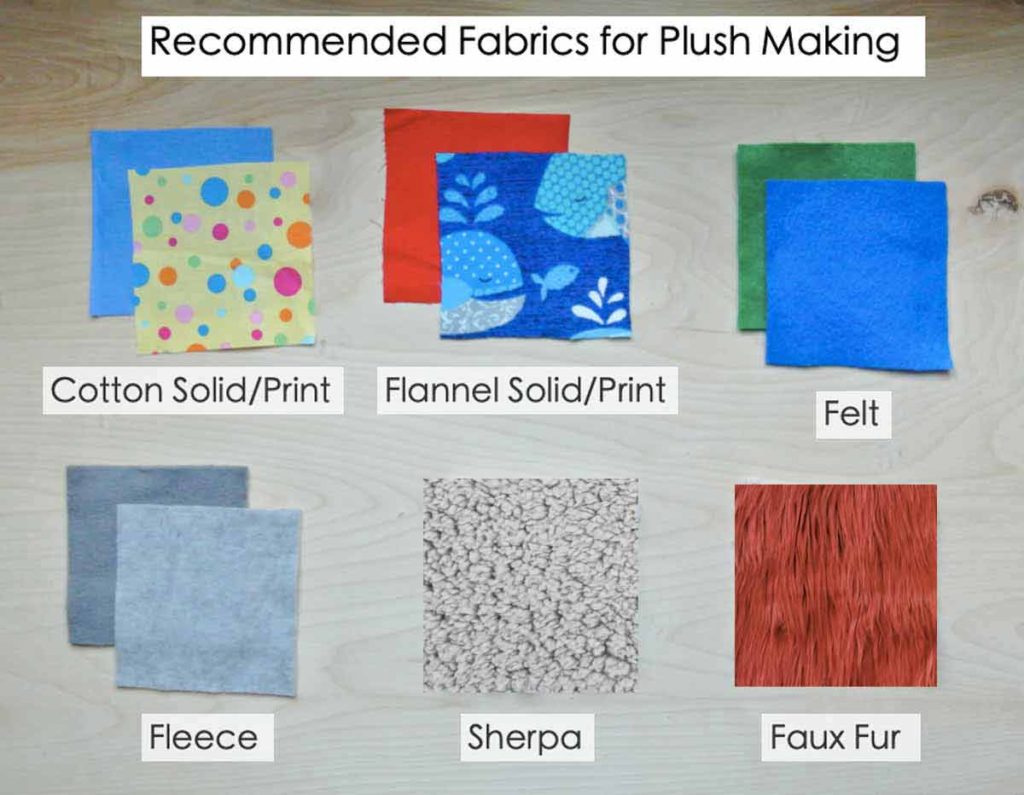
COTTON SOLIDS & PRINTS
Pros: Easy to purchase everywhere and comes in all sorts of colors and prints.
Reasonably Priced
Cons: Not as soft or fuzzy as other types of fabric (fleece, sherpa, etc)
FLANNEL SOLIDS & PRINTS
Pros: Easy to purchase and available in all sorts of colors and prints.
Reasonably Priced
Minimal Fraying of edges, thus easy to work with.
Cons: Not as soft or fuzzy as other types of fabric (fleece, sherpa, etc)
FELT
Pros: Easy to purchase and comes in a good selection of color.
Reasonably priced.
Easy to work with and doesn’t fray
Cons: Polyester felt pills over time. (see notes about “Pilling”)
Not as soft and fuzzy as other types of fabric (fleece, sherpa, etc.)
FLEECE (my favorite type of fabric for making plush!)
Pros: Super soft and great for making a huggable plushie
Reasonably Priced
Comes in a large assortment of color choices
Readily available in anti-pill option (in the United States), so won’t pill over time.
Easy to work with and doesn’t fray
Cons: Can’t achieve “furry” or “hairy” look for certain plush animals
FAUX FUR
Pro: Good for creating plushies that look realistic and store bought.
Easy to hide imperfect sewing because the long fur covers over the stitches
Con: Difficult to work with as it SHEDS LIKE CRAZY. Your workspace, clothes, floor will be covered with fur everywhere after you cut the fabric
Depending on the quality and type, can be expensive per yard
Can be difficult to sew depending on thickness of the faux fur
You can also use other fabrics such as SUEDE, VELVET, KNITS, or even an OLD T-SHIRT or OLD COTTON DRESS/SHIRT.
Fabrics NOT RECOMMENDED for Plush Making:
Sheer (see-through) fabrics such as LACE or CHIFFON
This is just a recommendation, not a hard rule. Keep in mind you will need to stuff the plushie to plump it up at the end and these fabrics will not be able to hide the filling. Also, fiberfill is usually white, so the white will show through the fabric. If you are using a dark colored see-through fabric, you probably won’t like seeing the white fiberfill underneath.
Nevertheless, lace or chiffon are great for plushie accessories such as a lace dress or chiffon flowers!
Stiff fabrics such as FAUX LEATHER, PLEATHER, or UPHOLSTERY VINYL.
Generally you sew the seams and turn the fabric inside out to hide the seam. With stiff fabrics you will have a hard time inverting the sewed plushie.
Notes:
Pilling: Pilling of fabric is when little fuzzball or lint balls form on the surface of the fabric over time. “This happens when asking and wearing of fabrics causes loose fibers to begin to push out from the surface of the cloth, and, over time abrasion causes the fibers to develop into small spherical bundles, anchored to the surface of the fabric protruding fibers that haven’t broken” [2]
This is not good for plushies that will be hugged and held often. You can prevent this by using wool felt. However, wool felt is generally more expensive than polyester felt. They also don’t come in as many colors as craft fleece in local fabric stores. Nevertheless, there are many specialty wool felt stores online that offer a whole array of colors.
What Do I use to Stuff a Plush?
Plushies are generally stuffed with a polyester Fiber Fill. Here in the United States we have easy access to two types of Fiber Fill: Premium Polyester Fiber Fill and Dry Polyester Packing Fiber Fill.

Both the Premium and Dry Polyester Packing Fiber Fill are made by the Fairfield Company and are good for stuffing plushies. According to the company website, the difference is that the Dry Polyester Packing Fiber Fill “has not been treated with silicone so the fiber has a coarse texture that packs firmly, allowing you to stuff it into small spaces with a stuffing tool without the fiber “popping” out of place.”1
From personal experience, I find the Dry Polyester Packing Fiber Fill to be much easier to push into tight corners (i.e., limbs) compared to the Premium Fiberfill. Also, this “stay put” property also makes it easier to conform the plush to your desired shape.
For these reasons I recommend the Dry Polyester Packing Fiber Fill if you can get your hands on some. If not, the Premium Fiber Fill works well too. Just know that you may need to spend a little more time stuffing and contouring your plush.
What Alternatives Can I use to Stuff a Plush?


Fairfield Company also makes Poly-Pellets and Bean Bag Fillers (in 2 sizes) that can be used to stuff plush
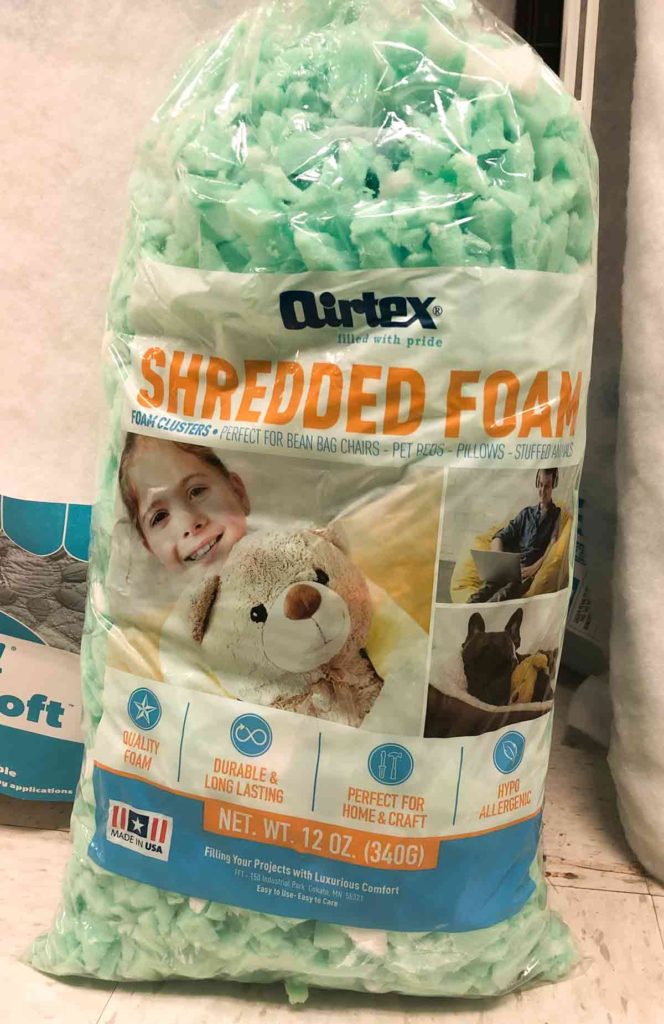
Shredded foam is another good option for stuffed animals as well
Other plush stuffing alternatives:
- Dried Rice
- Dried Beans (remember those beanie babies from the 90s?)
- Large Plastic Beads
- Shreds of Old T-Shirts and fabrics
- Stuffing from an old pillow or stuffed toy
- Mix of different materials.
How long does it take to Make a Plush?
There really is no exact answer to this question! It depends on how complicated and detailed your plushie is. Obviously, the more details you want in your plushie, the longer it will take.
For the plushies we will make in this tutorial today, they will take around 45-60 minutes if you make both using my pre-made patterns (available in my free resource library). If you are going to design your own plushie and make your own pattern (which I will show you in this tutorial), the process will take longer.
How do you Make a Plush Without Sewing?
You can definitely make a plush doll using glue to keep the seams together if you don’t want to sew. Hot glue is a good option as it generally adheres well to fabric and dries fast. However, hot glue dries a little rigid, so that will create a hard part around the seam of the plushie. This is ok if you are trying to make a plushie for decorative purposes (ornament, wreaths, etc). However If you are trying to make a super soft and huggable plushie, I would recommend sewing.
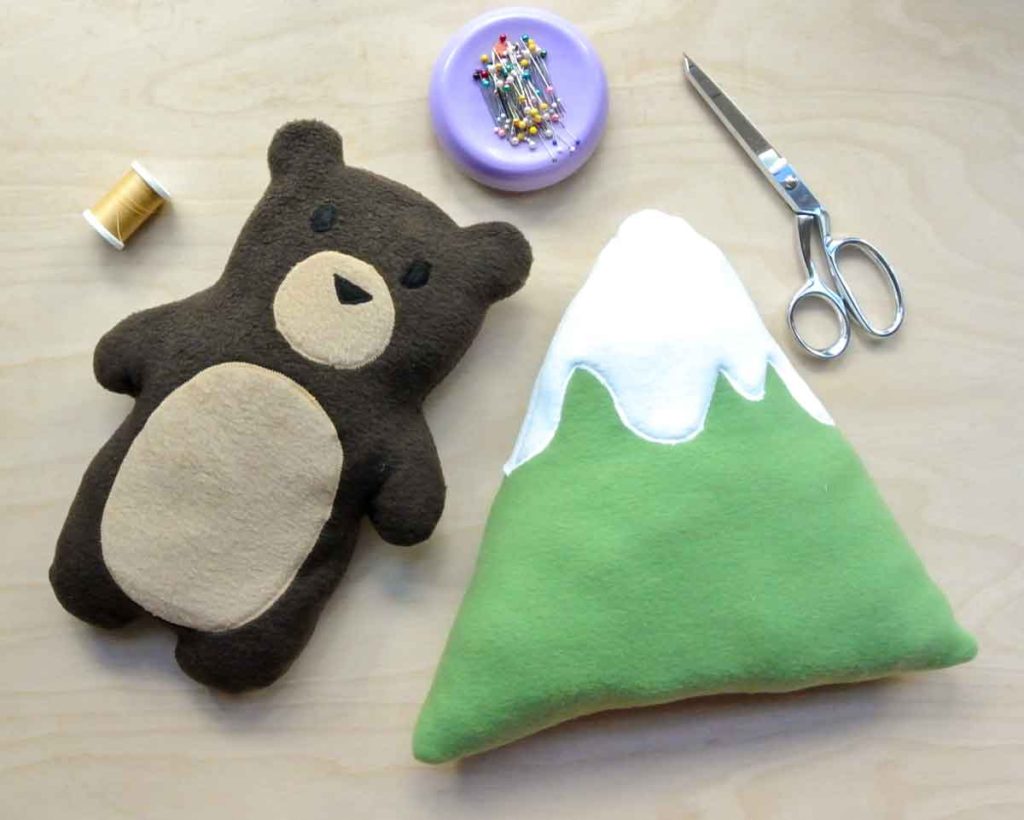
Today, I will show you the exact steps to easily make a soft plush from the design, the pattern making process, to sewing the plushie. If you are new to sewing, or consider yourself a beginner, this is a great project. We will practice sewing curves and also using the zig-zag stitch on your sewing machine to machine-appliqué.
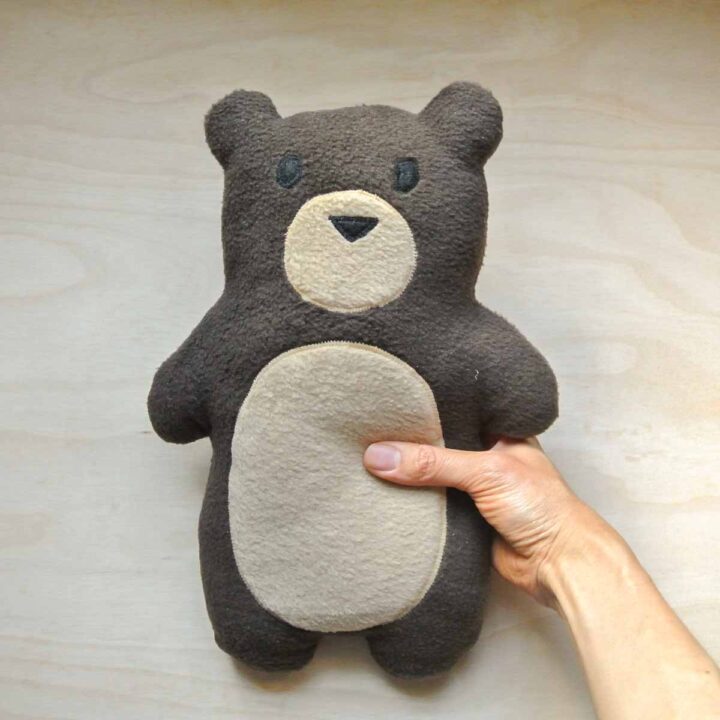
For this tutorial, we will be making a little brown bear. I’ve also made a snowy green mountain plush because I thought brown bear seemed a bit lonely! The little brown bear pattern is available in the MindyMakes free resource library.
Ready to design and sew your own plushie? Follow along this photo tutorial!
MATERIALS:
- Brown Bear Plush Pattern (available in my free resource library) – get the password by subscribing. I promise no spam, just updates on new projects I’m working on!
- Anti-Pill Fleece (I used anti-pill fleece from Joanns)
- For Brown Bear Plush I used 1/2 yard CHOCOLATE for the body and 1/4 yard CAMEL for the belly and snout
- For Green Mountain Plush I used ONLINE LIME and WHITE
- 1 Sheet of Black Craft Felt
- Dry Packing Polyester Fiber Fill
- Matching thread
- Embroidery Stabilizer – for applique details (eyes, nose, belly, etc)
How Much Does it Cost to Make a Plushie?
The cost of a plushie will vary depending on its size and complexity. Larger plushies will require more fabric and stuffing and obviously cost more. If your plushie also includes a variety of colors or prints, then you will need to account for those fabric costs as well. The use of extra accessories such as plastic nose, eyes, and beads also needs to be accounted for
For the stuffed bear we are working on today, a quick calculation of the material comes out to be around $31. Keep reading! Don’t be scared by the cost just yet…
This cost (see breakdown below) is calculated based on if you don’t pre-own any of the materials (such as thread or fabrics) already. Furthermore, many times you can get some of the materials on sale at local craft stores (don’t forget those coupons when shopping at Joanns!)
Another thing to note is that you can make 2 stuffed bears with the amount of fabric in the cost breakdown chart below. On top of that, you will have quite a bit of leftover fiber fill for future plushie projects.
BROWN BEAR PLUSHIE MATERIAL COST BREAKDOWN CHART:
- FABRIC: ~$13
- $8 for 0.25 yard of chocolate fleece
- $4 for 0.25 yard of camel fleece
- 59cents for a sheet of black craft felt
- POLYESTER FIBER FILL ~ $9 – $10/bag
- EMBROIDERY STABILIZER ~ 70cents for 1/8 yard
- THREAD ~ $3-$4 per color.
- GRAND TOTAL = $31
You can also use existing fabric you already own or upcycle old sweaters, shirt, etc to make this project. This will save on costs and also add sentimental value to your plushie!
TOOLS:
- HOME SEWING MACHINE
- FABRIC SCISSORS – these Ginghers are my favorite.
- FABRIC CHALK
- CLEAR RULER – I have the DRITZ See-Through Sewing Ruler
- SEWING PINS & SEWING CLIPS
- PENCIL + PAPER
- CRAFT SCISSORS – for cutting out paper pattern. Don’t use fabric scissors for paper as it will damage them!
How to Design Plush Pattern:

Sketch design (or find one that you like). Enlarge sketch to size you want your plush to be. If you don’t feel confident to draw an enlarged sketch, take your design to a print shop and ask them to enlarge it for you. However, don’t worry too much about how accurate your enlarged sketch is. We will be adjusting for symmetry in the next step.


(This step is only needed if your plush is symmetrical). Approximate mid line of enlarged sketch and fold in half. Then decide which side of the sketch you like more and cut along that side of the sketch on fold.
In this example, I liked the left side of my sketch more so I cut along that side.


Unfold your sketch and you now have a symmetrical pattern. Note how unsymmetrical the original drawing was! (see the gap between the cut line and the sketch line on right side of bear).
Fold a second piece of paper in half and match it to the mid line of the bear. Sketch the bear belly on the left side.


Cut out the belly to get it to be a symmetrical oval. Repeat this process for all other details of the plush that need to be symmetrical and cut them out.
How to Label Plush Pattern:

Brown bear plush pattern pieces all cut out. Label the pattern as such:
- Name of Project – Brown Bear Plush
- Name of Pattern Piece – [Body]
- How Many Fabric Pieces to Cut – “Cut 2 on Brown Fleece“
- Seam Allowance – “Seam Allowance not included” or “Includes 1/2″ Seam Allowance”
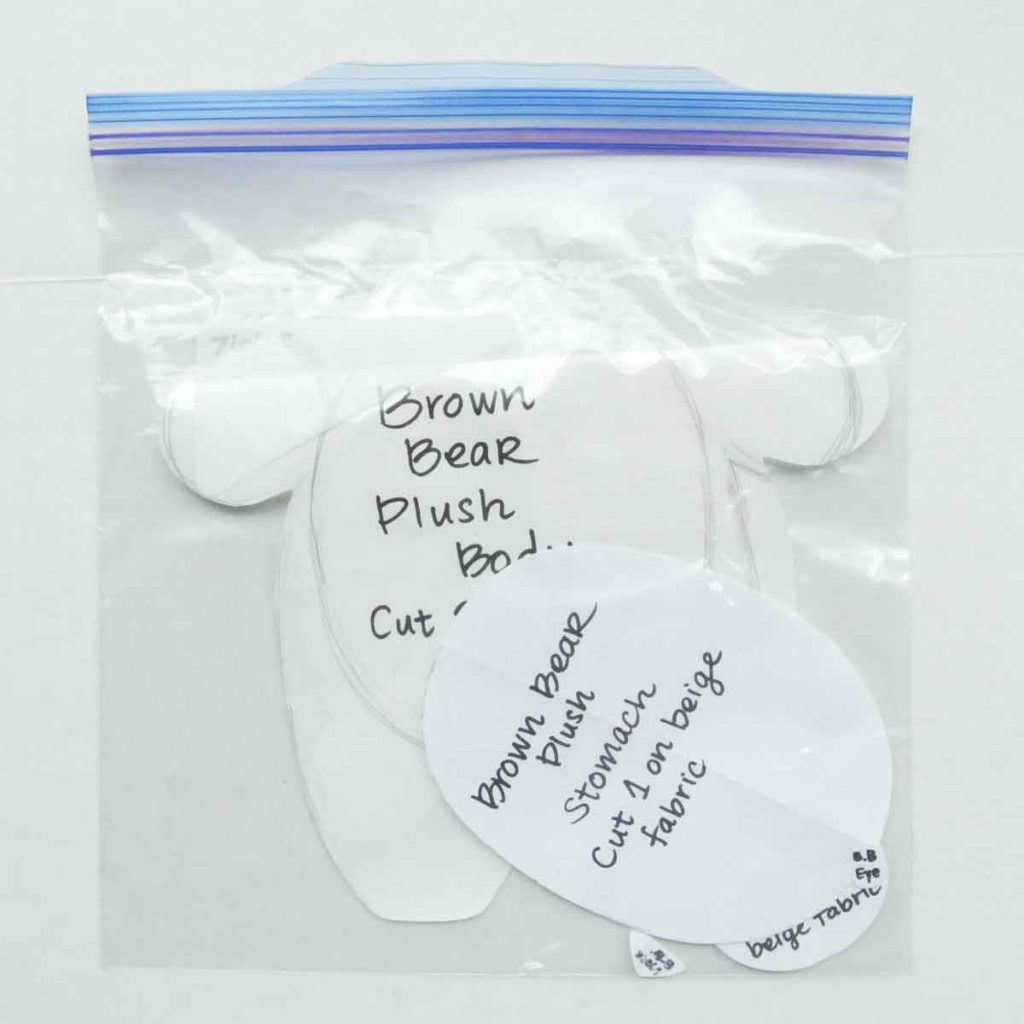
Keep all pattern pieces stored away when finished (I like to use a large zip-lock bag)


Place bear pattern on fabric, making sure the mid line of the pattern is parallel to to the selvedge of the fabric. Trace with chalk and cut out 3/4″ (~2cm) from trace line.
Cut out bear eyes, nose, snout, and belly.
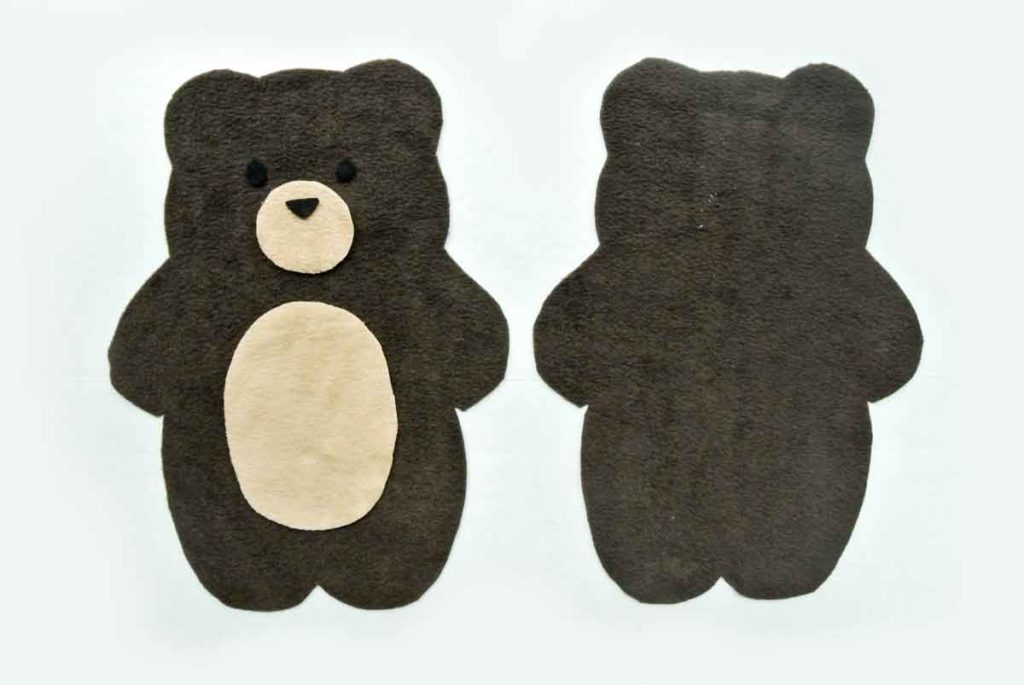
Applique Plush Details (eyes, nose, etc):
For more details about how to applique, check out this post


Applique nose to snout using embroidery stabilizer. Back view of appliqued nose.


Glue eyes to bear body and pin snout and belly on. Machine applique details with matching thread.
Sewing Plush Together:


Pin bear body right sides together and sew at trace line. Leave an opening on the side (Red dotted line indicates sew line). Clip curves and sharp corners (blue arrows indicate sharp corners).


Turn bear plush to right side through the opening. Stuff bear with Fiber Fill, starting at the corners farthest away from the opening (use a chopstick, or That Purple Thang). In this case, start by stuffing the ears, then the face, and the arms, all the way down to the legs.
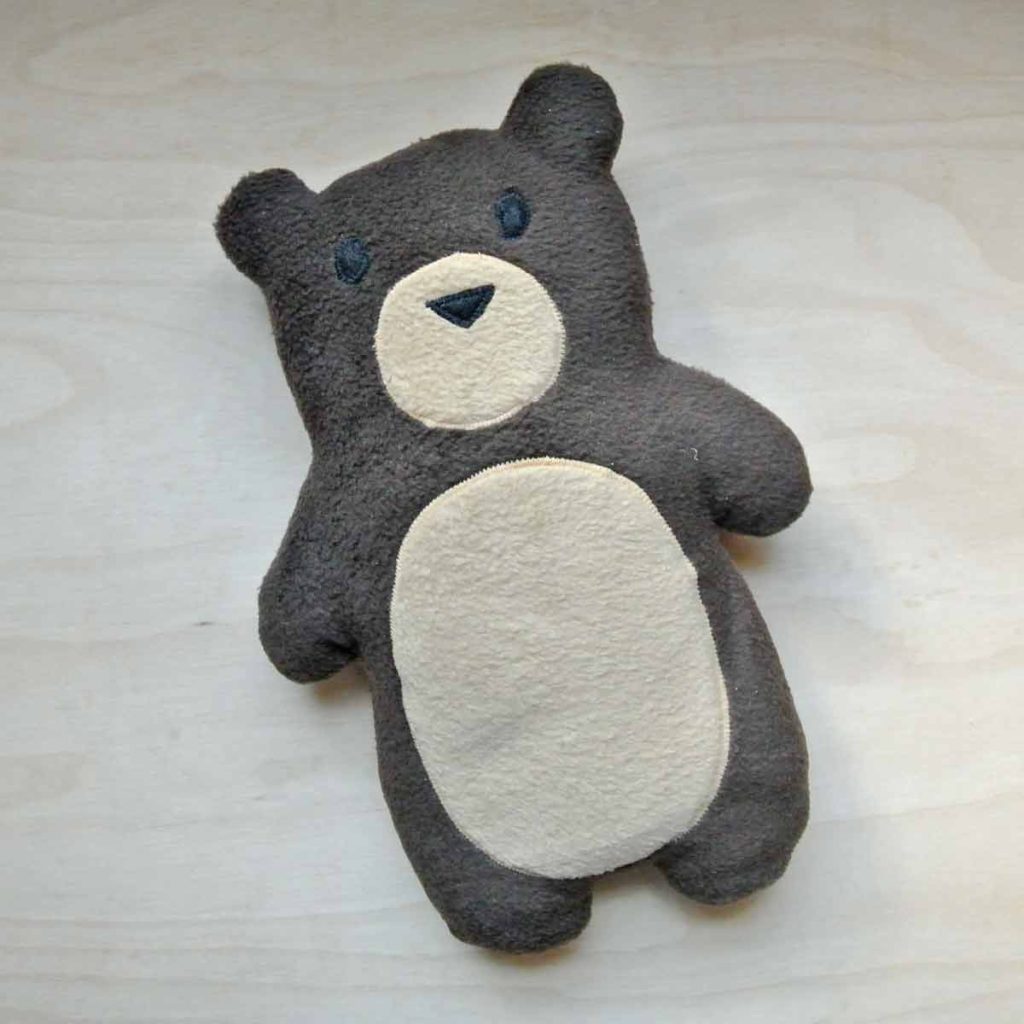
Close the side opening with a blind stitch (ladder stitch) and you are finished!
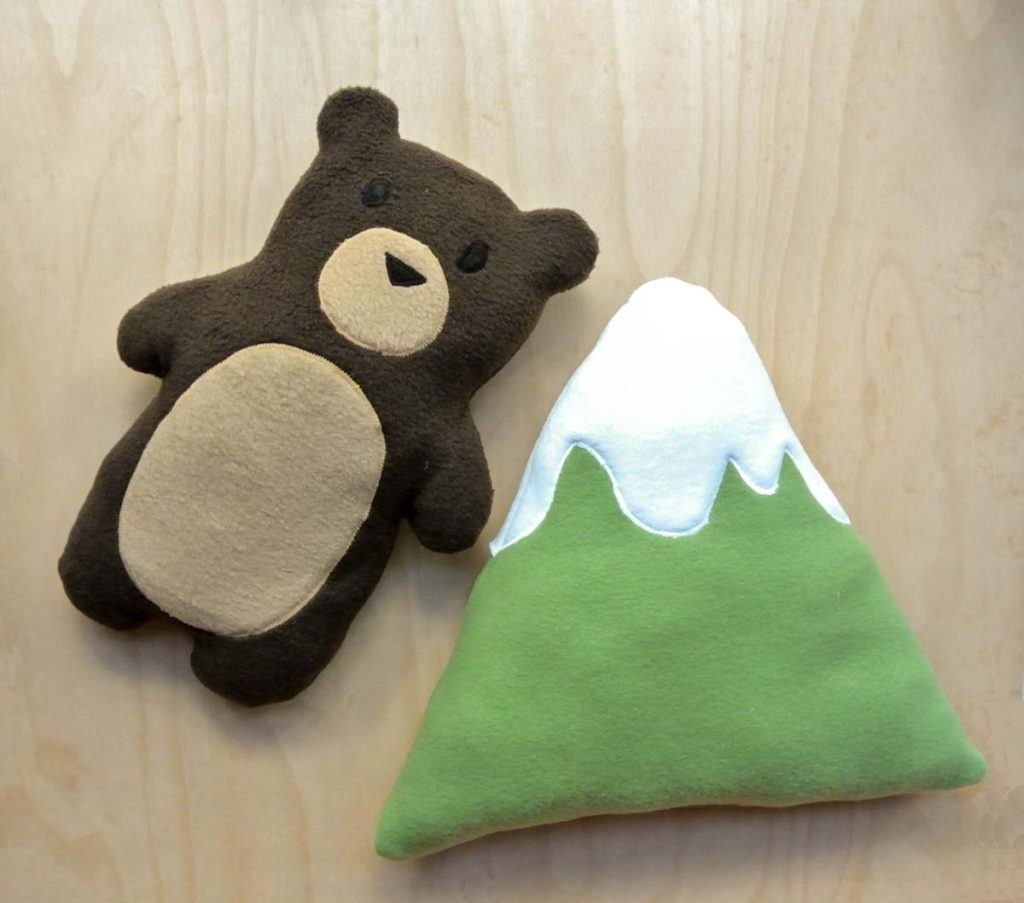
Brown bear with his matching buddy mountain plush.
Is it Hard to Make Plushies?
As you just saw from the tutorial, making plushies is as easy as sewing together two pieces of fabric that are cut out to a particular shape and then stuffing the interior. This is what I call a “flat plushie” as the depth of the stuffed animal is created purely from stuffing (versus from the pattern of the plushie).
With that being said, plushies can also be extremely complex and difficult to sew. For example, making 3D plushies can require many pattern pieces that are sewn together to create that 3 dimensional shape you desire. The more complex and asymmetrical the shape, the harder it is to make.
Imagine this: making a sphere shaped plushie (think of a beach ball) requires about 6 pieces of fabric that all need to be sewn together. This is definitely more complex and time consuming than making a circle shaped “flat plushie” as described previously.
Nevertheless, learning to make stuffed plushies is an extremely rewarding and gratifying experience. First you learn a new skill (a joy in itself), and then you get to enjoy the satisfaction of accomplishing something. Then you also get the satisfaction of showing off your accomplishment. Finally, should you decide to gift your bear away, you get to experience the joy of giving!
I hope I’ve convinced you why you NEED to learn how to make a stuffed plushie, ASAP. Happy Sewing!
How to Make a Plushie
Designing and sewing a cute plushie doll is easier than you think! Learn how to create and sew your own custom plush.
Materials
Tools
- SEWING MACHINE
- FABRIC SCISSORS
- FABRIC CHALK
- SEWING PINS or
- SEWING CLIPS
- PENCIL + PAPER
- CLEAR RULER
- CRAFT SCISSORS - for cutting paper
Instructions
HOW TO DESIGN PLUSHIE PATTERN
- Sketch your design (or find one that you like).
- Enlarge design to the actual size you want your plush to be (see note 2). Don't worry too much about how accurate your enlarged sketch is. We will be adjusting for symmetry in the next step.
- The following steps 3-5 are only necessary if your plushie is symmetrical. Approximate mid line of enlarged sketch and fold your paper in half.
- Decide which side of the sketch you like more and cut out your design along that side of the sketch. Make sure to cut on fold.
- Unfold your sketch and you now have a symmetrical pattern.
- Fold a second piece of paper in half and match it to the mid line of the design (my design is a bear). Trace the plush details on the design that will need to be symmetrical (i.e. bear belly).
- Cut out the belly to get it to be a symmetrical oval. Repeat this process for all other details of the plush that need to be symmetrical and cut them out (snout, nose, etc).
HOW TO LABEL PLUSH PATTERN
- Label each of the pattern pieces with the following information:
- Name of Project - Brown Bear Plush
- Name of Pattern Piece - [Body]
- How Many Fabric Pieces to Cut - "Cut 2 on Brown Fleece"
- Seam Allowance - "Seam Allowance not included" or "Includes 1/2" Seam Allowance"
CUTTING OUT PATTERN ON FABRIC
- Place bear pattern on fabric, making sure the mid line of the pattern is parallel to to the selvedge of the fabric. Trace with chalk and cut out 3/4" (~2cm) from trace line.
- Cut out bear eyes, nose, snout, and belly.
APPLIQUE PLUSH DETAILS
- Applique nose to snout. Make sure to place a piece of embroidery stabilizer on wrong side of snout.
- Glue eyes to bear body and pin snout and belly on. Don't forget the embroidery stabilizer!
- Machine applique all the plushie details using matching thread.
HOW TO SEW PUSH BEAR
- Pin bear body right sides together and sew at trace line. Leave an opening on the side.
- Clip curves and sharp corners
- Turn bear plush to right side through the opening.
- Stuff bear with Fiber Fill, starting at the corners farthest away from the opening (use a chopstick, or That Purple Thang). In this case, start by stuffing the ears, then the face, and the arms, all the way down to the legs.
- Close the side opening with a blind stitch (ladder stitch) and you are finished!
Notes
- For Brown Bear Plush I used CHOCOLATE for the body and CAMEL for the belly and snout
For Green Mountain Plush I used ONLINE LIME and WHITE - If you don't feel confident about drawing an enlarged sketch, take your design to a print shop and ask them to enlarge it for you.

I subscribed to your site & confirmed my email. Where do I get the password to get the pattern?
Also – your “Contact Me” page doesn’t work. There’s no form available to send a question.
Hope to hear from you soon! Thanks!
Hi Jan!
Thank you for letting me know about the Contact Me Page!
We can be reached at: [email protected]
Hope that helps!
Lindo seu trabalho com uma dedicação impecável amei quero saber de todas as novidades vc dar uma aula espetacular sobre cada peça e isso faz muita diferença em quem está te seguindo e muito especial esse carinho essa dedicação e explicar o máximo. Deus te ilumine sempre obrigada
Mindy, your tutorial for this little bear is perfect! I made one and had such fun! My little bear came out so cute and is now sleeping away in his little sleeping bag waiting for winter to be over! Thank you!
Hi Kathy!
I’m so glad to hear that! And that is SOOOOO adorable that bear is hibernating in his sleeping bag until spring! I LOVE IT! Would love to see a photo if you would like to share. You can email it to [email protected] 🙂
Hello, I love your tutorial.
Is the green mountain plush pattern in your library? I can’t find it…
Thanks for the bear 🙂
Hi Johanne,
We are working on putting the green mountain plush pattern in the library. Thank you for your patience!
it says I need a password
Hi Angela,
You will receive a welcome email with the password to the free resource library once you subscribe. You can subscribe here. Hope that helps!
I also need the password, thank you.
Hi Na Yeon,
You will receive an email with the password to the Free MindyMakes Library once you subscribe to our mailing list. Hope that helps!
I want to make Pokemon slushies so this was really helpful! Thanks a lot!
Looks like fun.I sell things at farmer’s market in our little town and this looks awfully cute for the kids.Thank you for your information
These are excellent instructions!!!! ⭐⭐⭐. Never made a plushy before but plenty of other type dolls, pins, etc. I was looking for a little soft creature to include with my baby quilts. This is perfect!!!! Thank you for sharing!!!!
Hi Cindy,
You are so welcome! This project won’t be difficult at all if you’ve done dolls before.