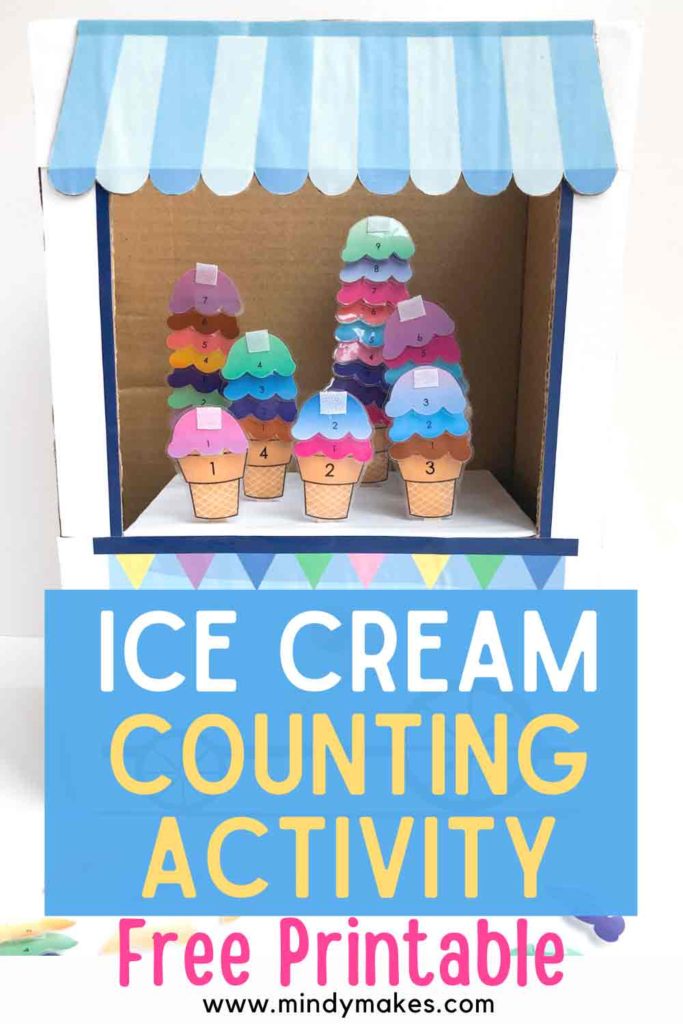
Count to 10 Ice Cream Activity for Preschool (Free Printable)
This post may contain affiliate links. Please read my disclosure policy for details. As an Amazon Associate, I earn from qualifying purchases.
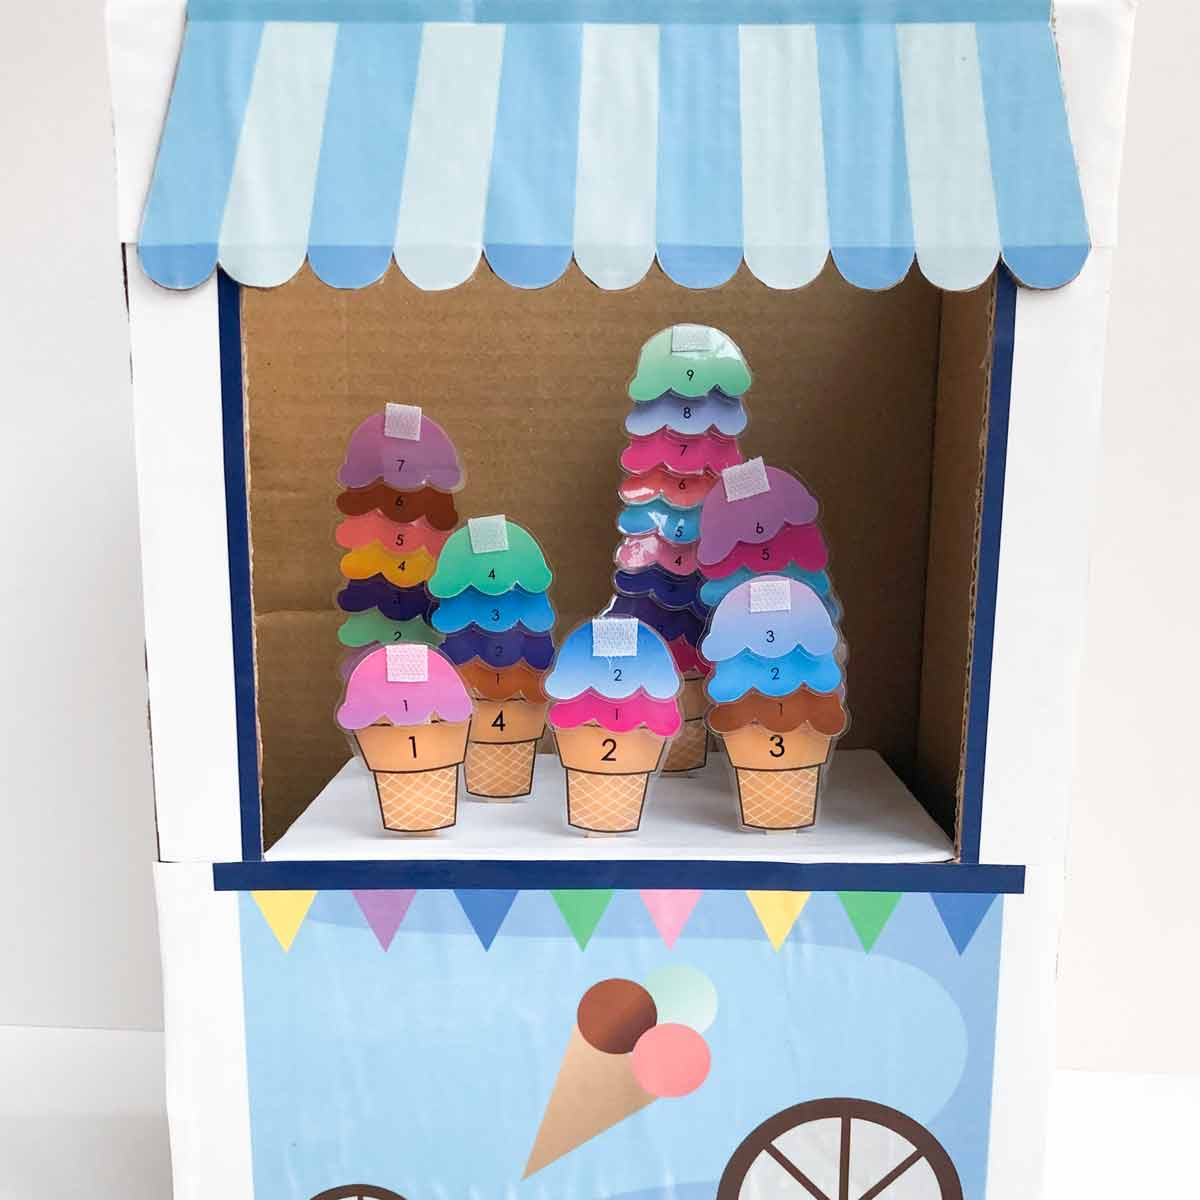
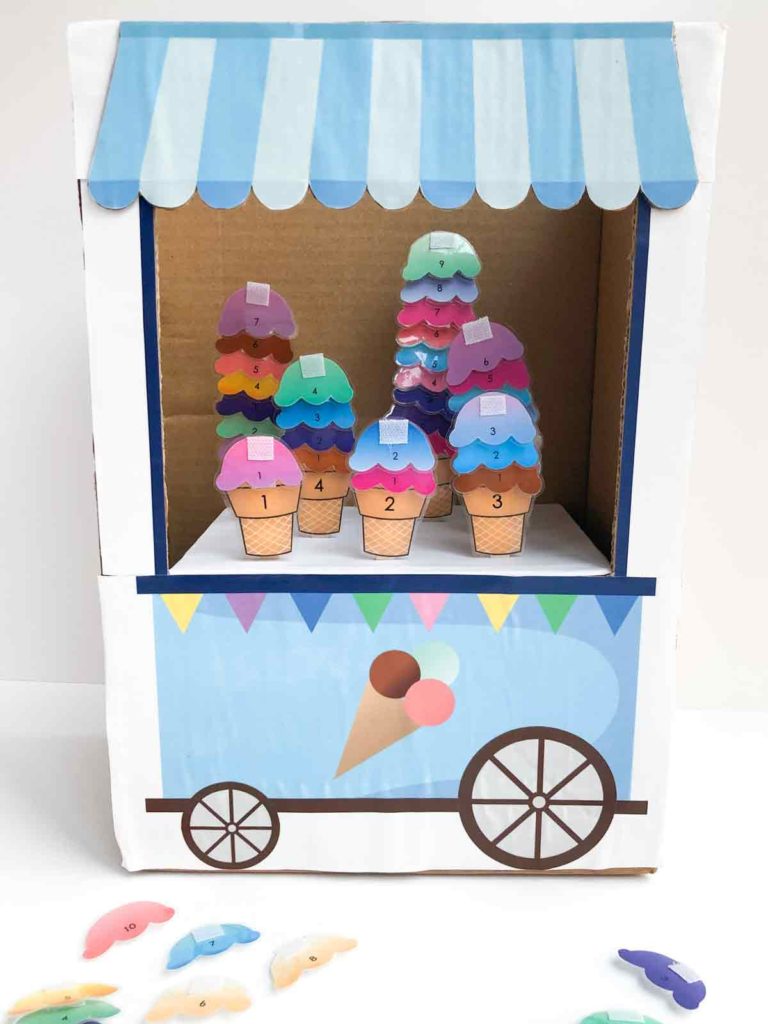
Learn to count and recognize numbers 1-10 with this cute DIY ice cream scoops and cones activity. Afterwards, put the ice cream cones in an ice cream cart for some pretend play!
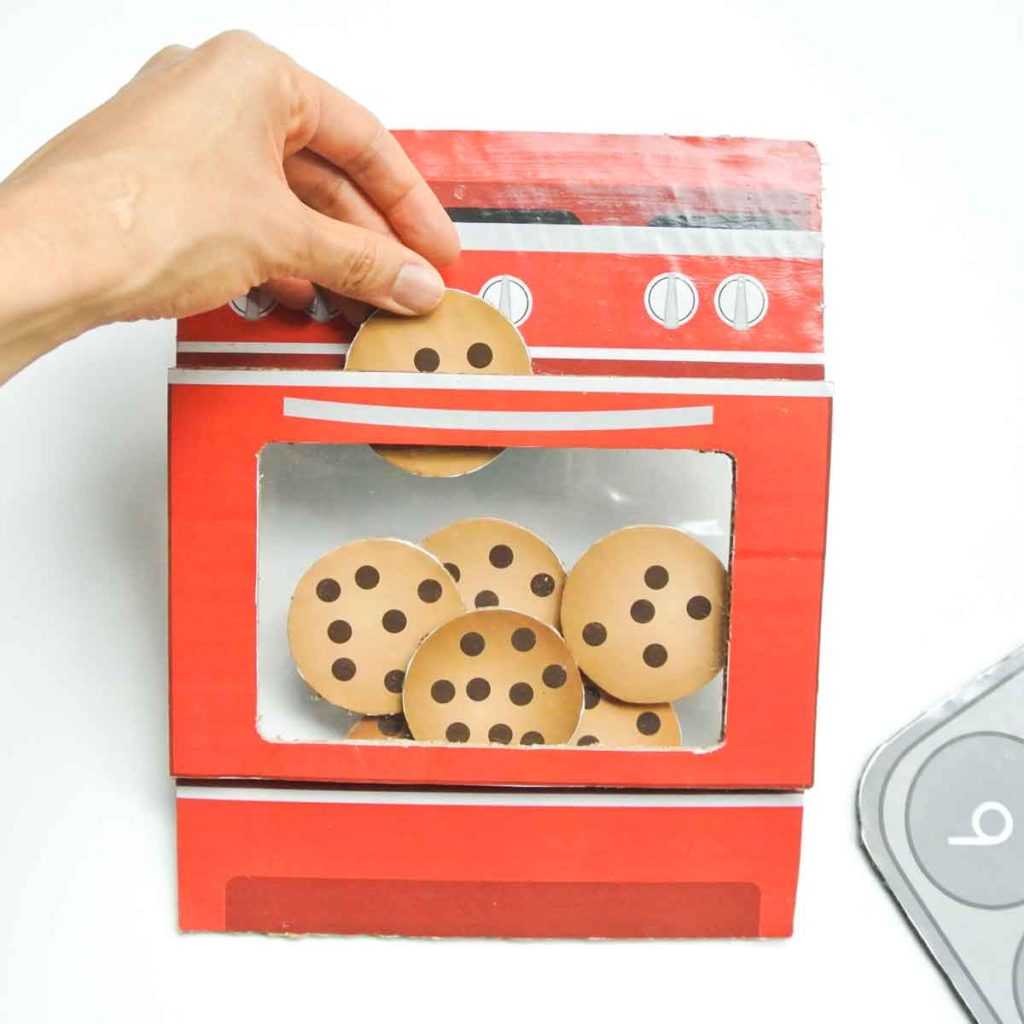
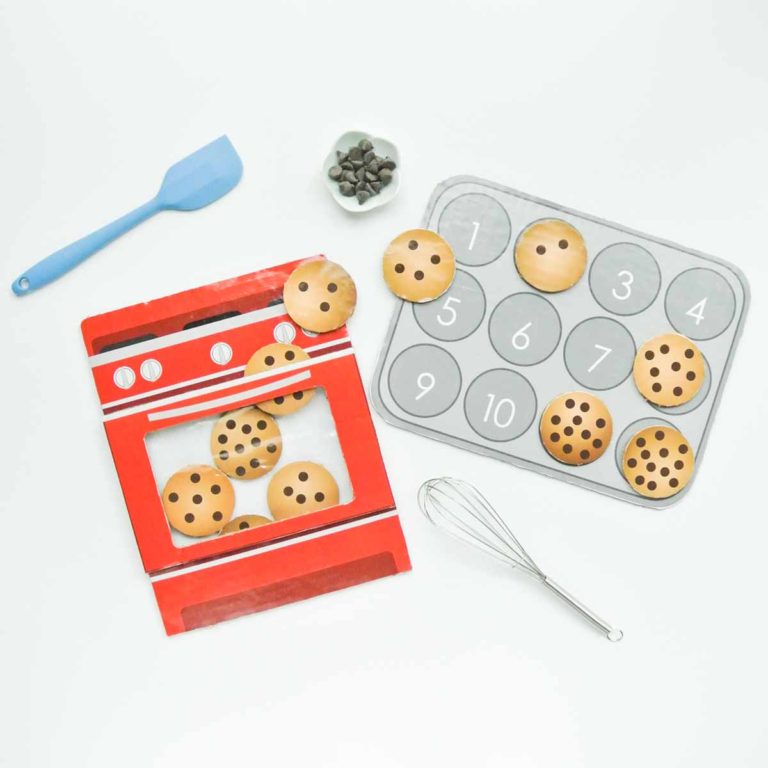
My recent Cookie Matching Activity has been a reader favorite, and since I LOVE food themed Kid’s Activities, I came up with another one!
This time, we will be counting yummy ice cream scoops and matching them to the ice cream cones with the correct number from 1-10. Once the ice cream scoops are correctly stacked, you can pretend play with the ice cream cart.
This ice cream scoops counting activity is very easy to make. Simply print the ice cream printable, cut out the scoops and cones, laminate, cut again, and apply sticky velcro and you are ready to play!
Cutting out the ice cream scoops and cones is definitely the most time-consuming part. However, it’s a very easy task and you can do it while watching a favorite show or next to your child.
My toddler was perfectly okay to play next to me while I did the cutting. I think he’s pretty happy to entertain himself when he knows I’m making a new activity for him. Ha, kids! They are just so smart!
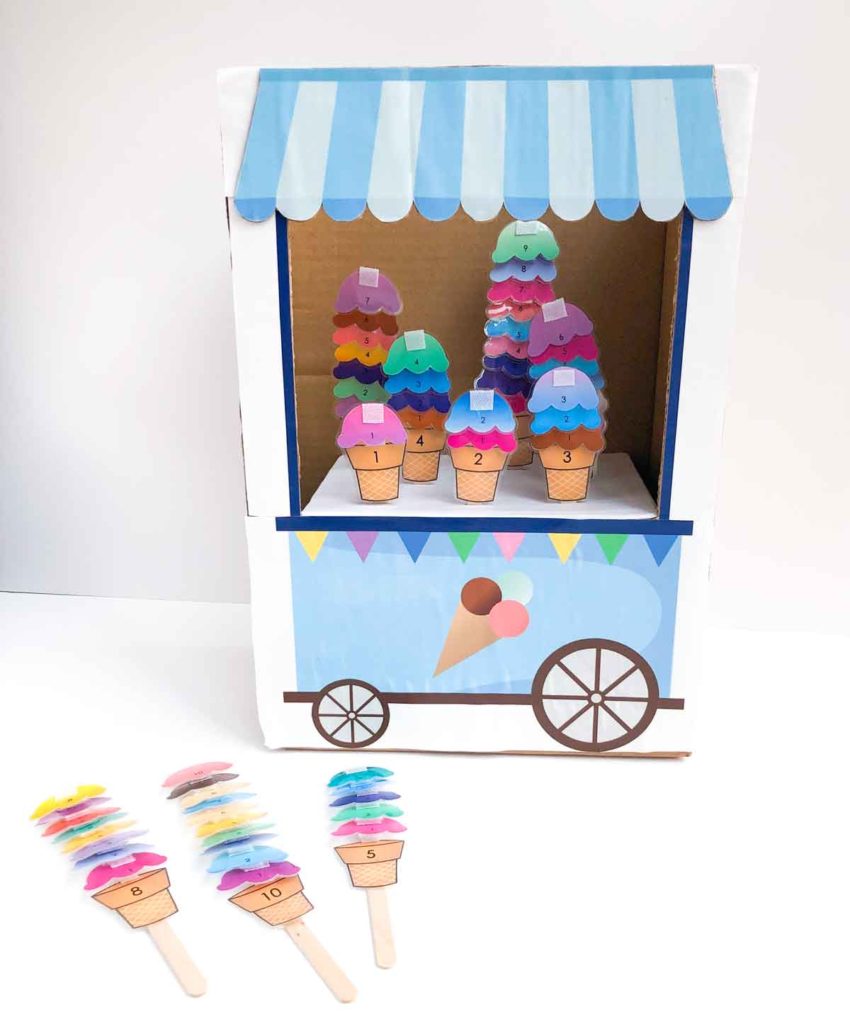
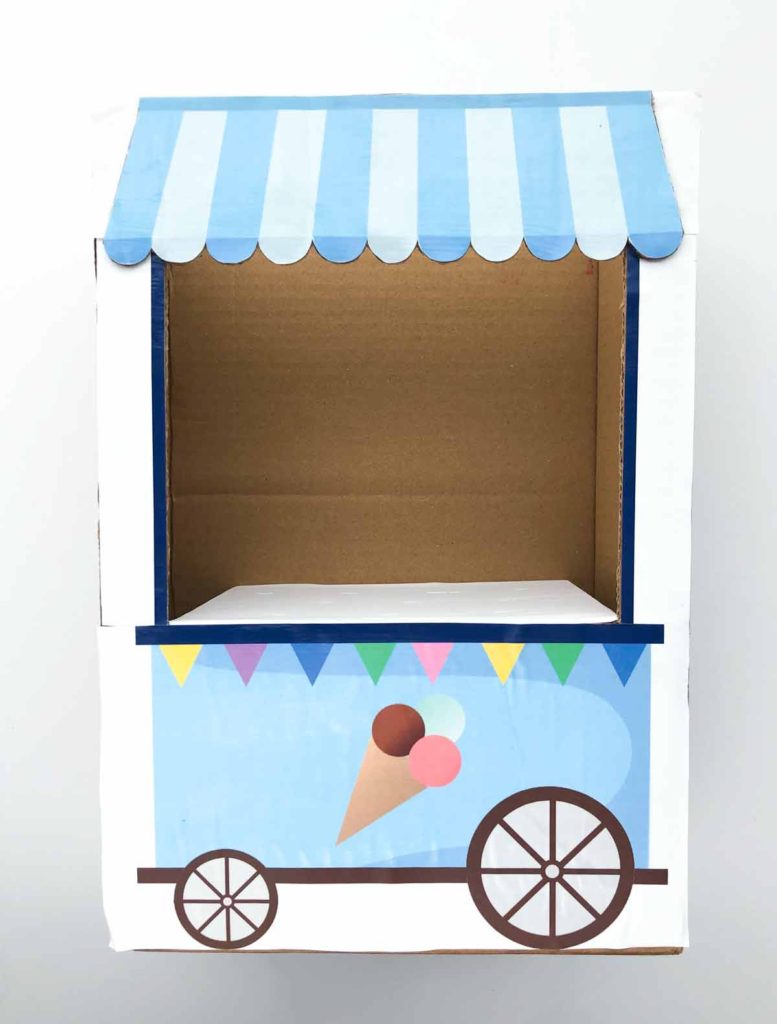
The ice cream cart is completely optional to make. However, it does add another dimension of fun as you can store the cones in them and pretend play.
For example, kids can pretend to be an ice cream vendor and scoop out the correct number of ice cream scoops the customer wants. They can also push around the ice cream cart and share already made ice cream scoops. The cart is also a place to store all the cones when it’s clean-up time.
The cart is also very easy to make. Definitely less time consuming than cutting out each ice cream scoops and cones. So, I do recommend you make the whole set for more fun!
MATERIALS TO MAKE ICE CREAM COUNT TO 10 ACTIVITY:
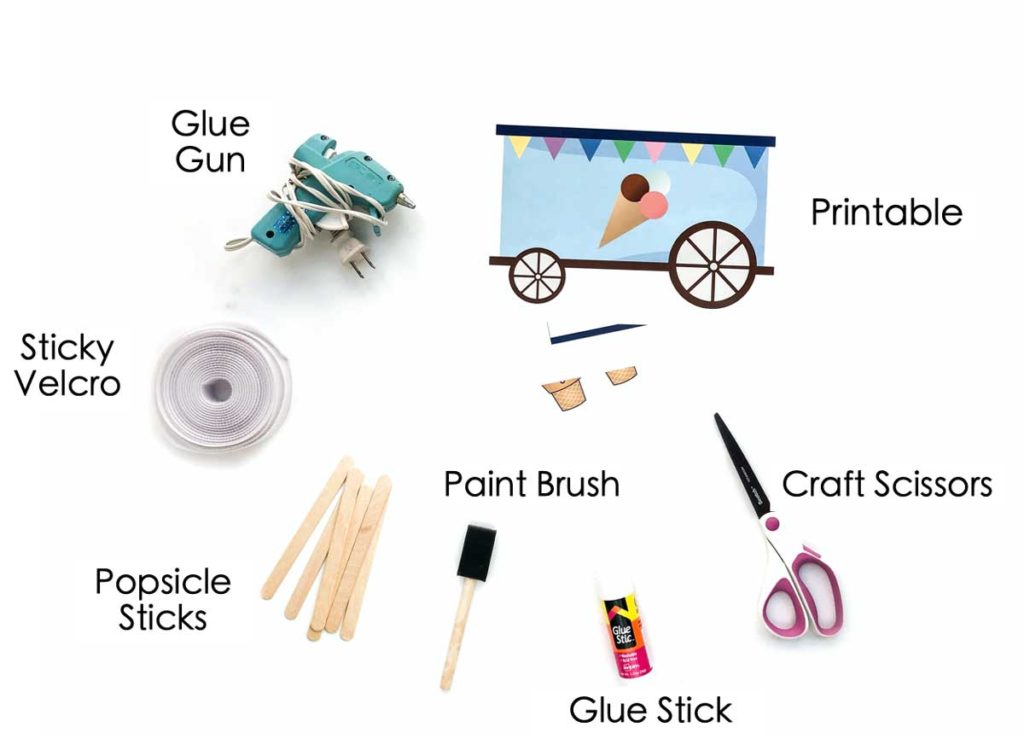
To make the Ice Cream Counting Activity with Ice Cream Cart, you will need the following:
- Count to 10 Ice Cream Activity Free Printable (Available in my FREE RESOURCE LIBRARY)
- Craft Scissors
- Glue Stick
- Glue Gun
- Tape (not pictured)
- Popsicle Stick
- Sticky Velcro – I use this Sticky Velcro Roll in White because I like that you can cut the velcro to the size I want. However, Sticky Velcro Dots are also great if you just want to peel and stick without having to cut it first.
- Mod Podge (optional) – I like the Gloss Finish to create a nice shine on the ice cream cart. This also helps to protect the ice cream cart from grubby little fingers!
- White Paint and paint brush (optional) – For painting brown box. Alternatively, you can glue white paper to cover the brown box.
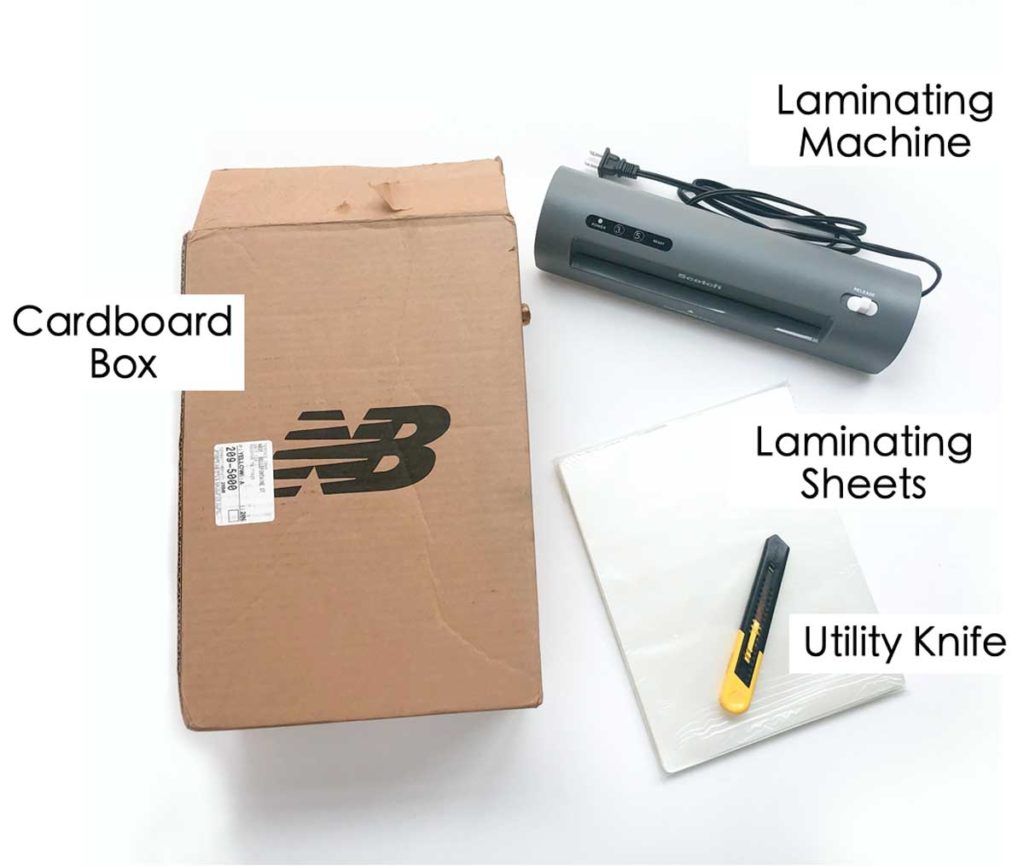
- Utility/Craft Knife
- Laminating Machine + Laminating Sheets (optional) – You can also get the printable laminated at your local copy shop. I have the Scotch Thermal Laminator and I use the 5 mil laminating sheets for extra protection
- Cardboard box
HOW TO MAKE COUNT TO 10 ICE CREAM SCOOPS AND CONES
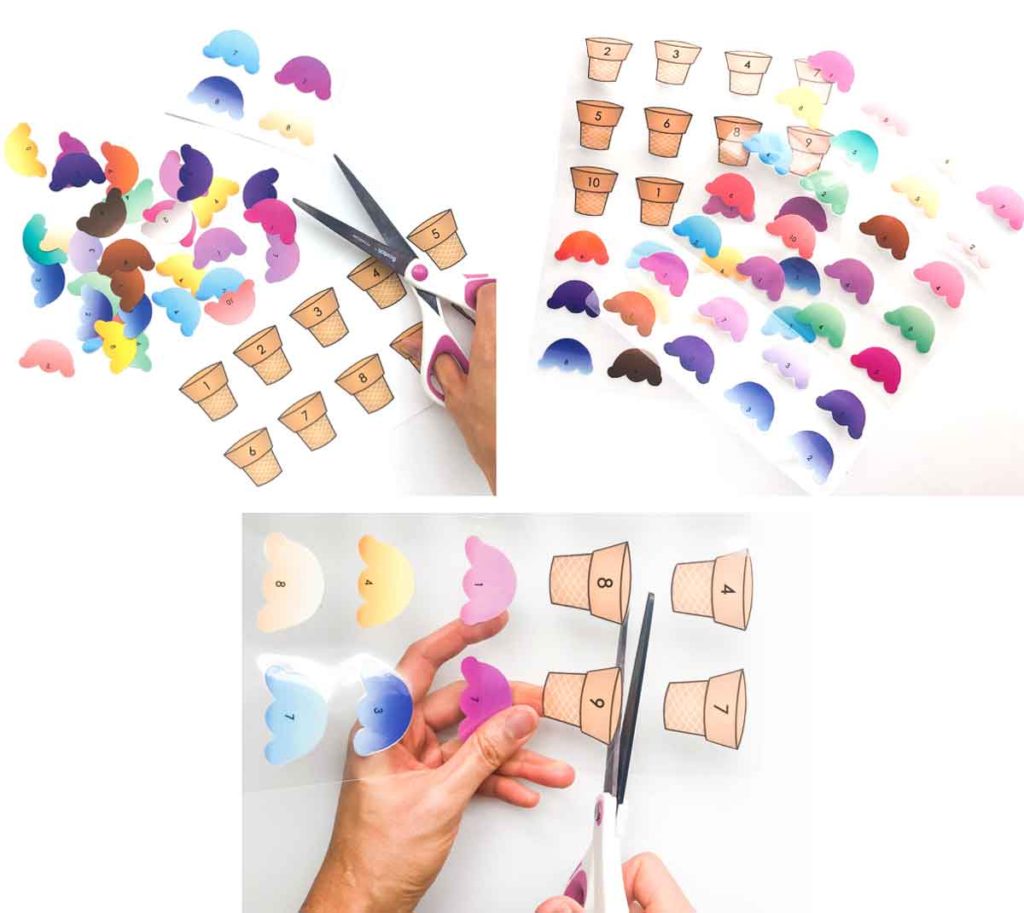
Start by cutting out all the ice cream shapes and cones. Laminate them and cut them out
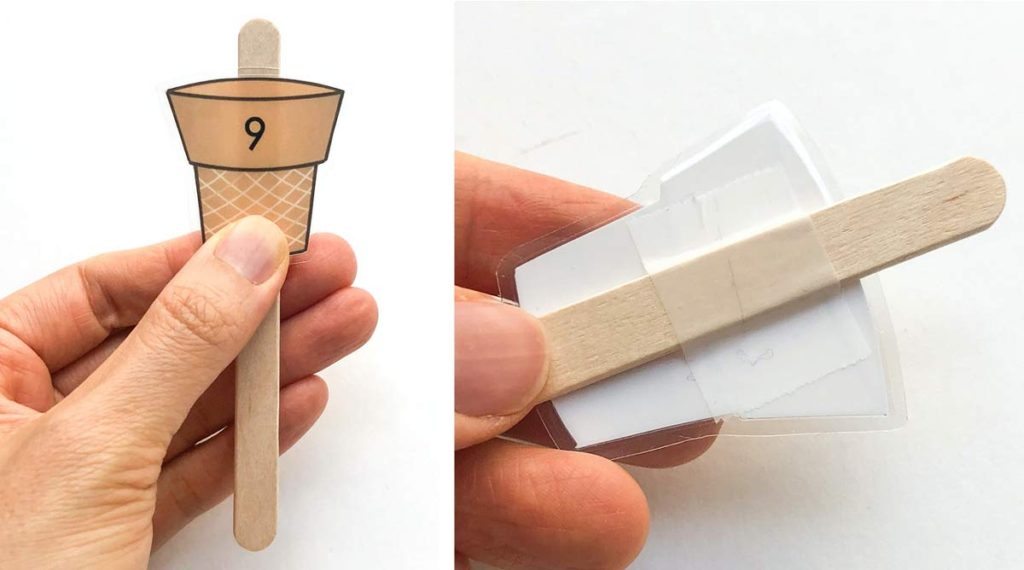
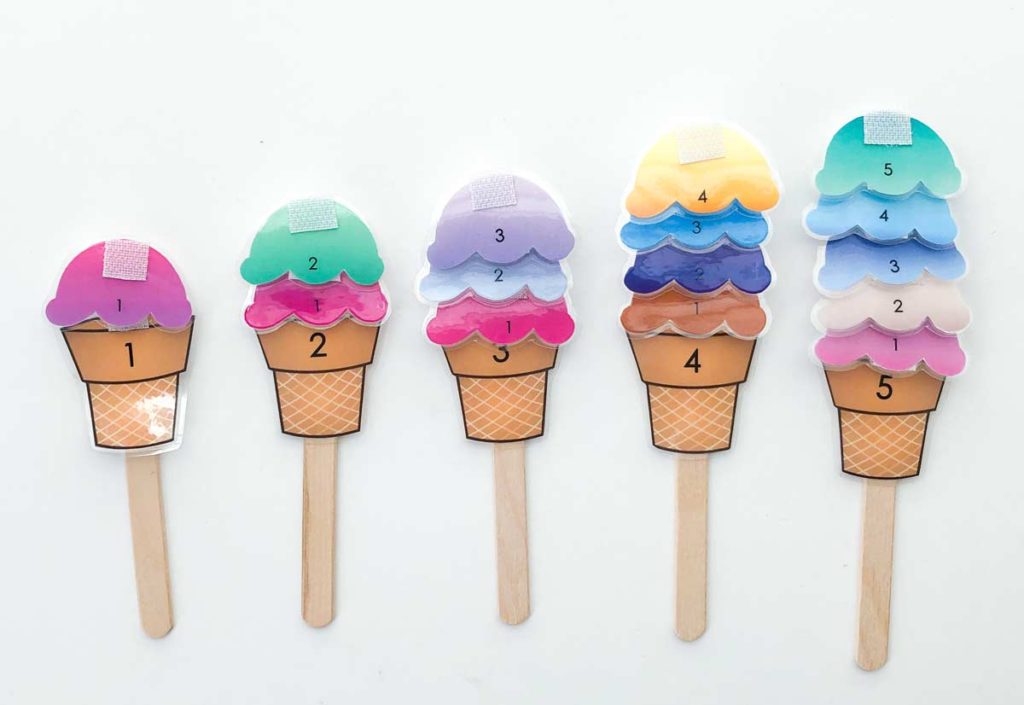
Tape the ice cream cones to a Popsicle stick. Leave about 0.5-0.75 inch (1.27cm – 2cm) of the stick sticking out of the top of the ice cream cone.
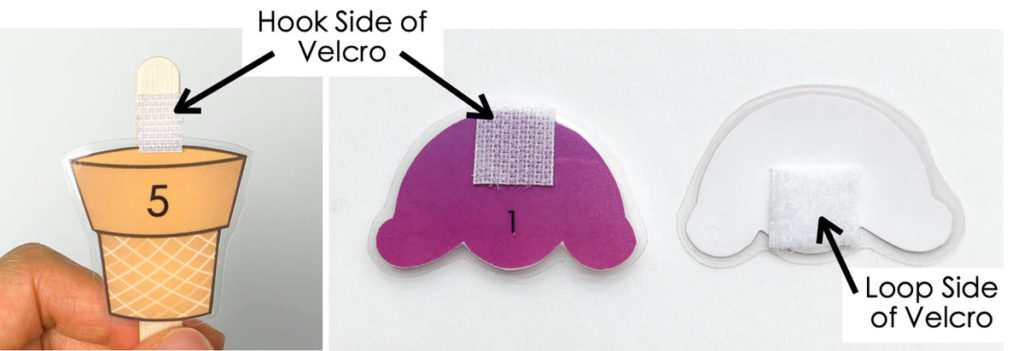
LEFT: Put sticky velcro (hook side) on ice cream cone.
RIGHT: Put sticky velcro on ice cream as pictured. Put the loop side on the bottom back and hook side on the top front of ice cream.
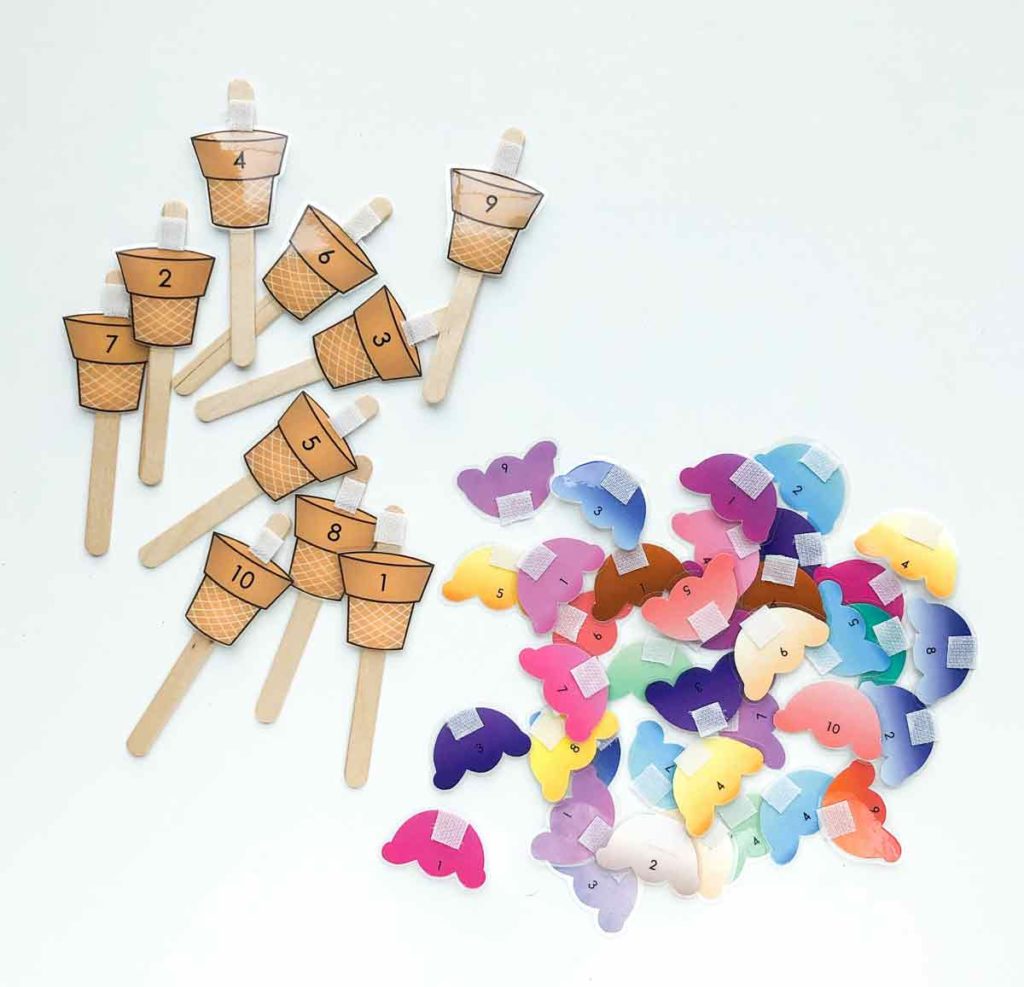
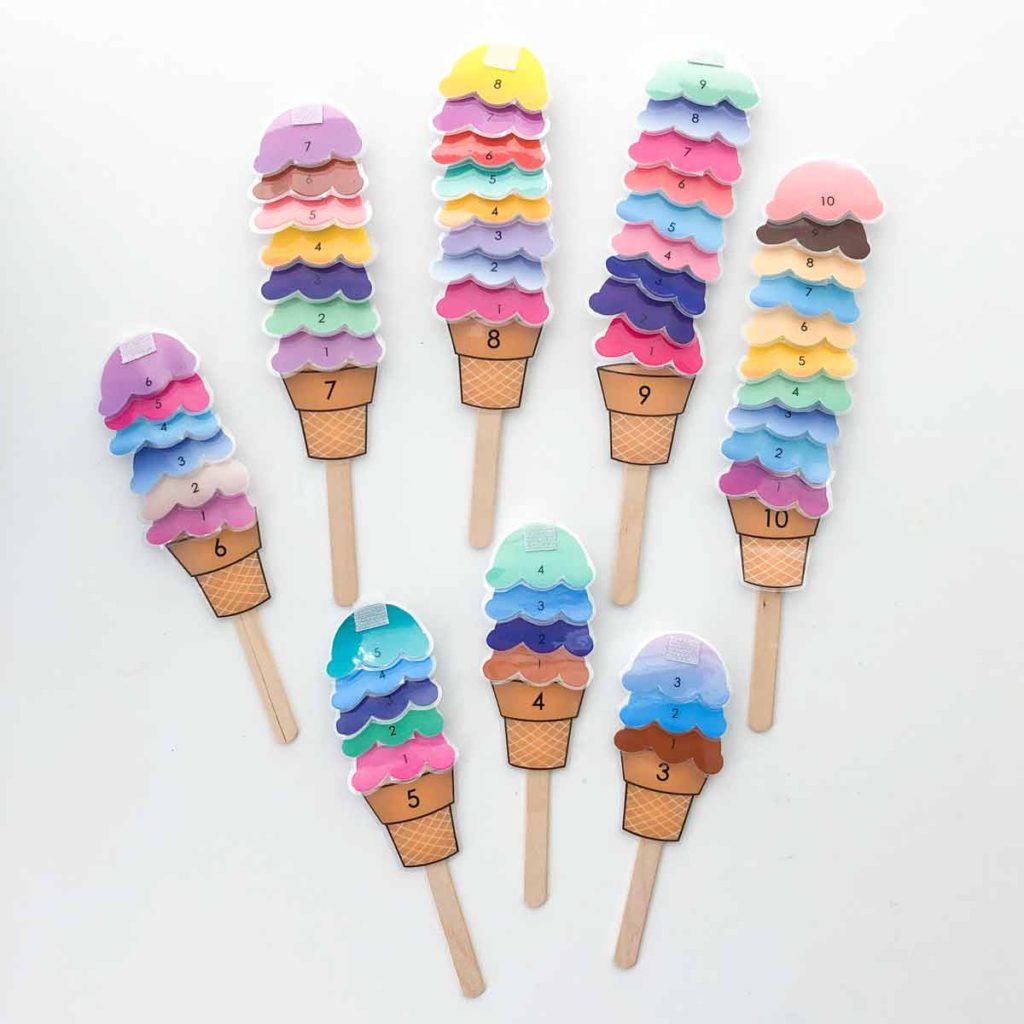
Finished ice cream cones and number ice creams. This is the most time consuming part of the project, cutting out each ice cream, laminating and cutting out again. However, once this is done, the rest goes a lot faster!
HOW TO MAKE CARDBOARD ICE CREAM CART
Gluing Printable to Cardboard Box
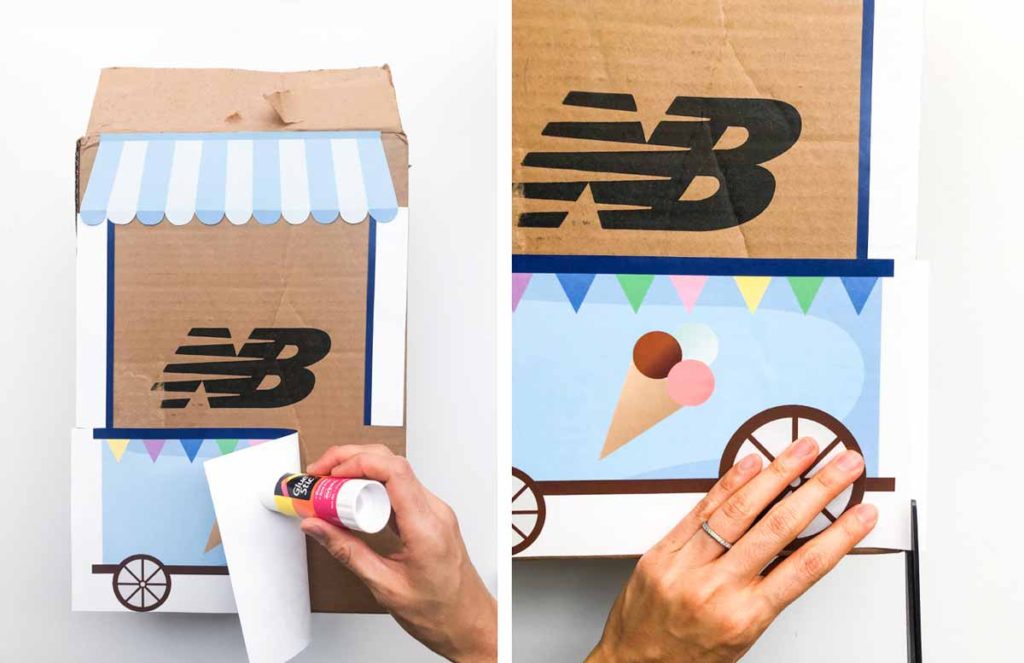
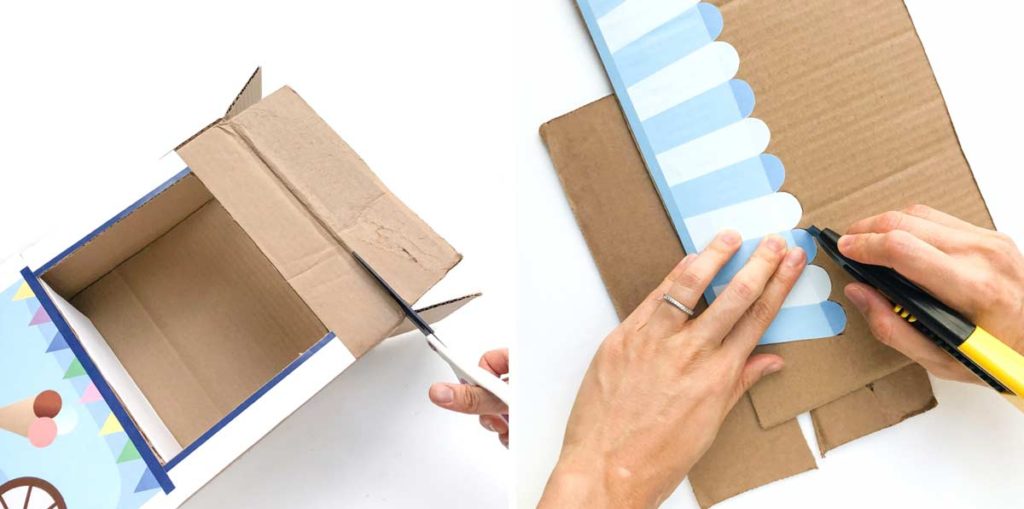
LEFT: Cut out the ice cream cart printable. Use glue stick to glue cart and side bars to the box. Don’t glue the top canopy down just yet. We will do this at a later step.
RIGHT: Trim off excess paper on the side of box if needed.
Creating Cut Out for Ice Cream Cart
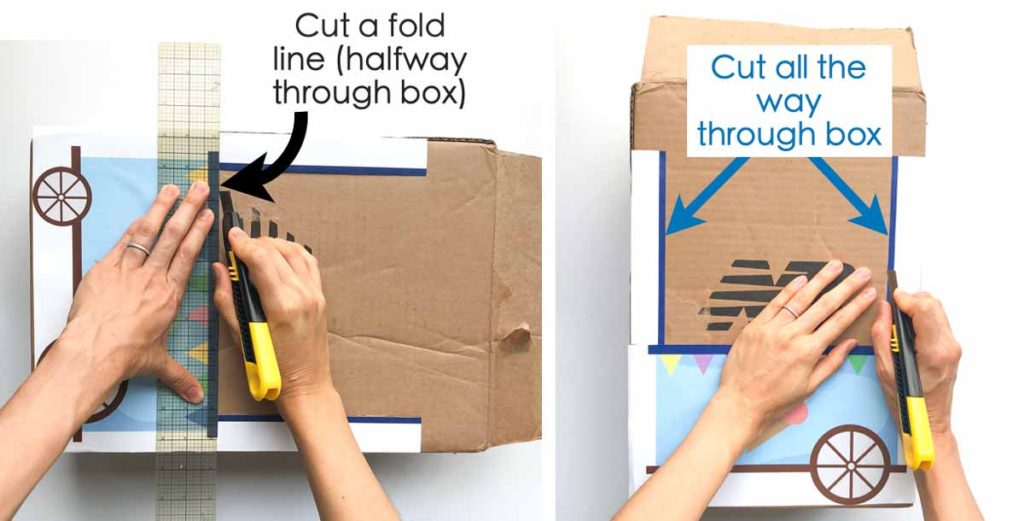
LEFT: Make a slit (don’t cut all the way through box) at the bottom of ice cream cart (black arrow). This creates a fold line to make it easy to fold later on.
RIGHT: Cut all the way through the box on both sides of ice cream cart (blue arrow)
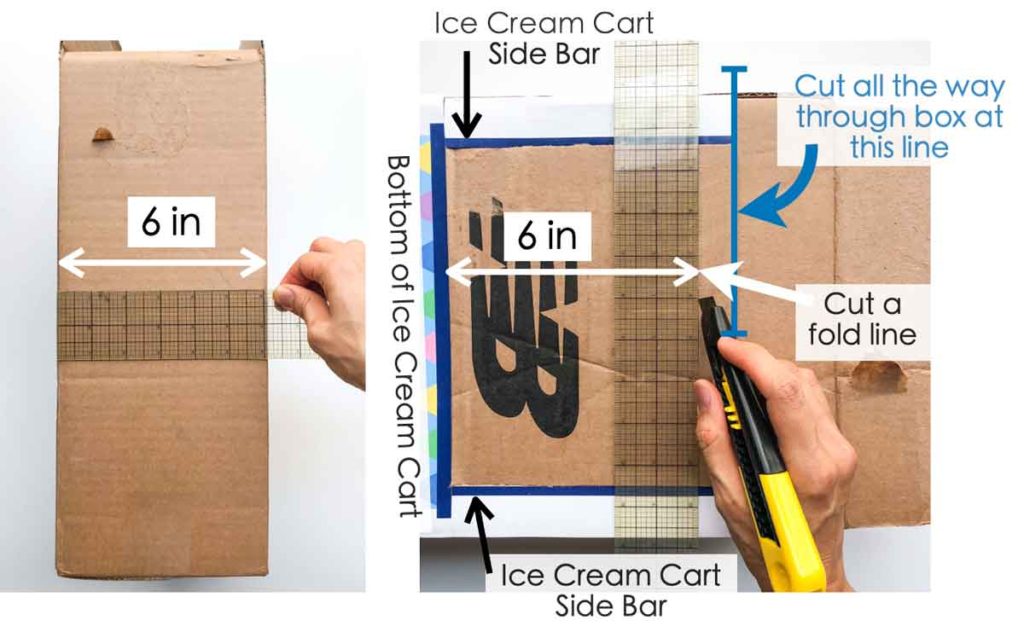
LEFT: First, measure the side width of your box. Mine is 6 inches (15.24 cm)
RIGHT: Next, cut a fold line (not all the way through box) from bottom of ice cream cart that is the same distance as width of your box (white arrow). Next, cut all the way through box at the height of ice cream cart side bars. (blue arrow)
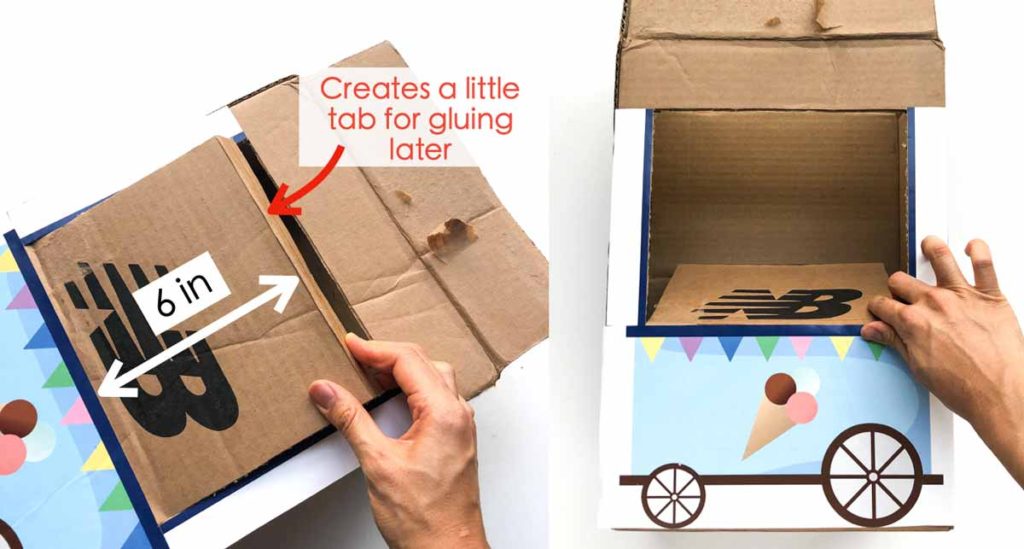
By doing so, this creates a tab for gluing later on (red arrow). Next, fold at fold lines and push the cut out back to meet other side of box.
Gluing Cut out to Other Side of Cardboard Box
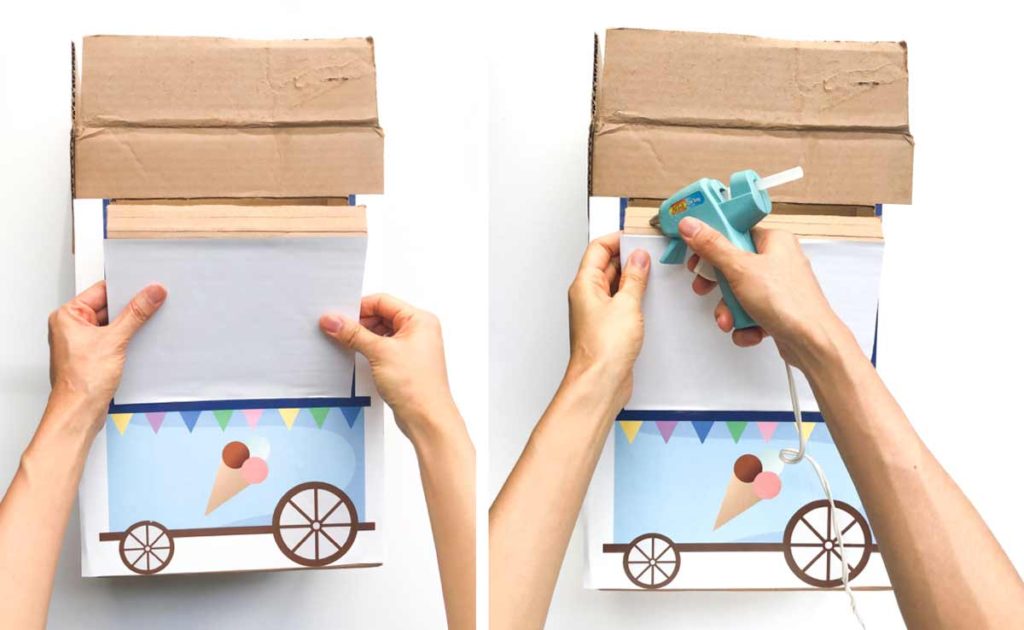
LEFT: Glue a piece of white paper to the cut out to cover the brown cardboard. I used a white sticker paper. You can also paint the cut out as well.
RIGHT: Apply glue gun to the tab of the cut out.
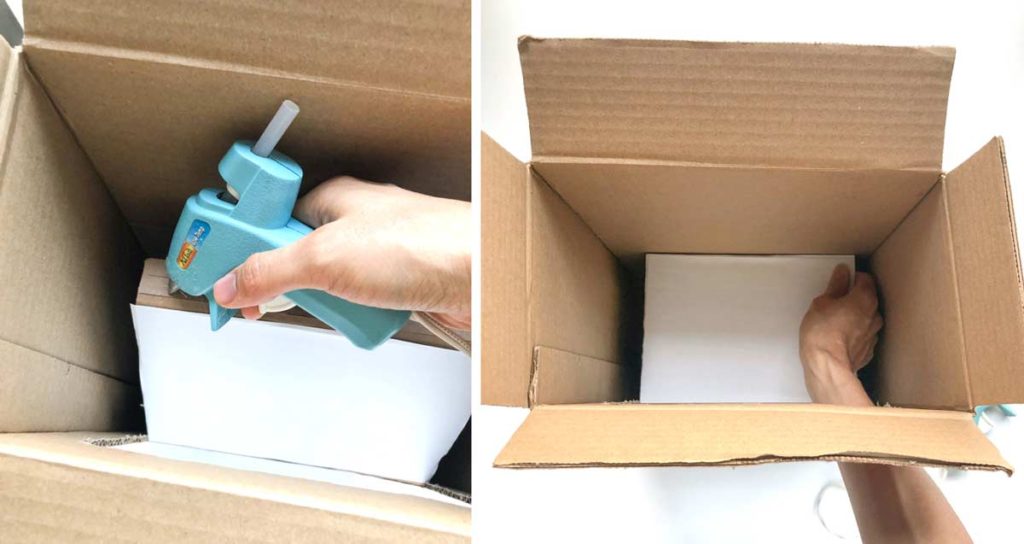
LEFT: Another view of applying glue to the tab.
RIGHT: Glue the tab to other side of box (viewed from top of box)
Cardboard Ice Cream Cart: Finishing Touches
LEFT: Trim off tops of box. Alternatively, you can also fold the close the top of the box with tape. The reason I decided to leave the top open is so the inside of the ice cream cart isn’t so dark.
RIGHT: Next, glue canopy piece to another piece of cardboard and cut it out.
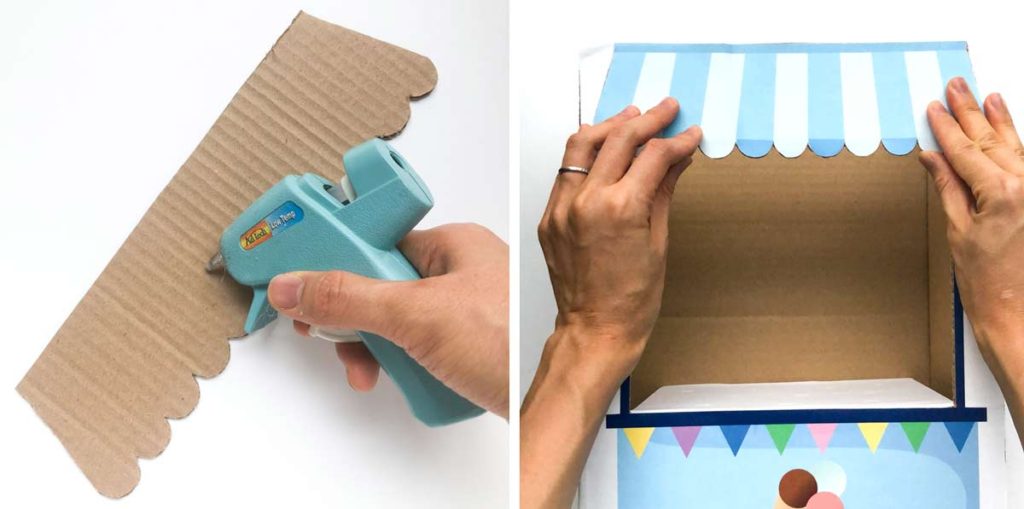
Glue canopy piece to top of ice cream cart. I glued two white pieces of paper on the sides of the canopy to cover the brown cardboard.
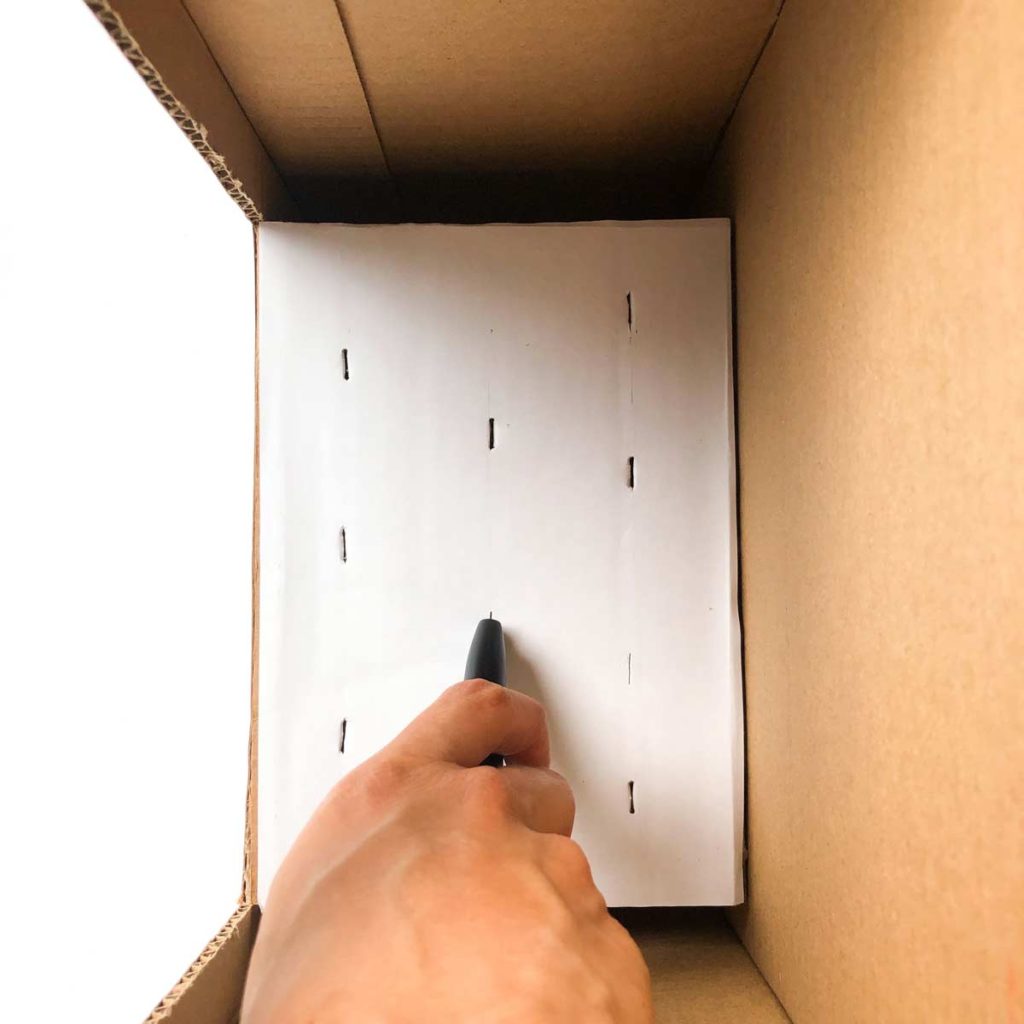
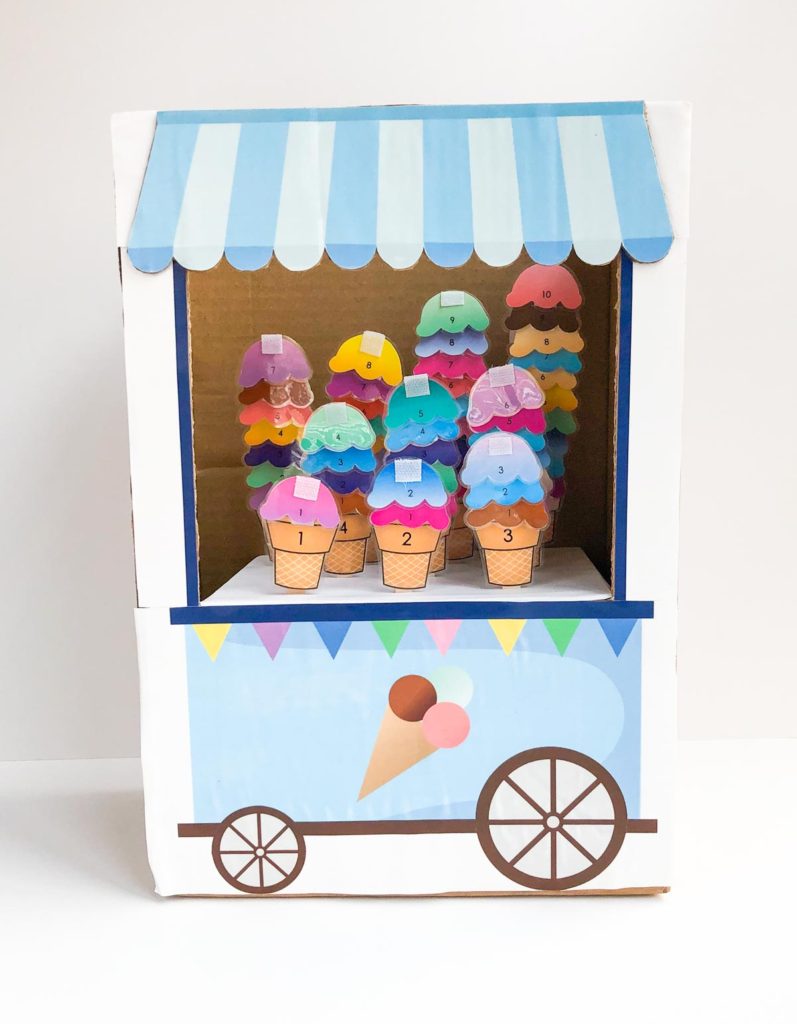
Make 10 slits on cut out of ice cream cart. You can put the slits wherever you like.
I recommend staggering the slits so the back cones don’t get covered by the front cones. For mine, I made 4 slits in the back row, and 3 slits in the middle and front row.
You are now finished with your ice cream cart!
DIY Ice Cream Scoops Counting Activity for Kids
Kids will learn to count and recognize the numbers 1-10 with this cute DIY ice cream scoops and cones activity. Afterwards, put the ice cream cones in an ice cream cart for some pretend play!
Materials
- ICE CREAM COUNTING FREE PRINTABLE
- CRAFT SCISSORS
- UTILITY KNIFE
- GLUE STICK
- GLUE GUN
- POPSICLE STICKS
- VELCRO DOTS
- MOD PODGE (optional)
- WHITE PAINT and PAINT BRUSH (optional) - For painting brown box. Alternatively, you can glue white paper to cover the brown box.
- LAMINATOR
- LAMINATING SHEETS
Instructions
HOW TO MAKE ICE CREAM SCOOPS AND CONES
- Start by cutting out all the ice cream shapes and cones. Laminate them and cut them out.
- Tape the back of the ice cream cones to a popsicle stick. Leave about 0.5-0.75 inch (1.27cm - 2cm) of the stick sticking out of the top of the ice cream cone.
- Put sticky velcro (hook side) on ice cream cone.
- Put sticky velcro on ice cream. Put the loop side on the bottom back and hook side on the top front of ice cream.
HOW TO MAKE CARDBOARD ICE CREAM CART
- Cut out the ice cream cart printable. Use glue stick to glue cart and side bars to the box. Don’t glue the top canopy down just yet. We will do this at a later step.
- Trim off excess paper on the side of box if needed.
- Make a slit (don’t cut all the way through box) at the bottom of ice cream cart. This creates a fold line to make it easy to fold later on.
- Cut all the way through the box on both sides of ice cream cart.
- Measure the side width of your box. Mine is 6 inches (15.24 cm)
- Cut a fold line (not all the way through box) from bottom of ice cream cart that is the same distance as width of your box (that you just measured).
- Next, cut all the way through box at the top of ice cream cart opening.
- This creates a tab for gluing. Next, fold at fold lines and push the cut out back to meet other side of box.
- Glue a piece of white paper to the cut out to cover the brown cardboard. I used a white sticker paper. You can also paint the cut out as well.
- Apply glue gun to the tab of the cut out and glue the opposite side of box. This creates a stand for the ice cream cart.
- Trim off tops of box. Alternatively, you can also fold the close the top of the box with tape.
- Glue canopy piece to a piece of cardboard and cut it out.
- Glue canopy piece to top of ice cream cart (See Note 1).
- Make 10 slits on the ice cream cart stand (See Note 2). Your slits will be approximately the width of your popsicle sticks.
- Finished!
Notes
- I also glued two white pieces of paper on the sides of the canopy to cover the brown cardboard.
- I recommend staggering the slits so the back cones don’t get covered by the front cones. For mine, I made 4 slits in the back row, and 3 slits in the middle and front row.
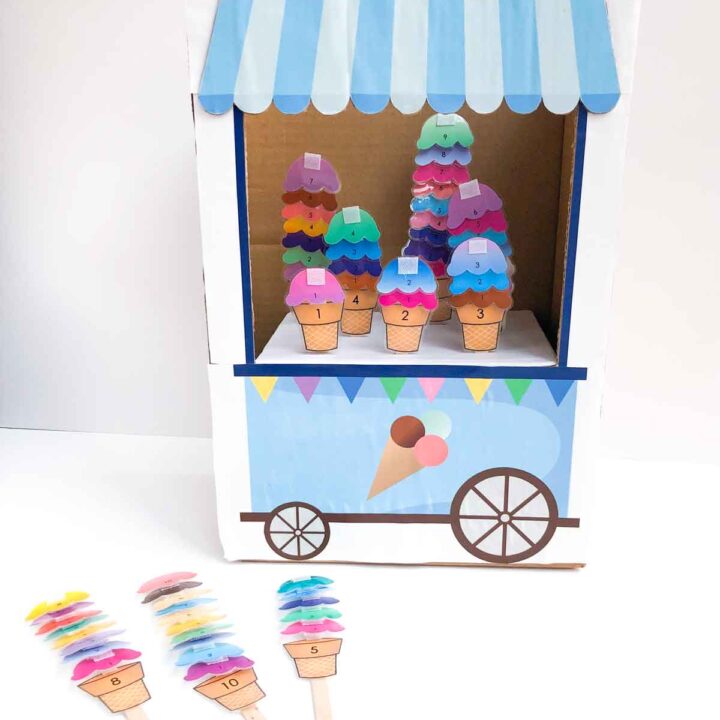
First, count the ice cream scoops and stack them on the ice cream cones. Next, place them into the ice cream cart. You are now ready to sell some ice cream! Yum yum!
This is a perfect kid’s activity for a hot summer day when you just want to stay cool indoors. After you sell some ice cream, be sure to enjoy some frozen treats with the kids as well.
How did your kids play with their new ice cream truck? I’d love to hear the creative ways your child used this activity in the comments below. Kids really have the BEST imagination when it comes to pretend play!

More Free Printable Kid’s Activities You’ll Love!


Hello! Love your material! How do I sign up for the library? When I fill out the necessary information, the subscription button doesn´t activate.
Hi Poliana,
That’s odd! So you can’t click on the “submit” button after you’ve filled out the form?
I love this activity and I want it , I want to send it to me please.
Hi Bushra,
The printable is available in the our Free Resource Library. Subscribe Here to receive the password. Thank you!