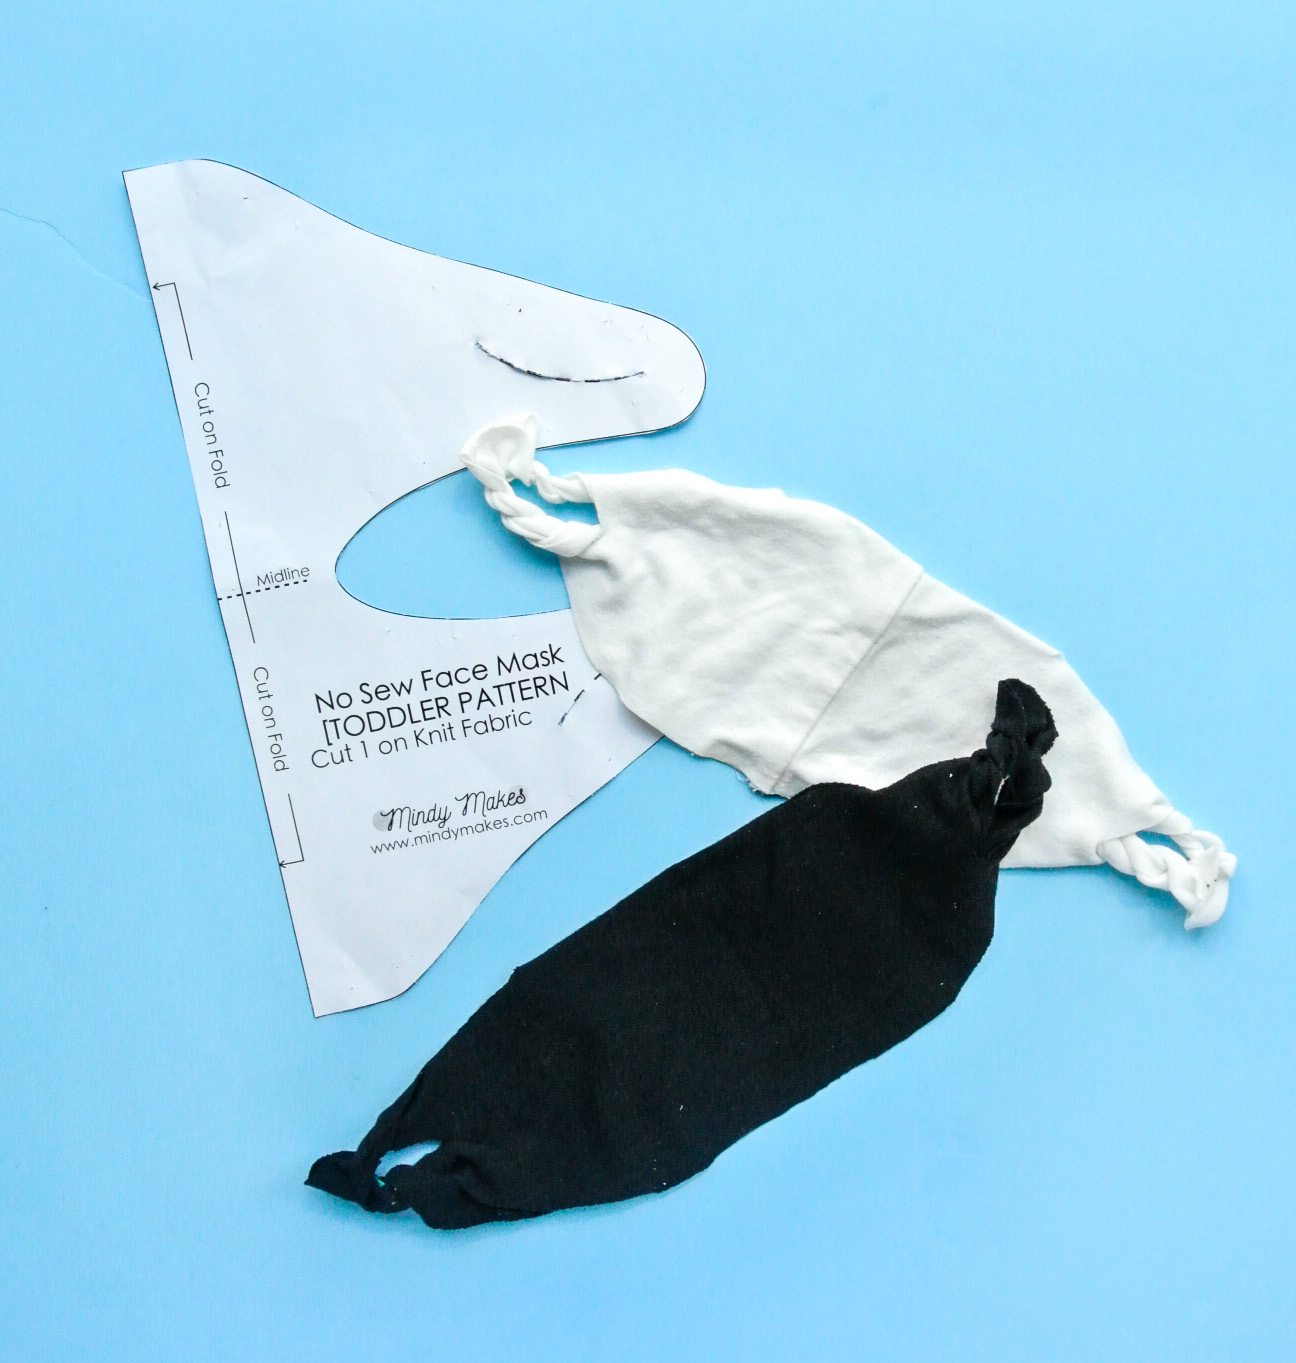
DIY No Sew Face Mask from a T-shirt |Free Pattern for Adults and Kids
As the COVID-19 pandemic rages on, masks have become a regular part of daily life. Back in March 2020 I wrote a post about How to Sew a Face Mask with makeshift elastic. It was updated in May with the addition of a child and toddler face mask pattern. While this mask is extremely simple and requires only two straight stitches, I am also aware of many who don’t own a sewing machine or don’t feel confident sewing. I know this because a few of my friends who own sewing machines (and know how to operate them) have requested masks from me.
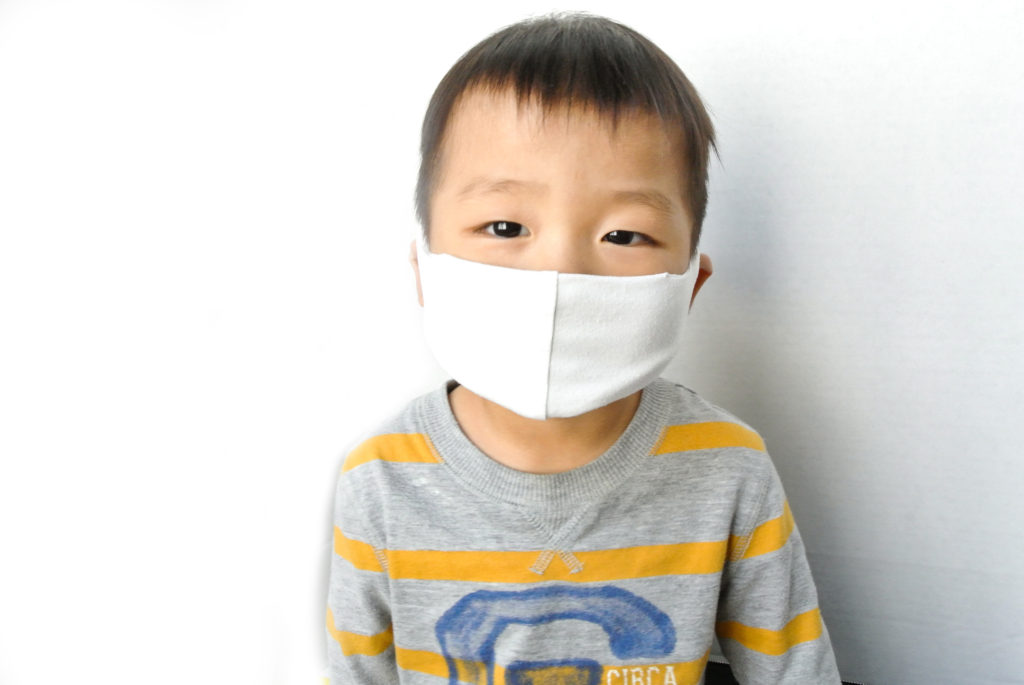
Additionally, now that my toddler is over two, CDC guidelines recommends that he also wear a mask when out in public. I’ve sewed a few face masks for my toddler using my original pattern. However, they either get dirty, drop on the floor or disappear into the land of no return. Because of this, I decided I needed to make some quick and easy face masks for my toddler that I can replace in a pinch if I just can’t find one (or a clean one).
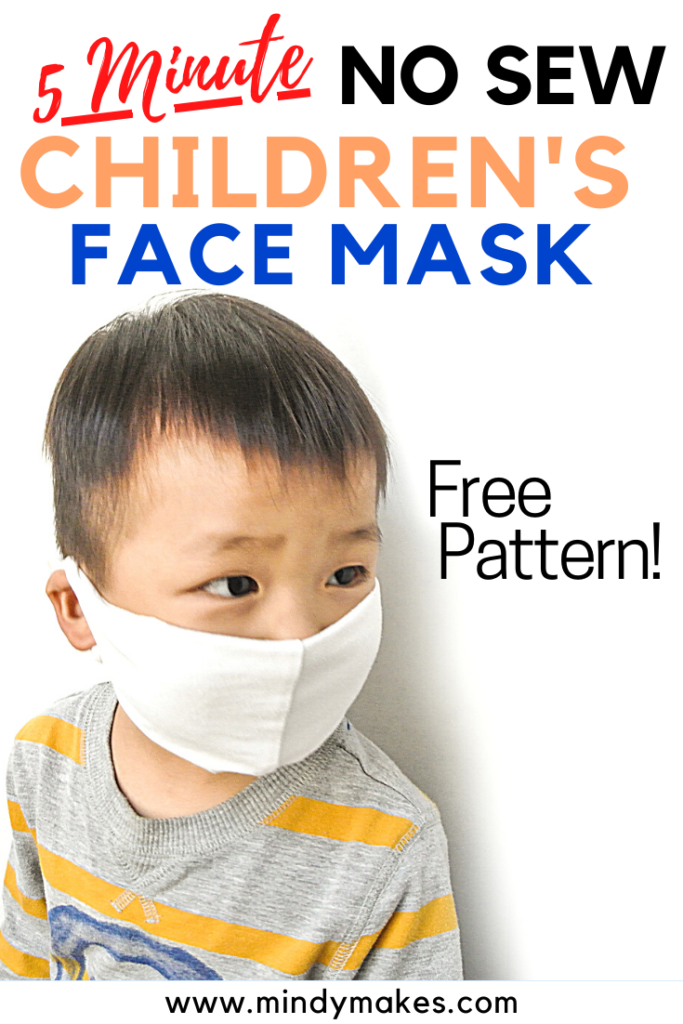
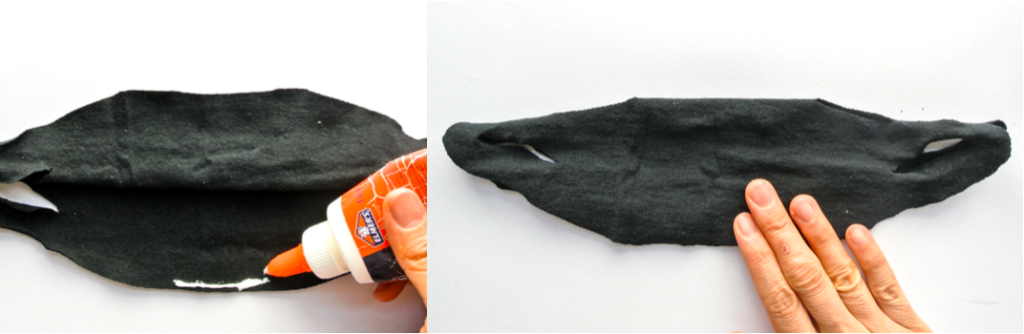
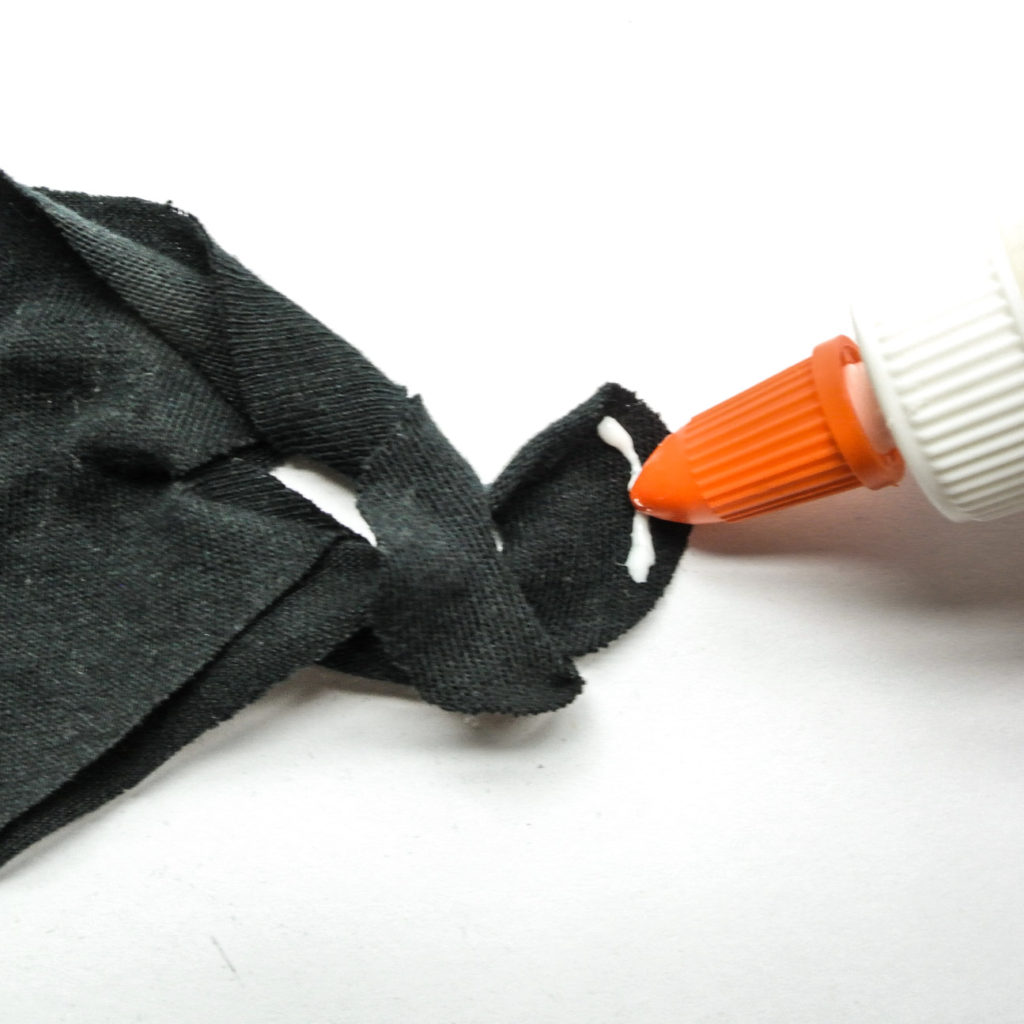
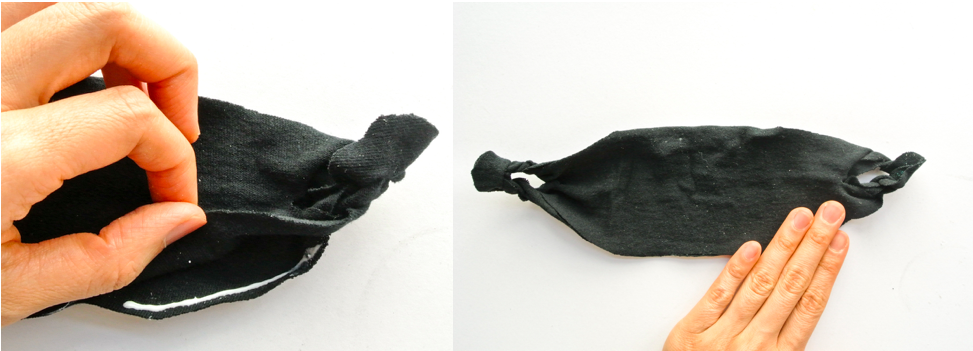
For these reasons I decided to create a no-sew face mask. This face mask is extremely easy, and can be made in 5 minutes from start to finish. At the end of the tutorial I glue the two mask together, which take 24 hours to dry. However, if you need the mask in a pinch, save the gluing part for later.
Also, this face mask is made from a T-shirt. This is great because you don’t have to run to the store to get fabric…I’m sure we have those forgotten T-shirts in the back of our closet!
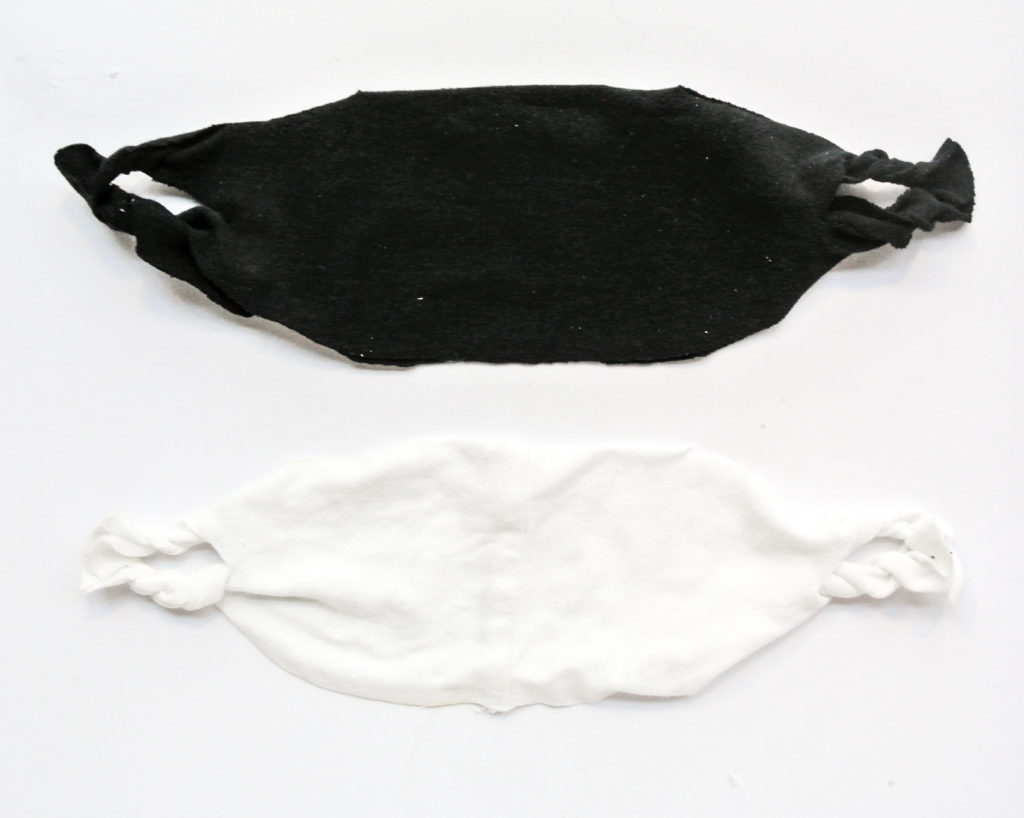
Finally, I created a double layer mask because studies have shown that while one layer of T-shirt only filters out 3.4% of 0.3 micro particles (the size of the COVID-19 virus), a double layer T-shirt was able to filter out 15%!
Do I have to use a T-shirt to make this No Sew Face Mask?
You can use any type of knit material to make this no sew face mask. However, I recommend using a T-shirt that is 95% polyester/rayon and 5% spandex versus 100% cotton. According to this study, T-shirts consisting of 95% polyester and 5% spandex filtered out 7% of 0.3 micron particles (the size of the Covid-19 virus) versus 100% cotton T-shirts which only filters out 2% of 0.3 micron particles. Nevertheless, 100% cotton T-shirts are still a good option for homemade face masks as they are comfortable on the face, breathable, and do the job of filtering out virus particles.
Can I use other materials to make this No-Sew Face Mask?
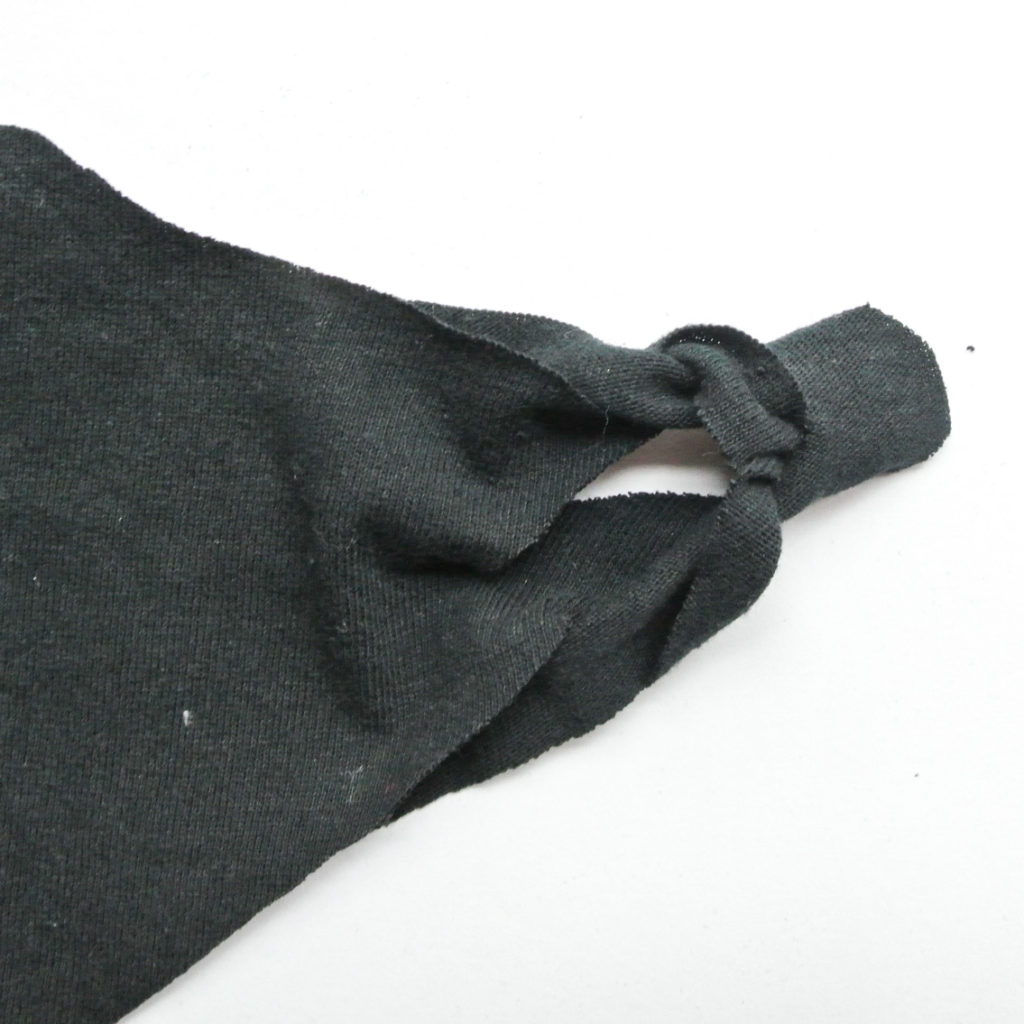
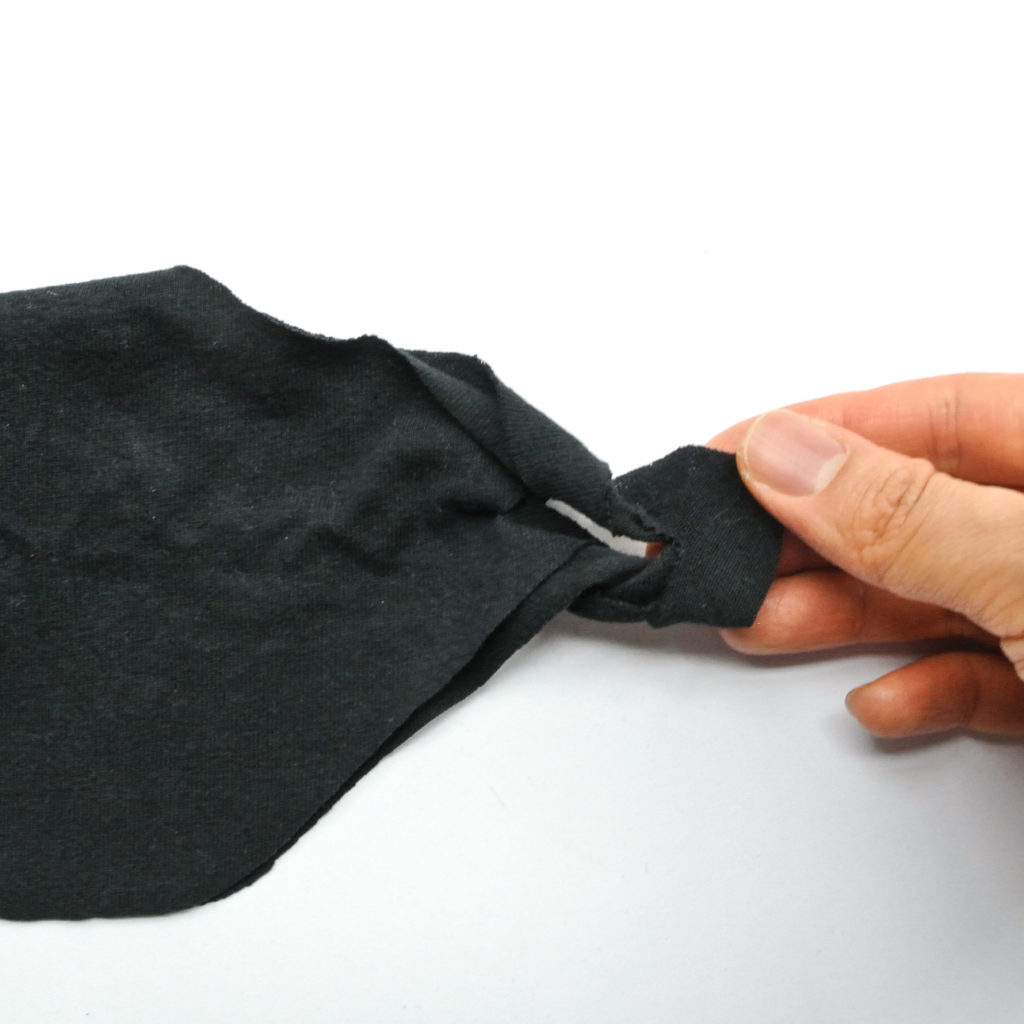
Because the ear loops of this face mask is part of the mask itself, you MUST use a stretchy fabric. Otherwise you won’t be able to pull the ear loops over the ears. The fabric itself acts as the ear loop elastic. Also, stretchy fabrics such as knit do not fray. This is important since you will not be sewing and turning the fabric inside out, which hides the raw edges to prevent fraying. If you want to use other materials such as quilters cotton to make a DIY cloth face mask, I recommend checking out FACE MASK PATTERN FOR ADULT AND CHILDREN.
What sizes does the No Sew Face Mask Pattern come in?
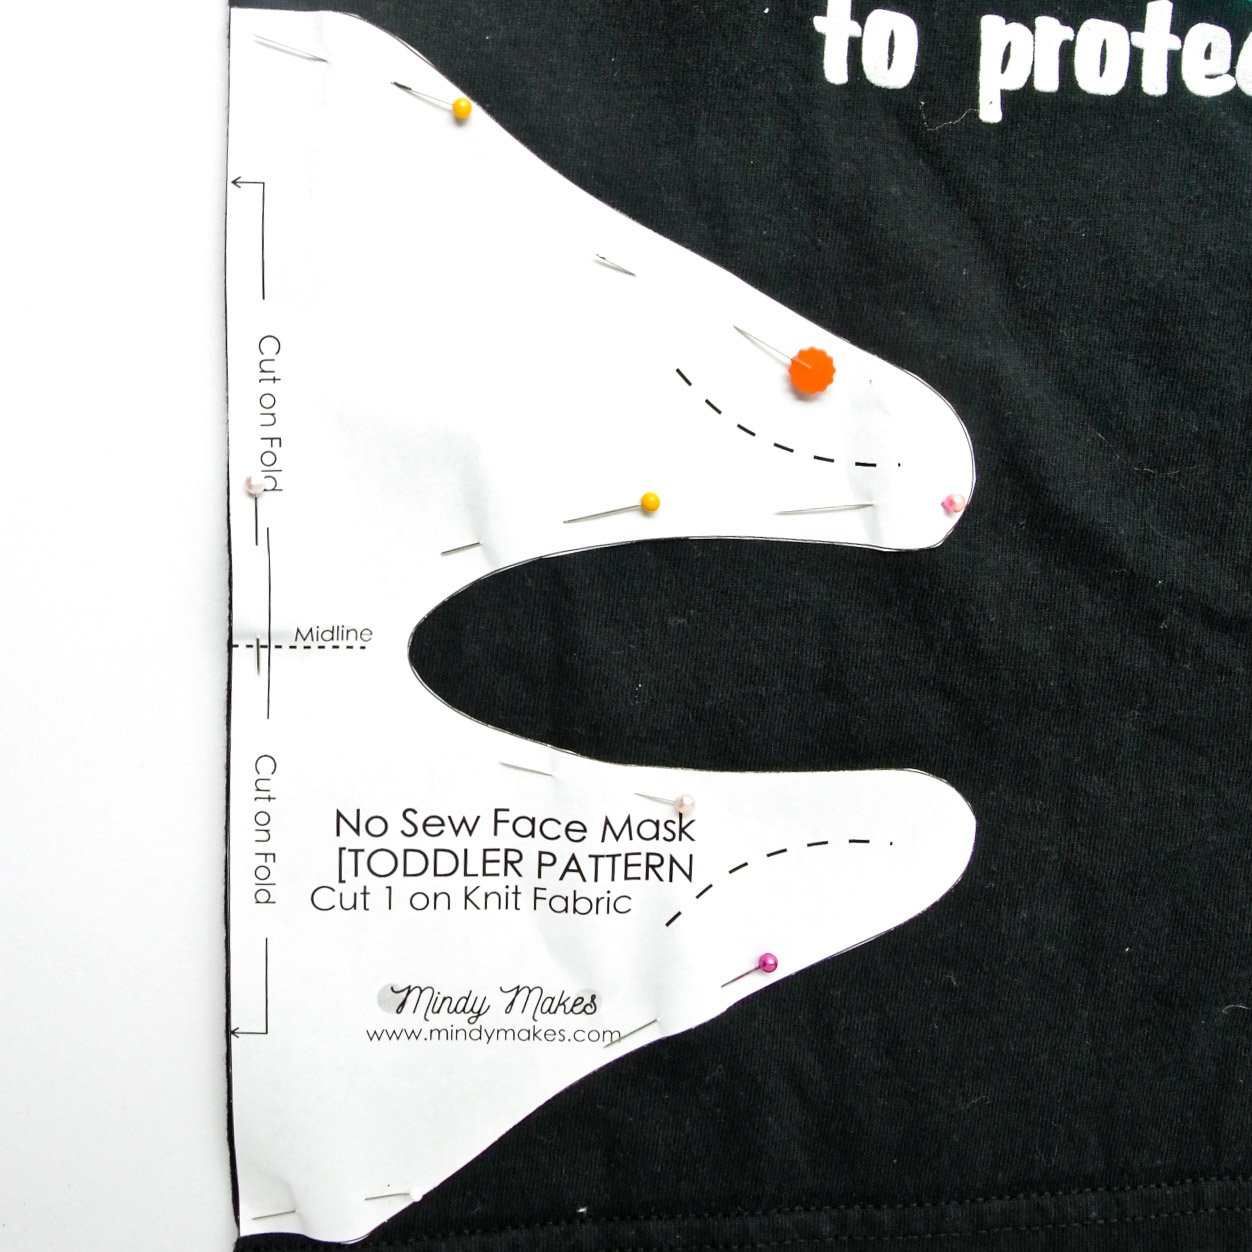
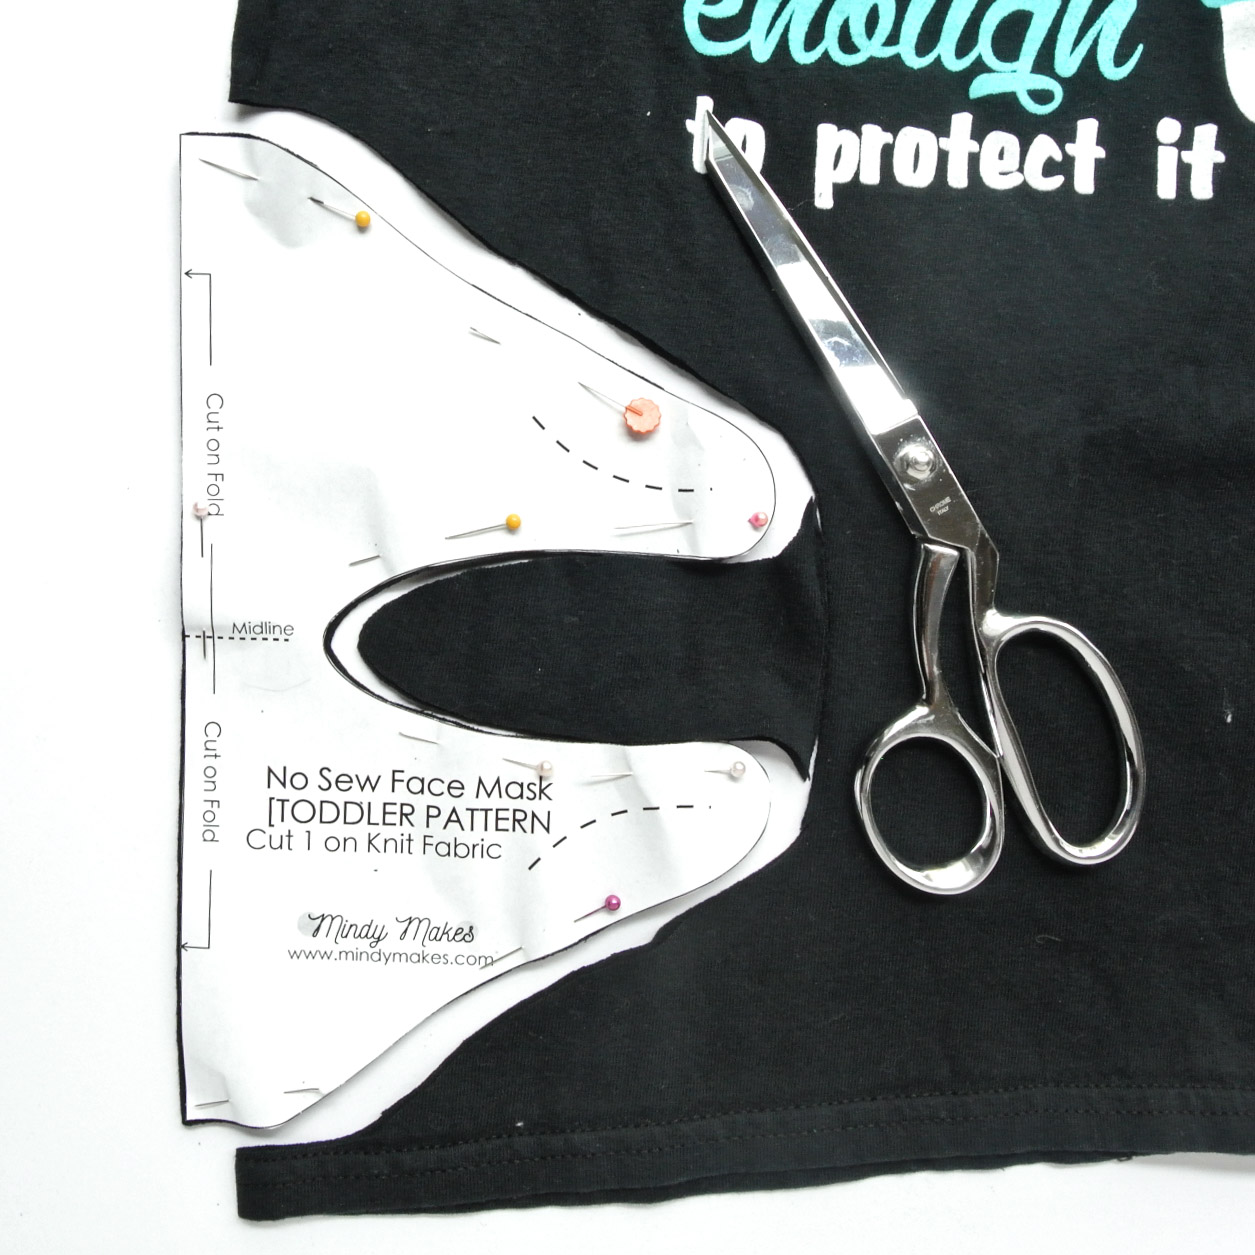
My Free No Sew Face Mask Pattern (available in my free resource library) comes in 3 sizes:
- Adult
- Child (5-12 years)
- Toddler (2-4 years)
The fit of these face masks will vary, especially depending on the stretch of the T-shirt you use. If you are making this face mask for the borderline ages (10-12 year old and 4 -5 year olds) or you are a petite adult, I would start with the smaller size first. The good thing is because the face masks are made from knit fabrics, they are also very forgiving in terms of size.
How Do I Put a Face Mask on?
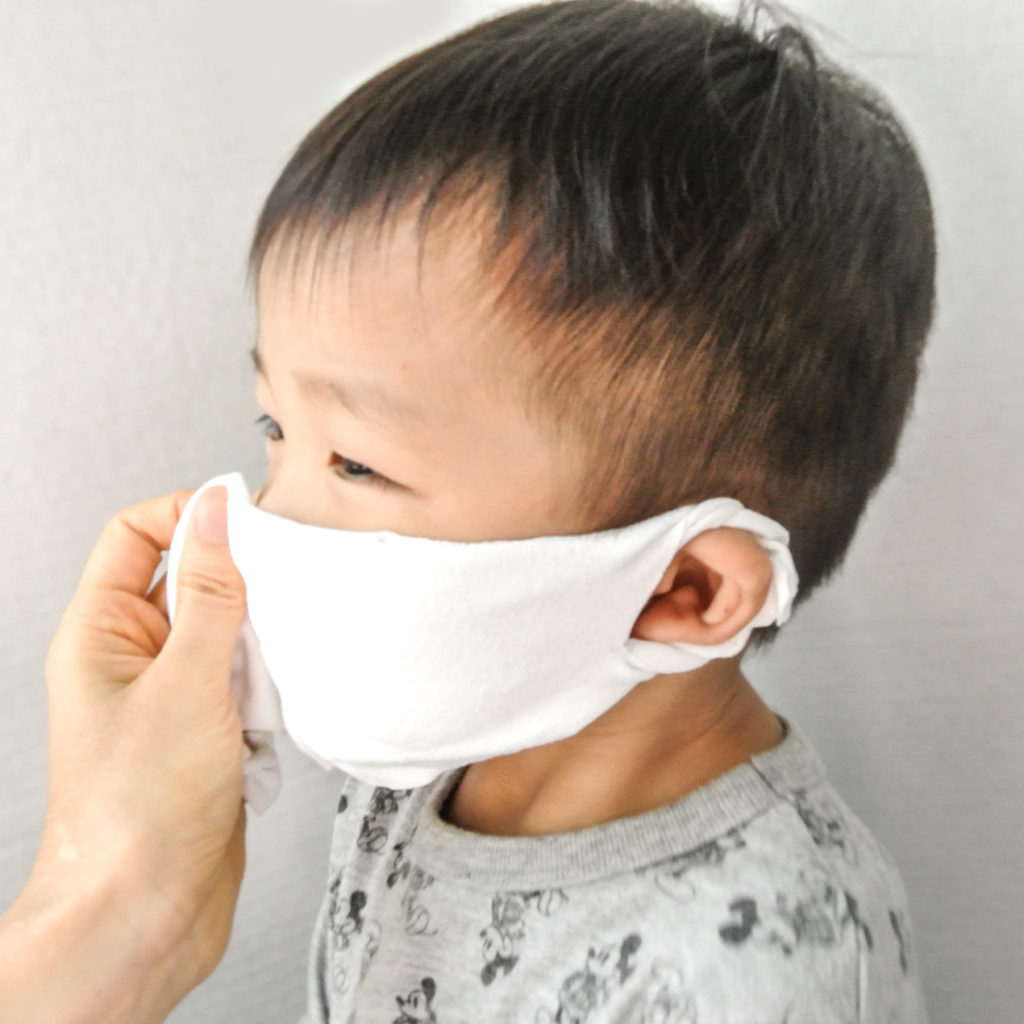
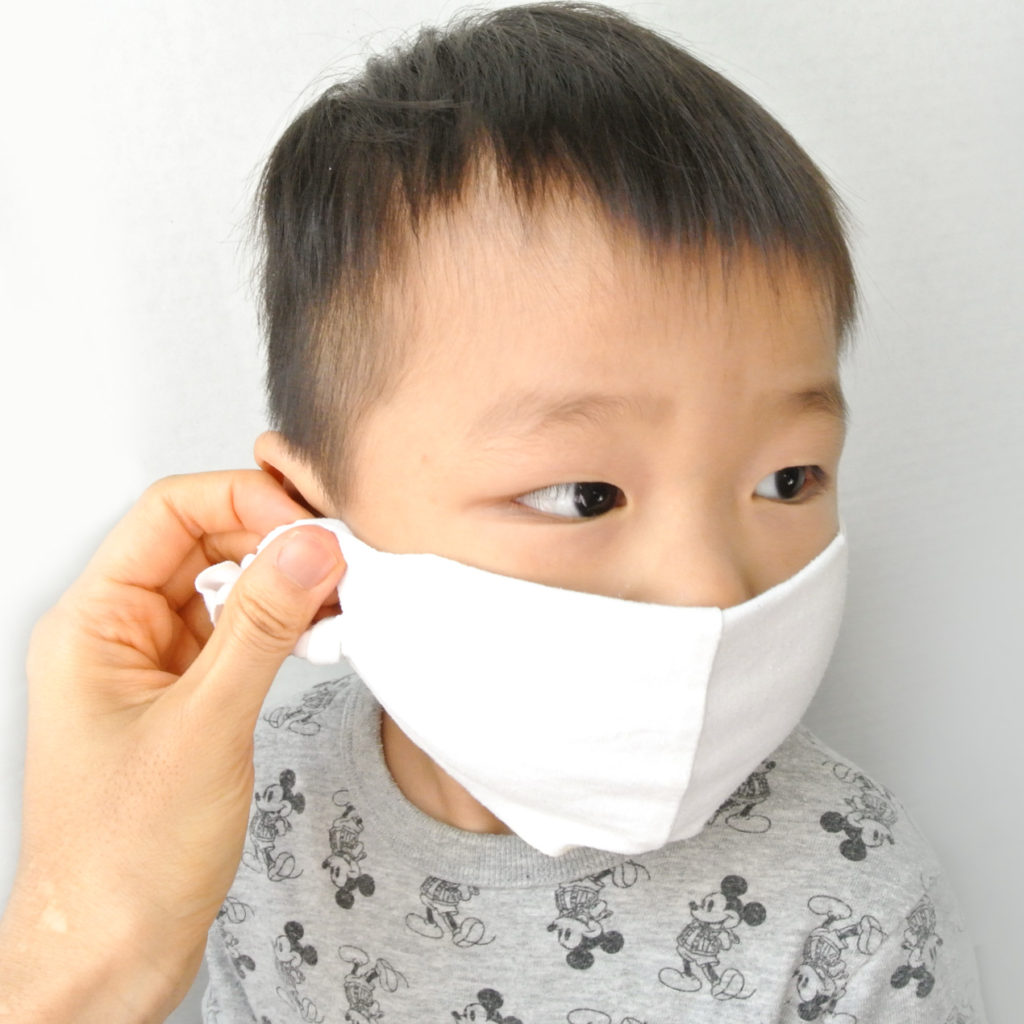
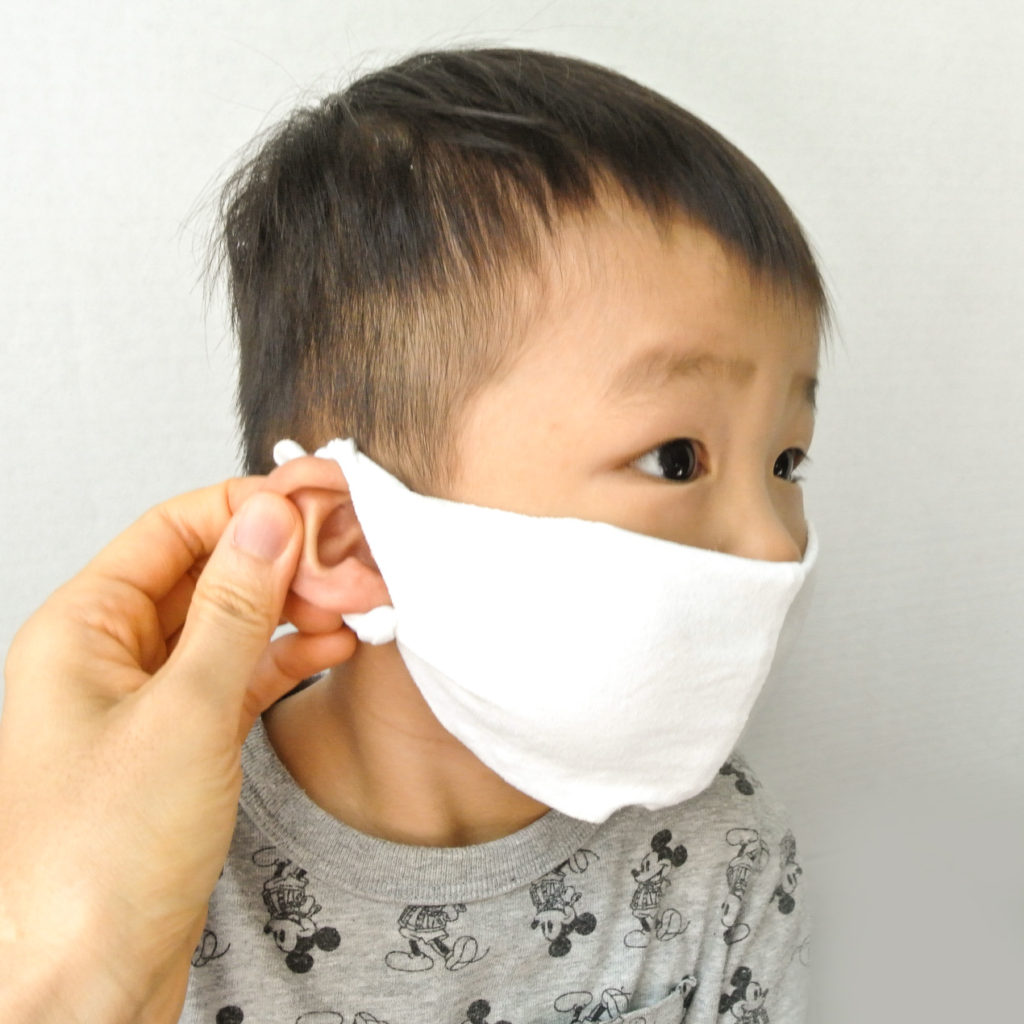
2. Pull mask across the face over the nose.
3. Open ear loop on other side and pull it over the other ear.
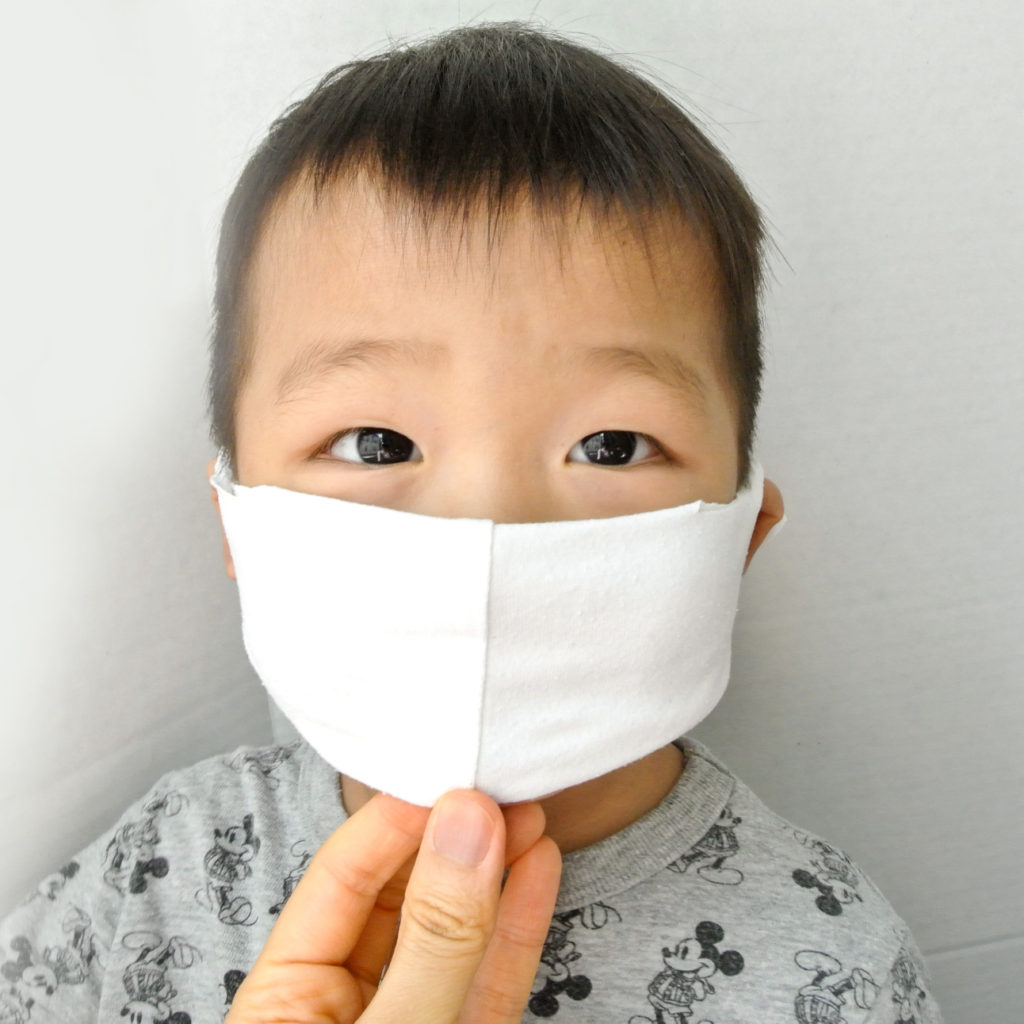
4. Pull top of mask so it completely covers the nose. Adjust bottom of face mask by tucking in fabric if necessary.
For more information about keeping our children safe during this time, check out CDC’s guide to Help Stop the Spread of Covid-19 In Children.
How Do I Safely Take off my Face Mask?1
- Remove face masks from the ear loops and handle mask only by the ear loops
- Fold ear loop corners of face mask in half so that the outside of the mask is now on the inside.
- Put used face mask in washing machine
- Make sure not to touch your eyes, nose, and mouth when removing face mask. Wash your hands immediately after removing face mask.
How Do I Wash my Face Mask?2
- It is safe to wash your face mask with the rest of your laundry
- Wash your face mask in the washing machine on the warmest setting that is allowable for the T-shirt/Knit fabric you chose to use
- Dry your face mask in the dryer on the highest setting allowable for the T-shirt/Knit fabric you used and dry completely.
- To air dry, lay flat and allow to completely dry. If possible, allow face mask to dry in the sun as UV light helps kill virus particles as well.
MATERIALS/TOOLS:
- My Free No Sew Face Mask Pattern (available in my free resource library) – get the password by subscribing. I promise no spam, just updates on new projects I’m working on!
- T-shirt- preferably one that is 95% polyester/rayon and 5% spandex, but 100% cotton works as well.
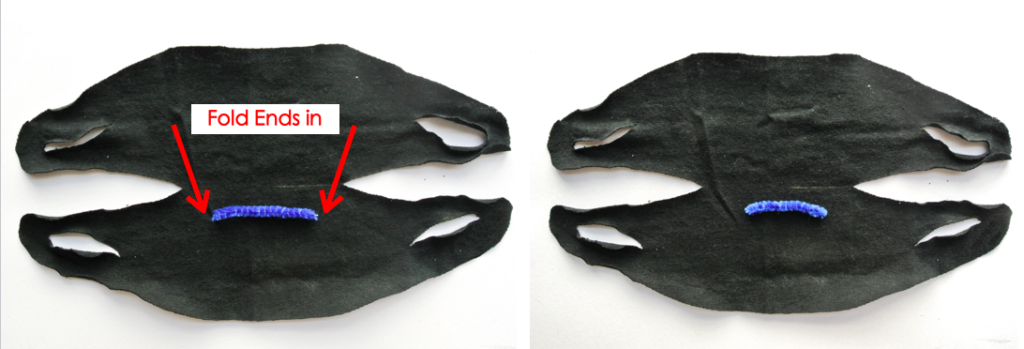
- (optional) pipe cleaner/wire – for nose bridge
- Craft Bond or any fabric glue. I like craft bond because it is still flexible after dried. This is good for cloth masks so it can bend with the curve of your face.
- Fine pins
- Fabric Scissors (I use Gingher 8” Dressmaker Shears, my absolute FAVORITE!)
- (optional) Embroidery scissors
NOTES:
If you decide to add the wire for nose bridge, this will help you remember which side is the outside of the face mask when you pinch the wire over the nose. However, if you decide not to add a nose bridge, I recommend using a sharpie to mark the inside of the mask (perhaps your initial) so you know which side is the outside when you reuse the mask.
- Taken from CDC’s “How to Wash a Cloth Mask Covering” https://www.cdc.gov/coronavirus/2019-ncov/prevent-getting-sick/how-to-wash-cloth-face-coverings.html
- Taken from CDC’s “How to Safely Wear and Take off a Cloth Mask Covering” https://www.cdc.gov/coronavirus/2019-ncov/prevent-getting-sick/how-to-wear-cloth-face-coverings.html
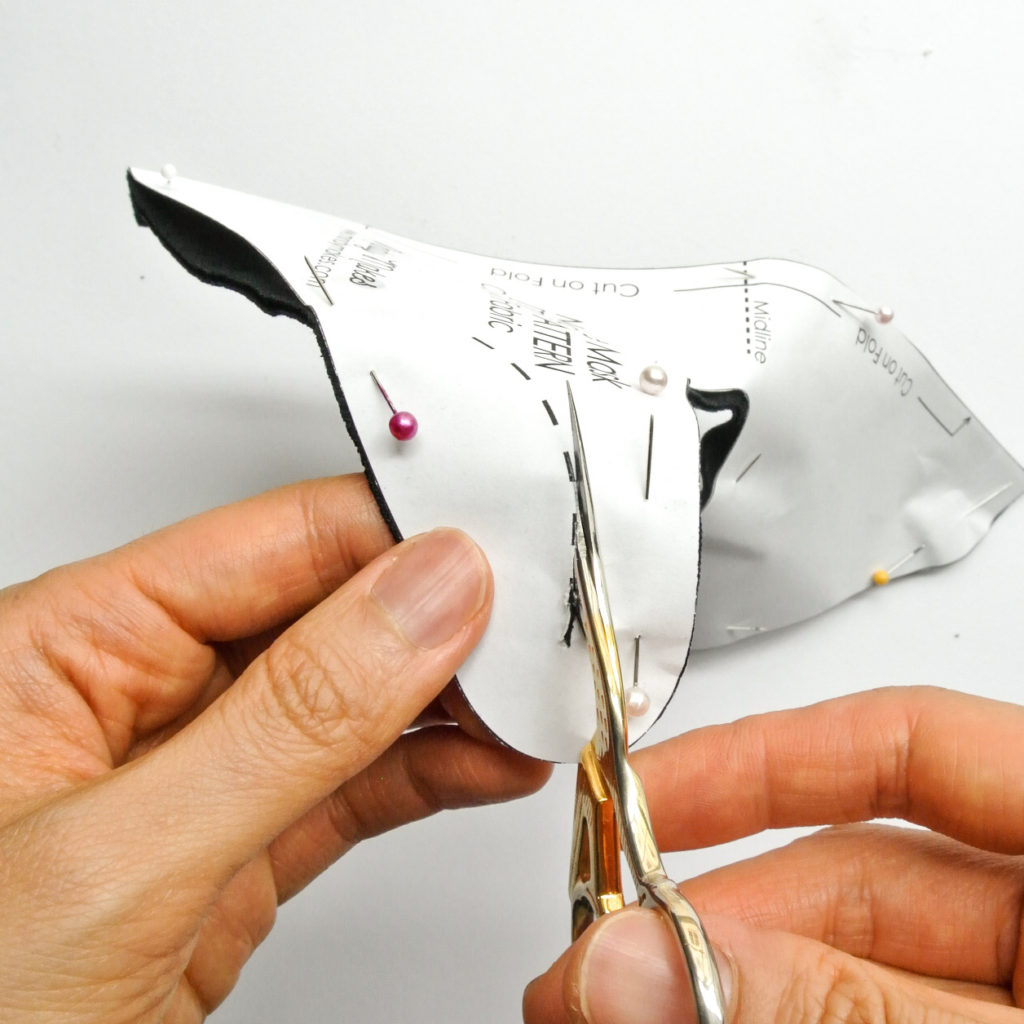
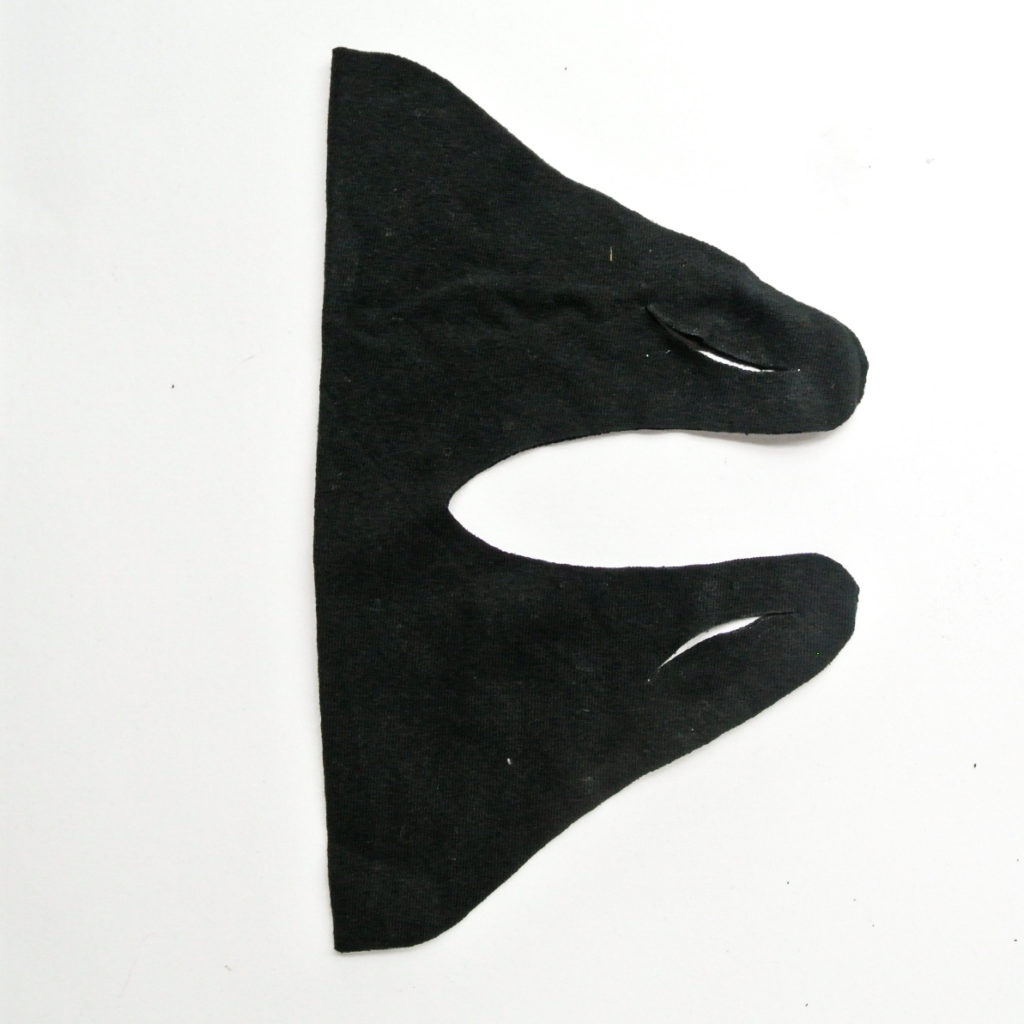
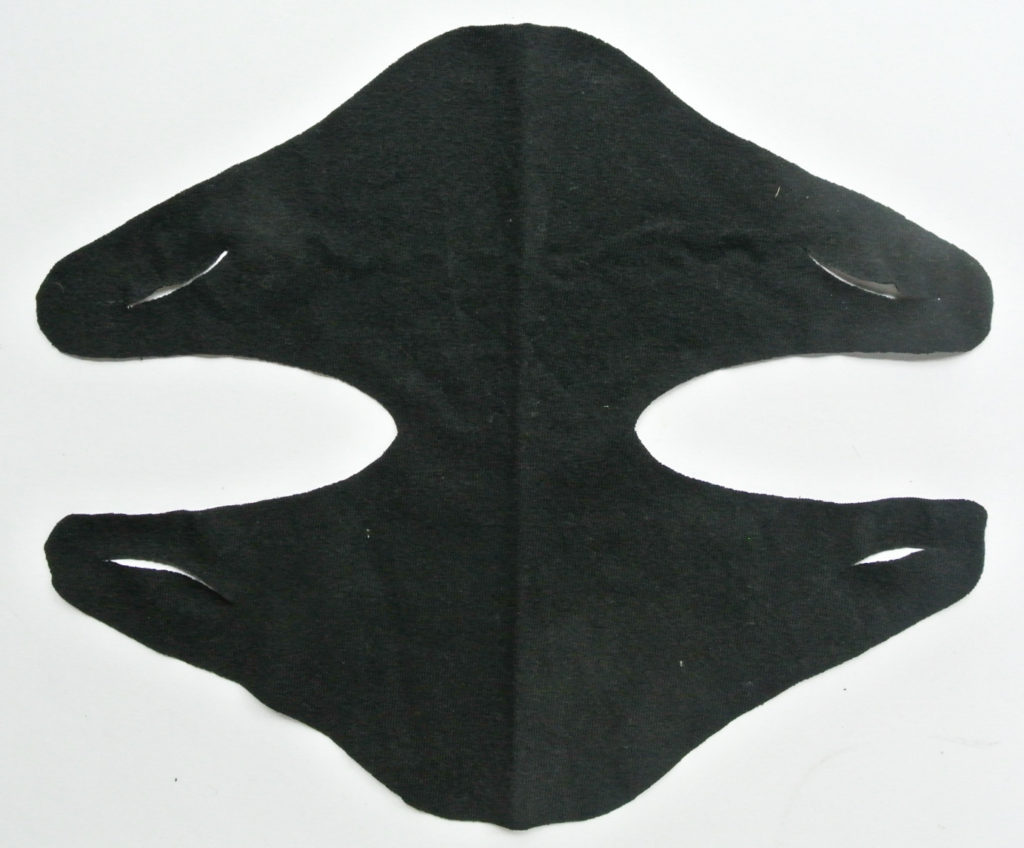
HOW TO MAKE NO-SEW T SHIRT MASK
How to Add Nose Wire to Face Mask (optional)
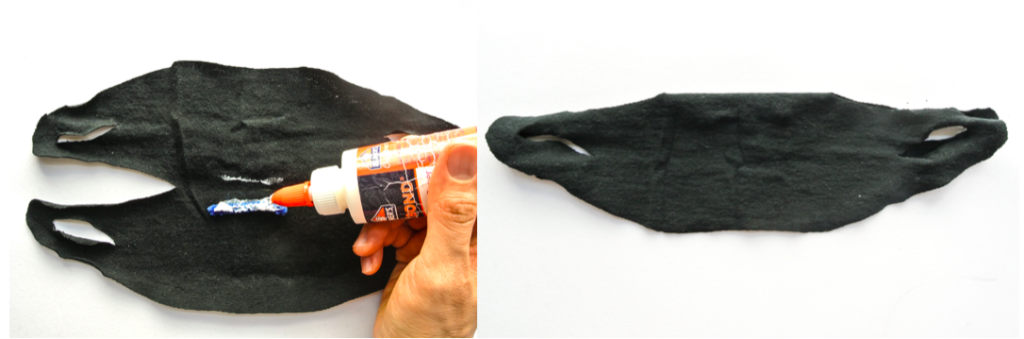
How to Finish No-Sew Face Mask
Toddler ready to visit the store while practicing social distancing!
Let me know in the comments below if you made this. Happy No Sew Face Mask making 🙂

So handy and easy to make!