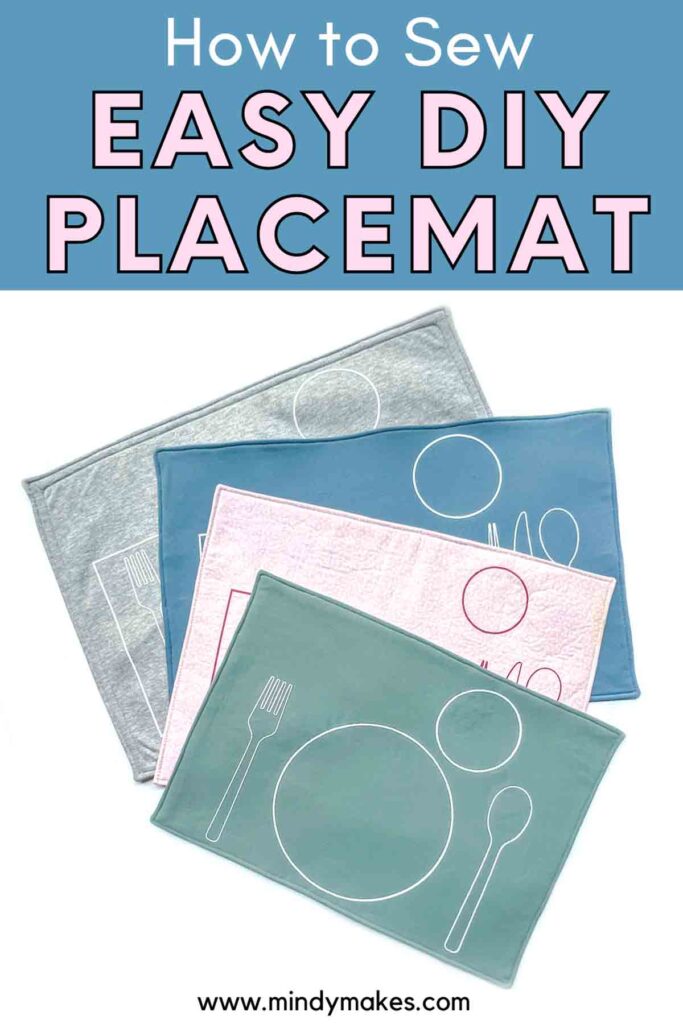
The Easiest DIY Placemat (Free Pattern in 4 Sizes)
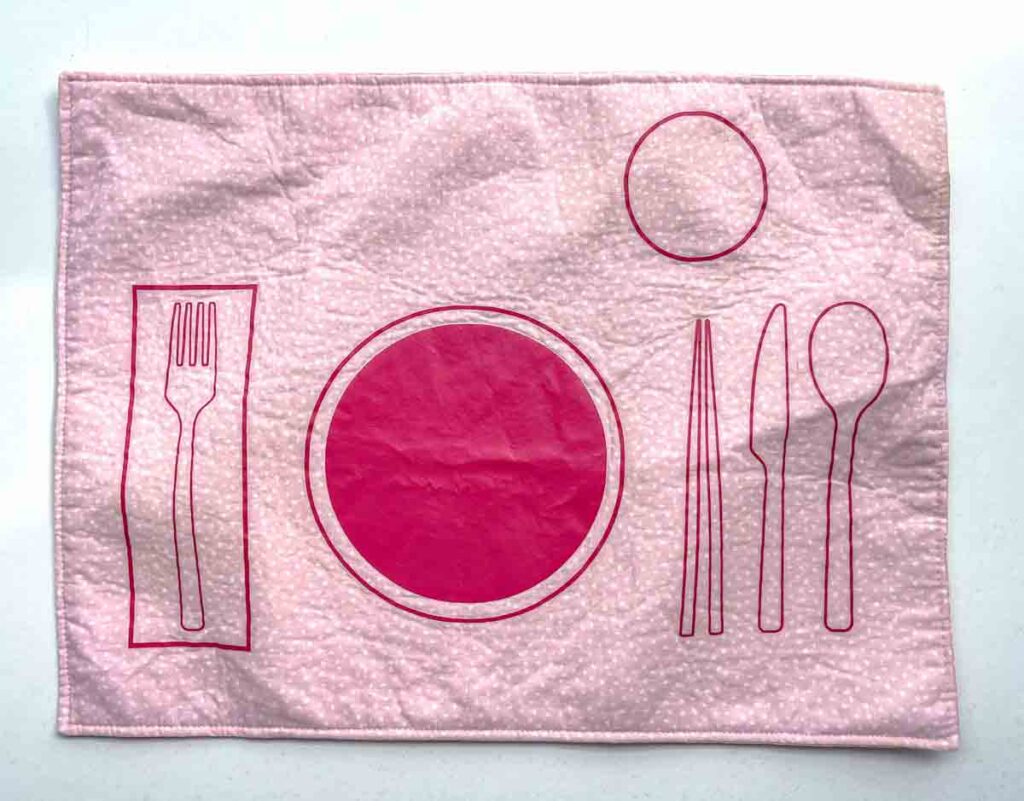
These simple DIY placemats are super fun and easy to sew. Add a table settings heat-transfer-vinyl and turn it into a Montessori placemat for kids!
This post may contain affiliate links. Please read my disclosure policy for details. As an Amazon Associate, I earn from qualifying purchases.
Always wondered “how do I make my own placemats”? Well, today I will be showing you how to make the easiest diy placemat. This project perfect ever if you are a beginner.
Additionally, I’ve included a tutorial (and the SVG file) to show you how to add HTV to the placemat to turn it into a montessori placemat! This SVG file includes a fork, a plate, spoon, and cup to help kids with their table settings.
Otherwise, make these as is and you will have placemats in no time!
What is a Good Size for a Placemat?
A good size for a placemat depends on the size your table and how many people are sitting at the table. It will also depend on the size of your dinner plates and the number of utensils you plan to place.
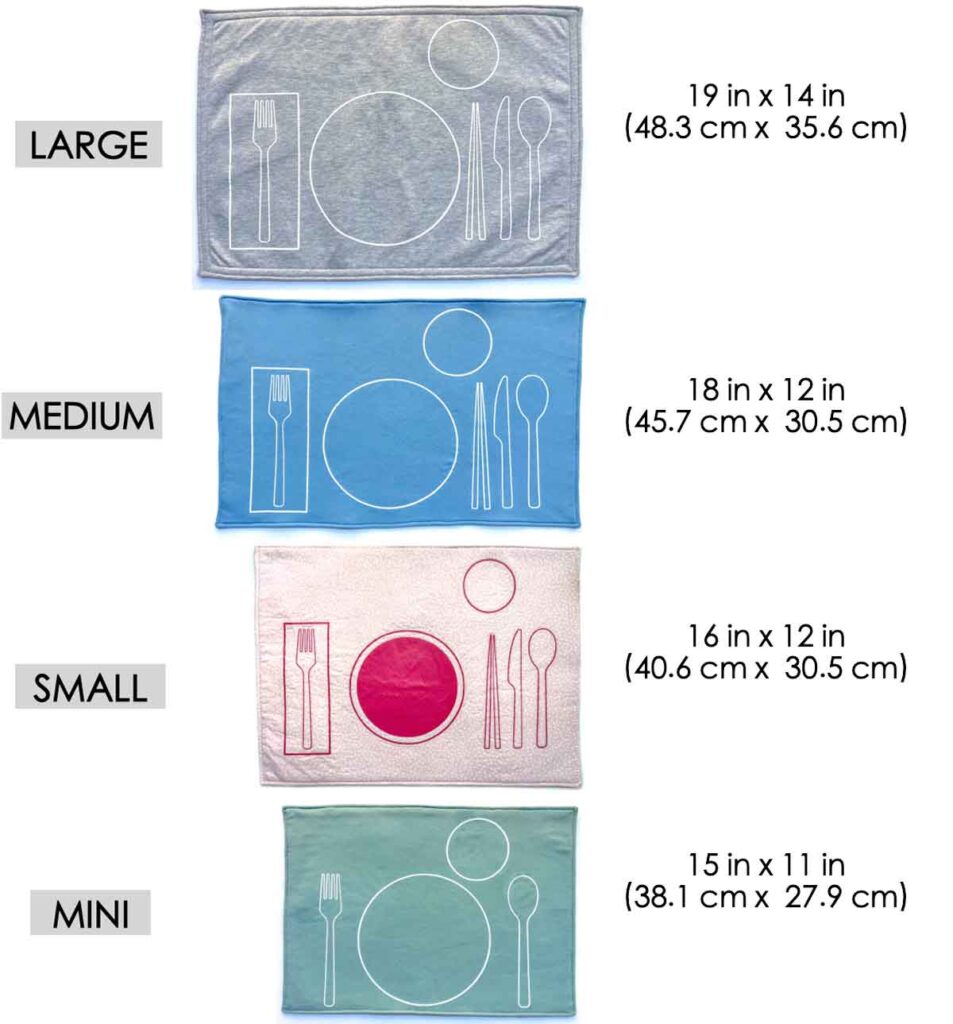
For rectangular placemats, the typical size dimensions falls between between 15-20” wide and 11-14” tall. A standard placemat size sold at your local store measures 19” x 14” or 20” x 14”.
Smaller sized rectangular placemats (for smaller tables or for kids) may have measurements of 19” x 10”, 16” x 12” or 15” x 11”.
Size of Placemats
For this sewing tutorial, I will be showing you how to make a 15” x 11” sized placemat. This size is perfect for kids as it fits really well on a small kids table.
Furthermore, it’s also a good size for adults to enjoy a quick and easy meal (i.e. a bowl of cereal for breakfast, or a bowl of instant ramen).
If you want to make other sizes of placemats, I have also included the patterns for making 3 additional sizes: 16″ x 12″ (small), 18″ x 12″ (medium), and 19″ x 14″ (large).
How to Make Montessori Placemats
To make these into montessori placemats, all you have to do is cut out the fork, plate, spoon, and cup images on HTV (heat transfer vinyl). Then, apply the HTV to the fabric before you sew.
I show you step-by-step exactly how to do this in the tutorial below.
The different sized placemat images (plate, fork, spoon, etc) are available in MY SHOP. You will receive them in 4 different formats: SVG, EPS, PNG, and STUDIO3.
Additionally, you will receive the ad-free, printer friendly version of the Pattern and Tutorial in PDF format. This way, you can easily reference the tutorial each step of the way as you sew.

What Batting to Use for Placemats?
There are many types of batting that can be used for placemats. Common battings that are suitable for placemats include fleece batting, cotton batting, and polyester batting.
In general, choose a batting with a low loft. This is a good choice because it supplies padding and softness to the placemat without adding too much bulk.
If you plan to place hot foods or beverages on your placement, choose a heat resistant batting. Insul Bright by the Warm Company is a good choice for this purpose. The polyester fibers resist conduction while its metallic film reflects hot and cold energy away.
If you want to make a microwaveable placemat, use 100% cotton batting. Warm-N-Zap by Pellon is good choice because it is designed to be microwaveable. Just make sure that you also use 100% cotton fabric and 100% cotton thread to make the rest of the placemat.
Fleece Batting
Fleece batting, also called project fleece, is a lightweight polyester batting with a soft drape. It comes in two forms, fusible and sew in (see discussion below).
Additionally, fleece batting is a good choice for placemats because of its softness and pliability. Thus, you can easily fold or roll up your placemats for easy storage when not using.
Fusible Fleece
Fusible fleece is my recommended choice of batting to use for placemats. It is low loft and can be adhered to fabric via heat activation.
The heat activated adhesion means you don’t have to thread baste or pin the batting to the fabric, which saves time.
When choosing a fusible fleece batting, make sure it only has a single side of fusible (as opposed to two). Pellon 987F fusible fleece is a great choice for this project as it will add softness, body, and stability to your placemat.
Additionally, fusible fleece is made from 100% polyester, which means it won’t shrink with wash. The fusible part of the fleece will wash off. Therefore, if you did not quilt your placemat, it is important to do a final top stitch to keep the fleece in place.
The tutorial below shows you step-by-step exactly how to use fusible fleece for your placemat.
Sew in Fleece
Sew in fleece is also another good choice as batting for placemats. Just like the fusible fleece, it is low loft and does not shrink with wash.
In order to use sew-in fleece, you will first need to machine or hand baste it to your fabric. Alternatively, you can use basting adhesive, which is a temporary spray-on adhesive.
You can also use regular fleece fabric such as polar fleece as a batting option.
This is great to use up extra fleece fabrics you may have, or even to up cycle an old fleece jacket or sweater.
Polyester Batting
Polyester batting is similar to fleece batting in that both are made from the same fibers (polyester).
The only difference between polyester and fleece batting is in the way it is made.
The process of making fleece batting involves needle punching the polyester fibers together to form a soft sheet of fleece.
On the other hand, polyester batting is made via heat bonding the polyester fibers together.
Whether to use polyester or fleece batting is truly a matter of personal preference. However, polyester batting gives you the option of low, medium, and high loft, which is essentially the thickness of the batting. The higher the loft, the thicker the material.
For our purposes of making a placemat, a low loft polyester batting is the preferred choice.
Similar to fleece batting, polyester batting comes in two forms: fusible and sew-in. As mentioned earlier, fusible is preferred e as it makes this a quick and easy sewing project.
Cotton Batting
Cotton batting is another great option for placemats. A diy placemat made with cotton batting can double as pot holders and mug rugs to shield your table top from hot soups and hot drinks.
Additionally, if you use 100% cotton fabric and 100% cotton thread for your diy placemat, the placemat becomes microwavable! This is very handy if you want to be able to microwave the placemat along with your food.
Then, after your food is heated, you can take it out of the microwave with the placemat as a pot holder.
Learn all about How to make a Microwave Bowl Cozy. Then come back to this tutorial and use the same 100% cotton materials to make your microwavable placemat!
How Much Fabric Do I Need for 6 Placemats?
To make 6 standard 19” x 14” diy placemats, you will need about 2⅔ yards of fabric. This fabric amount applies whether you use 44” wide, 57” wide, or 60” wide fabrics.
For six 18” x 12” diy placemats, you will need about 2½ yards of 44” wide and 57” wide fabrics. On a 60” wide fabric, you will need about 1¾ yards of fabric. This is because on a 60” wide fabric you can cut 3 pieces of placemats across the width.
To make six 16” x 12” diy placemats, you will need about 2⅓ yards of 44” wide and 57” wide fabrics. On a 60” wide fabric, you will need about 1¾ yards of fabric.
Finally, to make six 15” x 11” diy placemats, you will need about 2¼ yards of 44” wide and 57” wide fabrics. On a 60” wide fabric, you will need about 1½ yards of fabric.
How Much Yardage Do I Need for 4 Placemats?
To make 4 standard 19” x 14” diy placemats, you will need about 2 yards of fabric.
In order to make four 18” x 12” diy placemats, you will need about 2 yards of 44” wide and 57” wide fabric. On a 60” wide fabric, you will need about 1⅓ yards of fabric. Again, this is because on a 60” wide fabric you can cut 3 pieces of placemats across the width.
To make four 16” x 12” diy placemats, you will need about 1⅔ yards of 44” wide and 57” wide fabrics. On a 60” wide fabric, you will need about 1¼ yards of fabric.
Finally, to make four 15” x 11” diy placemats, you will need about 1½ yards of 44” wide and 57” wide fabrics. On a 60” wide fabric, you will need about 1¼ yards of fabric.
How Many Placemats Can I get out of 1 yard of Fabric?
With 1 yard of fabric, you can make 2 standard 19” x 14” diy placemats.
How Much Fabric Do I need for Placemats?
To make one mini size diy placemat (15″ x 11″), you will need 1/2 yard (0.46m) of fabric or a minimum of 13″ (33cm) of fabric.
In order to make things easier for you, I’ve created a chart which shows you how much fabric you need to make the different sized placemats (mini, small, medium, and large).
Additionally, the chart also shows you how much fabric you will need to make 1, 2, 4, 6, and 8 total placemats.
To access the free chart in PDF format, subscribe to the MindyMakes Email List to receive the password for the Mindy Makes Free Resource Library. This PDF also includes Placemat Patterns in 4 sizes.
What Material is Best for Placemats?
The best material for making placemats will depend on its function and purpose.
Placemats for every day use will need fabrics that are durable and release stains easily.
On the other hand, decorative placemats used on occasion will need attractive and eye-catching fabrics for aesthetics.
Elegant and Luxurious Placemats
For elegant and luxurious placemats, high quality linen is a good option as they are soft, absorbent, and durable.
Decorative Placemats
If you want to make a diy placemat for decorative purposes, brocades, printed cottons, satin and lace are all good options. Even denim, velvet, or pleather could be good depending on the “look” you are going for on your dining table.
Every Day Placemats
For every day use (especially you if have messy eaters), natural fibers such as linen or cotton are good choices. These fabrics are more absorbent than synthetics to catch spills and other messes.
What’s more, natural fibers tend to release stains more easily in the wash. They can also undergo repetitive washings under high heat without distortion or damage.
Heat Resistant Placemats
To make a heat resistant diy placemat, fabrics with natural fibers (100% cotton) is the way to go. Placing a piping hot bowl of soup on a diy placemat made with synthetic fibers may melt and permanently damage the placemat.
Microwaveable Placemats
As discussed earlier, micowaveable placemats need to be made with 100% cotton from the inside out. This means that you will need to use 100% cotton fabrics for the top and bottom of the placemat.
My Fabric Choice for Every day Placemats
While I love the prints and colors offered by 100% cotton, the downside is that they tend to wrinkle easily in the wash. The photo below shows how wrinkled my diy placemat (made with quilter’s cotton) became after a quick wash. Yikes!
Of course, this is an easy fix with a good steam press. But honestly, who has time to iron their placemats after every wash?!
For this reason, I like using fabrics that are a cotton-synthetic blend. Interlock knit fabric is a good choice as it is 60% cotton and 40% polyester.
The cotton in the interlock helps to absorb large spills and messes while the synthetics (polyester or spandex) keep the placemat wrinkle free. Additionally, this fabric is extremely soft and comfortable to the touch. Another plus is that it also comes in an array of colors!
How Do You Make Homemade Placemats?
So in today’s tutorial, I will show you how to sew a simple diy placemat using knits fabric.
If you have never worked with knits fabric, it really is not that hard and just takes a little getting used to. The best part is you can do it all with a regular sewing machine! Be sure to check out my post on How to Sew Knits and Stretchy Fabric for some helpful tips!
How to Sew Placemats with Interfacing?
It really is extremely easy to sew placemats with interfacing.
Today I will show you how to sew an easy diy placemat using fusible fleece as the interfacing. Here are the summary of steps:
- First, you will use a hot iron to adhere the fusible fleece to the wrong side of your placemat fabric. The fusible is applied to the fabric that will become the top of the placemat.
- Next, you will sew the placemat fabrics together, right sides facing each other. Then, you will turn the placemat to the right side.
- Finally, make a top stitch all around the placemat and you are done!
Placemat Patterns
To get a copy of the FREE PDF DIY Placemat Patterns (in 4 sizes), subscribe to the MindyMakes Email List to receive the password for the Mindy Makes Free Resource Library. The Placemat Patterns PDF is listed under section ‘P’ of the library as “Placemats”.
Once you click “submit”, the password will show up on the next page. You will also receive a welcome email with the password in case you forget.
Please allow up to an hour for the welcome email to fly through cyberspace and travel into your inbox. If you still don’t receive the email, make sure to check your junk or spam folders and add my email to your safe list!
Need more help? Be sure to check out this step-by-step guide that shows you exactly how to get the password, enter the library, and download the PDF.
NOTE: Placemat patterns are listed as dimensions that you will need to draw on fabric. They are not ready-to-use pattern pieces.
Need additional help? Be sure to check out this step-by-step guide that will show you exactly how to get the password, enter the library, and download the PDF.
Materials & Tools For Easy DIY Placemat
Materials
- FABRIC – see Fabric Amount PDF chart (available in the Free MindyMakes Library)
- FUSIBLE FLEECE – I recommend Pellon 987F, which is a single sided fusible fleece
- MATCHING THREAD
- PLACE SETTING SVG FILE* – available as SVG and Studio3 file in the Free MindyMakes Library
- HEAT TRANSFER VINYL* – I’m using 12″ x 10″ HTV in white
Tools
- HOME SEWING MACHINE – I LOVE my SINGER HEAVY DUTY SEWING MACHINE
- FABRIC SCISSORS – GINGHERS are my favorite. I’ve tried other brands such as Fiskars, but they just don’t compare.
- SEWING PINS and/or SEWING CLIPS
- CLEAR RULER
- FABRIC CHALK
- HAND SEWING NEEDLES
- THAT PURPLE THANG – optional, but extremely useful for top stitching around corners of placemat
- IRON – for pressing
- SILHOUETTE or CRICUT MACHINE*
* Only needed if making Montessori placemats (with the place settings).
How Do I Make My Own PlaceMats?
Make sure to prewash and dry fabric on the laundry cycle you plan on using for the finished placemats.
Preparing Fabric Pieces
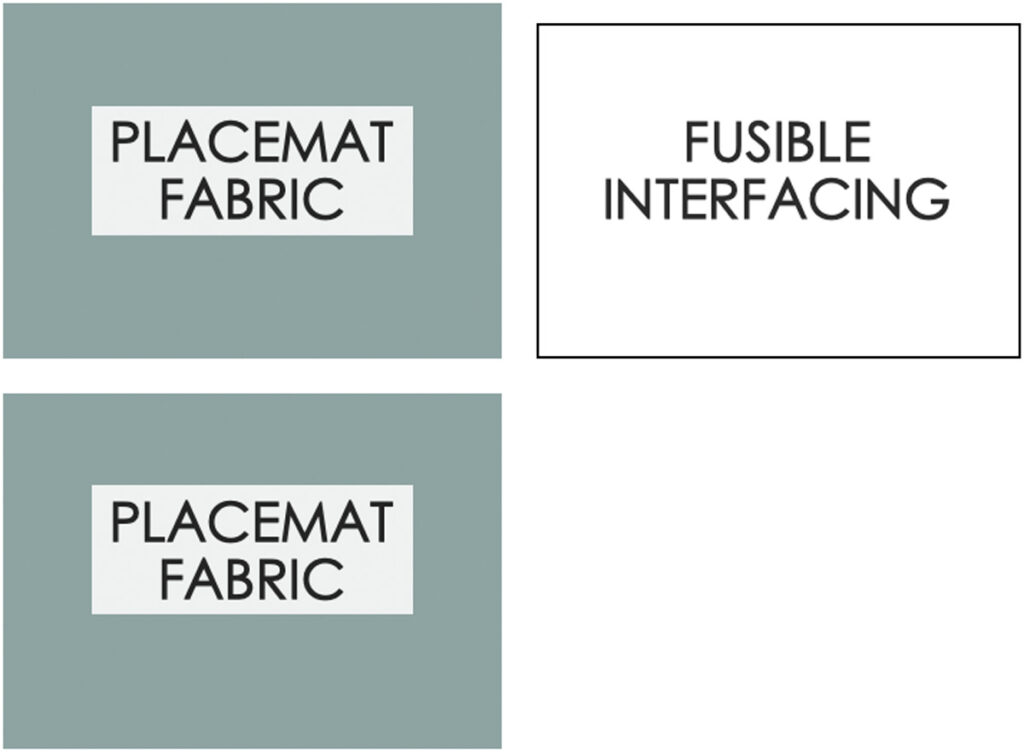
Cut out fabric pieces. To make ONE placemat, you will need the following pieces:
- PLACEMAT FABRIC – top
- PLACEMAT FABRIC – bottom
- FUSIBLE INTERFACING
NOTE: I’m using the same fabric for the top and bottom of the placemat, so I just cut out 2 pieces of the same fabric. If you are using two different fabrics, make sure to keep track of which fabric is for the top, and which one is for the bottom.

Next, apply fusible interfacing to the wrong side of [PLACEMAT FABRIC – top]
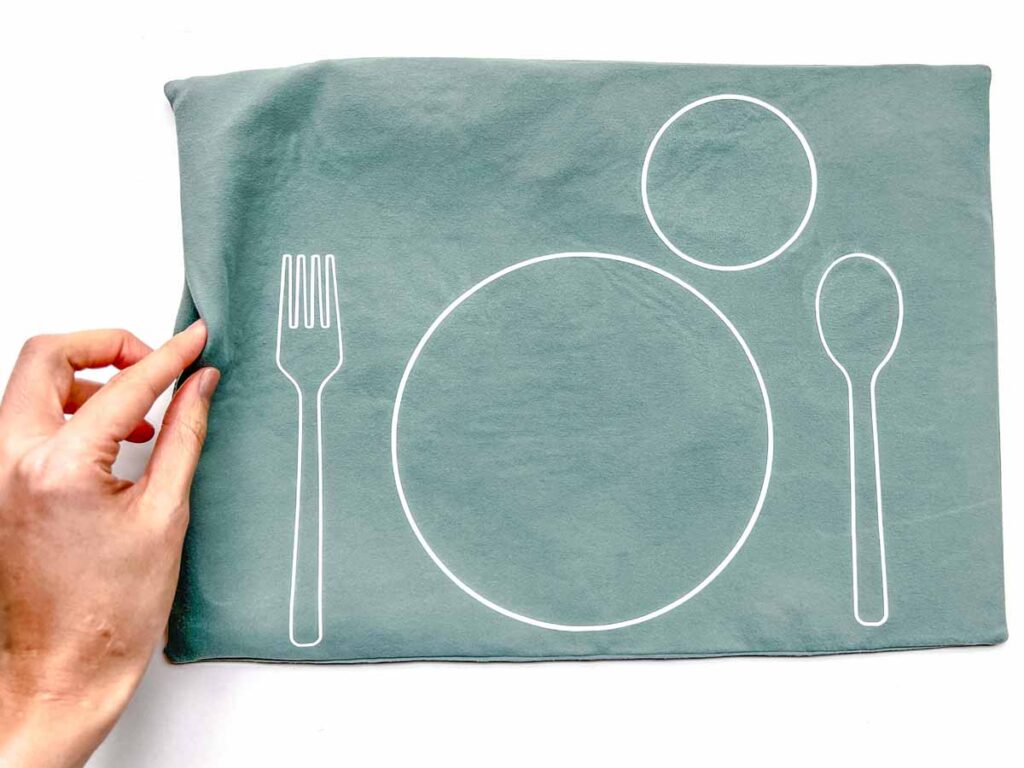
How to Make a Montessori Placemat
These instructions show you how to apply HTV (heat transfer vinyl) so you can make your own Montessori Placemat. If you are making a placemat without the vinyl, skip ahead to SEWING DIY PLACEMAT TOGETHER

LEFT: Weed and peel off iron-on vinyl around border of spoon, plate, and fork
RIGHT: Cut out CUP vinyl that is inside the plate. Be careful not to cut into the actual iron-on vinyl.
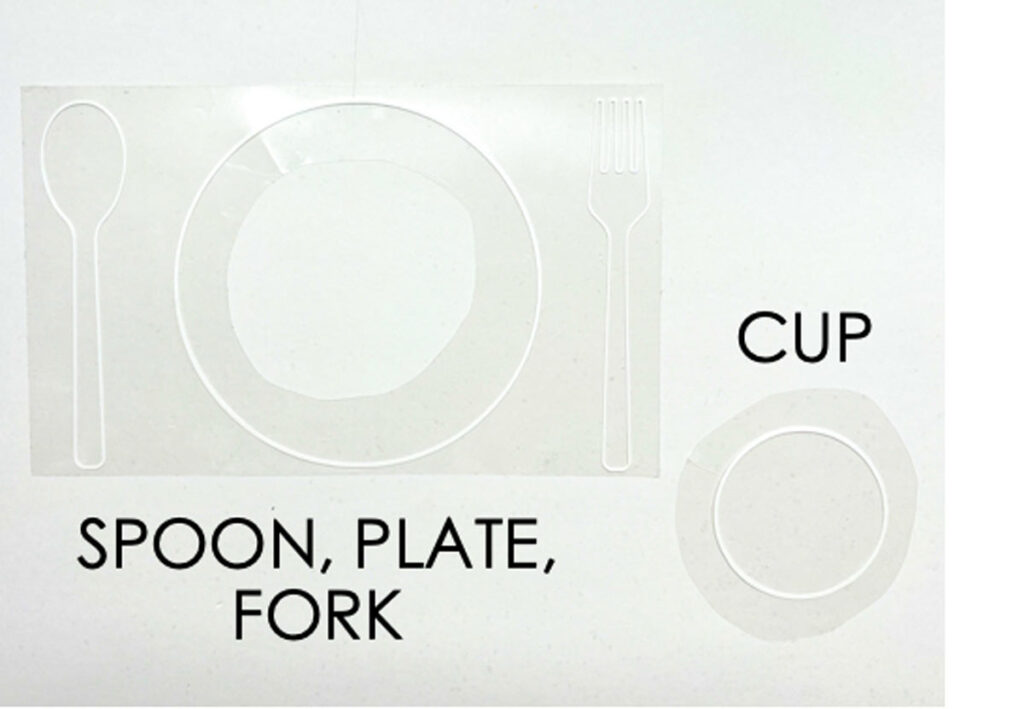
Your iron-on vinyl will look like this after CUP is cut out
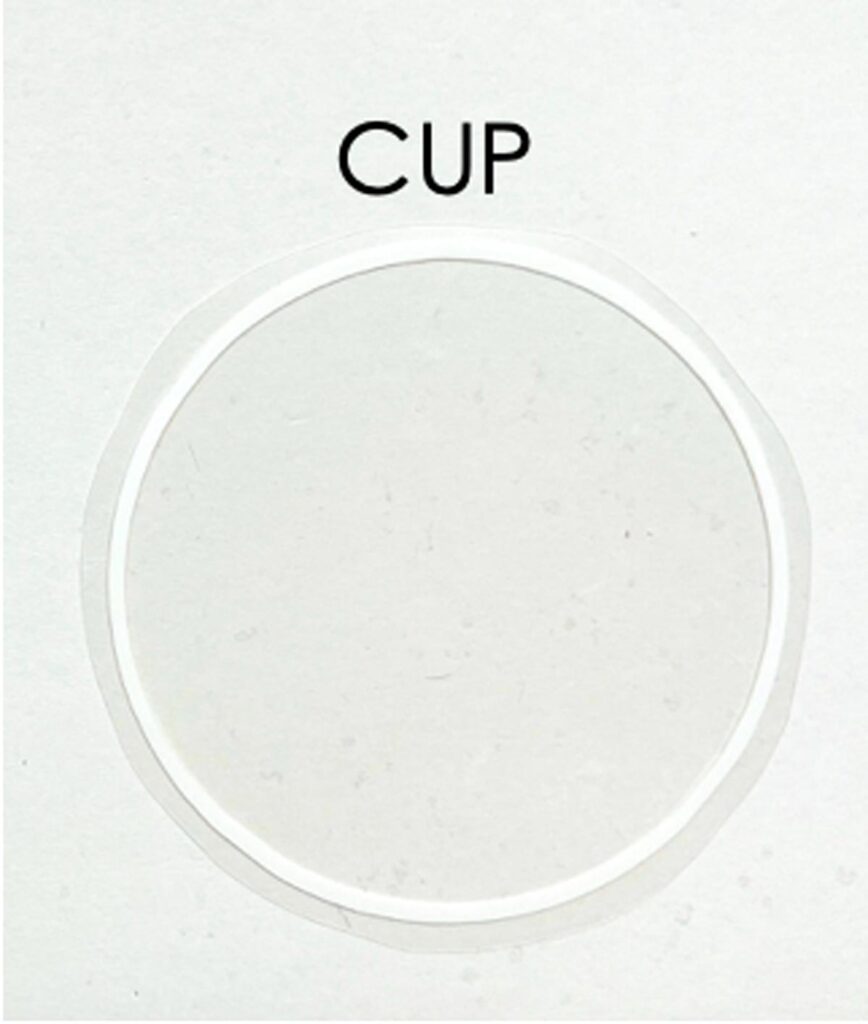
Trim excess border around the CUP.
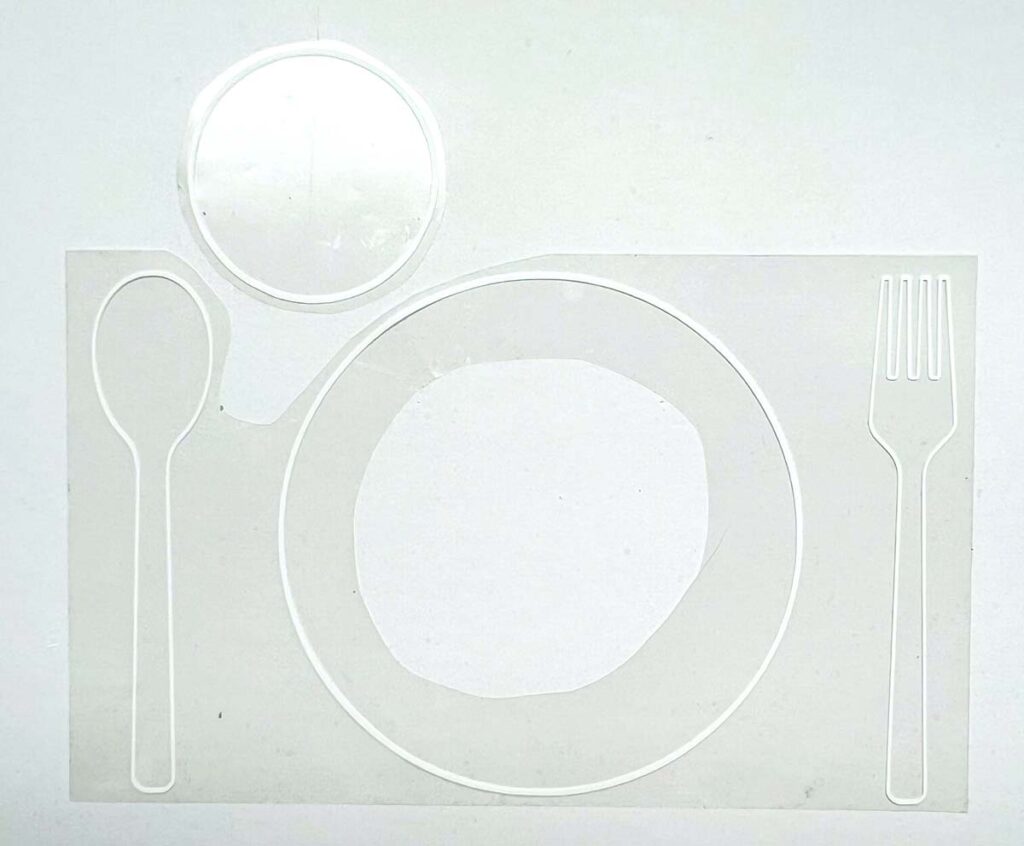
Cut out excess border between plate and spoon. This is make room to place the CUP.

Then, stick it onto the right side of [PLACEMAT FABRIC – top]. I’ve included some measurements as a guideline of where to place the vinyl. Remember it’s a guideline, doesn’t have to be exact!
- Left and right edge of vinyl is about 2” (5cm) from edge of fabric.
- The bottom of spoon and fork is approximately 1” (2.54cm) from bottom edge of fabric.
- Right side of cup is 3¾” (9.5cm) from right edge of placemat.
- Top of cup is approximately 1⅛” (2.85cm) from top edge of placemat.

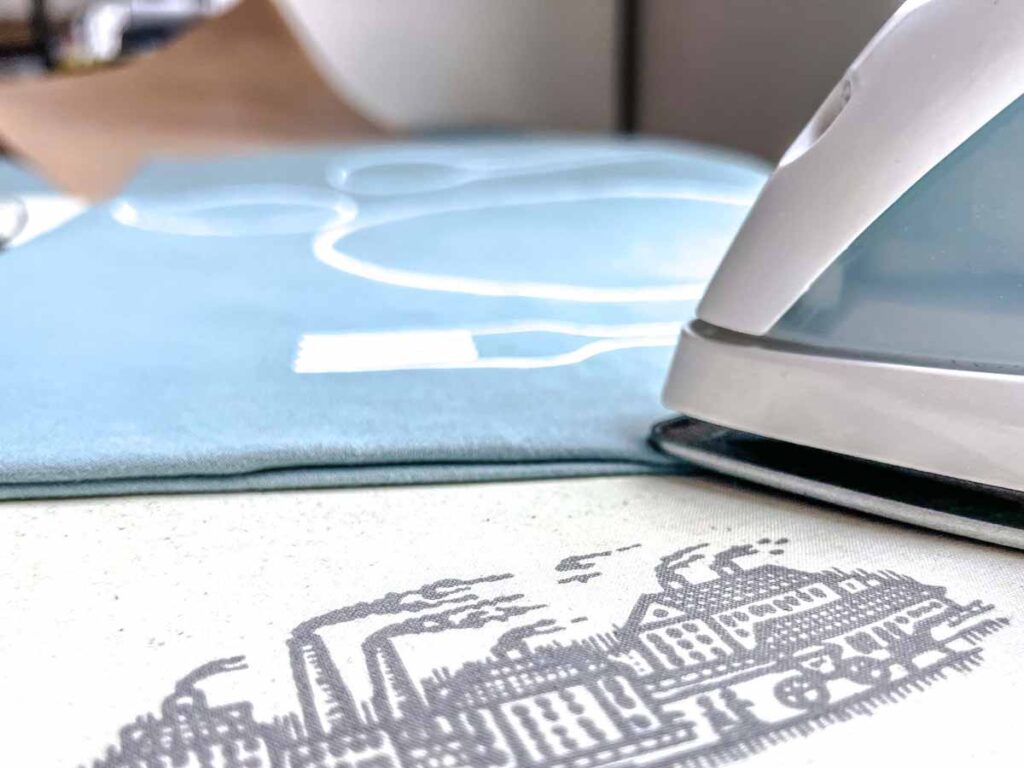
Apply iron-on vinyl to fabric according to manufacture instructions.
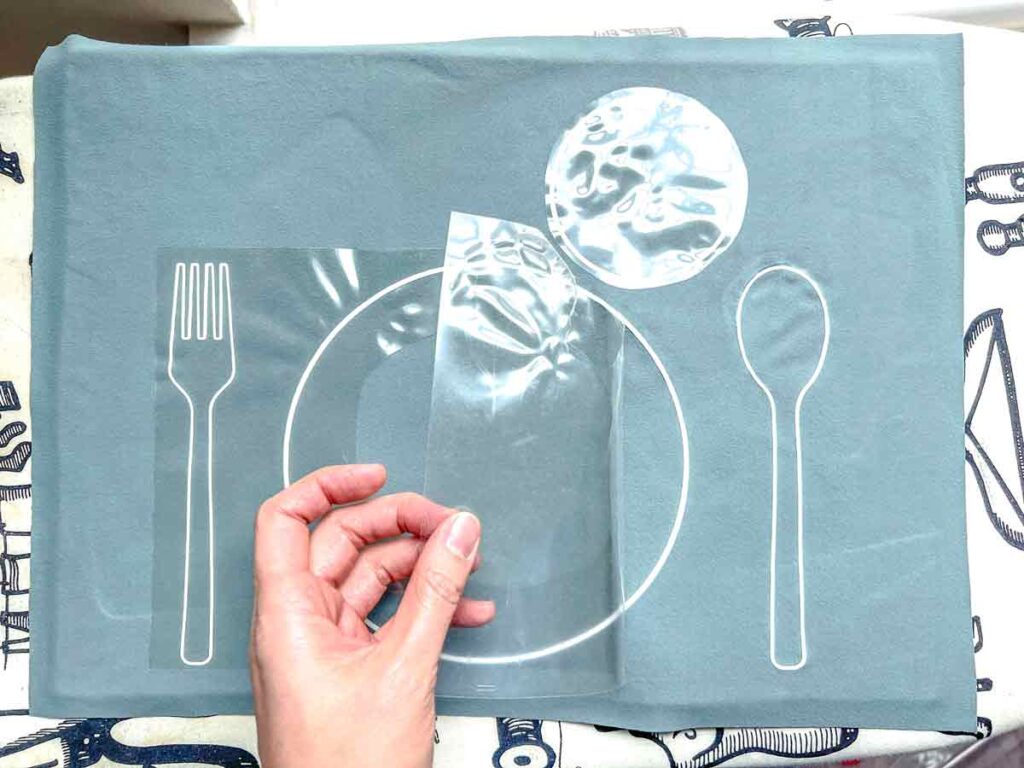
Wait for vinyl to cool completely before removing clear plastic.
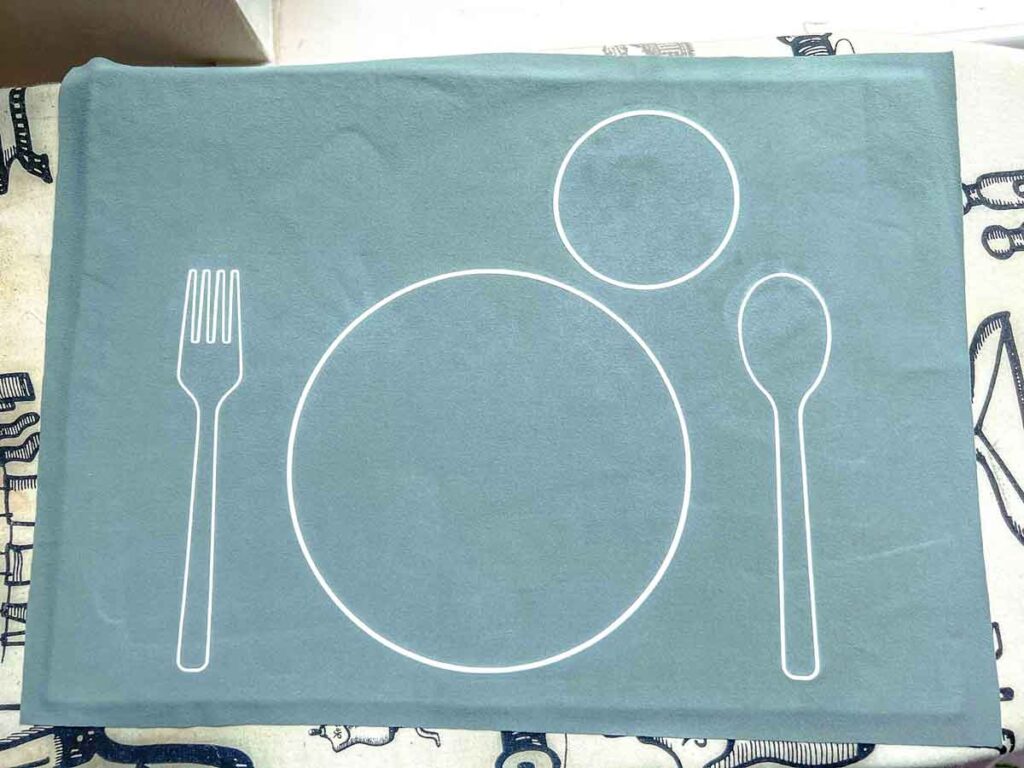
Iron-on vinyl successfully applied to fabric!
Sewing DIY Placemat Together
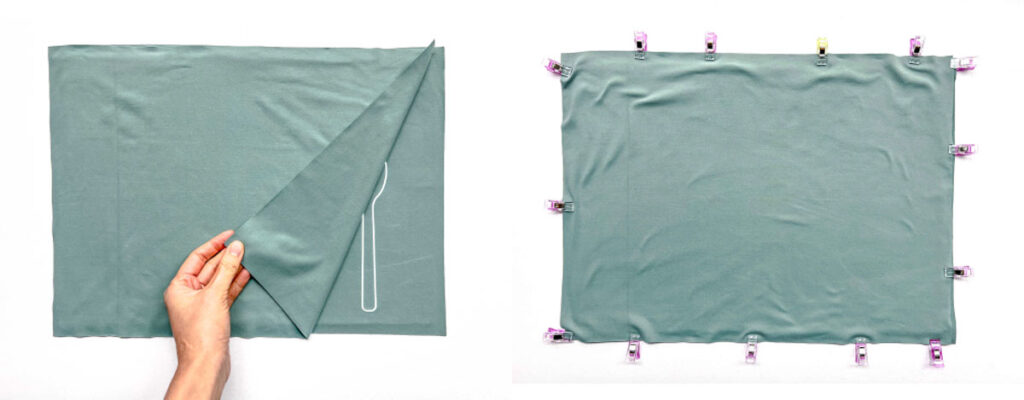
Now place [PLACEMAT FABRIC – bottom] and [PLACEMAT FABRIC – top] right sides together. Hold in place with clips or pins.

Then, with the fused side facing up, stitch around fabric at 1/2” (1.27cm) seam allowance (red dotted lines). Leave a 2-3” opening on one of the side (doesn’t matter which one). Back stitch on both ends.

Now, clip corners (this eliminates bulk so that the corners will look nice and sharp once placemat is turned to the right side).

Next, repeat clipping all 4 corners.

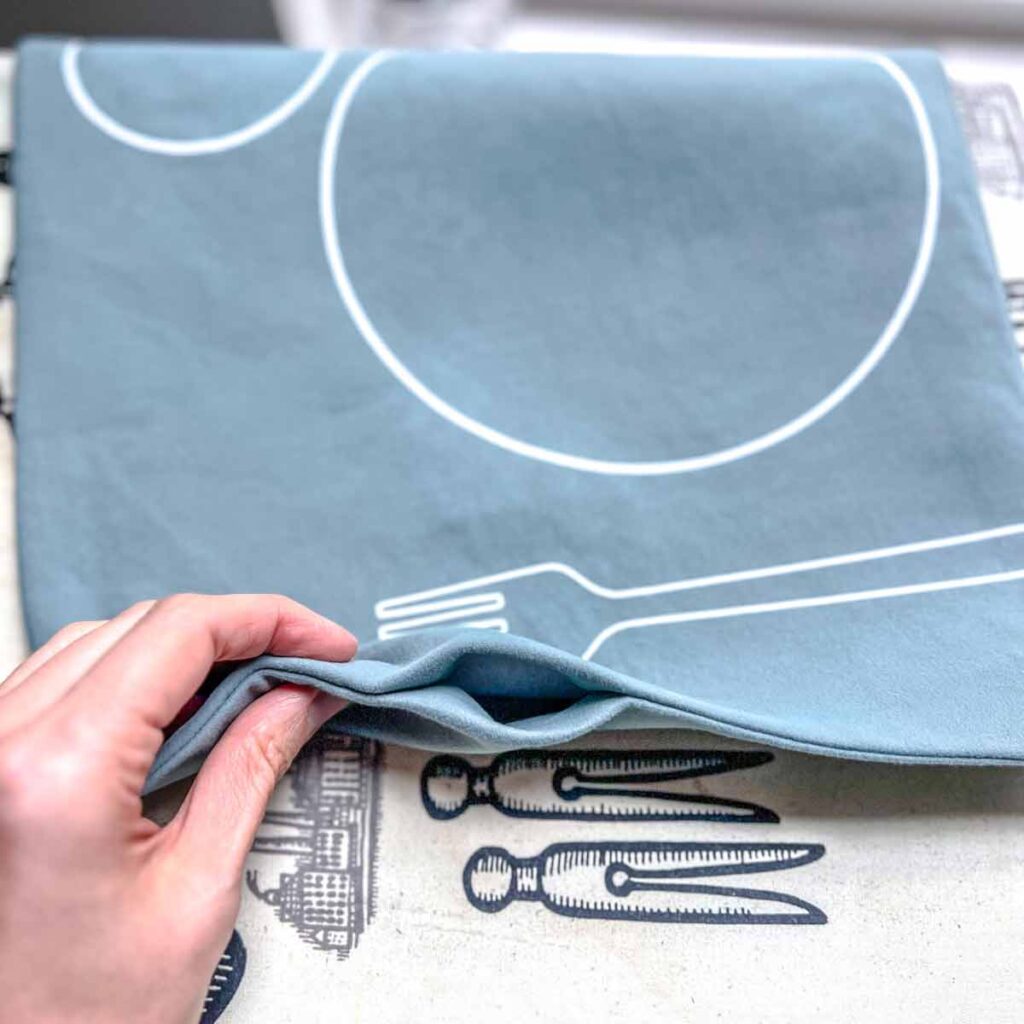
Finally, turn placemat to right side through opening.
View of placemat turned to the right side. Next, tuck in seam allowance on opening
Then press seam allowance into the placemat.
NOTE: Optional, but at this point, you can hand close the opening with an invisible ladder stitch to make your placemat look super super nice all around the edges!
View of opening after seam allowances pressed in.
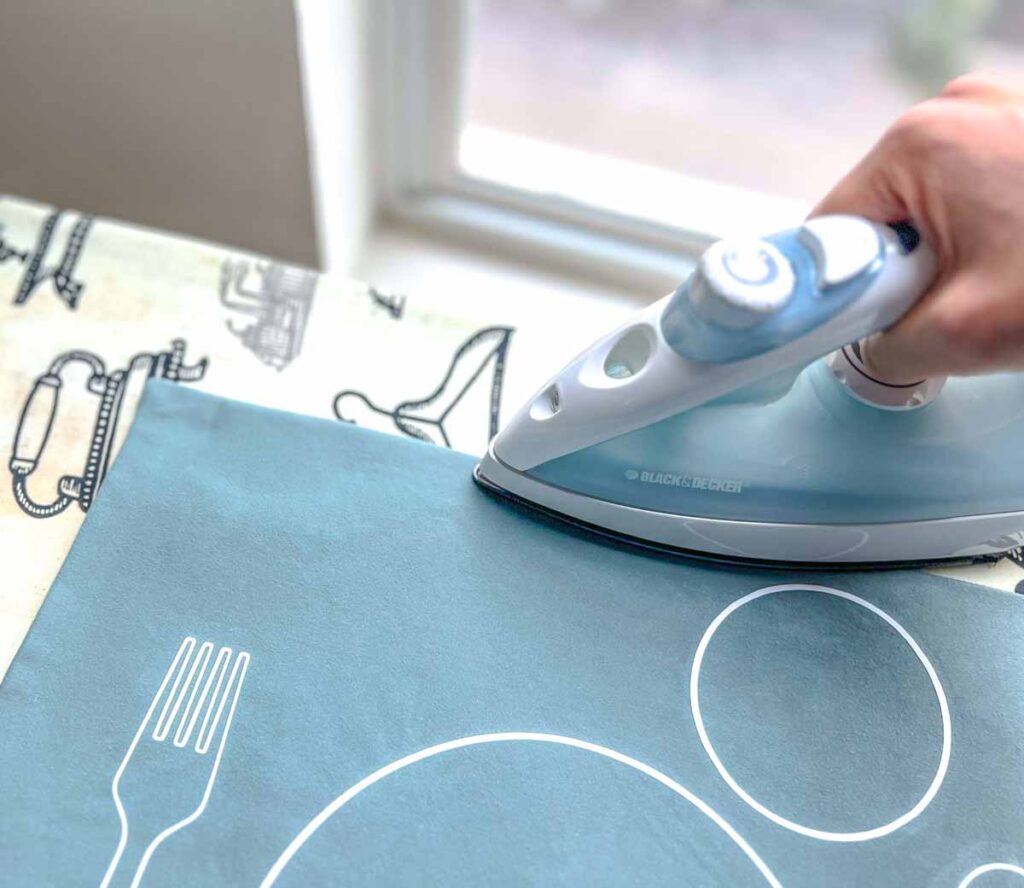
Now press around entire border of placemat.
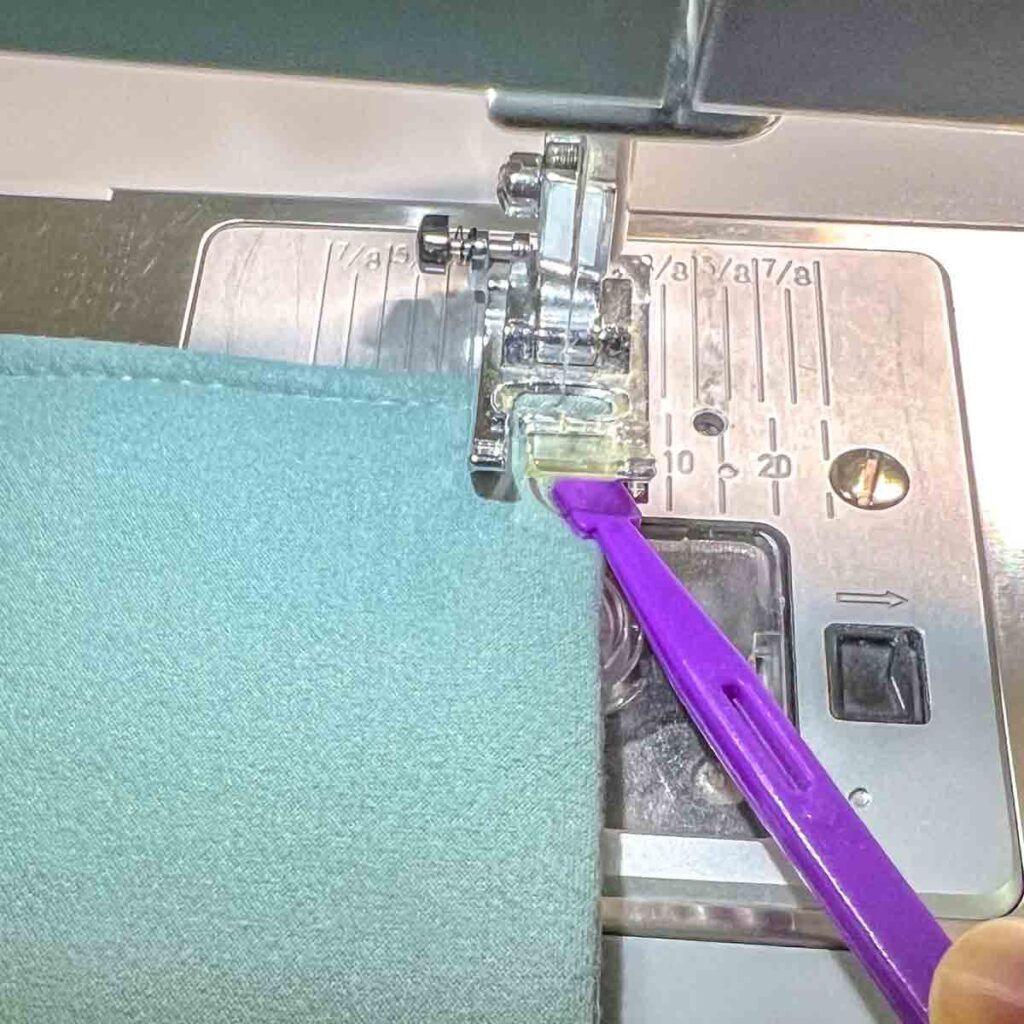
Finally, top stitch around entire placemat, 1/8” (3mm) from edge. Pivot at the corners. That Purple Thang is super helpful tool to help guide placemat into the machine every time you pivot!

Tada! Your diy placemat is finished! How simple was that!
Grab the ad-free, printer friendly Pattern and Tutorial in PDF format today! Print a copy today for easy reference as you sew. Additionally, you will receive all the different sized placemat images (plate, fork, spoon, etc) in 4 formats. This includes SVG, EPS, PNG, and STUDIO3 files.
How to Sew the Easiest DIY Placemat

These simple DIY placemats are a quick and easy beginner sewing project. Add some table settings heat-transfer-vinyl and turn it into a Montessori placemat for the kids!
Materials
Tools
Instructions
PREPARATIONS:
- Make sure to prewash and dry fabric on the laundry cycle you plan on using for the finished placemats.
- Cut out fabric pieces. To make ONE placemat, you will need the following pieces:
- PLACEMAT FABRIC - top
- PLACEMAT FABRIC - bottom
- FUSIBLE INTERFACING
- Next, apply fusible interfacing to the wrong side of PLACEMAT FABRIC - top.
HOW TO SEW A MONTESSORI PLACEMAT (optional)
- Download placemat settings from the Free MindyMakesLibrary and cut out on HTV.
- Weed and peel off iron-on vinyl around border of spoon, plate, and fork.
- Cut out CUP vinyl that is inside the plate. Be careful not to cut into the actual iron-on vinyl.
- Trim excess border around the CUP.
- Cut out excess border between plate and spoon. This is make room to place the CUP.
- Stick HTV onto the right side of PLACEMAT FABRIC - top (see note 1).
- Apply iron-on vinyl to fabric according to manufacture instructions.
- Wait for vinyl to cool completely before removing clear plastic.
SEWING DIY PLACEMAT TOGETHER
- Place PLACEMAT FABRIC - bottom and PLACEMAT FABRIC - top right sides together. Hold in place with clips or pins.
- With the fused side facing up, stitch around fabric at 1/2” (1.27cm) seam allowance (red dotted lines). Leave a 2-3” opening on one of the side (doesn’t matter which one). Back stitch on both ends.
- Clip corners (this eliminates bulk so that the corners will look nice and sharp once placemat is turned to the right side).
- Repeat clipping all 4 corners.
- Turn placemat to right side through opening.
- Tuck in seam allowance at the opening and press seam allowance into the placemat (see note 2).
- Press around entire border of placemat.
- Top stitch around entire placemat, 1/8” (3mm) from edge, pivoting at the corners.
- DIY Placemat is finished!
Notes
Note 1:
- Left and right edge of vinyl is about 2” (5cm) from edge of fabric.
- The bottom of spoon and fork is approximately 1” (2.54cm) from bottom edge of fabric.
- Right side of cup is 3¾" (9.5cm) from right edge of placemat.
- Top of cup is approximately 1⅛" (2.85cm) from top edge of placemat.
Note 2: (Optional) At this point, you can hand close the opening with an invisible ladder stitch to make your placemat look super super nice all around the edges!