Tutorial: Turn a Dress into an Apron
Difficulty: Easy-Intermediate
Time: 1-2 hours
Recently a friend asked if I could repurpose one of her old dresses into an apron. I’ve always really liked the idea of up-cycling old clothes into something else, so I decided to give it a try.
The overall process consisted of 4 simple steps:
- Trace apron pattern over dress
- Add seam allowance
- Cut out pattern
- Add apron ties and finish raw edges
The beauty of up-cycling clothing is that you can save a few steps of sewing by utilizing what is already made. For example, I didn’t have to finish the neckline nor did I have to sew the hem. This makes for a quick and easy project that looks store-bought.

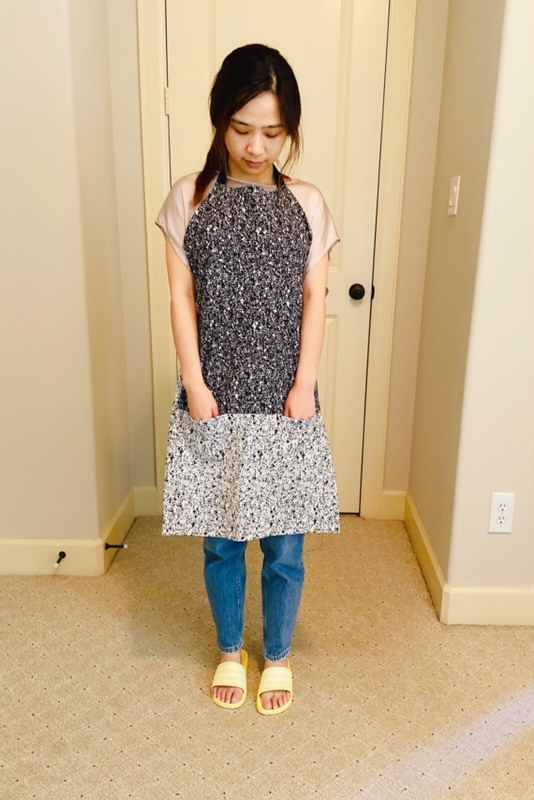
You can do this with any type of dress, although to make things easier I do recommend a short dress. My friend’s dress is a size XS short shift dress. Because it was a short dress, the length was perfect for the apron and I didn’t have to alter the hem. I also recommend choosing a dress material that is soft and easy to wash. Aprons get lots of stains and usage, so stiff polyester bridesmaid or prom dresses probably won’t do the job.
My friend was happy with the results and so was I. This definitely is a quick and easy project to give some more life out an old dress!
MATERIALS:
Old dress
Apron (for pattern), or use Apron Pattern below
1/4 – 1/3 yard of thin cotton fabric (ideally 54″ wide, but 44″ will work as well): for making apron ties
TOOLS:
Clear ruler/Pencil/Paper – for drawing pattern and adding seam allowances
Sewing Machine
Fabric Scissors
Chalk pen
Thread
Fine Pins
Sewing Needles
Loop Turner
Iron for pressing
NOTES:
INSTRUCTIONS:
Tracing/Cutting Apron Pattern:
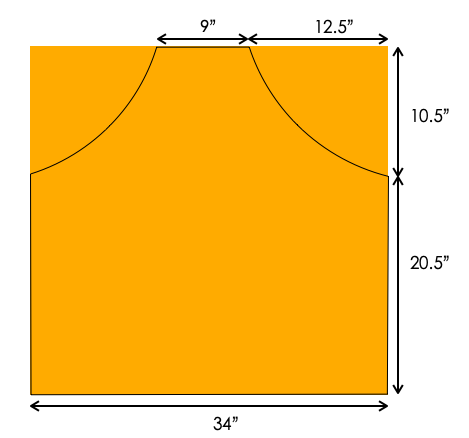
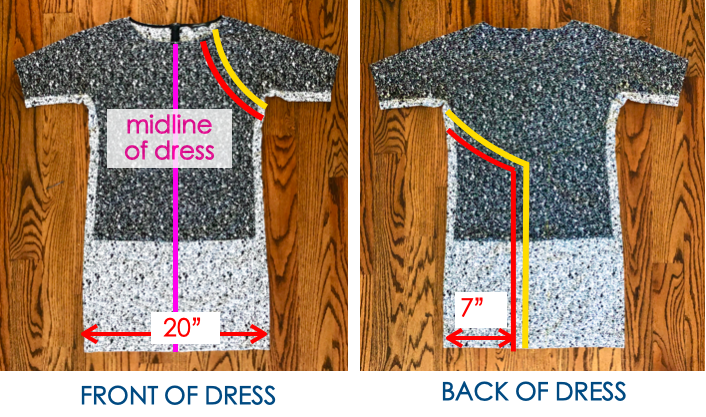
Apron measurements. If you don’t already own an apron, you can use these measurements as the pattern to cut your dress.
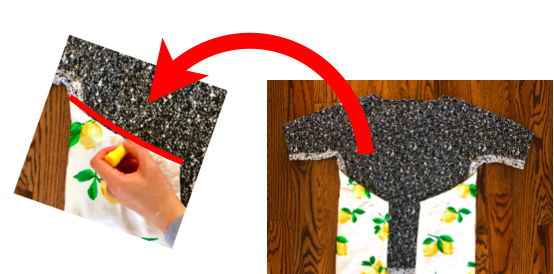
LEFT: Place front of apron over front of dress .
RIGHT: Wrap back of apron to the back of dress
Trace front of apron on front of dress with marking chalk (solid red line)
Trace back apron curve on back of dress with marking chalk (solid red line). You only need to trace one side of apron. In the photos shown I am only tracing the RIGHT side of apron to RIGHT side of dress.
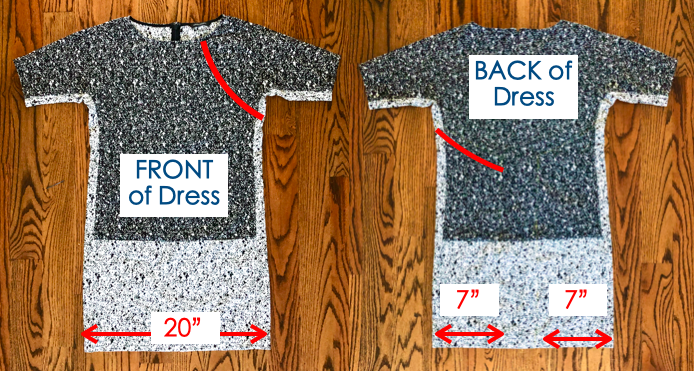
Measure bottom width of dress. My skirt is 20”. Since the bottom width of apron pattern is 34”, 34 – 20 = 14” will be cut on back of the dress. Since we are cutting 2 sides of the apron on the back of the dress, each side of the dress will be cut 7”width.
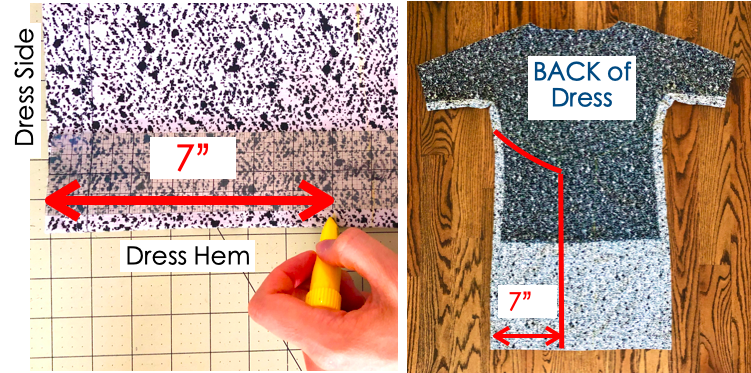
LEFT: Mark off 7” on dress hem from dress side
RIGHT: Extend 7” mark in a straight line to the top of the apron curve previously traced.
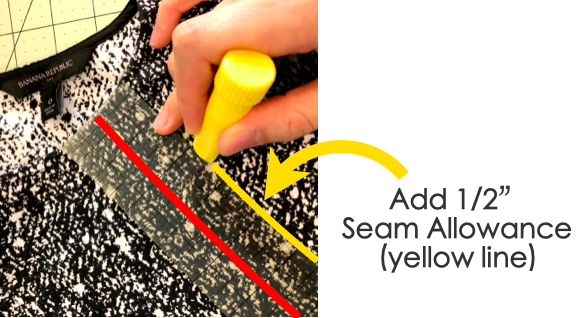
With a ruler, add 1/2”seam allowance to traced apron lines (solid red line)
Add seam allowance to front and back of dress (solid yellow lines)
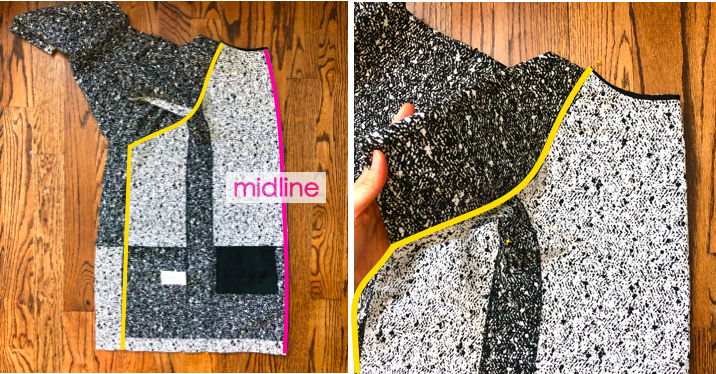
LEFT: Cut dress along yellow lines and fold along midline of dress.
RIGHT: Pin cut edge (yellow line) to opposite side of dress and start pinning from neckline all the way down to dress bottom seam. Cut along yellow line.
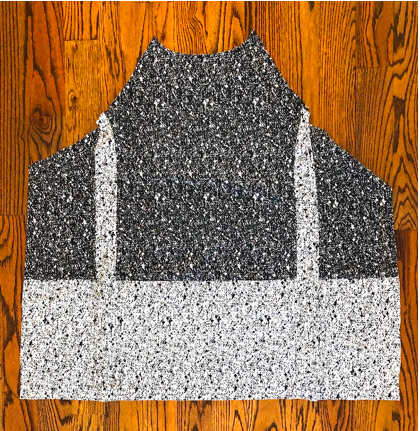
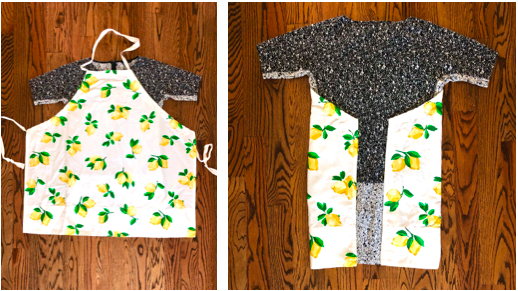
View of cut apron
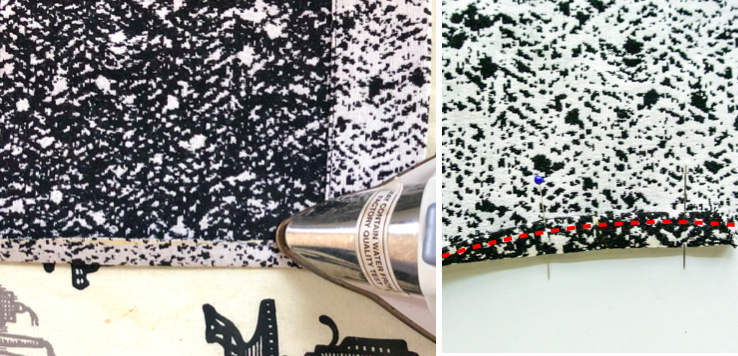
To finish raw edges, press 1/4” then press another 1/4” in, pin and sew (red dotted line).
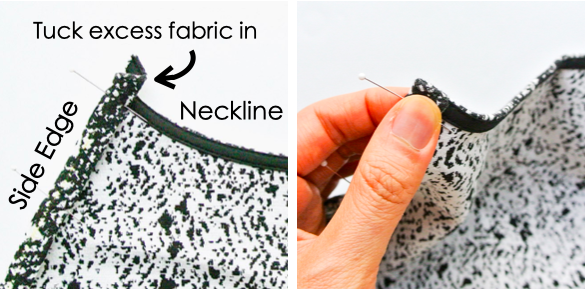
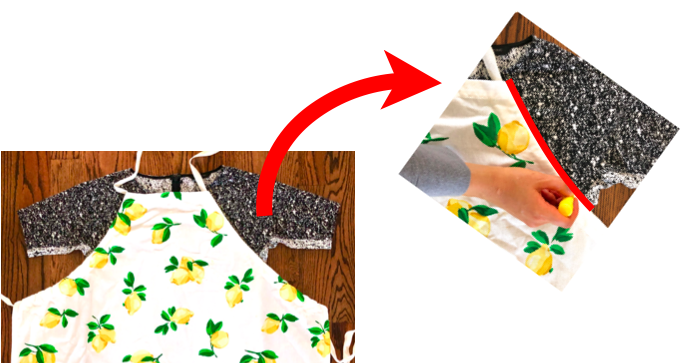
You will notice excess fabric at intersection of side edge and neckline. Tuck this excess fabric in, pin and sew.
Apron Ties:
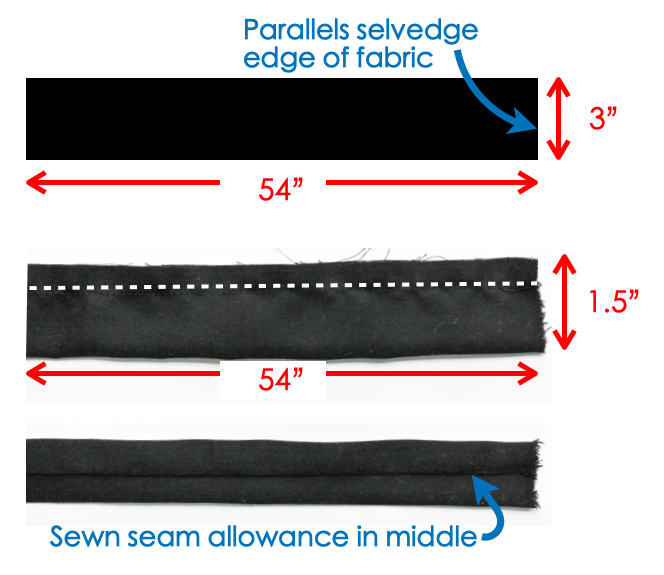
TOP: Cut 3 pieces of fabric strips 3″ x 54″ (Photo not to scale). Makes sure the 3″ height is along the selvedge edge of fabric.
MIDDLE: Fold fabric strip in half (so you have a piece of fabric 54″ x 1.5″) and stitch at 1/2″ seam allowance.
BOTTOM: Turn fabric strip to right side with loop turner. Press strip with seam allowance in the center of the strip.
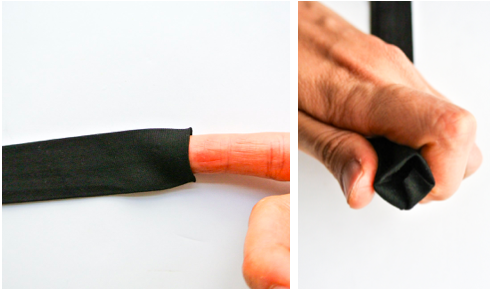
LEFT: With your fingers, gently push in seam allowance (1/4”-1/2”) on ends of apron ties
RIGHT: Top view of apron tie ends
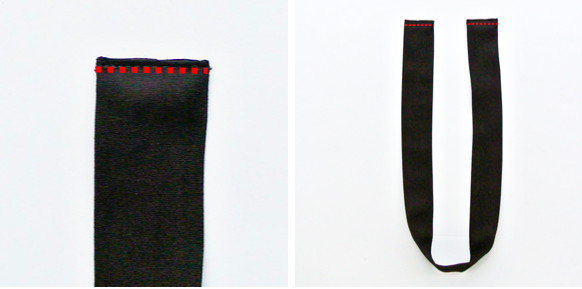
LEFT: Stitch down ends of apron tie 1/8”from edge using matching thread (shown as red dotted line)
RIGHT: Repeat on other end of apron tie.
Finishing Apron:
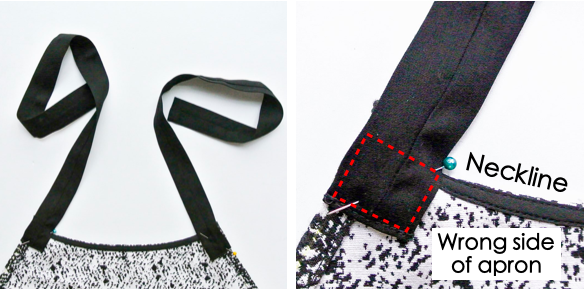
On two sides of neckline, pin right side of apron ties on wrong side of apron and stitch in place (red dotted box)
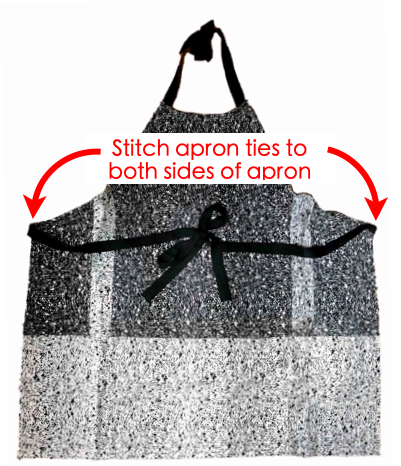
Attach apron ties to both sides of apron in the same way and you are finished! Let me know in the comments below if you up-cycled a dress into an apron. Happy Sewing 🙂

Very nice