
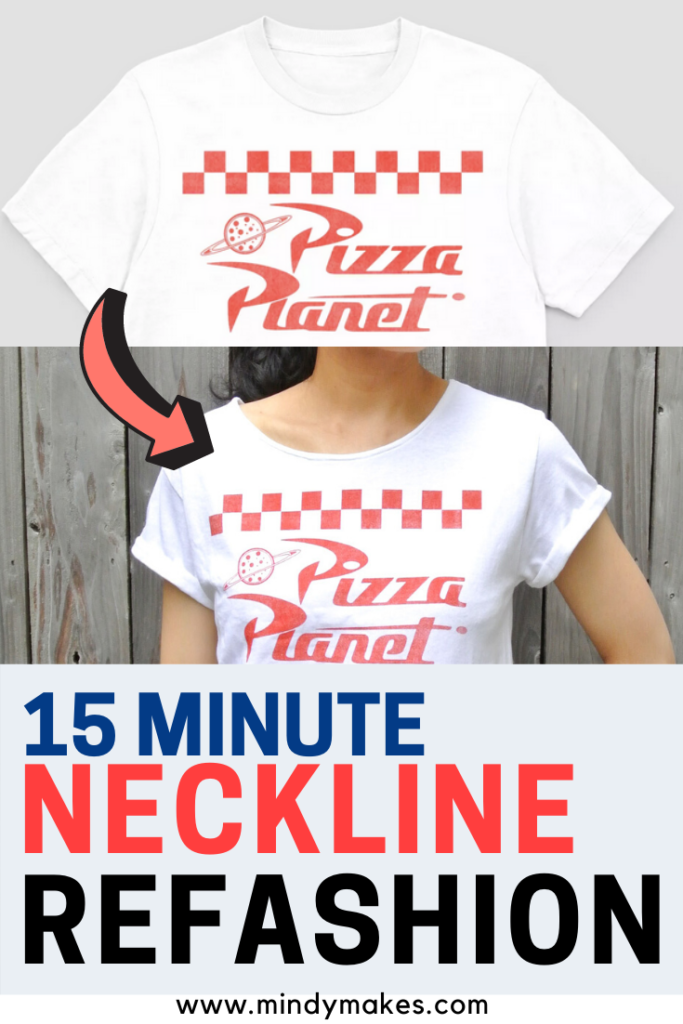
How to Transform a Boring Crew Neck T-shirt to One You Will Actually Wear (Over and Over)
Have you ever saw a T-shirt that is soft, has a cute logo, is in a color you like…except the neckline is too high? Or have you ever seen a cute men’s graphic T shirt that you would love to wear, but the neckline is just NOT right?
Recently there was a sale at Target for $7.99 Men’s graphic T (regular price $12.99). I originally was browsing for some T-shirts to get my husband. Inevitably I ended up looking for T-shirts for myself (ha!) Since only the men’s graphic Ts were on sale, I decided to stick to those since I also saw a few that I liked for myself!
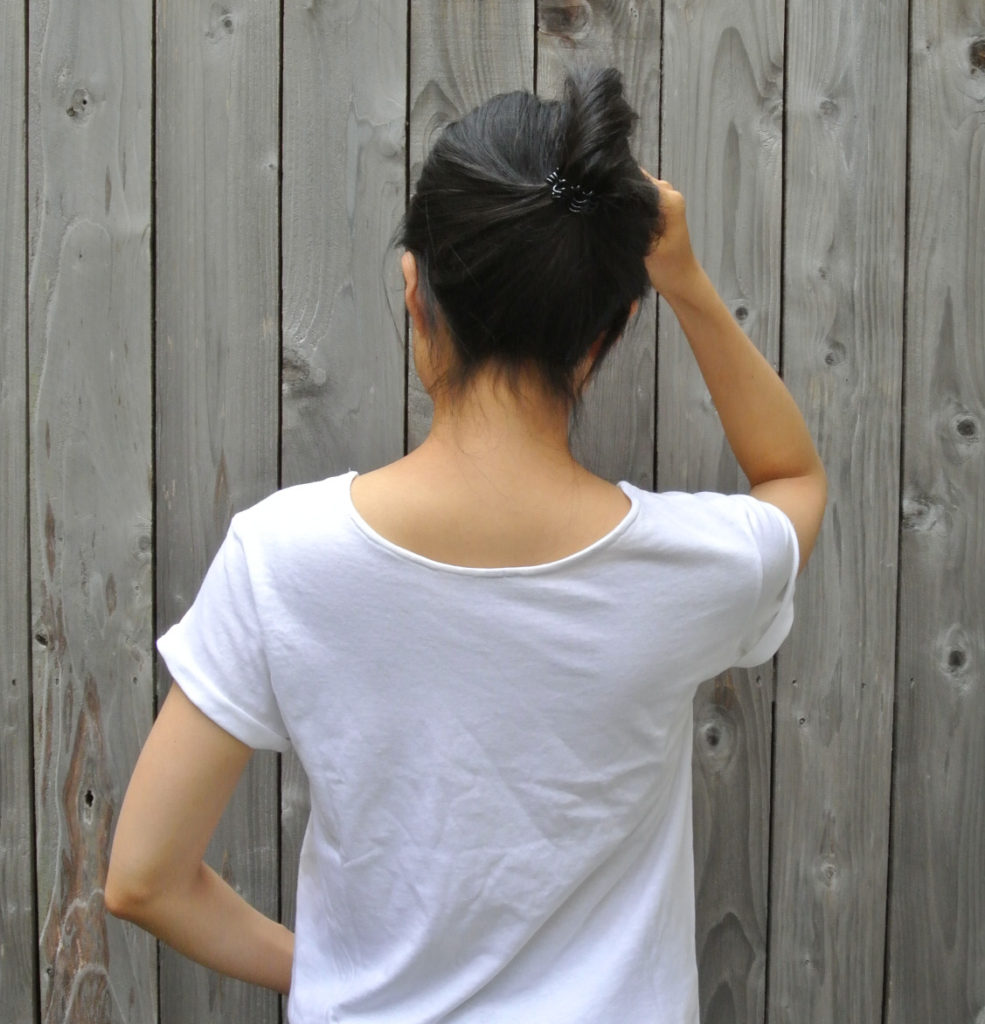
At the end, I chose this white Pizza Planet Shirt:

Looks pretty manly right? I knew the neckline would be way too high and I was right. Don’t get me wrong, I am NOT into super low necklines. However, in general I find crew neck T shirts rather uncomfortable because of the high neckline. It feels suffocating and I find myself tugging at the T-shirt all day trying to adjust the neckline.
Unfortunately that never works.
Luckily hemming a T-shirt neckline is quick and easy. I know you can cut off the neckline and wear as is (since knit materials don’t fray). However, I find that the edge still looks a bit raggedy and unpolished. I much prefer finishing the neckline with a bias tape because it looks much nicer.
And yes, although it will take about 15 minutes (vs 3 minutes to cut off the neckline), I think the end result is definitely worth it. Your altered T-shirt will look store-bought, and who doesn’t want that?
I also decided to alter the sleeve (very slightly) since I thought it made the T-shirt cuter. All I did was roll up the edge of the sleeve twice over and tack it down on the top and bottom with a straight stitch. This is completely optional and just depends on your preference.
Follow along with the tutorial to alter your own T-shirt neckline!
MATERIALS:
- Crew neck T shirt
- 1/2″ Single fold bias tape (see Notes) – check out How to make Bias Tape
TOOLS:
- Sewing Machine
- Fabric Scissors
- Chalk for marking fabric
- Ruler
- Thread of matching color
NOTES:
- The amount of bias tape you will need depends on how wide the neckline is. Make sure you have at least an extra 1-1.5″ of bias tape compared to the circumference of your new neckline.
- In this tutorial I used home made bias tape made out of knit material. This allows the neckline to be able to stretch when you pull the T-shirt over your head. You can make your own knit bias tape by cutting knit fabric (or an old T-shirt) and following the tutorial on “How to make bias tape”.
- You can also use bias tape made out of woven material as well, but the neckline will not stretch as much.
- In this tutorial I used bias tape that matches the color of the T-shirt (white). However, using a different colored bias tape can also add an extra “pop” to your T-shirt as well! In the video tutorial I use a different colored bias tape for better visualization.
INSTRUCTIONS:
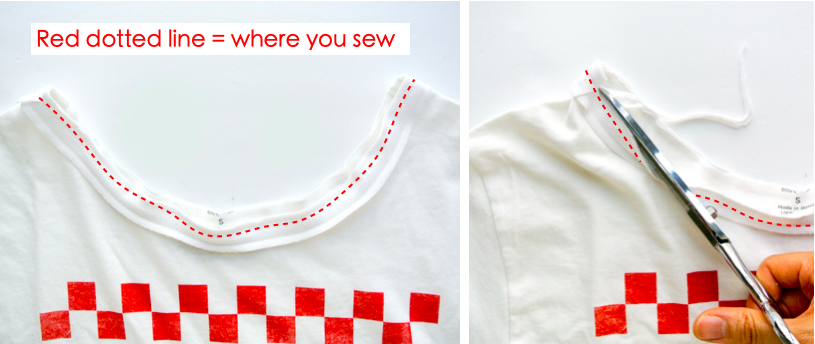
CUTTING NECKLINE:
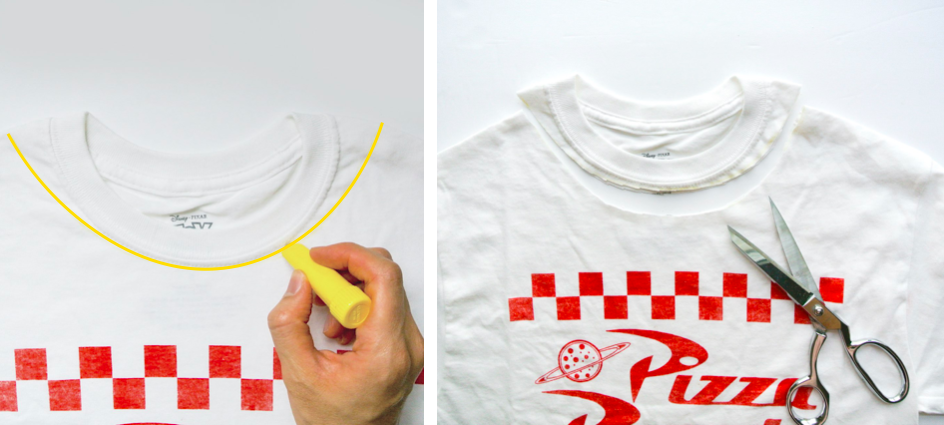
LEFT: Draw the desired neckline on your T-shirt. You will be sewing at 1/4” seam allowance, so make sure to take that into consideration when drawing the new neckline.
RIGHT: Cut neckline
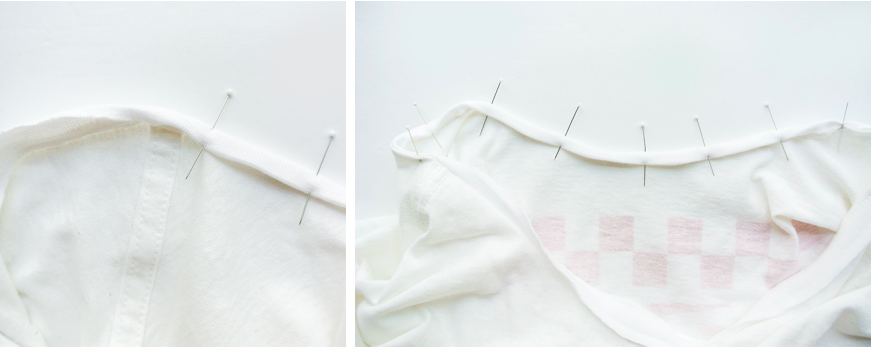
PIN BIAS TAPE TO NECKLINE:
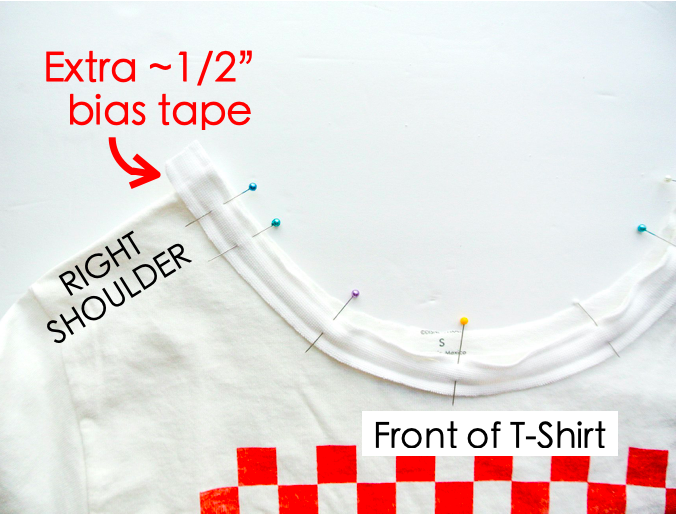
LEFT: Open the folds on a piece of single fold bias tape. Match right side of bias tape to right side of T-shirt. With front of T-shirt facing you, pin bias tape to neckline starting at right shoulder of T-shirt. Leave 1/2” extra piece above the right shoulder.
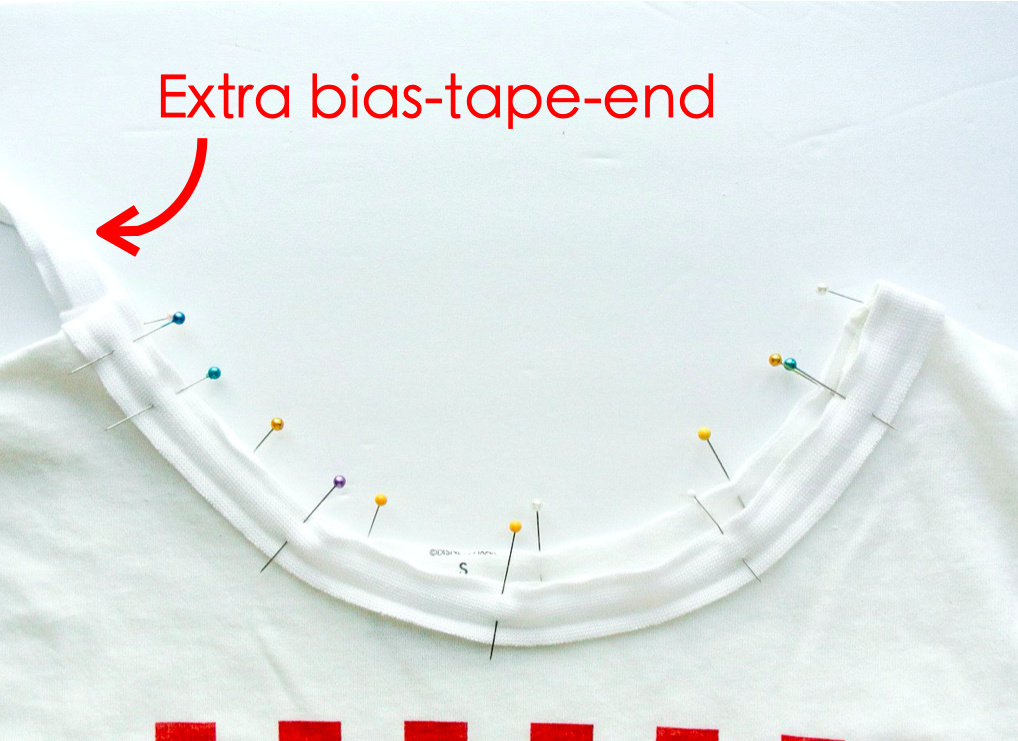
RIGHT: Pin bias tape around entire neckline back to where you started. You will have some extra bias tape at the end.
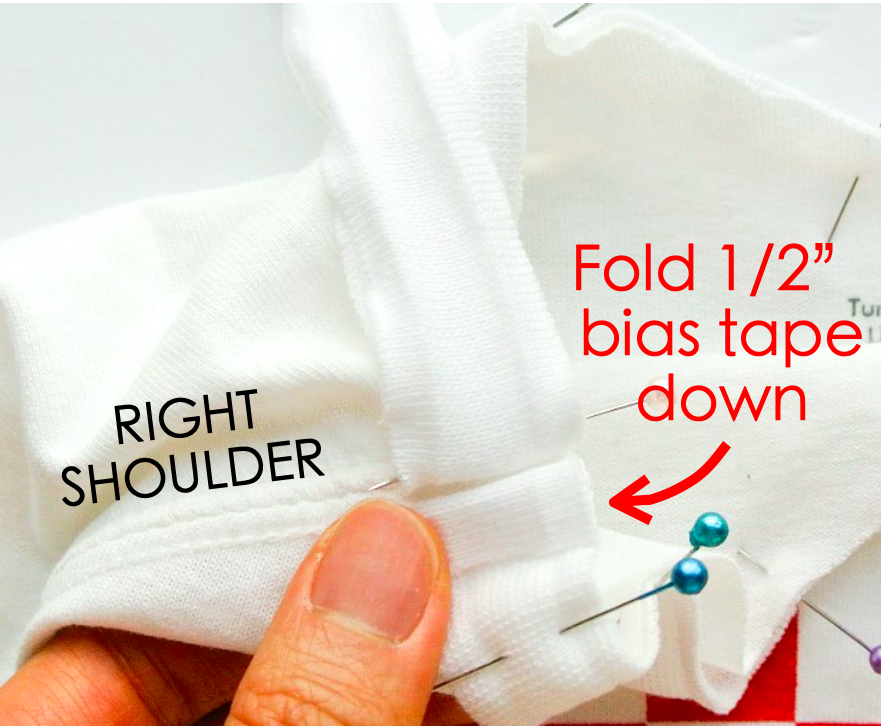
Fold the extra 1/2” bias tape down (at beginning of where you started pinning bias tape to neckline)
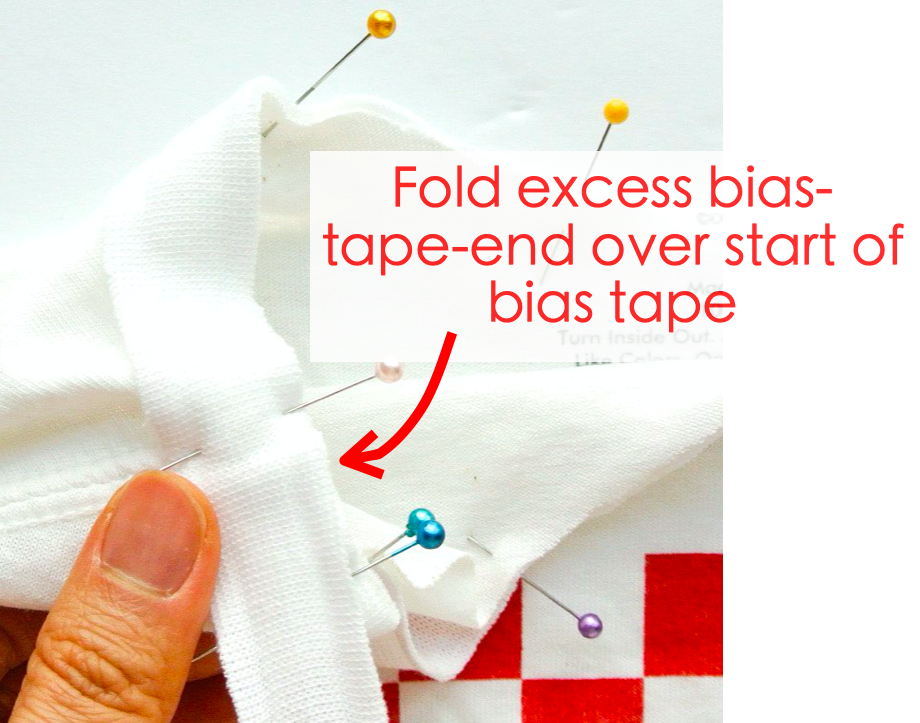
Fold excess bias-tape-end down over where you started pinning bias tape to neckline.
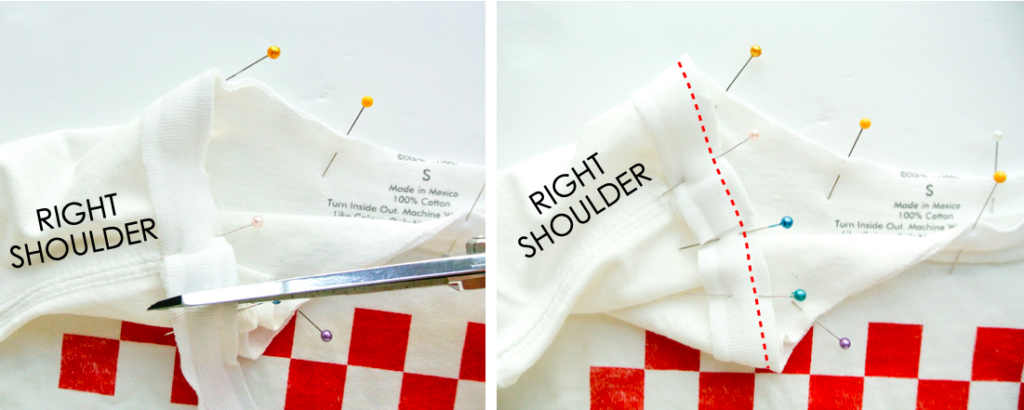
SEWING BIAS TAPE:
LEFT: Sew bias tape to neckline at fold of bias tape (~1/4”)
RIGHT: Trim seam allowance to 1/8”
Turn bias tape to wrong side of T-shirt. Fold in bias tape and pin to neckline.
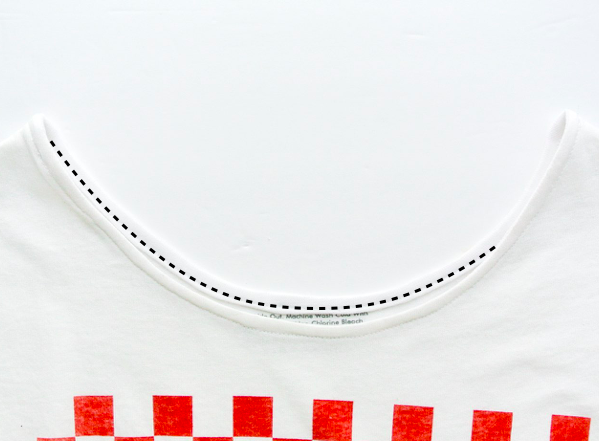
Stitch at 1/8” from bottom edge of bias tape all around neckline (black dotted line).
ADJUSTING SLEEVE:
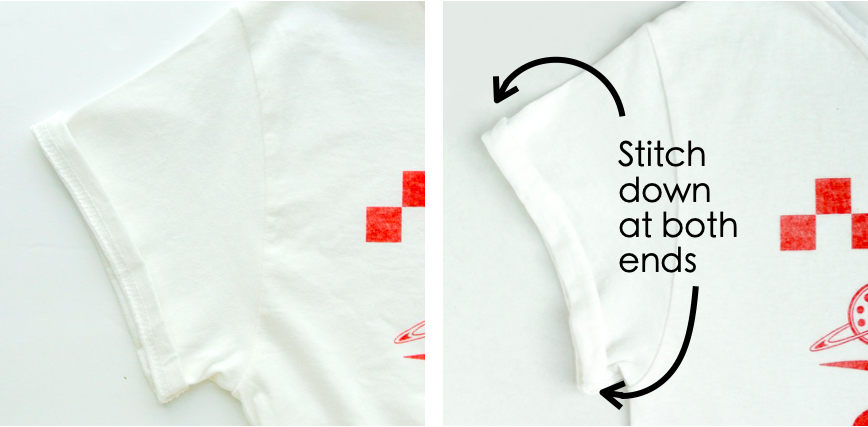
Roll edge of sleeve in once, then roll in again and stitch down both ends (top and bottom of sleeve)
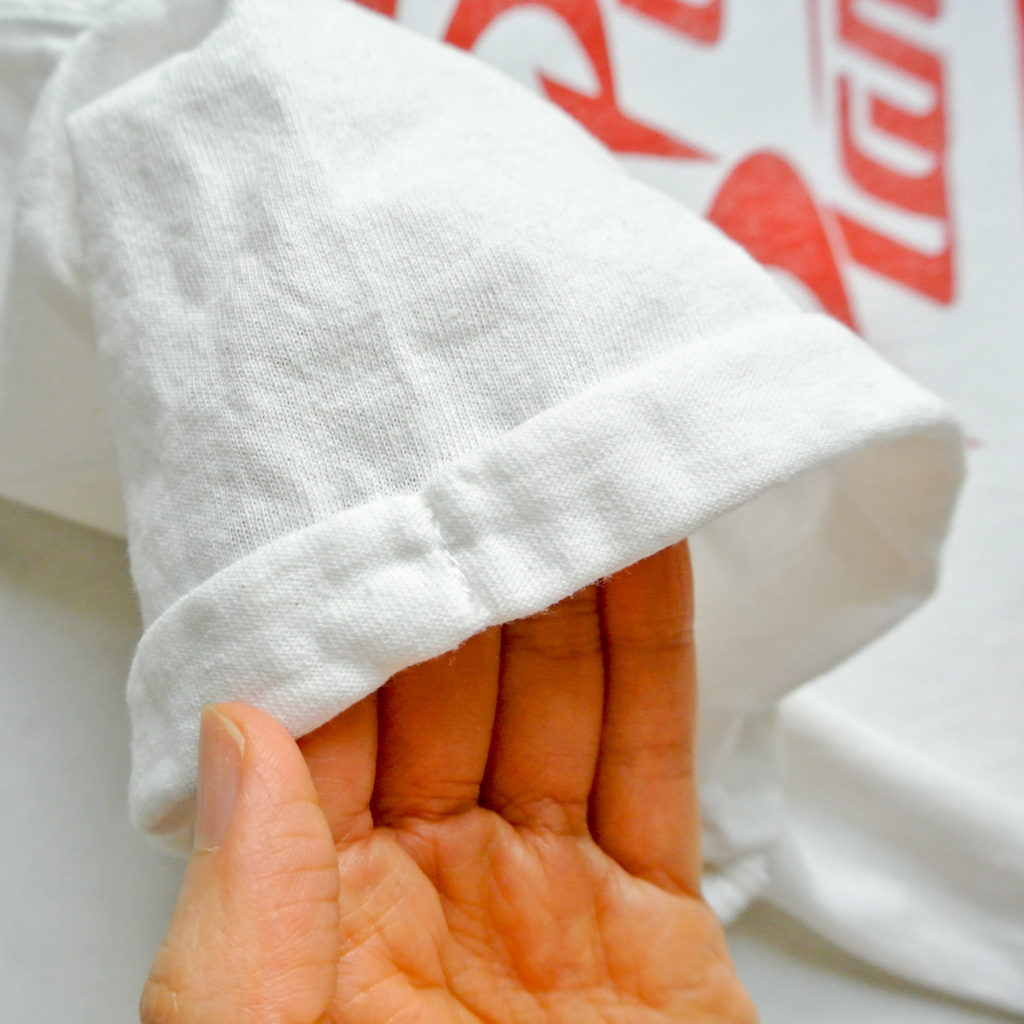
Close up of straight stitch on top of sleeve. Bottom of sleeve stitched in same way.


Finished! Wasn’t that simple? I’m sure you already have T-shirts laying around your closet that need a new look.

Grab some accessories and you are ready for your next Disneyland trip!
Other sewing projects to go with your new t-shirt!


This is so great! I have a couple of tees that I love, but just barely wear them because of that choking necklace (Gildan T-shirts are notorious for this). But this just might prove to be the best solution!
Hi Tammy,
Oooh yes I totally agree about the choking Gildan T-shirts, lol. I’ve altered several Gildan T-shirts for myself with this method and now I wear them all the time.
Love how simple tweaks can totally upgrade a T-shirt neckline!
https://www.tshirtideal.ca/t-shirts.html
This tutorial is such a game changer! I’ve always wanted to give my basic tees a more polished, store-bought look, and your step-by-step guide makes it feel so doable. I especially appreciate the clear photos and tips — it’s such a great way to refresh old shirts without spending a dime. Can’t wait to try this on a few of mine!
Thank you for instructions for those of us who learn visually.
Hi Cora,
You are so welcome!
Gilden T-shirts are good quality. I have a few printed with different designs for the collie rescue I’m part of but don’t wear them because they look like a man’s shirt. You changed that completely! Now I will change my shirts from a man’s to a woman’s and get some wear out of them. Thanks!
I’m so glad to hear that! Yes I’ve altered quite a few Gildan shirts over the years for myself to wear as well. They are so much more comfortable!
Just did this thanks to your amazing instructions. Didn’t bother with the bias tape- just 1/8 “hem” and single stitched with needle in middle then again with on the left to create a double hem that hides the trimmed edge. Looks great and love the sleeve idea. Thank you!
Thanks Crystal! So glad you enjoyed the tutorial
Can you explain more please? I can’t quite picture it in my head.
Hello,
I am in the (slow) process of making videos for some of my tutorials. Will keep you posted!
Hi Alison,
Just wanted to let you know that there is now a video for the t-shirt neckline alteration tutorial! You can find it https://youtu.be/tYJDS0gZv5M
Hope that helps!
Where have you found the knit bias tape?
Hi Annemarie,
I’ve actually never found knit bias tape, I just make them.
Nice tutorial — I love how you took a basic crew-neck tee and made it feel custom and store-bought with just simple steps! The bias tape finish really gives it that polished look, and the sleeve roll trick is a cute touch. Thanks for sharing this — I’m excited to try it on some tees I don’t wear anymore 🙂
Thank you so much! I’ve made a video for the tutorial. You can find it HERE
And I hope that gives a second life to those tees you don’t wear anymore!