How to Install Snaps To Fabric: Easy Tutorial For Beginners
Always wanted to learn how to add snaps to fabric? This step-by-step tutorial will show you just that!
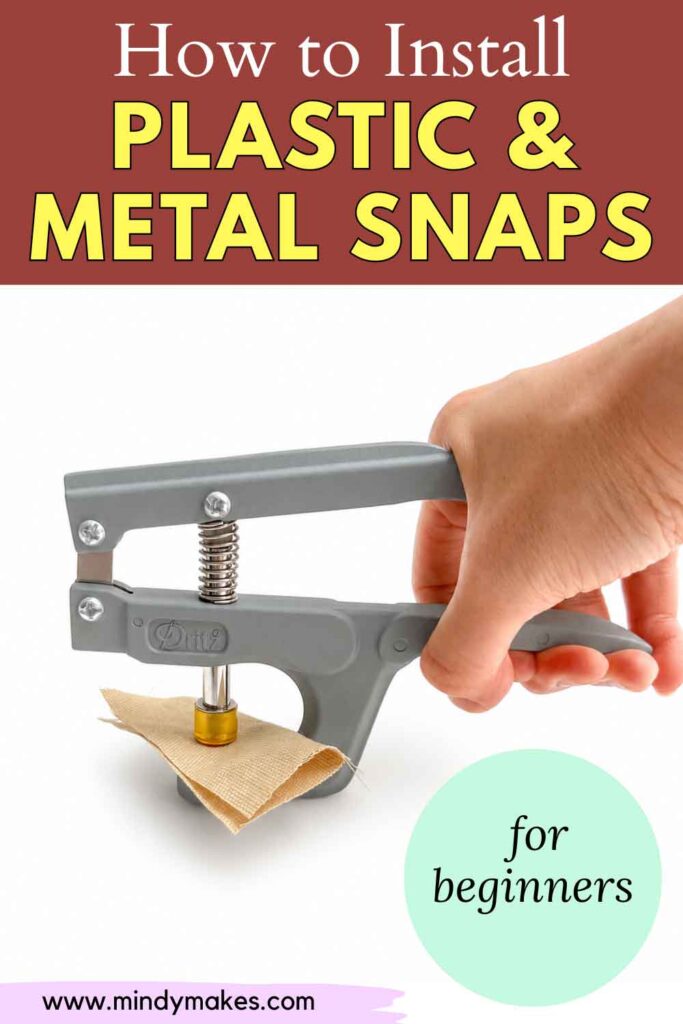
Adding snaps to fabric is one of the easiest ways to create clean, professional-looking closures for handmade projects. Whether you’re sewing baby bibs, clothing, bags, wallets, or home décor items, snaps provide a secure closure without the need for buttons or zippers.
If you’ve never installed snaps before, don’t worry! This tutorial will show you step-by-step how to install snaps to fabric. You will be able to confidently add snaps to your sewing projects in no time!
This post may contain affiliate links. Please read my disclosure policy for details. As an Amazon Associate, I earn from qualifying purchases.
Why Choose Snaps?
Snaps are popular because they are:
- Easy to open and close.
- Durable and long-lasting.
- Great for beginners.
- Available in many colors, sizes, and finishes.
- Perfect for garments, accessories, and crafts.
They’re especially useful for projects that need frequent opening and closing, such as baby clothes, bibs, purses, pouches, and wallets.
Common Types of Snaps
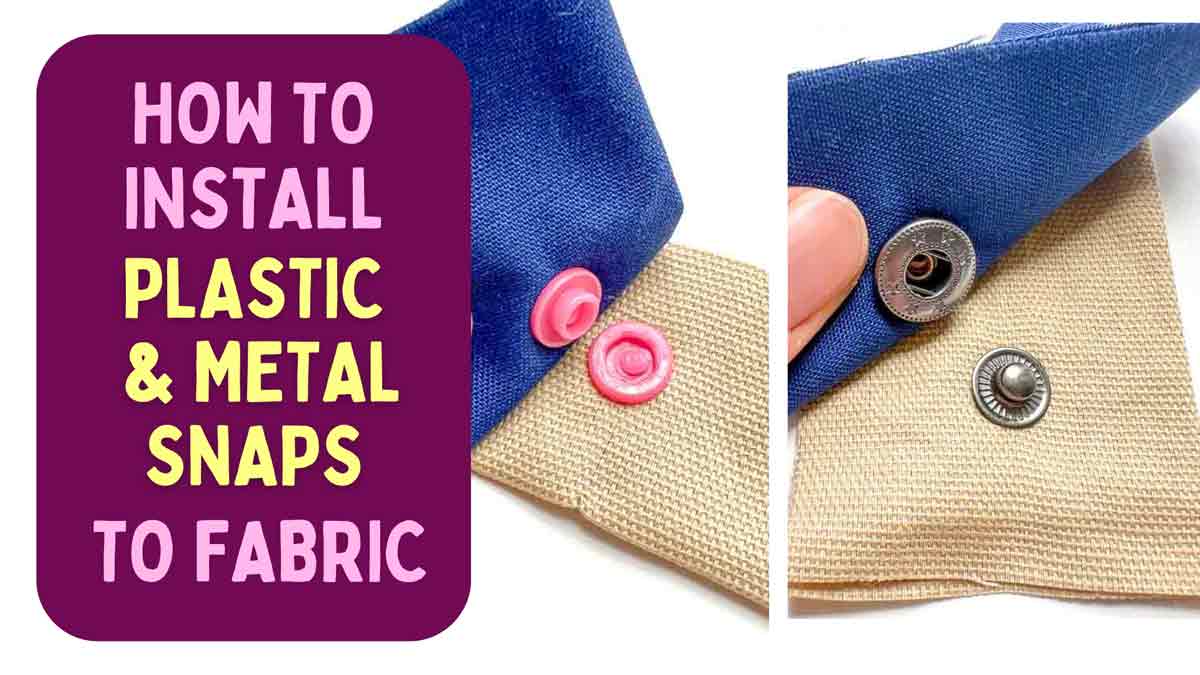
In general, there are 2 types of snaps: plastic snaps and metal snaps.
Plastic snaps are made of resin and have a socket that clicks into a prong. Metal snaps, on the other hand, come in several varieties that look and come together differently. Below are the most common types of snaps you will run into:
Plastic Resin Snaps (KAM Snaps)
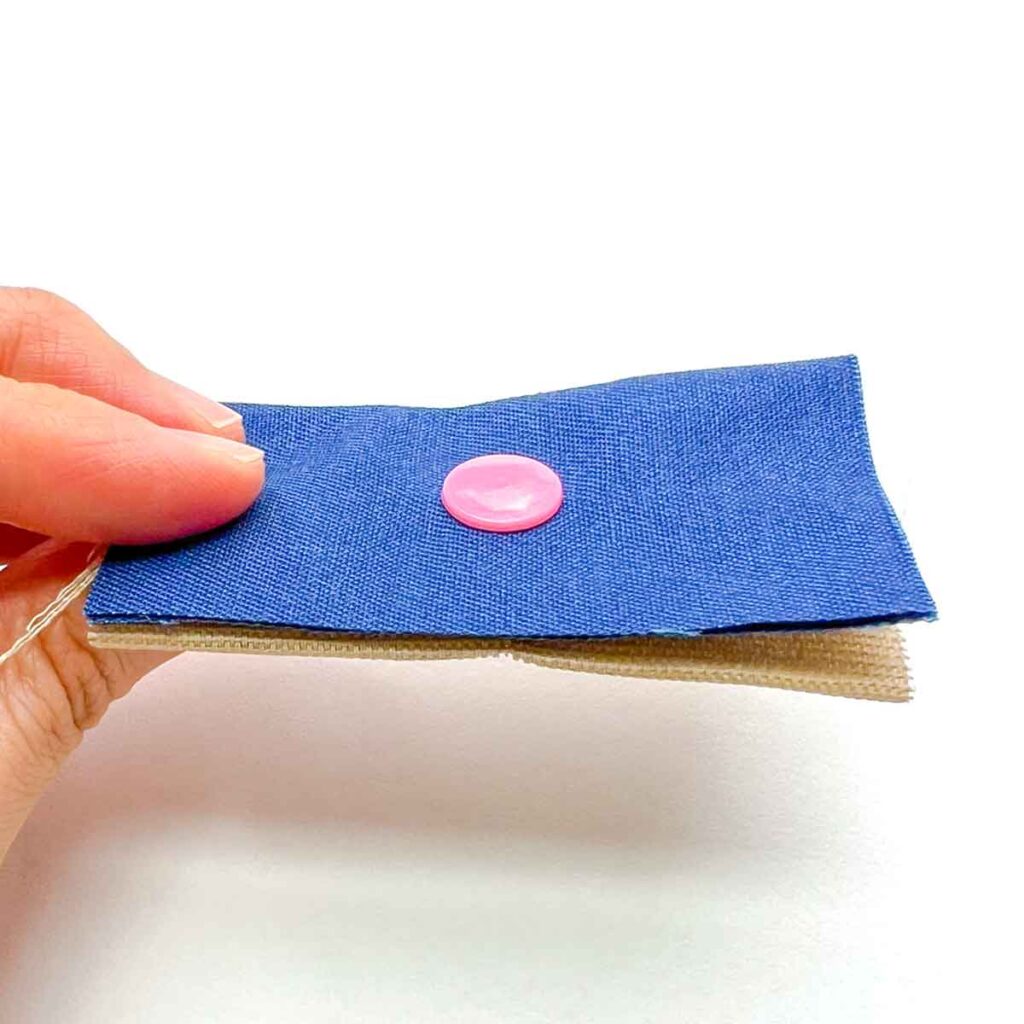
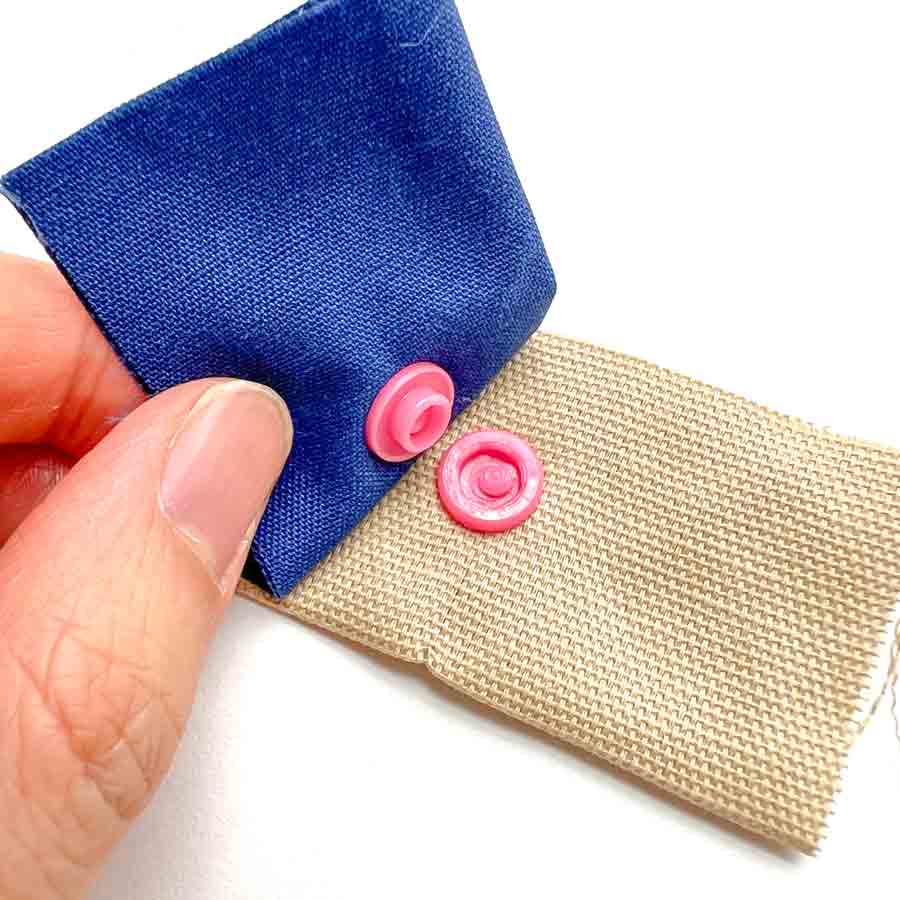
Plastic snaps are the most popular choice for beginner sewists and crafters. They consist of a cap, socket, stud, and prong and are installed using a snap press or handheld snap pliers.
Plastic resin snaps are washable, durable, and available in hundreds of colors.
Metal Snaps
Metal snaps, as the name implies, are made of metal and comes in various colors (although not as many as plastic snaps). Below are the most common types of metal snaps:
Ring Snaps
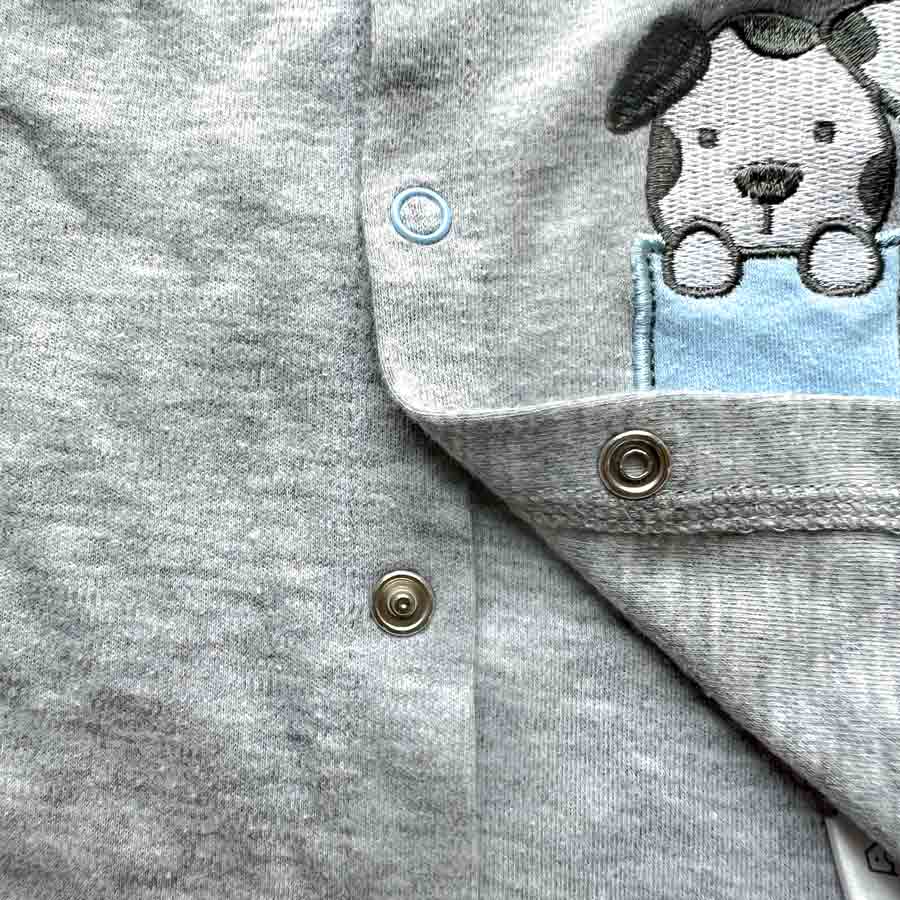
Ring snaps are metal snaps with a visible ring around the center of the cap. They’re often found on baby clothing (think onesies), lightweight garments, and fashion accessories because they combine durability with a decorative appearance.
Spring Snaps
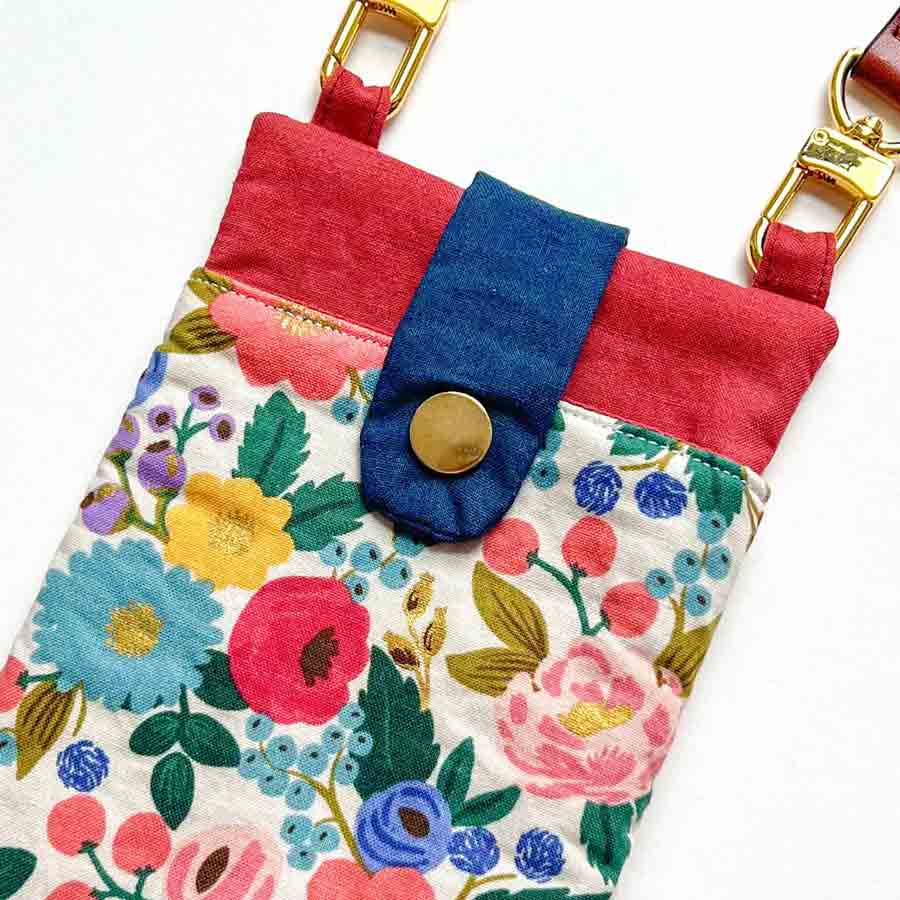
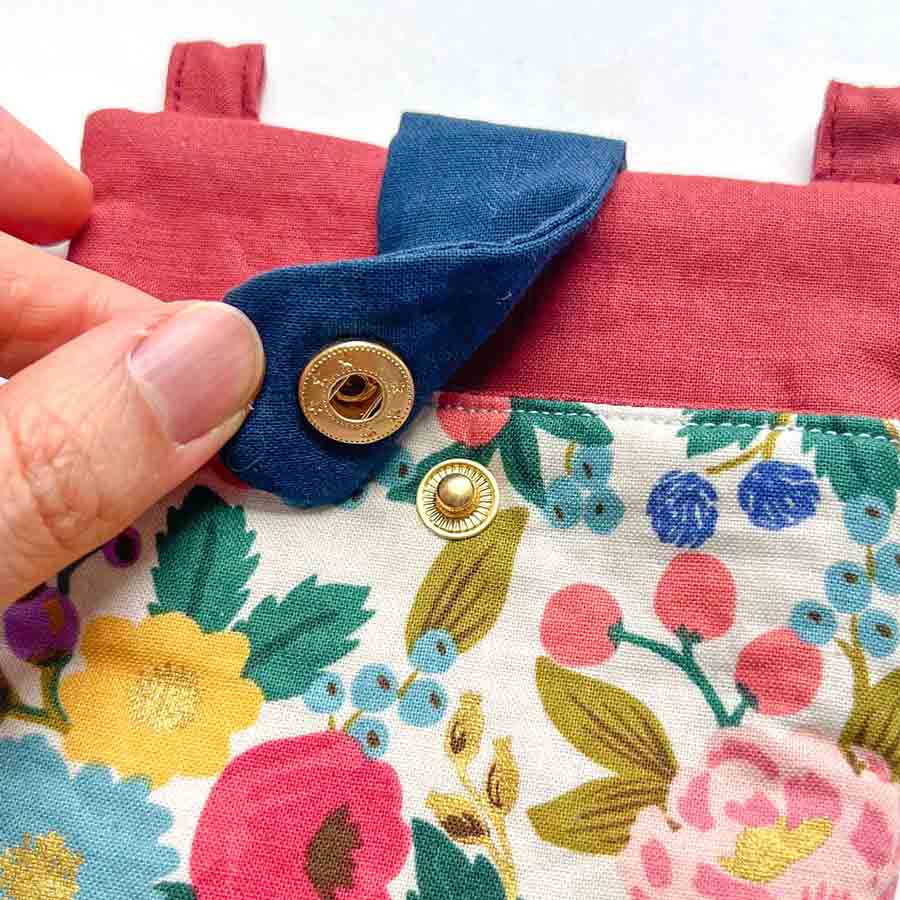
Spring snaps feature an internal spring mechanism that provides a secure hold while remaining easy to open and close. They’re commonly used on jackets, bags, and medium-weight garments.
Heavy-Duty Snaps

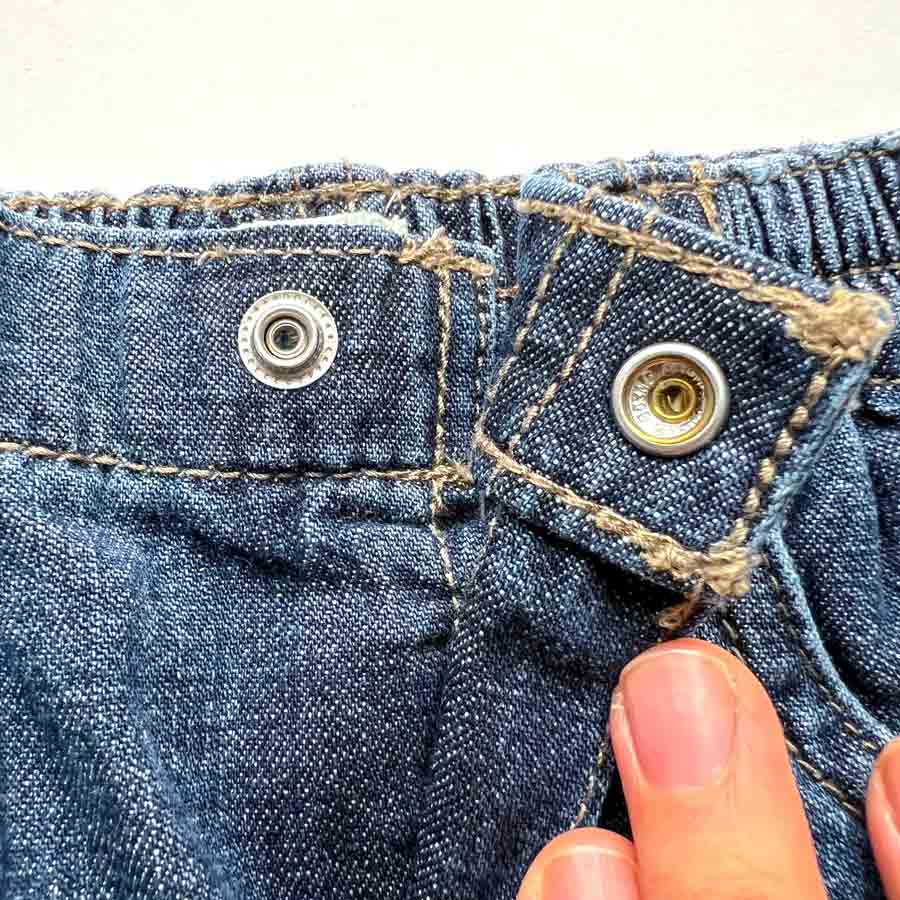
Designed for thicker fabrics like canvas, denim, and outdoor gear, heavy-duty snaps are larger and stronger than standard snaps. These are a popular choice for utility projects, tool rolls, boat covers, and heavy bags.
Sew-On Snaps
Unlike prong-style snaps, sew-on snaps have small holes around the edge that allow them to be stitched directly onto fabric by hand. They’re ideal when you don’t want to puncture delicate fabrics or when installing snaps after a project is complete.
Plastic vs. Metal Snaps: How Are They Different?
Before you begin installing snaps, it’s helpful to understand the different types available. While both plastic snaps and metal snaps create secure closures, each has unique advantages depending on your project.
Plastic Snaps
Plastic snaps, often called KAM snaps, are lightweight, rust-resistant, and available in a wide variety of colors. They’re a favorite for baby items because they won’t corrode after repeated washing and have smooth edges that are gentle against the skin.
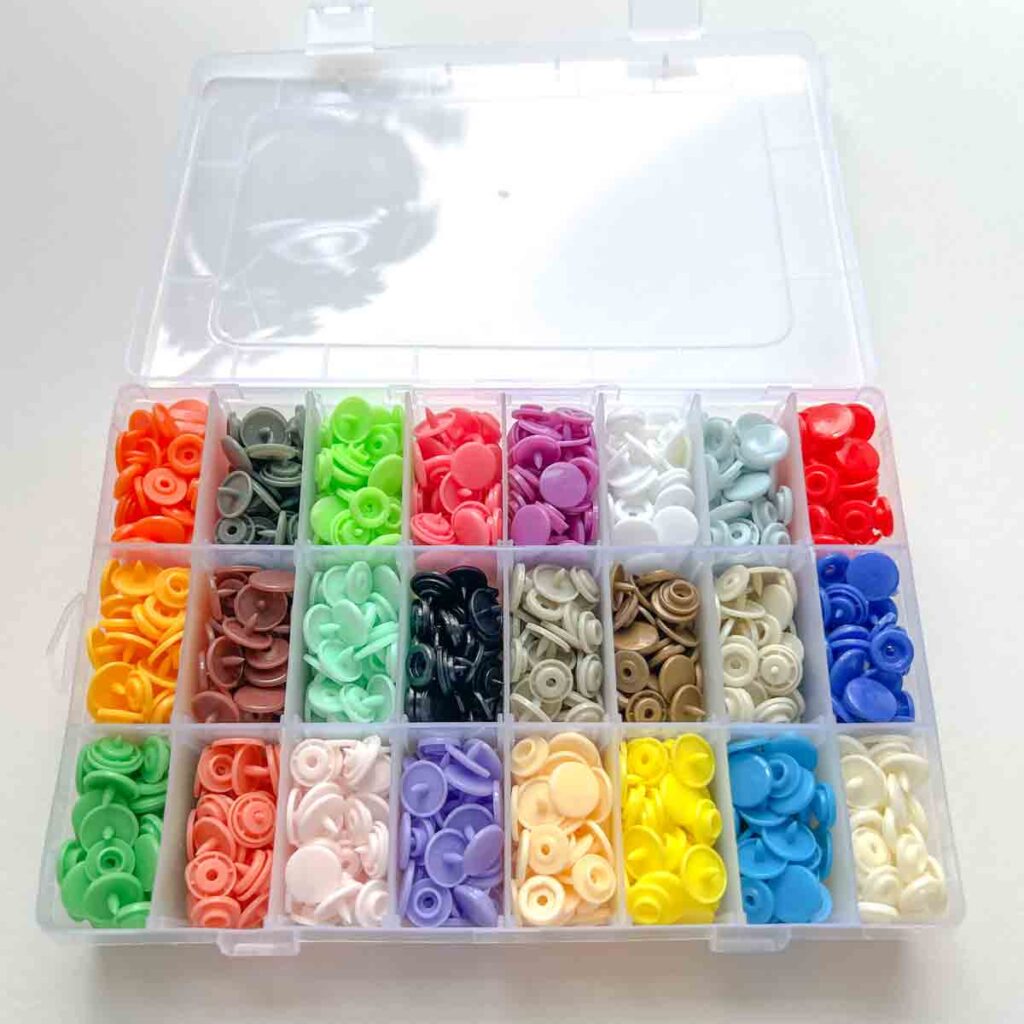
Plastic snaps are ideal for:
- Baby bibs
- Cloth diapers
- Children’s clothing
- Lightweight bags and pouches
- Aprons
- Quilting projects
- Reusable household items
Because they’re available in dozens of colors, plastic snaps can also become a decorative design element that coordinates with your fabric.
Metal Snaps
Metal snaps offer a classic, professional appearance and are typically stronger than plastic snaps. They work especially well on thicker fabrics and projects that require extra durability.
Metal snaps are commonly used for:
- Jackets and coats
- Denim projects
- Canvas bags
- Wallets
- Leather goods
- Home décor
- Heavy-duty sewing projects
Many metal snaps come in finishes like nickel, brass, antique bronze, matte black, and gunmetal, allowing you to match the hardware to your project’s style and color.
For today’s tutorial, I will be showing you How to install Plastic Snaps and How to Install Metal Spring Snaps. Personally, I find that these two types of snaps are most suitable for finishing up bags and pouches, which is the majority of sewing projects featured on this website.
Which Snap Is Best?
The best snap for your project depends on what you need it to do:
- Choose plastic snaps for baby items, children’s clothing, quilting projects, and colorful accessories.
- Choose metal snaps for bags, jackets, wallets, canvas, denim, and projects that require extra strength.
- Choose sew-on snaps for delicate fabrics or when you prefer hand sewing.
- Choose heavy-duty snaps for outdoor gear, upholstery, and heavy fabrics.
No matter which type you choose, using the correct installation tool and reinforcing lightweight fabrics will help ensure your snaps stay securely in place for years to come.
Supplies You’ll Need
Before getting started, gather the following supplies:
- Snap fasteners (plastic or metal)
- Snap installation tool or snap press
- Fabric
- Fabric chalk, pencil, or washable pen
- Ruler or measuring tape
- Fabric scissors
- Interfacing (optional but recommended if you are planning to add a snap to lightweight fabrics)
For this tutorial, I am installing the snaps on scrap fabric. If this is your first time applying snaps, I highly recommend practicing. Once you get the feel of how to do it, then go ahead and put it on your actual project!
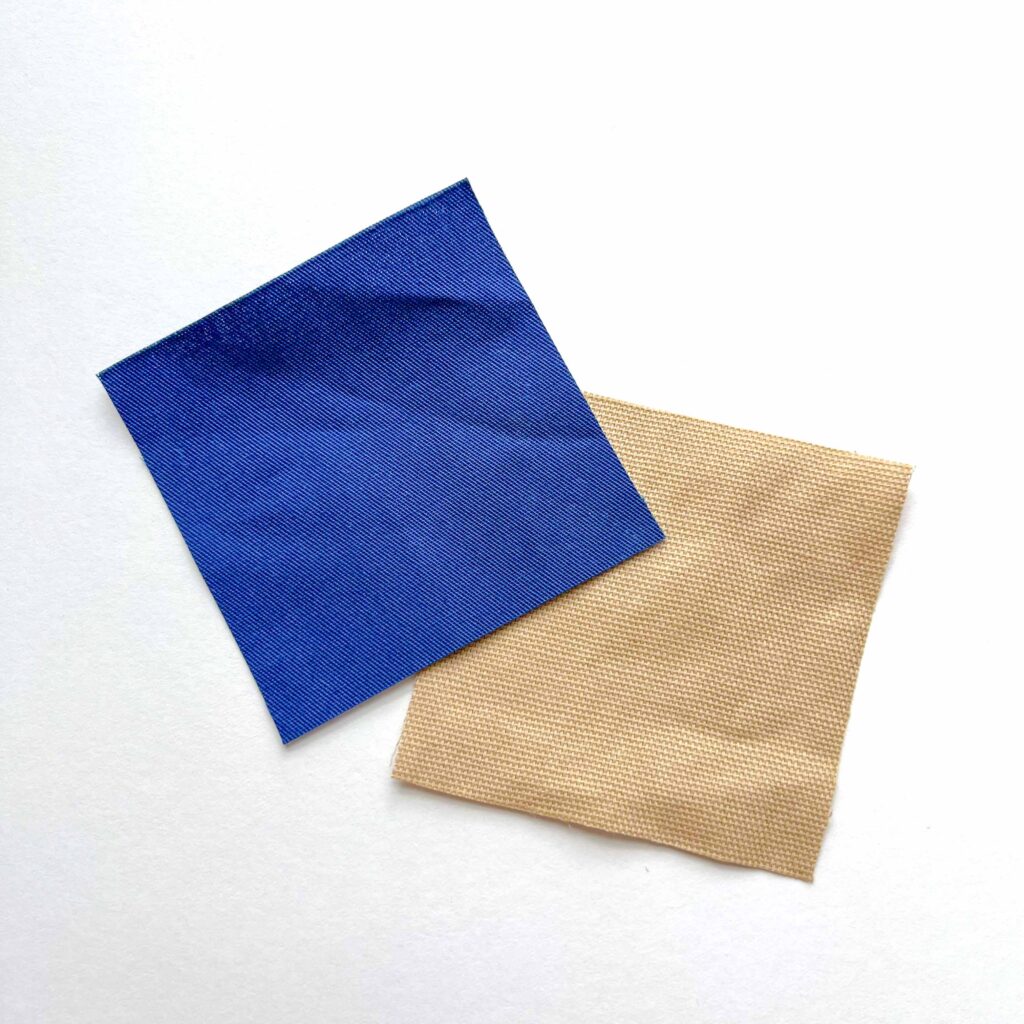
How to Install Snaps to Fabric: Metal Spring SNaps
Metal Spring Snap Tools
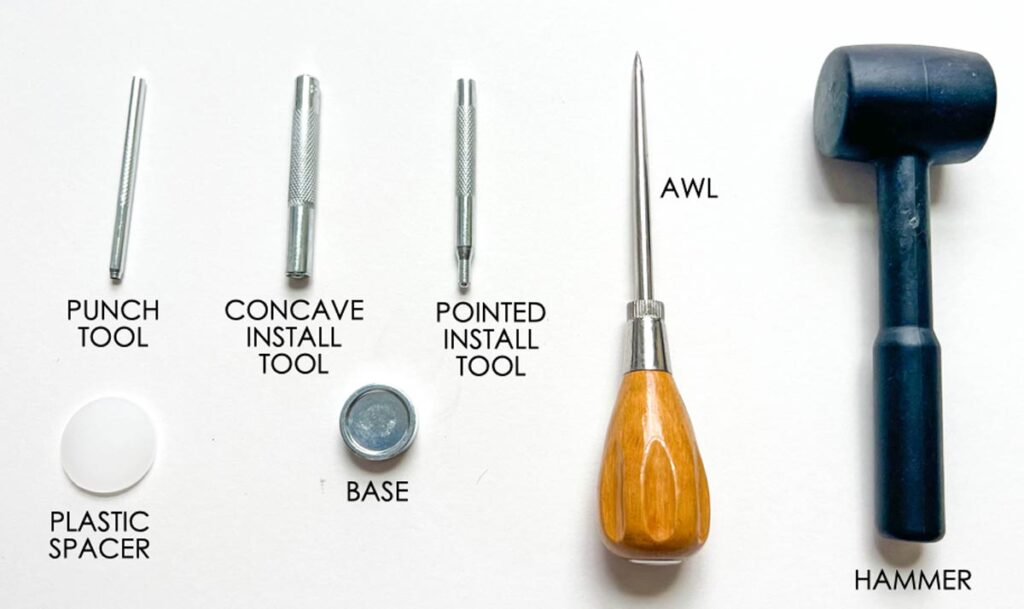
This photo shows all the tools that came with my metal snap kit (everything except the awl). For this tutorial, you will need the concave install stool, pointed install tool, base, and hammer.
The punch tool and plastic spacer are for puncturing a hole in leather before inserting the snap parts. However, it doesn’t work very well with cotton fabrics. The awl is a much better tool for that.
Since the tutorial today will be done on cotton canvas fabrics, we will not be using the punch tool and plastic spacer.
If you don’t have an awl, you can also use embroidery scissors to cut a small hole in your fabric.
Spring Snap Parts
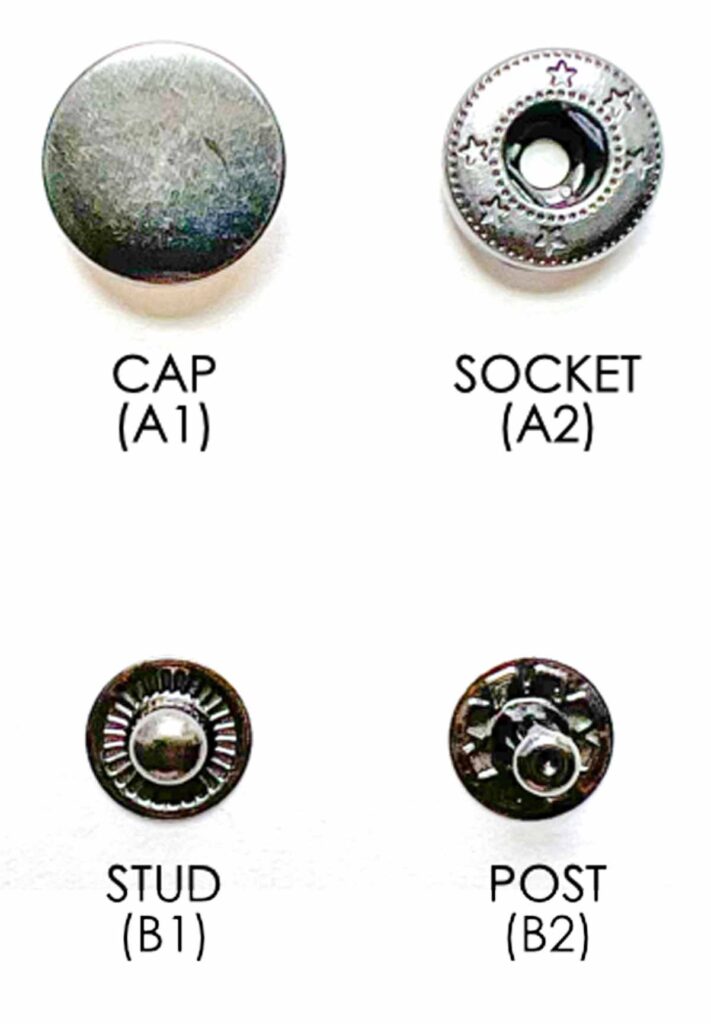
The metal spring snap comes in 4 parts, as pictured:
- CAP (A1)
- SOCKET (A2)
- STUD (B1)
- POST (B2)
For ease of reference, I’ve also labeled each snap part as a letter and number combination: A1 (cap), A2 (socket), B1 (stud), and B2 (post).
How to Install Snap Cap (Topside of Fabric)
STEP 1: MARK THE SNAP PLACEMENT
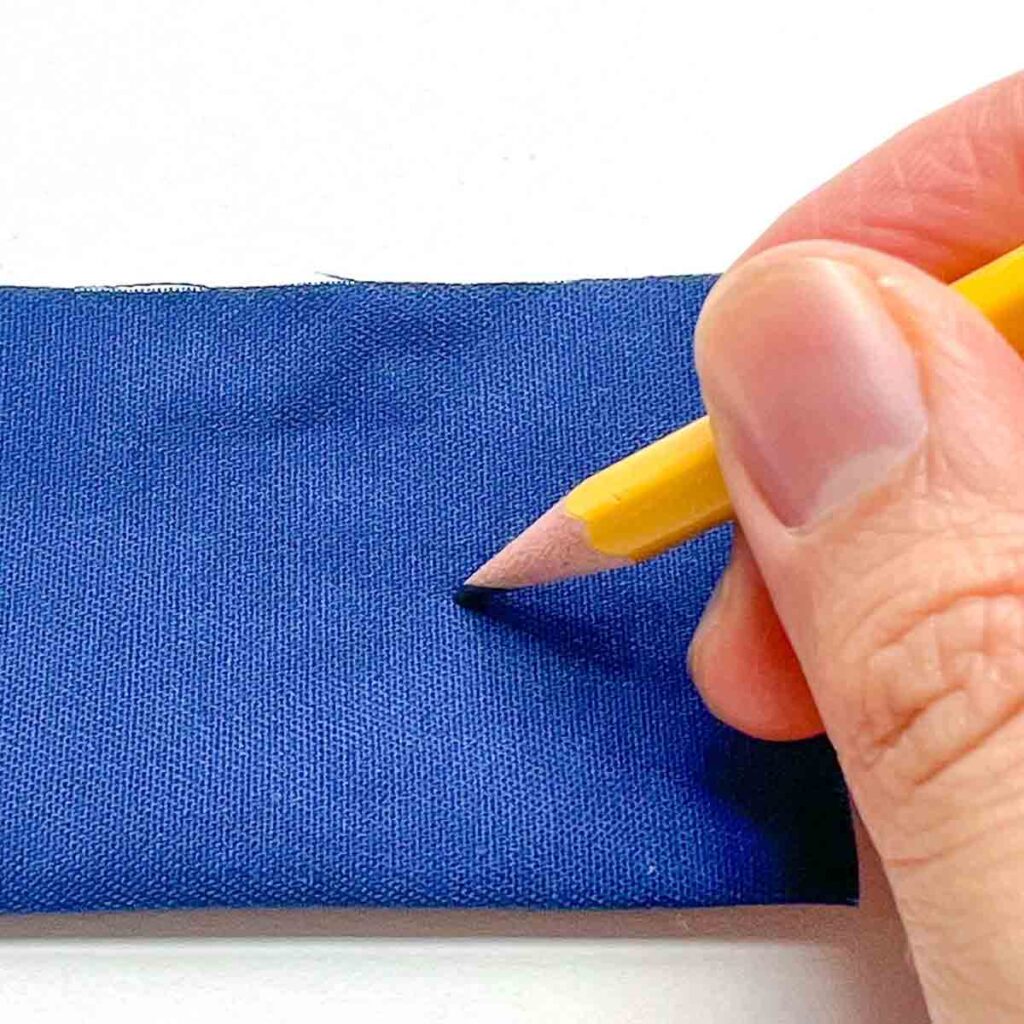
First, use a pencil or fabric chalk to mark the placement of your snap.
If your project requires multiple snaps, double-check that each mark is evenly spaced and aligned.
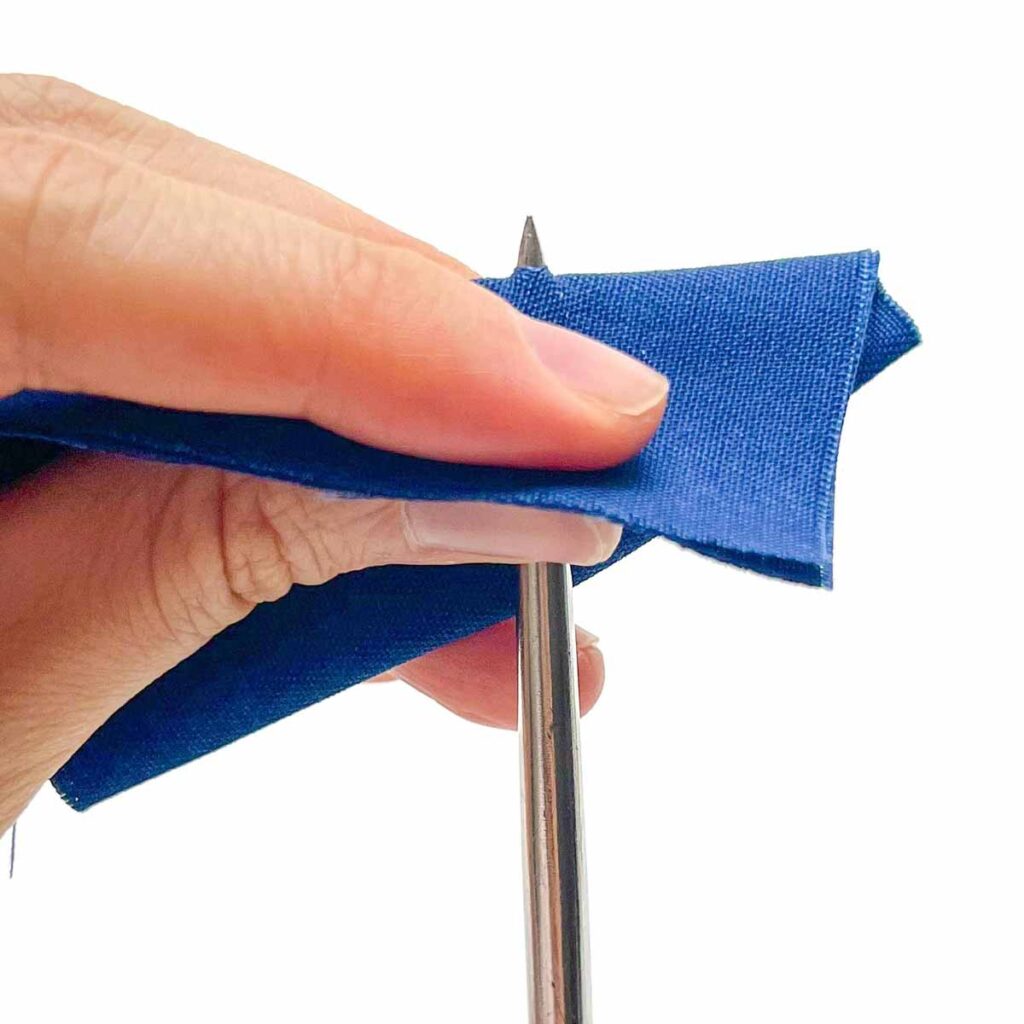
Next, use an awl (or embroidery scissors) to pierce through the fabric.
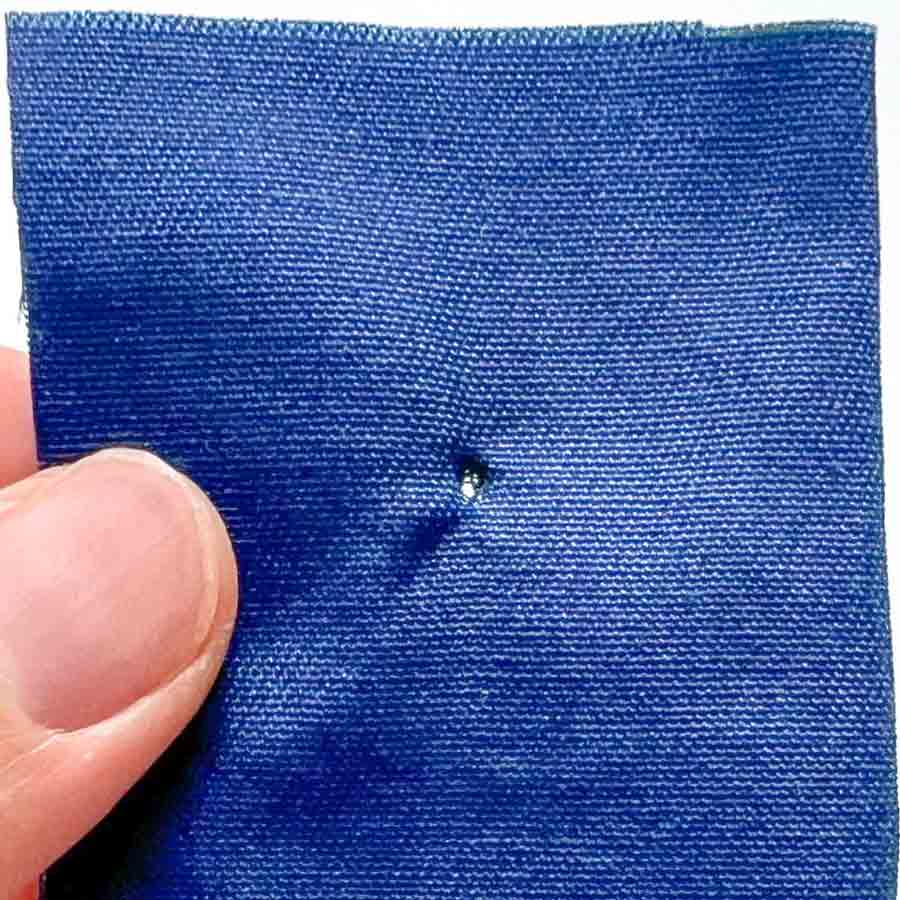
Now you will see a hole through the fabric.
STEP 2: INSERT THE SNAP CAP
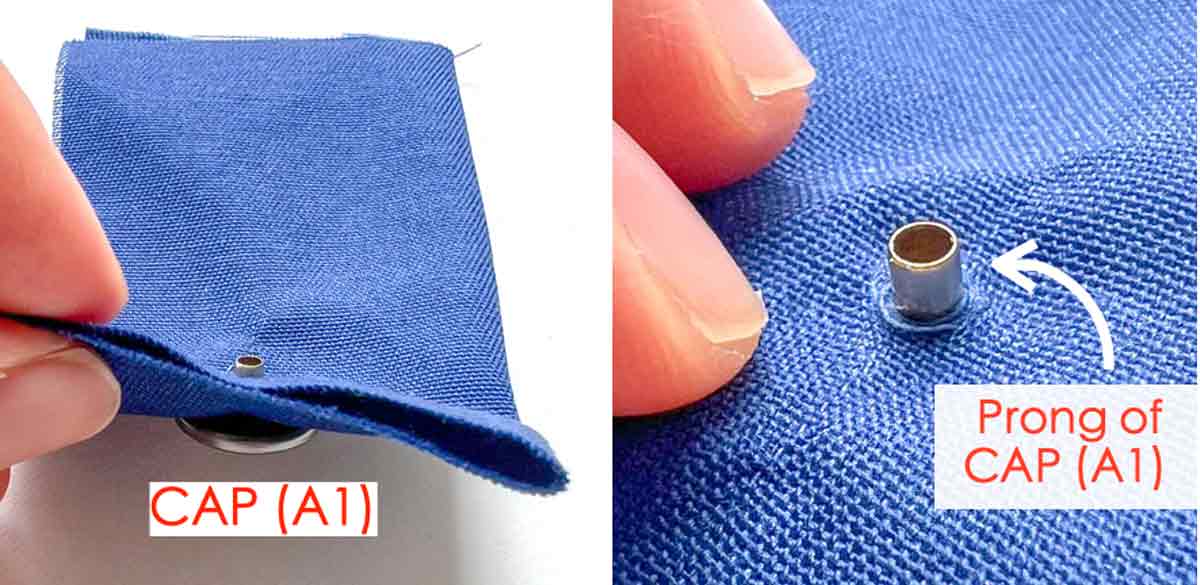
Then, take CAP (A1) and push the prong through the fabric from the wrong side so it comes through the marked spot.
STEP 3: INSERT THE SNAP SOCKET
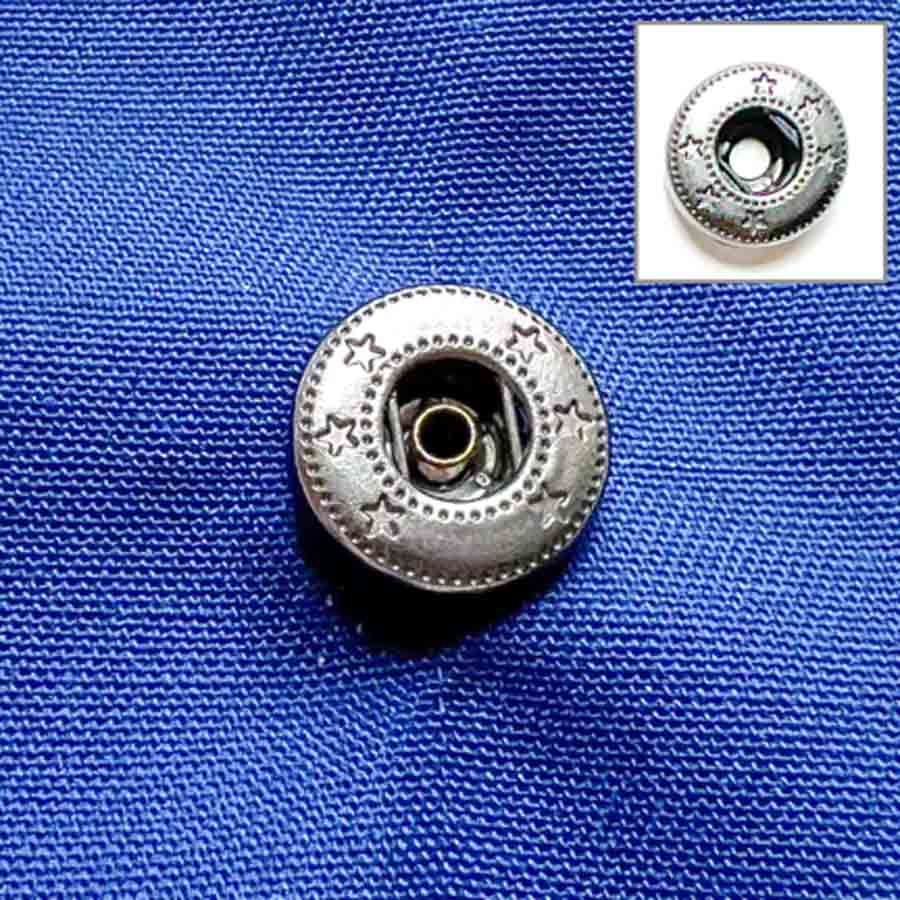
Next, place SOCKET (A2) over the prong on CAP (A1).
STEP 4: HAMMER SNAP CAP & SNAP SOCKET IN
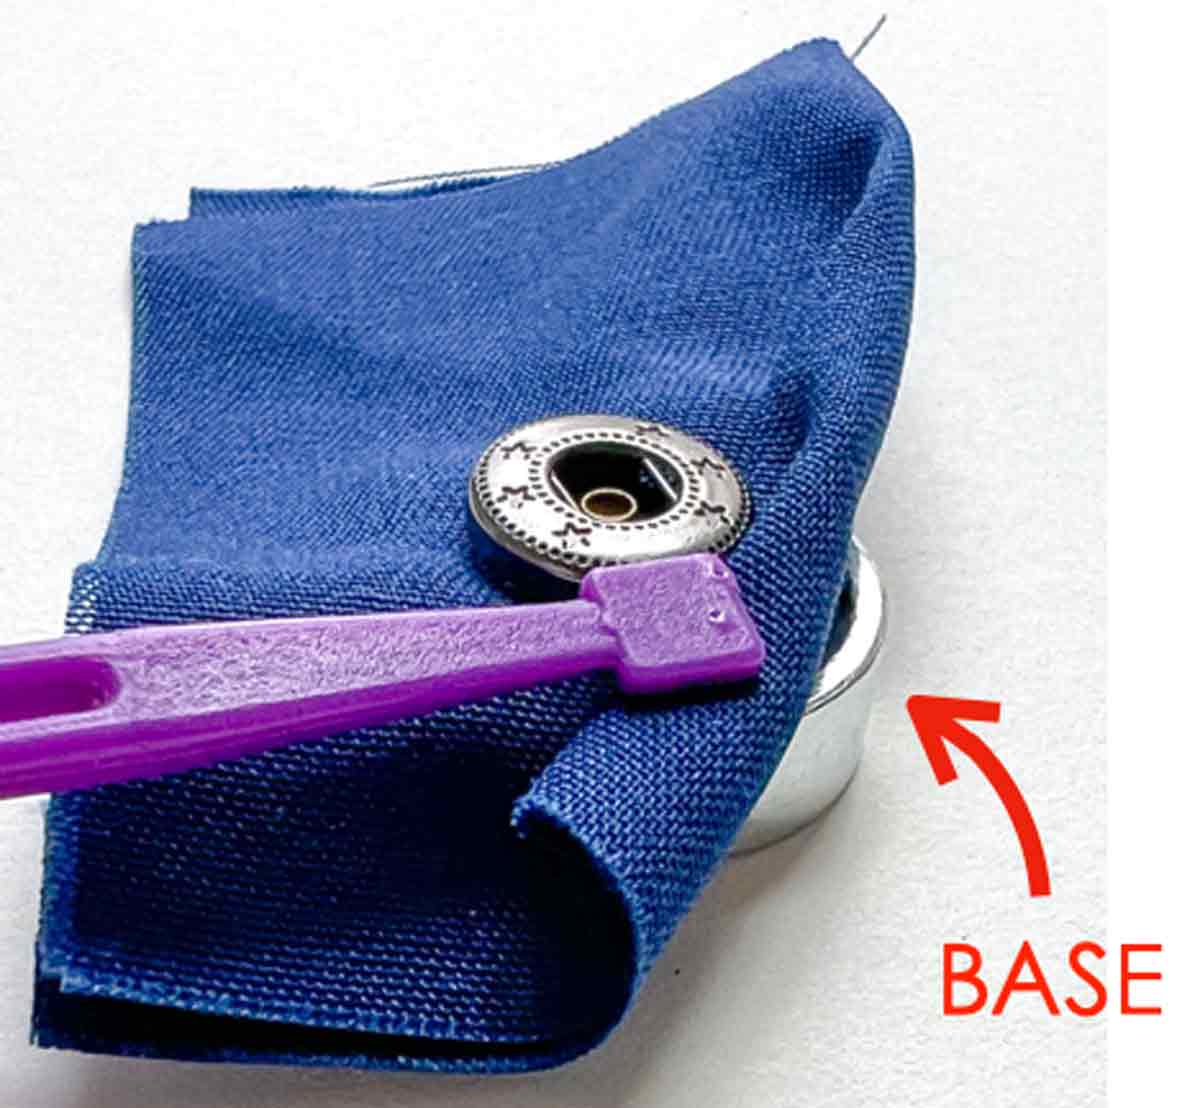
Then place BASE under the fabric, as pictured. You will keep the base under the fabric until you are done hammering.
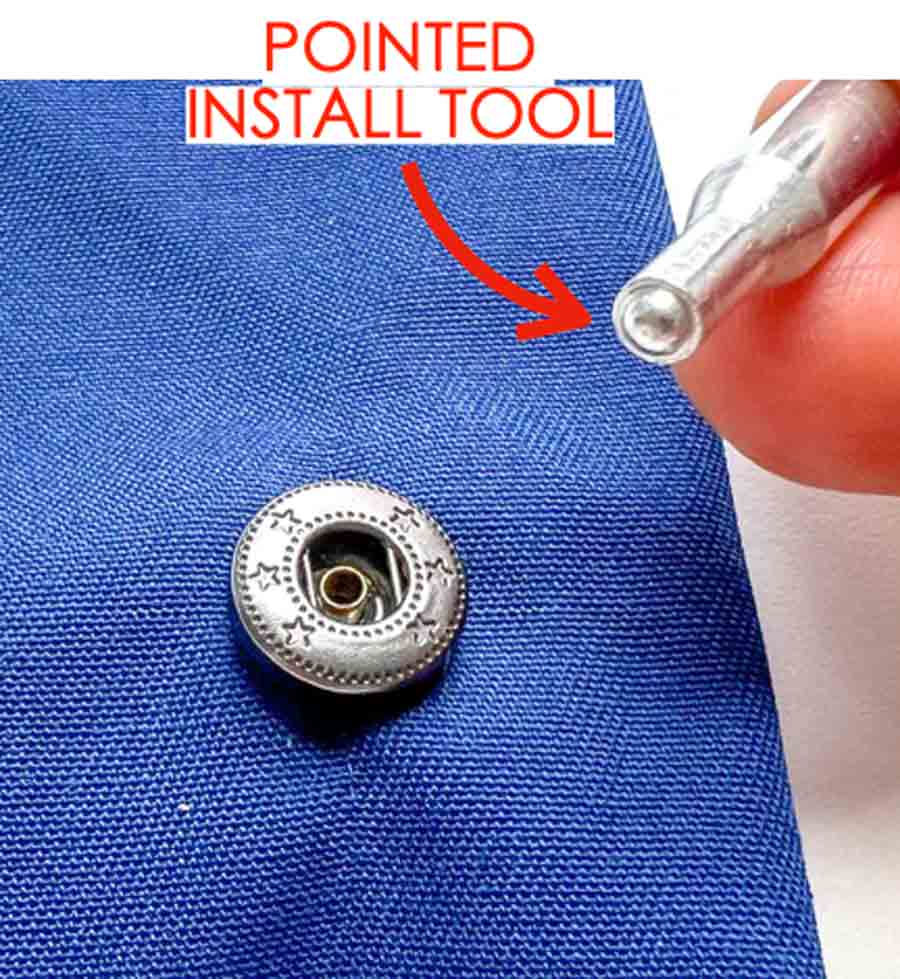
Then, take POINTED INSTALL TOOL and place it straight into the hole of the SOCKET (A2). The ball looking part of the POINTED INSTALL TOOL should be straight over prong of CAP (A1).
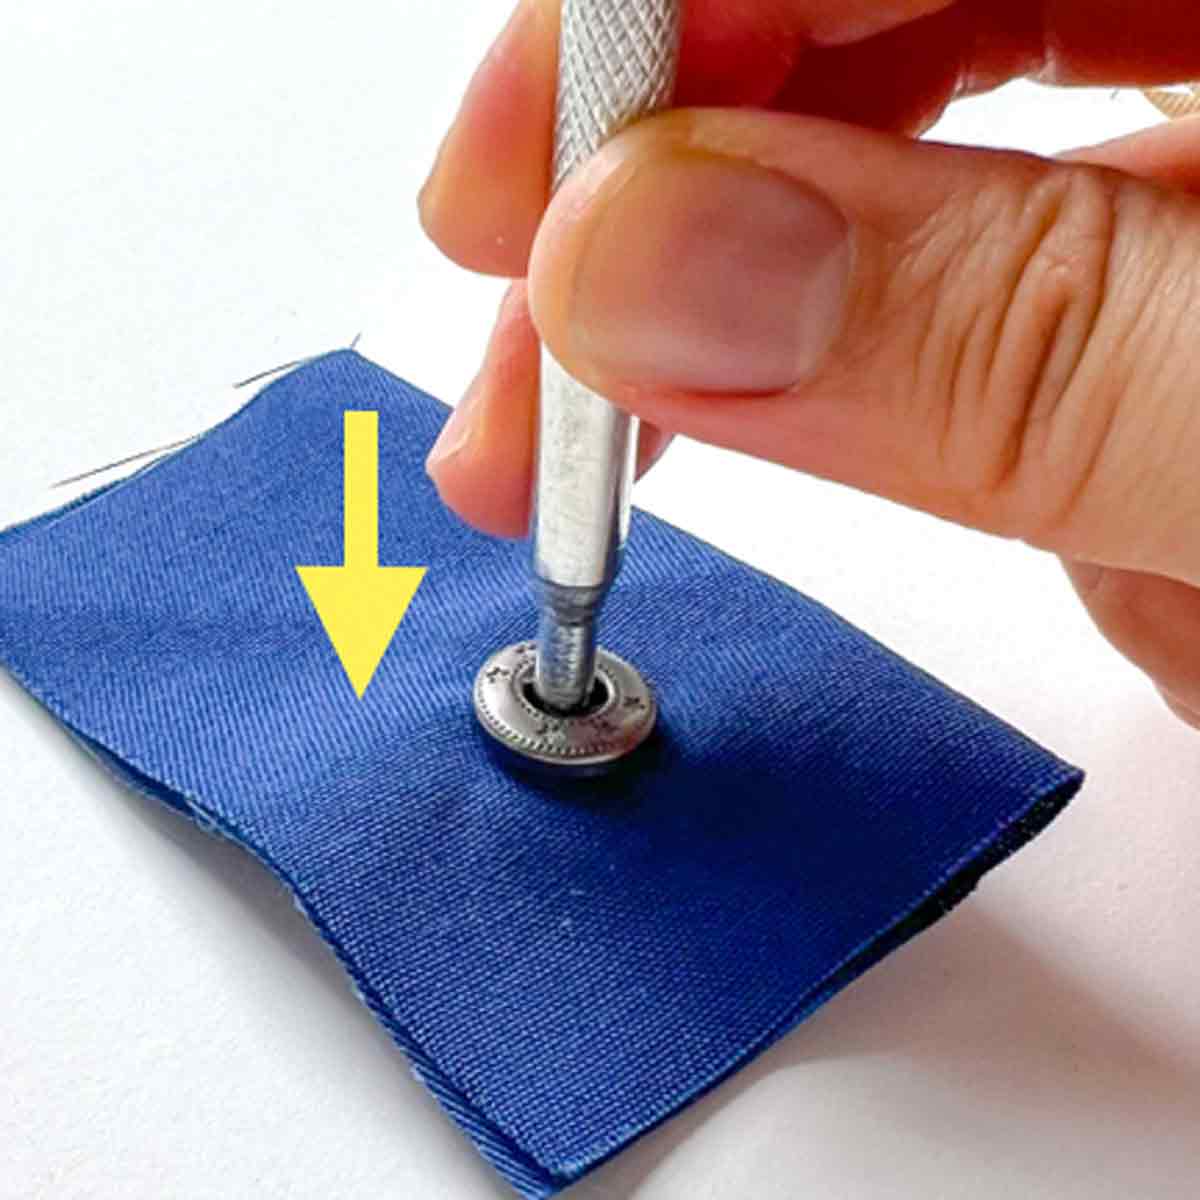
Make sure to keep the POINTED INSTALL TOOL vertical when hammering the snap. Do not tilt.
I also find my results come out better when I push the install tool down towards the snap while I hammer with my other hand.
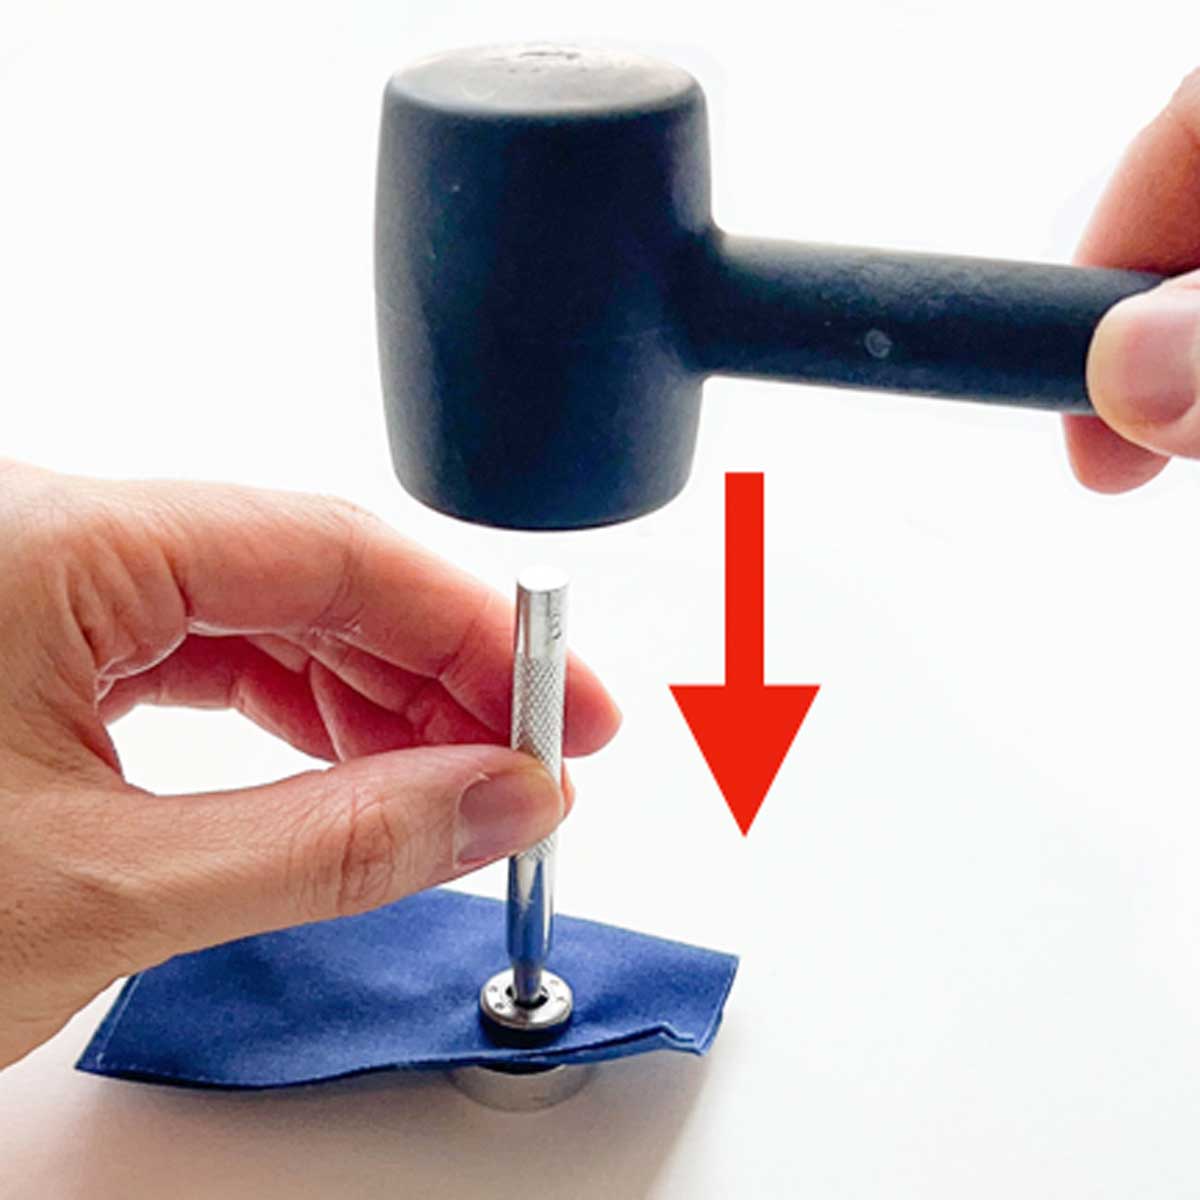
Now hammer the snap down several times with the hammer and POINTED TOOL (see NOTE 1).
NOTE 1: You will have to play around with how hard you need to hammer to get the snap cap tight over the fabric (that’s why it’s good to practice!). When the snap cap is correctly installed, it will feel tight and secure. The SOCKET will lay flat over the fabric and you won’t be able to rock it one way or the other.
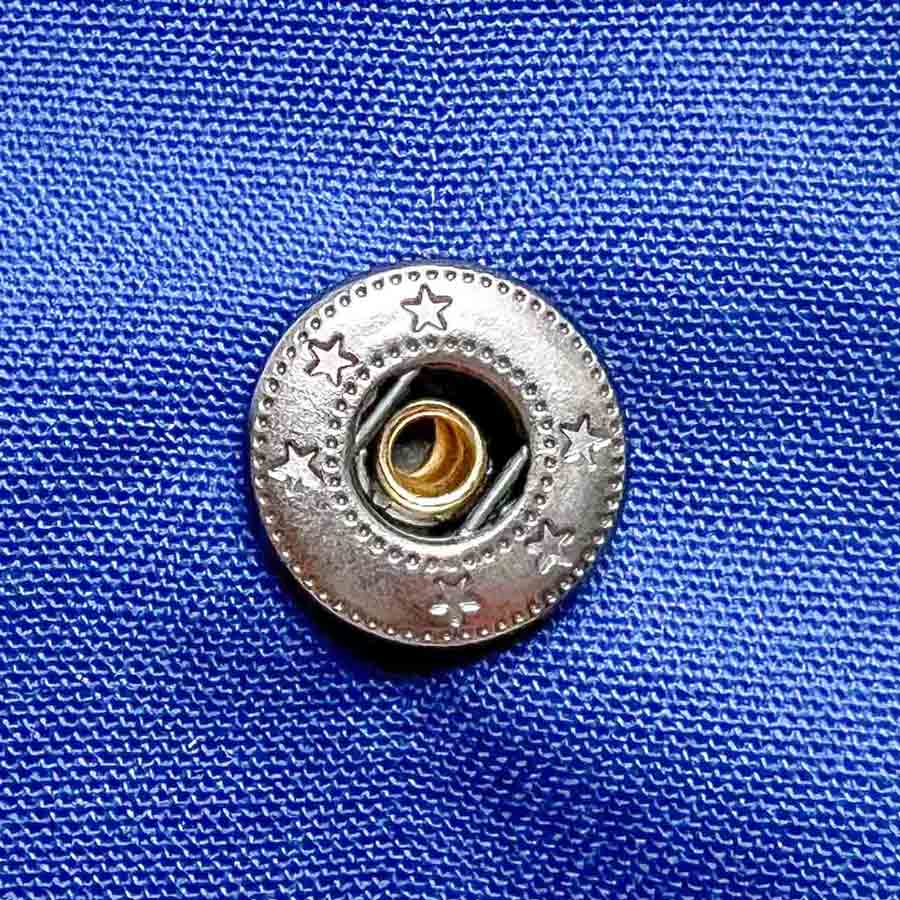
View of snap cap correctly installed
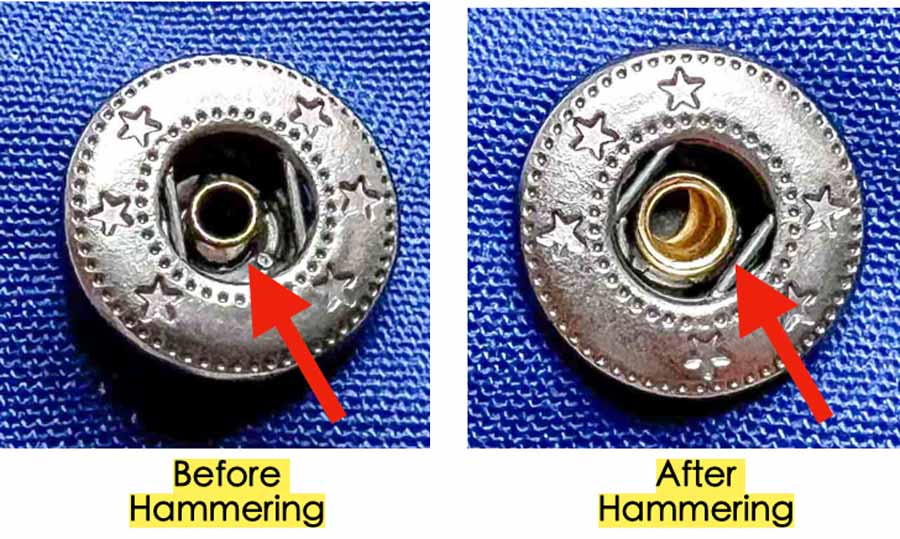
Note the difference in the look of CAP prong (red arrow) before and after it’s been hammered. See how the outer border of the prong has been flattened. This is what holds the socket in place.
How to Install Stud (underside of fabric)
STEP 1: MARK PLACEMENT OF STUD
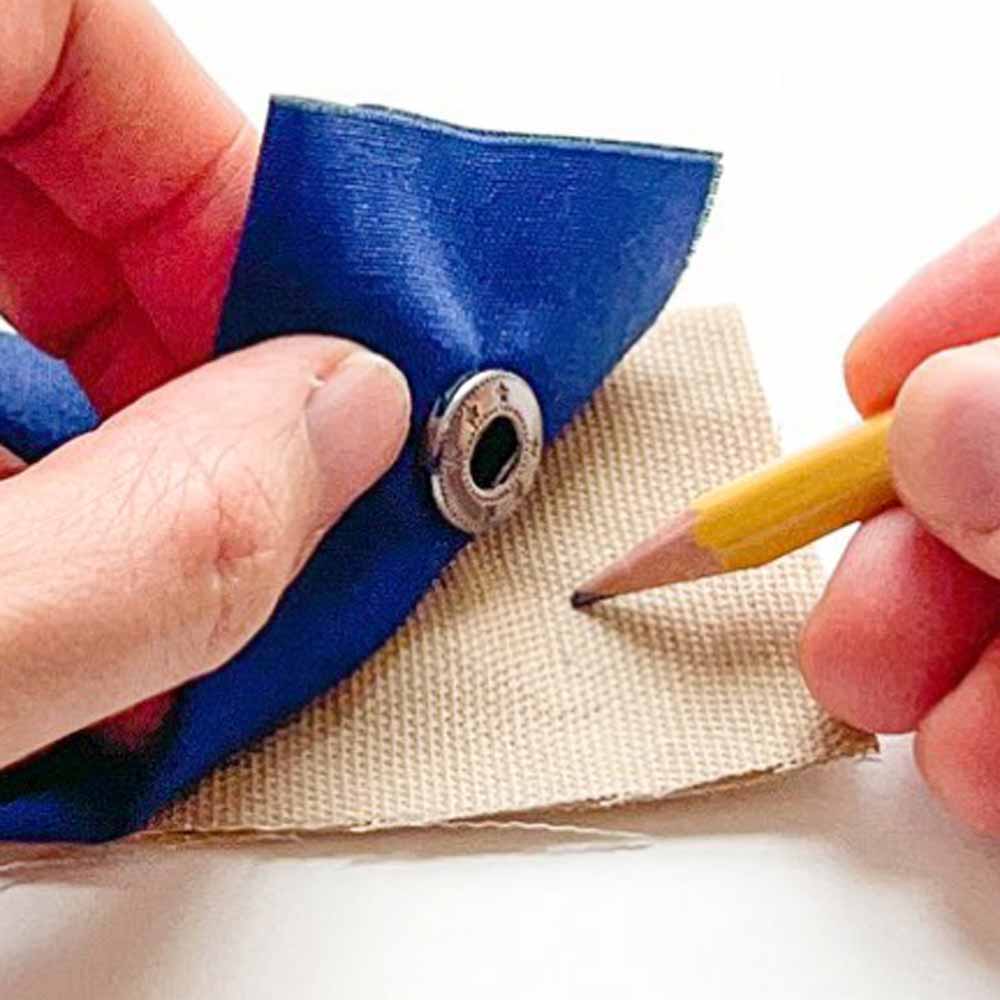
First, mark where the STUD needs to go according to where the CAP was installed.
Remember, accurate marking helps ensure your finished project closes properly.
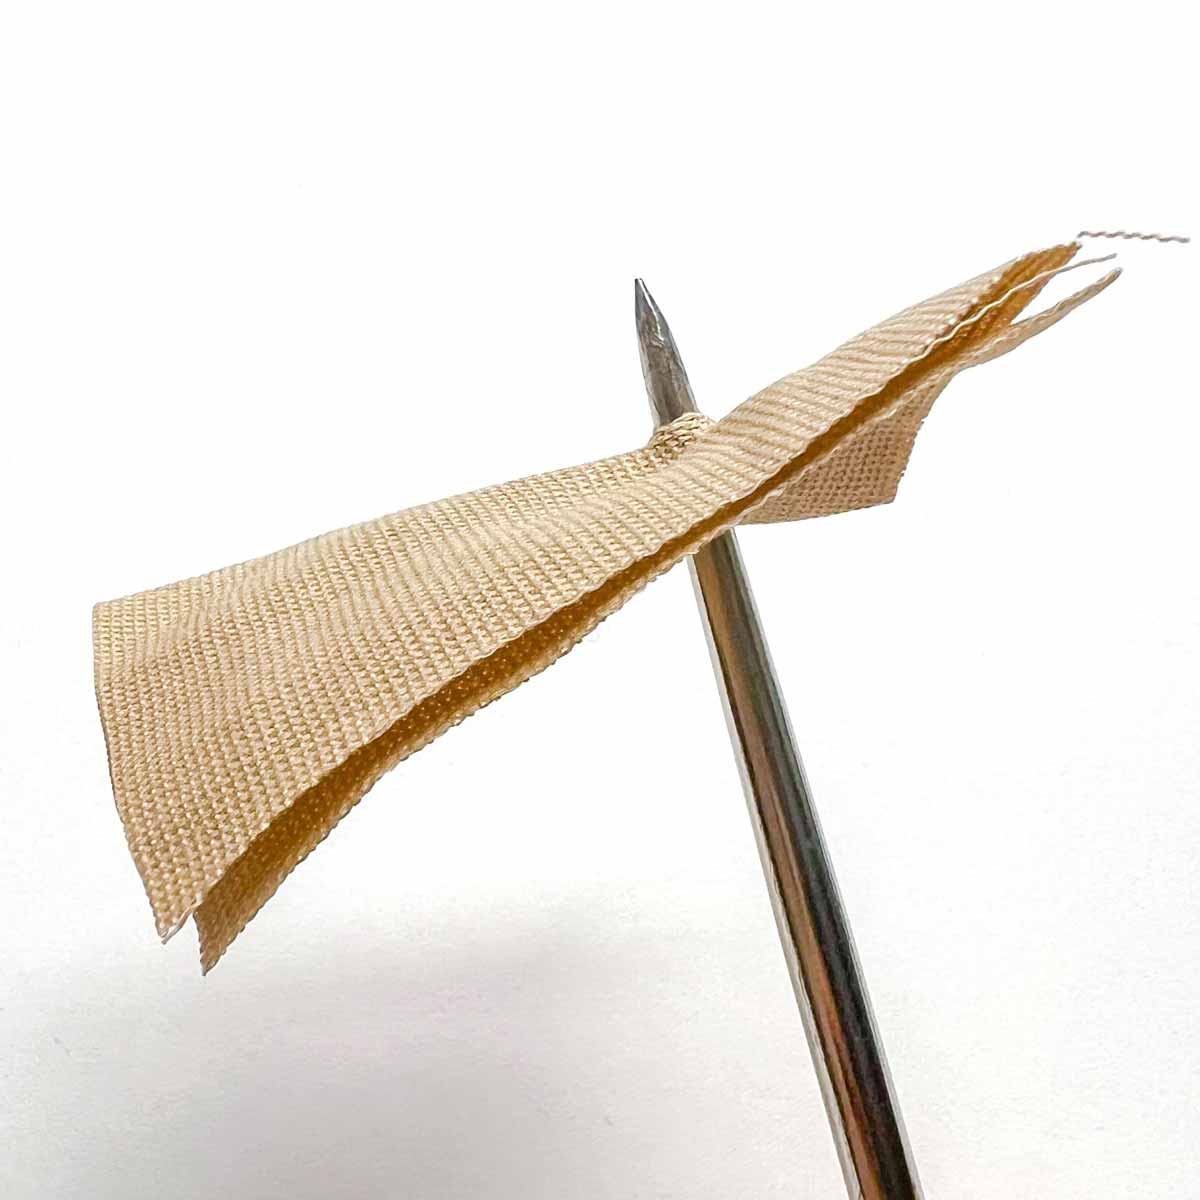
Again, use an awl to make a hole through the fabric.
STEP 2: INSERT SNAP POST
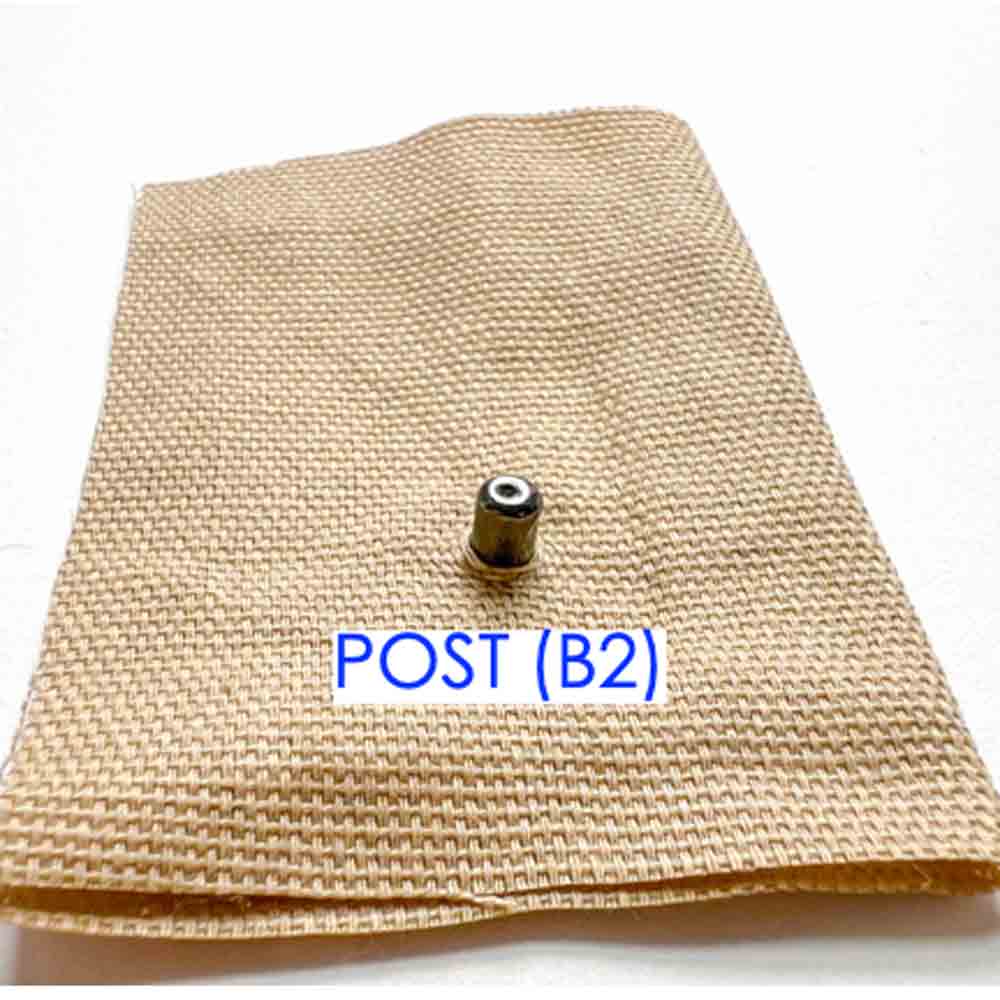
Next, pass the POST (B2) through the hole in fabric.
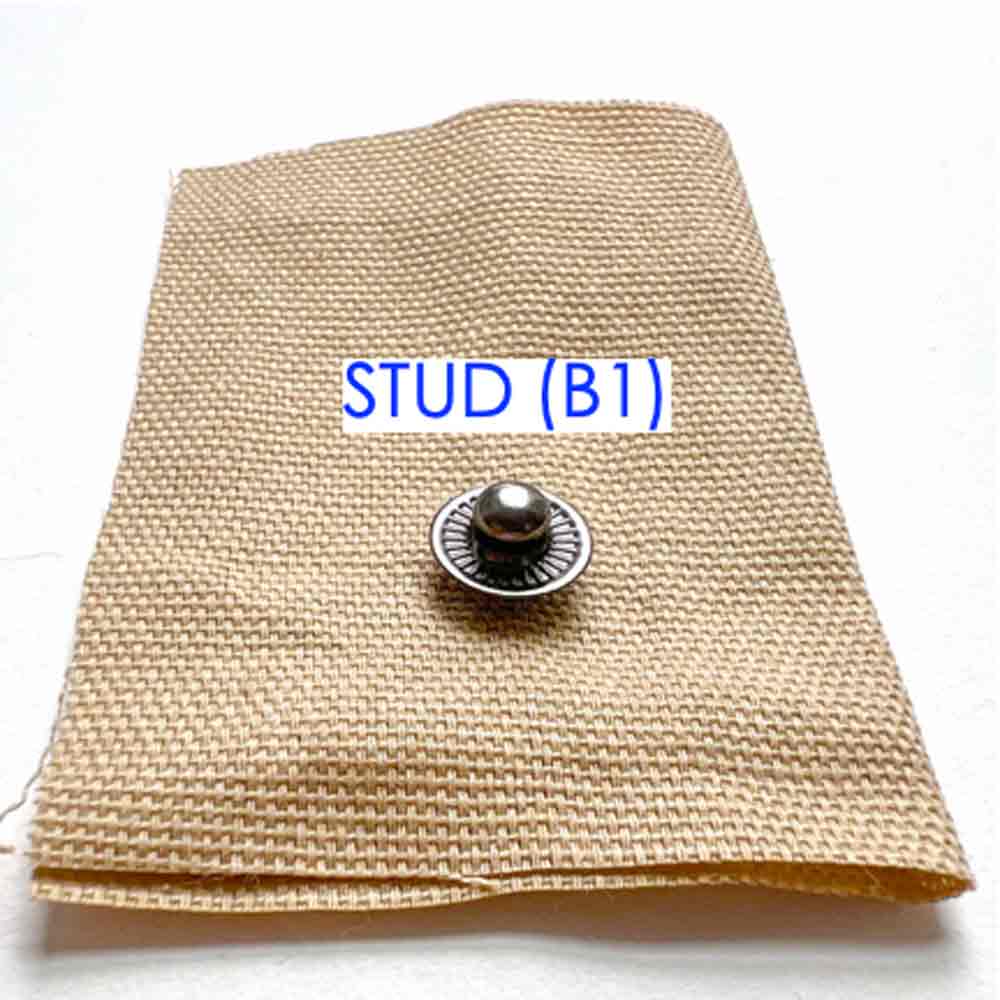
Now place the STUD (B1) over the POST.
STEP 3: INSERT SNAP STUD
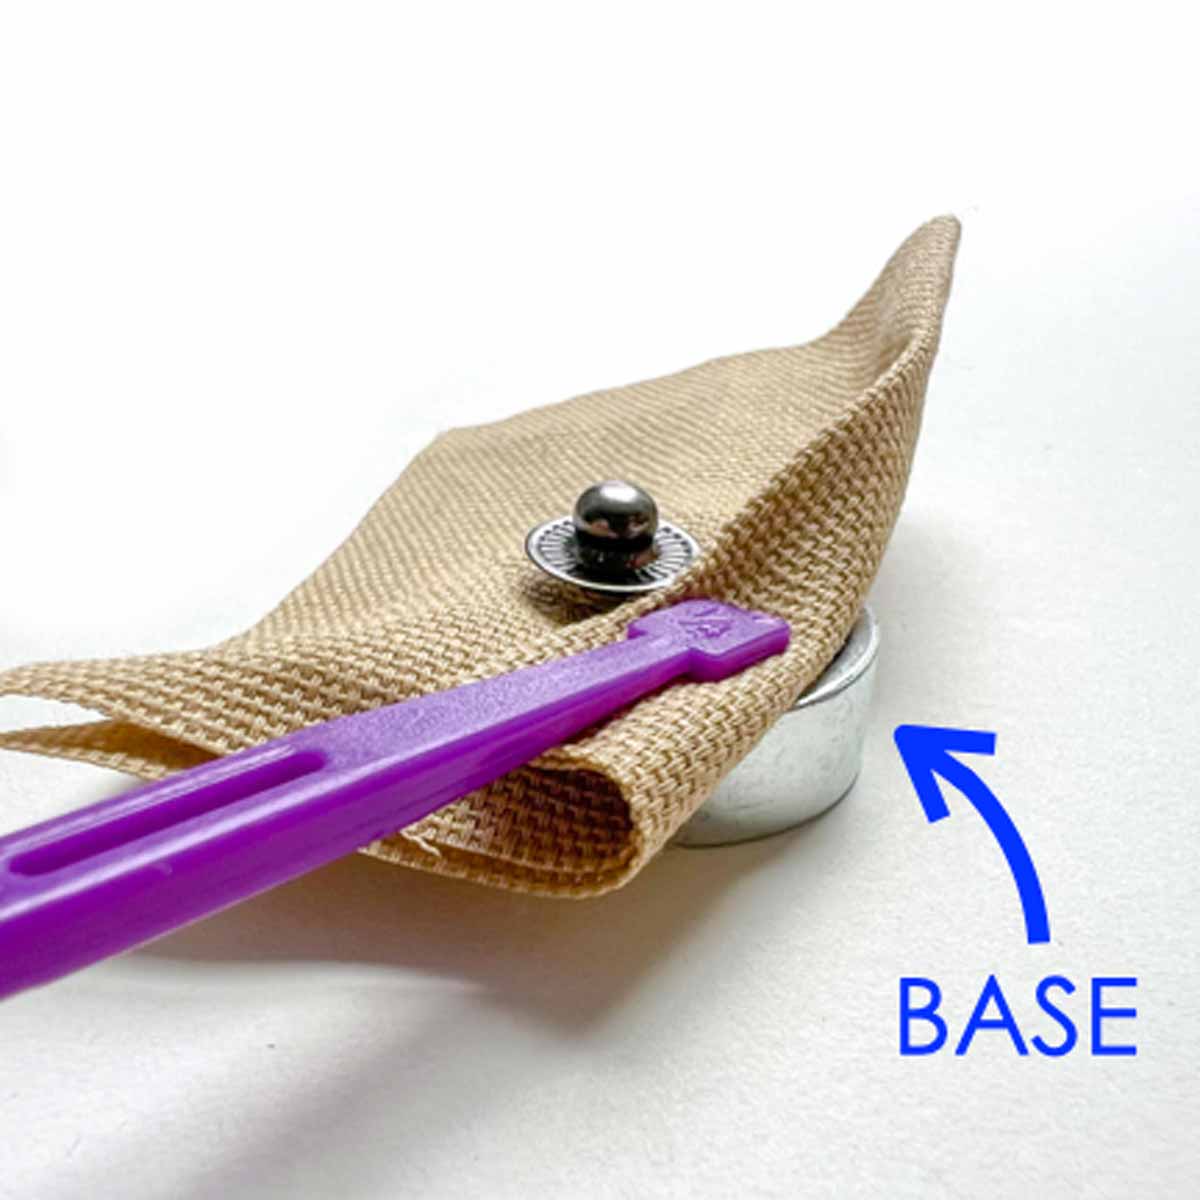
Again, place BASE under the fabric. You will keep the base here until you are done hammering the stud in.
STEP 4: HAMMER SNAP POST AND STUD IN
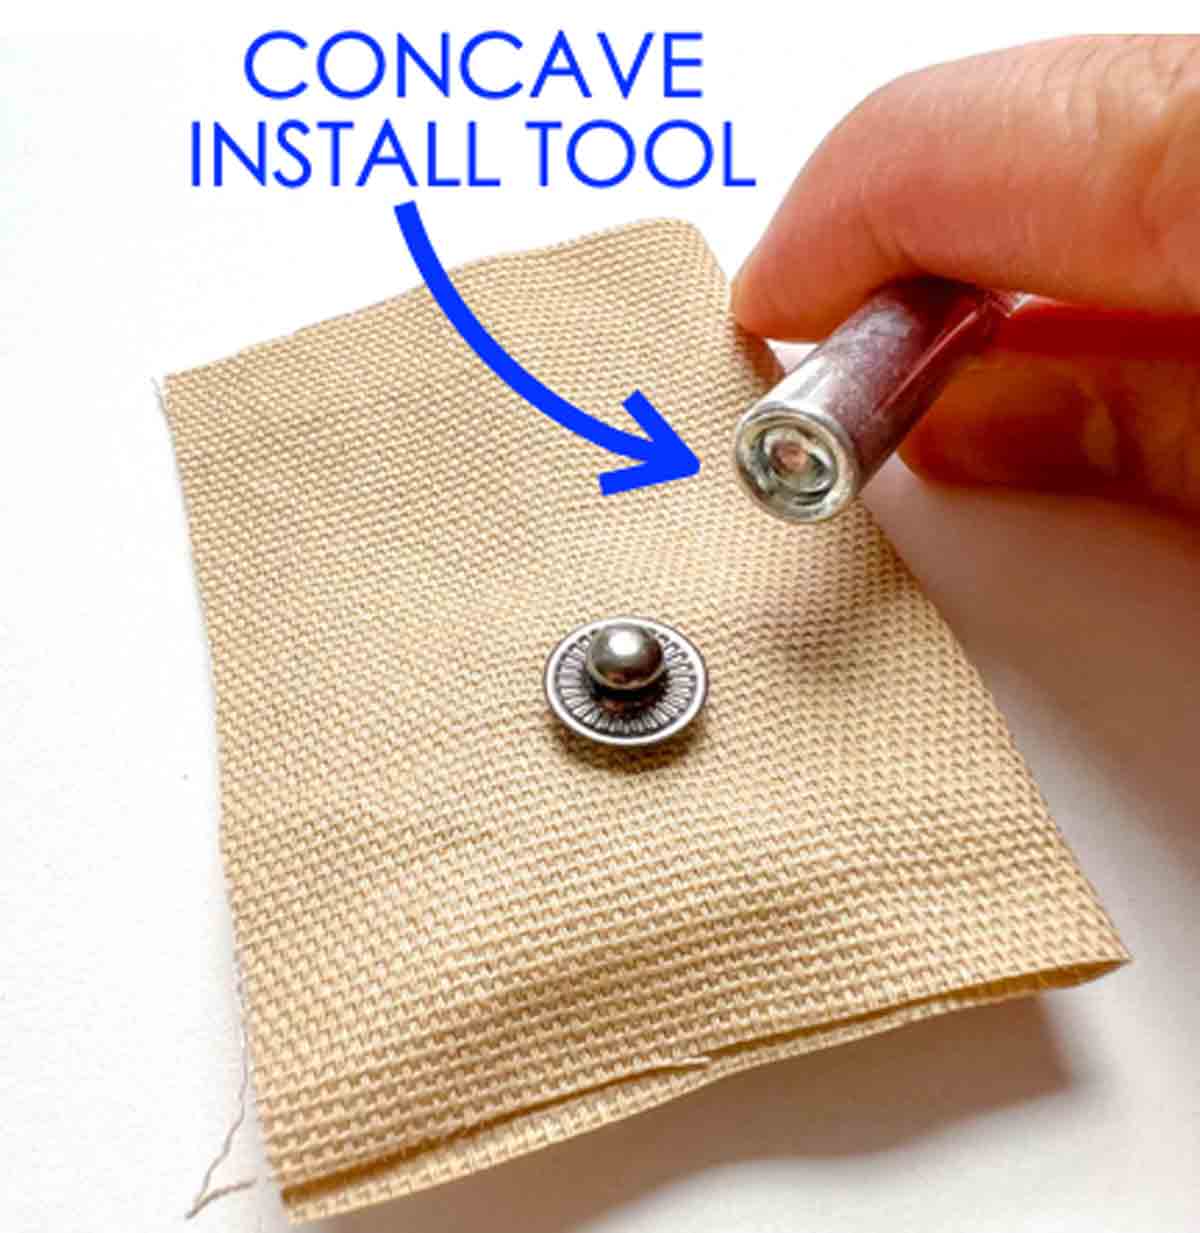
Next, we are going to use the CONCAVE INSTALL TOOL.
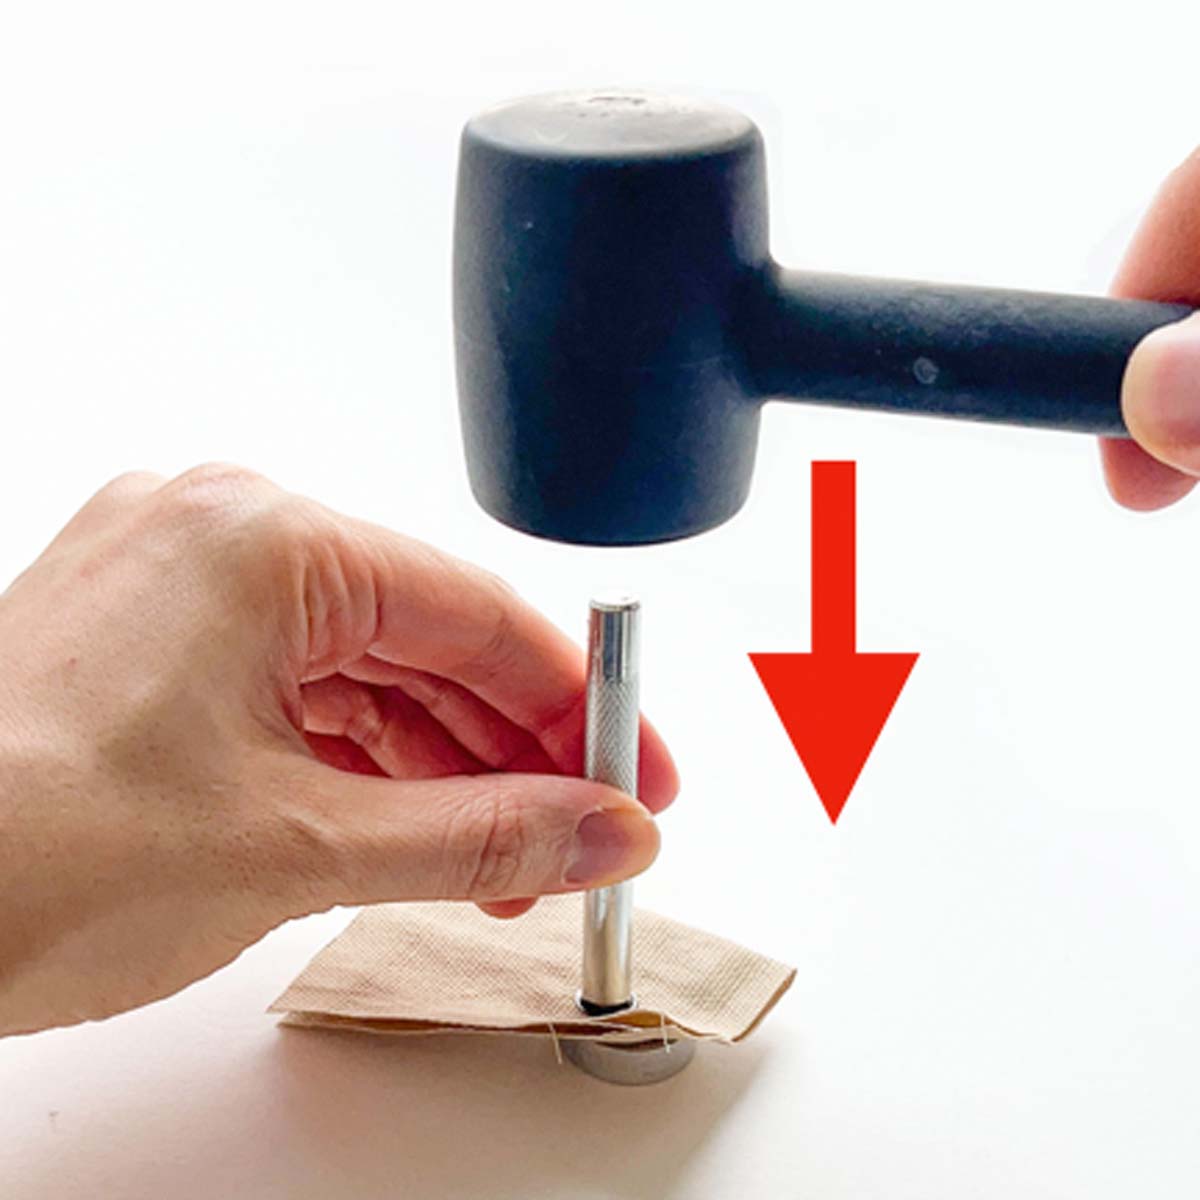
Now hammer the stud down several times with the hammer and CONCAVE TOOL. Make sure to keep your CONCAVE TOOL straight as you hammer.
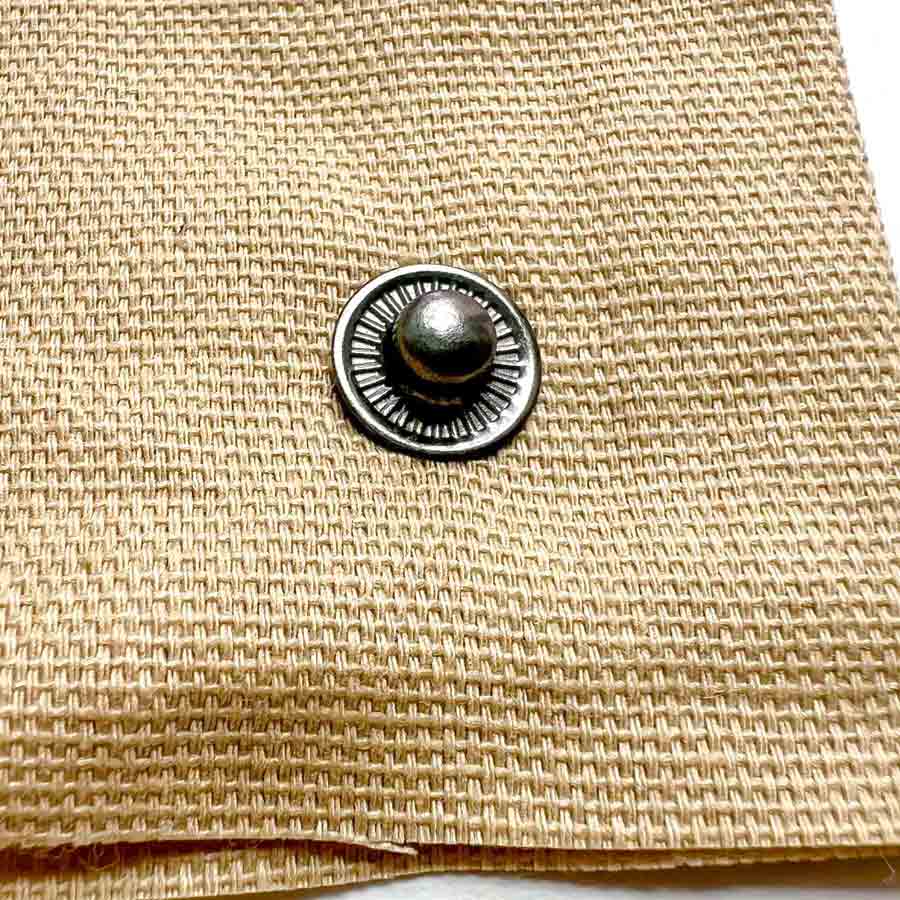
Your snap stud is now installed! Again, make sure the stud is tight and secure over the fabric. If the stud still rocks, you need to hammer it down some more.
STEP 5: CHECK SNAP PLACEMENT
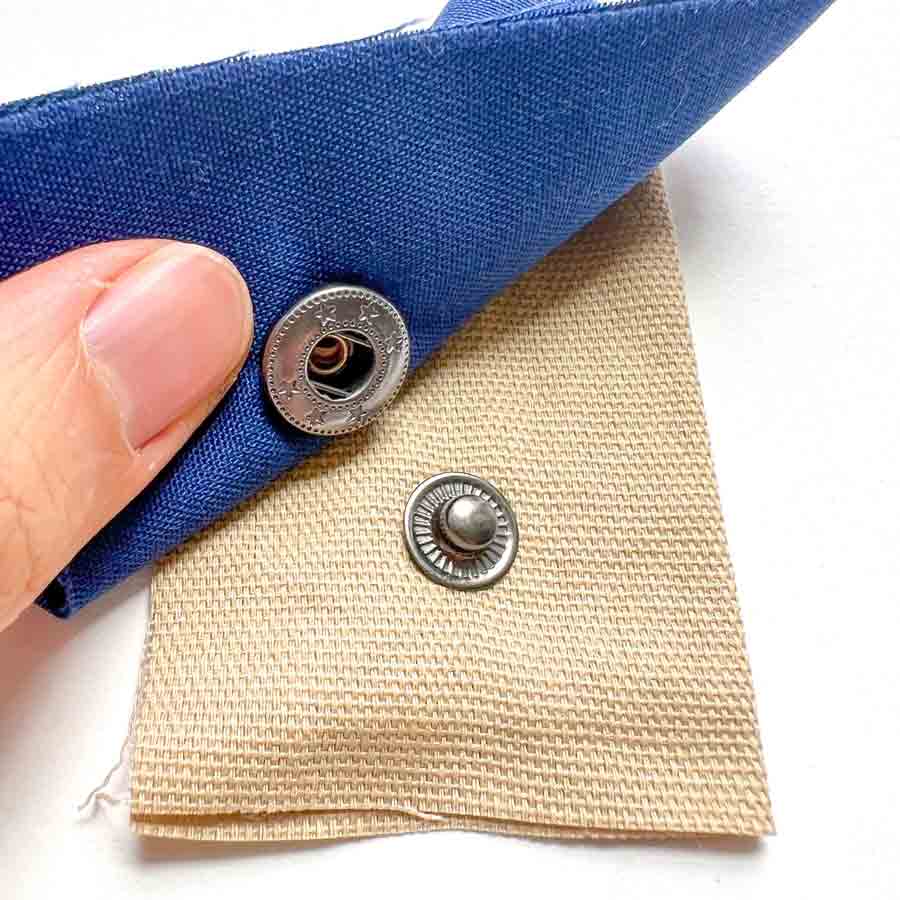
Finally, check if you have correctly installed your snaps by snapping them together. The cap and study will click in place nicely and you should hear a ‘click’ or ‘pop’ sound.
How to Install Snaps to Fabric: Plastic (KAM) Snaps
Plastic Snap Tools
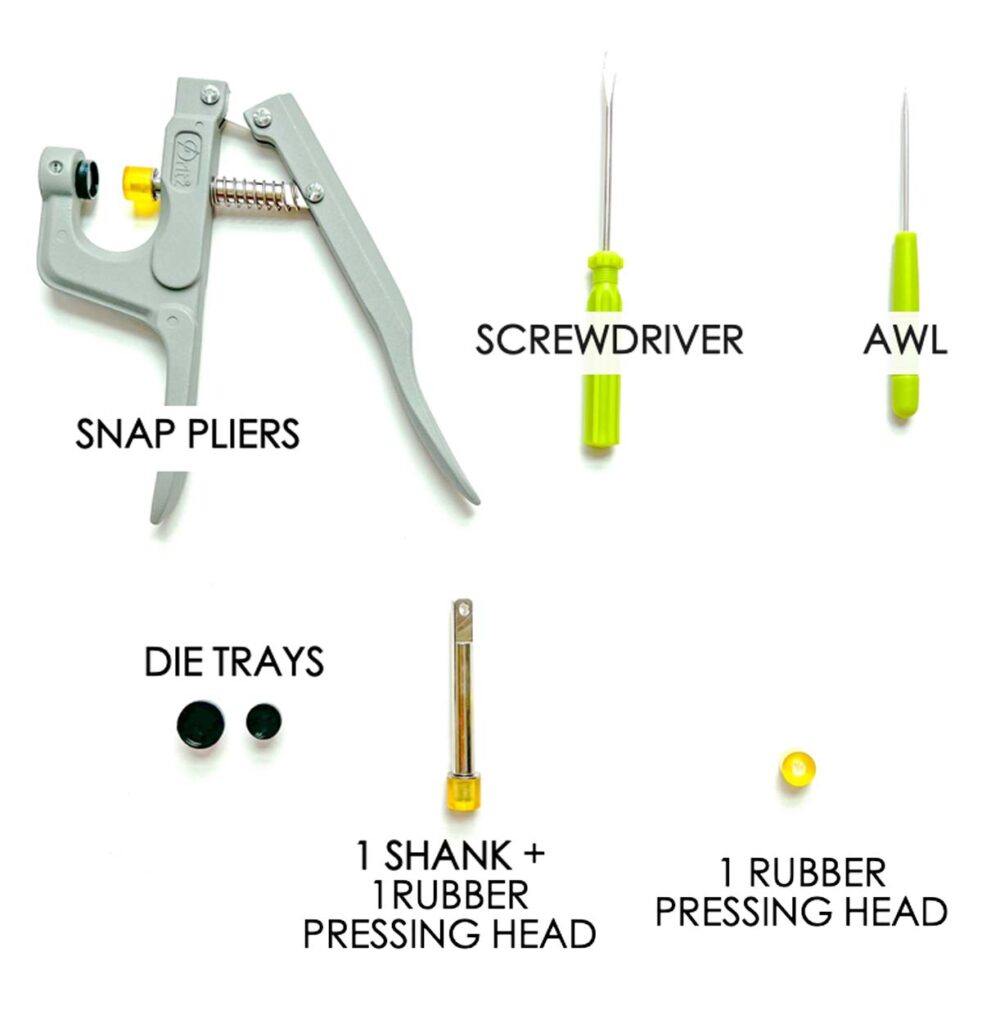
I have the Babyville Snap Pliers Set and it comes with the following tools:
- SNAP PLIERS
- 1 SCREWDRIVER
- 1 AWL
- 3 DIE TRAYS (SIZE 16, 20, 24)
- 2 RUBBER PRESSING HEADS
The die trays can be changed on the pliers for use on different snap sizes. The shank and rubber pressing heads are extra replacement parts.
You can also purchase the KAM SNAPS SET on Amazon which comes with a variety of colored snaps as well as the tools.
Plastic Snap Parts
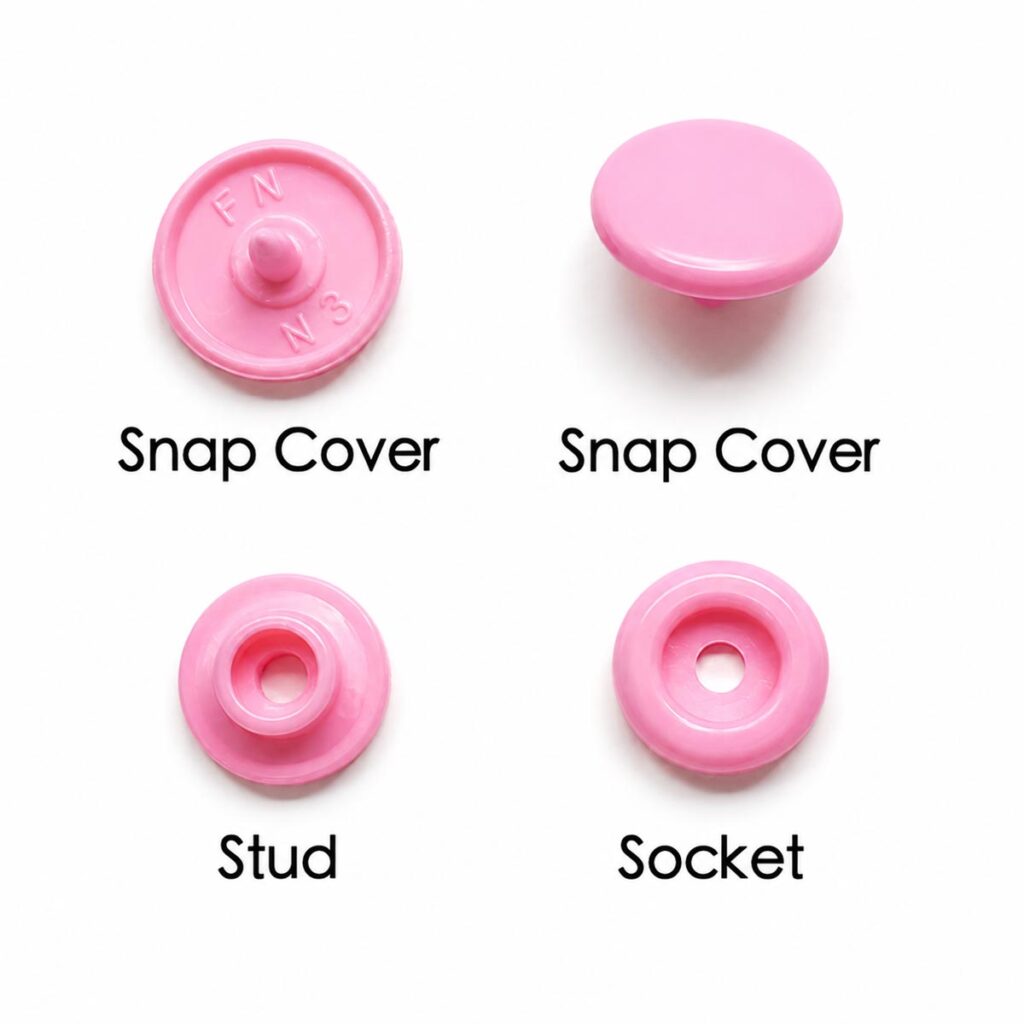
In order to install a plastic snap button, you will need to grab 2 snap covers, a stud, and a socket.
STEP 1: CHOOSE THE CORRECT DIE TRAY SIZE
Before starting, make sure that you have the correct die tray (the black plastic piece) installed on your snap pliers.
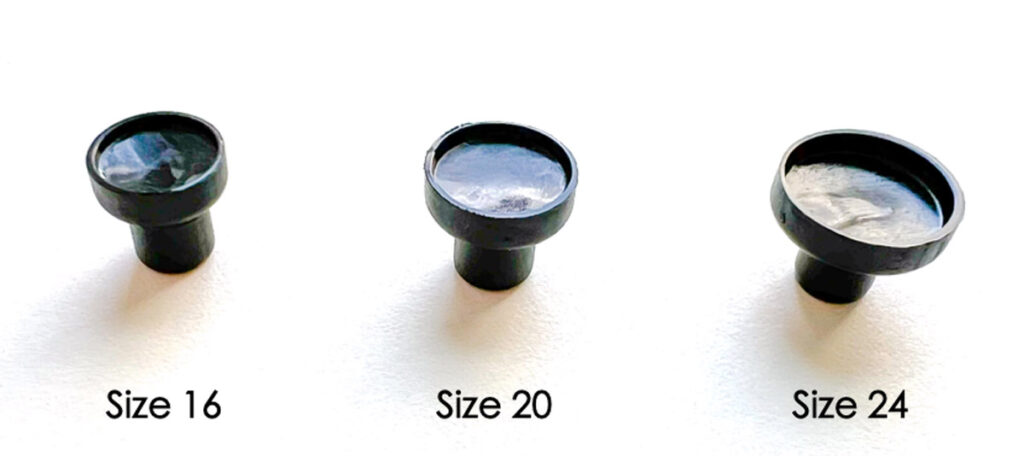
My Babyville Snap Pliers Set comes with 3 different size die trays, size 16 (T3), size 20 (T5), and size 24 (T8).
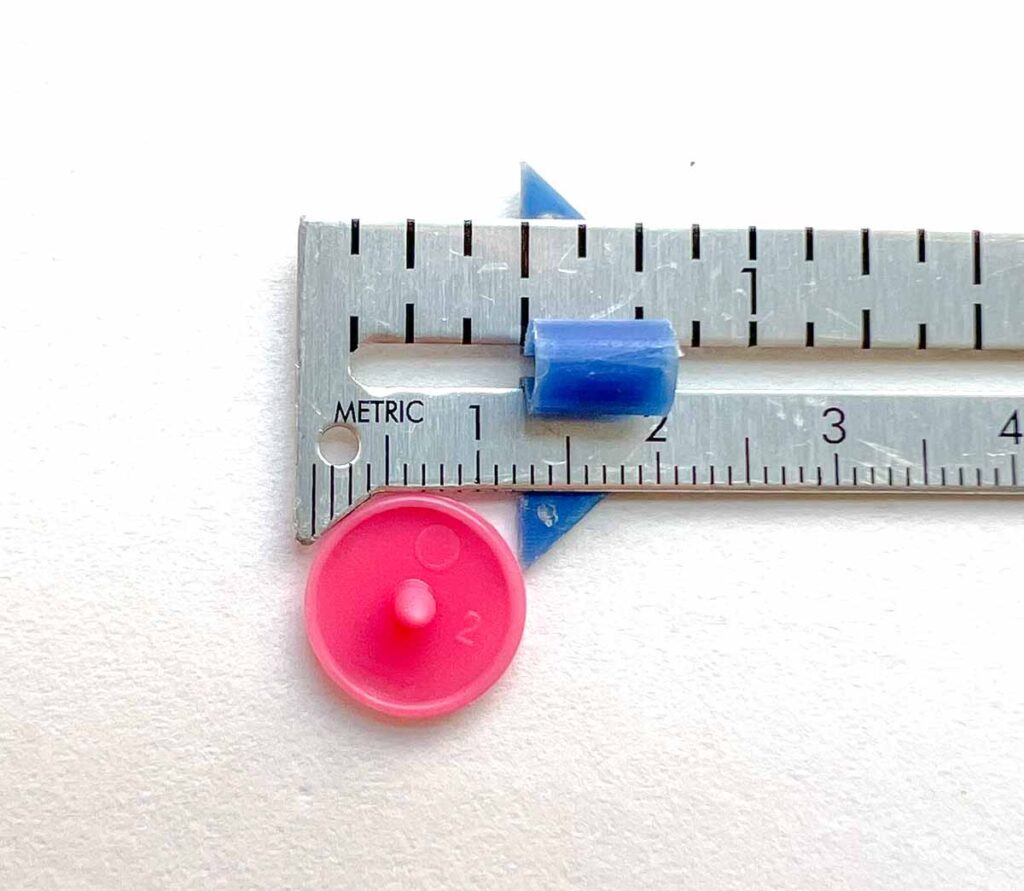
The snaps I’m using today are size 20 (T5) snaps. As you can see from the photo, they measure about 12mm in diameter.
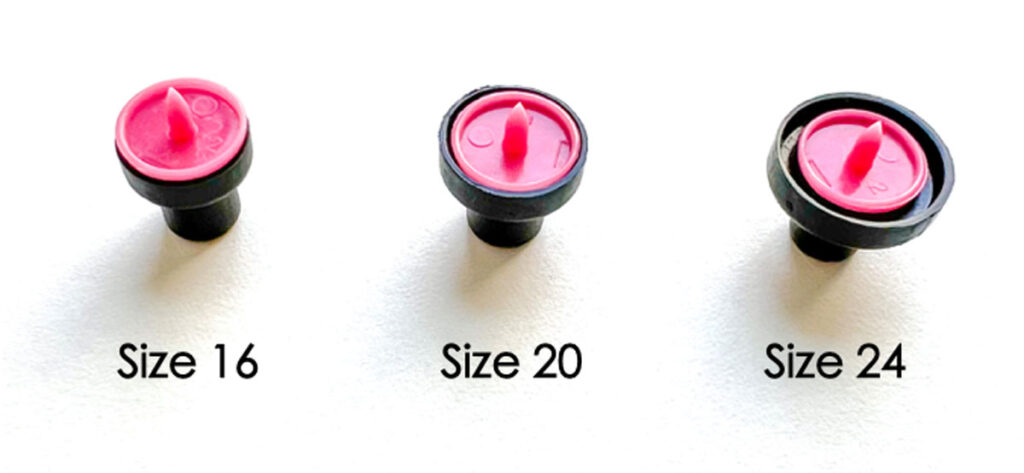
If you are not sure what size your snaps are, simply try them on the die trays. The photo above shows a size 20 (T5) snap cover on each of the die trays.
LEFT: Snap cover sits above the size 16 die tray.
MIDDLE: Snap cover sits snugly within the size 20 die tray.
RIGHT: Snap cover has too much space around the border when sitting in the size 24 die tray.
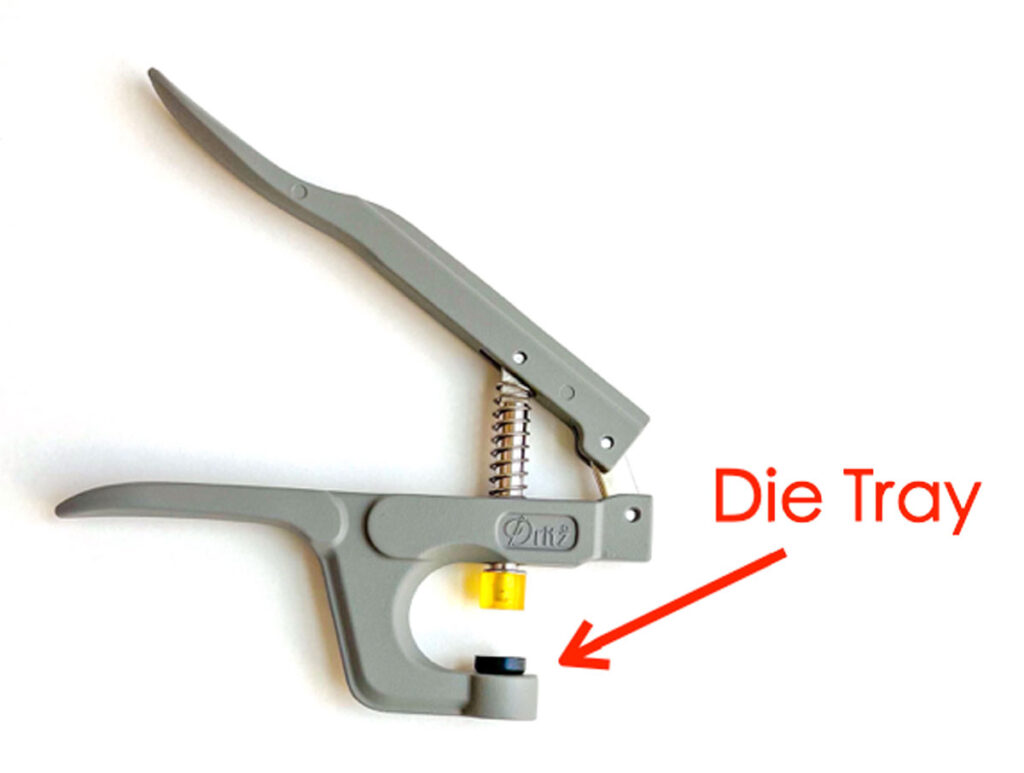
Once you have chosen the correct die tray size, pop it into the bottom of the snap pliers.
STEP 2: MARK SNAP PLACEMENT ON FABRIC
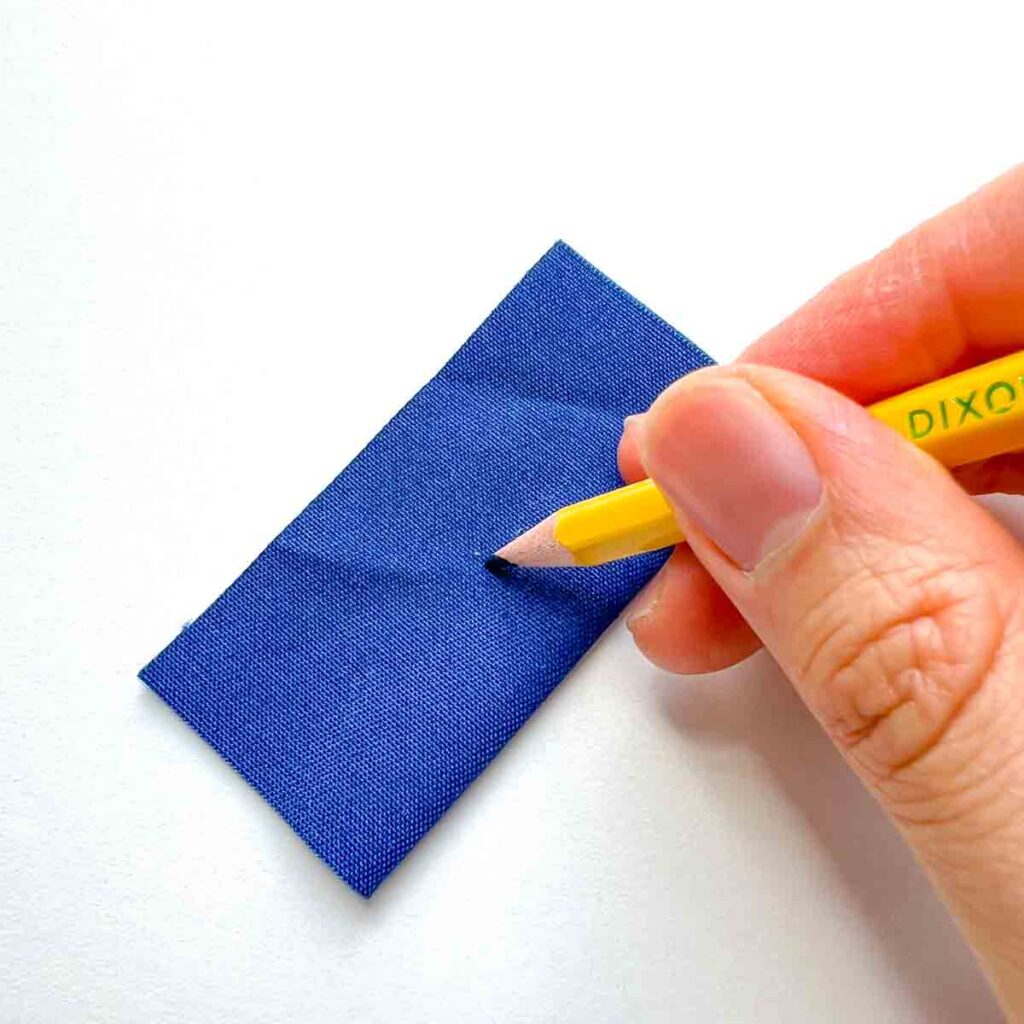
Now mark with a pencil or fabric chalk where you want your snaps placed.
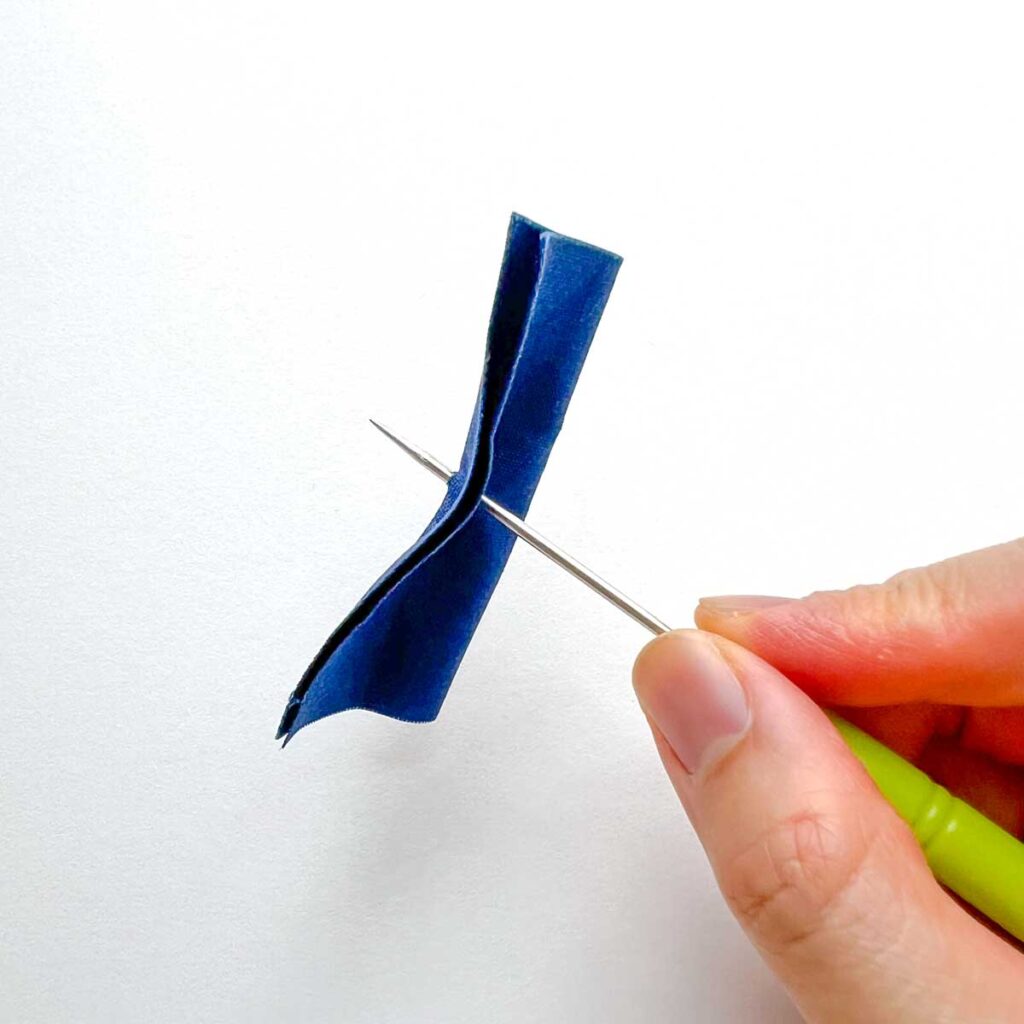
Next, make a hole in the fabric with the awl tool.
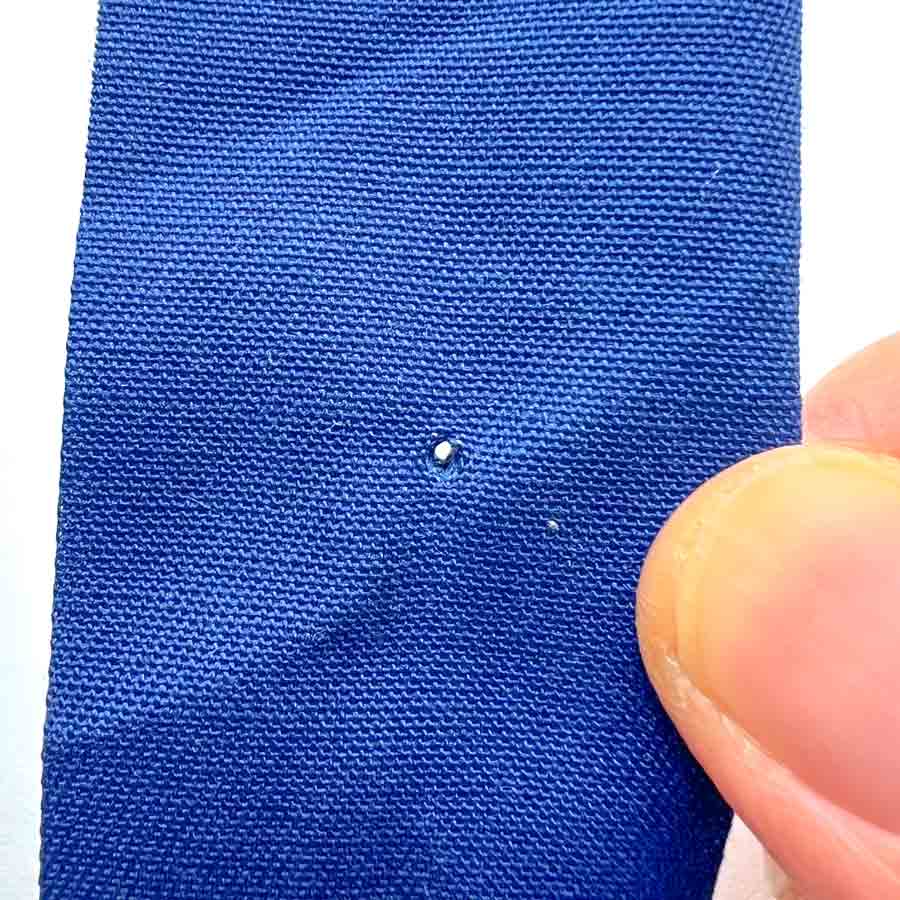
View of hole in fabric.
STEP 3: INSERT SNAP COVER
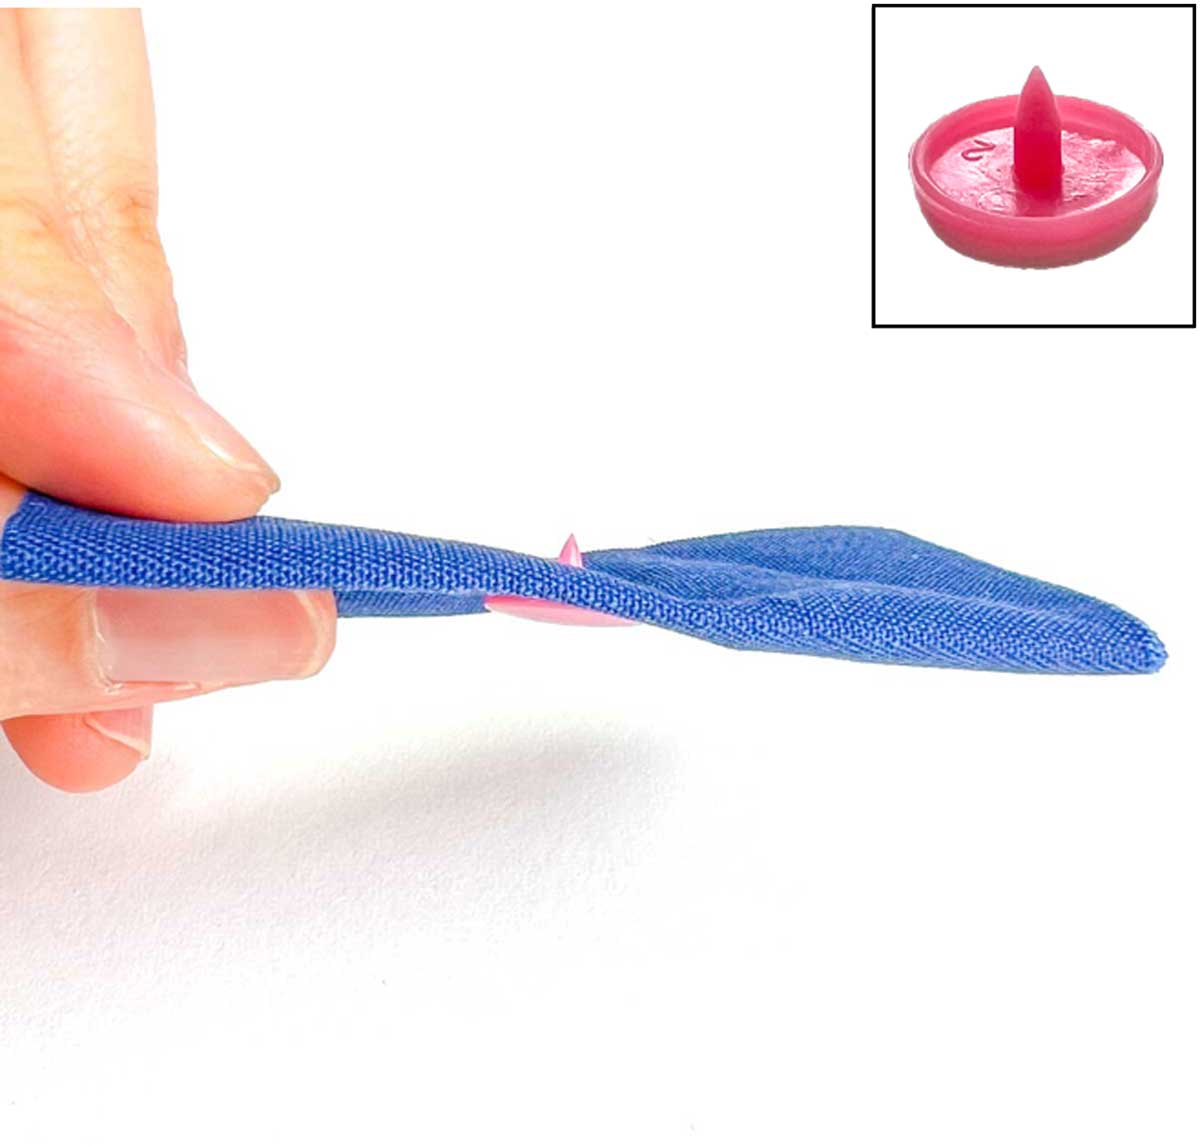
Then, insert snap cap through the hole from the exterior of the sewing project. Make sure the prong extends completely through the fabric.
STEP 4: INSERT SNAP STUD
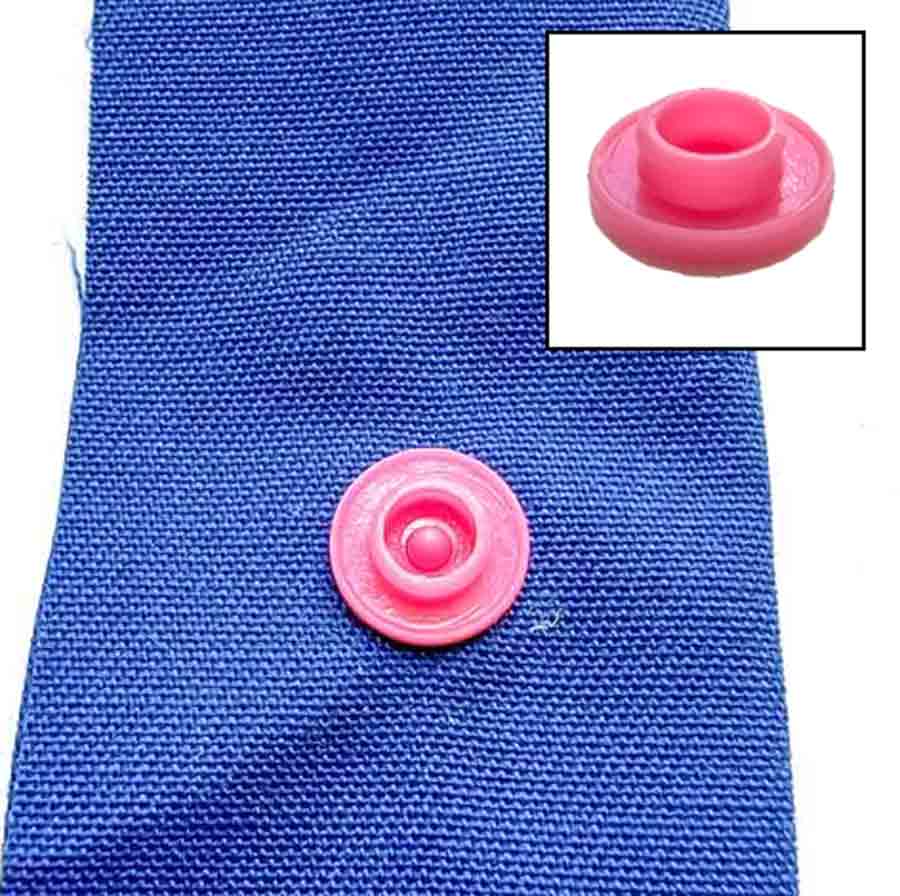
Next, place snap stud over the prong.
STEP 5: PRESS WITH SNAP PLIERS
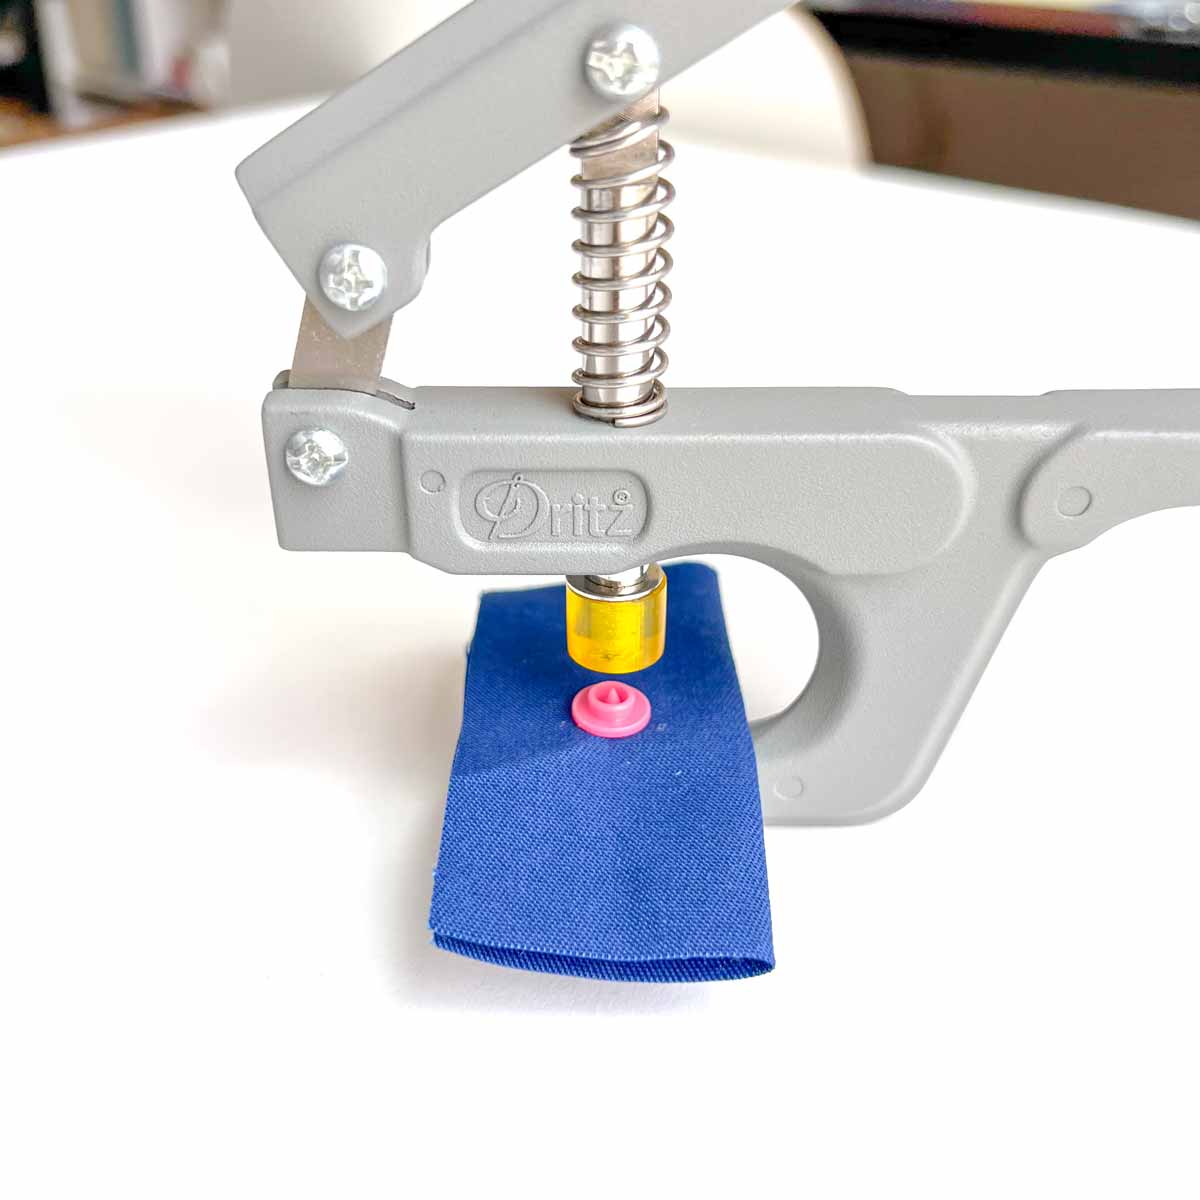
Then place your snap into the snap pliers. Note that the snap cap faces the black die tray (its underneath the fabric in the photo so you can’t see it). See how the stud faces the rubber pressing head.
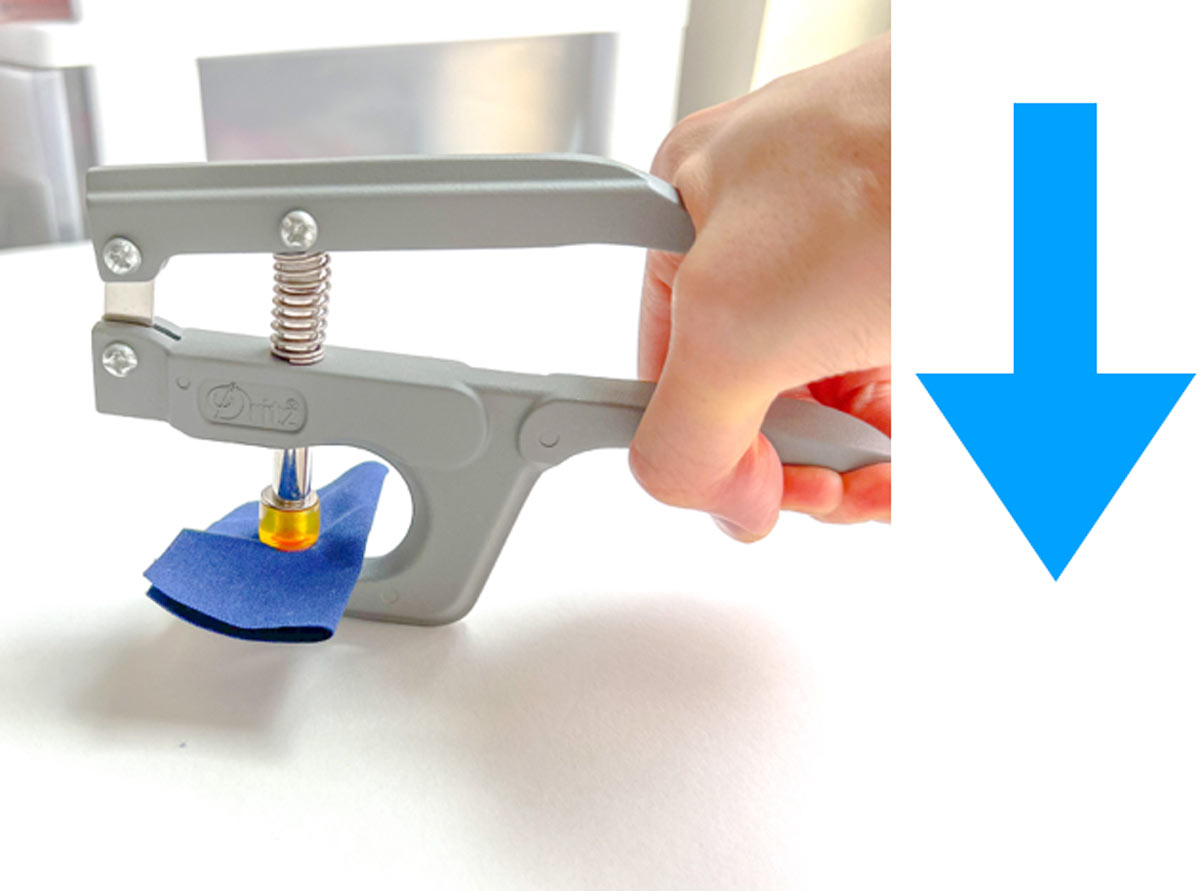
Now give the snap pliers a good hard squeeze.
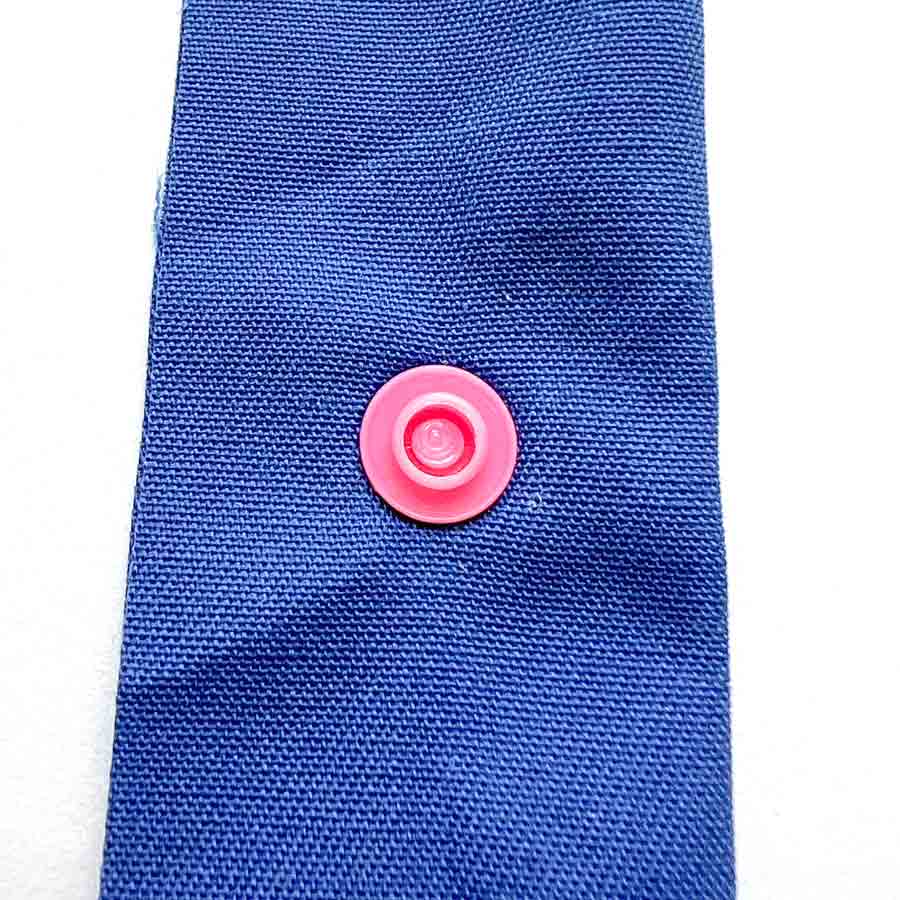
See how the tip of the prong has been flattened into the stud.
STEP 6: MARK PLACEMENT OF SNAP SOCKET
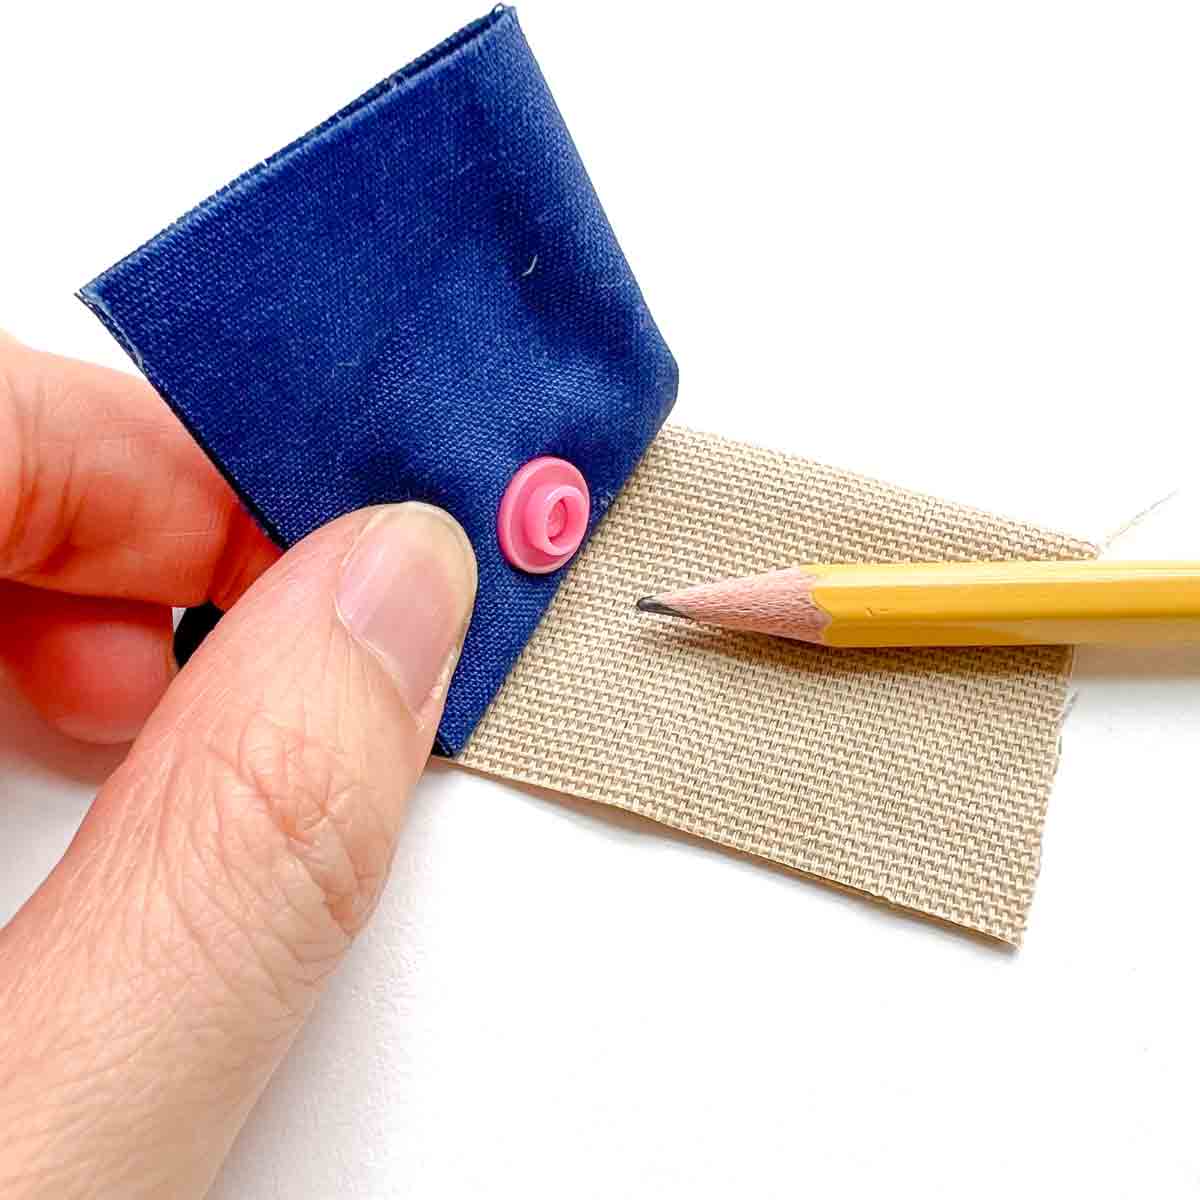
Next, mark where snap socket will go on other side based on where snap stud has been placed.
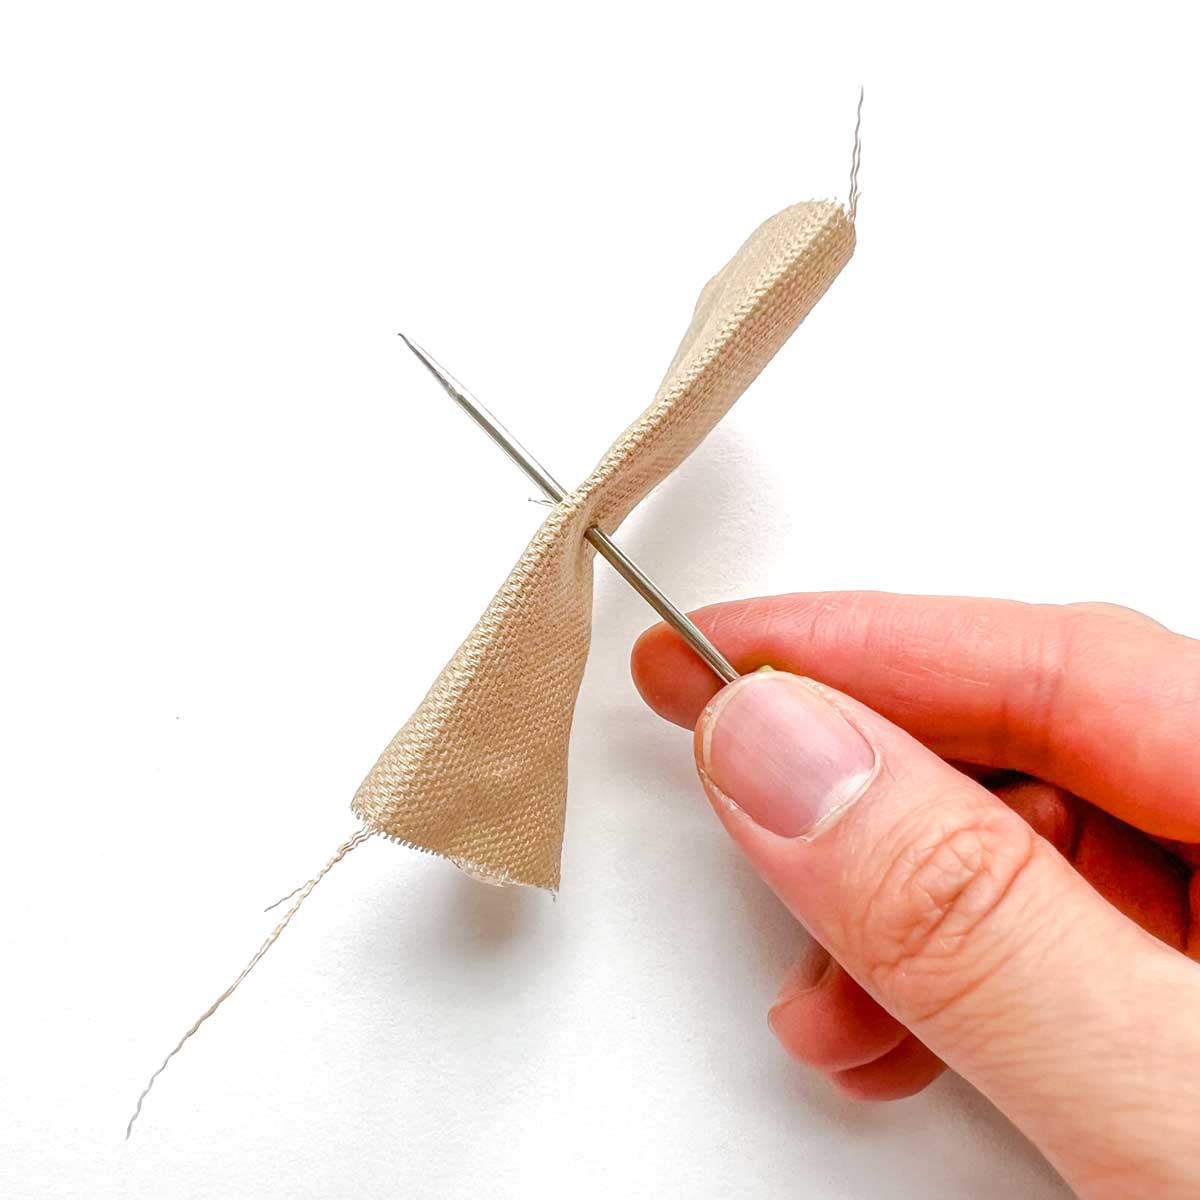
Again, poke the awl through your marking to make a hole in the fabric.
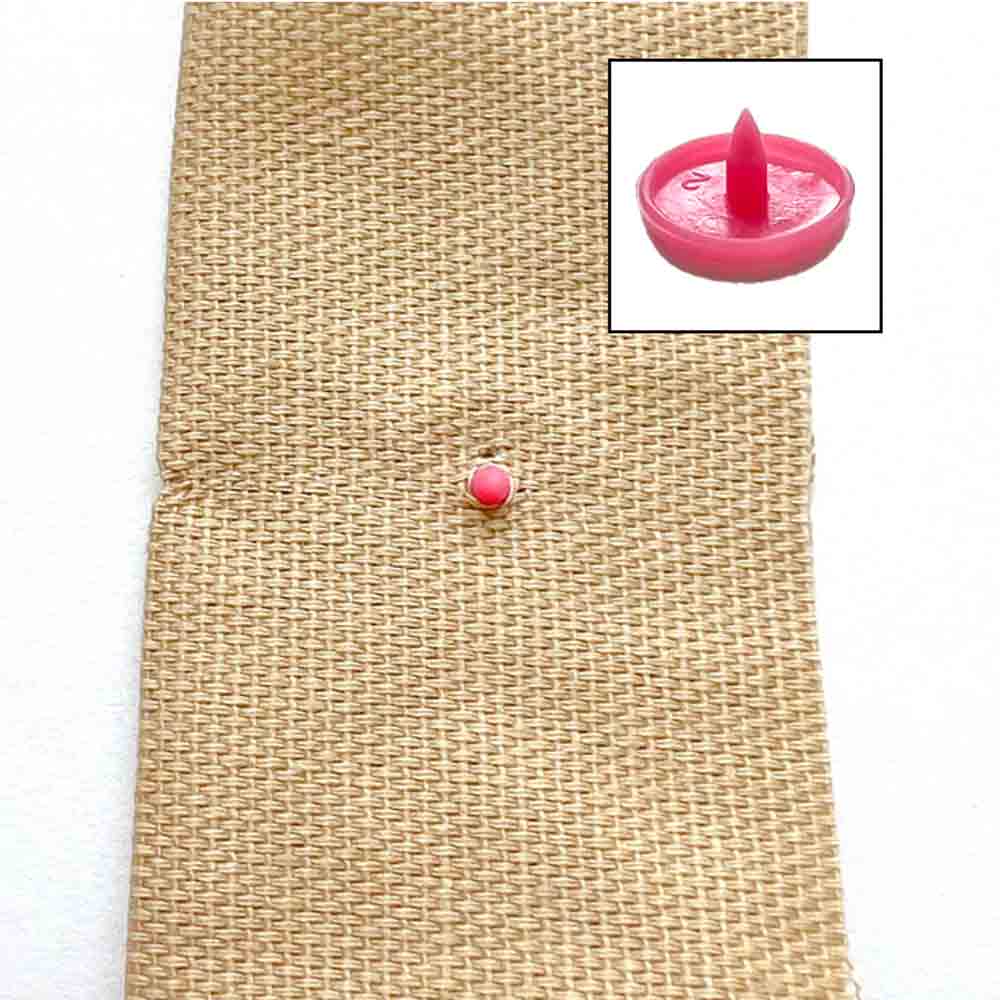
Then, insert snap cap through the hole from right side of fabric to inside.
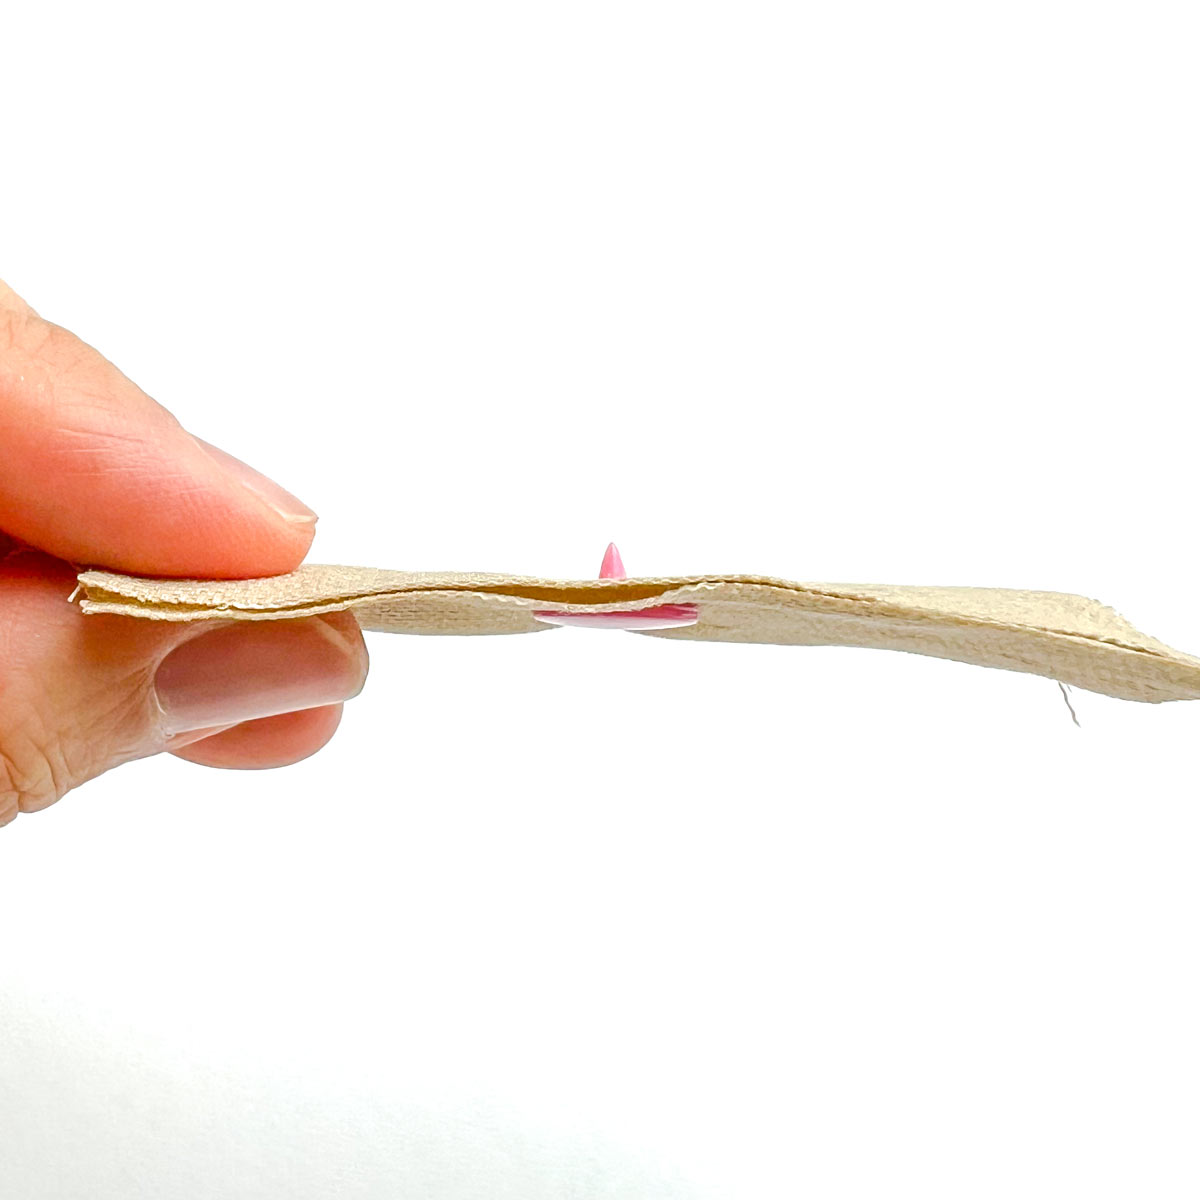
Again, make sure your prong is all the way pushed through the fabric.
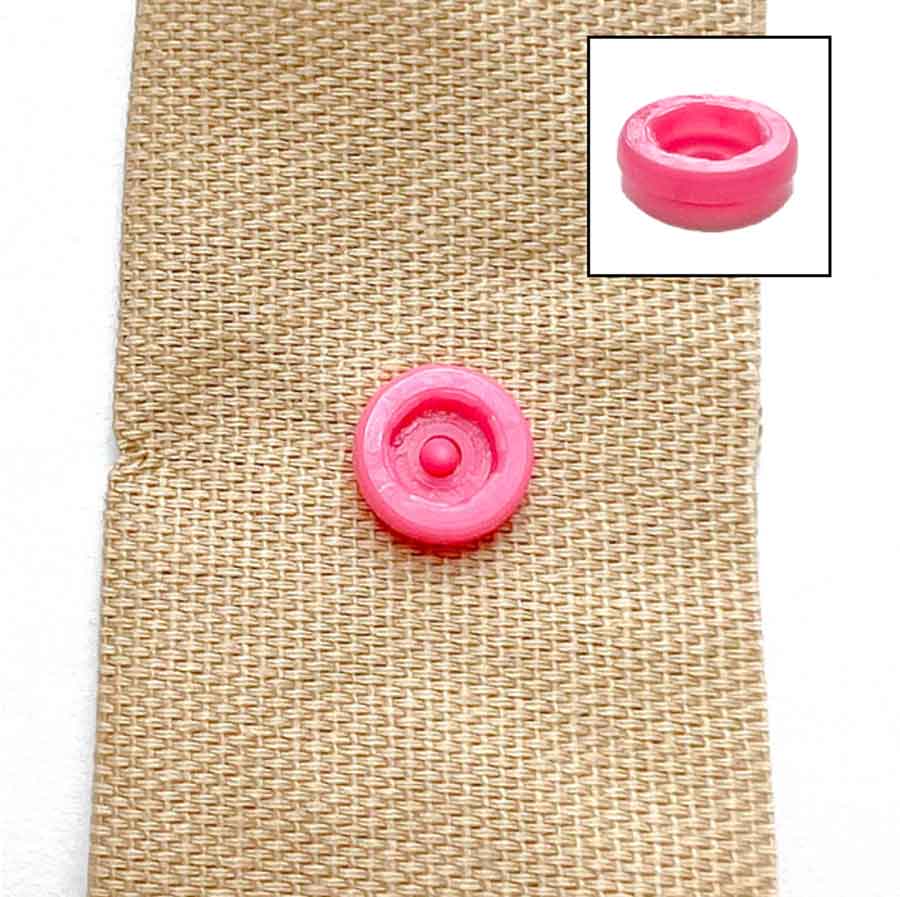
Next, place socket over prong of snap cap.
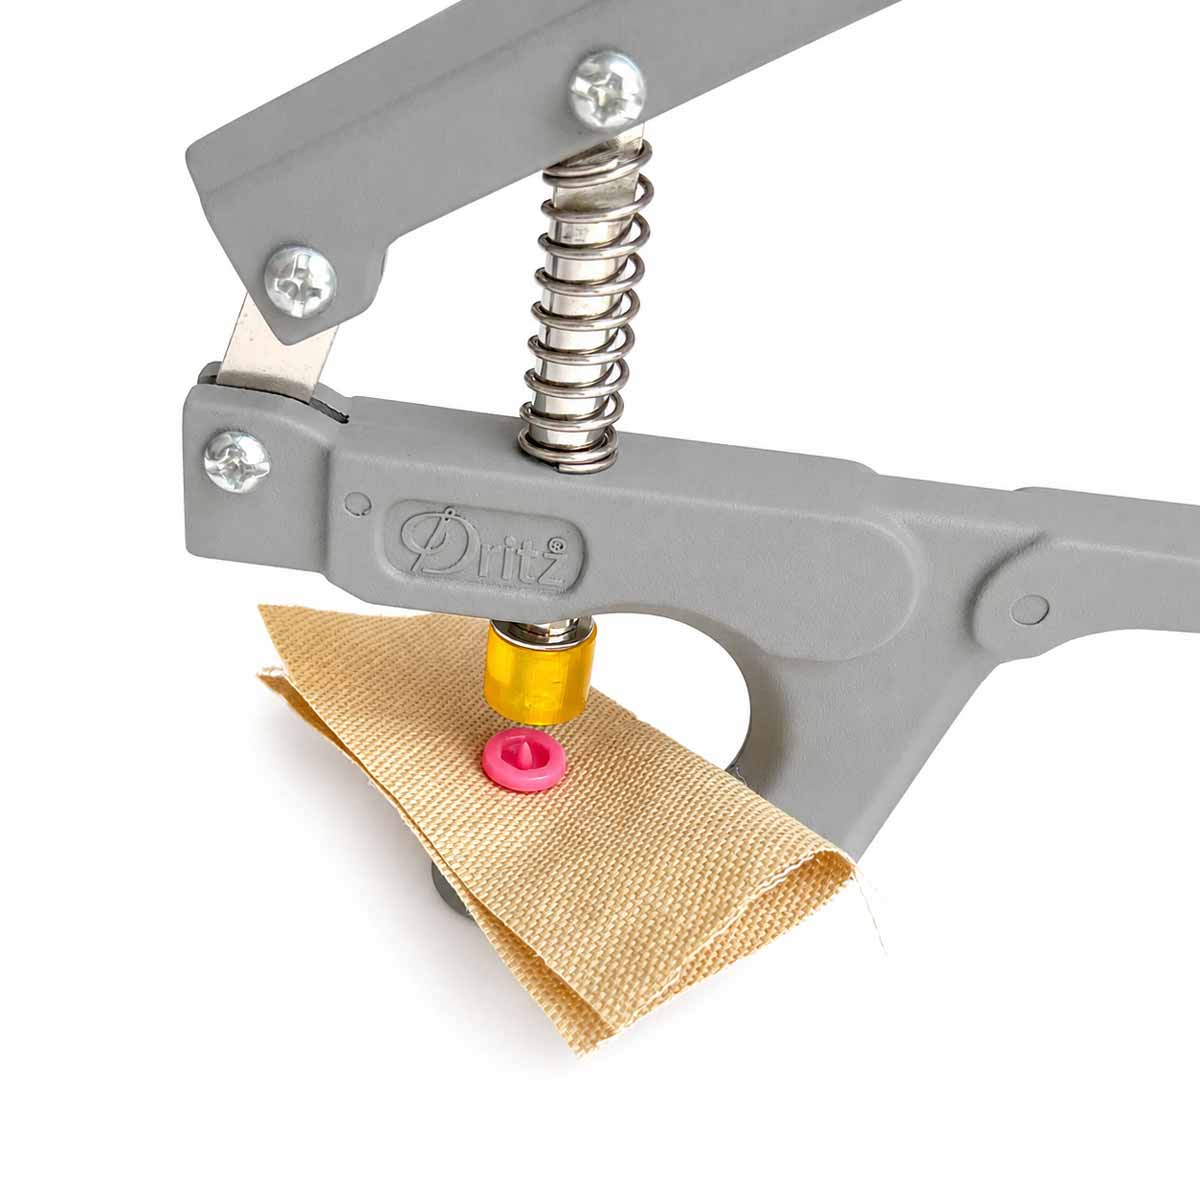
Then place snap into pliers with snap cap inserted into black die tray (again, under the fabric so you cannot see it from the photo). The socket faces rubber pressing. head.
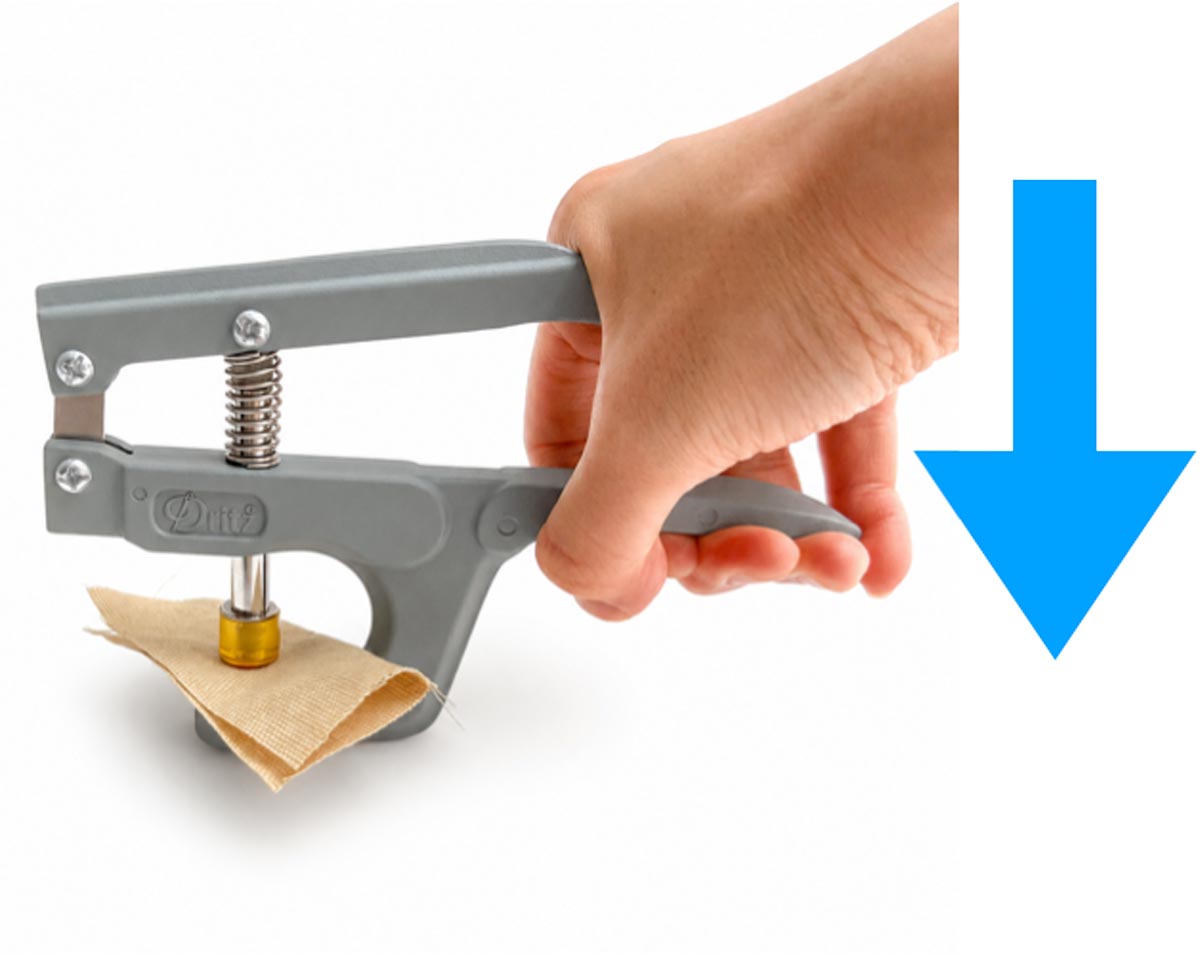
Again, give your pliers a good hard squeeze to flatten the tip of the prong.
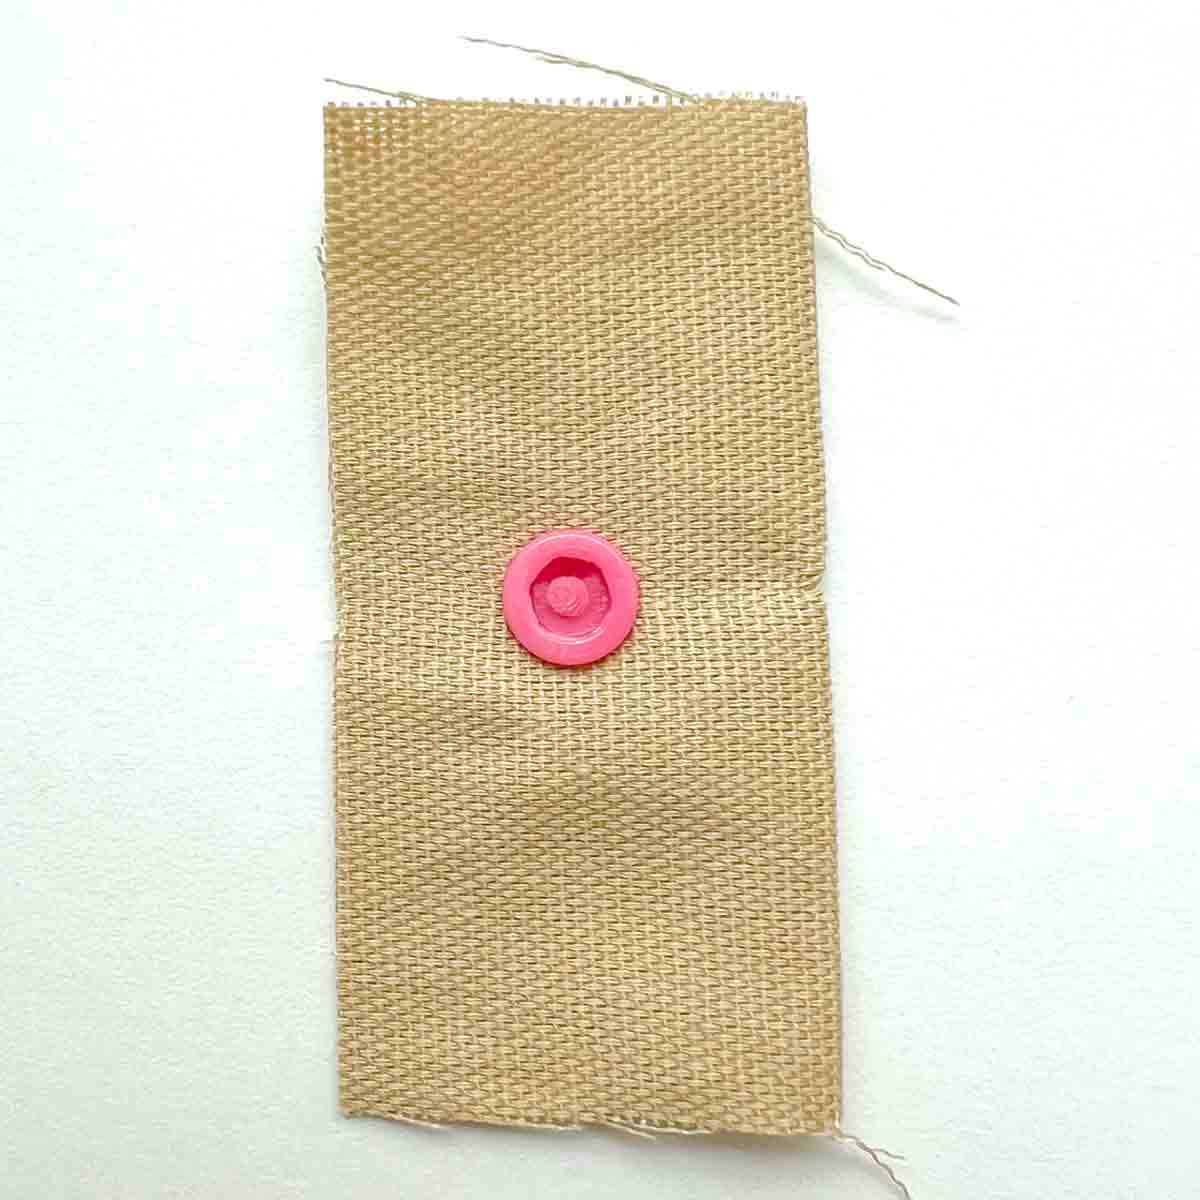
Your snap socket will look something like this photo.
Finally, check if you applied the snaps correctly. The snaps should click nicely in place when they come together. You are done!
Tips for Success
- Practice on scrap fabric before installing snaps on your final project.
- For lightweight fabrics, adding a small piece of interfacing behind the snap location provides extra stability – this reinforcement helps prevent tearing and keeps the snap securely attached over time.
- Measure carefully before marking your placement.
- Keep the snap parts organized so the matching pieces stay together.
- Avoid placing snaps too close to the fabric edge, which can weaken the material.
Common Mistakes to Avoid
Installing the Wrong Snap Pieces Together
Many snap sets include several similar-looking pieces. Double-check that you’re pairing the correct male and female components before pressing.
Forgetting to Reinforce Thin Fabric
Lightweight fabrics can stretch or tear around snaps over time. A small square of interfacing can significantly improve durability.
Misaligned Snap Placement
Always measure twice before installing. Even a small misalignment can prevent the snap from closing properly.
Frequently Asked Questions
Can I install Snaps Without a Snap Press?
Yes. Many snap sets include a handheld installation tool that works well for occasional projects. A snap press is faster and more convenient if you install snaps frequently.
Are Plastic or Metal Snaps Better?
It depends. Both plastic and metal snaps work well, so whether to use plastic or metal snaps depends on your aesthetic and functional desires.
For example, items that need frequent washing (i.e. baby onesies or cloth diapers) would benefit from plastic snaps.
Or perhaps there is a very specific colored snap you want so it matches your sewing project. Again, plastic snaps are ideal as they come in pretty much every color.
On the other hand, metal snaps can add a level of classiness to your sewing project that you like.
Additionally, if there are already other metal hardware on your sewing project (think D-rings and lobster clasps), metal snaps would fit the overall look better.
Finally, consider the thickness of your fabric. In general, plastic snaps are ideal for light to medium weight fabrics (1 – 2.5mm). Metal snaps are better suited for thicker fabrics such as denim, leather, or thick upholstery.
Can Snaps Be Removed?
Yes, although removing the snap may damage the snap itself as well as tear the fabric. You can use a flat screwdriver and wedge it under the stud or socket to pry it apart from the snap cap.
However, it is usually best to practice placement first (as well as measure correctly) to avoid needing to remove installed snaps.
Should the Stud or Socket Go on Top?
One of the most common questions beginners ask when learning how to install snaps on fabric is whether the stud or the socket should be installed on the top (right side) of the project.
While there isn’t a single “correct” answer, the general sewing convention is to install the socket (female) on the top flap or front-facing piece and the stud (male) on the bottom or underneath piece. This creates a smooth, finished appearance on the outside of your project while keeping the protruding stud hidden when the snap is closed.
For items like baby bibs, wallets, pouches, and bags, following this convention gives your project a clean, professional finish and makes the closure intuitive to use.
That said, the best placement ultimately depends on your project’s design and how it will be opened and closed. Before permanently installing your snaps, fold your project into its finished position and test the snap pieces to make sure they align correctly and function the way you want.
Taking a few extra moments to check the orientation can save you from removing and replacing a snap later.
Quick Tip: If your project has a decorative exterior, install the smooth snap cap on the visible outside of both fabric layers whenever possible. This hides the working parts of the snap and gives your finished sewing project a polished, professional look.
Final Thoughts
Learning how to apply snaps to fabric is a valuable sewing skill that opens the door to countless creative projects. Once you’ve installed a few sets, the process becomes quick and easy.
Whether you’re making baby accessories, handmade bags, garments, or home décor, snaps provide a durable, attractive closure that gives your projects a polished, professional finish.
With a little practice and careful measuring, you’ll be installing snaps with confidence in no time. Happy sewing!
More Sewing Projects with Snap Closures