How to Make Bias Tape
Bias tape is a MUST-HAVE ESSENTIAL in your sewing toolbox. You can purchase them from fabric stores in an array of colors and sizes. However, they are very easy to make and also gives you control over the color and design when you make it yourself. On top of that, it is also more economical to make them (versus buying) and there are SO many uses for them. Once you learn about their versatility, you will definitely want to keep some on hand. Today I will show you how to make two types of bias tapes (single and double fold) with a bias tape maker.
Before we get started, let’s go over some basics!
What is Bias Tape?
Bias tape is a piece of bias strip that has been pressed in a specific way (photo below) so that it resembles a long piece of tape, hence the name “bias tape”.
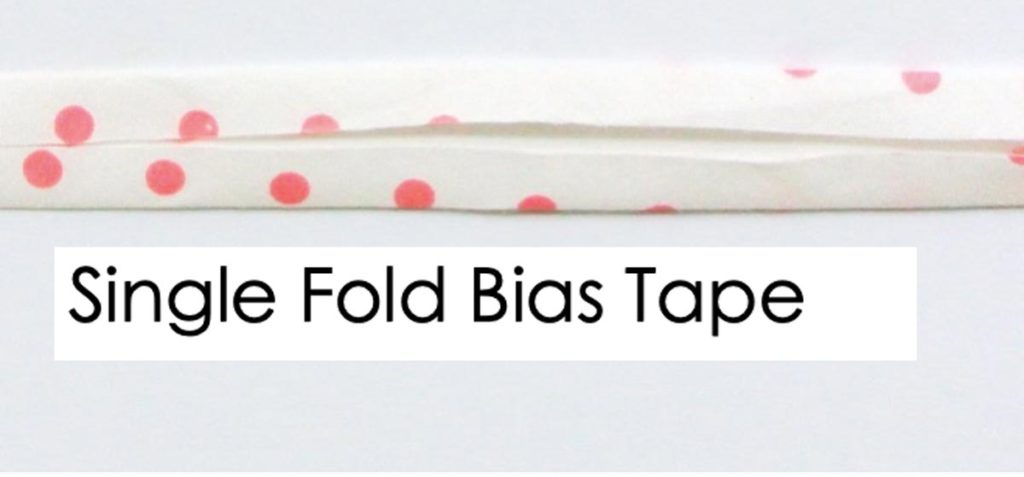
Single Fold bias tape is bias strip with the two sides folded in to meet each other at the middle. Singe fold bias tape, as the name implies, only has a single fold. Thus it lays flat without excess bulk so it is good for lining armholes and necklines. Other uses include hemming a circle skirt or lining a pocket edge. Additionally, it can also be used a decorative element.
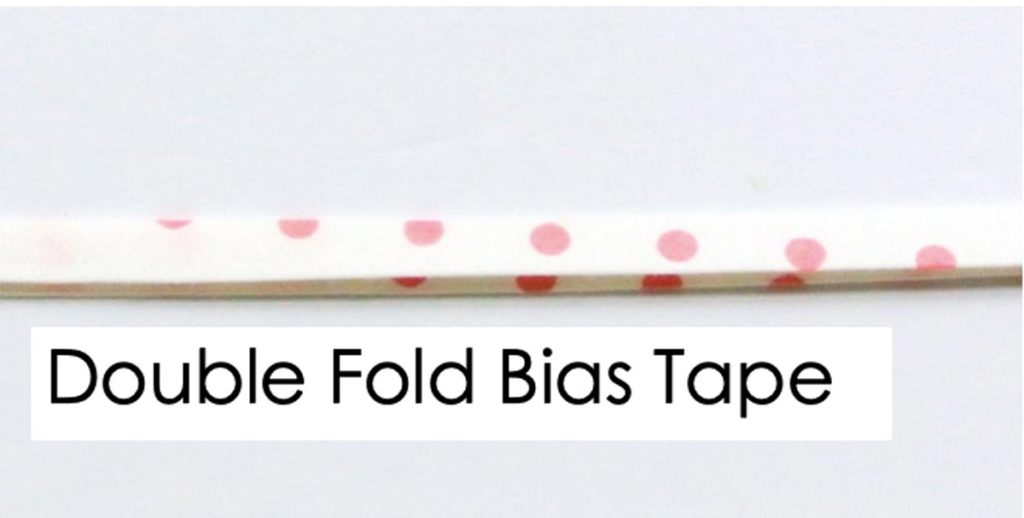
Double Fold bias tape is essentially a piece of single fold bias tape that is folded in half again. This extra fold is what gives it the name “double” fold. Double fold bias tape essentially “sandwiches”the raw fabric edge in between its fold. This serves to hide and protect the raw fabric, giving the final project a polished, finished look.
What is a Bias strip?
A bias strip is a strip of fabric of same width that has been cut on the bias of the fabric.
So, what is Bias?
If you carefully examine a piece of woven fabric, you will see that the fabric is made of interwoven threads that are perpendicular to each other. Now think of a loom and how to weave fabric. You have a set of threads that are suspended from top to bottom of the loom, then you have the thread you weave in and out of these suspended threads.
When you weave fabric, the width of the fabric does not change (these are the two sides of the loom), because you have already suspended those threads onto the loom (top to bottom) and that determines how wide your fabric will be. The only part that gets longer is the bottom of the fabric as you continue to weave thread in and out of the loom.
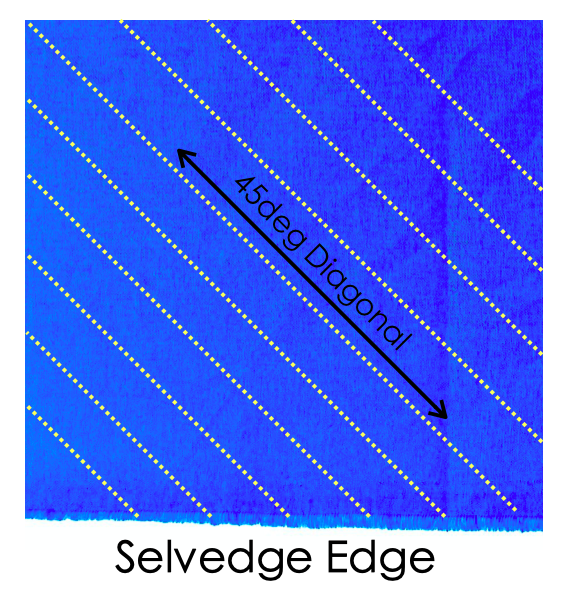
The part of the fabric that makes up the two sides of the loom is called the Selvedge, and does not fray. A lot of times you will find that the selvedge of fabrics is a different color than the rest of the fabric, with the copyright and brand information printed.
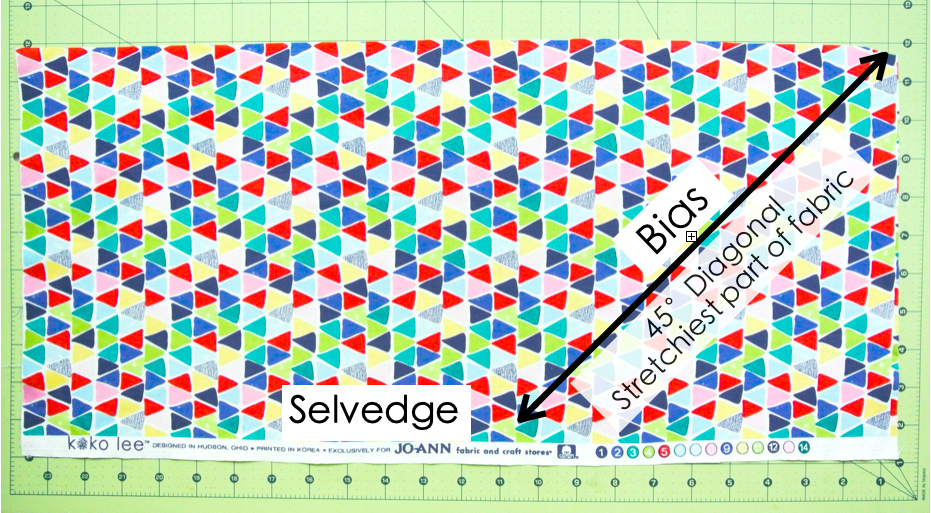
The bias is the part of the fabric that is 45° diagonal to the selvedge edge of the fabric. This is important because fabric that runs 45 degree diagonal to the selvedge is the stretchiest part of the fabric.
If you use your two hands to tug along the selvedge of the fabric, you will notice it barely stretches. Now try tugging with two hands along the bias and you will find that the fabric stretches quite nicely. This is extremely useful as fabric cut along the bias (which is what bias tape is made from) allows you to manipulate it around curves. And unless you will only be sewing squares and rectangles, you will need to sew around curves!
In this post we will be focusing on how to make the two type of bias tape that is commonly used for finishing raw fabric edges: single fold bias tape and double fold bias tape.
Armholes, necklines, and hems are commonly finished with the double fold bias tape. It is also used for binding quilts, mats, hot hands, etc. Another common use is to finish raw edges of seam allowances, know as the Hong Kong Finish. If you examine a piece of high-end unlined garment you will find the raw edges beautifully bound with a double fold bias tape. Low cost unlined garments will usually just have the raw edges serged.


Examples of double fold Bias tape on the back of a dress (LEFT) and to finish edge of hot hands (RIGHT)
What is a Bias Tape Maker and do I need one?
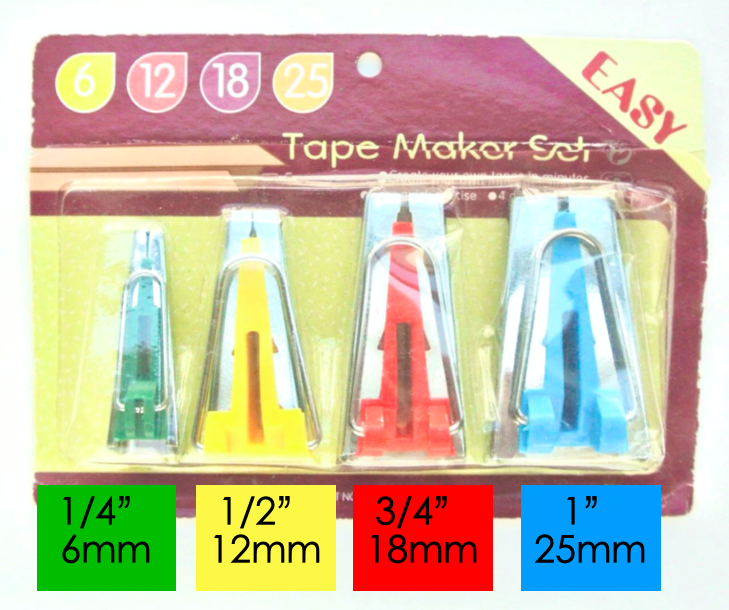
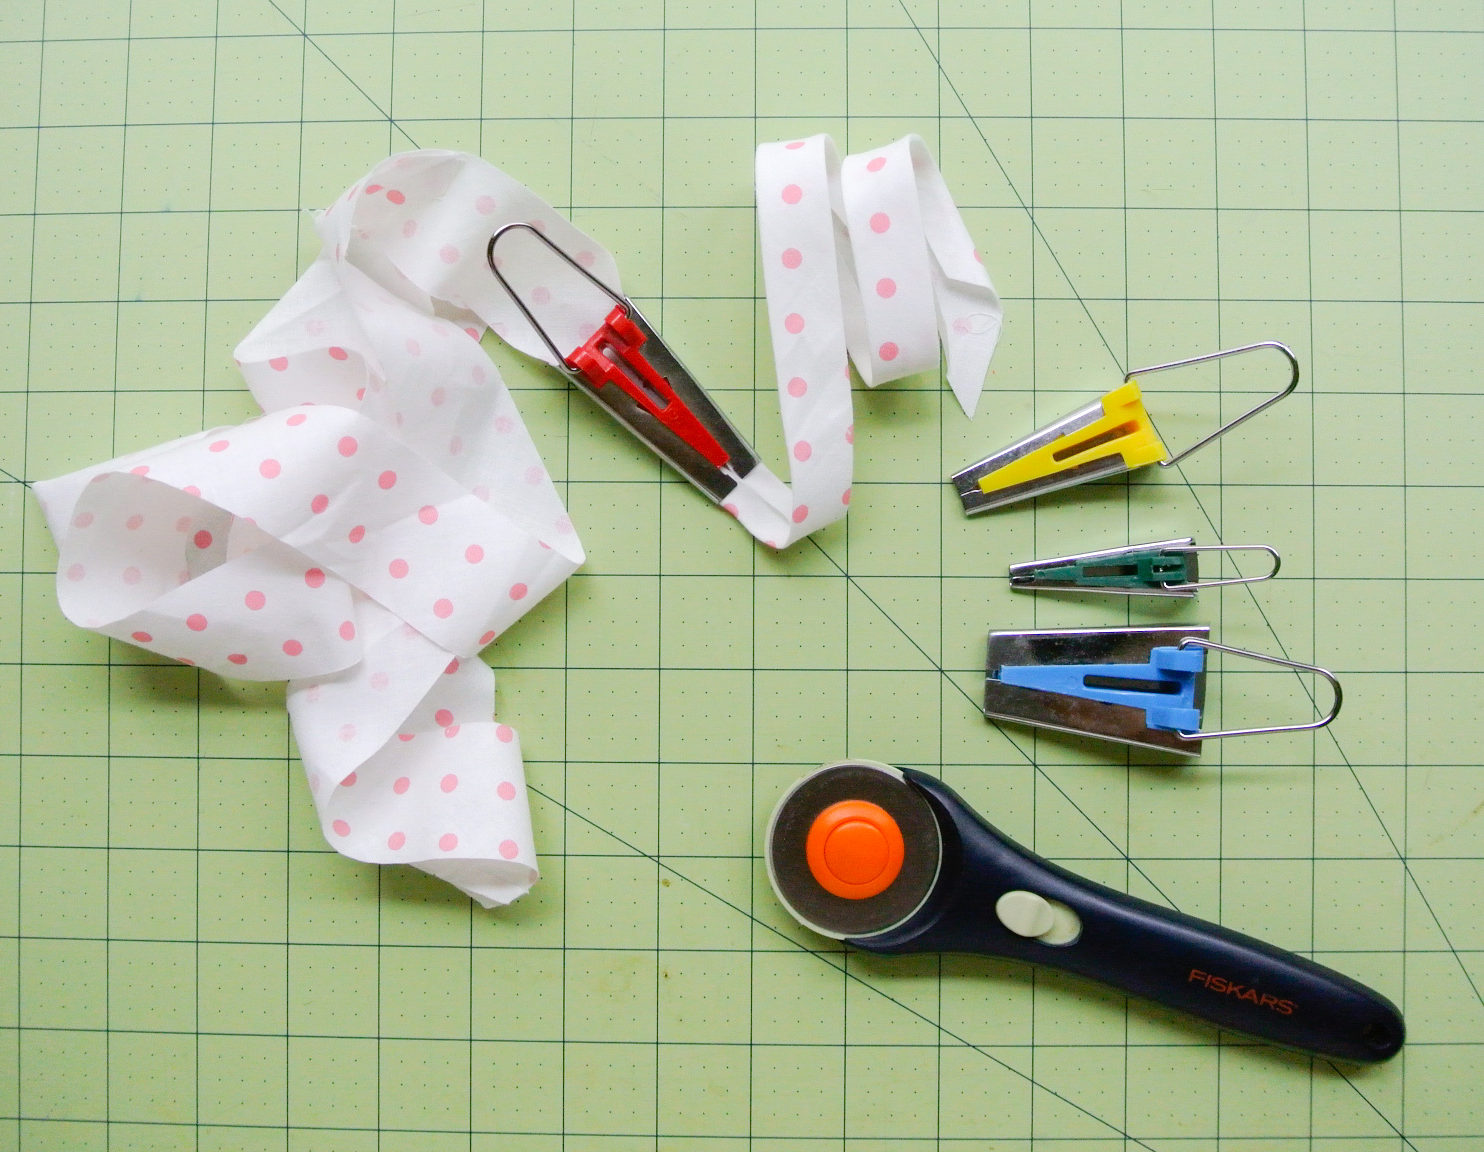
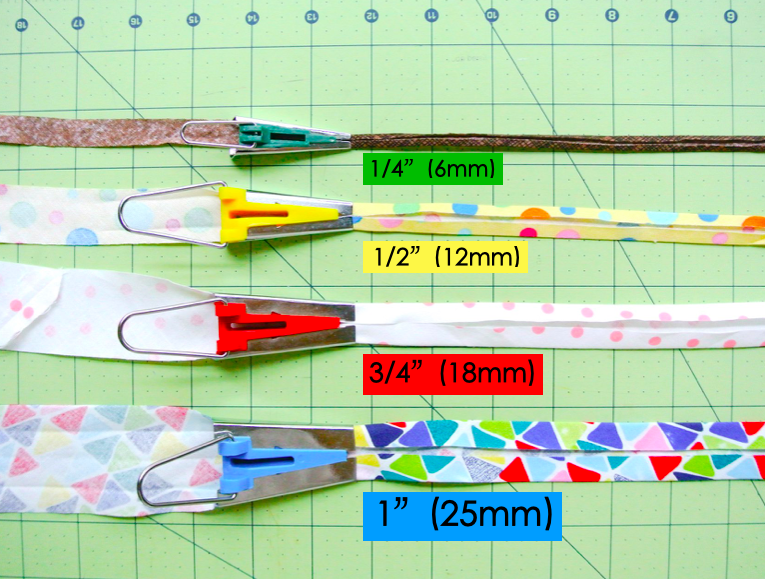
Bias Tape makers are a device for making single fold bias tape that come in different sizes. You can either purchase them individually or as a pack of 4 sizes: 1/4″ (6mm), 1/2″ (12mm), 3/4″ (18mm), and 1″(25mm)
Generally speaking, the smaller bias tape makers (1/4″ and 1/2″) are for making single fold bias tapes whereas the larger sizes (3/4″ and 1″) are for double fold bias tapes. However, bias tapes are extremely versatile and can be made and used for all different purposes.
You don’t need a bias tape maker to make bias tape. However, it is a lot faster and easier, so I HIGHLY recommend it! One day I’ll write a post about bias tape making without a bias tape maker. For now, we will focus on using this handy little device to make bias tape.
MATERIALS/TOOLS:
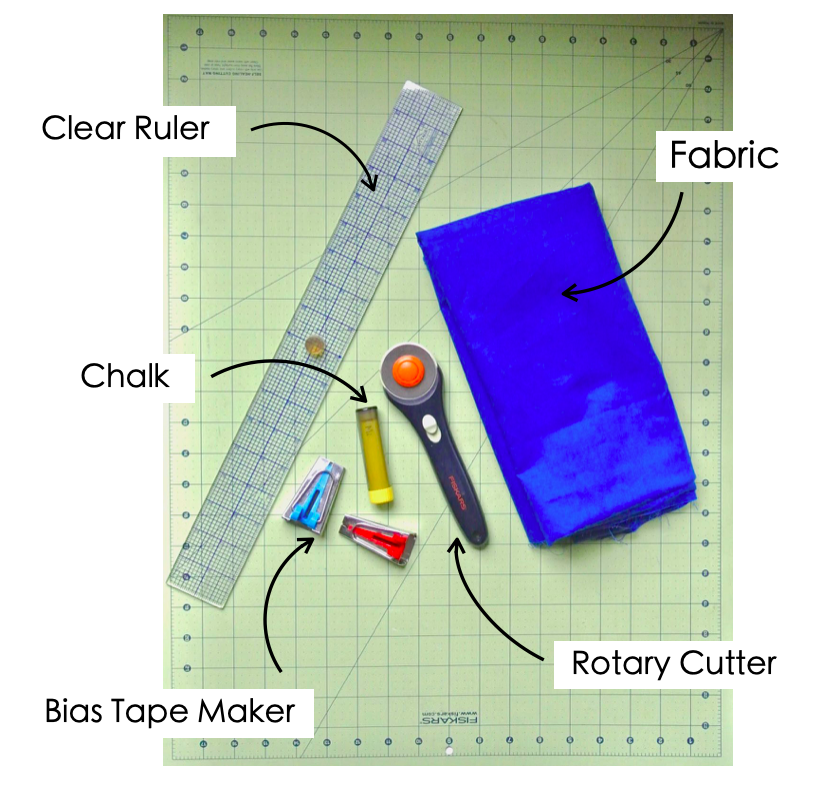
- Bias Tape Maker (about $9 USD for a set of four sizes on amazon)
- Clear Ruler
- Rotary Cutter/Scissors
- Cutting Mat
- Chalk for marking fabric (won’t need if you use rotary cutter)
- Iron
INSTRUCTIONS:
CUTTING BIAS STRIP
This is how we will be cutting bias strips.

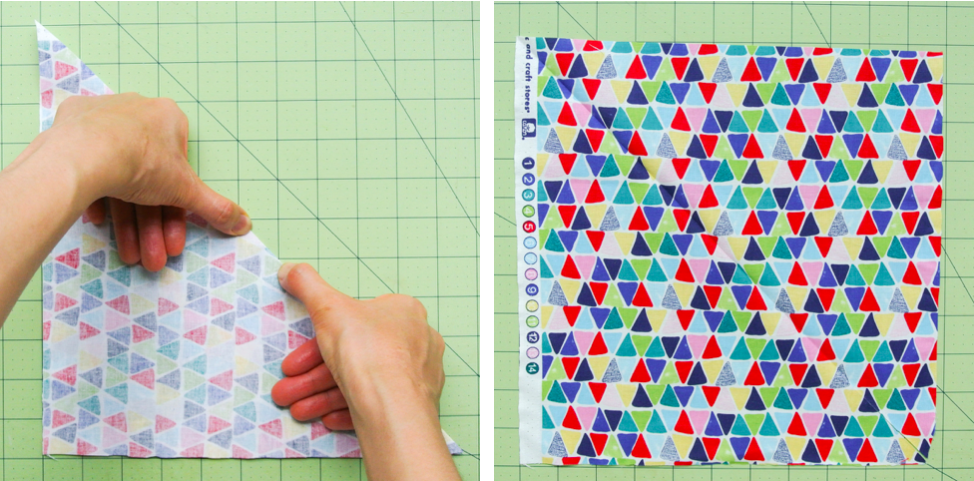
Place selvedge of fabric along straight edge of cutting mat.

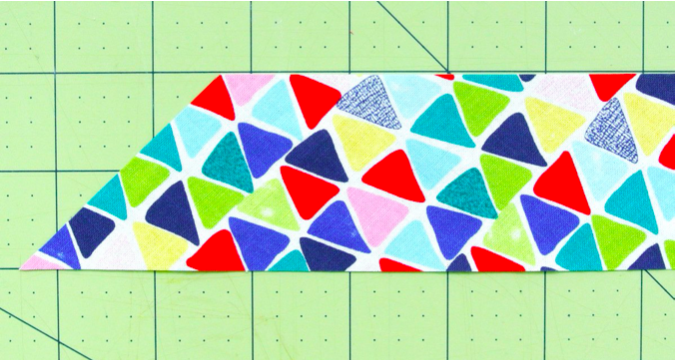
Fold one corner of fabric up to form a triangle. This will be 45 degree diagonal to the selvedge.

Using ruler and roller cutter, cut fabric to form a square
LEFT: Finger press the diagonal of the square
RIGHT: Open the square to see the diagonal
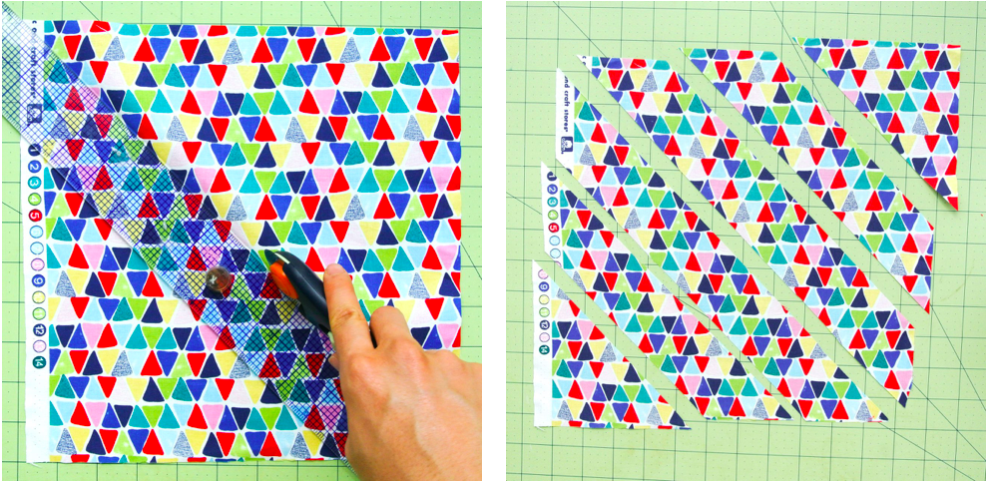
LEFT: Cut along the diagonal finger pressed line
RIGHT: Cut strips that are twice as wide as your bias tape maker.
Joining Bias Strip Together
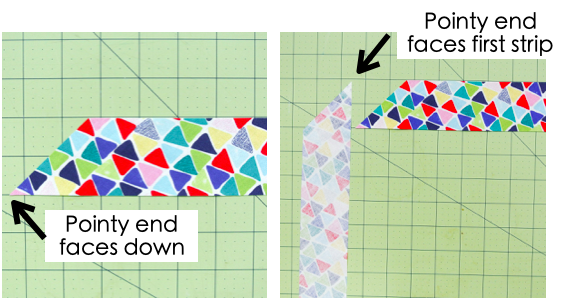
LEFT: Take a bias strip and lay it right side up. Make sure the pointy end faces down.
RIGHT: Take a second bias strip, wrong side up, and lay it perpendicular to the first strip with point end towards the first bias strip.
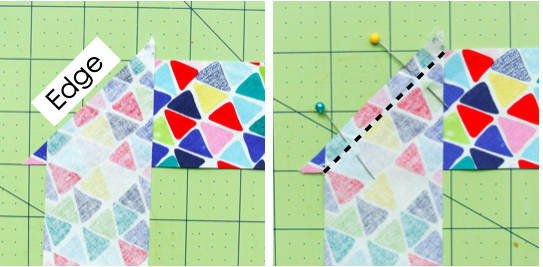
LEFT: Move second bias strip over first bias strip so the edges match.
RIGHT: Pin and sew from corner to corner (black dotted line)
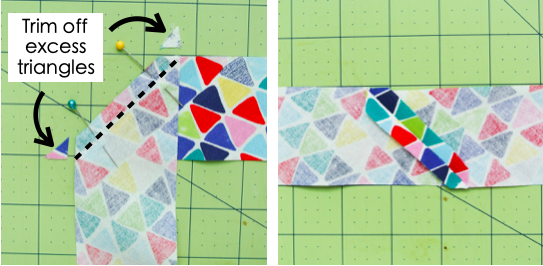
LEFT: Trim off excess triangles that hang off bias strip
RIGHT: Press open seams with iron
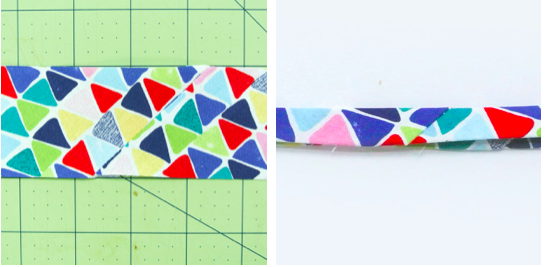
LEFT: View of right side of bias strip. Make bias tape (single/double) as shown below.
RIGHT: Seam after bias strip is ironed into double fold bias tape.
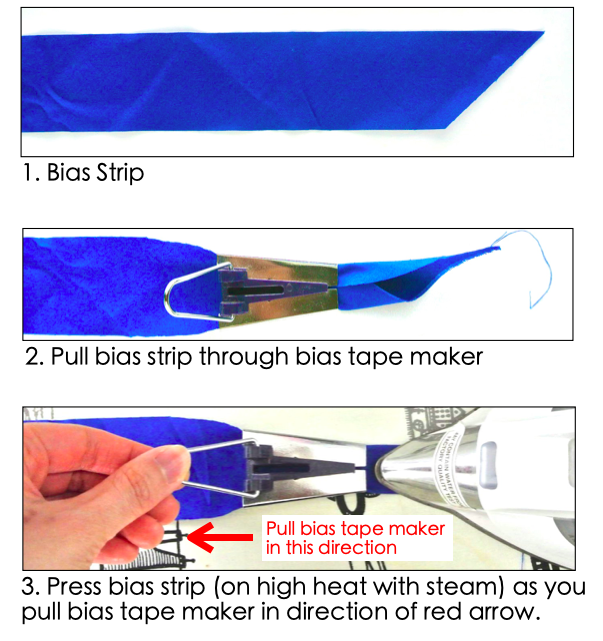
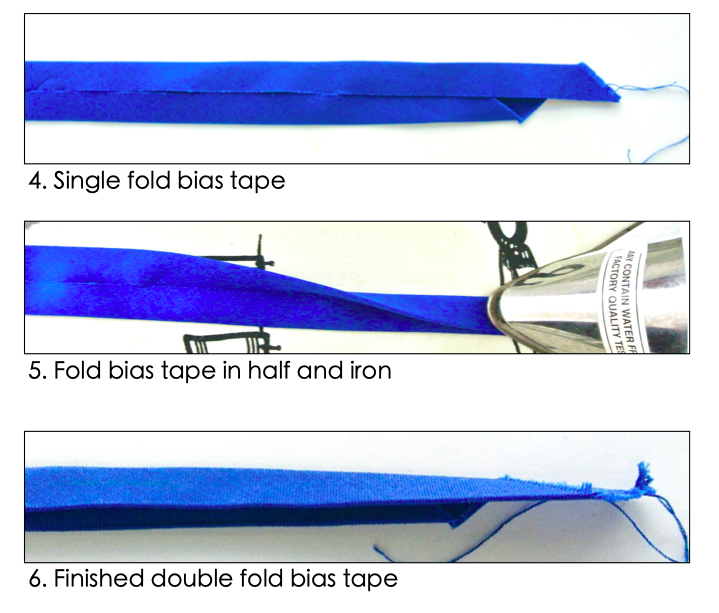
Making Bias Tape
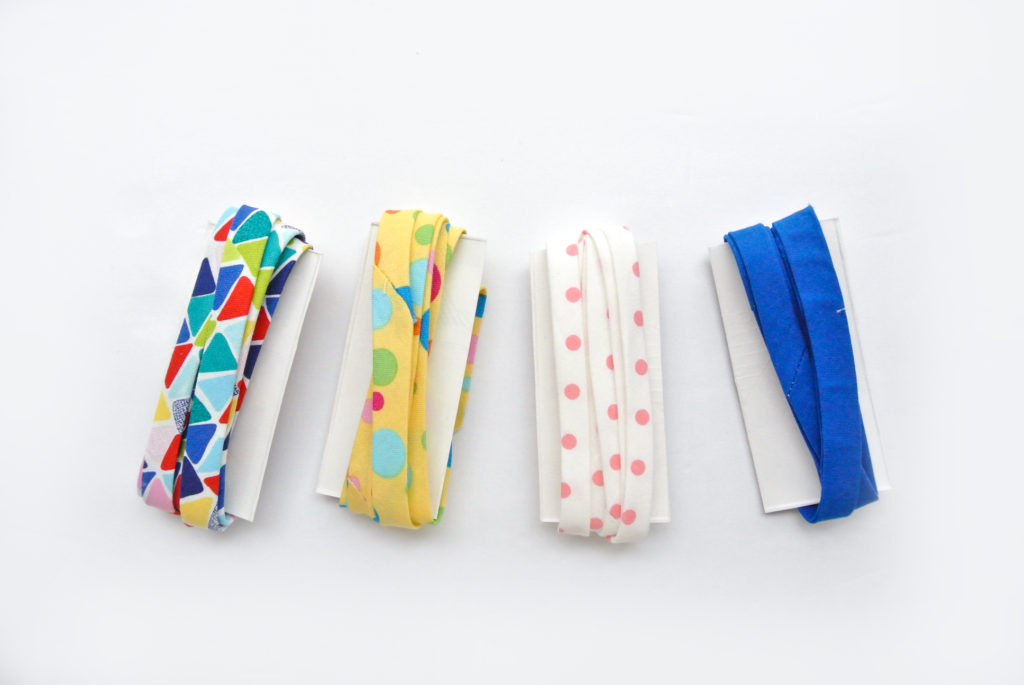
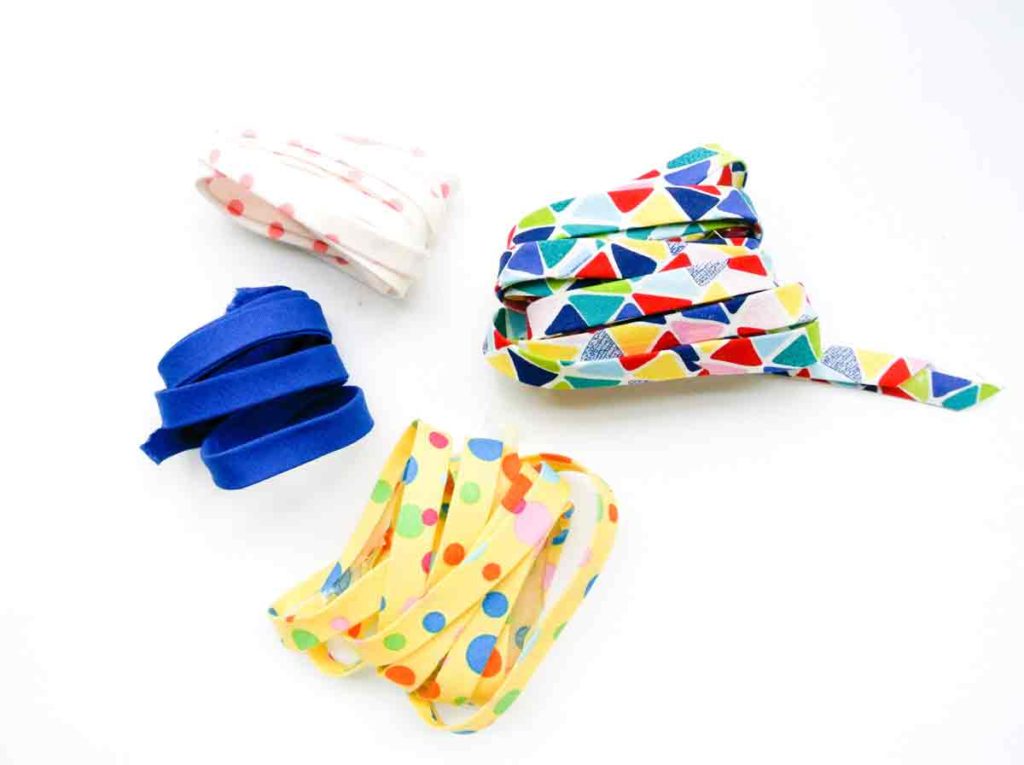
Finished! Wasn’t that easy? You can wrap the bias tapes around a piece of cardboard/cereal box to store.
Now that you know how to make them, the possibilities are endless! Let me know in the comments below if you have any questions. Happy Sewing 🙂
Check out these projects that use bias tapes:
Insulated Water Bottle Carrier
T-shirt Neckline Re-fashion