Beginner’s How to Use a Needle Threader on a Sewing Machine
Always wondered how to use the “automatic needle threader” function on your sewing machine? This step-by-step tutorial for beginners will show you just how to do so in a breeze!
When I first got a sewing machine that boasts of an automatic needle threader, I couldn’t wait to try it out! It took a few tries to learn how to use it, but once you get the hang of it, it really is quite simple. The best part is that you will never “misplace it” since it is attached to your sewing machine!
If your sewing machine does not come with an automatic needle threader, fear not! Check out my 10+ Hacks for How to Thread a Needle.
How does a Needle Threader Work on a Sewing Machine?
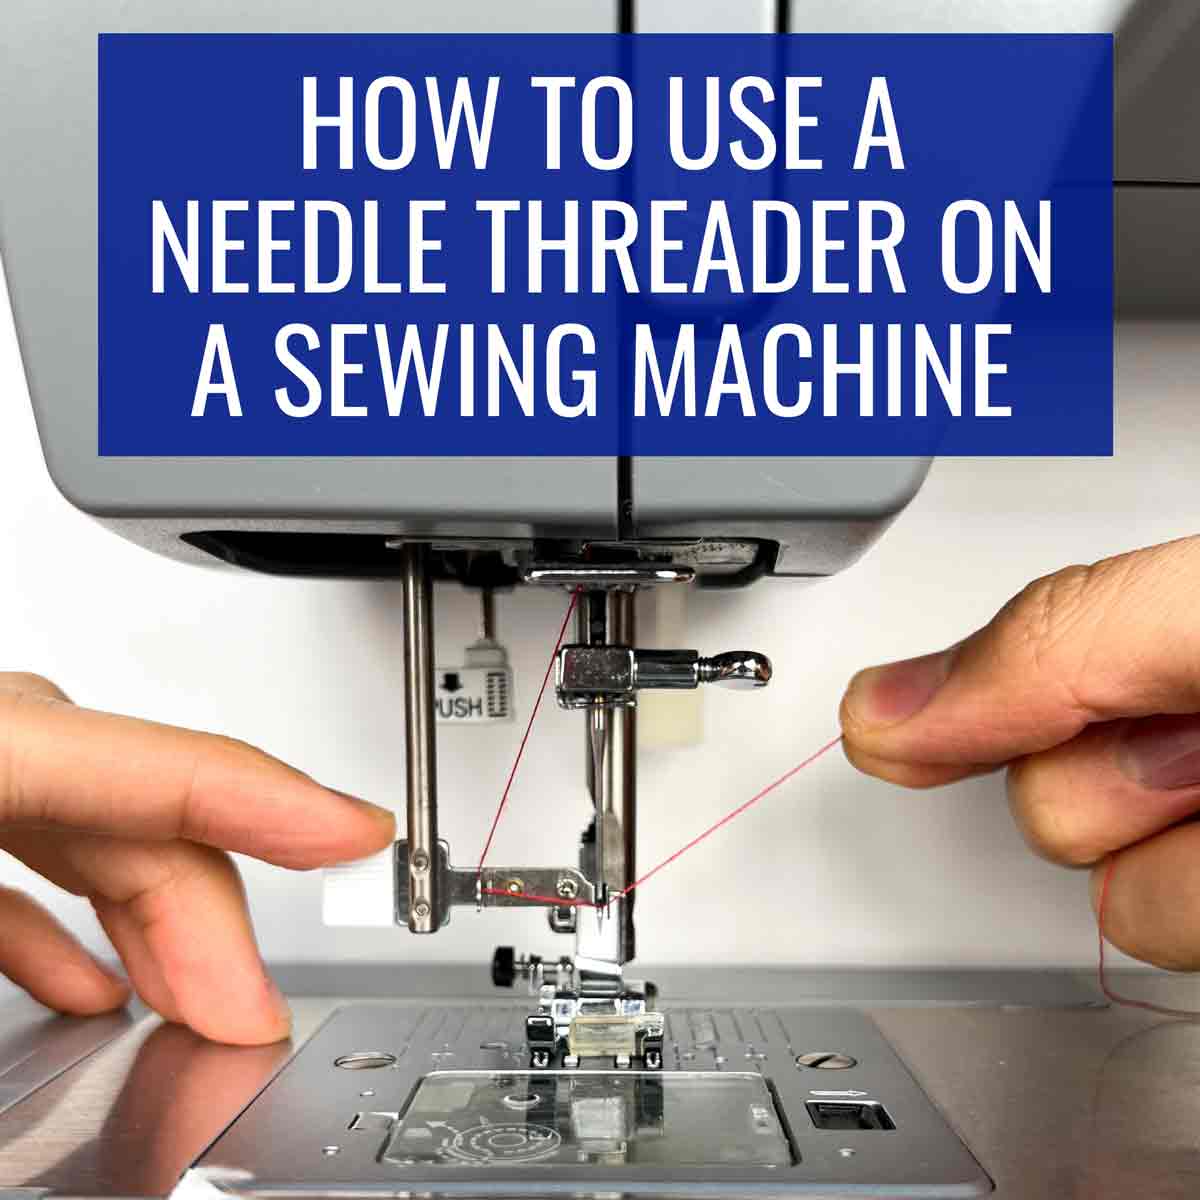
In a nutshell, the automatic needle threader consists of a tiny wire hook in between two metal plates that gets positioned around both sides of the needle. The tiny hook passes into the eye of the needle and catches the thread that you’ve pulled in between the two metal plates.
Once you release the needle threader, the hook passes out the eye of the needle, pulling the thread with it through. Your needle is now threaded!
Does the Needle Threader work On all Needles?
The answer is no. In this case, the automatic needle threader doesn’t work for twin needles or very small needles.
Generally speaking, I would avoid using the sewing machine needle threader with a needle that is smaller than 70/10.
In order for the threader to do its job, the tiny wire hook has to be able to pass through the eye of the needle. The smaller the needle, the smaller it’s opening. At some point you will find that the threader meets resistance as you turn the lever and won’t glide “into” the needle.
When this happens, don’t force the threader. This is very important because If you try to force it, you may end up bending the wire hook in the needle threader, not fun to fix! Additionally, you can damage your sewing needle as well. Simply release the lever and proceed to thread the needle manually.
Twin needles, since there are two eyes to thread, also need to be threaded manually. For more tips on threading a stubborn needle, check out our 10 Easy Hacks for How to Thread a Needle which will provide you some useful tips and tricks to get that stubborn thread in!
Preparing Your Sewing Machine to use the Needle Threader
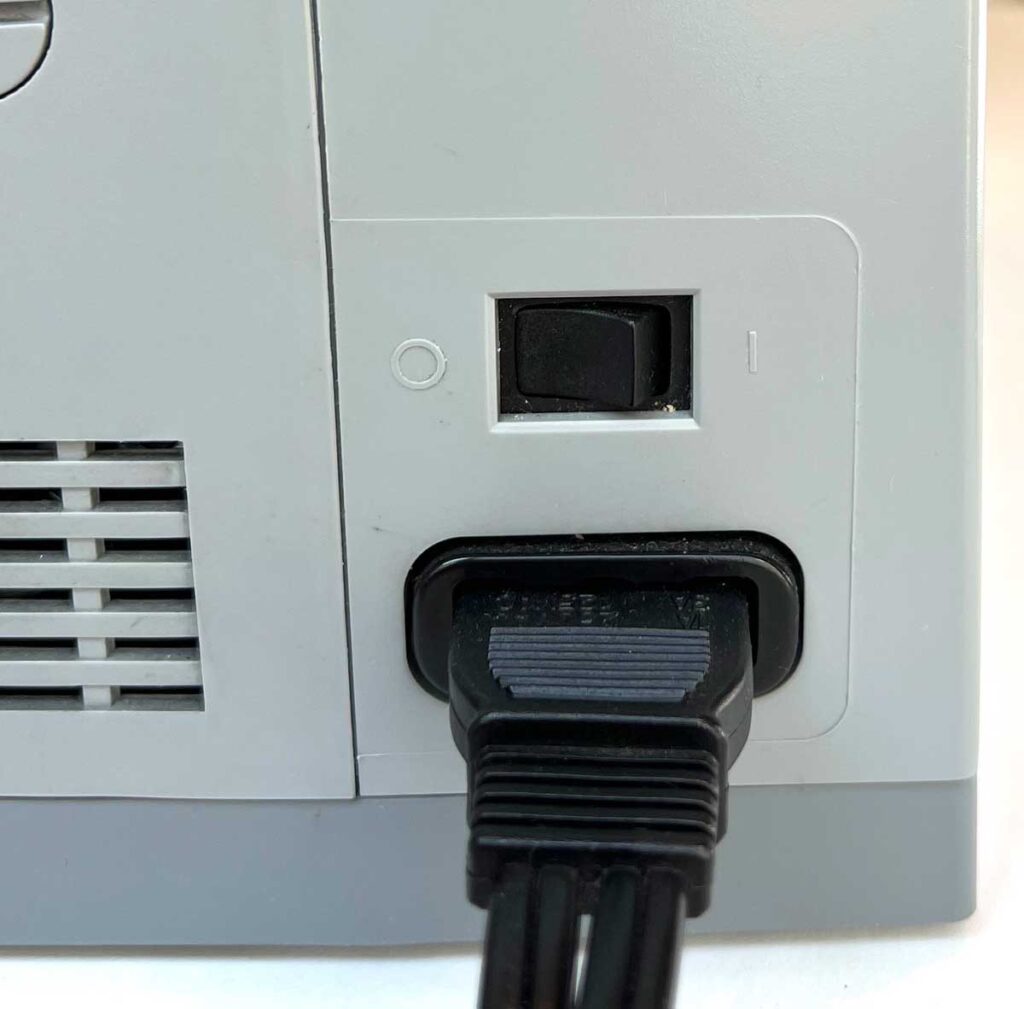
- Make sure your machine is turned off (“O”).
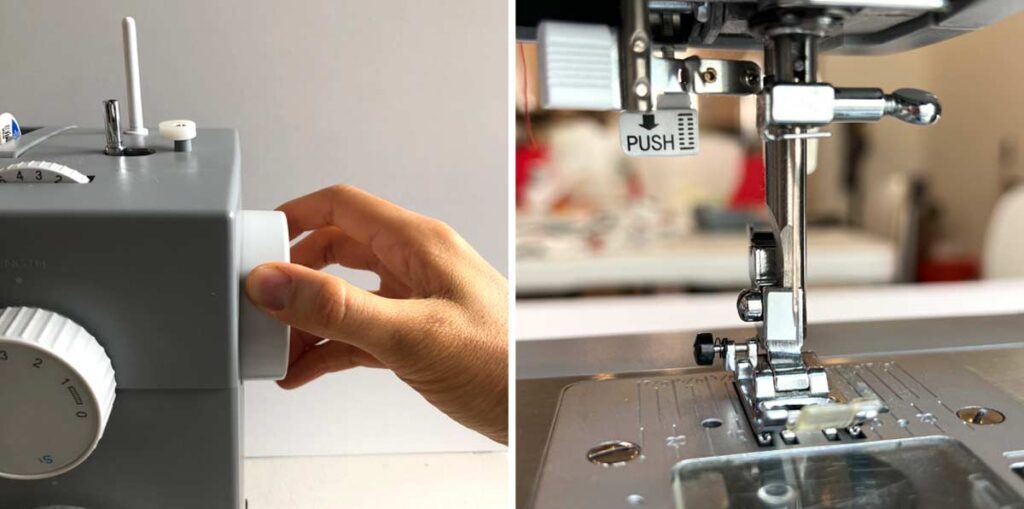
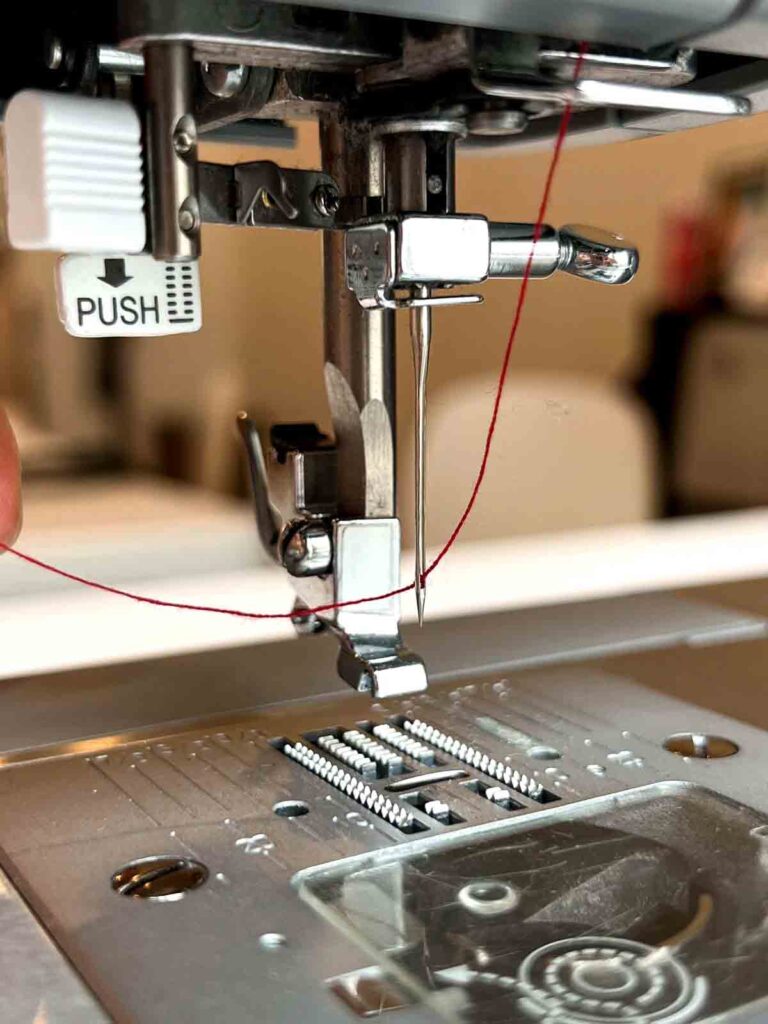
2. Turn hand dial with right hand to raise needle to it’s highest position. Lower the presser foot all the way down. This will give you more working space to thread your needle. Alternatively, you can also remove the foot.
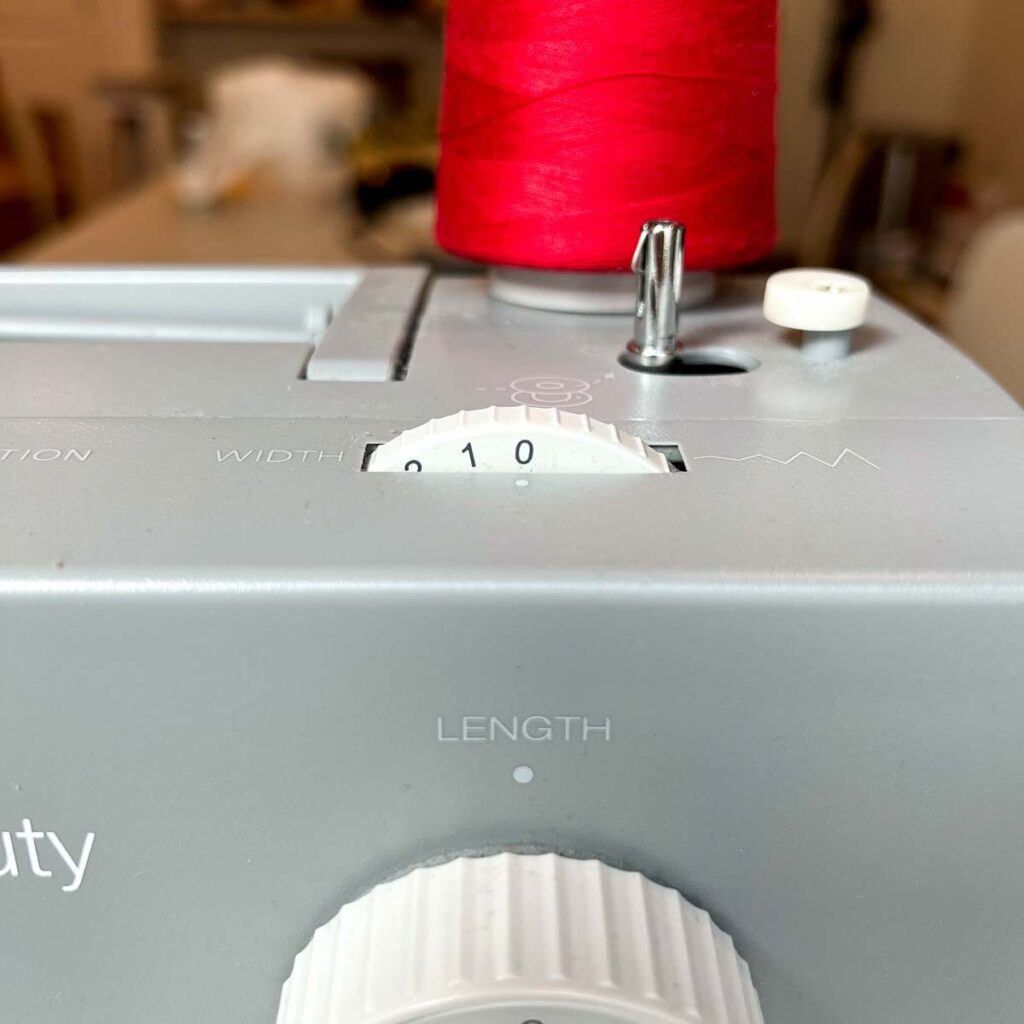
3. Set your needle position to neutral. On my Singer Heavy Duty 4452 (the machine in the tutorial), you set needle position to neutral by adjusting stitch width to 0.
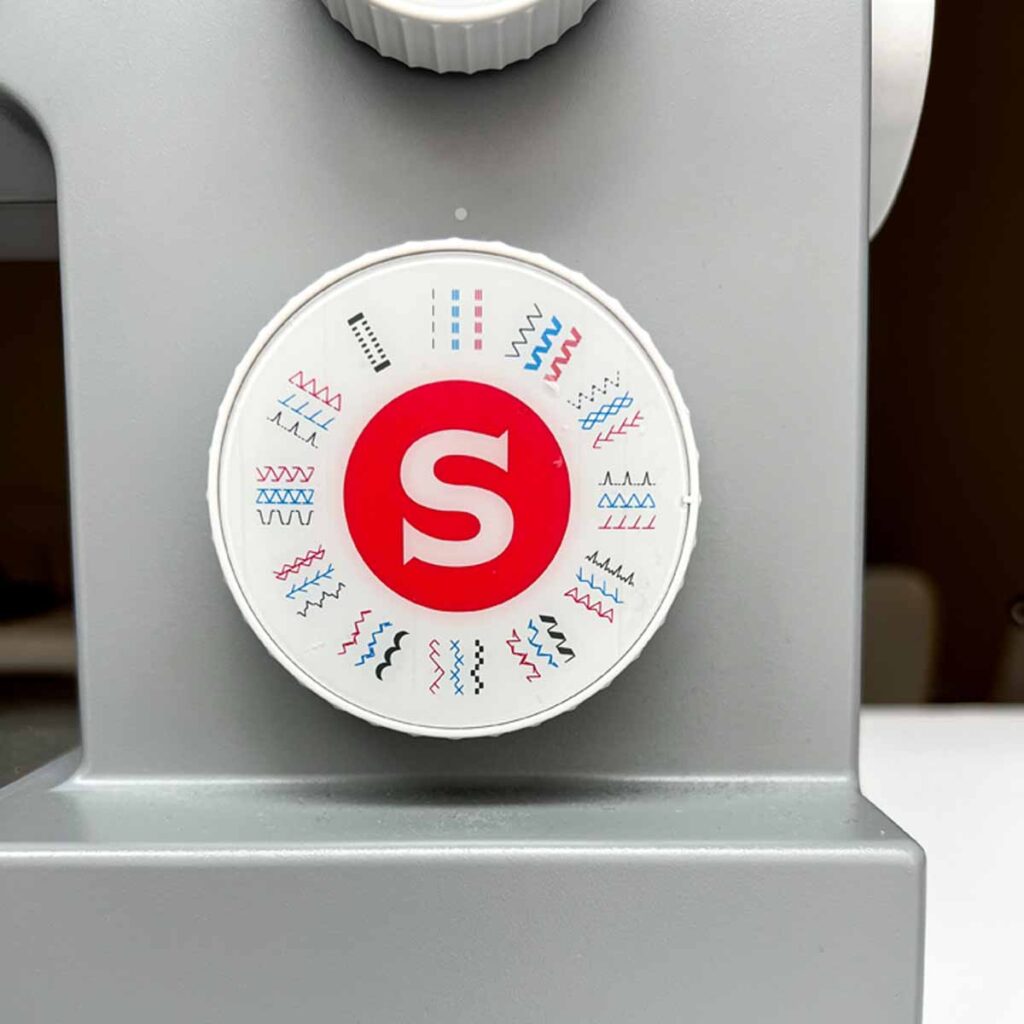
4. Select the straight stitch.
Sewing for Beginners – Using a Sewing Machine Needle Threader
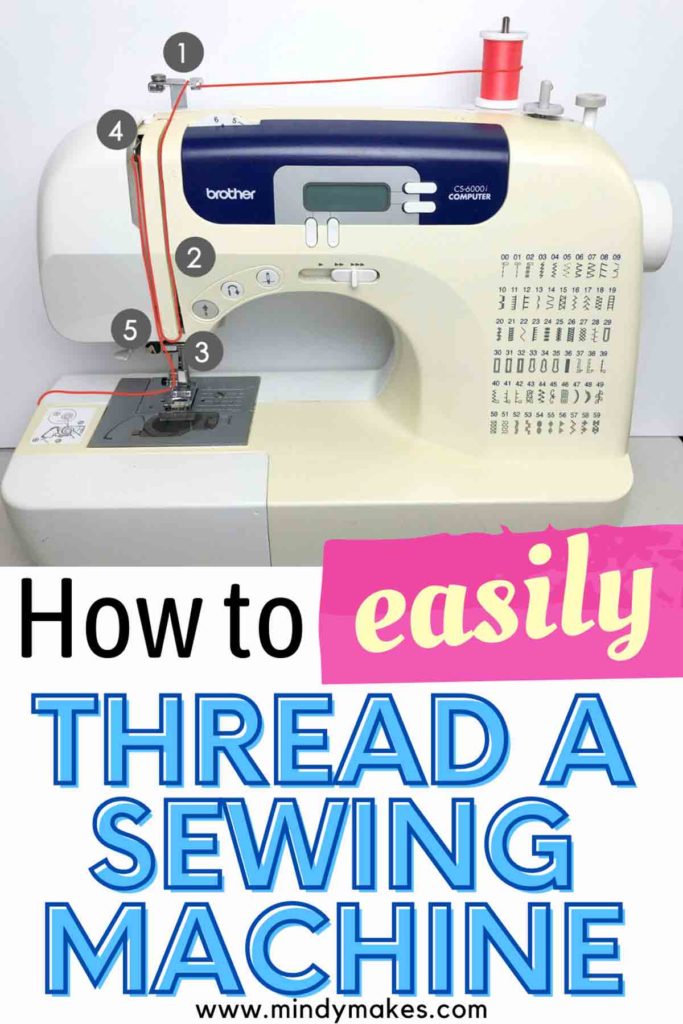
Before we start, first thread your sewing machine correctly, all the way to right before the thread goes into the needle. For my beginners, be sure to check out How to Thread a Sewing Machine for a step-by-step guide.
NOTE: In the following tutorial, I’ve removed the presser foot so you can have better visualization. You can choose to remove the presser foot as well or simply just lower it all the way down.
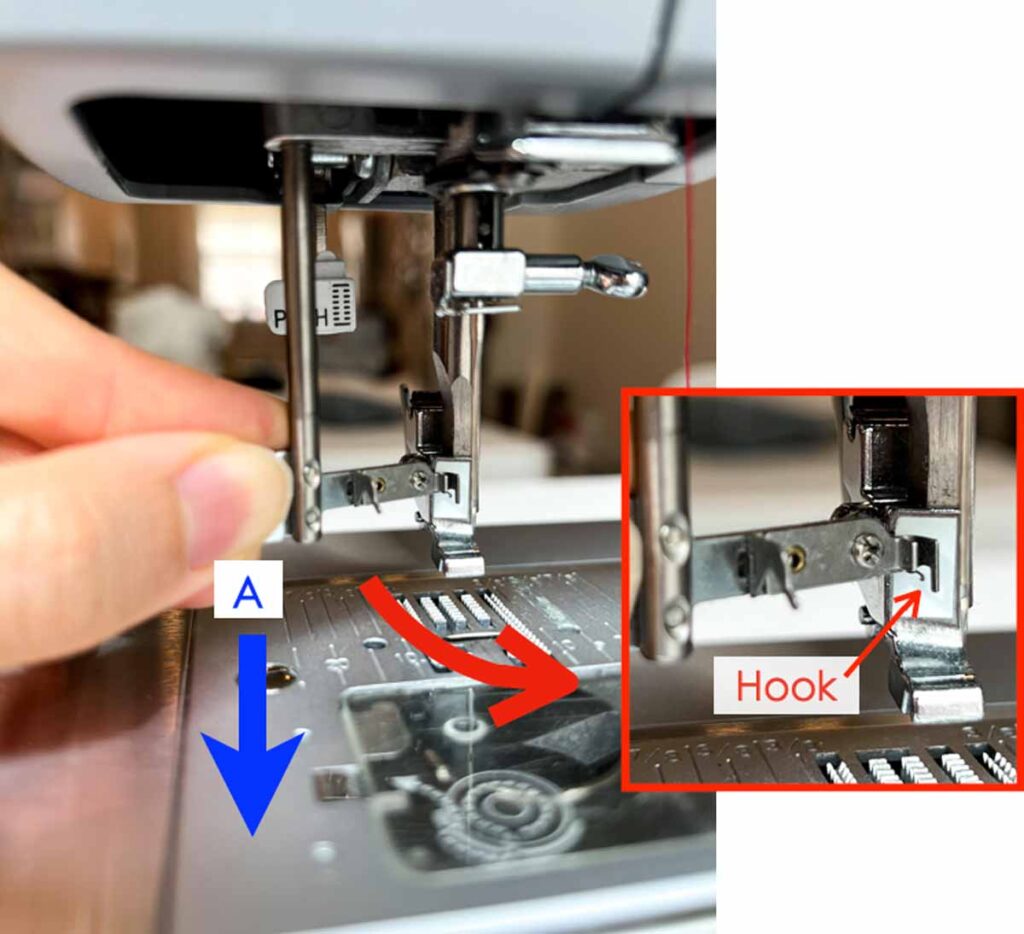
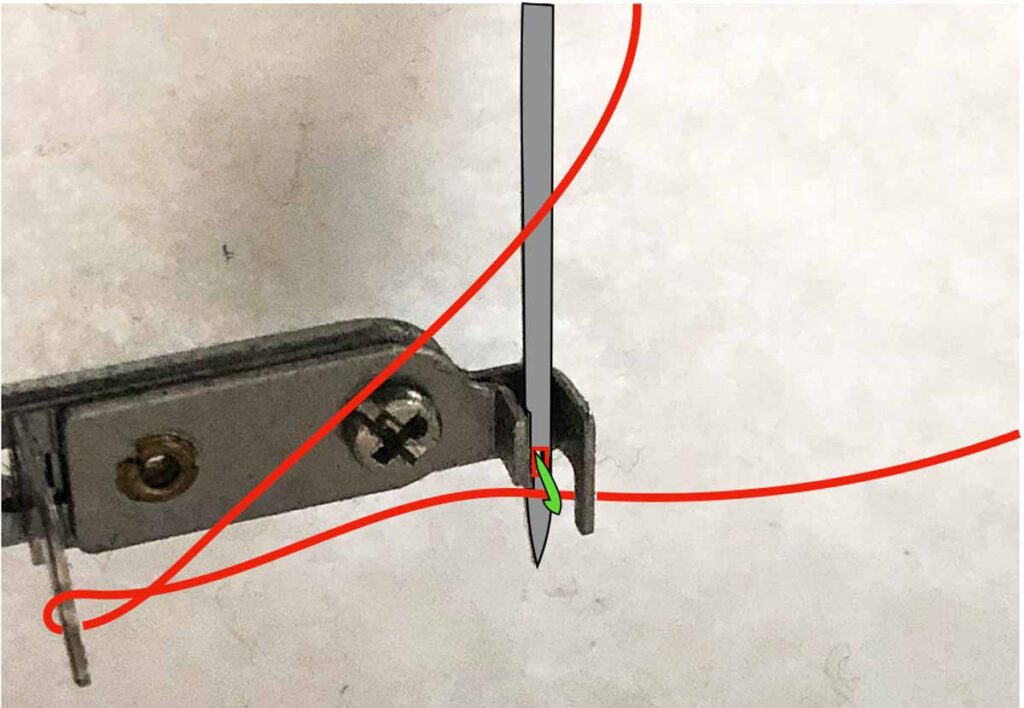
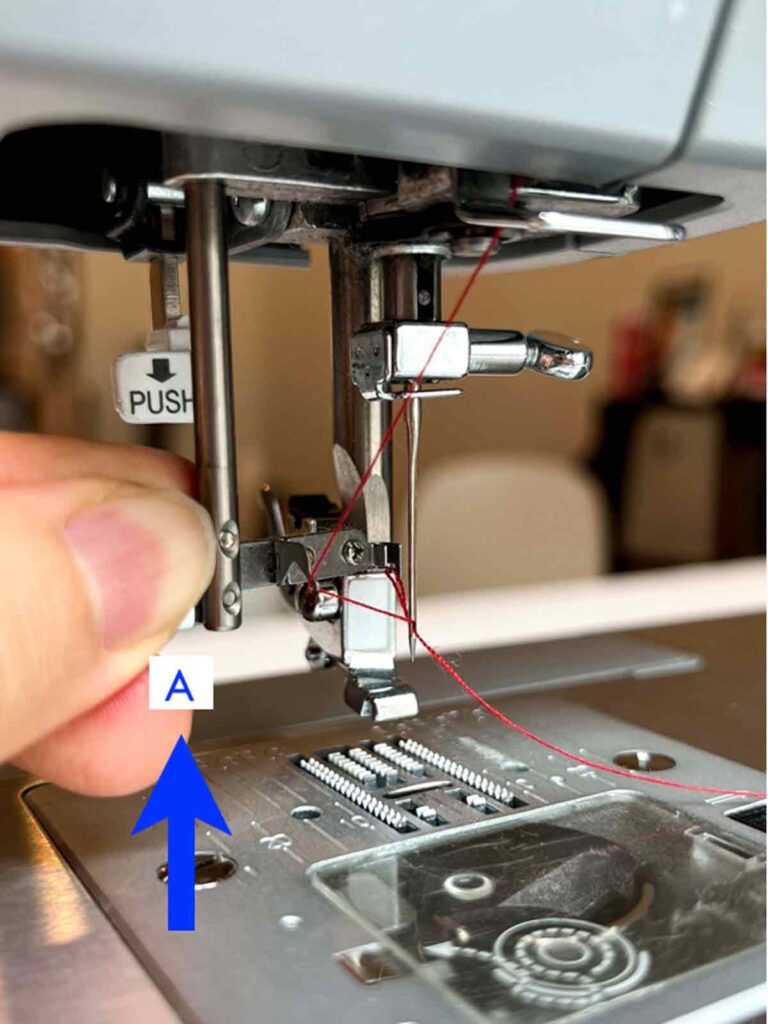
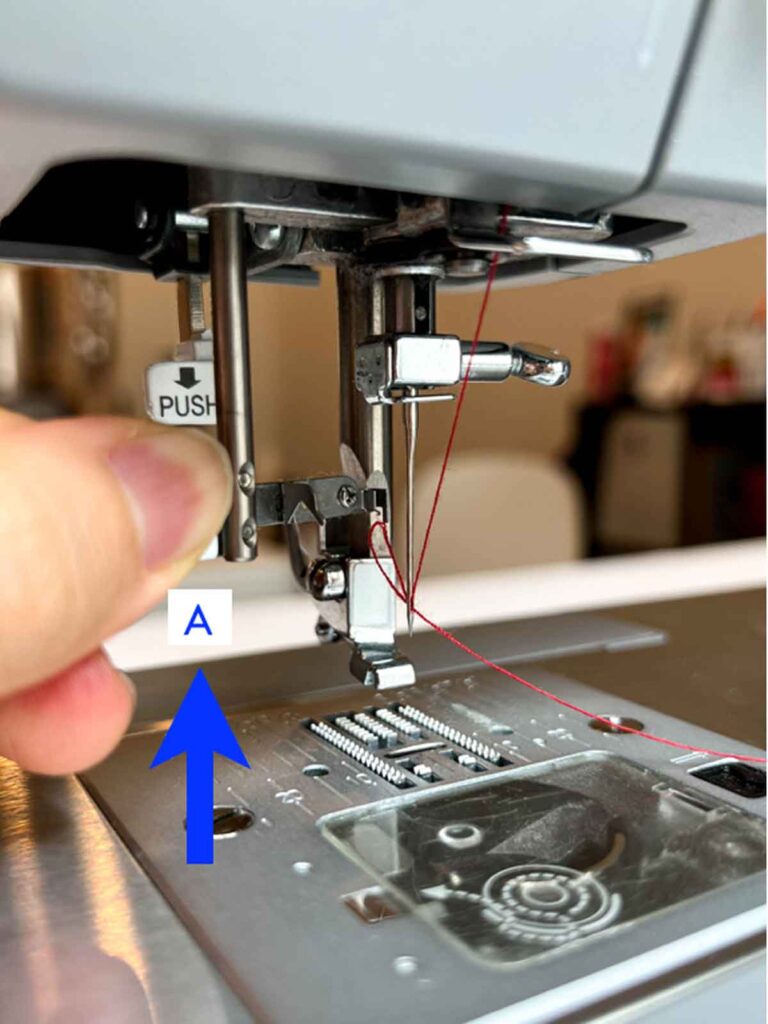
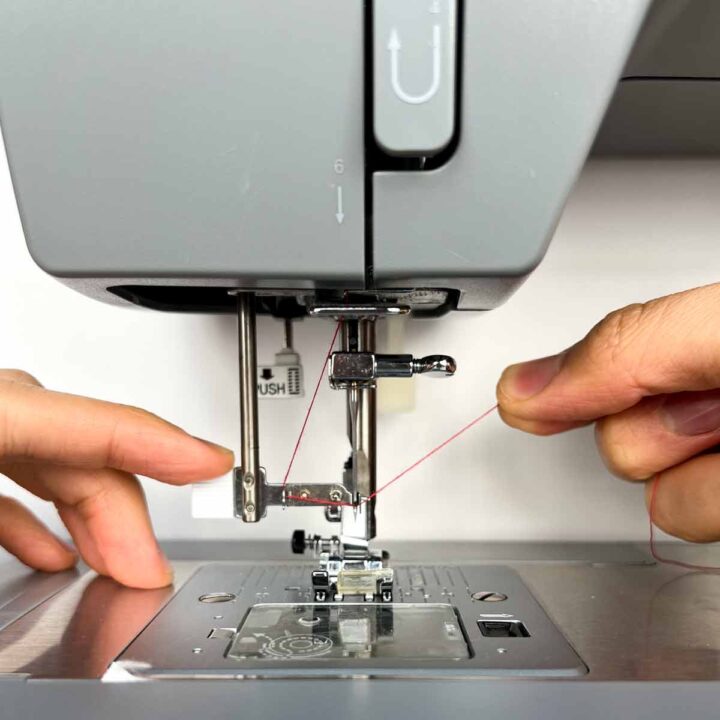
With your left hand, pull lever (A) down. See how there is a hook in the threader.
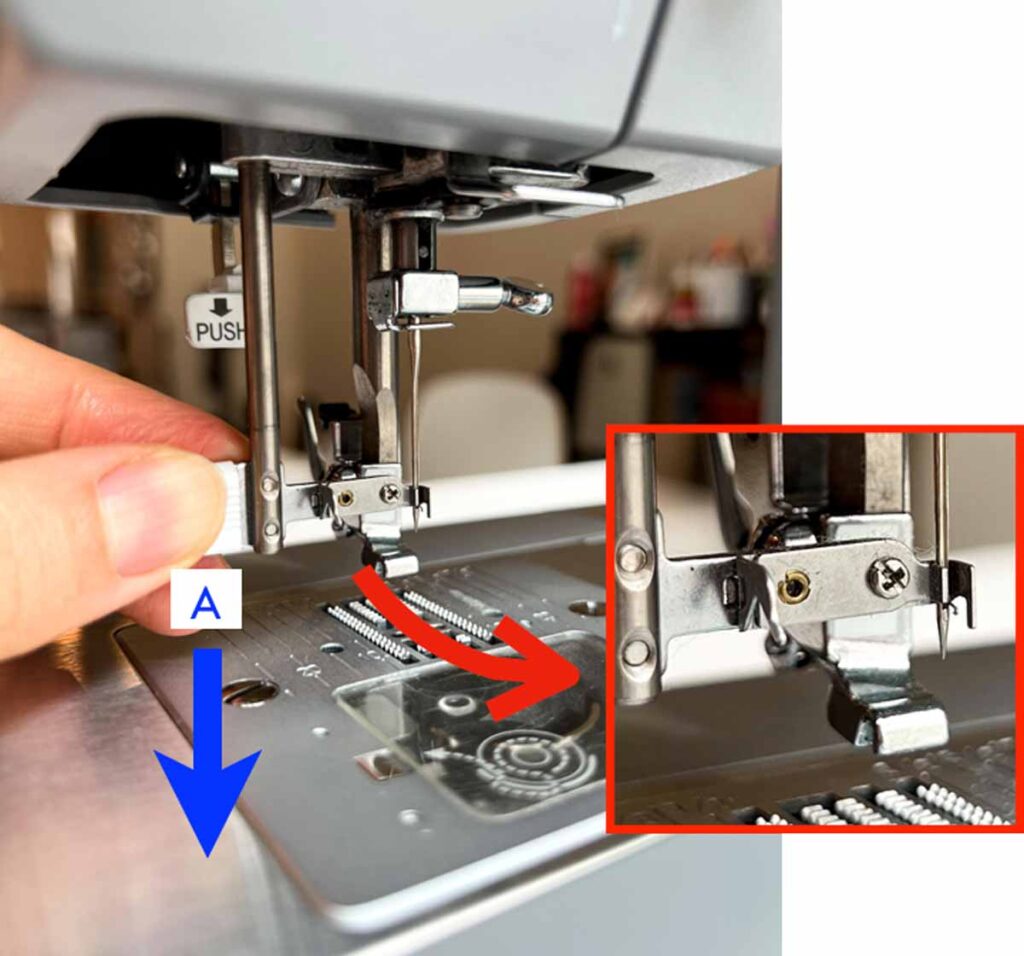
Once you have pulled the lever (A) all the way down, swing lever towards you and gently insert the hook of the threader into the eye of the needle.
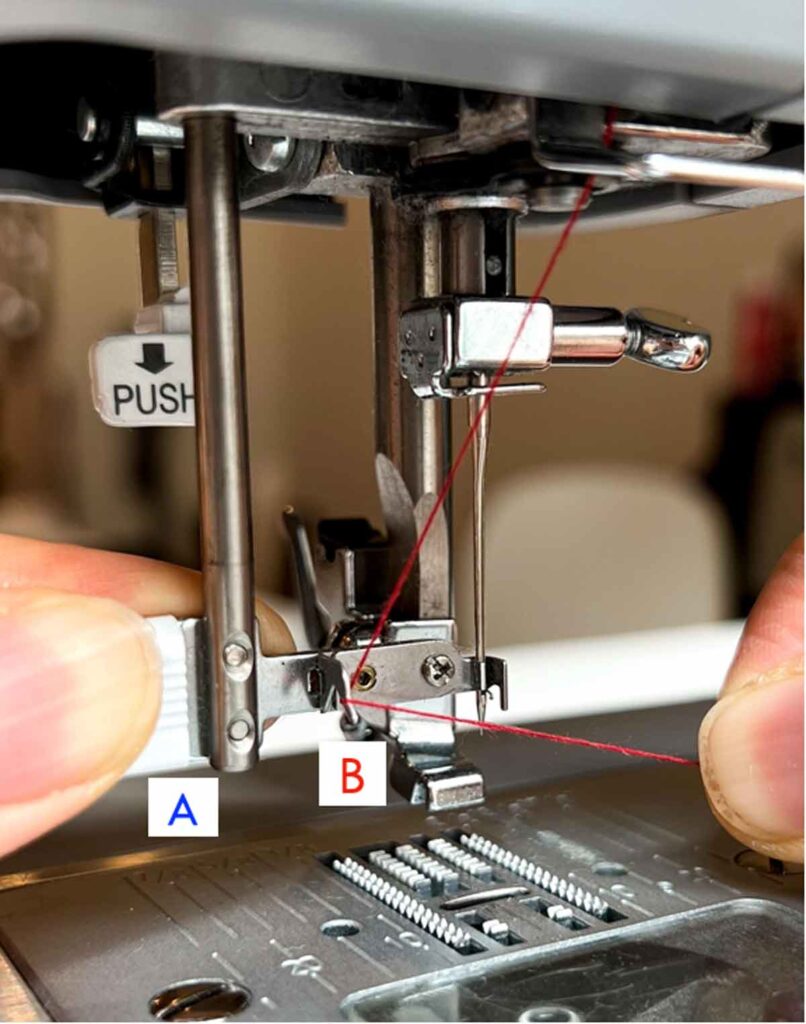
Hold lever in place. Pull thread under and then over the thread guide (B), from right to left.
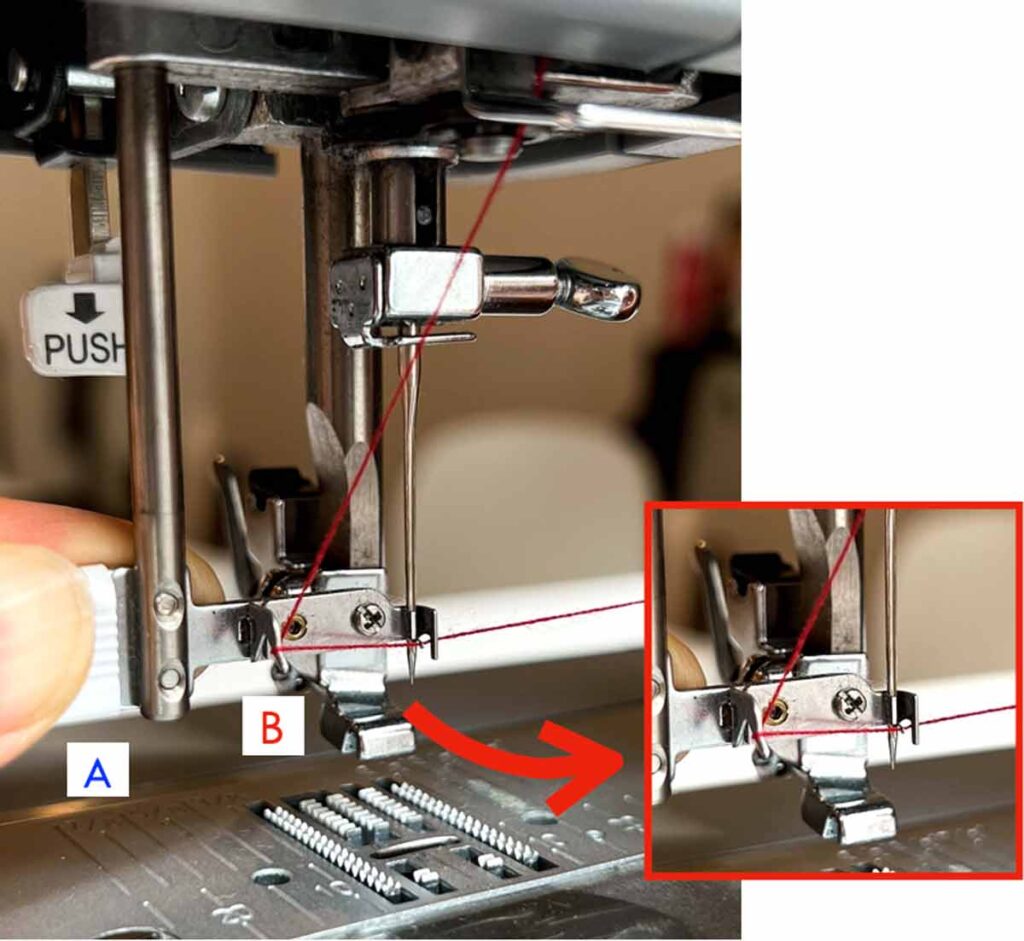
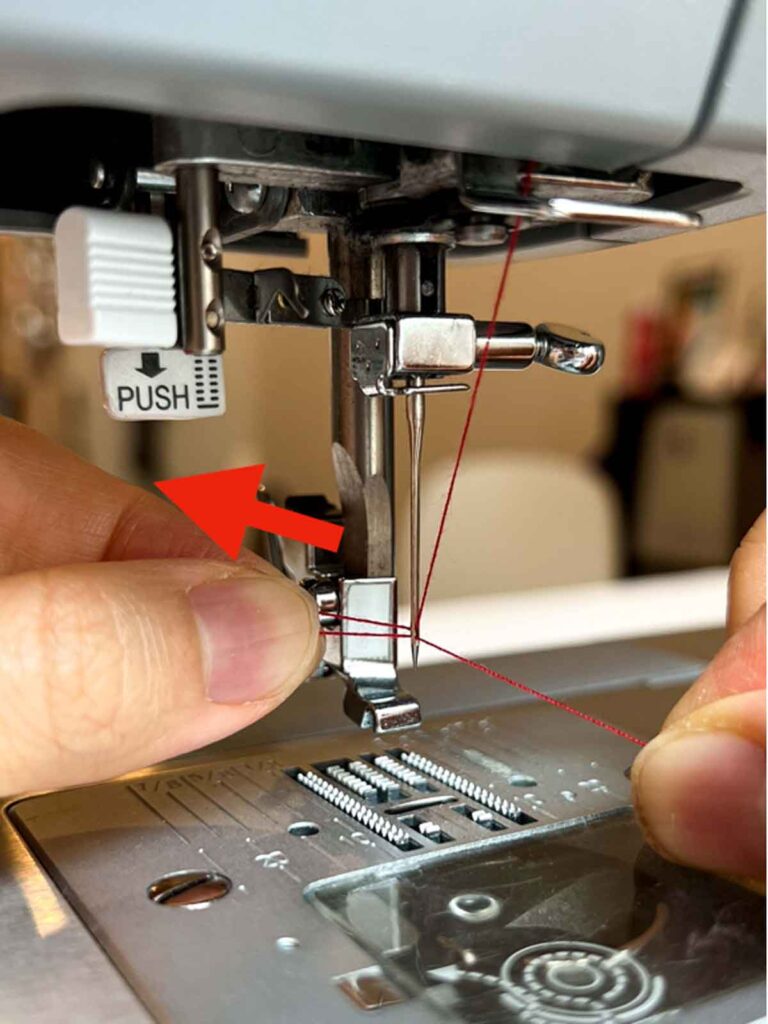
Continue holding lever (A) in place. Pass the thread in front of the needle and under the hook.
NOTE: At this point it may be difficult to see whether or not your thread has passed under the hook. However, as long you pass the thread in front of the needle and tug it in an upwards direction the hook will catch the thread.
Swing the lever away from you first and then move it upwards to the resting position. See how the hook in the threader has pulled the thread through the needle.
Continue lifting the lever until it is back to its resting position. See how the hook has disengaged from the thread.
Pull the thread through the needle of the eye.
Ta da! Needle is threaded (from front to back)
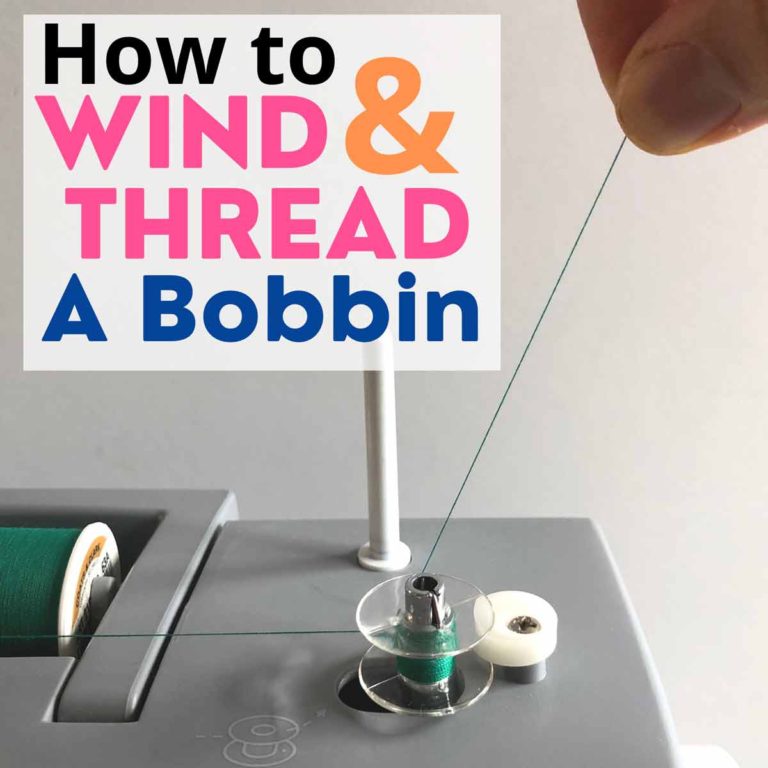
Place your presser foot back on and you are now ready to get sewing! If your bobbin is not already in place, be sure to check out this useful guide on How to Thread The Bobbin for Beginners.
Trouble shooting TIPS FOR USING Sewing Machine Needle Threader
The threader keeps hitting the needle every time I swing the lever.
Solution 1: Make sure your needle is correctly inserted (all the way) into the machine. A loosely screwed needle won’t thread correctly and may fall out when the threader hits it, causing damage to the threader.
Solution 2: Check if your needle is in neutral position. Computerized sewing machines these days comes with a button that you press to reset the needle position. This neutral position guarantees that the eye of the needle is at the correct level and height for the threader to insert.
If your machine doesn’t have that button, use the hand-wheel to turn the needle to the highest position. Also make sure that your stitch type is set to “straight stitch” as certain stitches (i.e. zig zag stitch) will shift the needle to the left as the starting position.
Solution 2: Check if your needle is too small for the hook of the threader to pass through. In general, I don’t recommend using the threader for machine needles smaller than 70/10. However, this can depend on the needle threader of your sewing machine as some may be able to threader small needles.
IMPORTANT! When in doubt, don’t ever force the threader hook through the eye of the needle as this can bend the hook or damage the needle. Manually thread the needle instead.
Solution 3: Check if your threader hook is bent. This possible if you’ve ever tried to force your threader into the needle. The hook of the threader hits the side of the needle (inside of passing through the eye) and gets bent out of alignment.
In this case, you can try to recenter the threader hook by gently pushing it with a small screwdriver or your fingernails. If this still doesn’t help, you may need to bring your machine in for service.
The threader won’t pull the thread through
Solution 1: Check the threader hook. If the hook is bent it may have a hard time catching the thread to draw it through the eye of the needle.
Solution 2: Check your thread and needle size. This may be an issue if you trying to thread a small needle using too thick of thread. Also, avoid using the threader with metallic or stiff threads. Manually thread the needle instead.
Solution 3: Don’t put too much tension on the thread with your right hand. the hook may not be able to catch the thread if you are holding it too taut.
Instead, hold the thread with enough tension so it’s not limp, and let go of your hold as soon as you release the lever with your left hand.
The threader pulls the thread through but the thread is frayed
Solution 1: Check if your hook is bent. Again, a faulty threader hook could be the culprit.
Solution 2: Check the position of your needle. If the needle is not completely in neutral position, the hook may be able to pass through the eye, but it won’t sit right to completely pull the thread through.
Solution 3: Check your thread and needle size. A thick thread that is incompatible with the needle size may fray as it’s getting pulled through the eye.
Final Tips
If you’ve tried all the above and the needle threader is still not agreeable, try using a brand new needle. Overtime, the eye of the needle can get worn and scratched from repetitive use. Sometimes a new needle is all it takes to fix the issue!
Finally, when all else fails, it may be time to take it into the shop to be serviced. Your threader may need a little fixing, or may need to be completely replaced.
How to Use a Needle Threader on a Sewing Machine
The automatic needle threader on a sewing machine is a wonderful and helpful tool to help you thread a needle. Very quick and easy to learn, you will have a threaded needle in no time!
Instructions
PREPARING YOUR SEWING MACHINE
- Make sure your machine is turned off (“O”).
- Turn hand dial with right hand to raise needle to it’s highest position.
- Lower the presser foot all the way down. This will give you more working space to thread your needle. Alternatively, you can also remove the foot.
- Set your needle position to neutral (see note 1).
- Select the straight stitch.
HOW TO USE A SEWING MACHINE NEEDLE THREADER
- Thread your sewing machine correctly all the way to right before the
thread goes into the needle. For more information check out How to Thread a Sewing Machine. - With your left hand, pull lever on left all the way down.
- Swing lever towards you to gently insert the hook of the threader into the eye of the needle.
- Hold lever in place. Meanwhile, pull thread (with your right hand) under and then over the thread guide from right to left.
- Continue holding lever in place. Pass the thread in front of the needle and under the hook.
- Swing the lever away from you first and then move it upwards to the resting position. At this point the hook in the threader will have pulled the thread through the needle.
- Continue lifting the lever until it is back to its resting position.
- Pull the thread through the needle of the eye.
- Needle is now threaded (from front to back)
Notes
- On the Singer Heavy Duty 4452, you set needle position to neutral by adjusting stitch width to 0.
I hope you found this tutorial helpful! Check out the following sewing tutorials for more tips and easing sewing projects:
Step-by-step tutorial for beginners to correctly thread your home sewing machine.
Never fear threading a needle again with these easy tricks!

These super easy drawstring bags are a great beginner sewing project.