How to Thread a Brother Sewing Machine For Beginners (Detailed Pictures)
Learn to quickly and easily thread your Brother sewing machine by following this simple step-by-step tutorial. Start sewing on your machine in no time!
Did you know that 9 times out of 10 when your sewing machine is “acting up”, there’s actually nothing wrong with the machine? Most of the time, it’s because you have threaded the machine incorrectly. Yes, you! However, the good news is that this is a very easy fix and you have full control over it.
When I was in sewing school, every time a student approached the instructor to say that the machine is broken, his response was always “did you check the threading? If not, thread it again!”
While there are definitely other reasons a machine may act up, I have found that re-threading is one of the easiest and fastest ways to set the machine in full function again. And when you are working on a sewing project, that’s exactly what you want! A quick fix so you can keep sewing!
9 times out of 10 when your sewing machine is “acting up”, there’s actually nothing wrong with the machine. Most of the time, it’s because the machine is threaded incorrectly.
In today’s tutorial, I will be showing up step-by-step how to thread a Brother CS-6000i Sewing Machine. You may not own this exact model, but MOST models of home sewing machines these days are threaded the same way, with a few minor difference.
It is always a good idea to refer to your sewing machine manual for the most accurate way to thread it. If you can’t remember the last time you’ve seen your manual, don’t worry! You can most likely find it online.
WHERE CAN I FIND MY MACHINE MANUAL?
- Brother Sewing Machines, check out Brother Support and type in your model number.
- Singer Sewing Machines, check out https://www.singer.com/manuals
- Janome Sewing Machines, check out the Janome Website and search for “manual” + your model number
- Juki Home Sewing Machines, click here
However, there are times I find the manual hard to understand or the diagrams to be super unclear (anyone else agree?). That’s why I decided to create this step-by-step guide to show you EXACTLY how to thread a Sewing Machine.
Because one can’t do any sewing if the sewing machine isn’t threaded properly, right? So this is a SUPER IMPORTANT step!
Since the Brother CS-6000i Sewing Machine also comes with an automatic needle threader, I have also included a step-by-step tutorial on How to Use a Built-In Needle Threader. However, you can always hand thread the needle if your machine doesn’t come with one.
Once your machine is correctly threaded, you will be ready to start sewing, which is where the fun begins! So let’s get started!
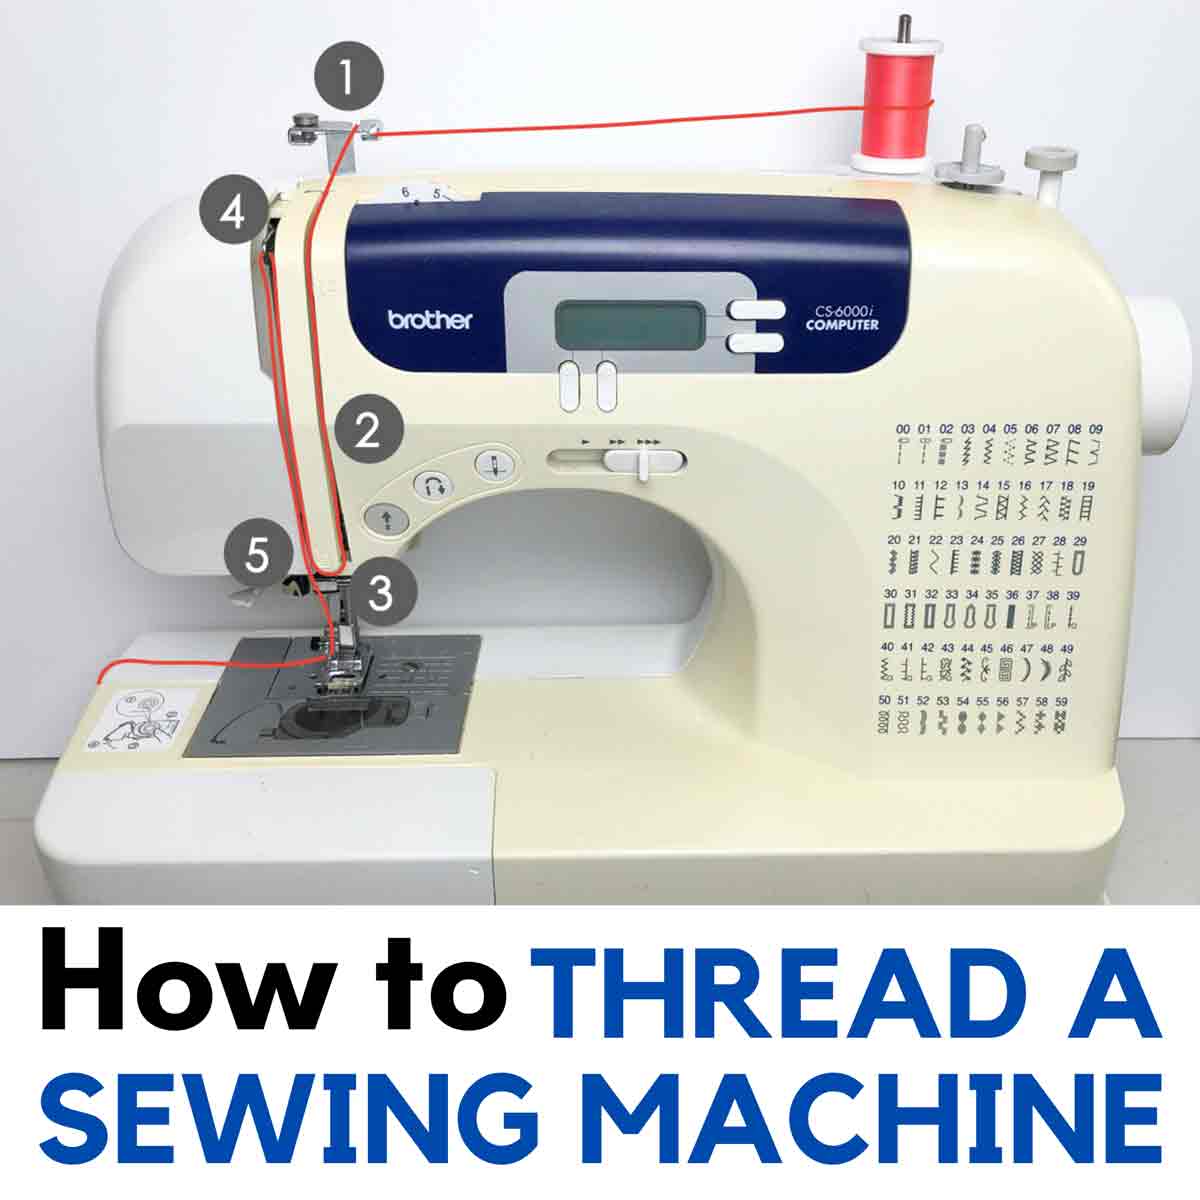
HOW TO THREAD A SEWING MACHINE: STEP-BY-STEP INSTRUCTIONS
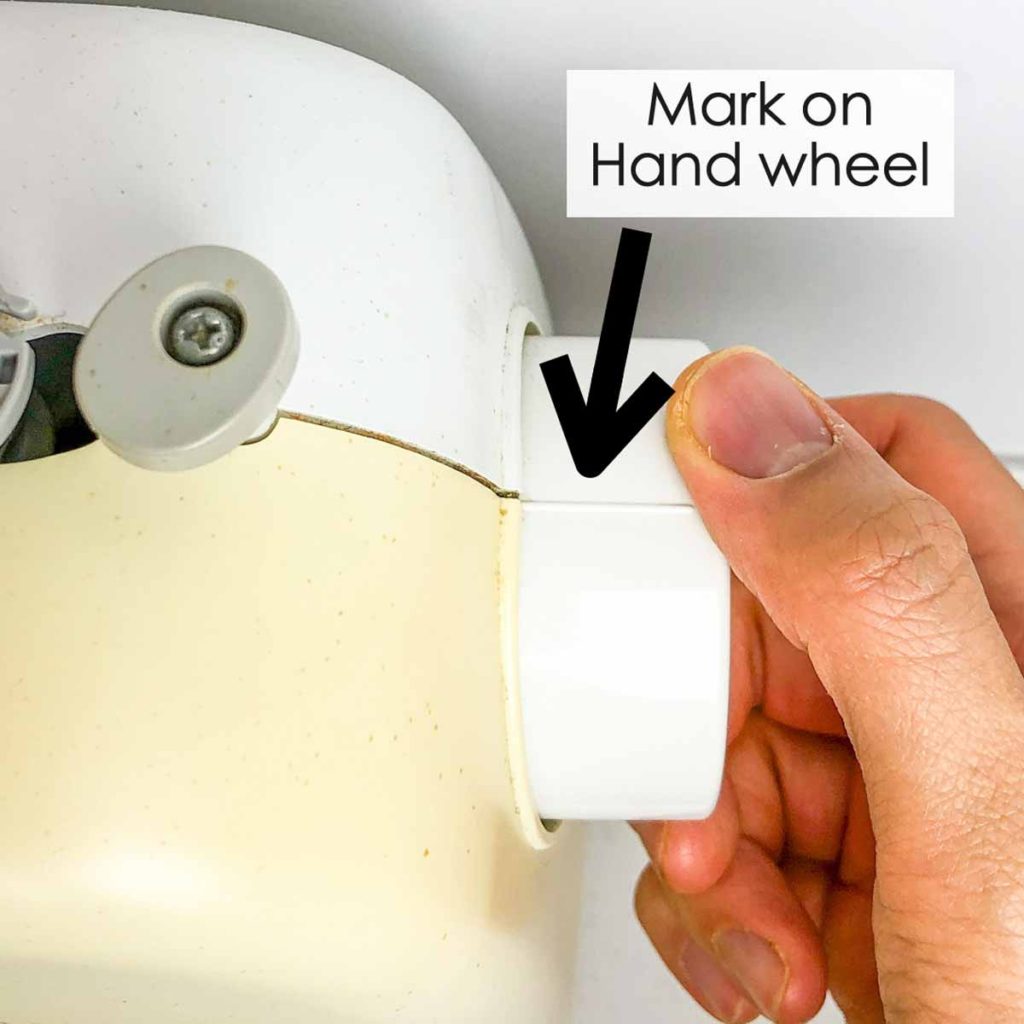
First, turn the hand wheel so that the mark on the hand wheel points directly up. See that this mark is aligned to the mid line of the sewing machine This makes sure the needle is in the fully raised position.
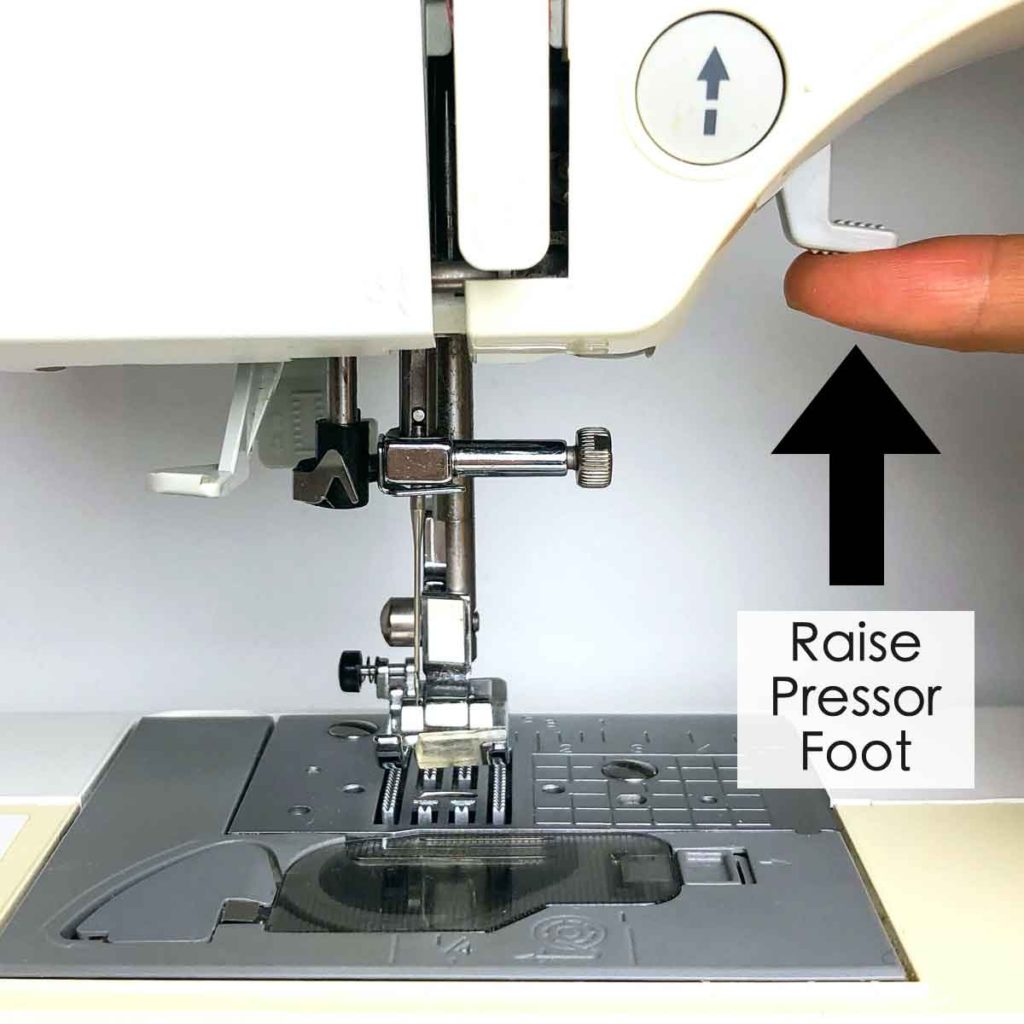
Next, raise the presser foot by lifting the presser foot lever up.
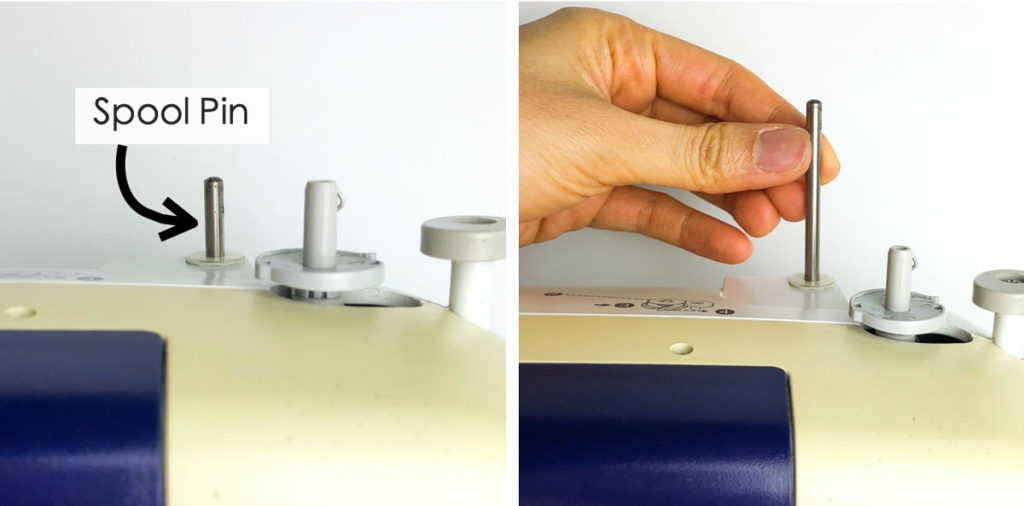
Make sure the spool pin is pulled as high as it can go.
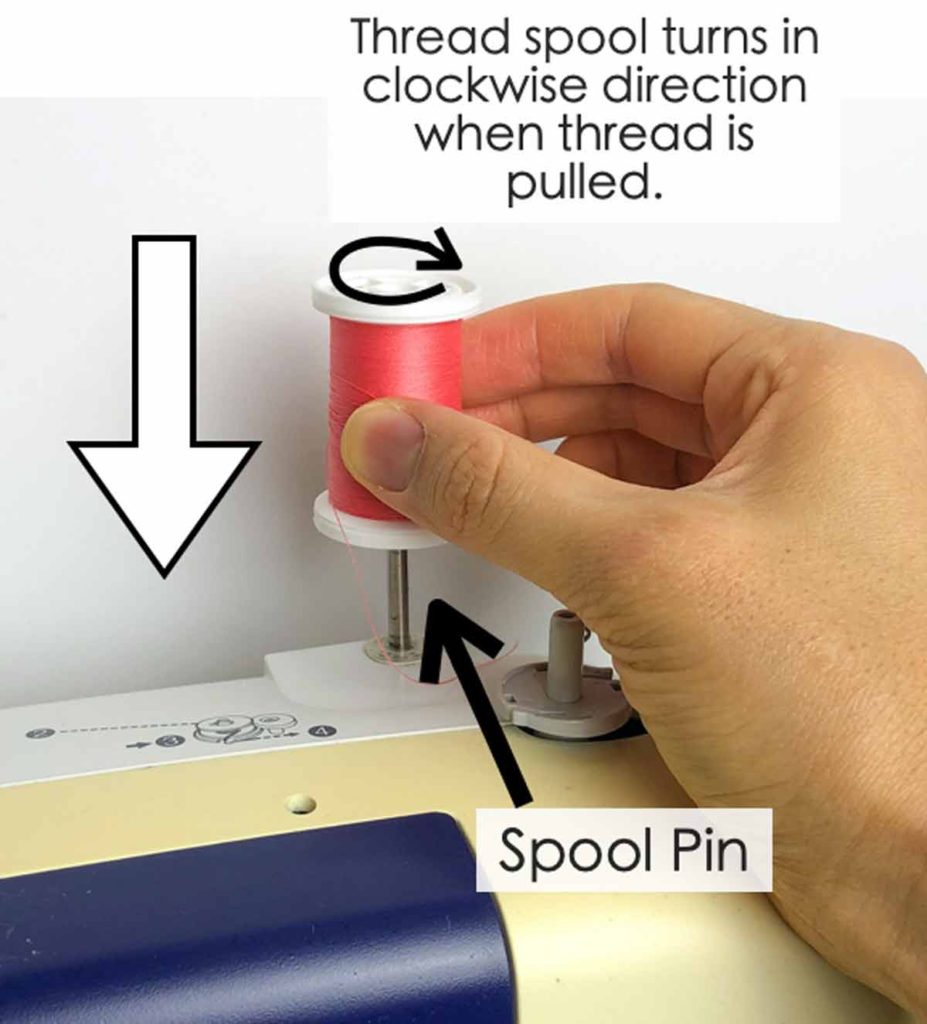
Now seat the spool of thread down on spool pin. The thread spool should turn in a clockwise direction when it is seated on the spool pin and you are pulling on the thread.
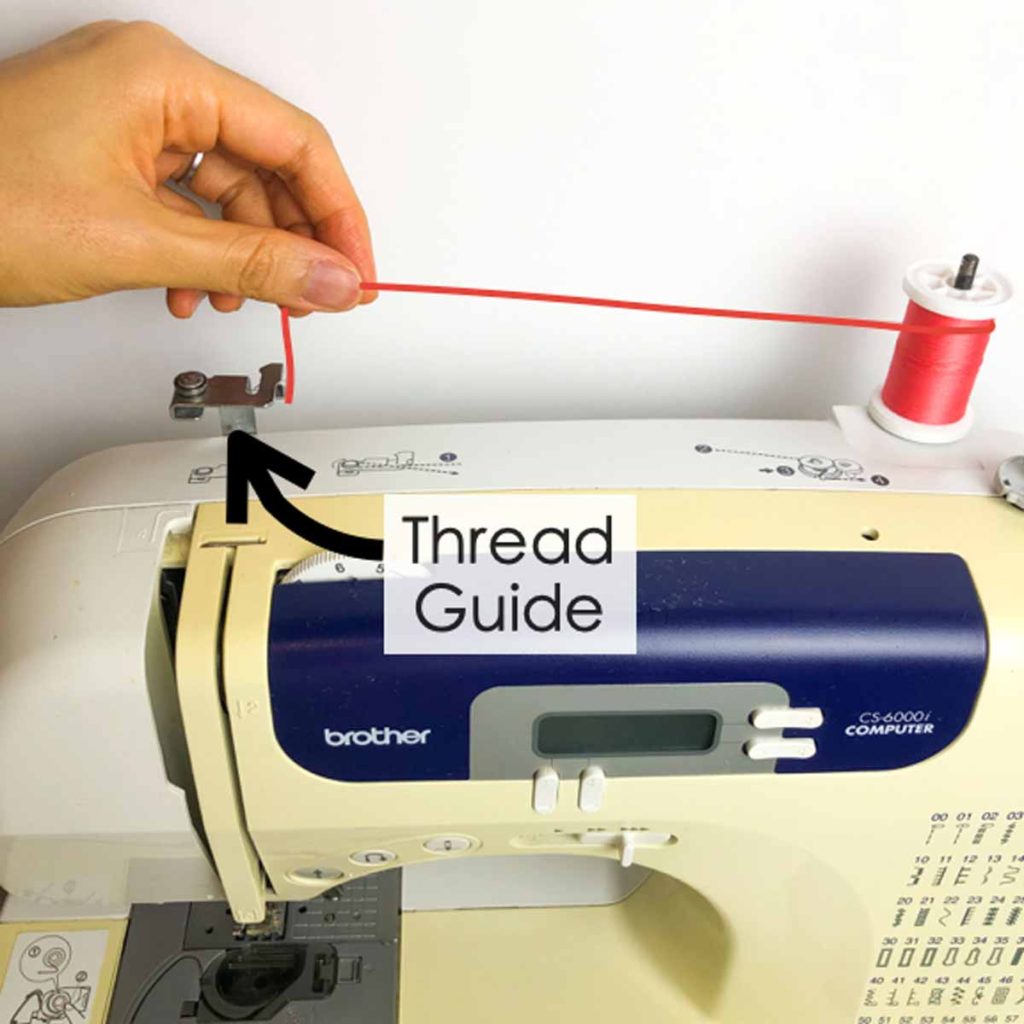
Pull thread to the left towards the groove in the thread guide
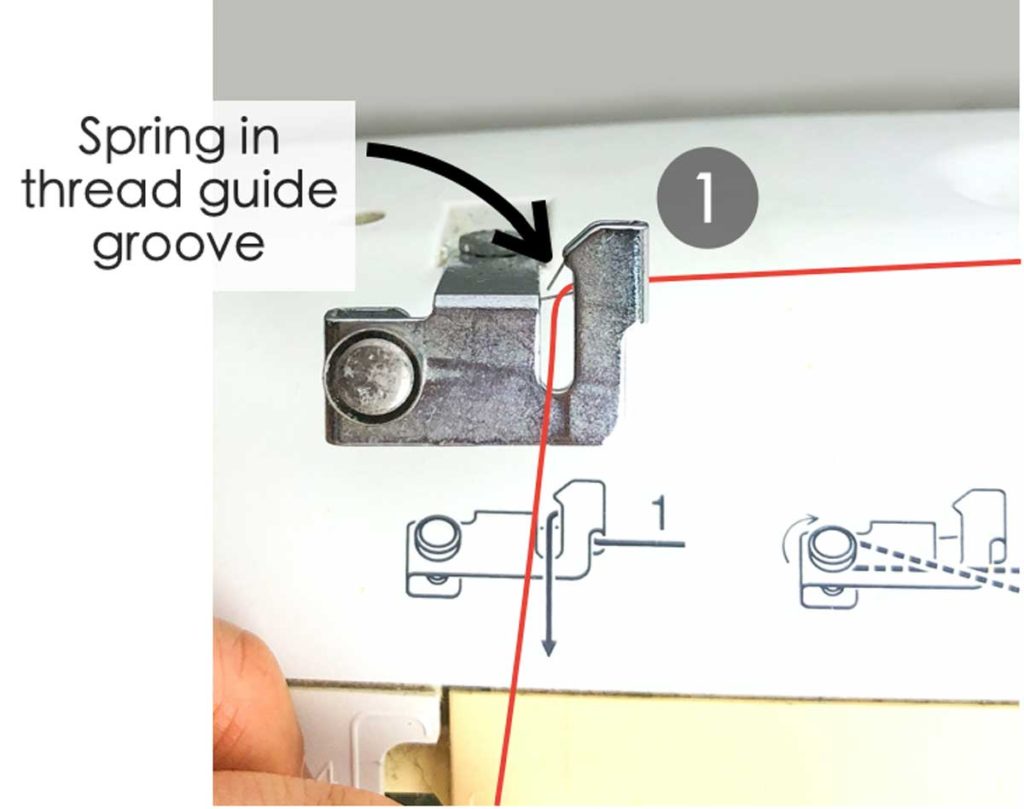
Pull thread into the spring of the thread guide (1). See the diagram printed on the machine. The solid line and arrow indicate how to thread the upper threader.
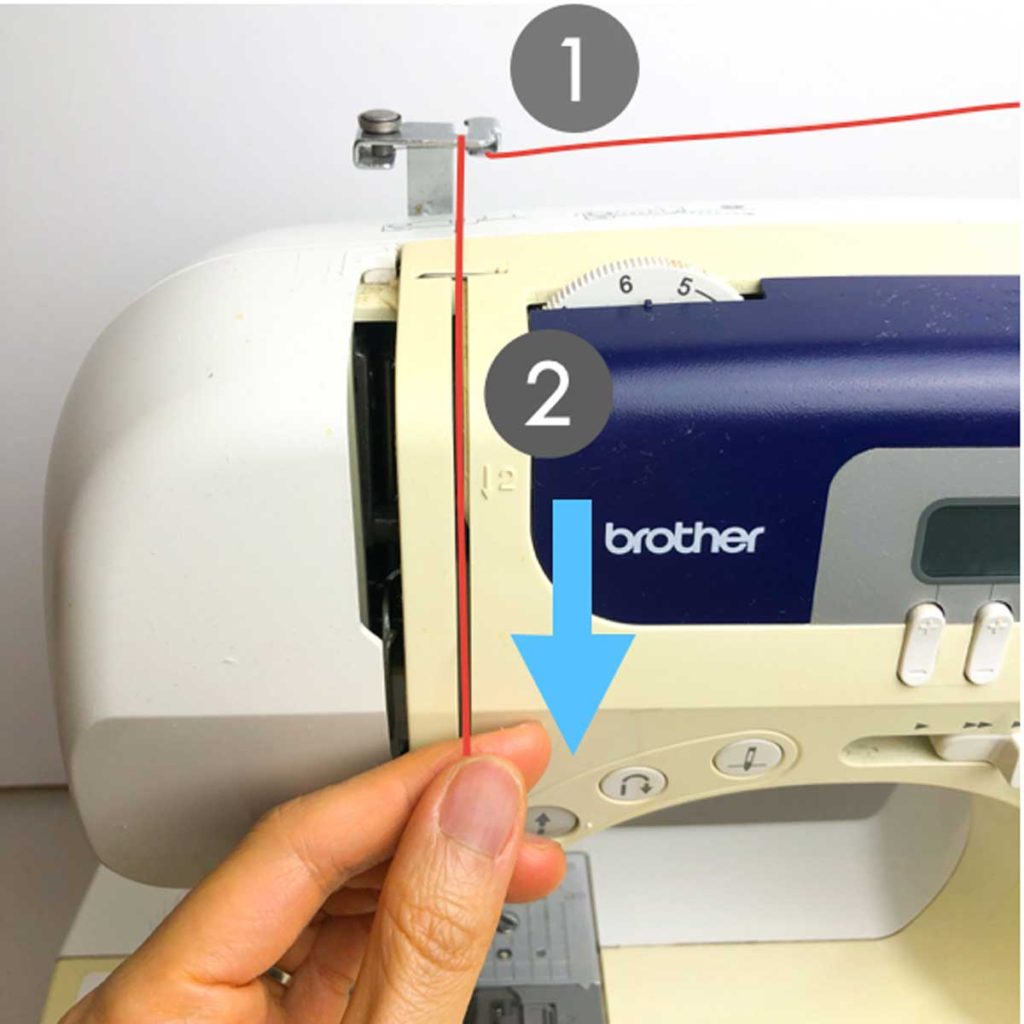
Pull upper thread down, following the number (2) and direction of the arrow (down)
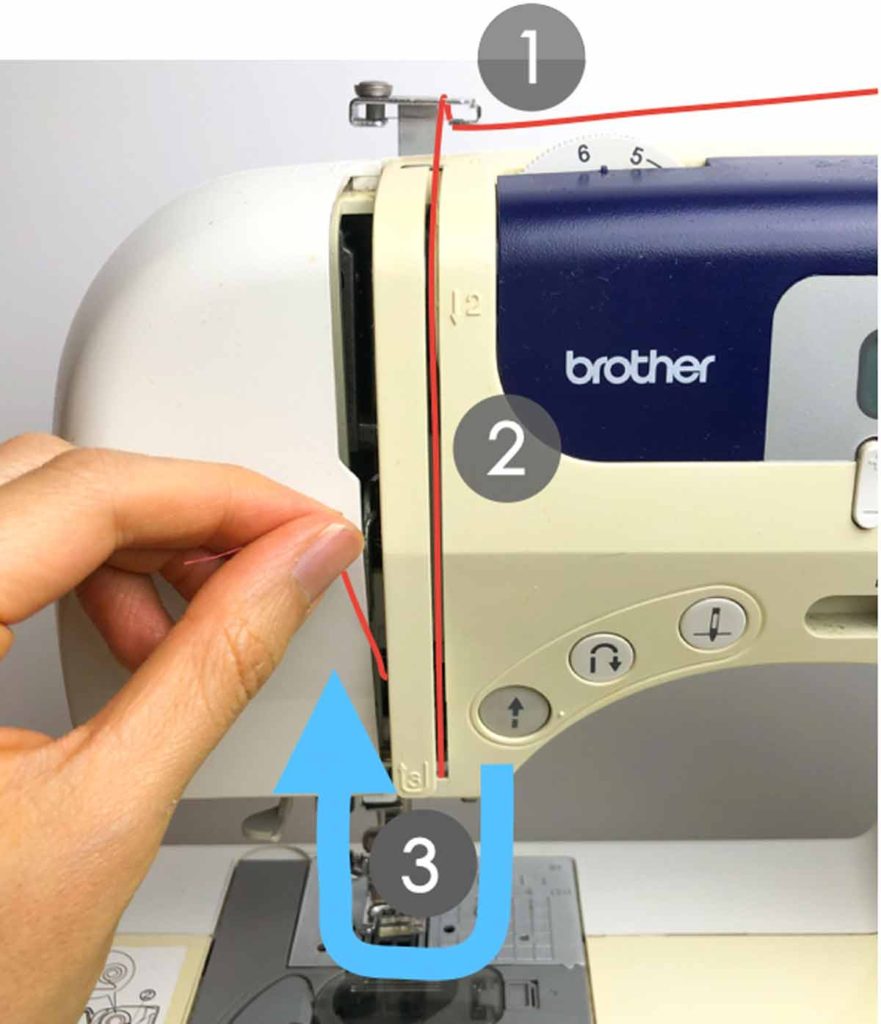
Continue threading the upper thread to (3), following the arrows (U turn)
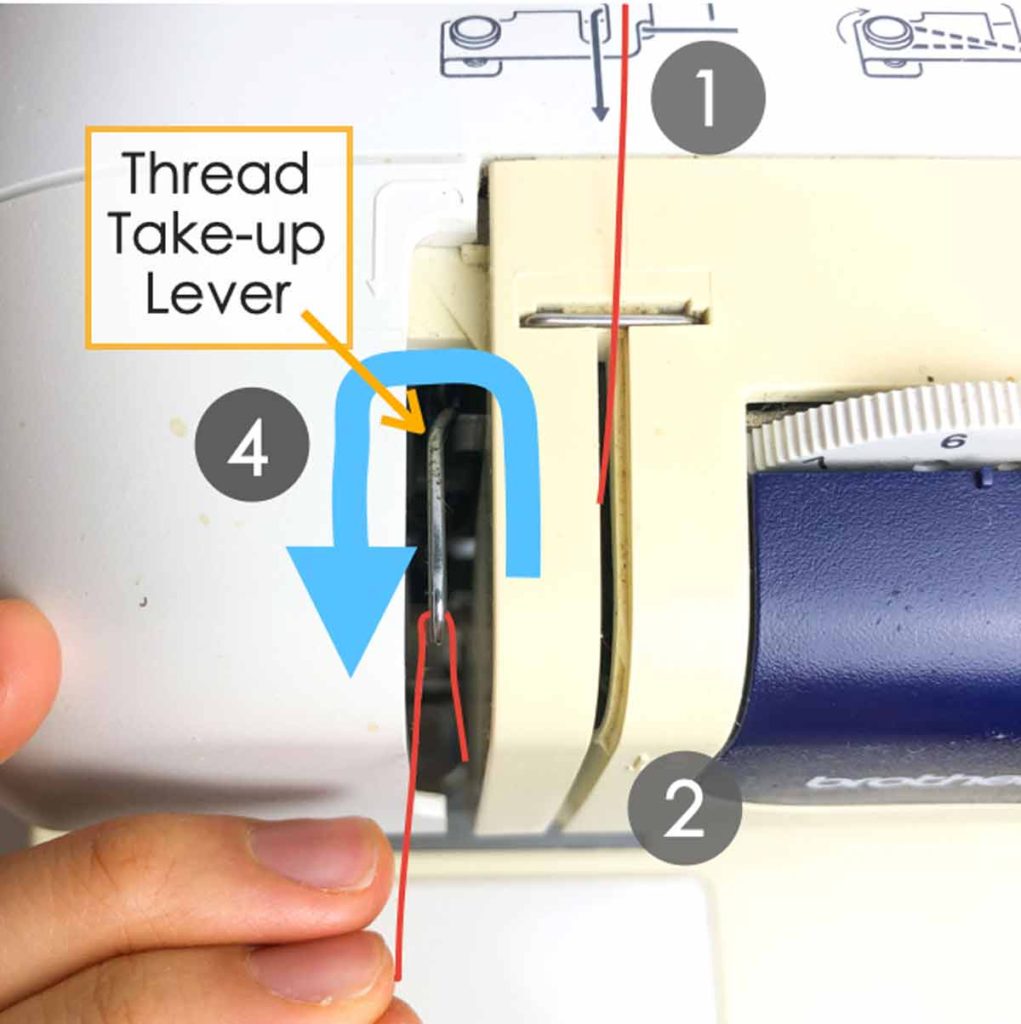
Pull thread up towards thread take-up lever. Guide the thread through the take-up lever from right to left (4) as shown in photo.
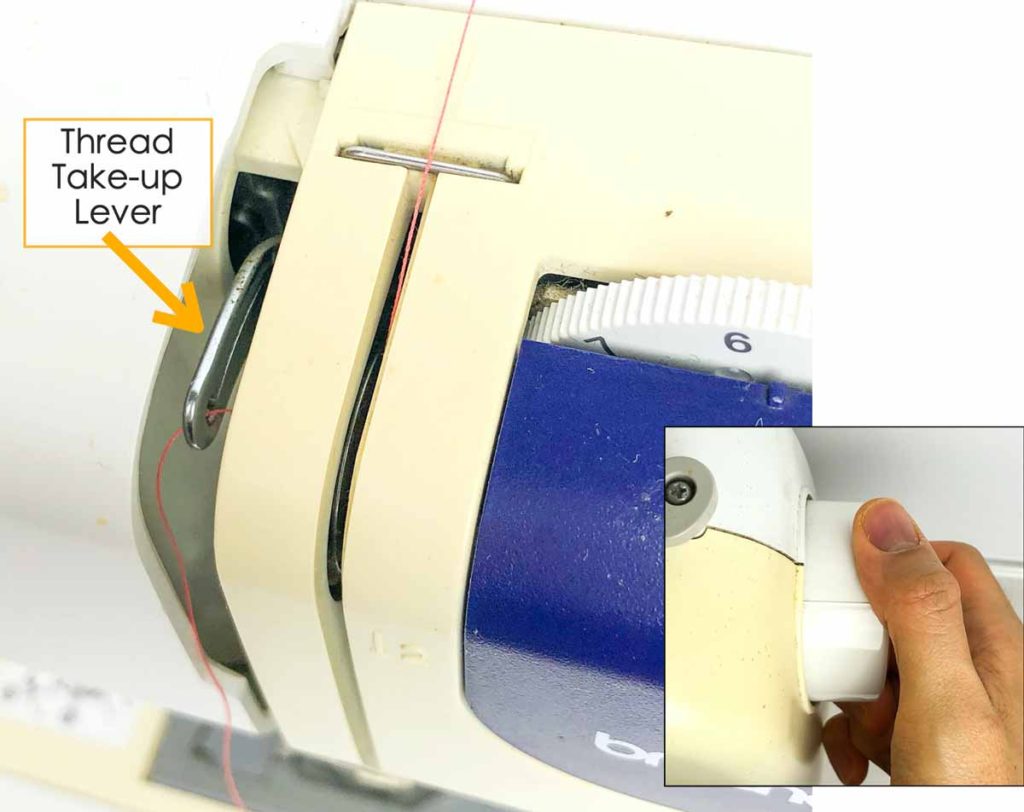
Another view of the upper thread correctly threaded through take-up lever from right to left. Thread take-up lever must be lifted to highest position in order for thread to pass through it correctly. Right photo shows the hand wheel mark is rotated slightly towards you to raise the take-up lever to its highest position.
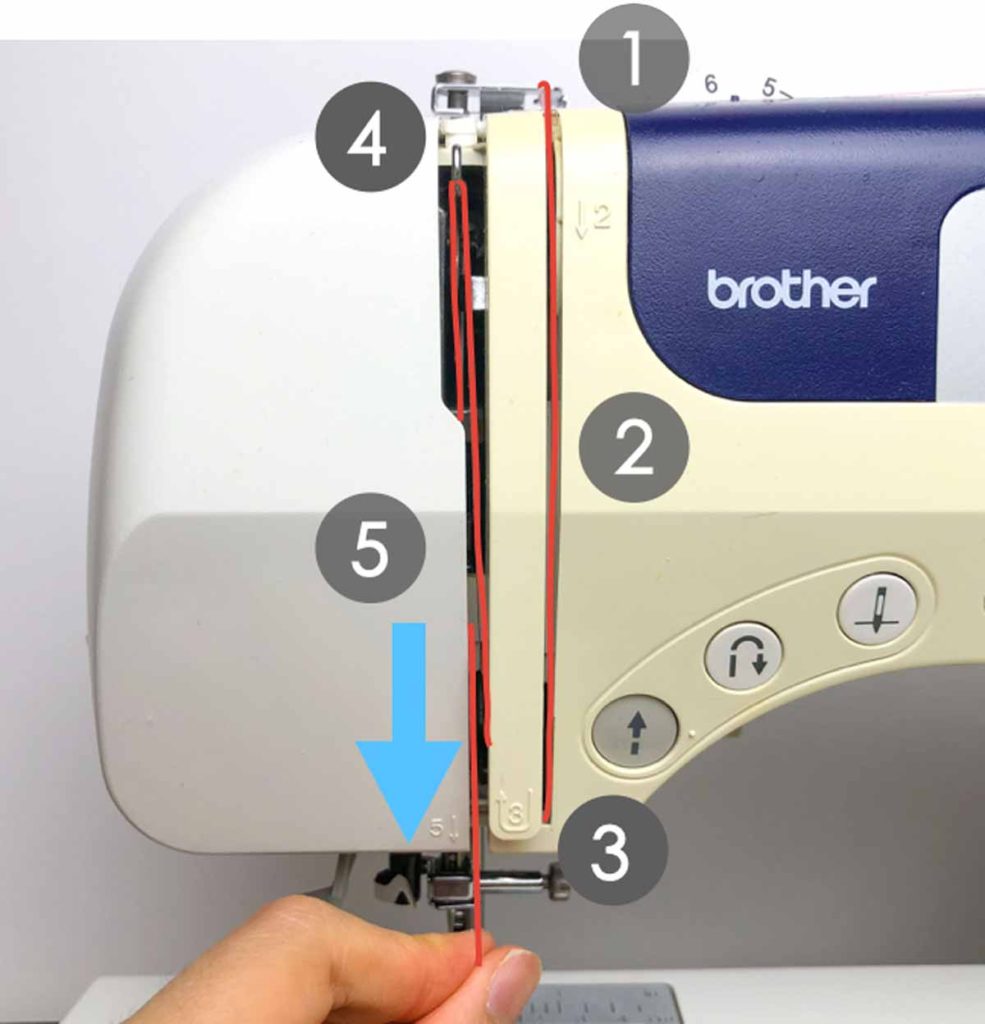
Pull upper thread down towards (5)
At this point you can manually hand thread the machine needle or use the built-in needle threader that comes with your machine. If you are unsure whether or not your machine has a needle threader, check the user manual.
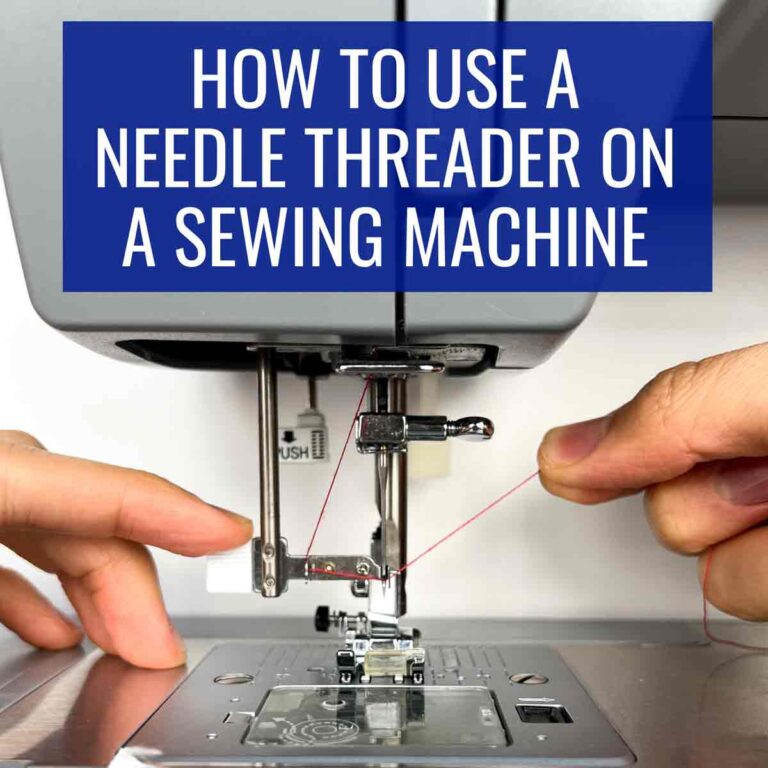
HOW TO USE SEWING MACHINE BUILT-IN NEEDLE THREADER
Notes:
1. The needle threader can only be used with home sewing machine needles size 75/11- 100/16.
2. You cannot use the needle threader when using special needles such as the twin needle and wing needle. If you are using those types of needles, be sure to thread the eye of the needle by hand.
3. Make sure to turn off the main power switch before threading the needle by hand.
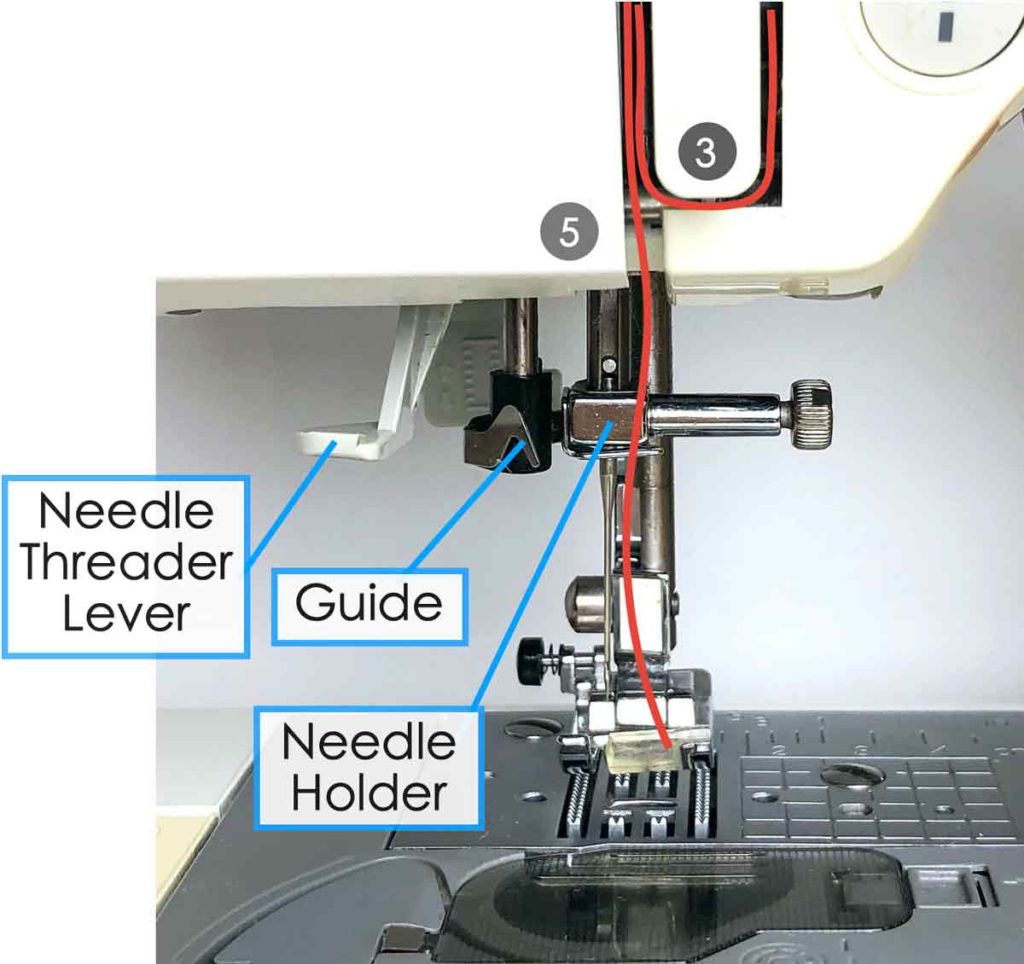
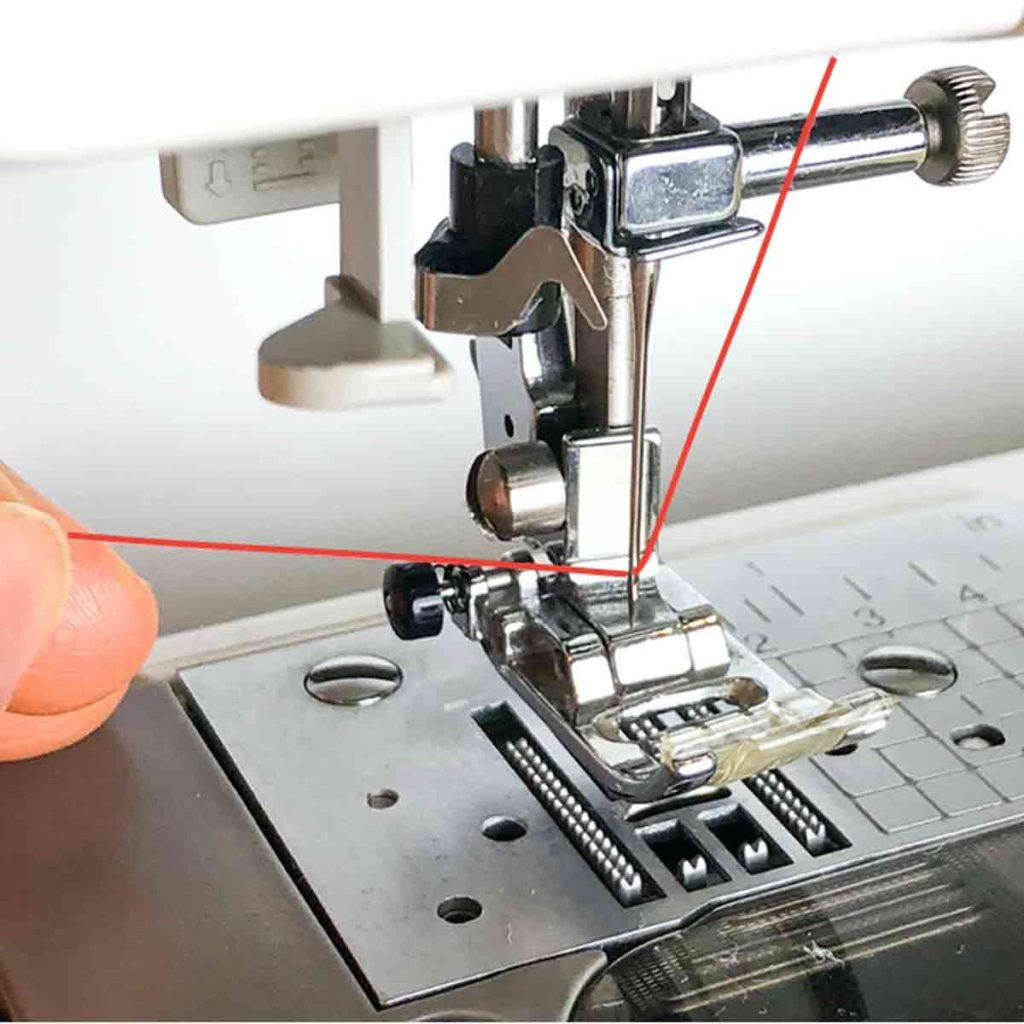
Your machine will look something like this after the upper thread is correctly threaded. On certain models, you may need to put the thread behind the needle bar thread guide (located right in front of needle holder is).
My Brother CS-6000i Sewing Machine does not have this thread guide so you don’t see it in the photo.
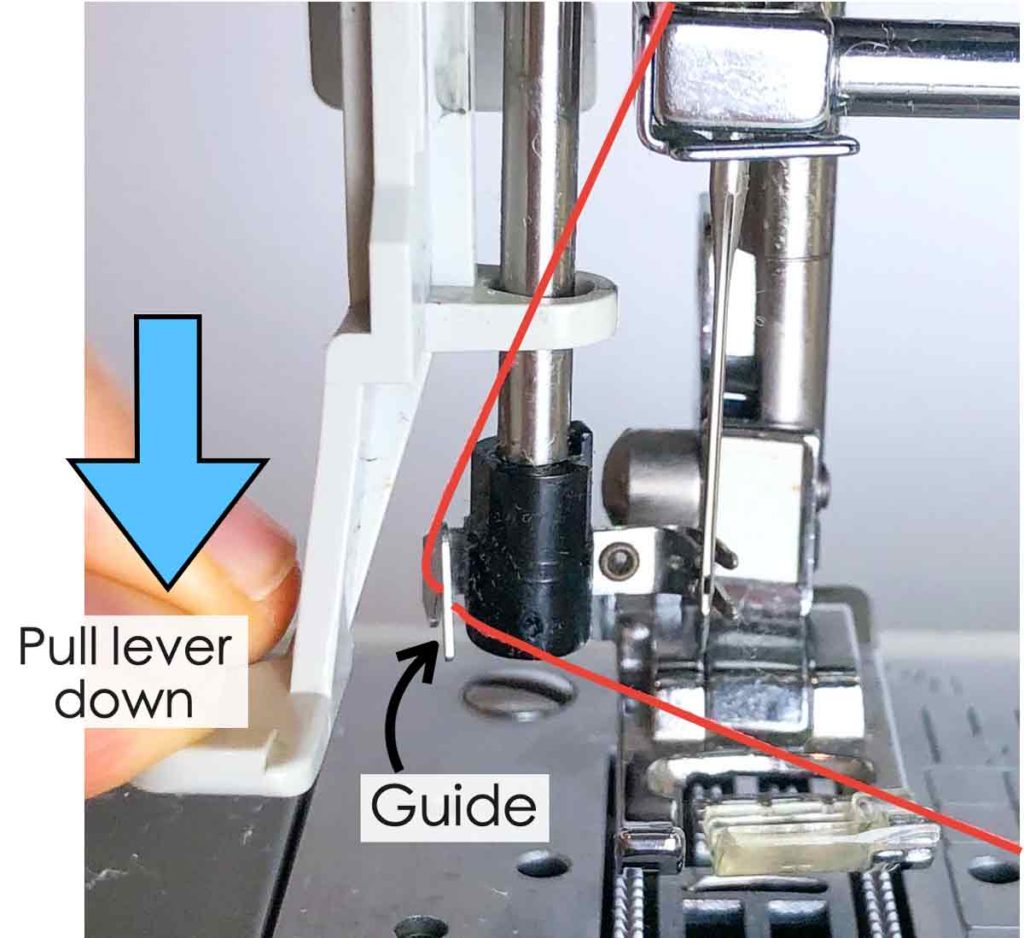
Lower the needle threader lever down with your left hand. Using your right hand, hook the upper thread onto the guide
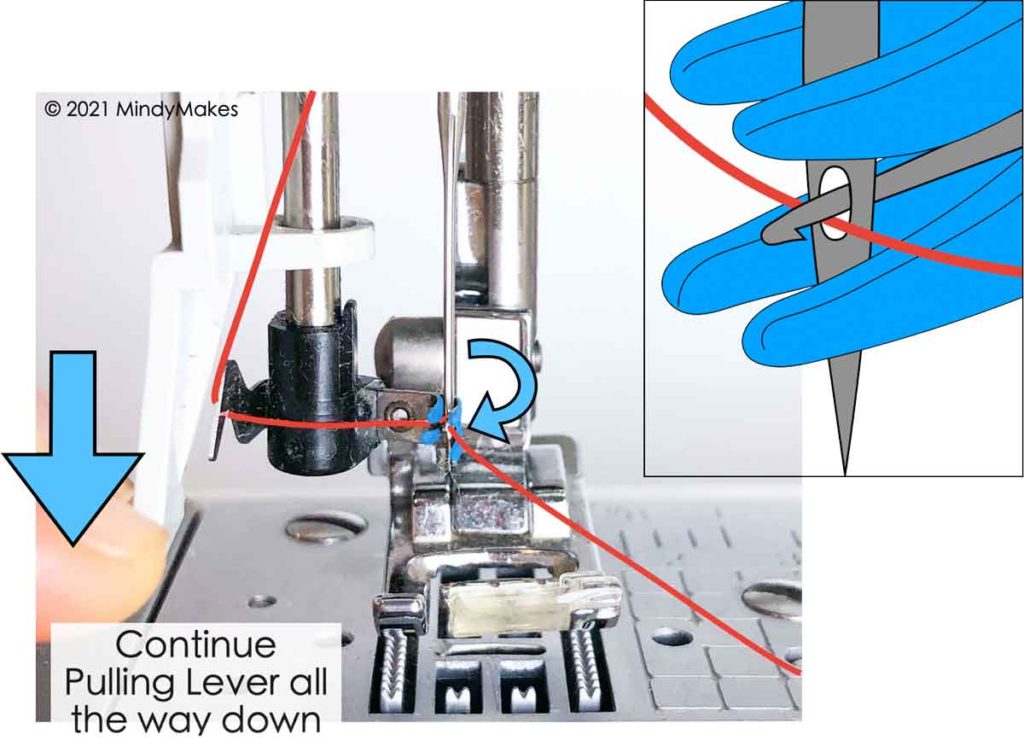
Pull lever all the way down. As you do this, the end of the needle threader rotates towards you (highlighted in blue). Right photo shows a closeup. There will be a hook that goes through the eye of the needle
Pull upper thread in between the double prongs (highlighted in blue) to catch the hook in the eye of the needle.
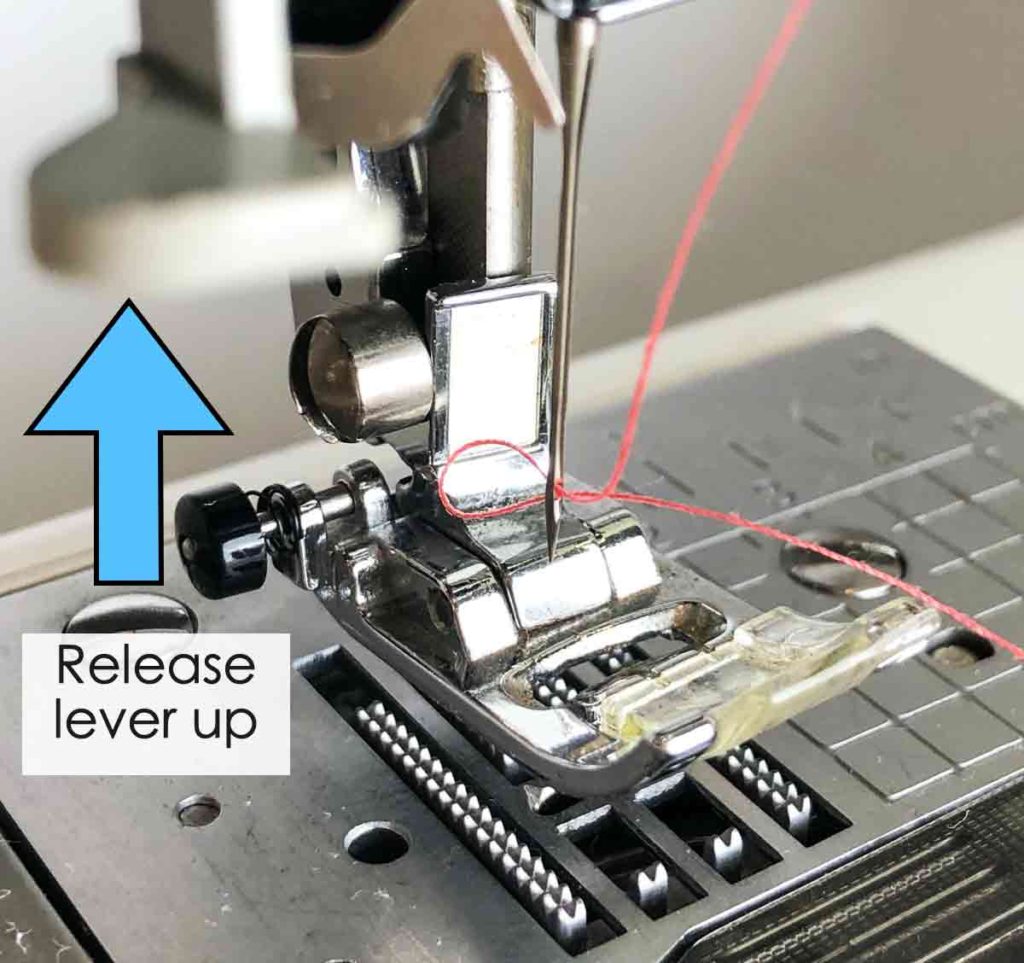
Release the lever of the needle threader up. As you do this, the hook will pull the thread through the eye of the needle, creating a little loop.
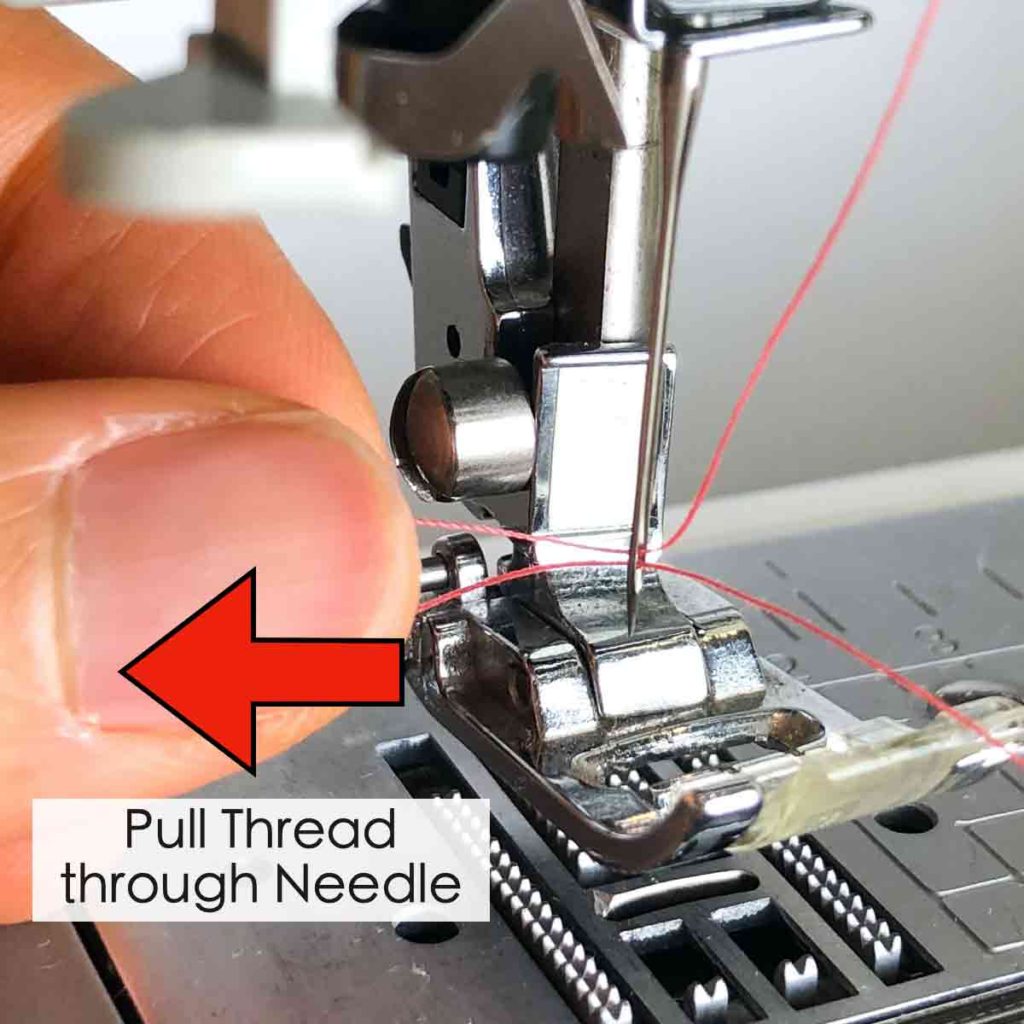
With your left hand, gently pull on the loop to pull the thread through needle.
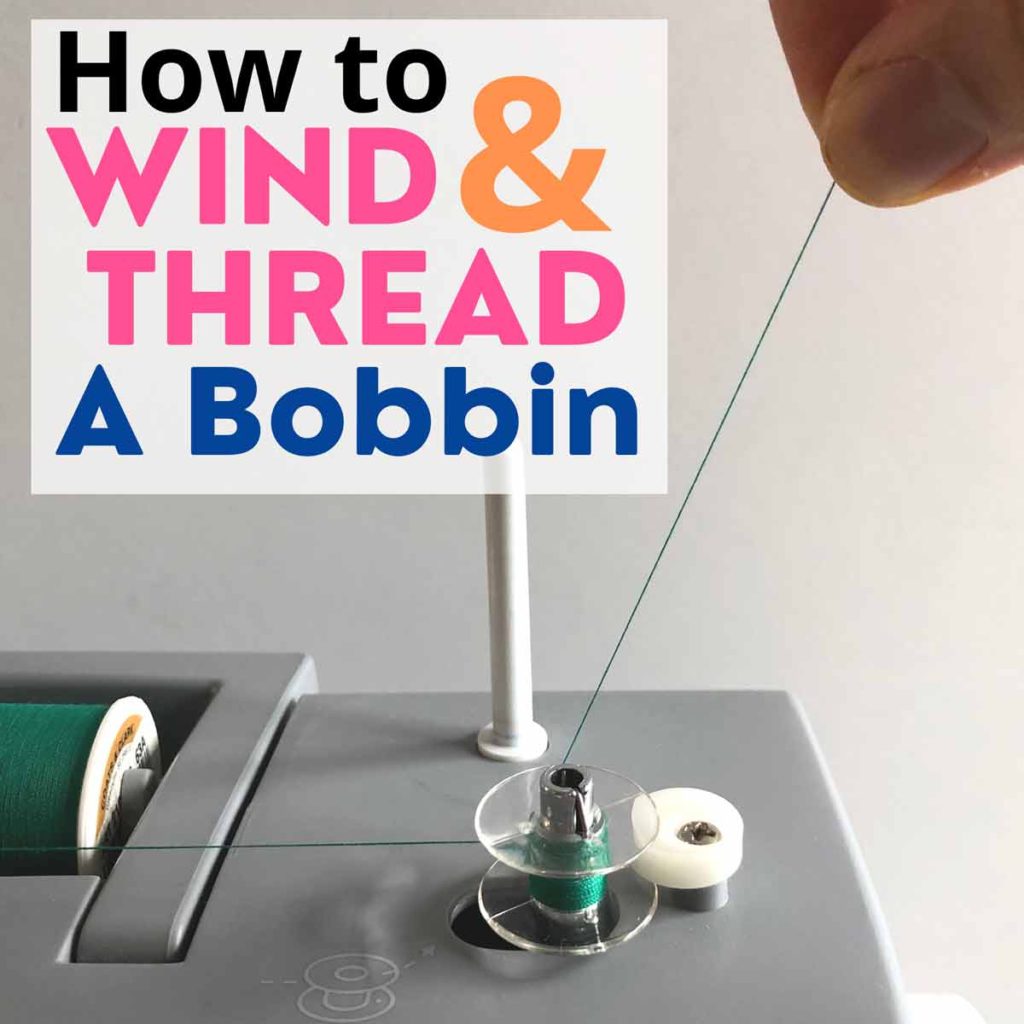
You have now successfully threaded the upper thread! See how simple that was? Now all you have to do is wind and thread the bobbin thread and you are ready to sew. If you don’t know how to thread a bobbin, check out my step-by-step guide to How to Properly Thread a Bobbin.
More Beginner Sewing Tutorials You’ll Love!


This is a great tutorial! I’m a beginner and this was really helpful.
Hi Riya,
I’m so glad you found it helpful! Yay for sewing!!!
This was a really helpful post on how to properly thread a sewing machine. I appreciate the advice that the issue is usually just improper threading. The detailed photos and explanations make the threading process seem less daunting. I especially liked learning about common places where machines can be found online if I misplaced my manual. Thanks for taking the time to break down this important task.
Hi James,
Thank YOU for taking the time to write such a kind comment. You are so welcome!
Oh my gosh I just looked at your photos again and got it! Thanks so much <<33
Thank you for the super easy to thread bobbin and machine. very helpful. Janet
Hi Janet,
You are so welcome!