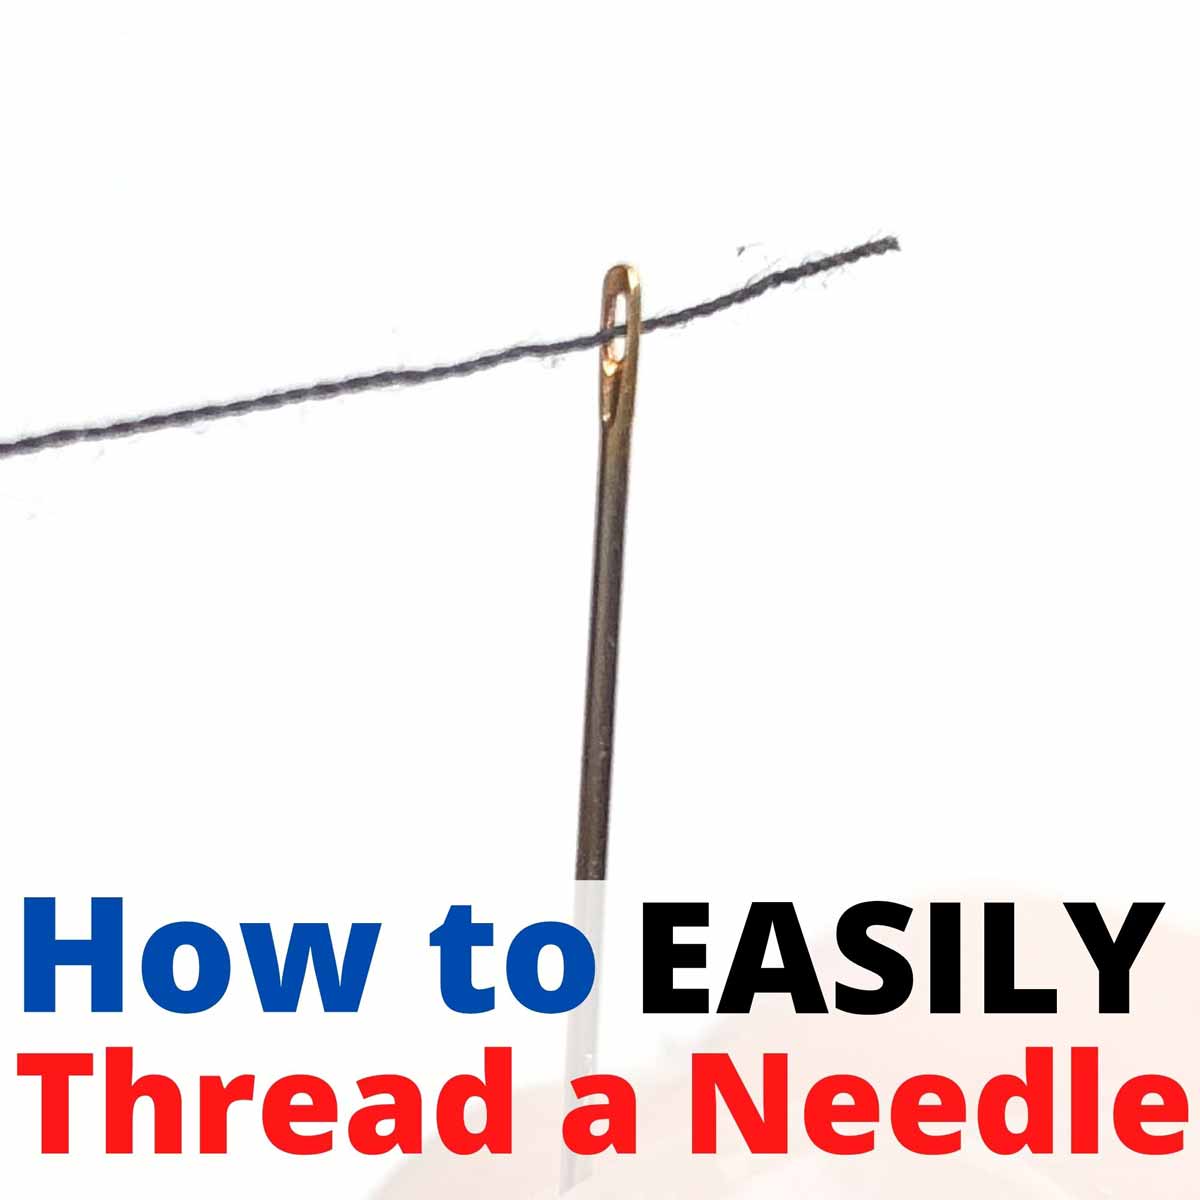
How to Easily Thread a Sewing Needle: 10+ Hacks
Never dread threading a needle again! Try one (or several) of these tried and true hacks to learn how to easily thread a hand sewing needle.
Threading a needle shouldn’t leave you frustrated. But somehow there always seems to be THAT piece of thread that just refuses to go through the needle. Sound familiar?
Try one of these 12 tried and true hacks below to make your life easier. Also includes a tutorial for How to Use a Needle Threader (Tip #6)
- Tip #1: Use Good Lighting
- Tip #2: Thread Needle Using a White Background
- Tip #3: Cut the Thread Using Sharp Scissors
- Tip #4: Cut the Thread at an Angle
- Tip #5: Moisten Tip of Thread or Eye of Needle
- Tip #6: Use a Needle Threader
- Tip #7: Bring Needle to Thread
- Tip #8: Use Tweezers
- Tip #9: Loop and Pinch Method
- Tip #10: Use the Right Size Thread and Needle
- Tip #11: Use Paper as Makeshift Needle Threader
- Tip #12: Stiffen Thread with Hair Spray or Beeswax
Let’s get started!
Tip #1: Use Good Lighting
This may seem very obvious, but believe me, sometimes I also forget and try to thread a needle with ambient lighting, and that is not very bright! You don’t need anything fancy, just a regular desk lamp will do.
If you want to get something nicer, there are specialty lights designed for sewing and crafting. OttLite is a popular brand that sells desk lamps, floor lamps, and they even have lamps with lighted magnification! While I’ve never used one before, I’m sure they are super useful to have for sewing, not just threading a needle!
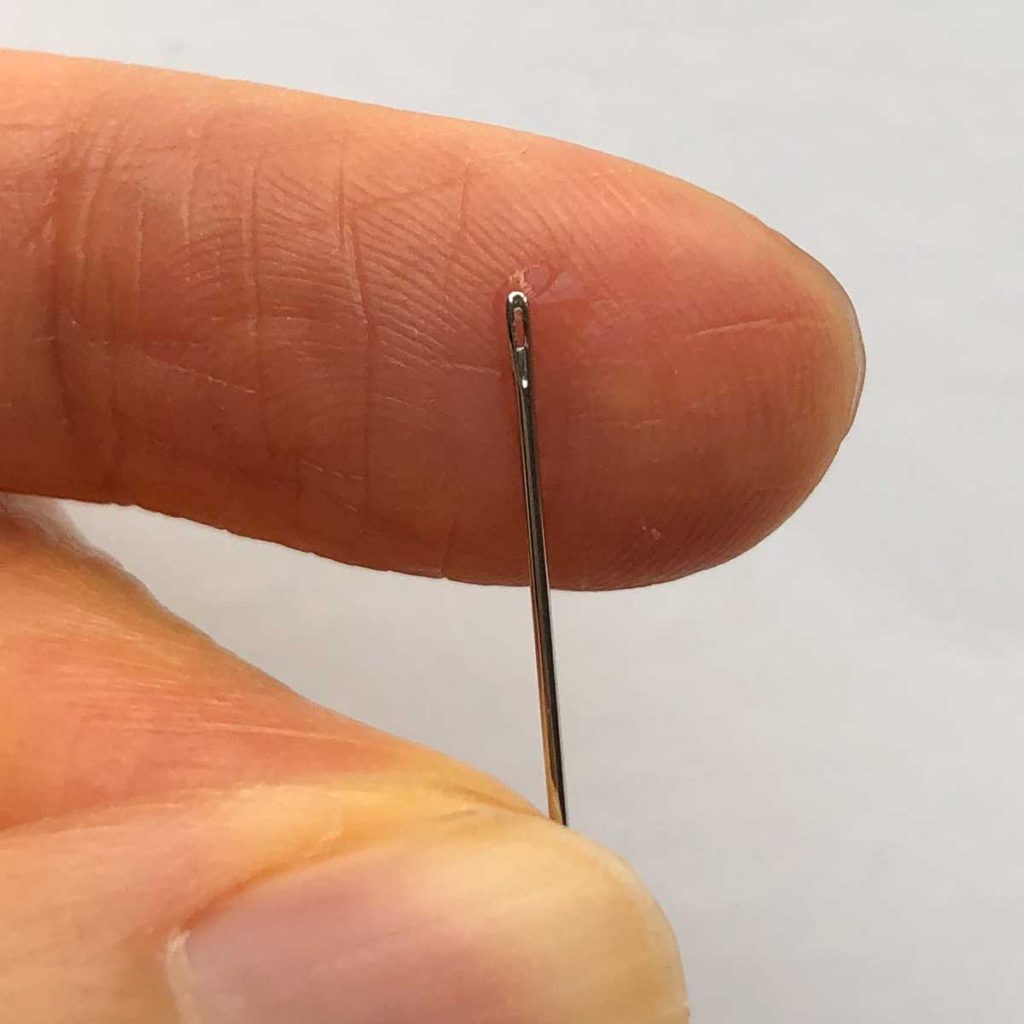
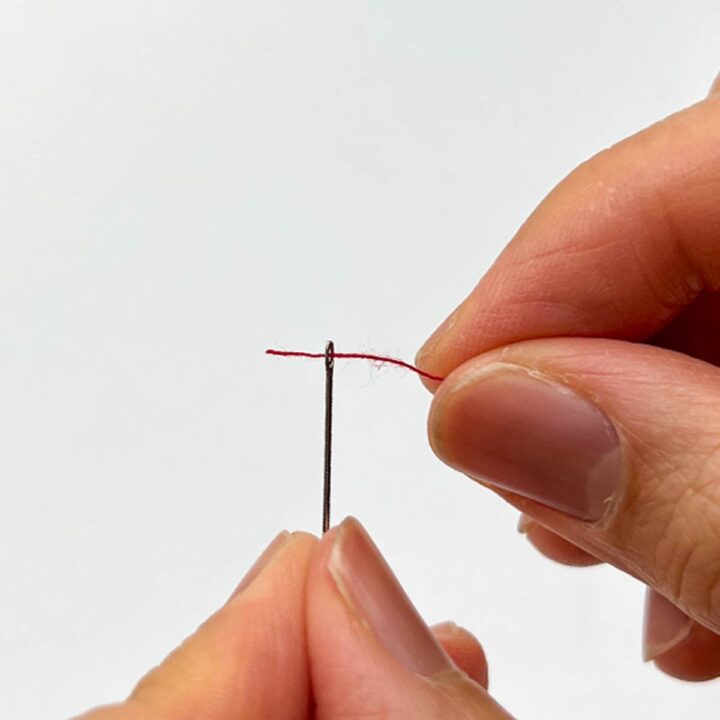
Tip #2: Thread Needle Using a White Background

See how much clearer the eye is with a white background versus a dark background?
Pin a sewing needle through a piece of white felt/paper and keep it where you store your needles. Next time you can easily whip it out when you need the white background.
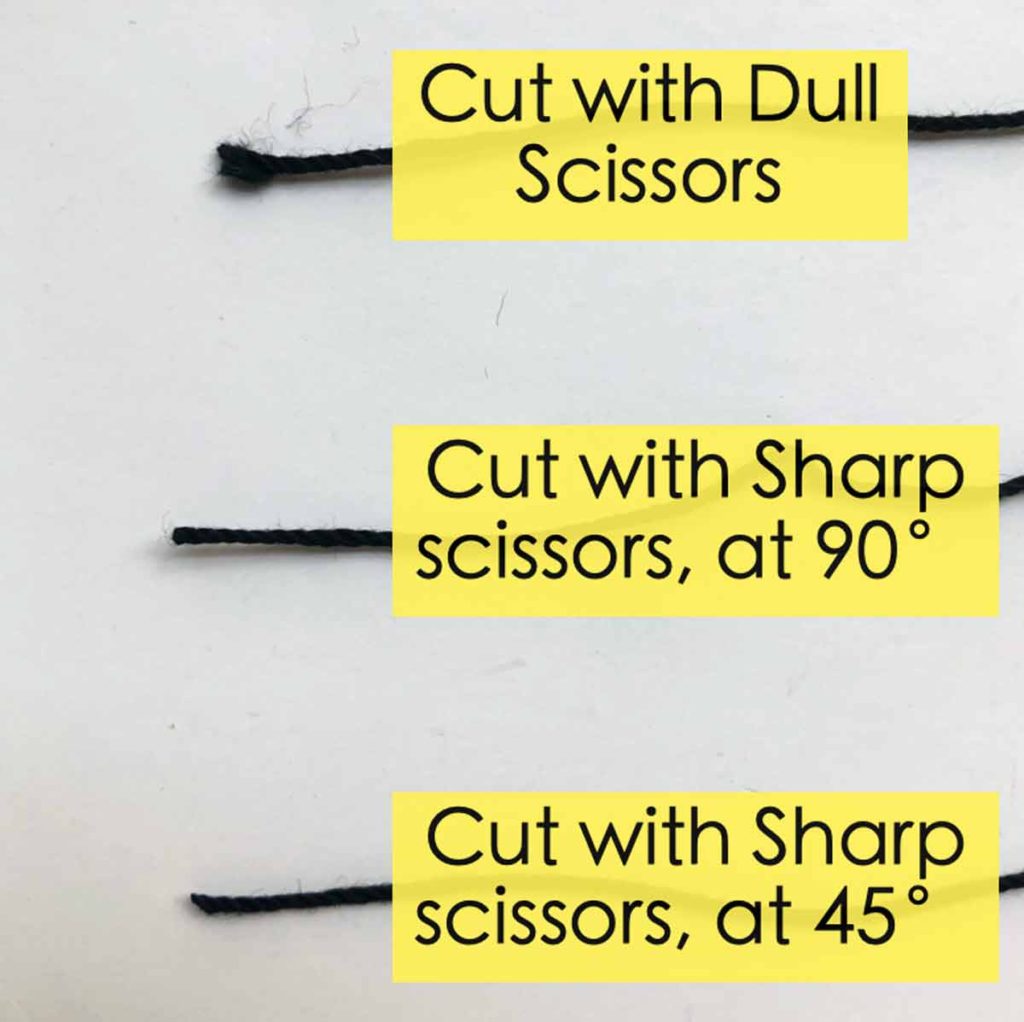
Tip #3: Cut the Thread Using Sharp Scissors
Sharp scissors will leave a crisp, clean edge on your thread whereas dull scissors will cause the thread to snag and leave a fuzzy end that is impossible to thread through a needle.

For hand sewing, I love these embroidery scissors (on left). But a good pair of fabric shears will work just as well well!
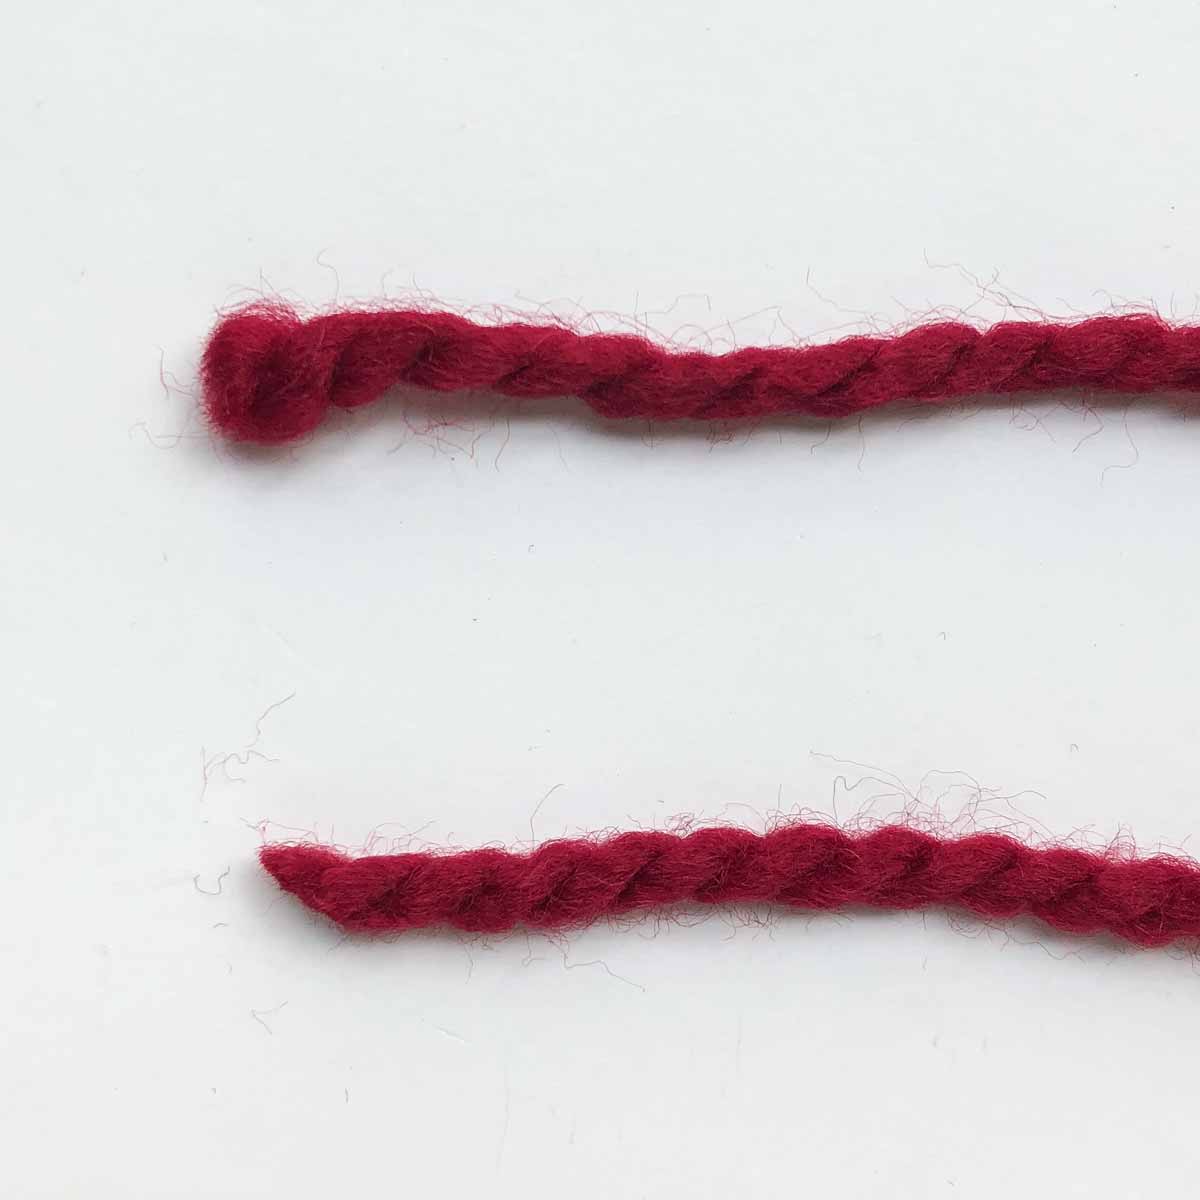
(I’m using a piece of yarn for better visualization) You can see from the photo what a difference it makes to use a sharp scissor. Top thread is cut from a dull scissor and the end is fuzzy and round. Bottom thread is cut with a sharp scissor at an angle (tip #3), which makes is so much easier to thread!
Tip #4: Cut the Thread at an Angle
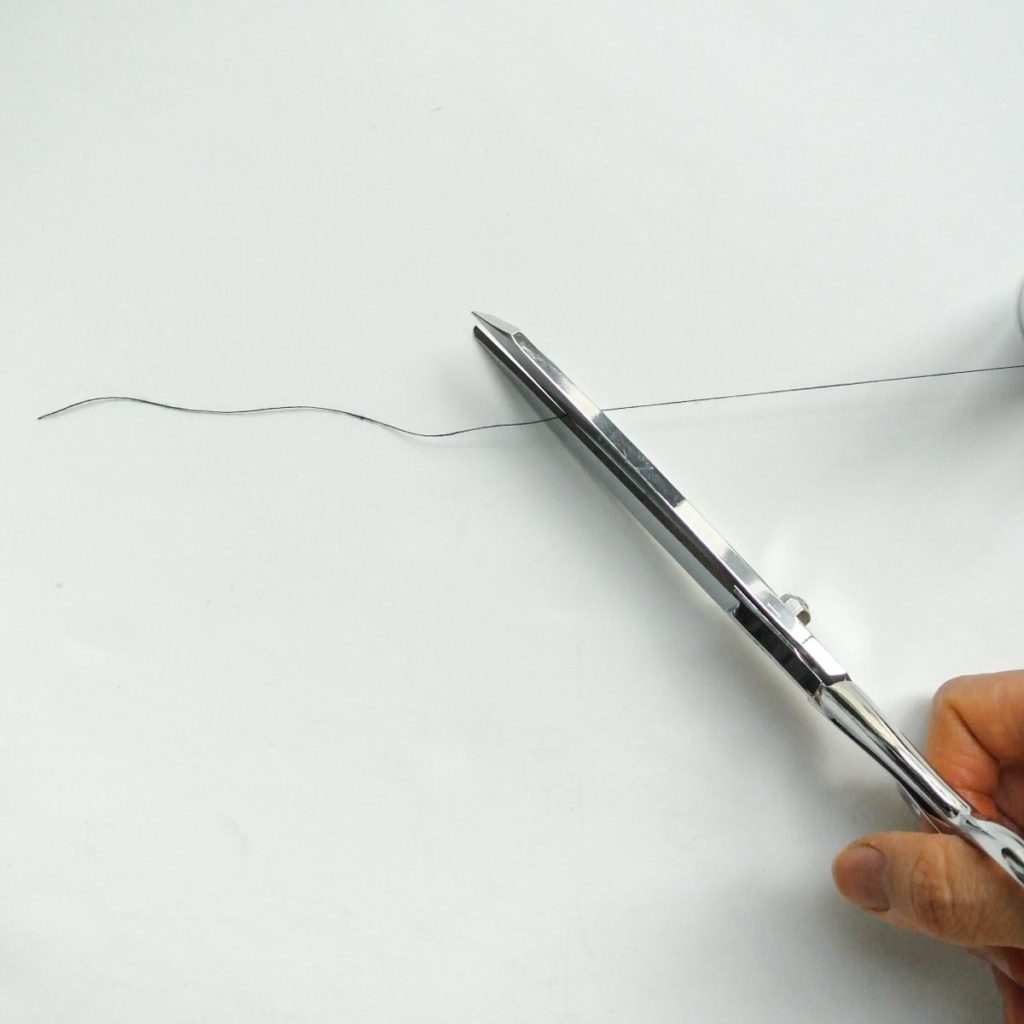
As mentioned in Tip #2, cutting the thread with sharp scissors at an angle leaves a nice clean bevel with a pointy end. This bevel keeps loose fibers of the thread together so you can easily guide the thread through. Even if you can’t actually see the bevel on the thread, you will notice the difference as you thread your needle.
Tip #5: Moisten Tip of Thread or Eye of Needle
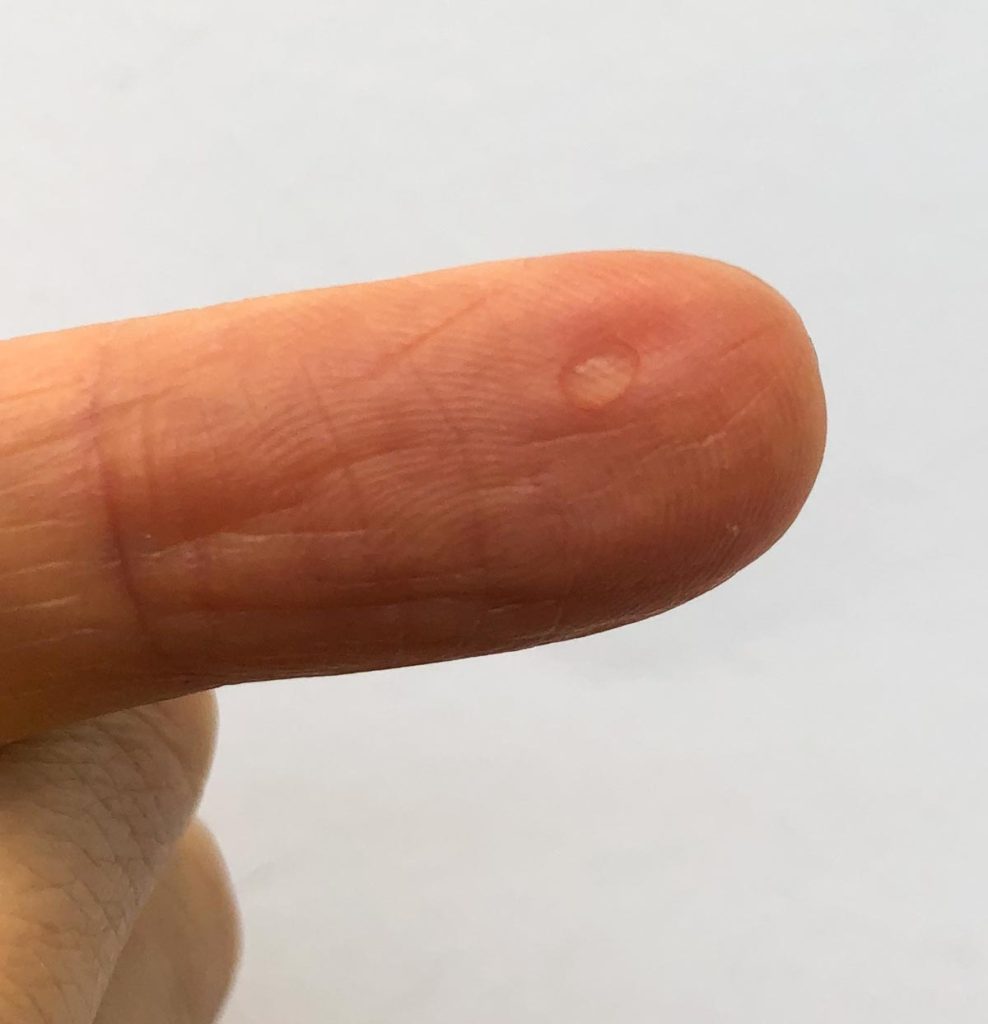
Apply a drop of water at finger tip.
Moisten eye of needle with water droplet

Push the thread through. The moisture in the eye will draw the thread in as you push, allowing you to easily thread the needle.
Alternatively, you can also moisten the tip of the thread and this works just as well. You can use water or your saliva, although saliva is probably less hygienic. However, I will admit I usually just give the thread a quick suck to moisten because…Who has time to get up and run to the sink to get some water?!)…but the choice is yours.
Tip #6: Use a Needle Threader
Ever seen the tiny piece of metal with a person’s face on it and tiny wires sticking out in your sewing kit? That’s the needle threader, and it is oh-so-handy for those days when the thread is more stubborn than your two year old about going through your needle!
How to Use a Needle Threader
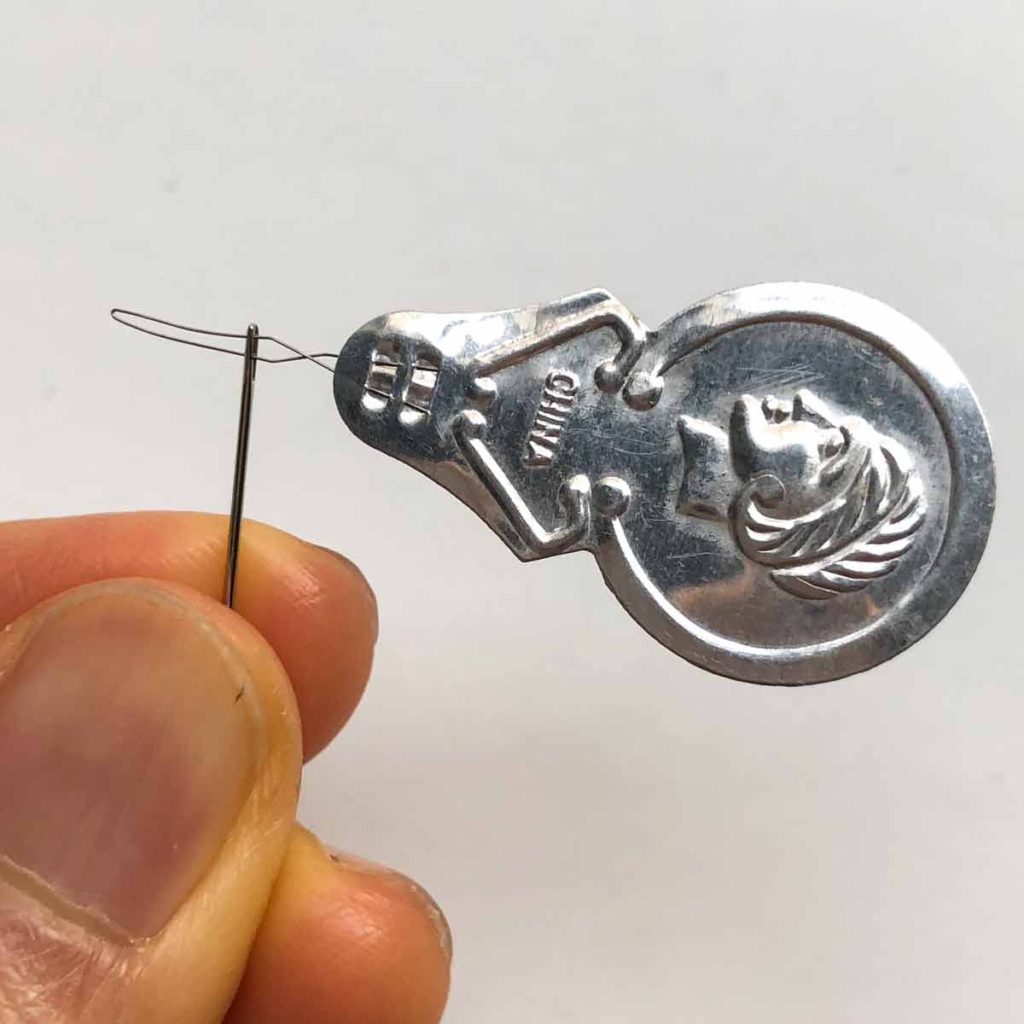
Stick pointy tip of wire through eye of needle. (the pointy diamond shaped end of needle threader wire makes it easy to push through the needle)
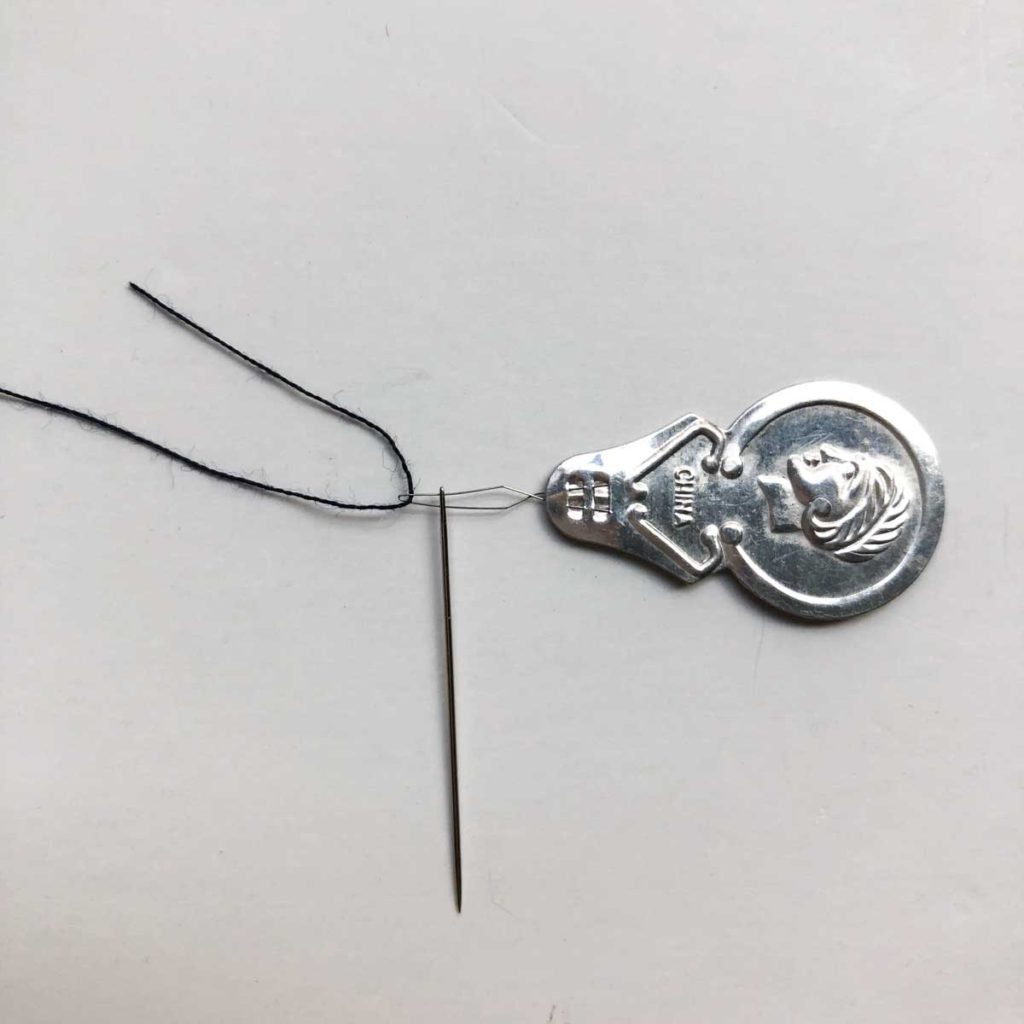
Scoot needle away from pointy tip (towards the person’s face) and stick your thread through the pointy tip.
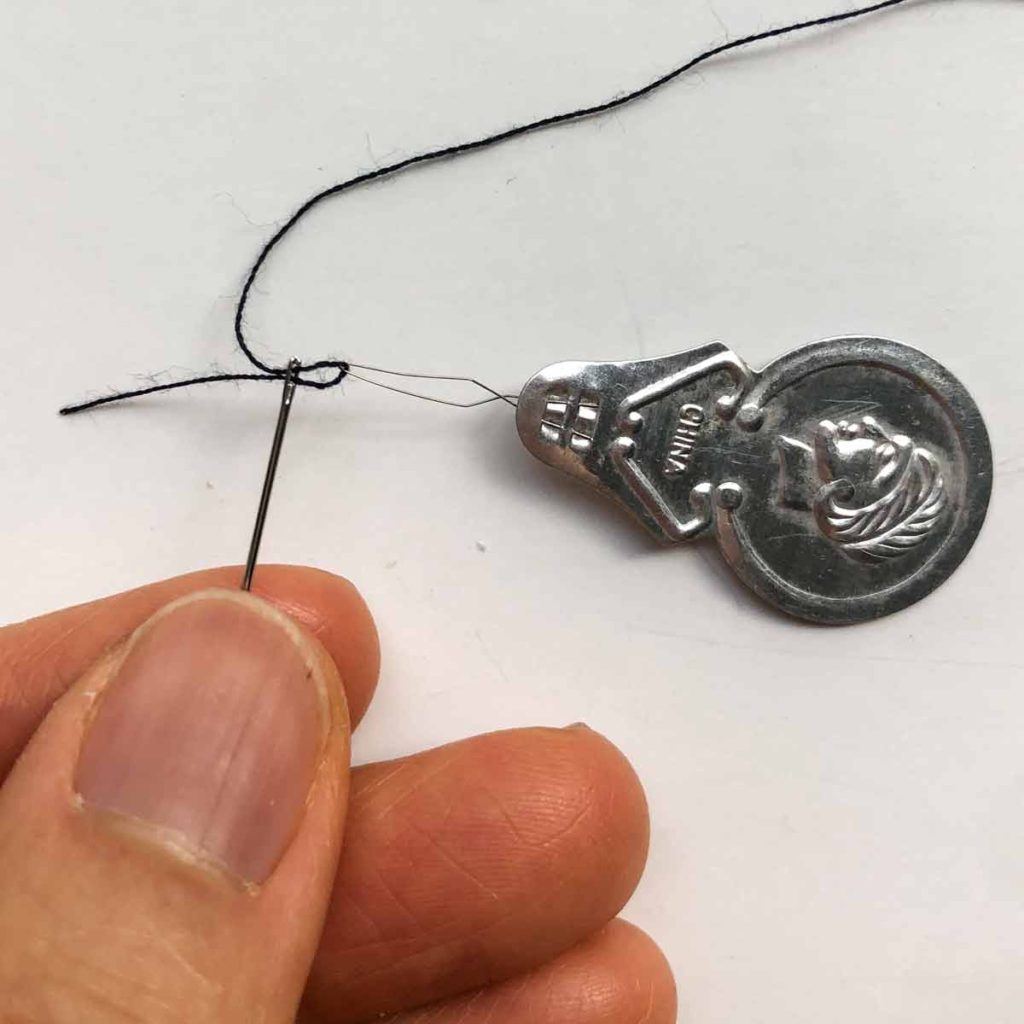
Pull needle off the wire and onto the thread. Tada! You now have a threaded needle 🙂
Want to learn how to use the built-in needle threader that comes with your machine? Check out Beginner’s Guide to How to Use a Needle Threader on a Sewing Machine.
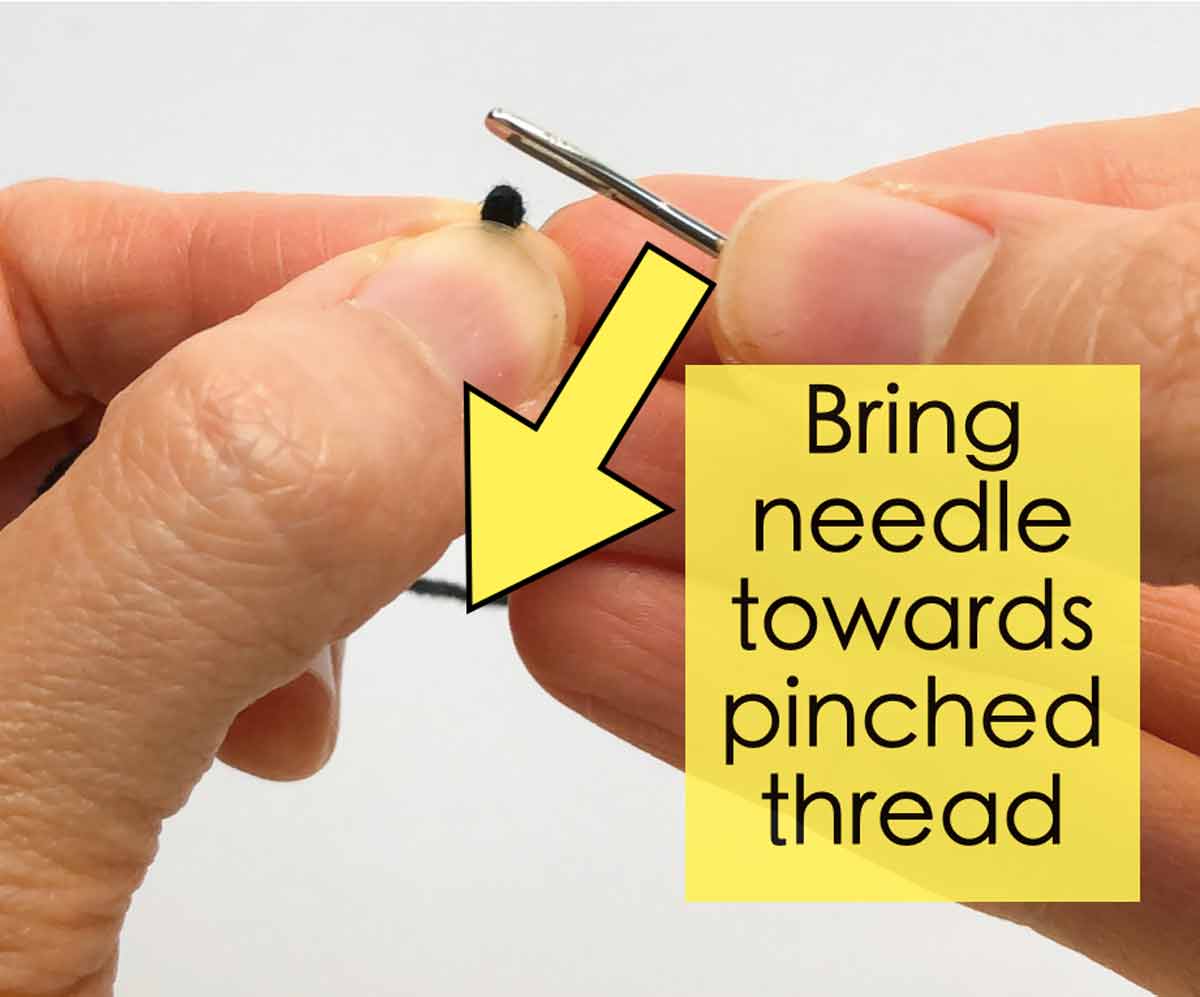
Tip #7: Bring Needle to Thread
Normally when we thread needles we tend to want to aim our thread at the target (eye of needle) and poke it through (winner!). However, sometimes doing things in reverse can be helpful too.
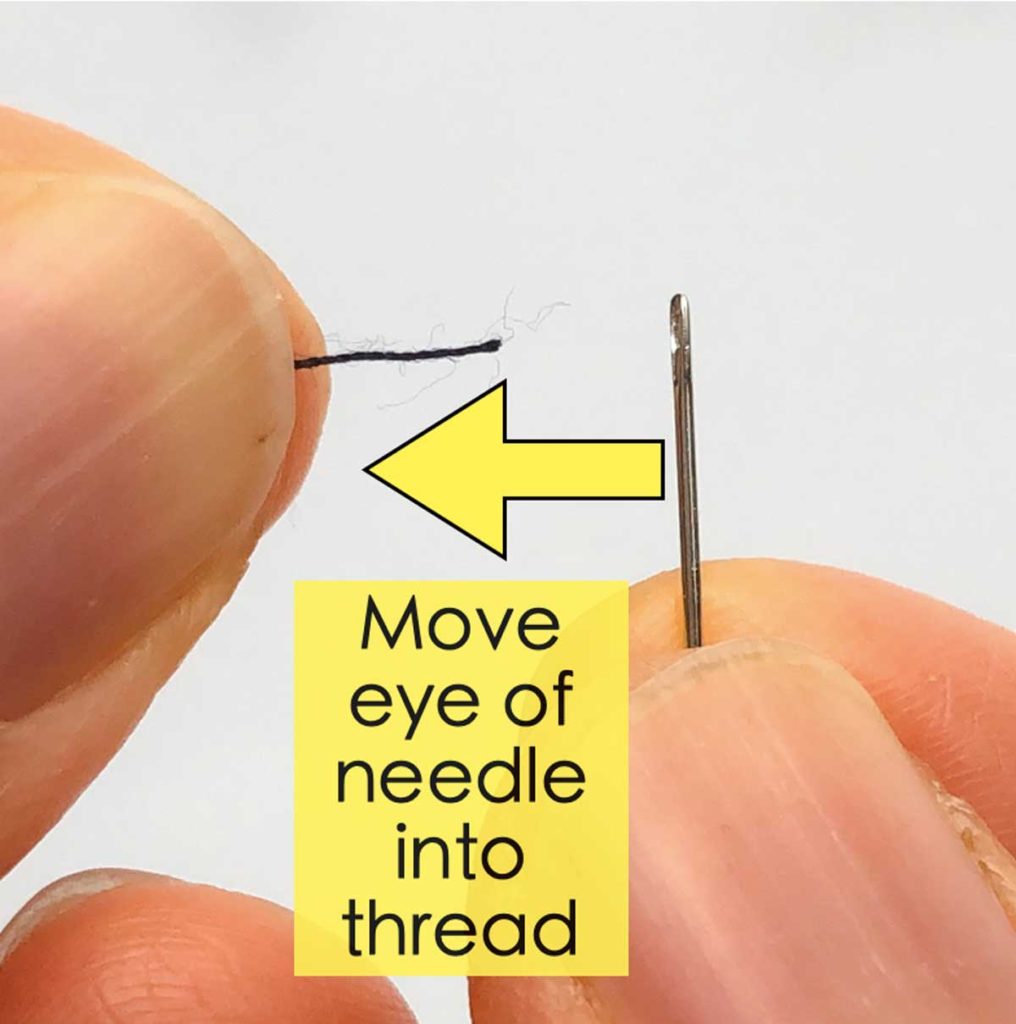
Pinch the tip of thread tightly with your fingers and hold it still. Using your other hand, hold the needle and bring the eye into the thread. For some reason, this works when you’ve been fussing at the thread to go through the eye all this time!
Tip #8: Use Tweezers
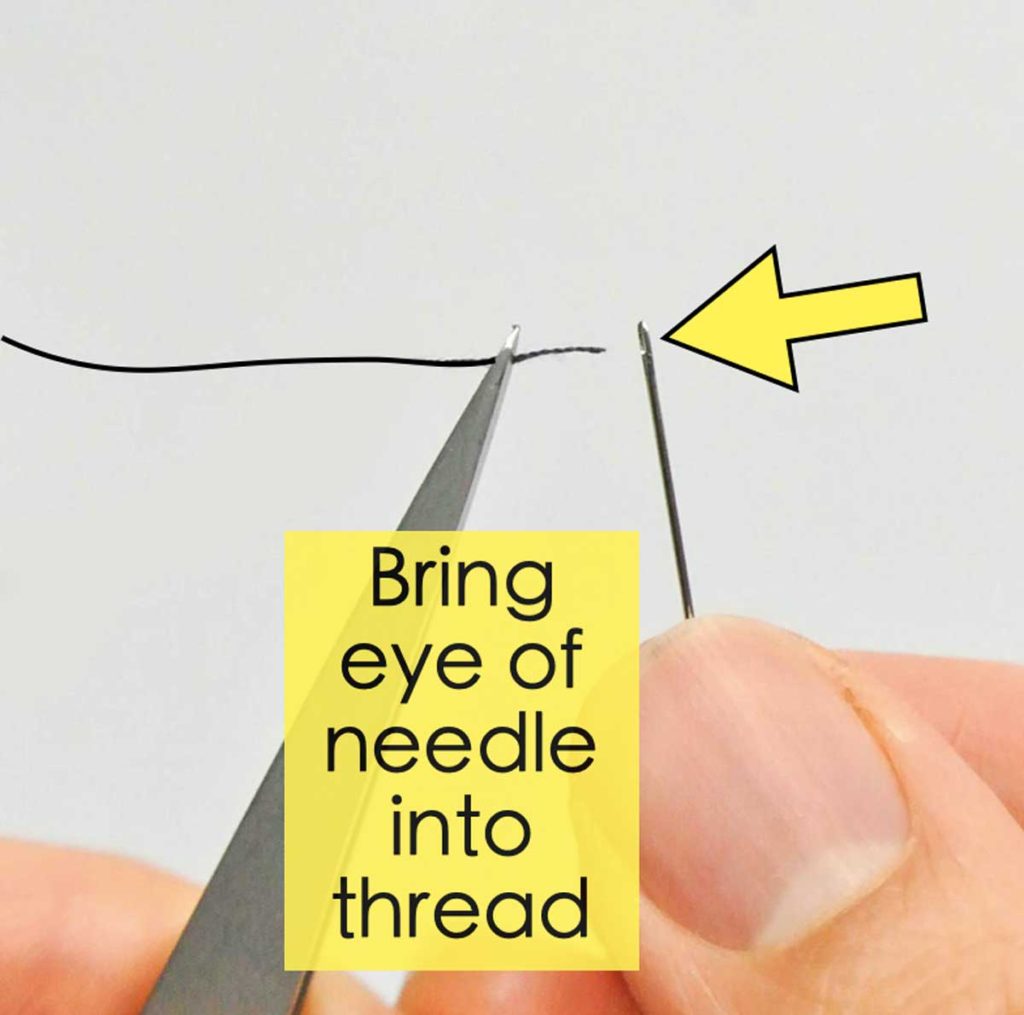
Use a pair of tweezers to pinch the end of the thread and bring the eye of the needle into the thread.
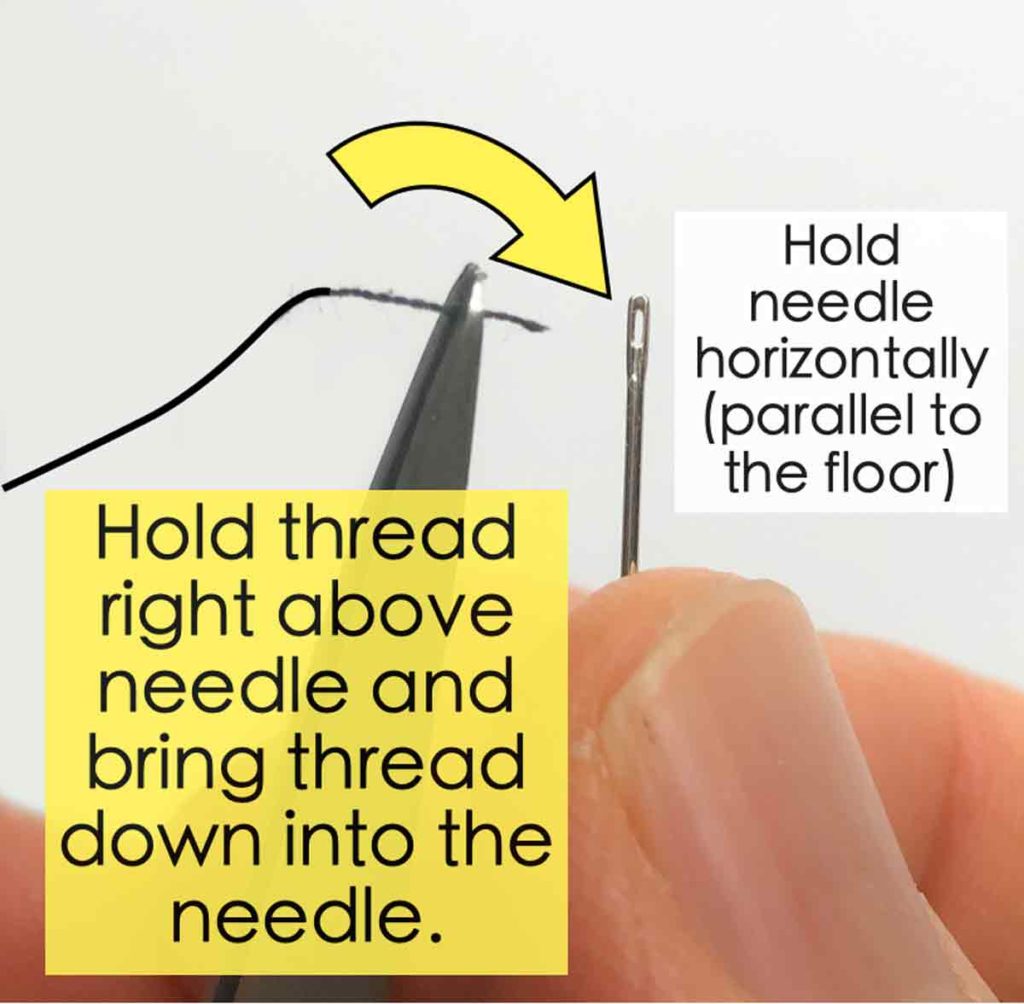
Alternatively, hold the needle horizontally (so you are looking at the floor through the eye of the needle). Then, using tweezers to hold the pinched thread above, bring the thread down into the needle.
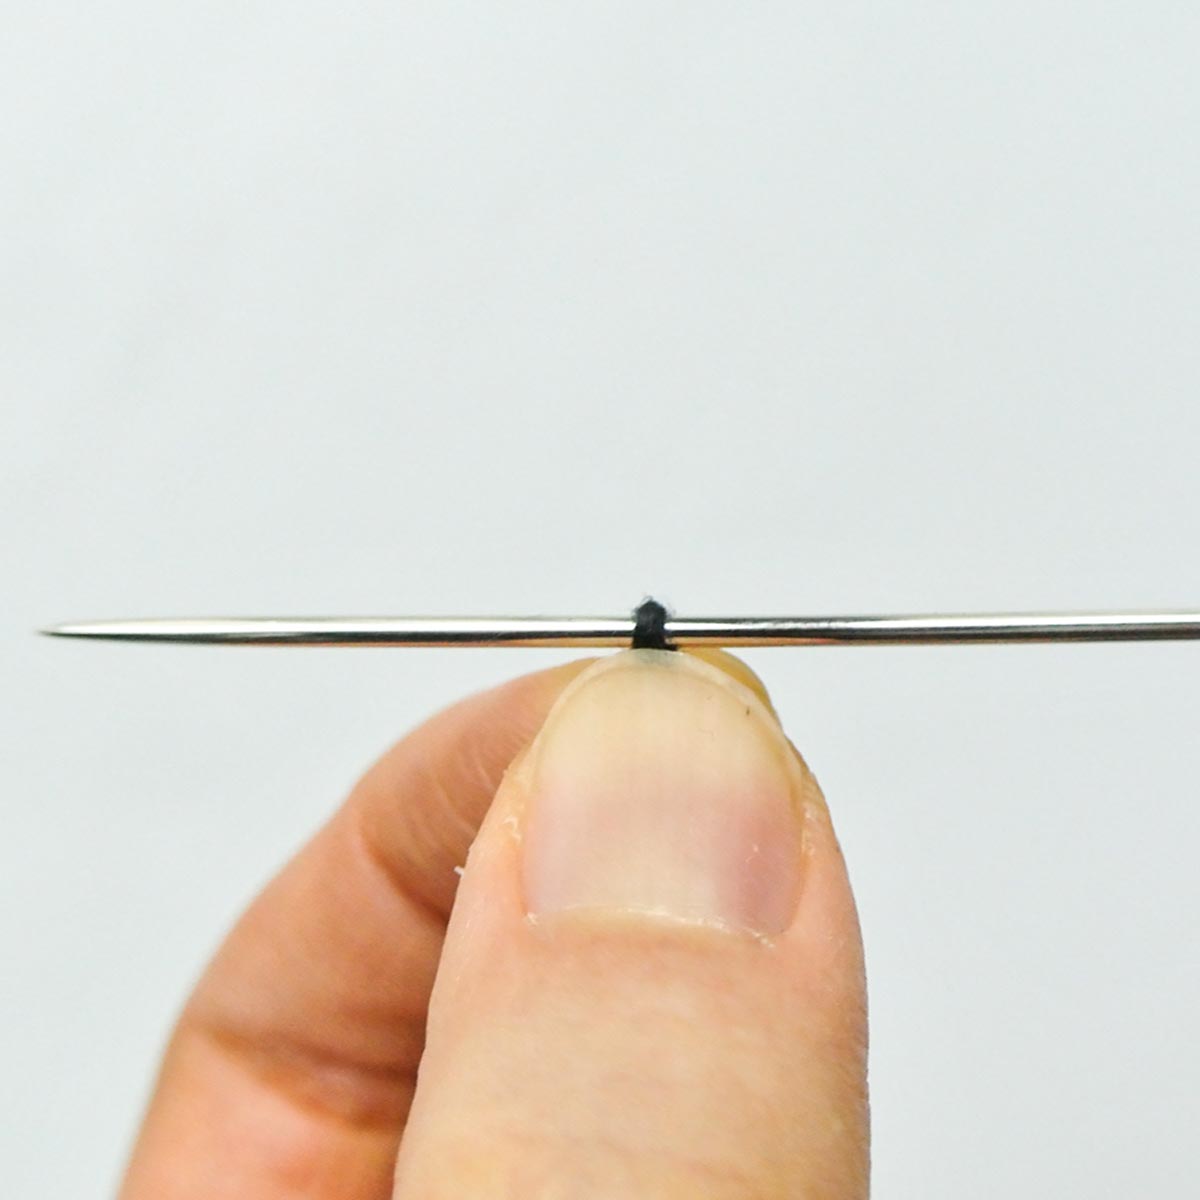
Tip #9: Loop and Pinch Method
I’m using embroidery yarn and a thick needle in the photos for better visualization 🙂
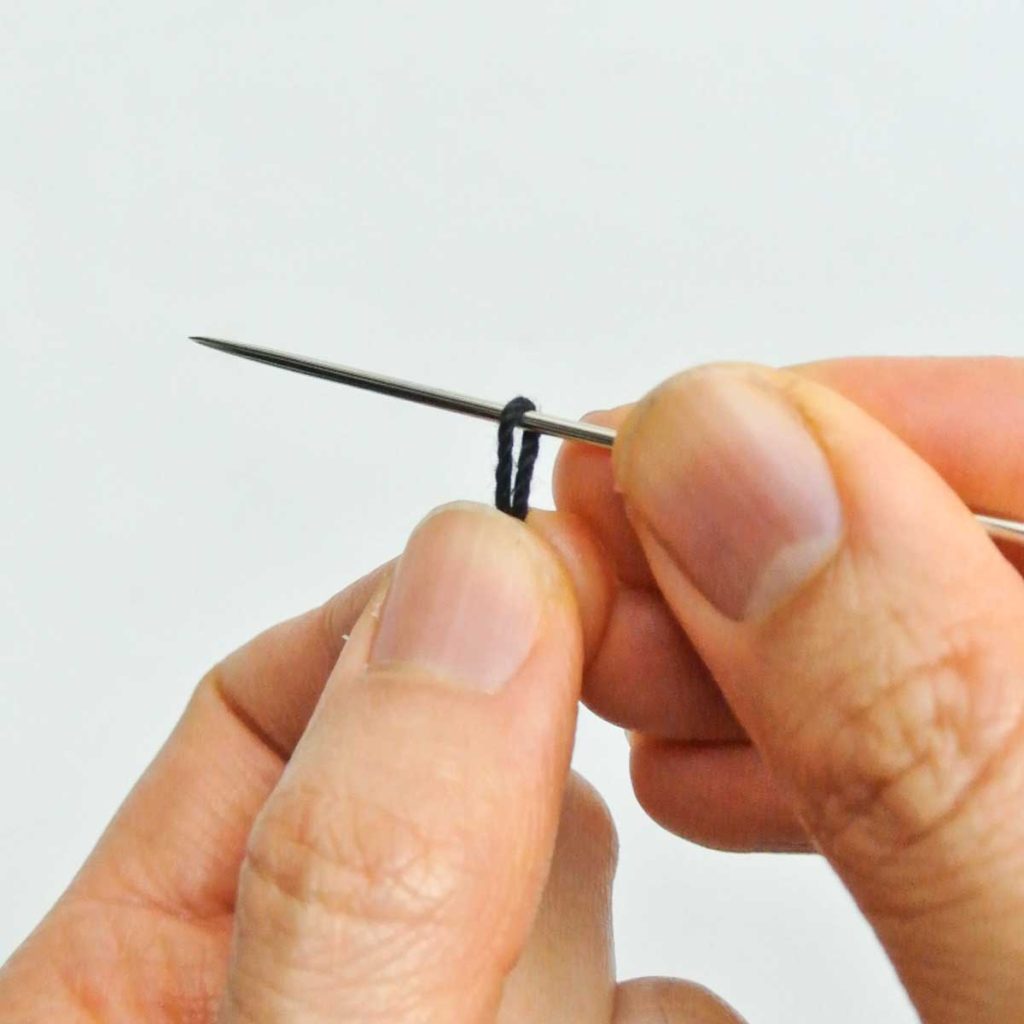
Make a loop around needle.
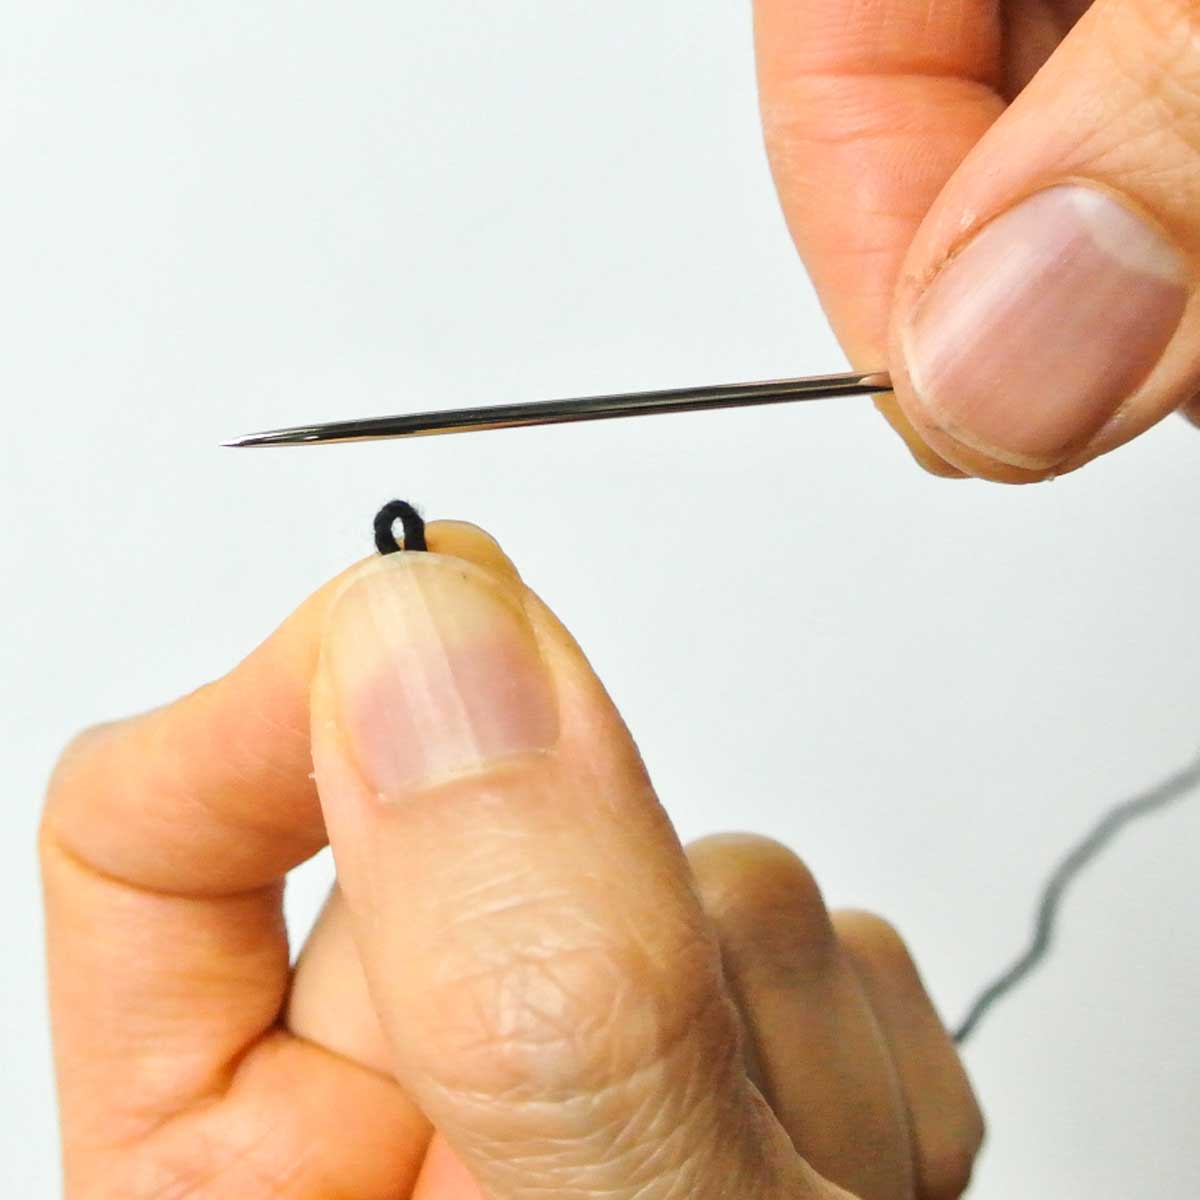
Pinch the loop tightly and remove needle, keeping your pinch tight the entire time.
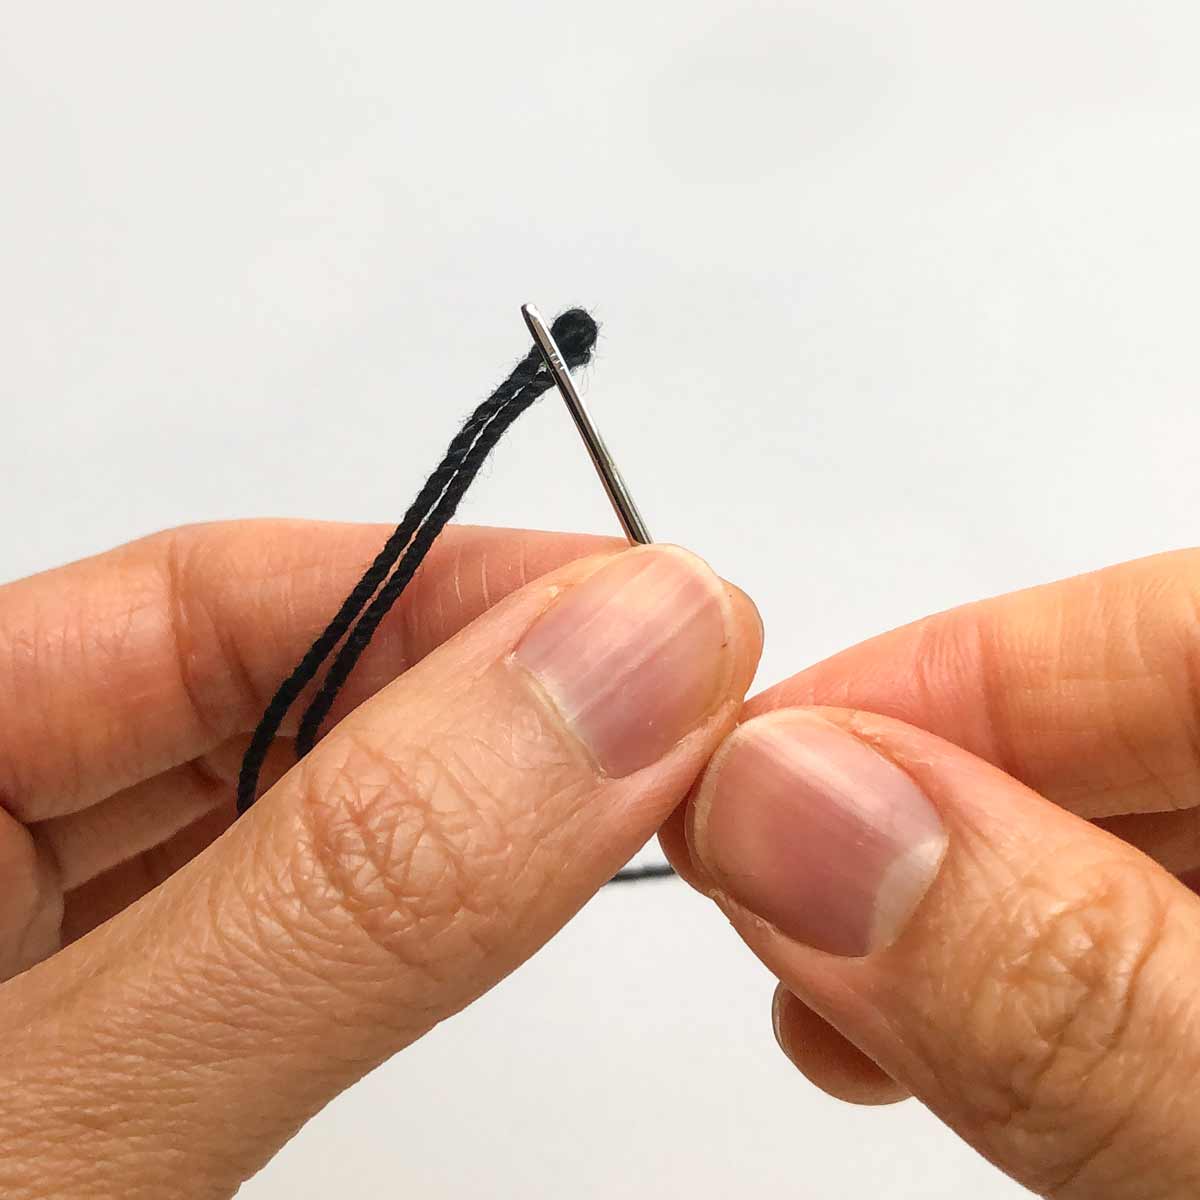
Bring eye of needle into pinched thread and you are done!
Tip #10: Use the Right Size Thread and Needle

If you are trying to thread a tiny sewing needle with a thick thread (think embroidery floss), you will definitely have a hard time. Additionally, you will not only end up frustrated, the end of your thread will also fray and bunch up.
Choose the correct size thread for the needle and you will be in good shape. A good rule of thumb is that the eye of the needle should be at least twice as big as the thread.
Tip #11: Use Paper as Makeshift Needle Threader
Did you know you can make a paper needle threader in a pinch? This trick works best for threading larger needle holes as you will need to cut a slip of paper that fits through the eye.
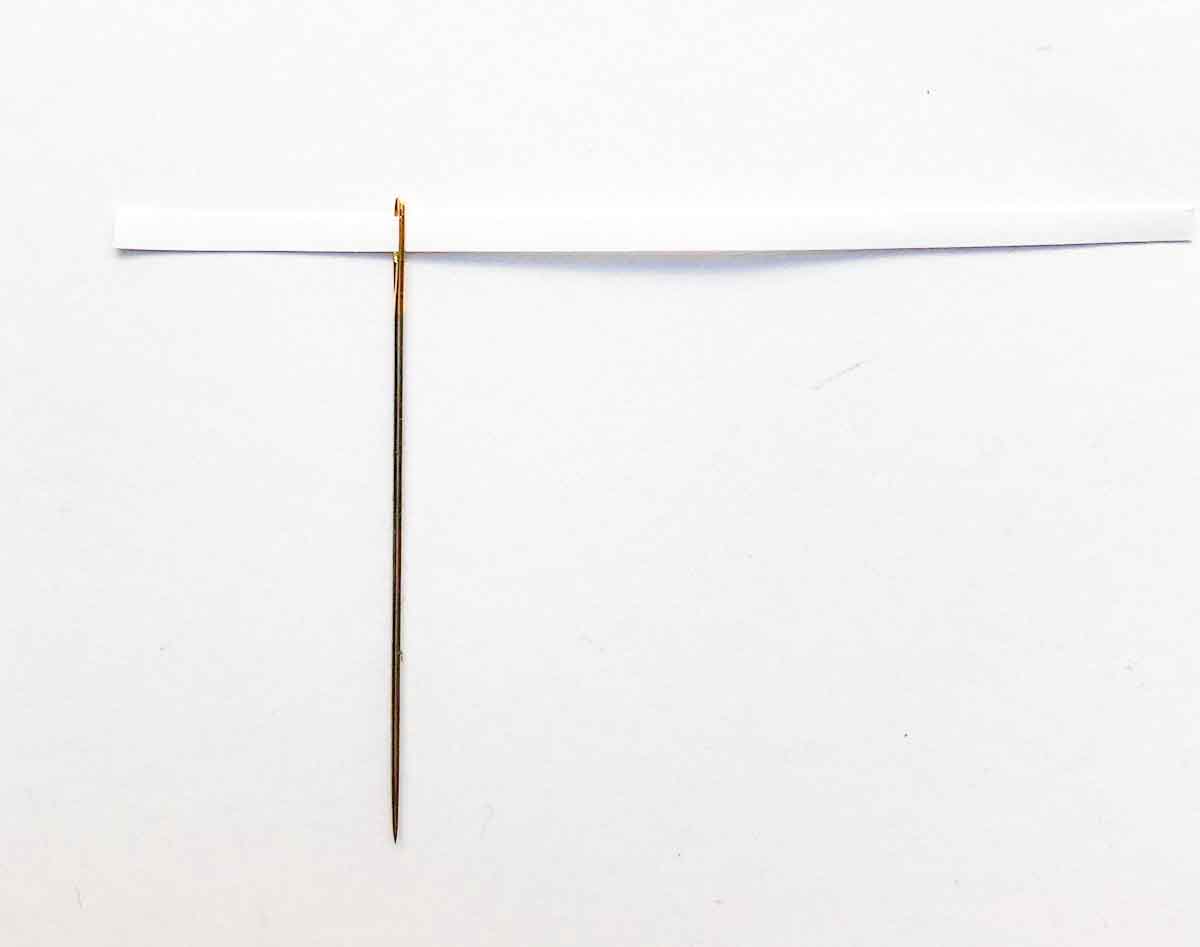
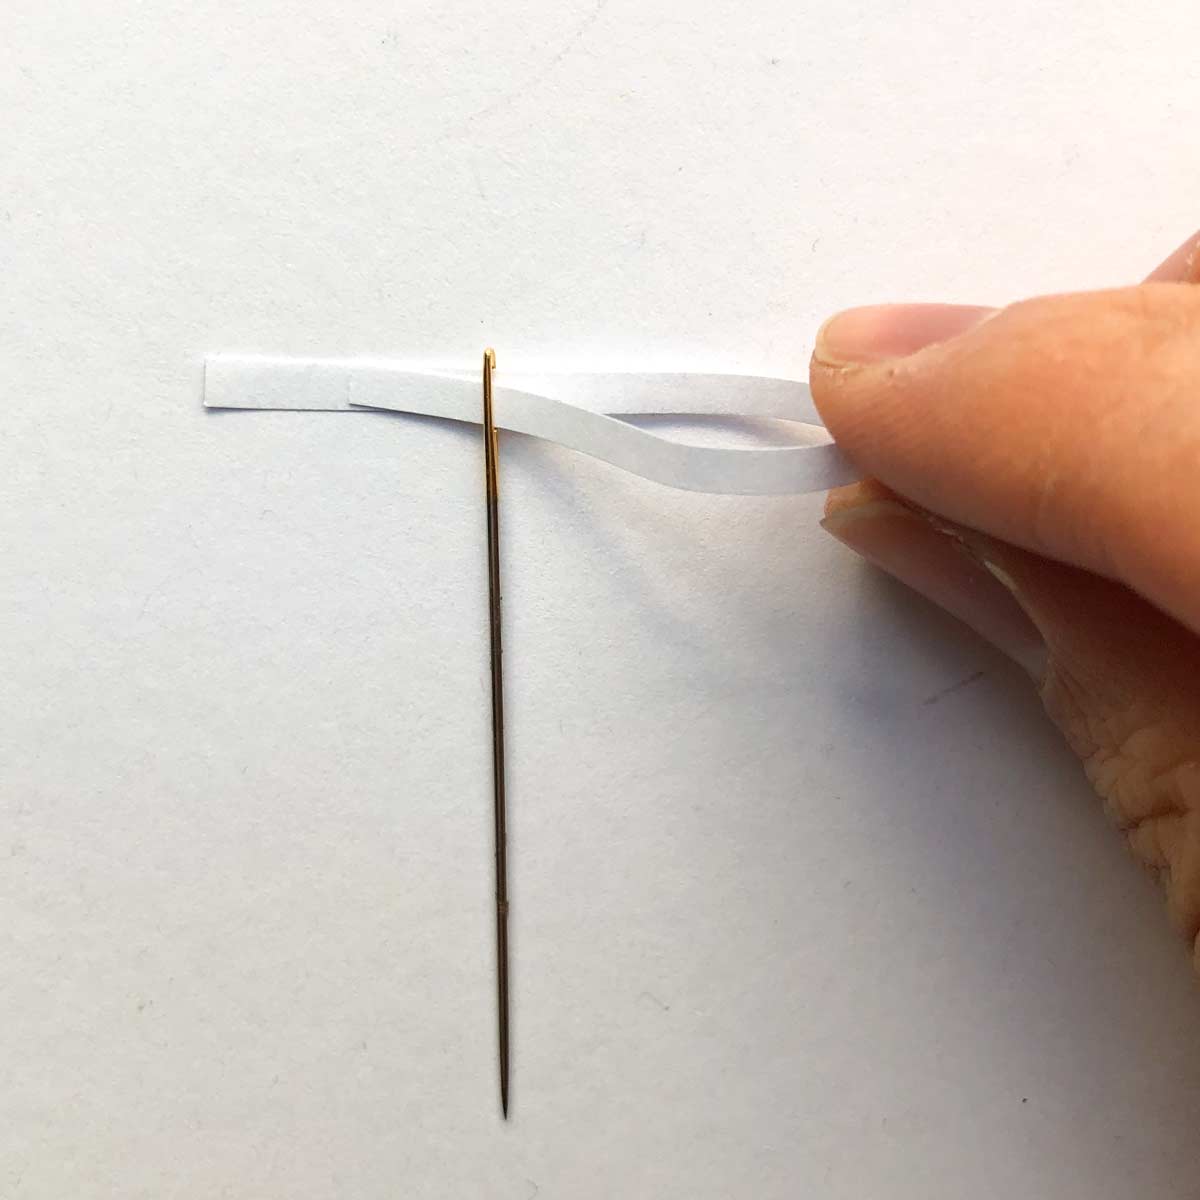
Cut a piece of paper that fits through the eye of the needle and slip it in. Then slip the other end of the paper through the eye as well, making a loop.
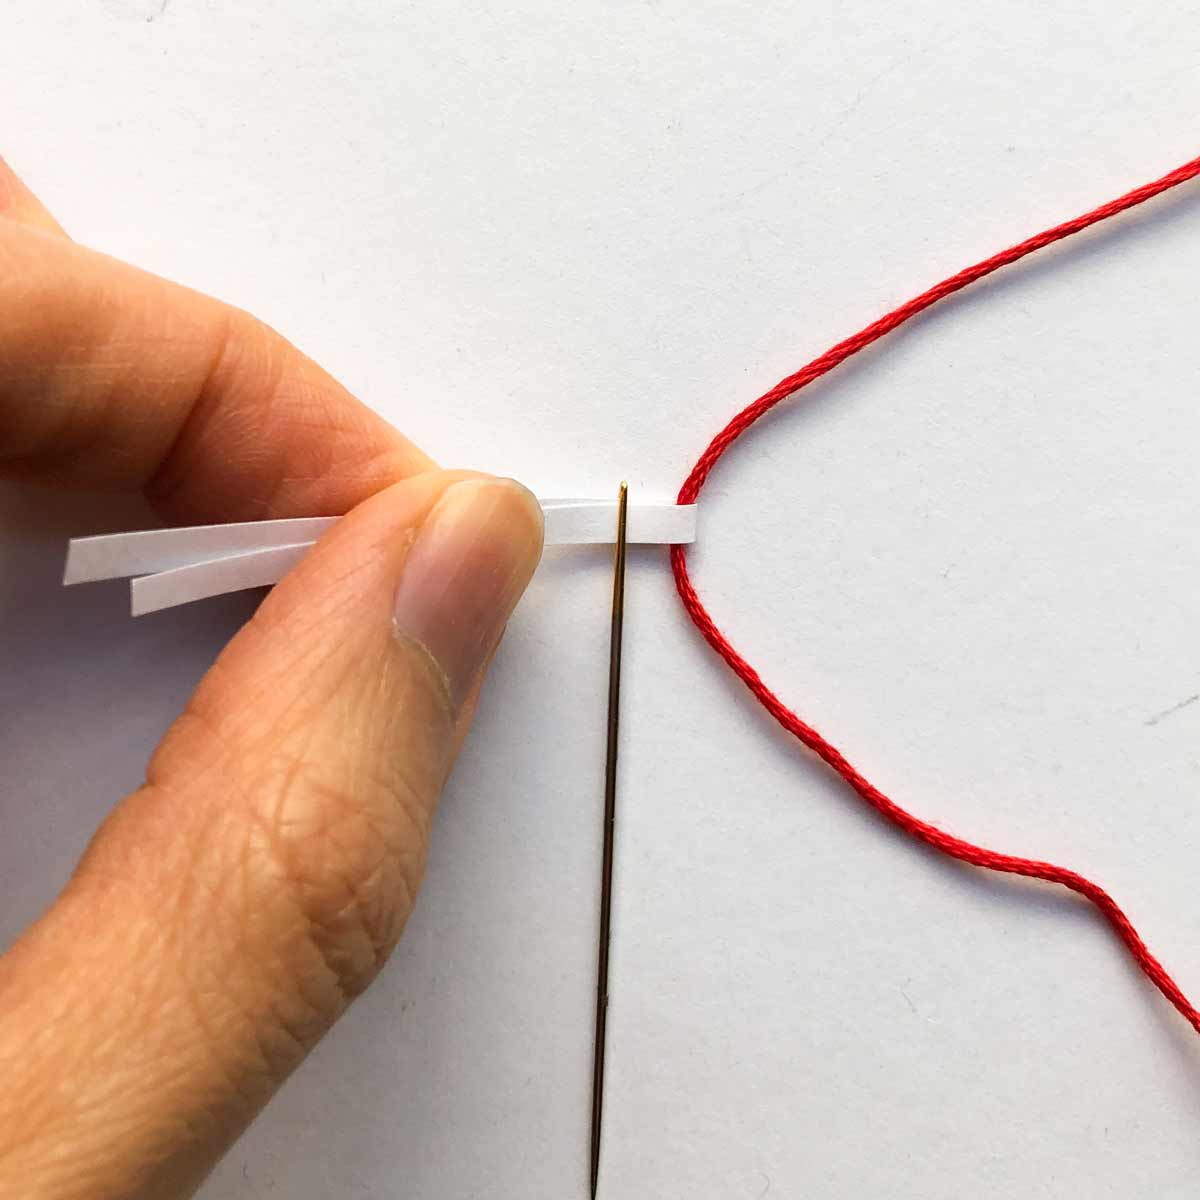
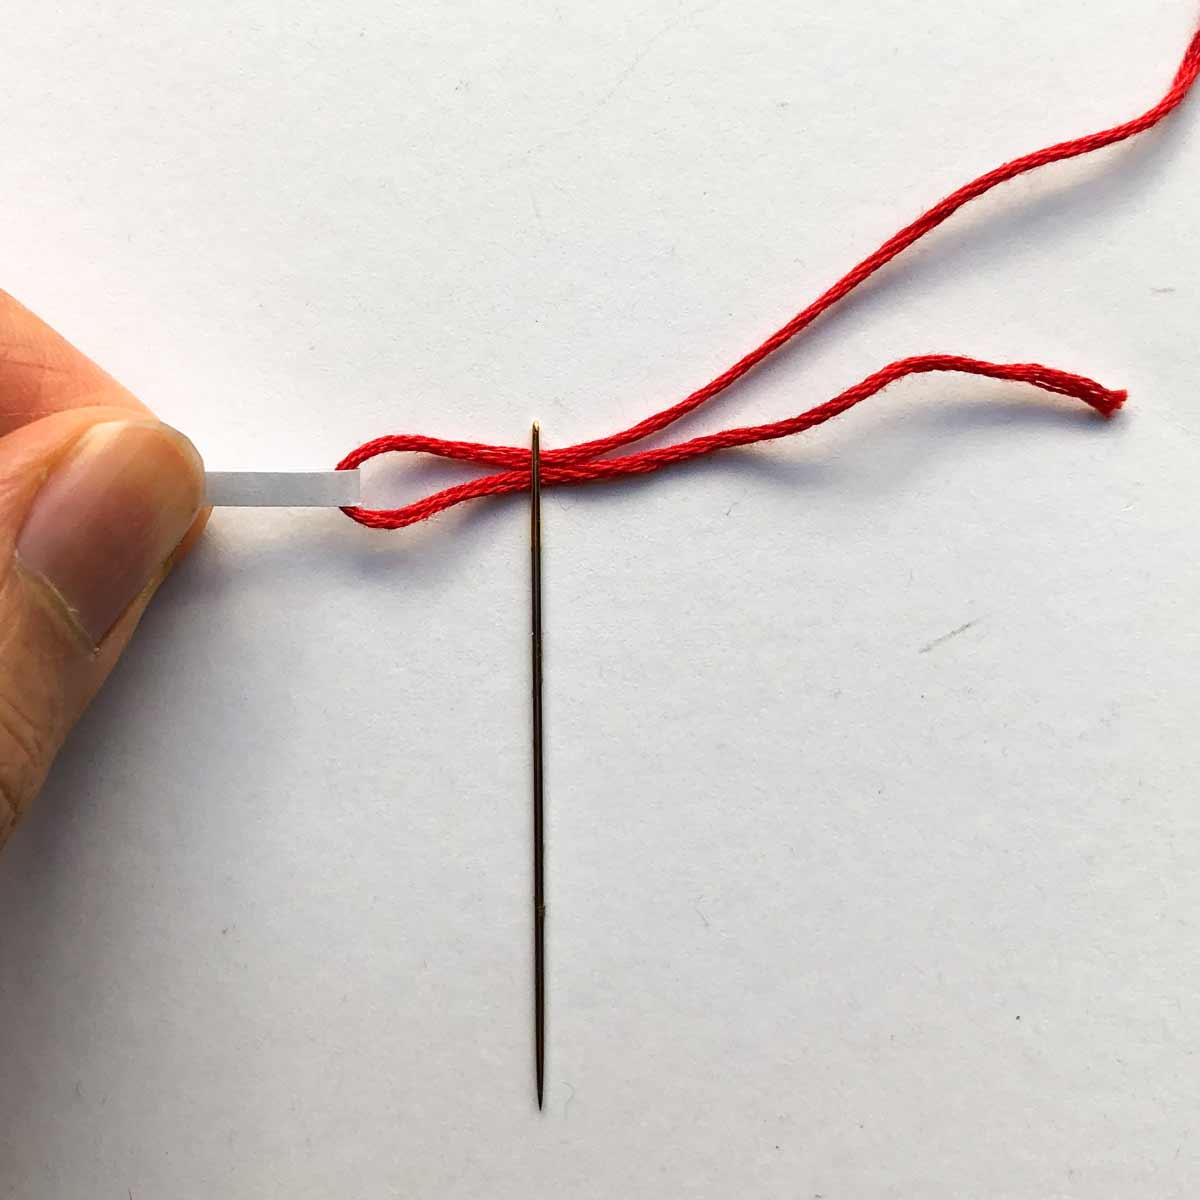
Insert your thread through the loop, and gently tug the paper loop and thread through the eye of the needle.
Tip #12: Stiffen Thread with Hair Spray or Beeswax


Stiffen the tip of your thread with hairspray or run some beeswax through. Can’t find any beeswax? Candle wax works in a pinch. The stiffened thread retain it’s shape better (even if you can’t really see it), which allows you to easily guide it into the eye versus a limp thread. This also helps to keep the small strands of fiber in the thread together so they don’t stick out and cause difficulty as you thread.
NOTE: This tip is only recommended for hand sewing needles. Applying products and waxes on sewing machine thread can cause gunk buildup in the interior mechanism of the machine.
That’s all folks! I hope this guide was helpful for your needle threading adventure. Let me know in the comments below if you have other hacks for how to thread a needle, I would love to know 🙂
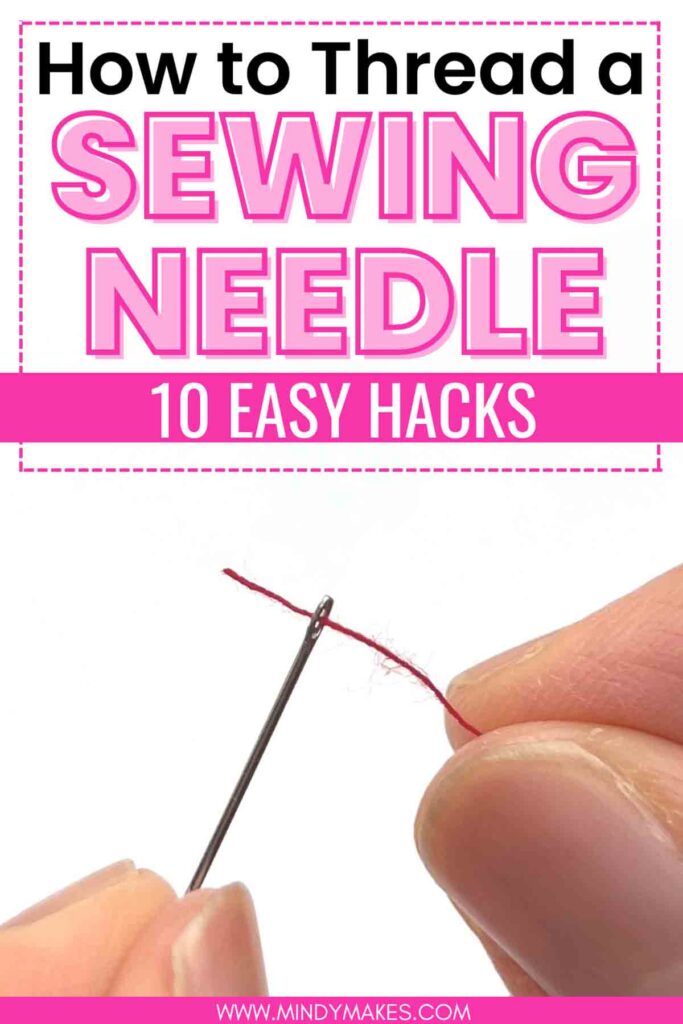
How to Thread a Hand Sewing Needle (10+ Hacks)
Never fear threading a hand needle again! Try one (or several) of these tried and true hacks to learn how to easily thread a sewing needle.
Materials
- THREAD
- HAND SEWING NEEDLES
- SCISSORS
Instructions
- Use Good Lighting
• Let there be light so you can see clearly to thread quickly! - Thread Needle in front of White Background
• You'll be able to see the eye of the needle much more clearly in front of a white backgroud versus a dark background
• Pin a sewing needle through a piece of white felt/paper and keep it where you store your needles. - Cut Thread with Sharp Scissors
• Sharp scissors will leave a crisp, clean edge on your thread whereas dull scissors will cause the thread to snag and leave a fuzzy end that is impossible to thread through a needle. - Cut Thread at an Angle
• Cutting the thread with sharp scissors at an angle leaves a nice clean bevel with a pointy end.
• This bevel keeps loose fibers of the thread together so you can easily guide the thread through. - Moisten Tip of Thread or Eye of Needle
• The moisture in the eye will draw the thread in as you push, allowing you to easily thread the needle.
• Alternatively, you can also moisten the tip of the thread and this works just as well. - Use a Needle Threader
• First, stick pointy tip of wire through eye of needle (see note 1).
• Next, scoot needle away from pointy tip (towards the person's face)
• Third, stick your thread through the pointy tip.
• Pull needle off the wire and onto your thread. - Bring Needle to Thread
• Pinch the tip of thread tightly with your fingers and hold it still. Using your other hand, hold the needle and bring the eye into the thread. - Use Tweezers
• Use a pair of tweezers to pinch the end of the thread and bring the eye of the needle into the thread.
• Alternatively, hold the needle horizontally (so you are looking at the floor through the eye of the needle). Then, using tweezers to hold the pinched thread above, bring the thread down into the needle. - Loop and Pinch Method
• With the thread, make a loop around the needle.
• Pinch the loop tightly and remove needle, keeping your pinch tight the entire time.
• Bring eye of needle into pinched thread and you are done! - Use the Correct Size Thread for the Needle
• A good rule of thumb is that the eye of the needle should be at least twice as big as the thread. - Use Paper as a Makeshift Needle Threader
• Cut a piece of paper that fits through the eye of the needle and slip it in.
• Next, slip the other end of the paper through the eye as well, making a loop.
• Finally, insert your thread through the loop, and gently tug the paper loop and thread through the eye of the needle. - Stiffen Thread with Hairspray or Beeswax
• The stiffened thread retain it’s shape better (even if you can’t really see it), which allows you to easily guide it into the eye versus a limp thread.
• This trick also helps to keep the small strands of fiber in the thread together so they don’t stick out and cause difficulty as you thread.
Notes
- The pointy diamond shaped end of needle threader wire makes it easy to push through the needle

Recently researching this as I use very small needles for beading, I discover I could make my own needle threaders. The ones on the market only last for several uses before breaking. So, get an electrical chord, strip the wire back to expose the thin wires inside, untwist the wires until you get the length you need and Voila. Bend the wire in half, push it through the needle eye and put the thread through the wires pushed through and this should work. You may have to pull the 2 wires out with pliers, but I haven’t gotten to that phase.
Thanks for the great ideas. I need to use a threader due to instability of my hands after a traumatic brain injury. We do what we can with joy!
Hi Suzanne! What a great idea! I love that you are thinking outside the box and using electrical wires! Now I feel like I need to try, but honestly taking apart anything with electricity scares me. I’m so glad you are still sewing and trying new techniques post brain injury. That’s SO amazing and awesome!
Some great options here. Another one I know, if you have a close look, the eye on hand sewing needles is different on each side. The best for threading has a dished channel which just leads your thread into the eye; after you have licked the thread, cut it on an angle etc. Sandy
Hi Sandy,
Thank you for this awesome tip. Will definitely have to try it out myself!
wow have I learned a lot this afternoon reading all about things I guess I took for granite. I sewed all our kids clothes & my own, plus i made my husband the leaser suits. Pants & Jacket. But my life got busier & kids needing more of my time to drive them here & there plus all the ball games. Don’t get me wrong I loved every min of the time. Now I’m 81 trying to remeber how to sew & read patterns from the computer. So I learned a lot today that I didn’t know back then. Very well written Thanks you for sharing
Great learning day for me. Thanks So Much
Hi Mariane,
I’m so glad you find this post helpful and also thank you for your kind words!