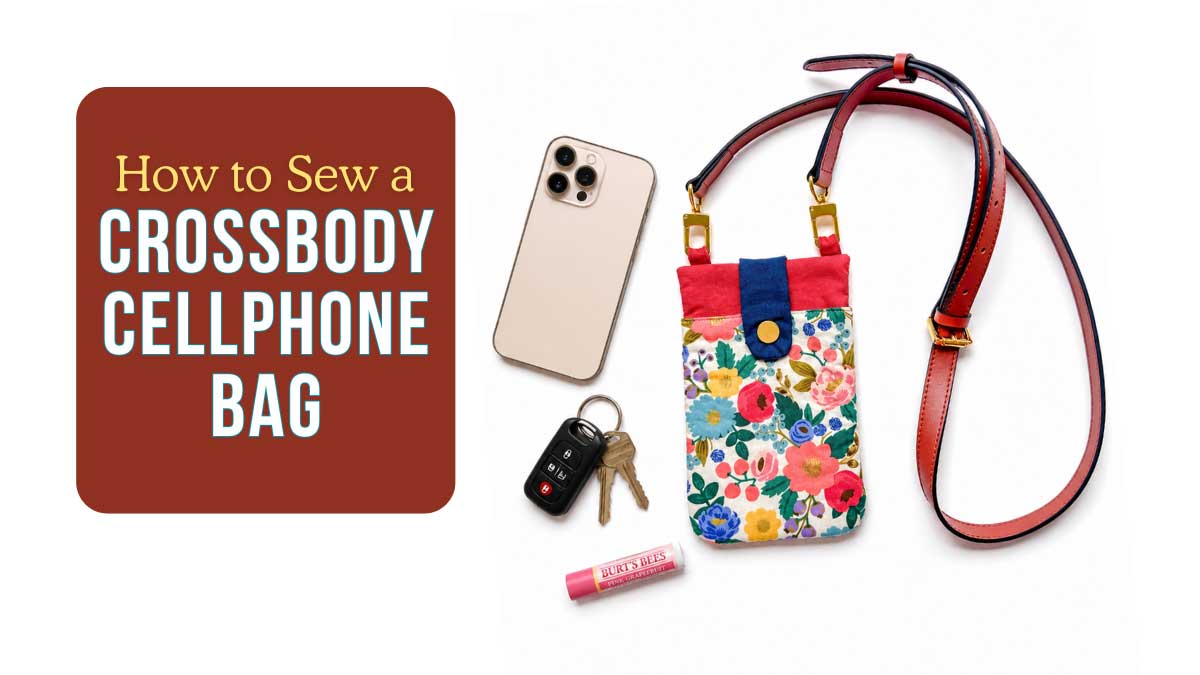
How to Make a Crossbody Cell Phone Bag (Free Pattern)
Looking for a quick and practical sewing project? A DIY crossbody cell phone bag is the perfect beginner-friendly project that you can complete in an afternoon. Ideal for carrying your phone, cards, keys, and other small essentials while keeping your hands free.
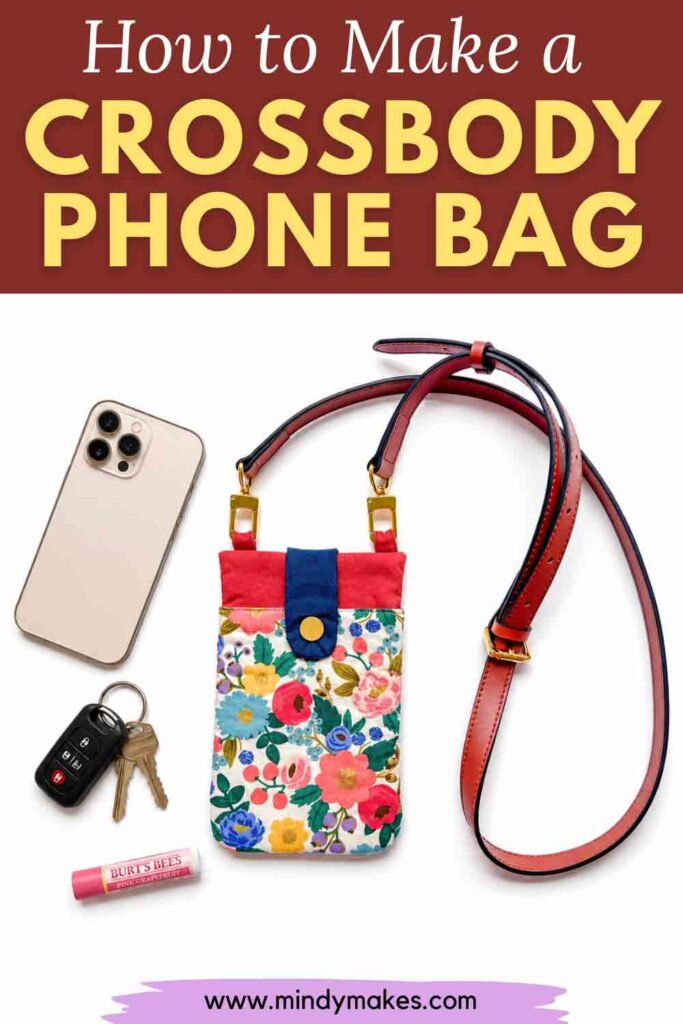
Whether you’re headed to the farmer’s market, walking the dog, traveling, or just running errands, this simple bag is lightweight, stylish, and completely customizable.
In this tutorial, I’ll walk you through how to sew a crossbody cell phone bag from start to finish.
Why You’ll Love This Project
- Perfect for beginners
- Uses small pieces of fabric
- Great for fat quarters and fabric scraps
- Makes an excellent handmade gift
- Easy to customize with pockets, closures, and decorative fabrics
Finished Size
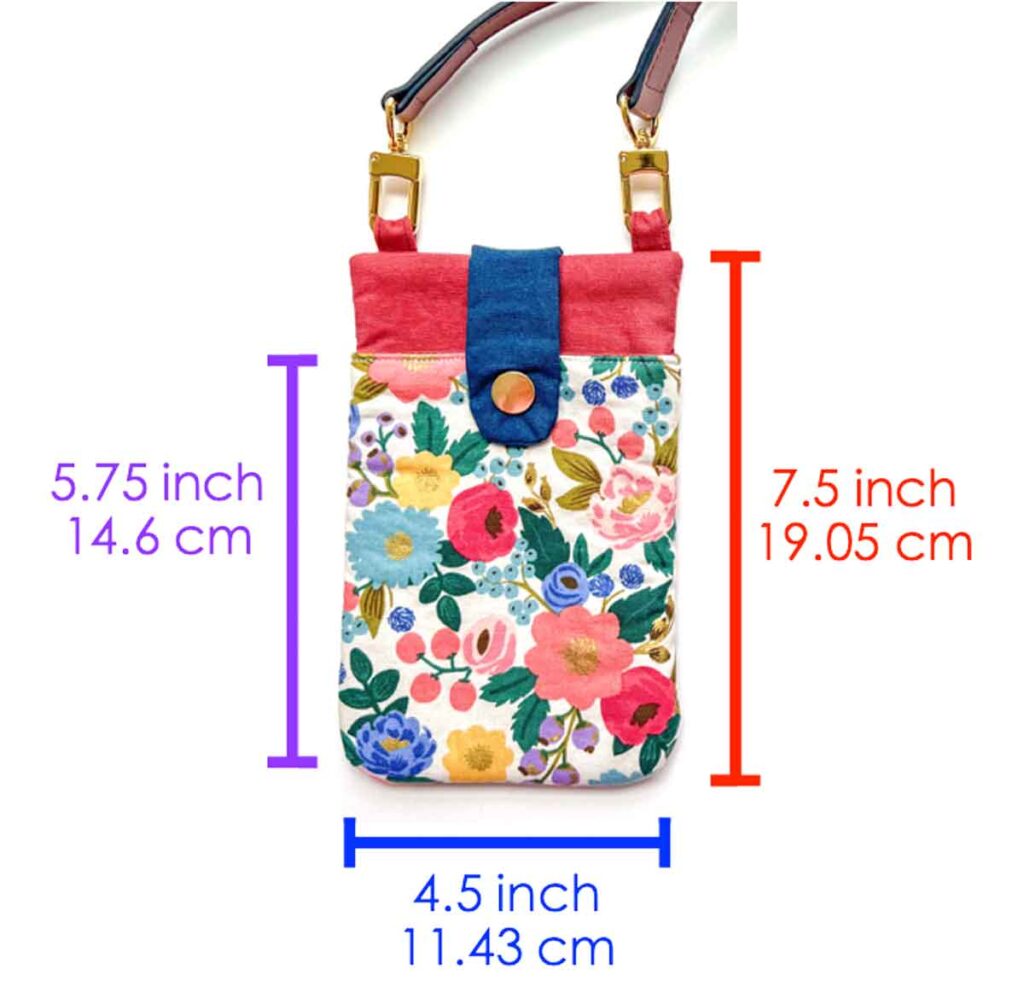
This handy little cross body bag measures approximately 4½ inches wide × 7½ inches tall.
Front pocket measures approximately 5¾ inches tall.
This size fits most modern smartphones, including larger models with protective cases.
Supplies You’ll Need:
Materials
- POCKET FABRIC – ¼ Yard (0.23M)- see note 1 for fabric types.
- LINING – ¼ Yard (0.23M), 100% Cotton Fabric.
- FRONT FLAP – Scrap fabric that fits the paper pattern, 100% cotton
- BACK PIECE FABRIC – ¼ Yard (0.23M) – see note 1 for fabric types.
- FUSIBLE FLEECE – ¼ Yard (0.23M)
- FUSIBLE INTERFACING
- MATCHING THREAD
- SNAPS – Metal Spring Snaps (I used 15mm snaps in the tutorial), Plastic KAM Snaps, or Magnetic Snaps
- CLIP-ON BAG STRAP – I like THIS ONE with gold hardware and different strap colors. Or make your own DIY bag strap with matching fabric!
NOTE 1: I recommend 100% cotton (especially if you are a beginner).
Other recommended fabrics: denim, canvas, cork, medium weight nylon, wool, corduroy.
Not recommended fabrics: knits, stretchy fabric, extra light weight fabrics such as chiffon, tulle, silks.
Tools
- SEWING MACHINE
- FABRIC SHEARS – I love my Ginghers Fabric Scissors! I’ve had it for over 10 years and it is still going strong!
- CLEAR RULER – I have the Dritz See Through Sewing Ruler 2 x 18 inch
- CHALK – I really like the Clover Chaco Chalk Liner for marking. It’s thin, marks well, and easy to use!
- POINT TURNER – optional, but very useful to push out the ears and bag.
- HAND SEWING NEEDLES
- SEWING PINS or SEWING CLIPS.
- POINT TURNER – optional, but very handy for all types of sewing projects!
- IRON – I love my Rowenta Iron with a retractable cord for easy storage
Crossbody Bag Pattern
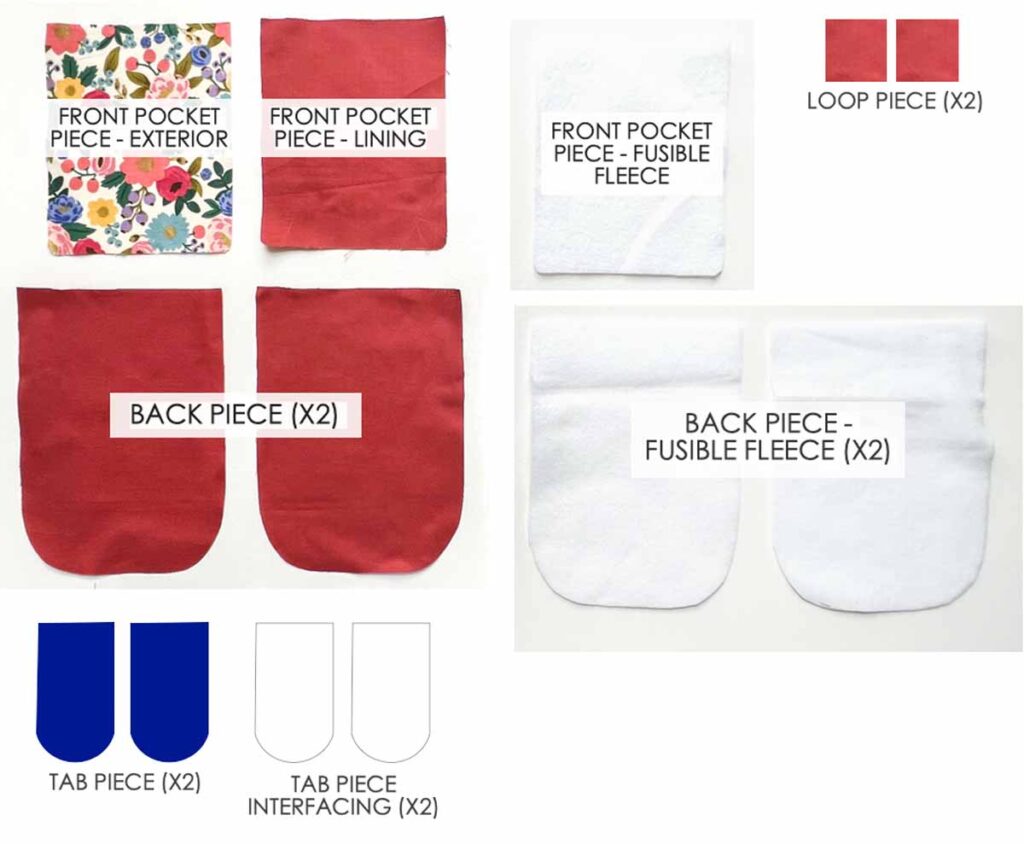
First, cut out the following fabric pieces:
- FRONT POCKET PIECE – EXTERIOR (X1)
- FRONT POCKET PIECE – LINING (X1)
- FRONT POCKET PIECE FUSIBLE FLEECE (X1)
- BACK PIECE (X2)
- BACK PIECE – FUSIBLE FLEECE (X2)
- TAB PIECE (X2)
- TAB PIECE INTERFACING (X2)
- LOOP PIECE (X2) – each piece measures 2”x 2” (5.08 cm x 5.08 cm)
Crossbody Cell Phone Bag: Step-by-Step Tutorial
Step 1: Prepare the Fabric
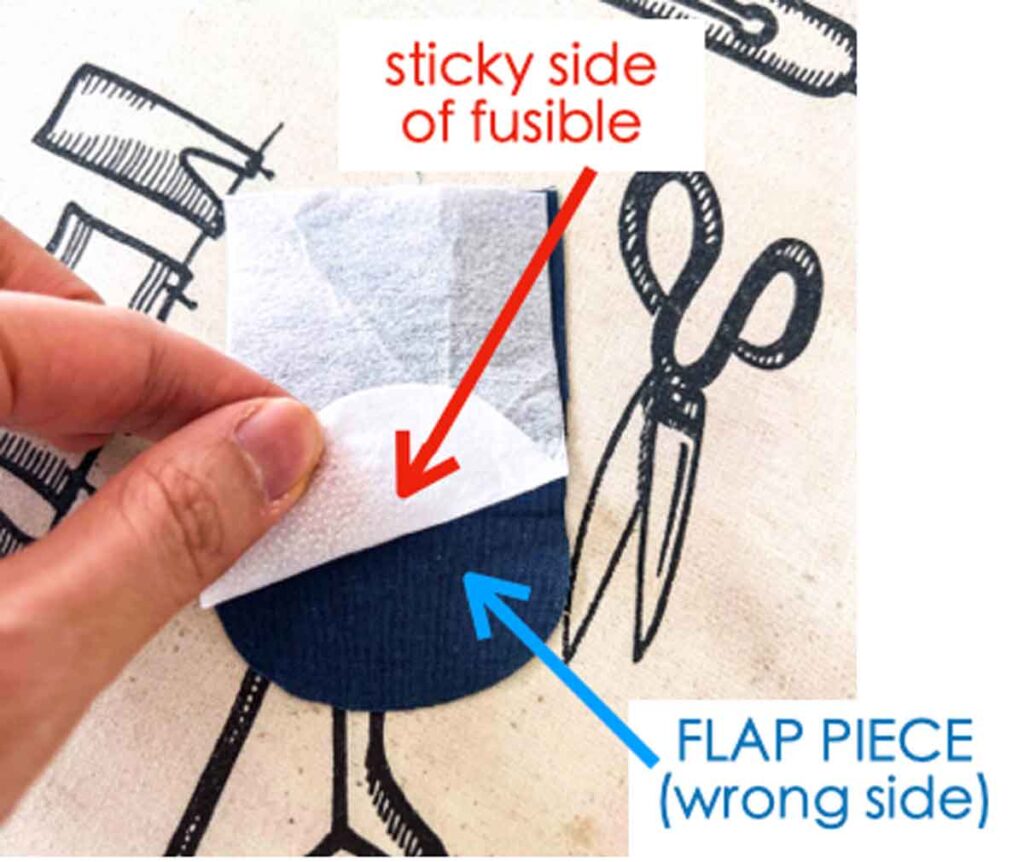
First, place sticky side of fusible interfacing over wrong side of TAB PIECE.
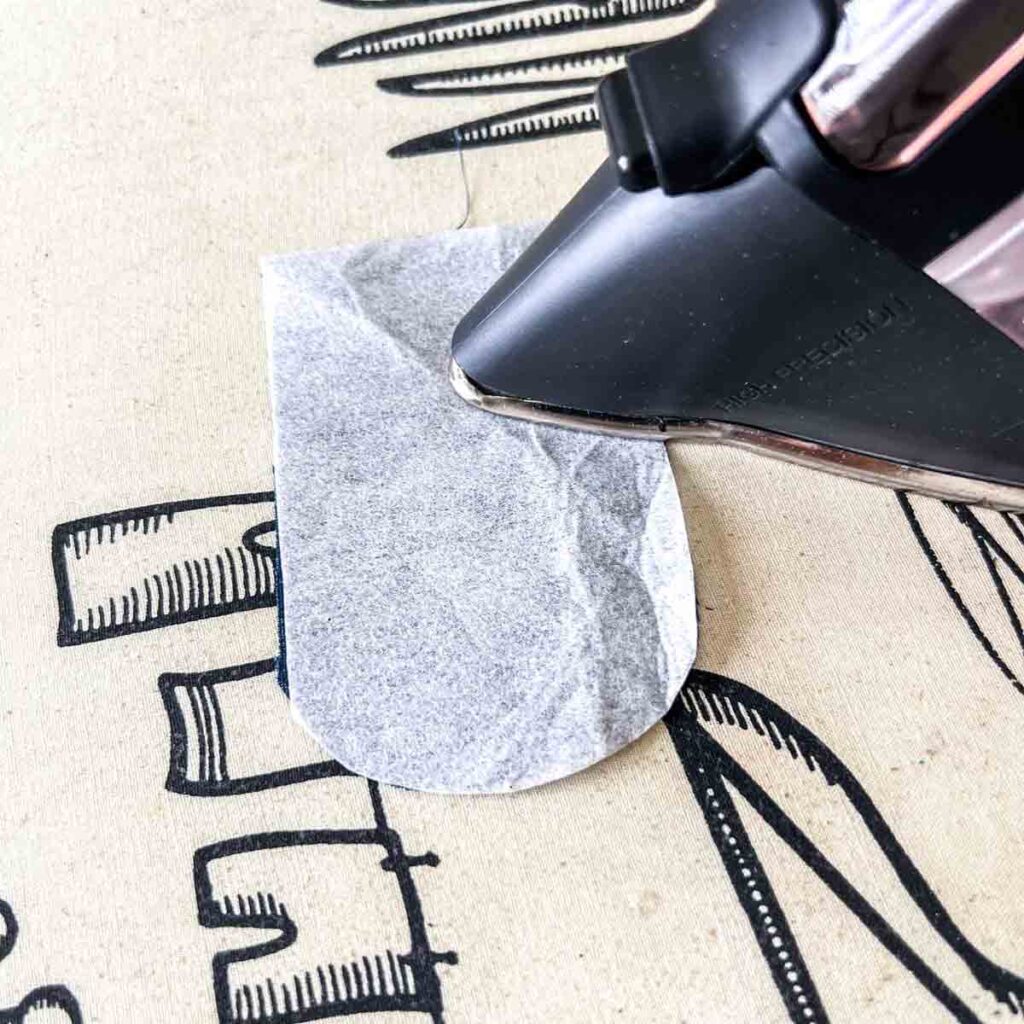
Second, iron it on following manufacture’s instructions.
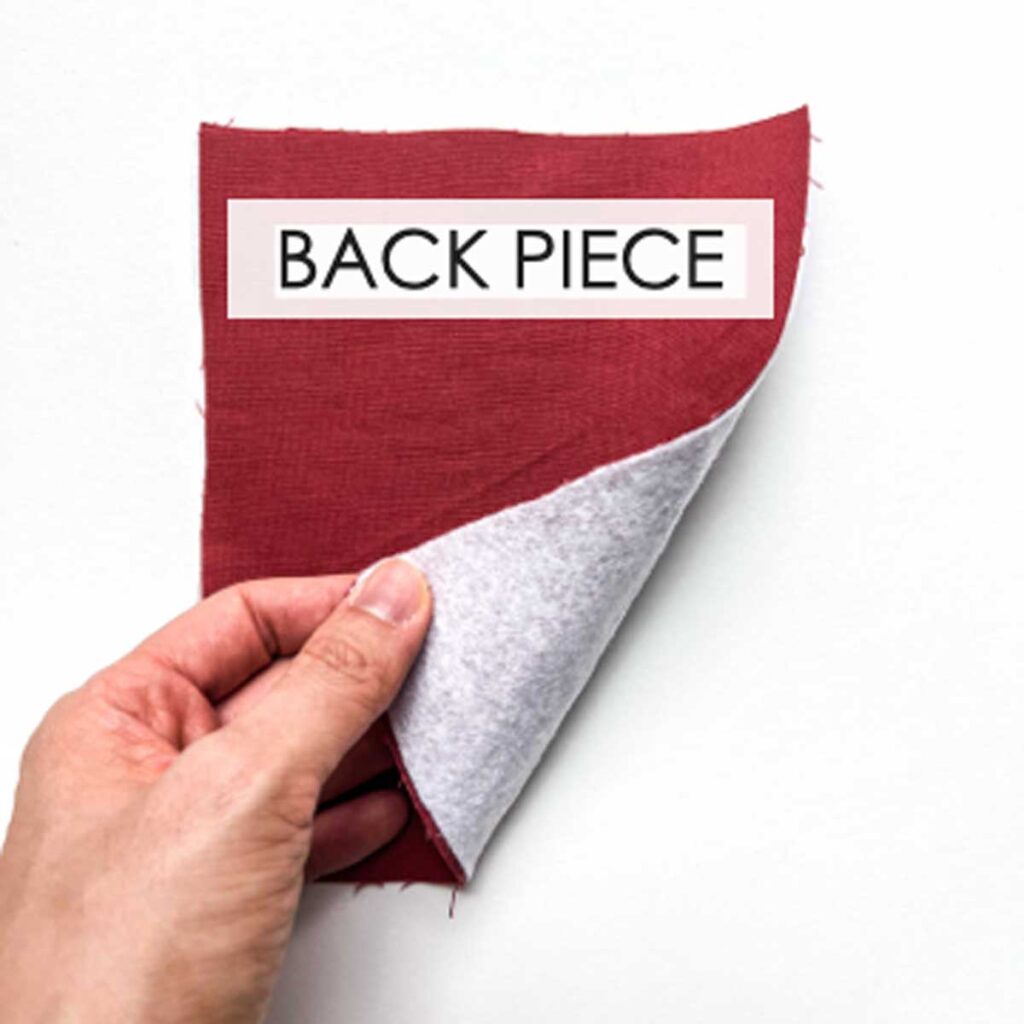
Next, iron on sticky side of fusible fleece to wrong side of BACK PIECE. Repeat for second BACK PIECE.
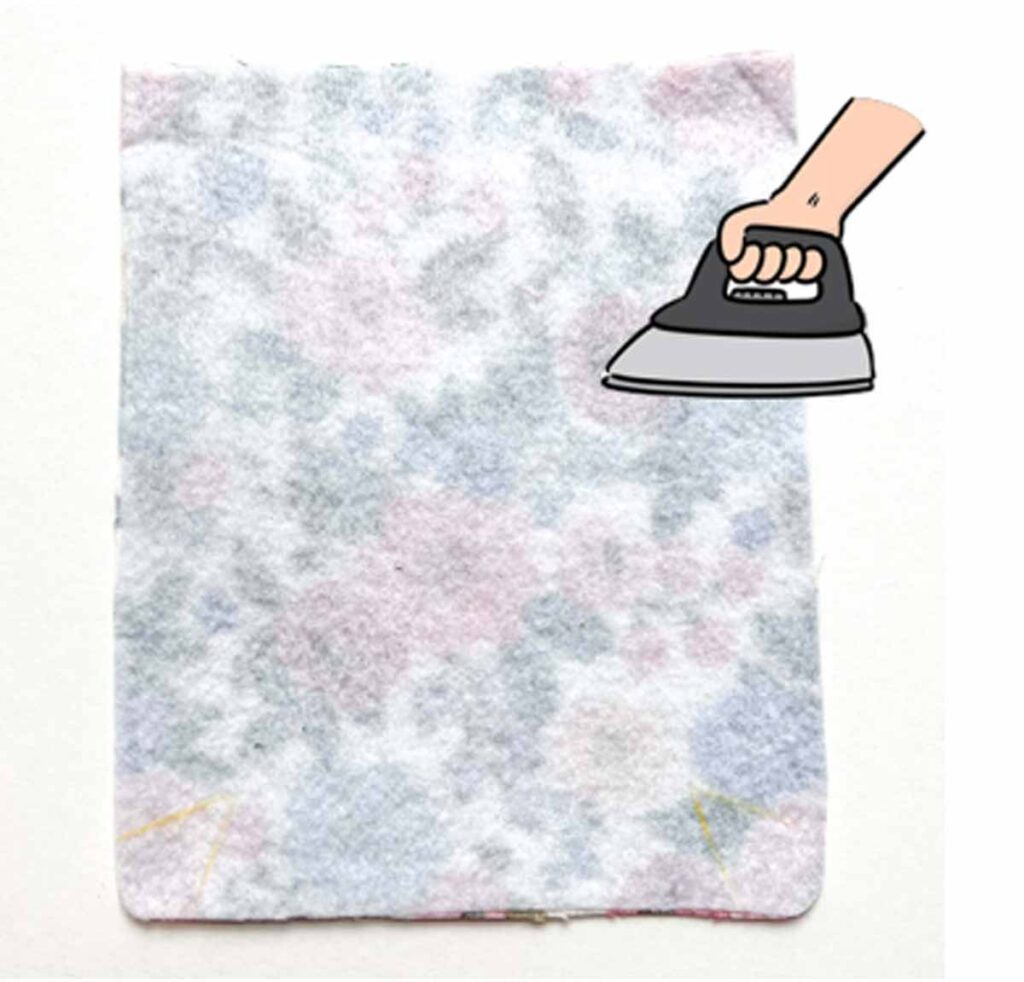
Now repeat ironing fusible interfacing to wrong side of FRONT POCKET PIECE – EXTERIOR.
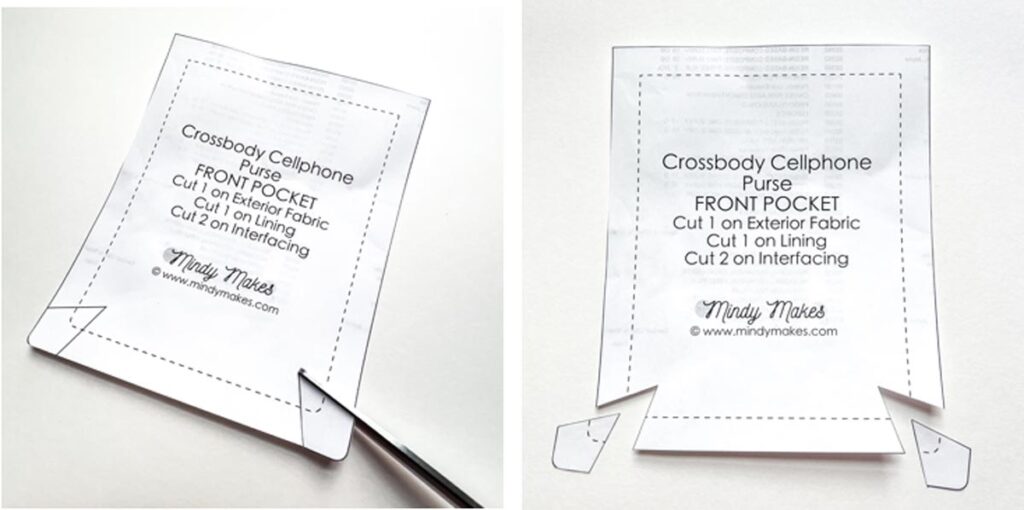
Next, cut out darts on both sides of FRONT POCKET paper pattern.
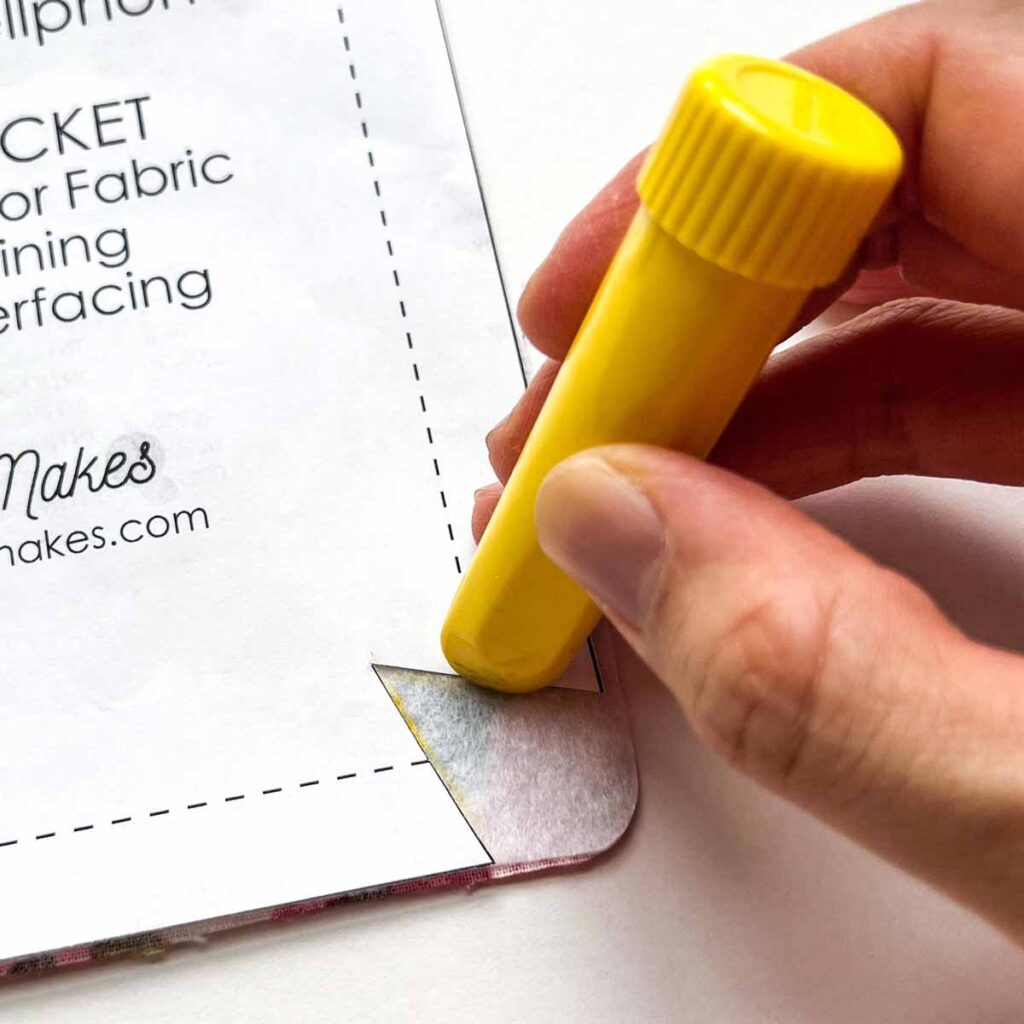
Then use fabric chalk and trace dart onto wrong side of fabric.
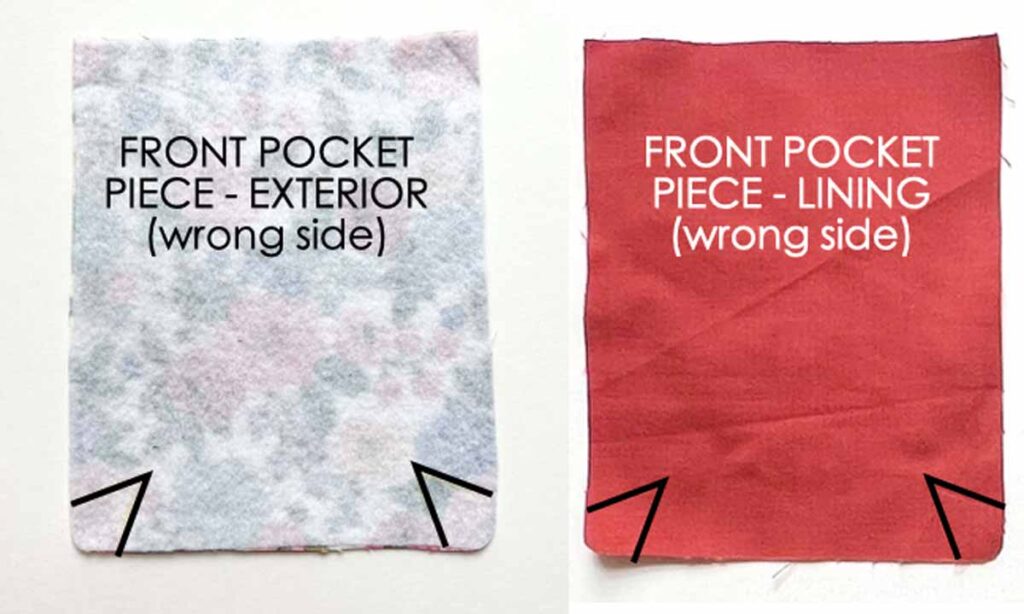
Next, repeat tracing dart on other side as well as on FRONT POCKET PIECE – LINING.
Step 2: Sewing Flap Piece
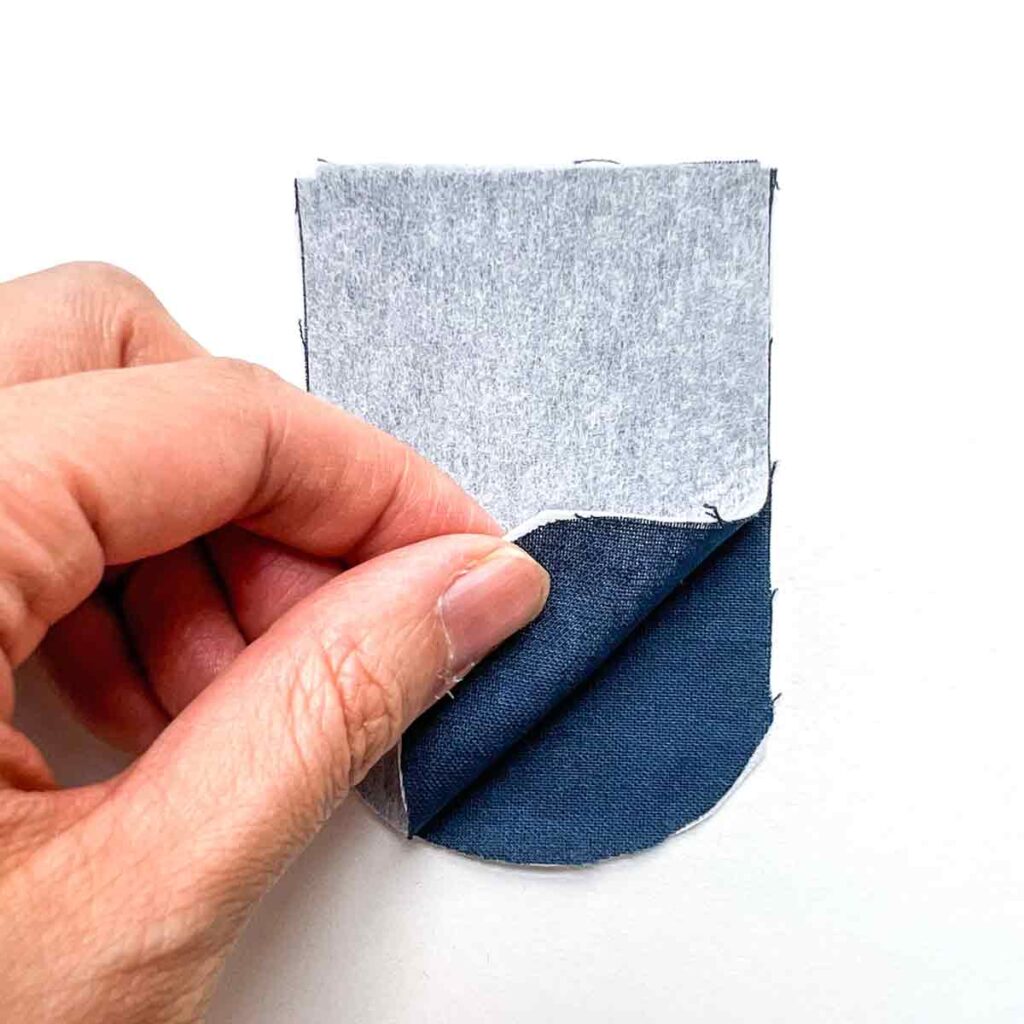
First, place the two FLAP PIECE right sides together.
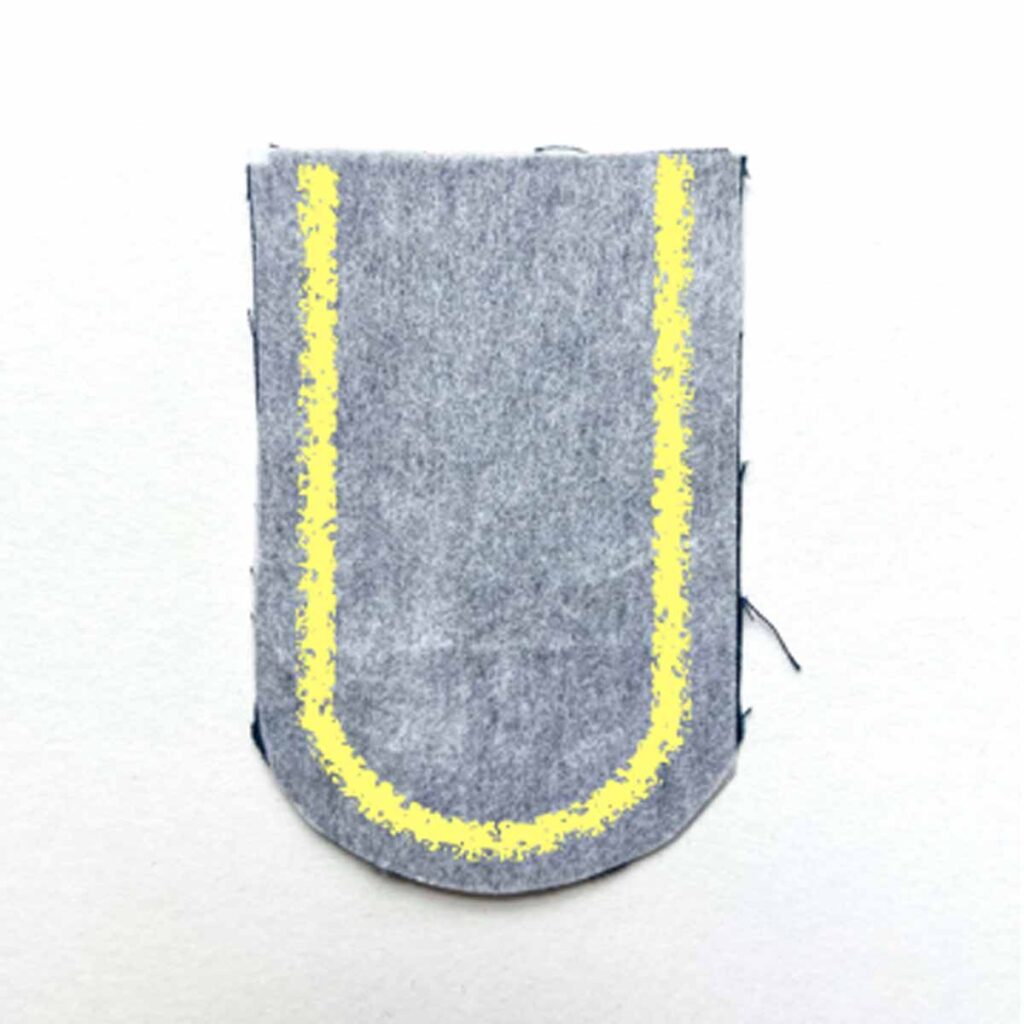
Next, sew together at 1/2” (1.27cm) seam allowance (yellow line), leaving an opening on the top.
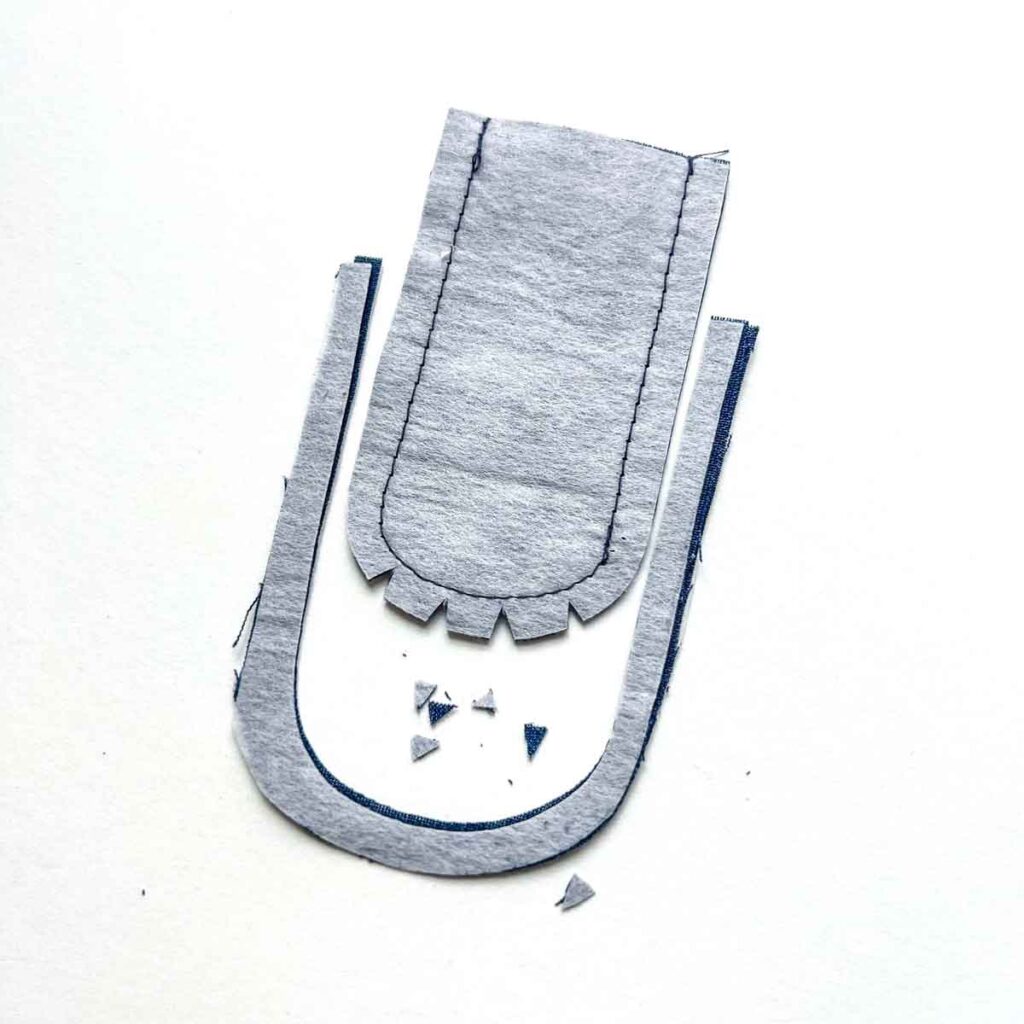
Now trim seam allowance to 1/4” (6mm) and clip curves.
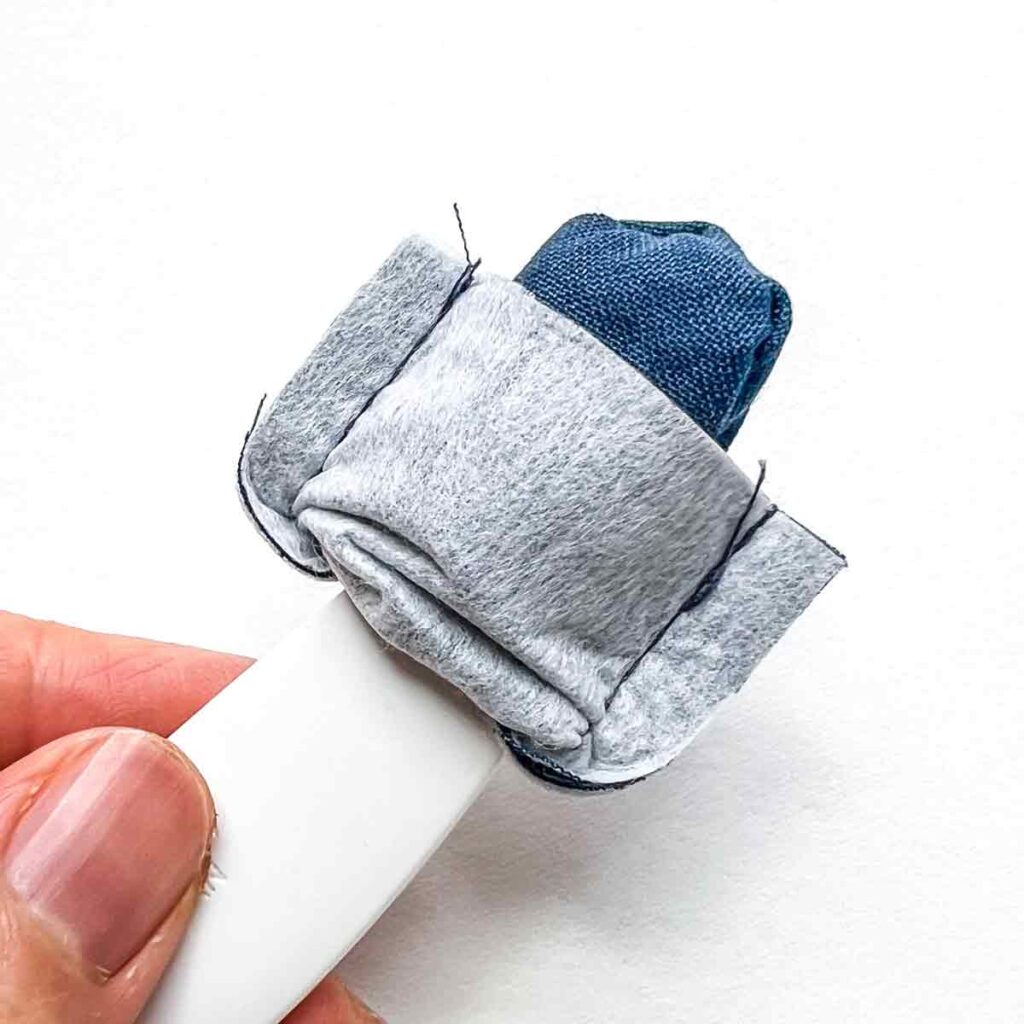
Then turn FLAP PIECE to right side. Use point turner to poke out the tip.
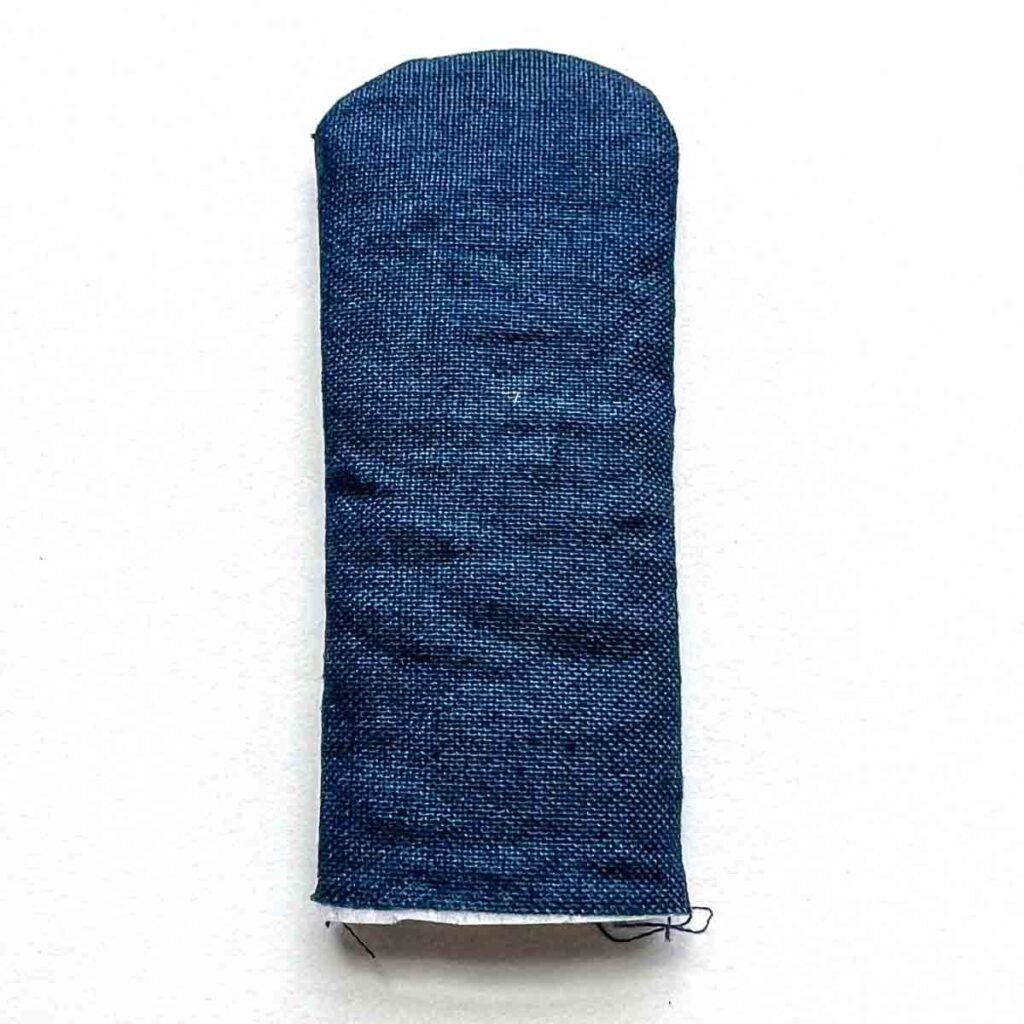
FLAP PIECE is now complete.
Step 3: Sewing Loops Piece
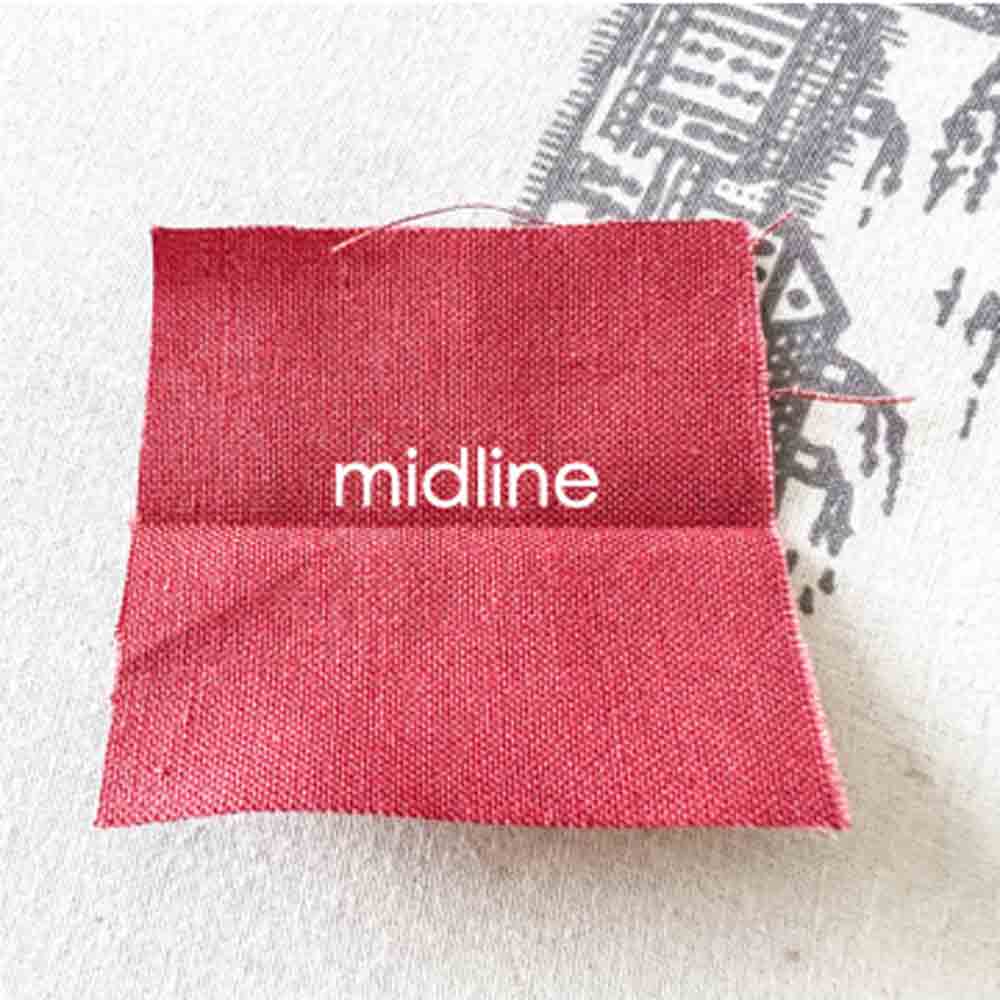
First, fold LOOP PIECE in half and fingernail press the fold to create midline.
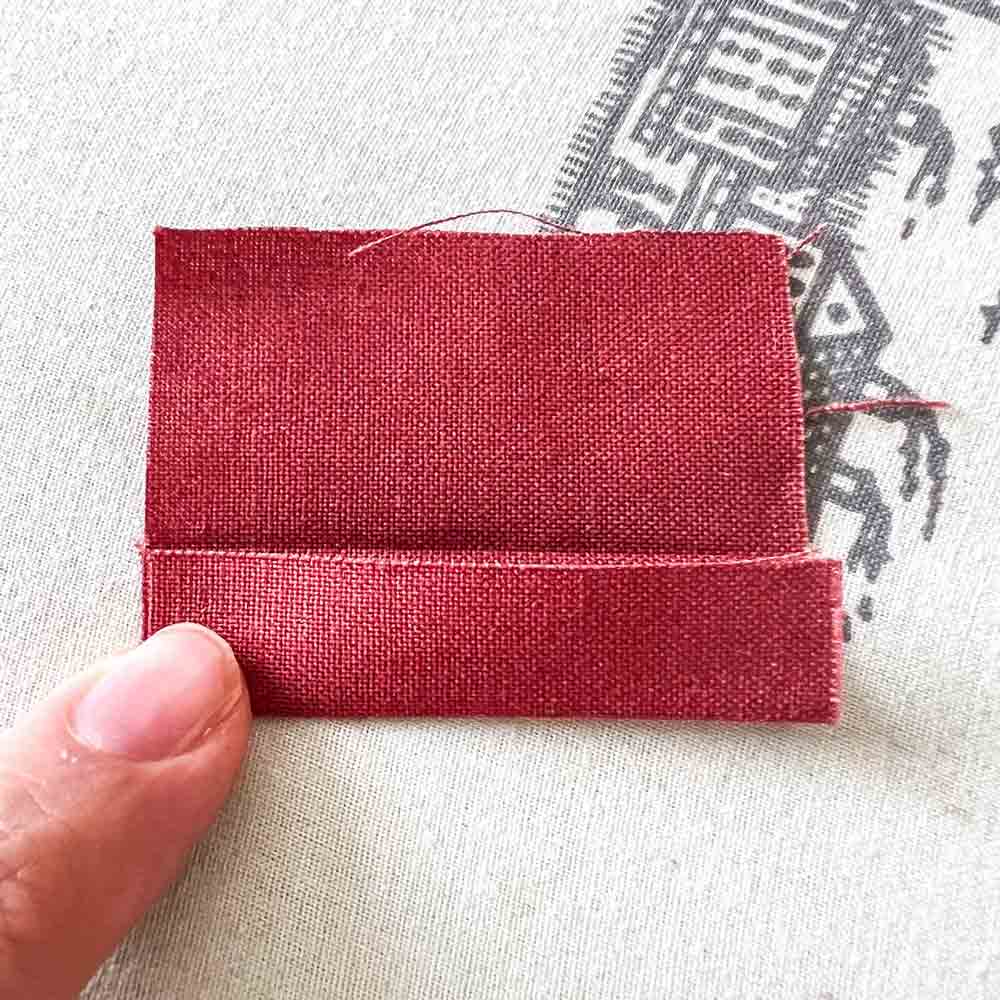
Second, fold bottom edge to meet midline.
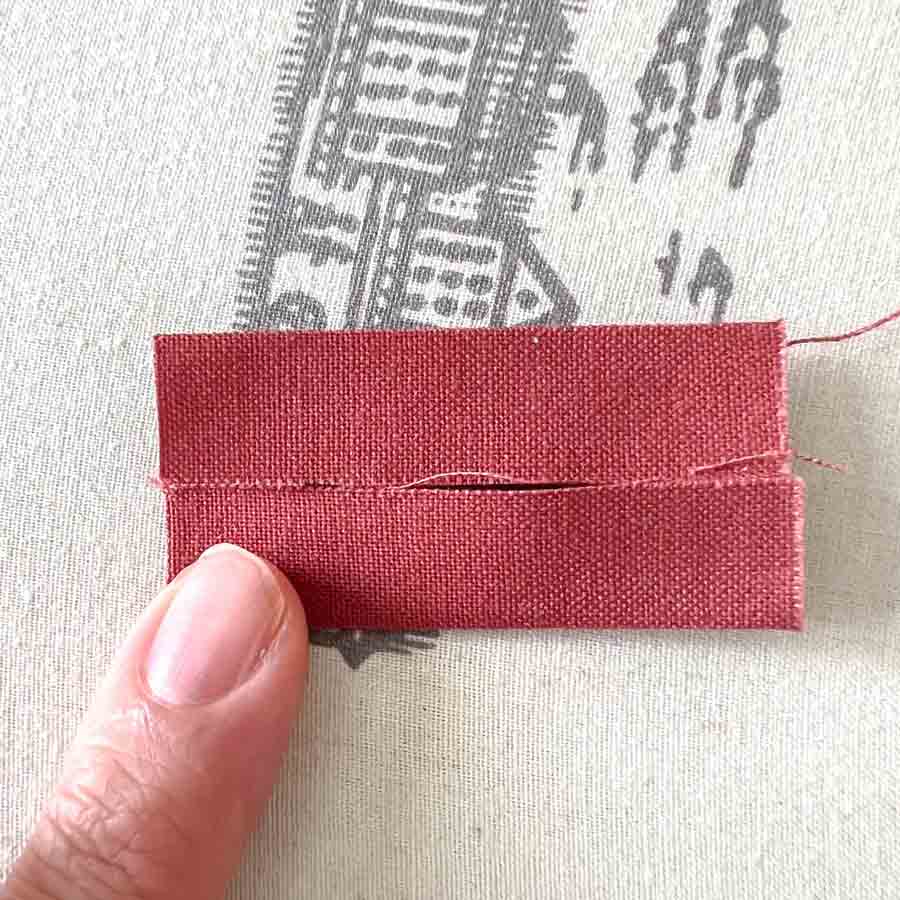
Third, fold top edge to midline.
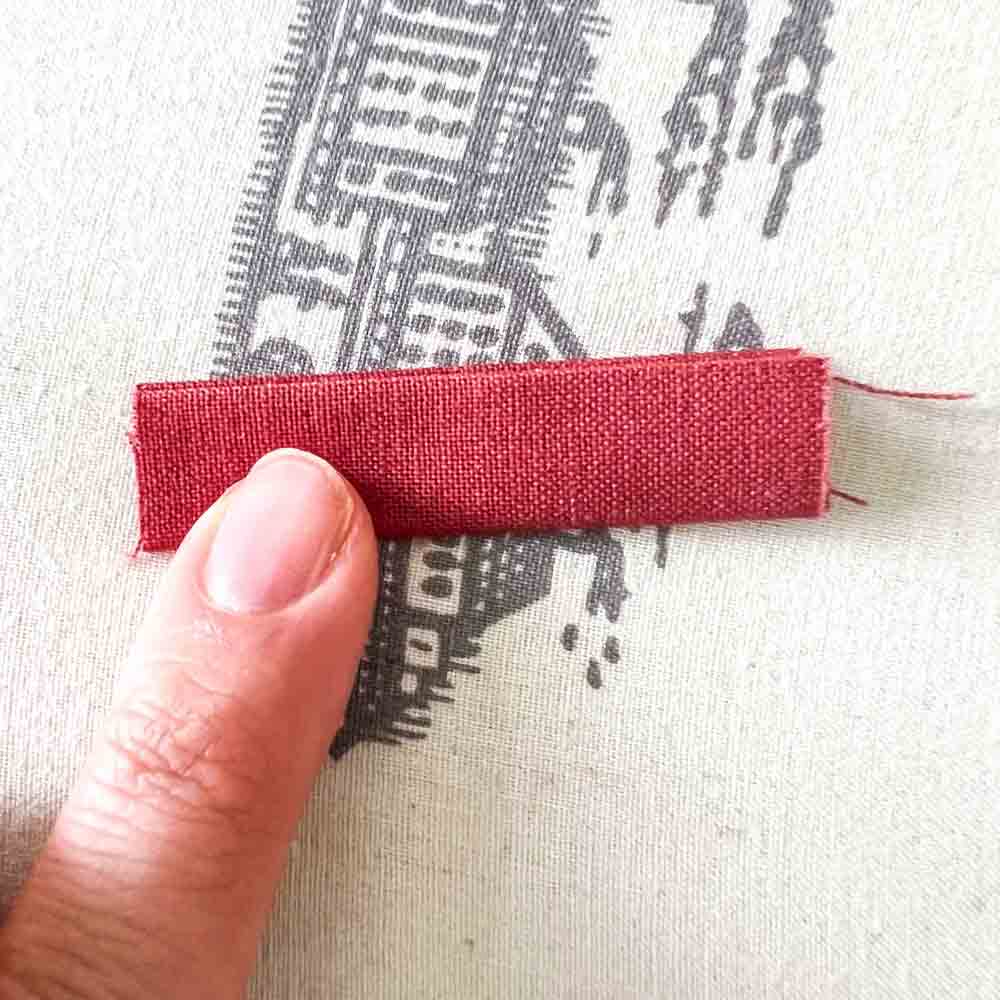
Next, fold entire LOOP PIECE in half so bottom edge matches top edge.
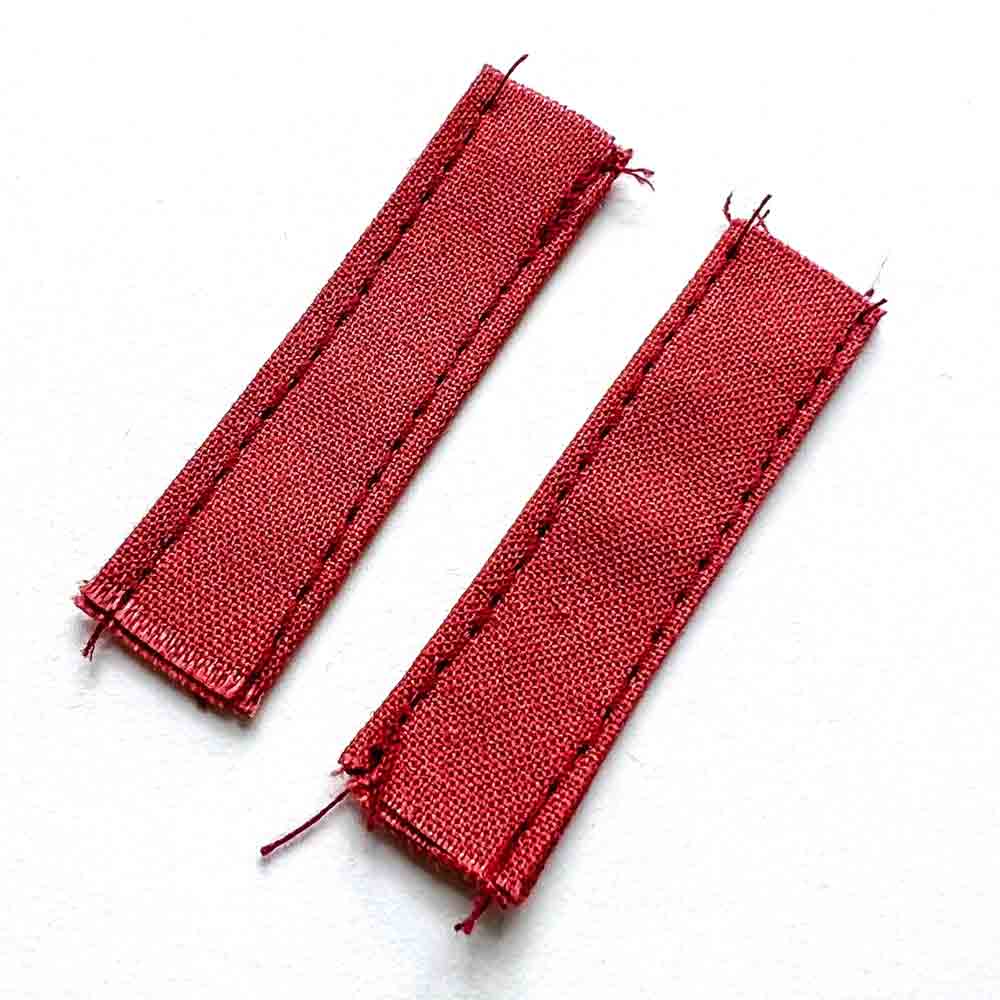
Finally, stitch LOOP PIECE down, 1/8” (3mm) from both edges. Repeat for second LOOP PIECE.
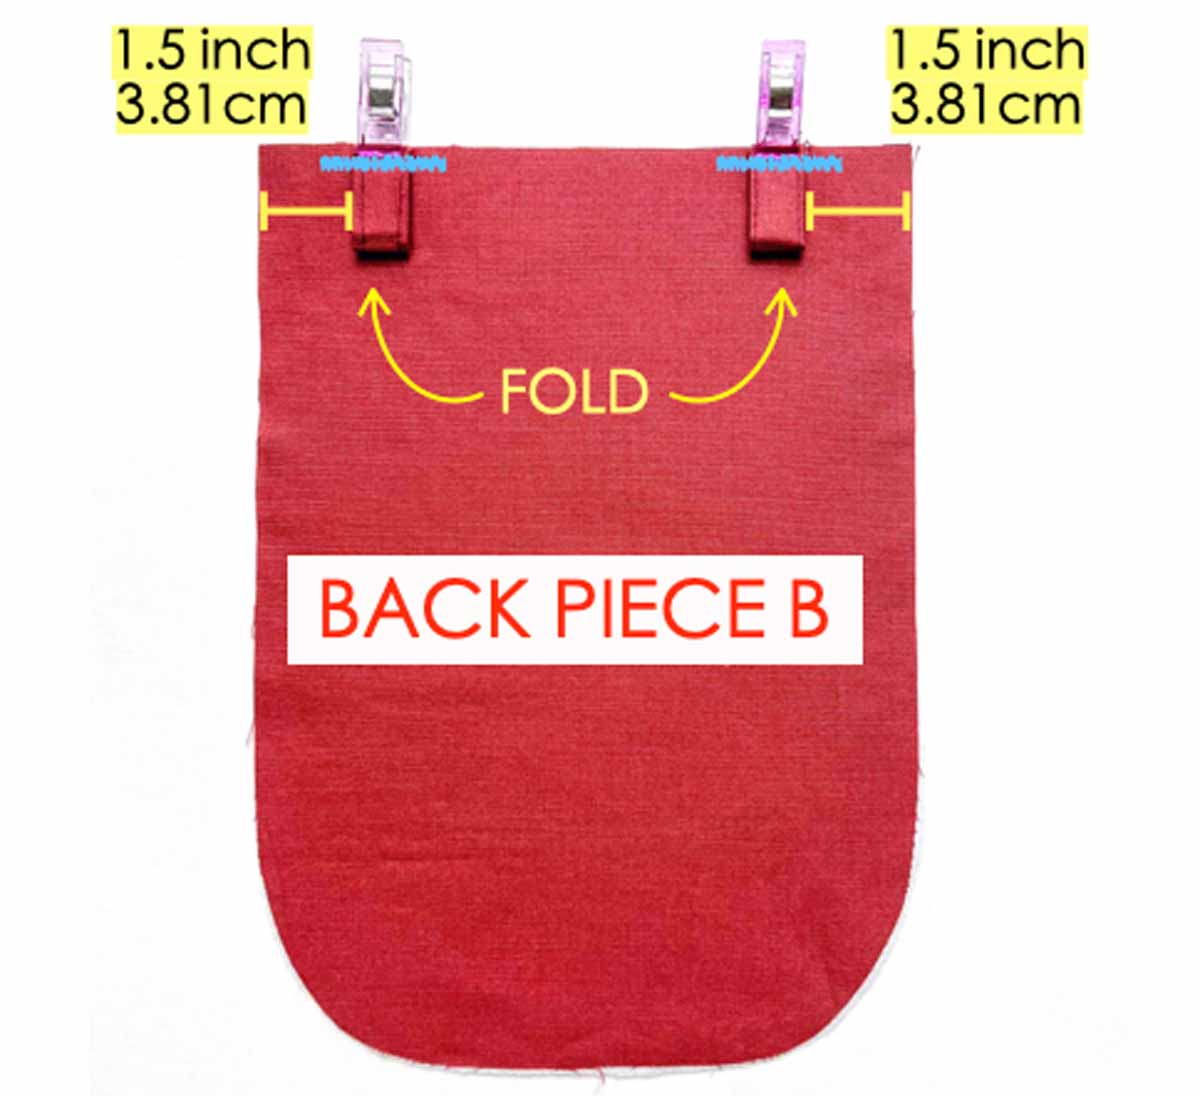
Now fold LOOP PIECE in half lengthwise and pin/clip to one of the BACK PIECE (doesn’t matter which piece), 1.5”(3.81cm) away from left and right edge, as pictured. Baste LOOP PIECES in place (blue lines).
This piece will become the back of the cross body cellphone bag and we will now be called BACK PIECE B.
Step 4: Sewing Pocket Piece
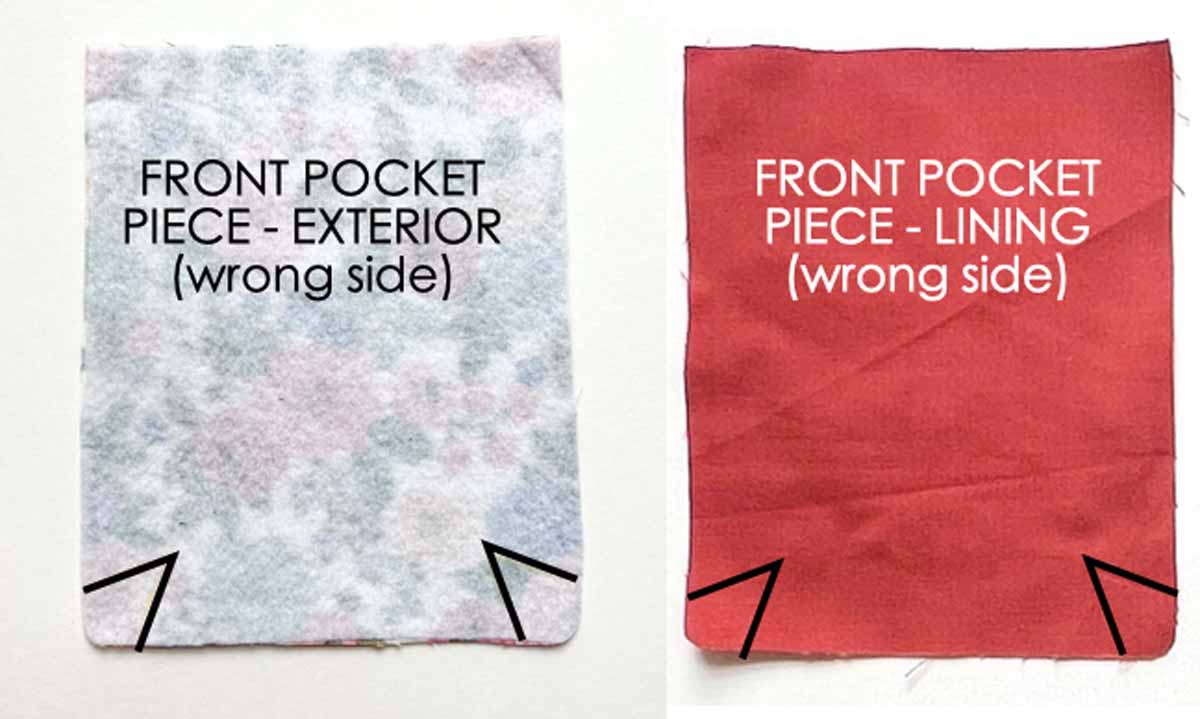
First, make sure that FRONT POCKET PIECE – EXTERIOR and FRONT POCKET PIECE – LINING both have darts marked (black triangles).
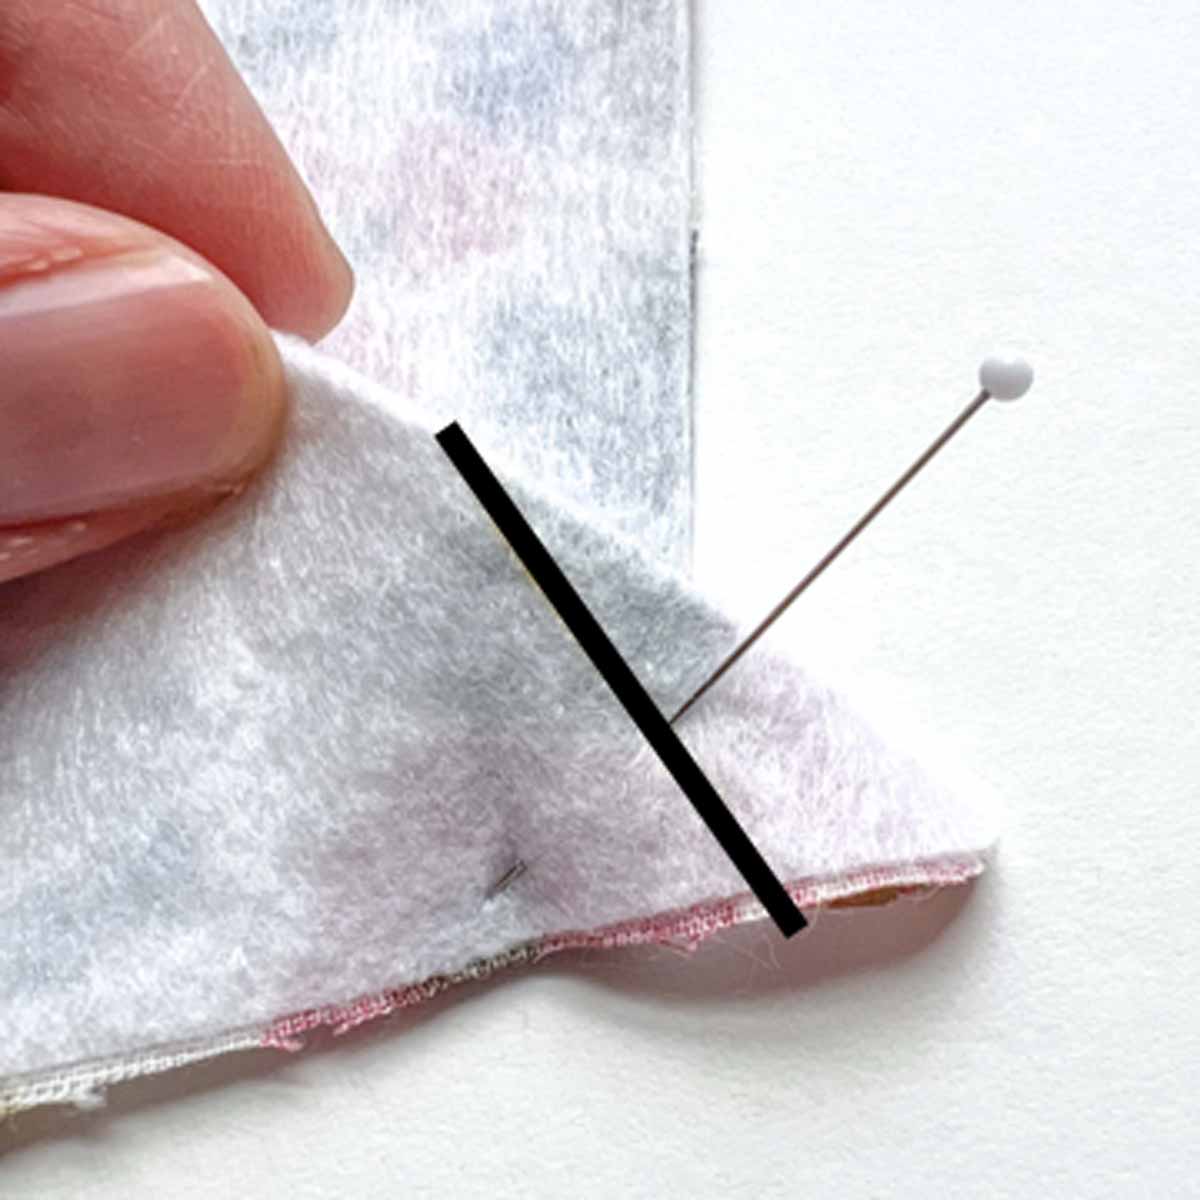
Next, fold darts together so the lines match and pin together on wrong side of fabric.
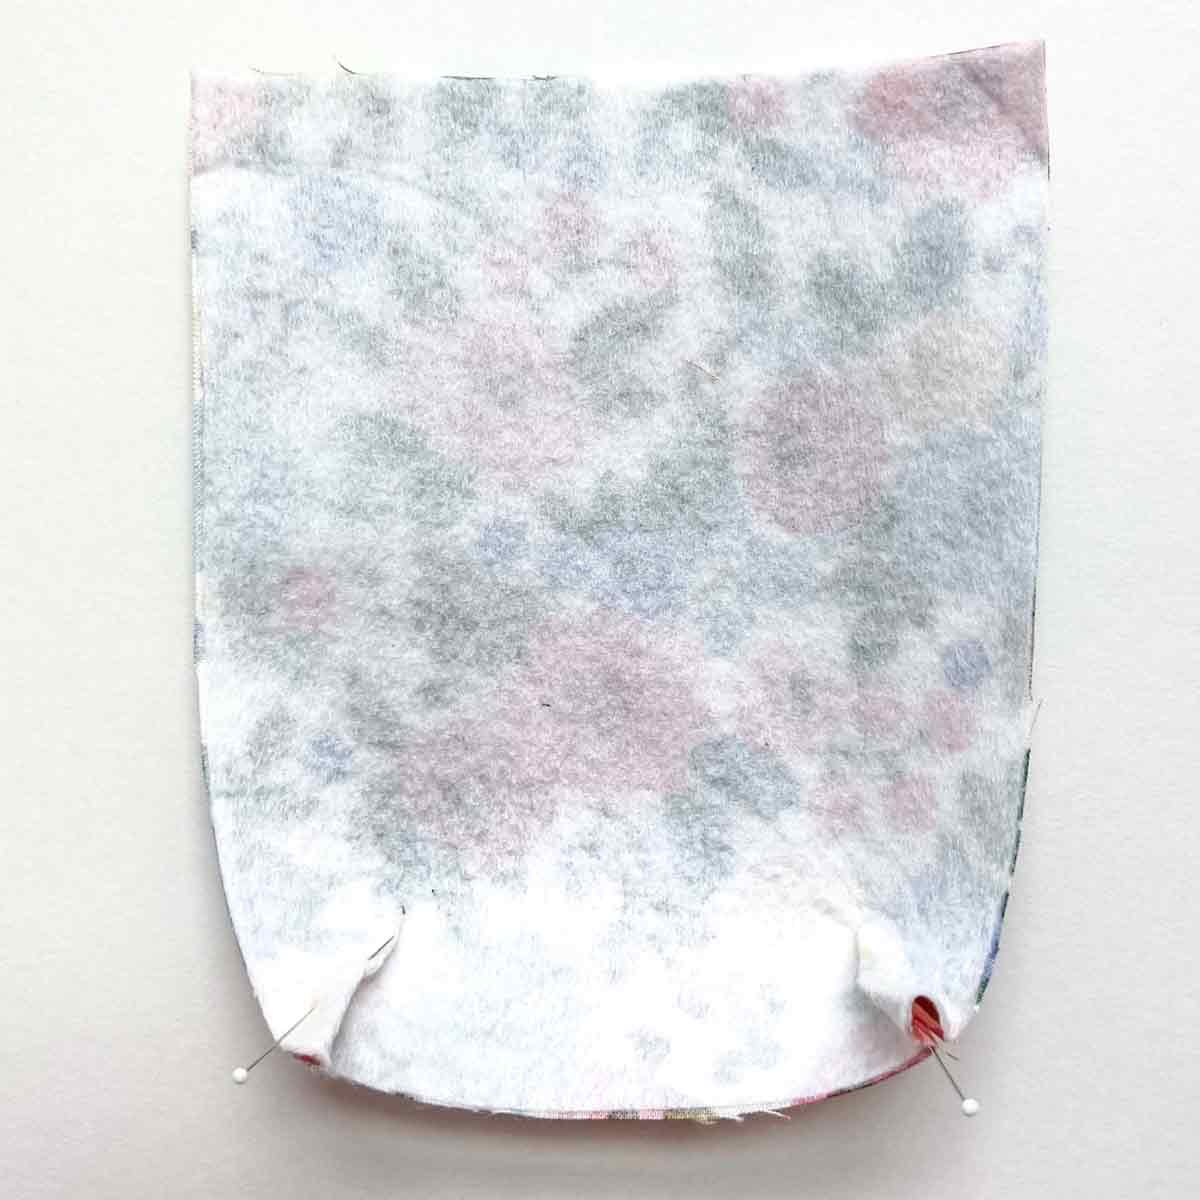
Now repeat for other dart.
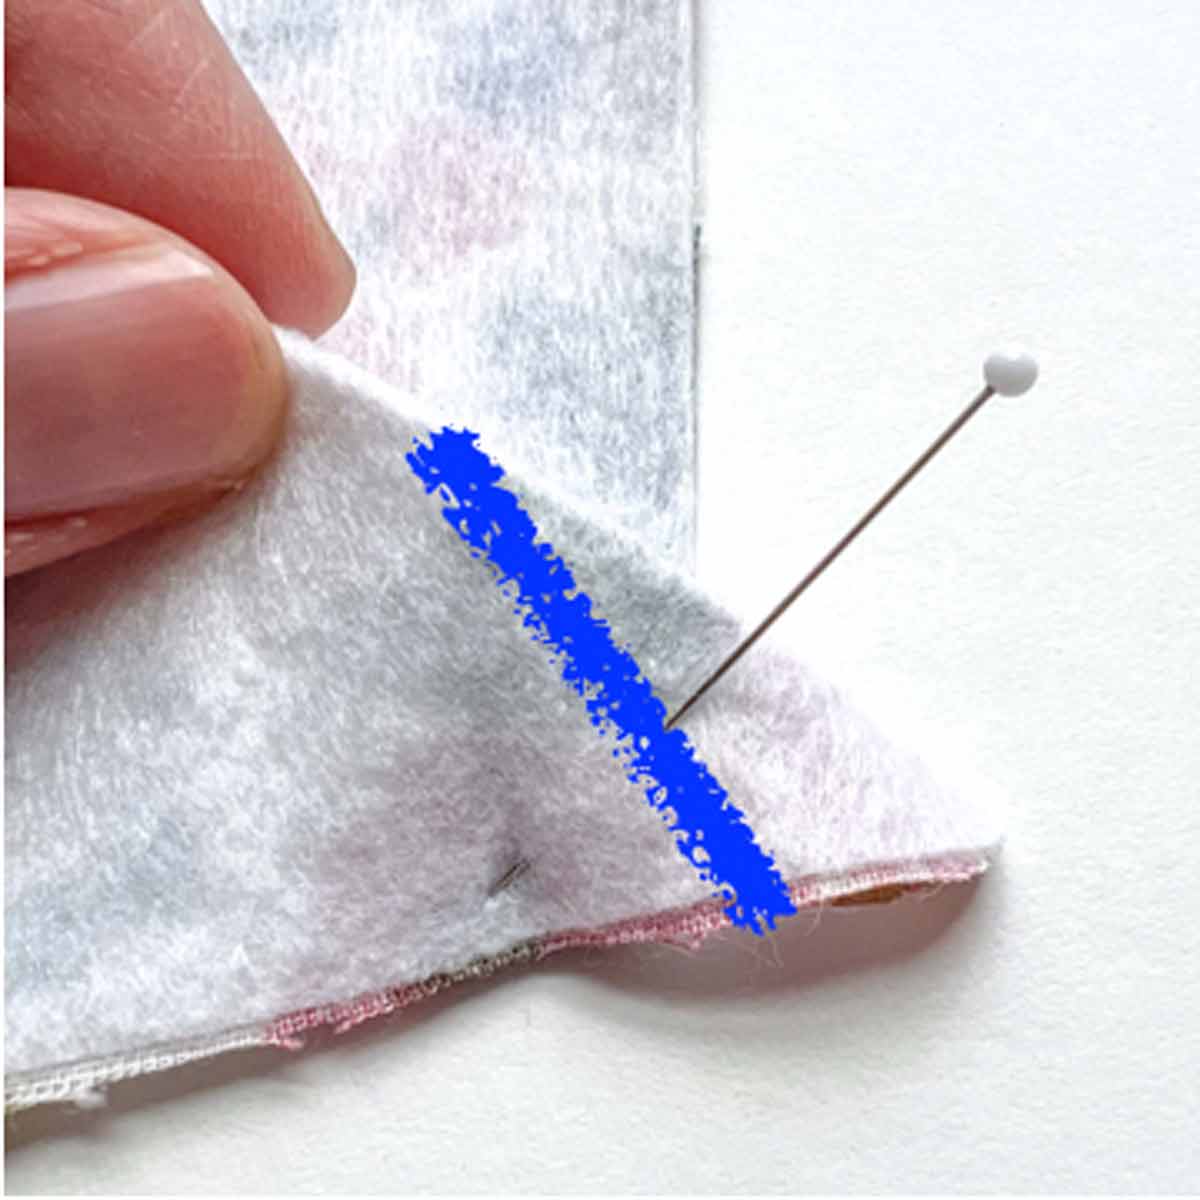
Then sew darts together (blue line).
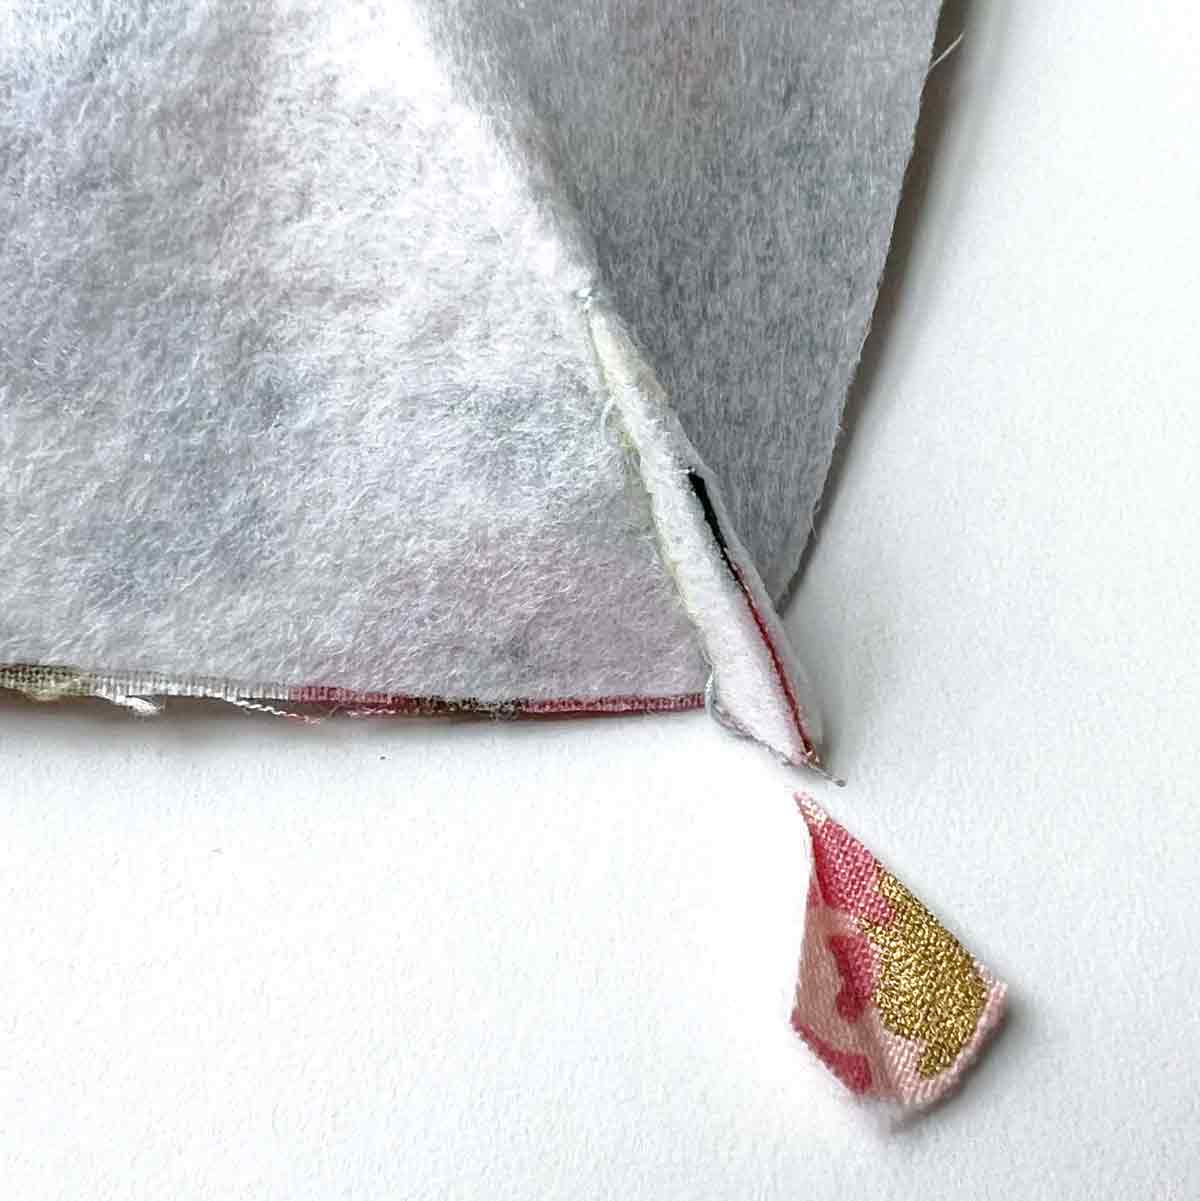
Now trim off excess darts, as pictured.
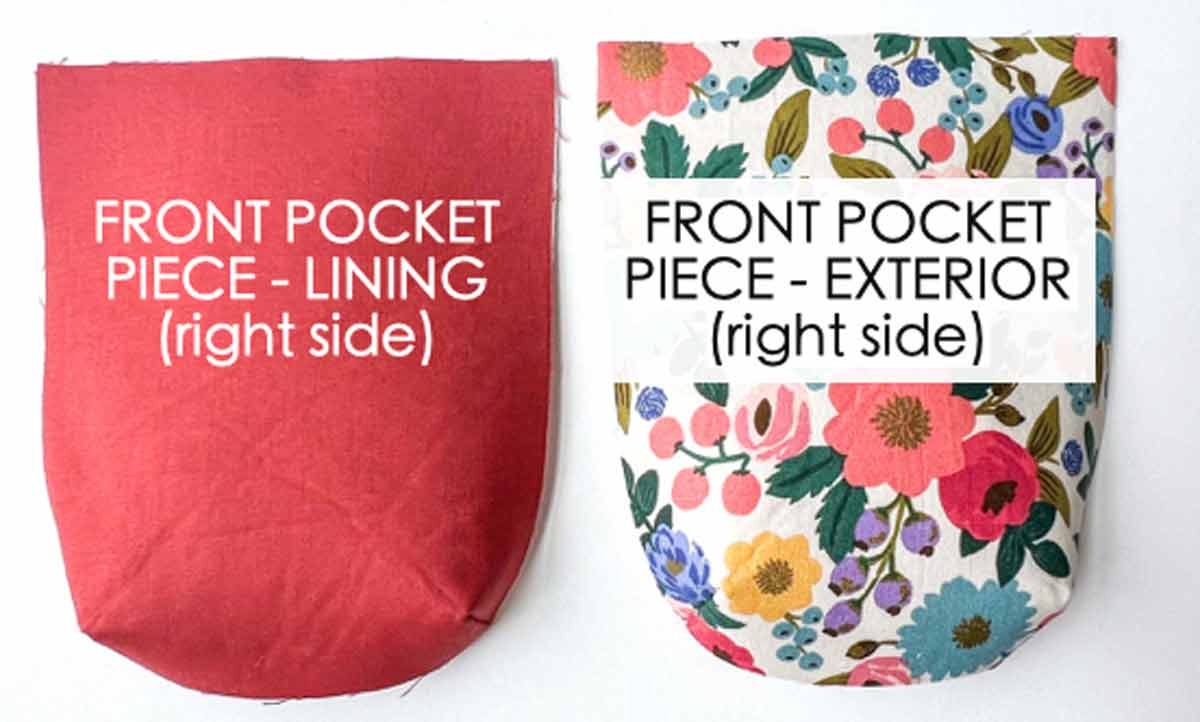
Finally, repeat on FRONT POCKET PIECE – LINING. You will now have two FRONT POCKET PIECES that look like the photo.
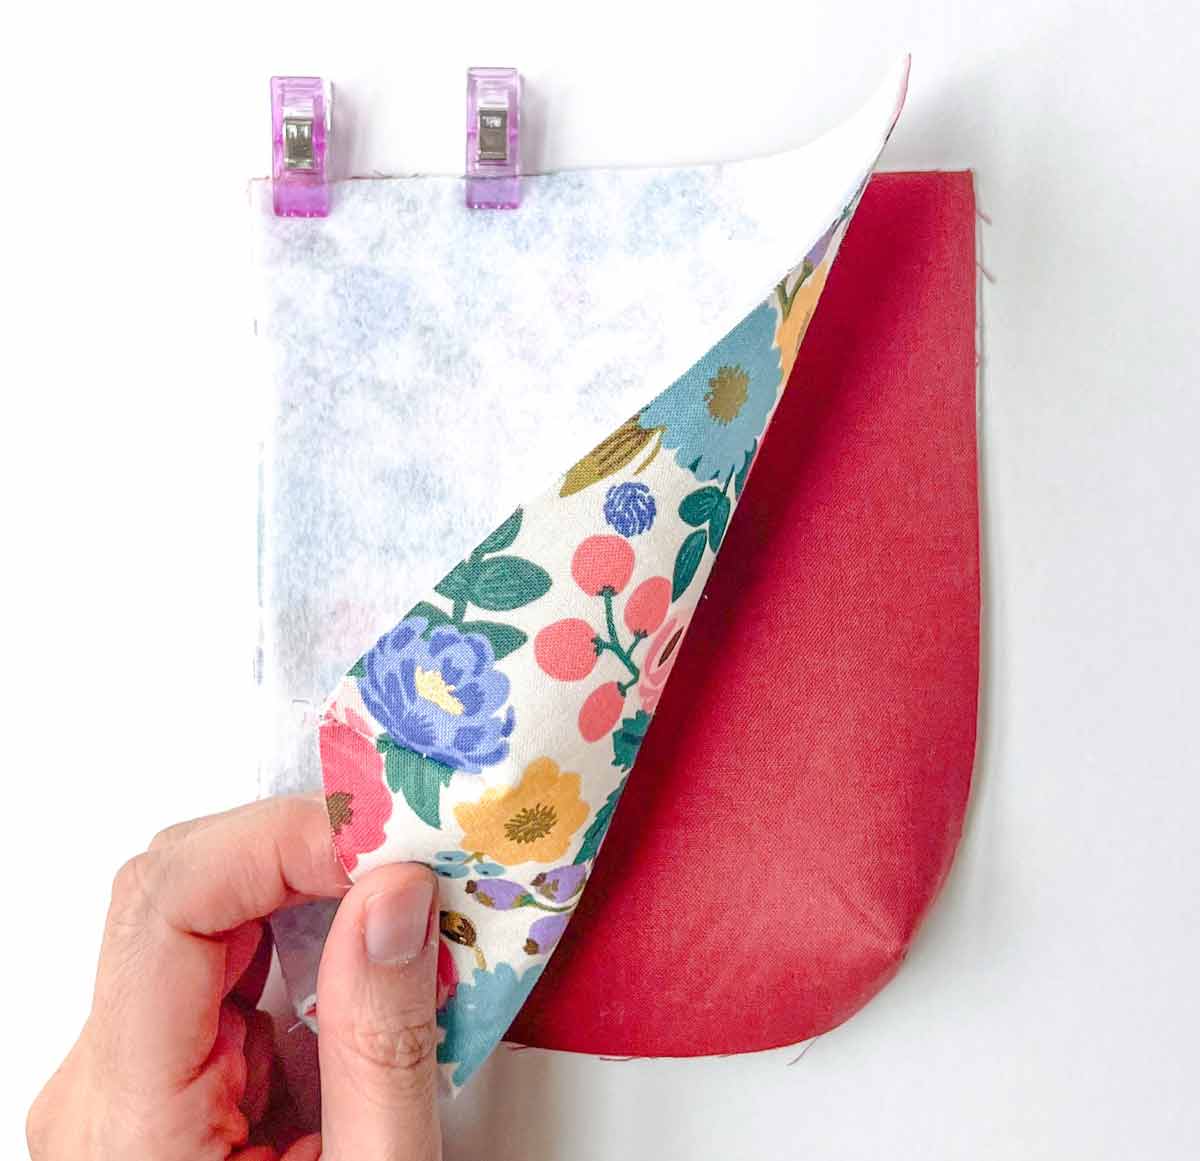
Now place FRONT POCKET PIECES right sides together.
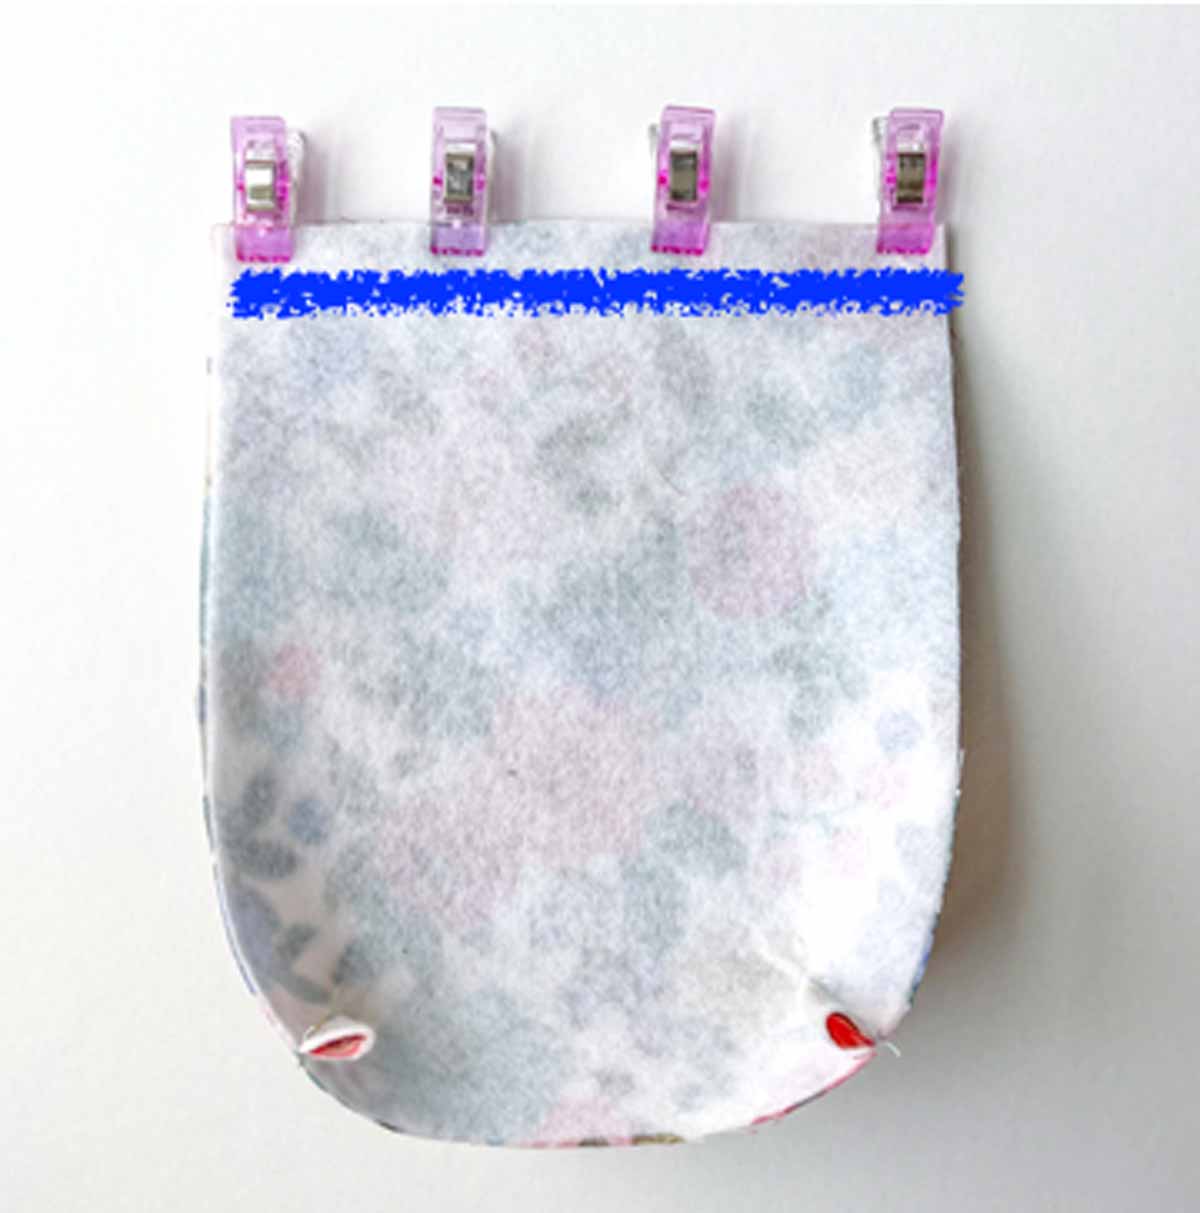
Next, pin/clip together along the top and sew together at 1/2” (1.27cm) seam allowance (blue line). Don’t forget to back stitch at both ends.
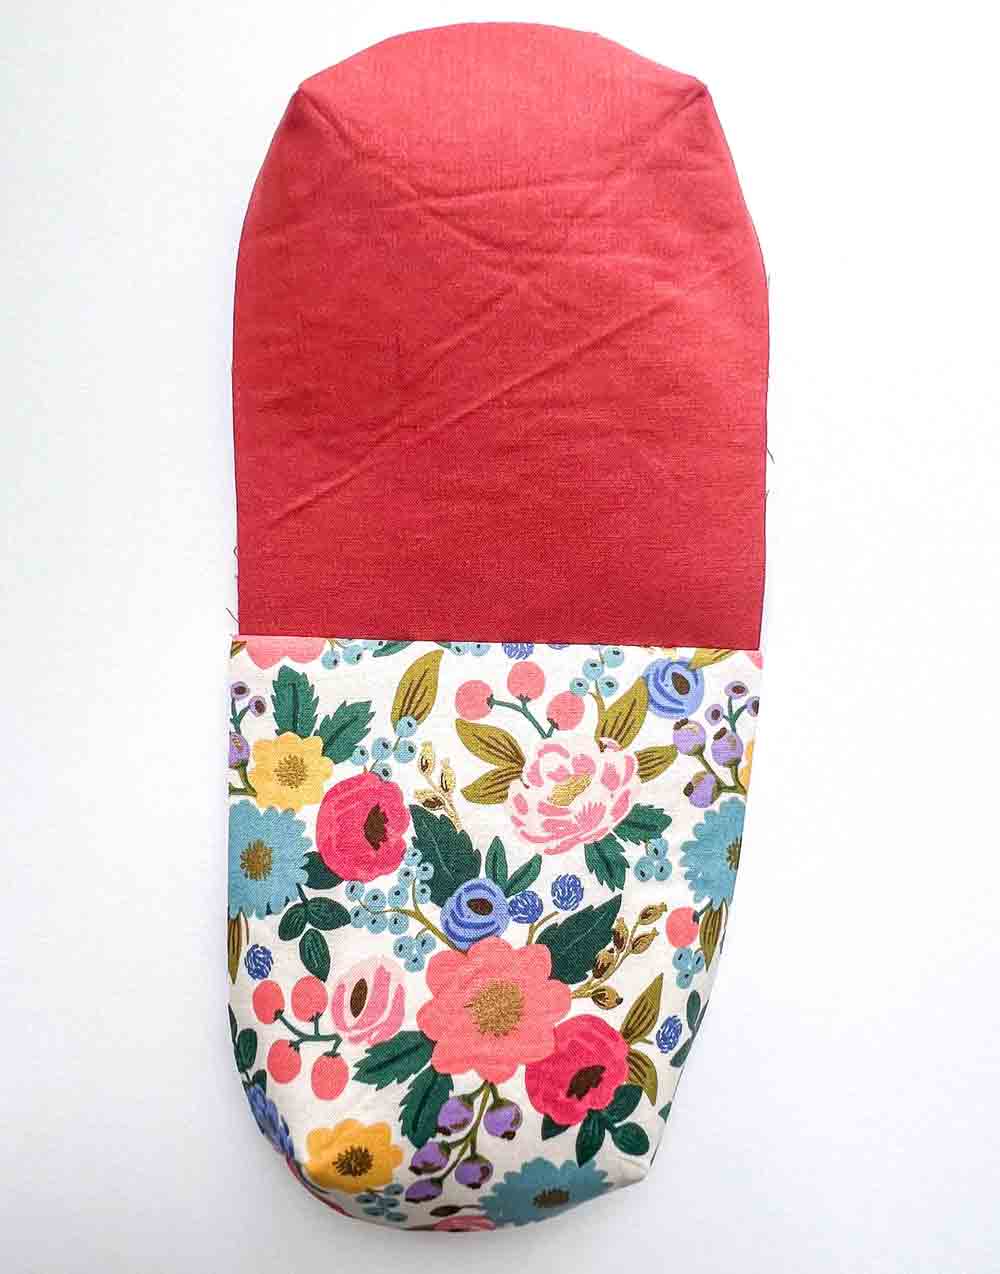
Now your FRONT POCKET PIECE will look something like this photo.
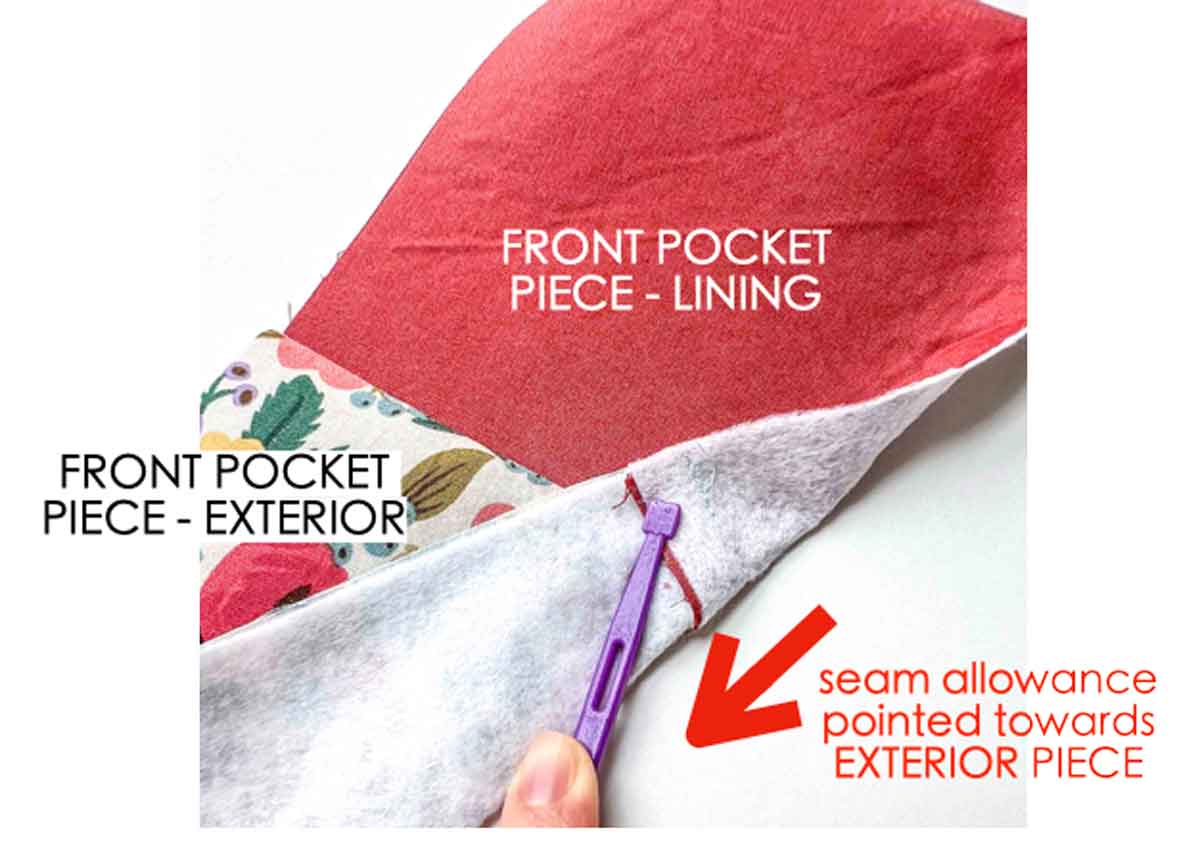
Next, we are going to edge stitch seam allowance down towards FRONT POCKET PIECE – EXTERIOR. See how in the photo the seam allowance is leaning towards EXTERIOR PIECE, away from LINING.
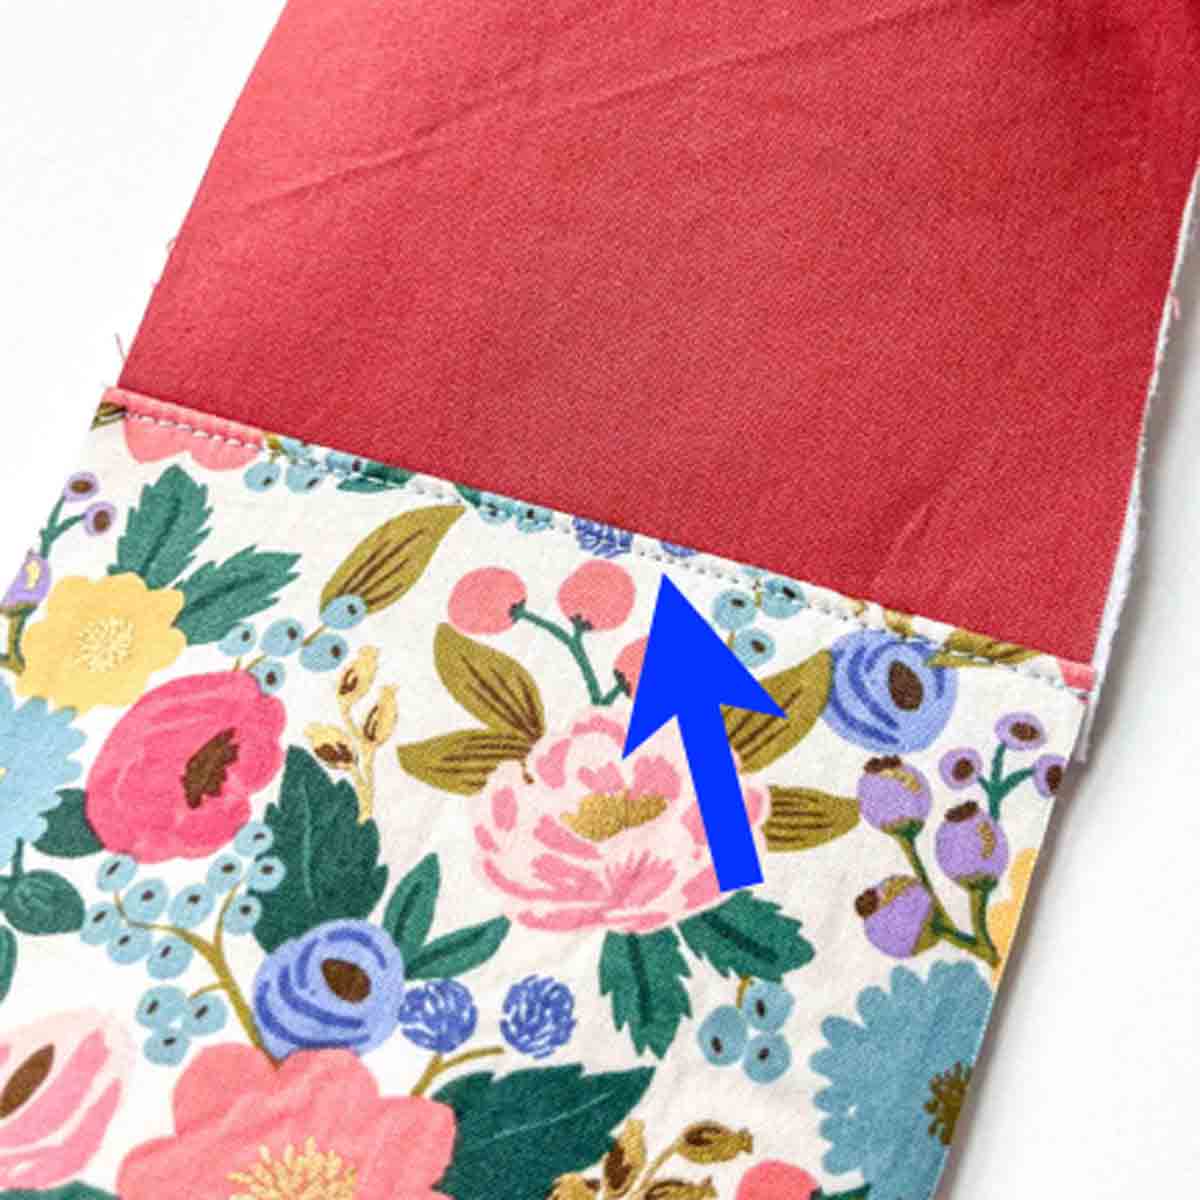
Then edge stitch seam allowance at 1/8”(3mm) away from folded edge of FRONT POCKET (blue arrow).
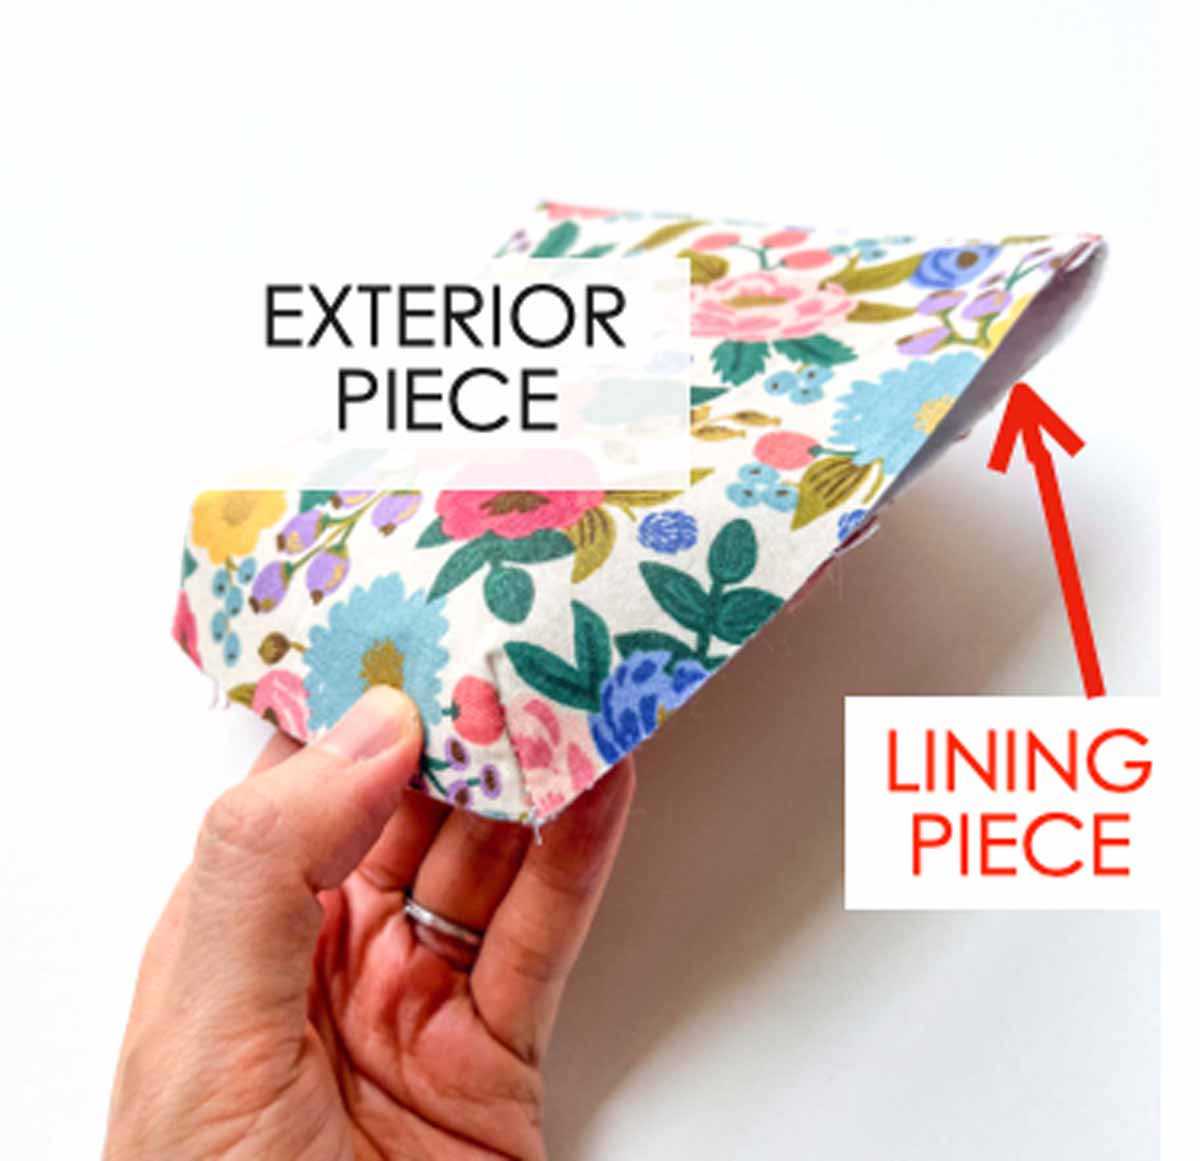
Now fold LINING PIECE so it’s behind EXTERIOR PIECE, as pictured.
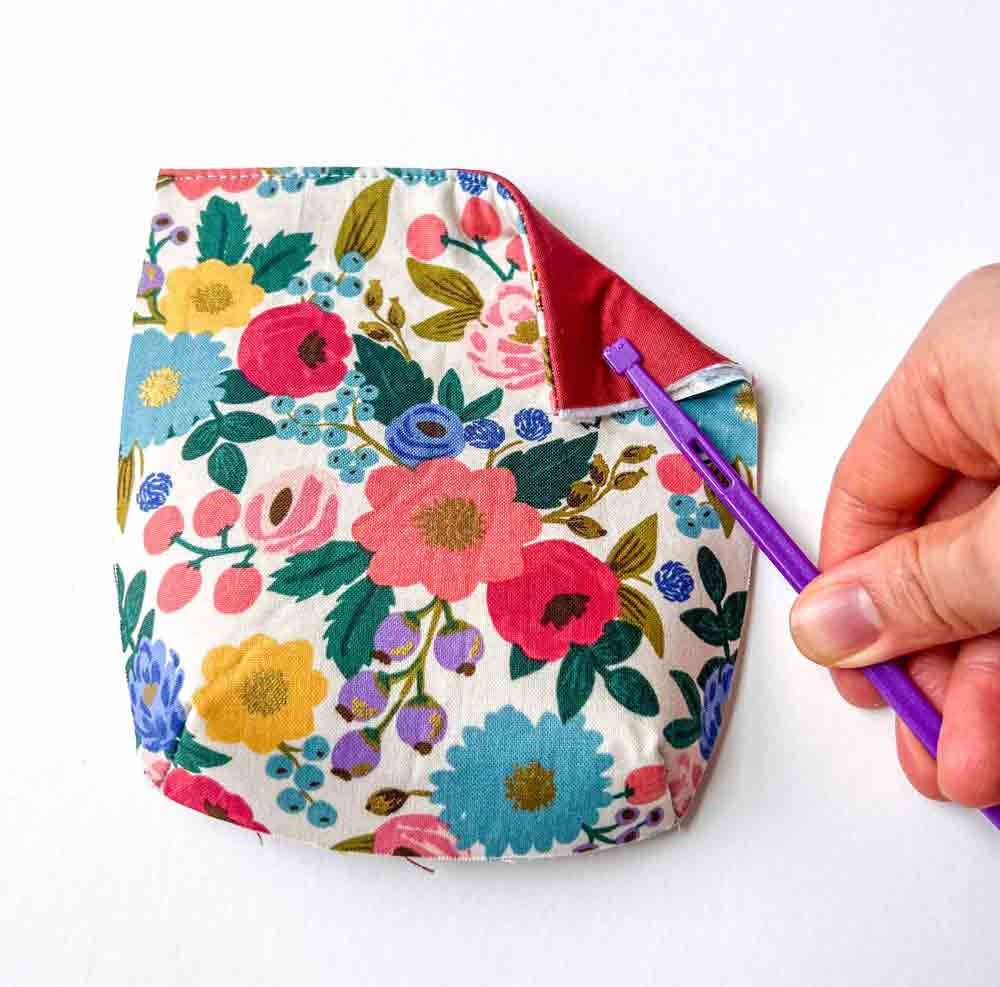
Another view of what your FRONT POCKET PIECE looks like, with lining in the back.
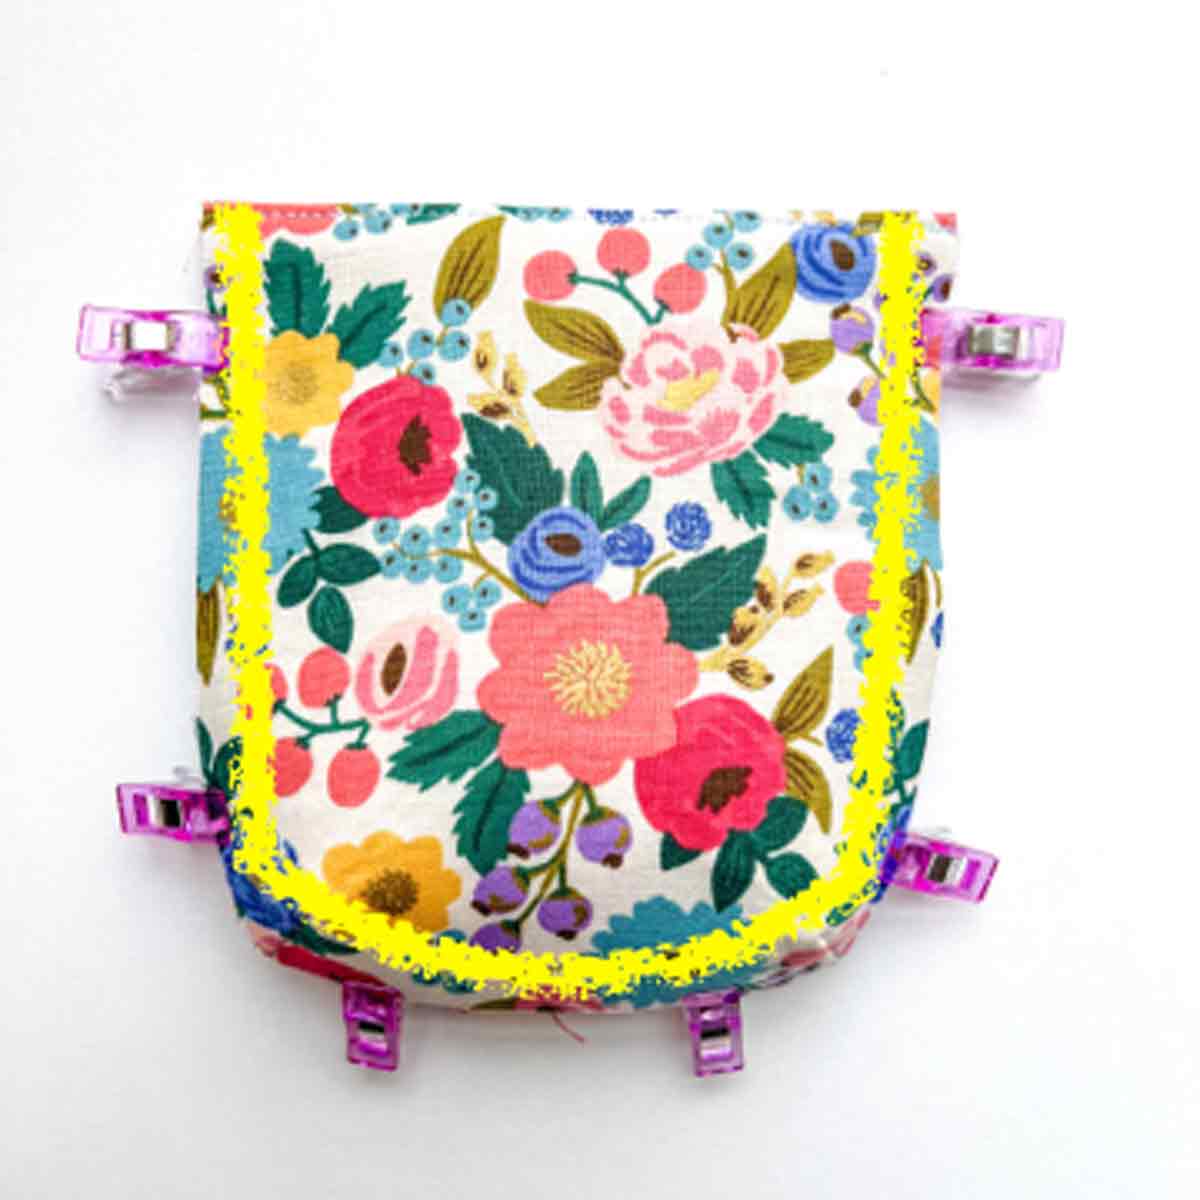
Next, pin/clip LINING PIECE to EXTERIOR PIECE, wrong sides together. Baste together (yellow line).
Step 5: Marking Midpoints
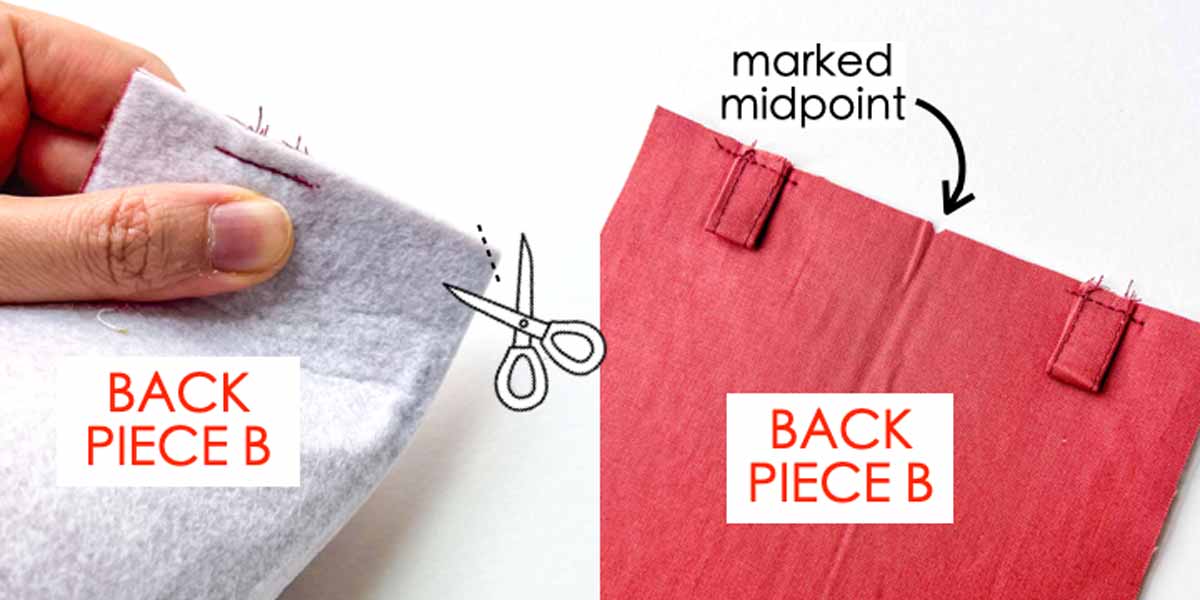
First, fold BACK PIECE B in half lengthwise and make a small diagonal snip to mark the midpoint.
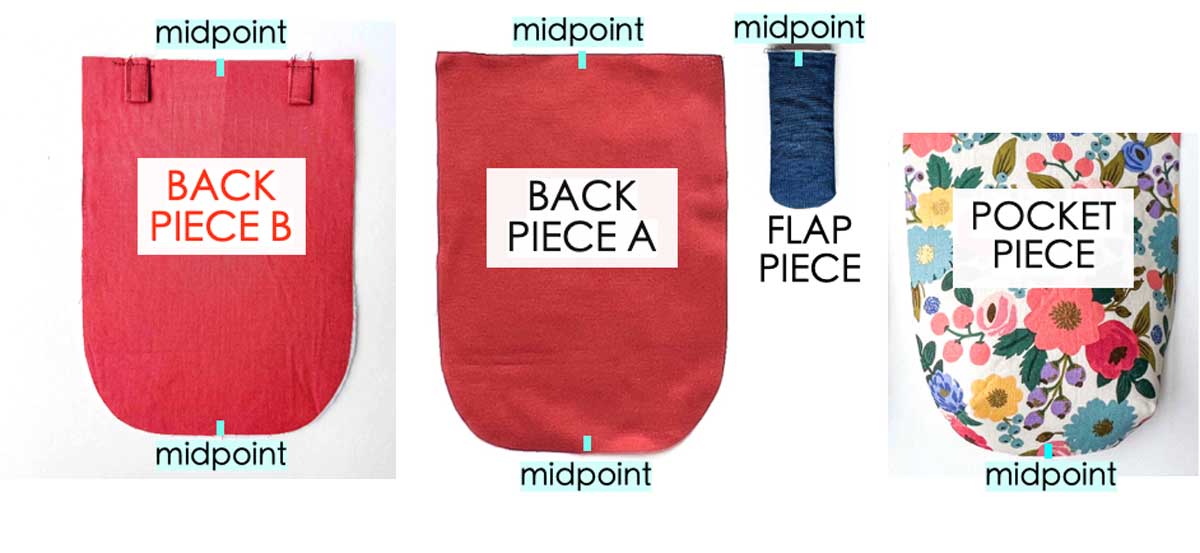
Next, repeat marking midpoint in the same way for BACK PIECE A, FLAP PIECE, and POCKET PIECE.
NOTE: You only need to mark midpoint at the bottom of POCKET PIECE.
Step 6: Basting Flap and Pocket To Crossbody Cellphone Bag
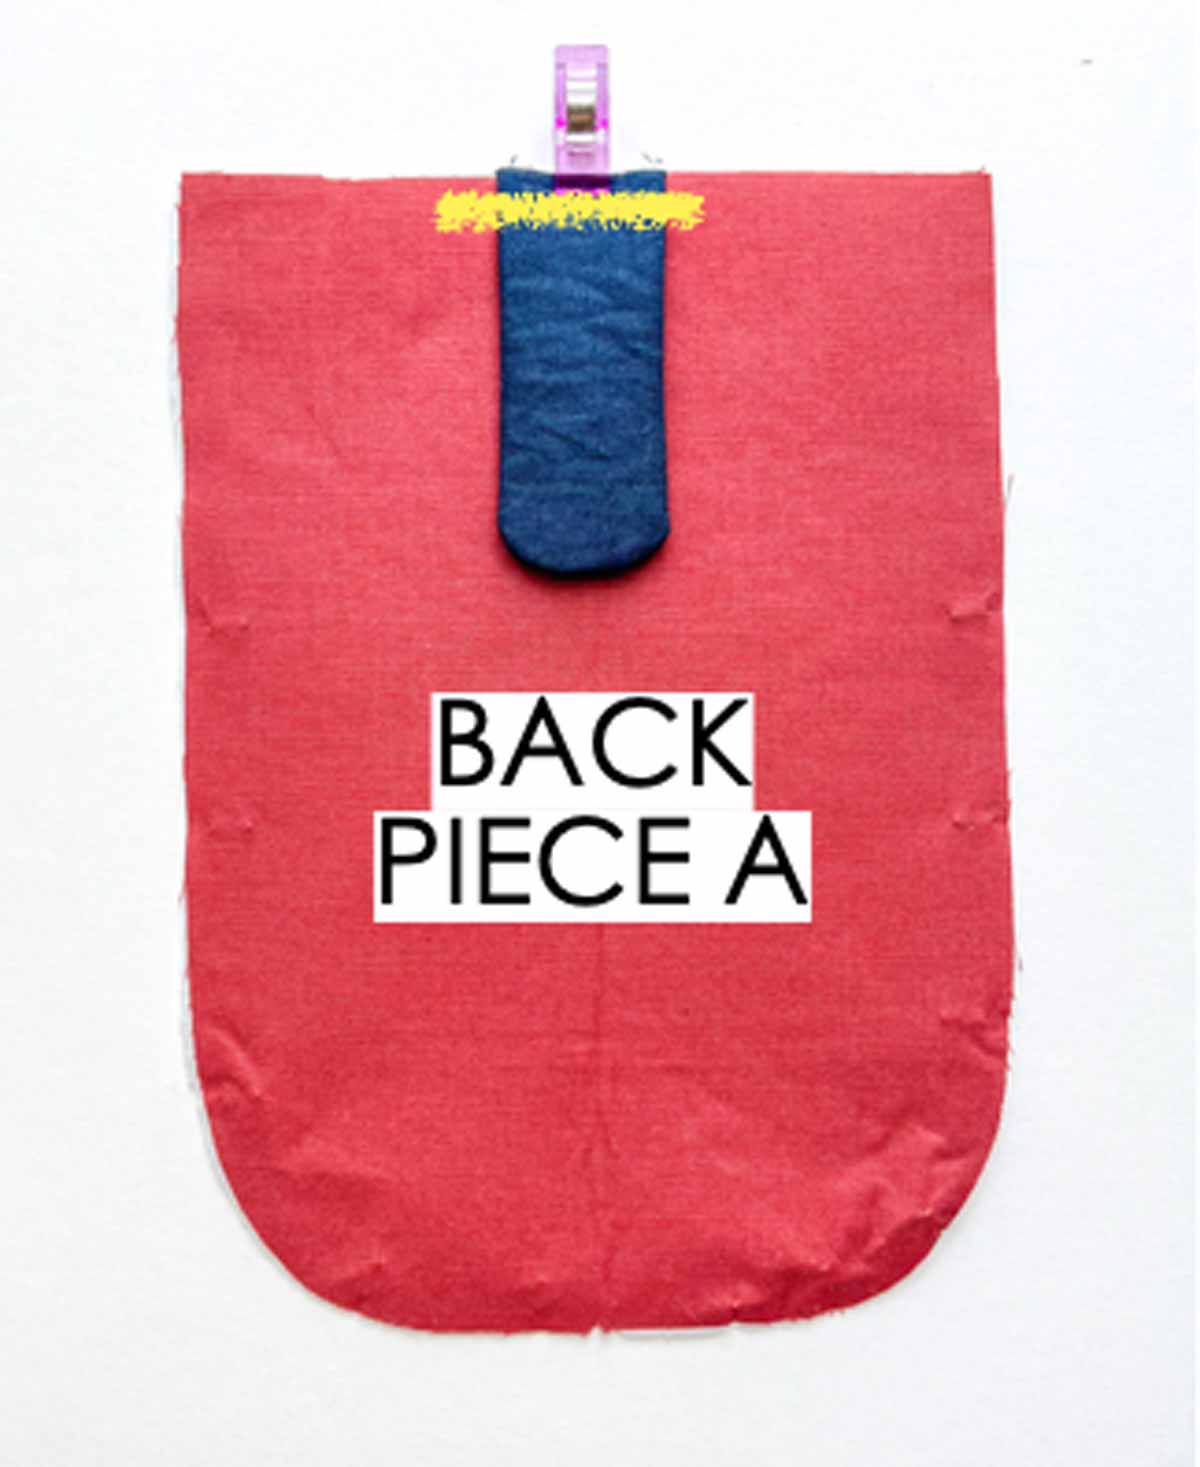
Then, match midpoint of FLAP PIECE to BACK PIECE A at the top. Pin/clip in place and baste (yellow line).
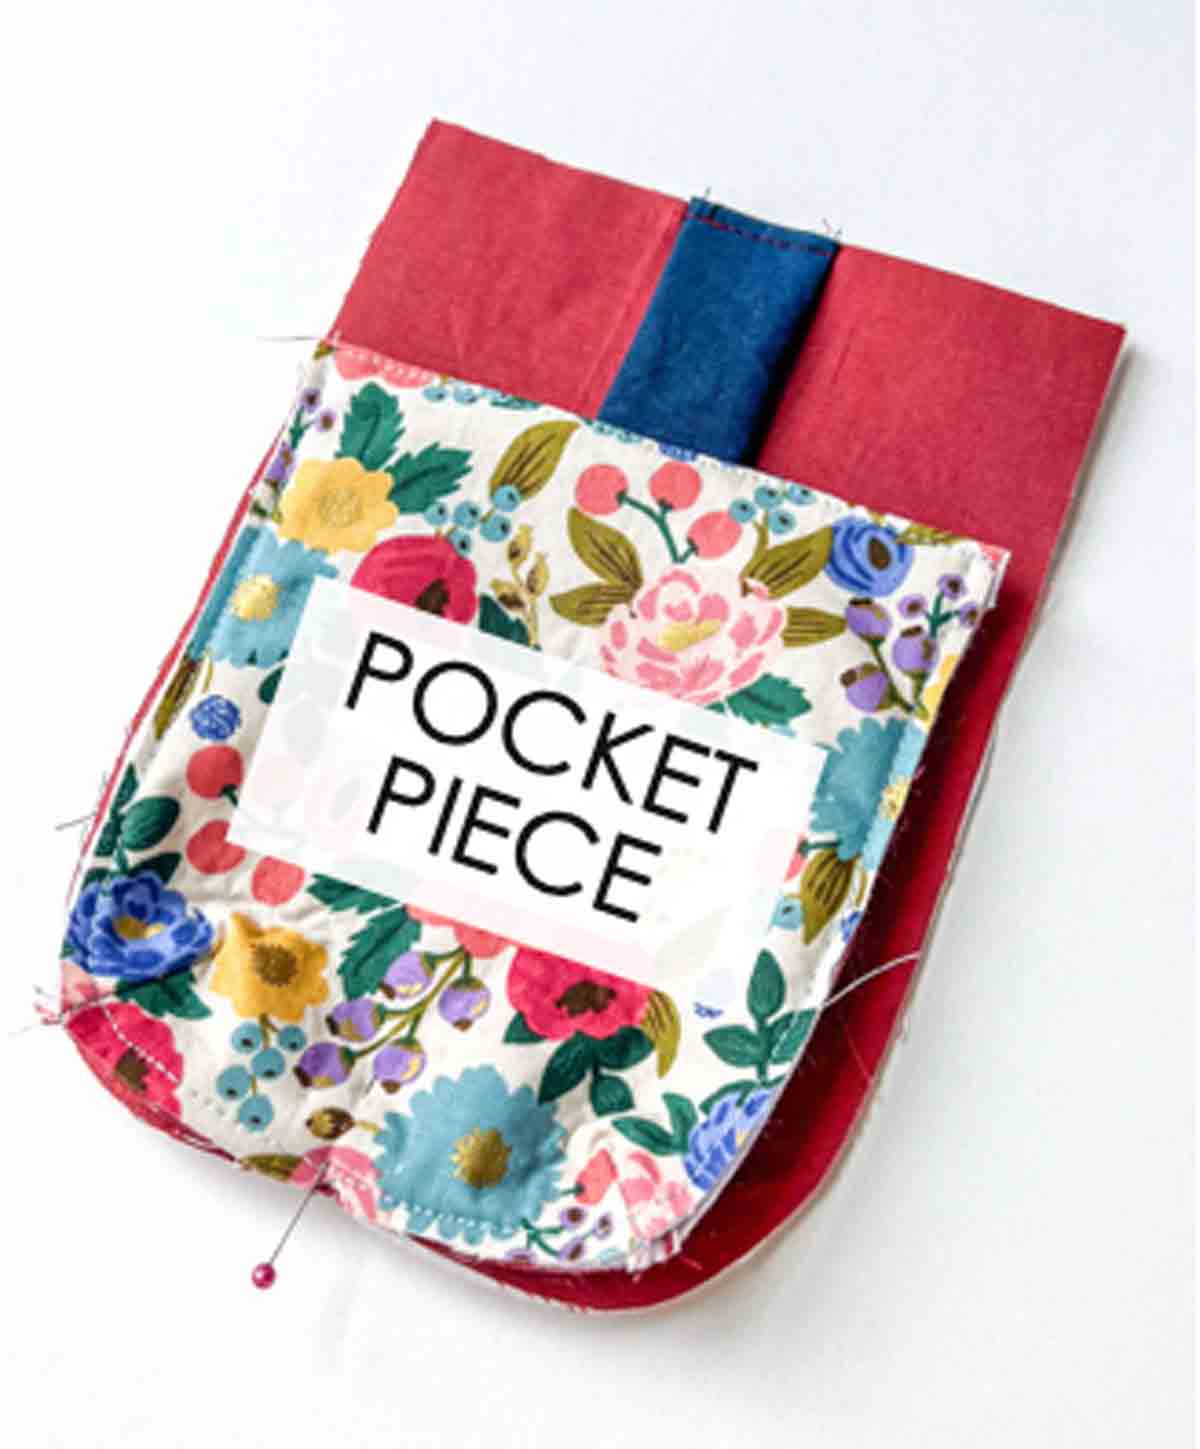
Next, match midpoint of POCKET PIECE to BACK PIECE A at the bottom. Pin or clip in place.
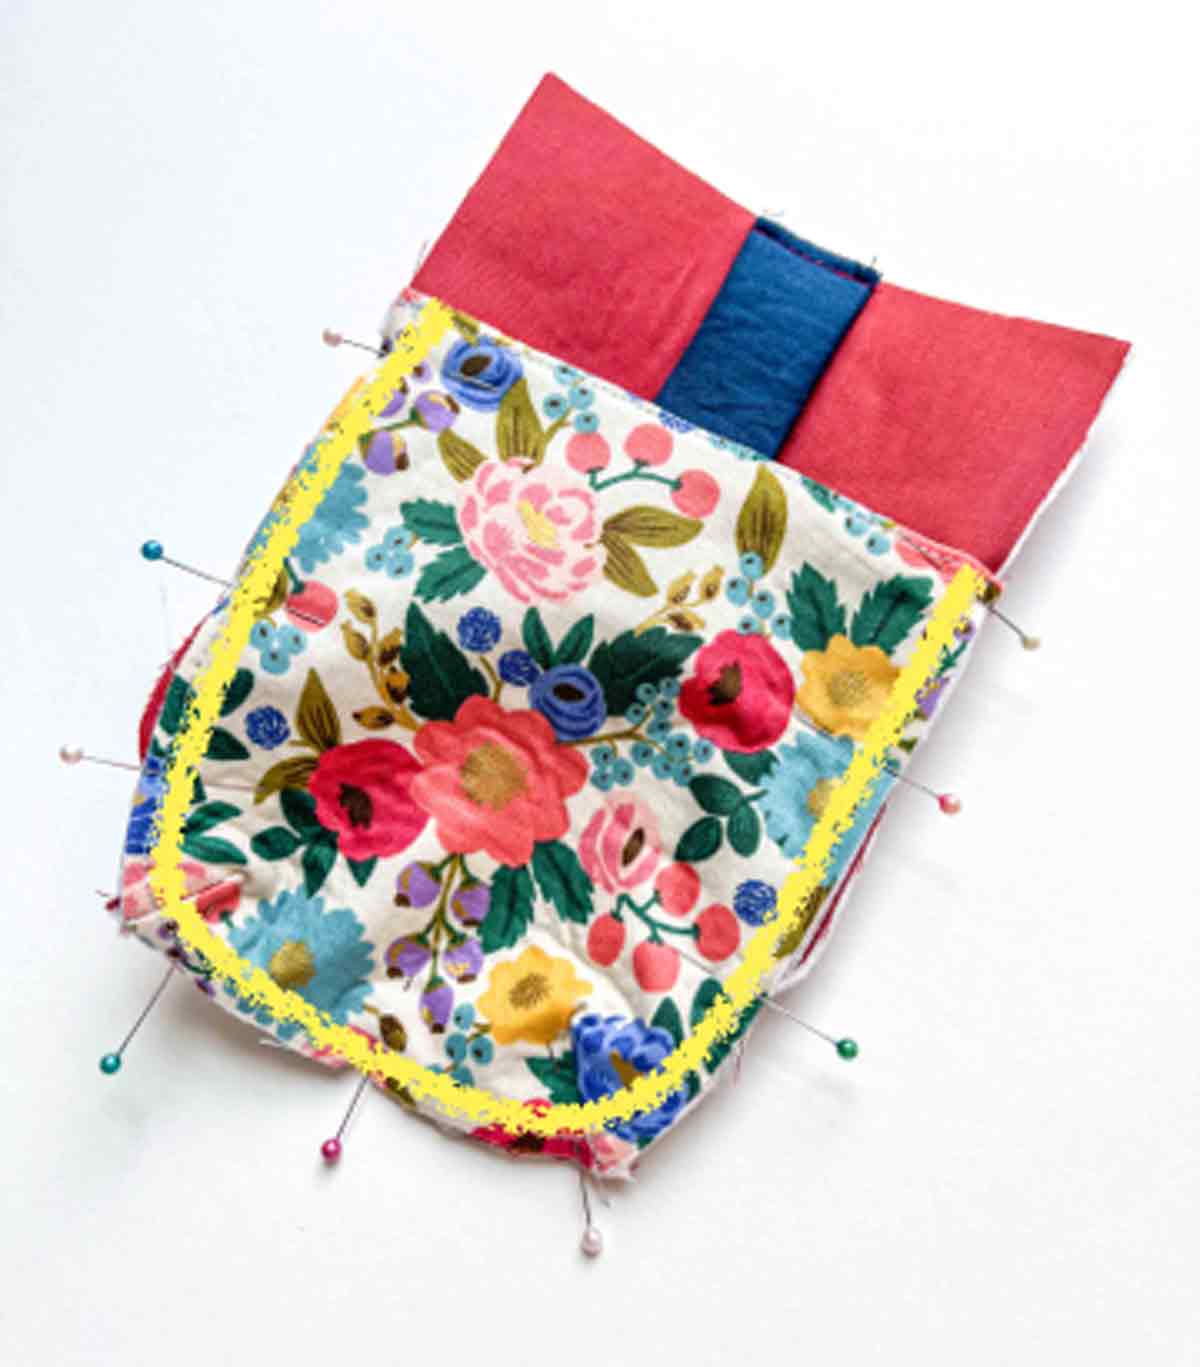
Then continue pinning/clipping entire POCKET PIECE to BACK PIECE A. Baste together (yellow line).
Step 7: Sewing Bag All Together
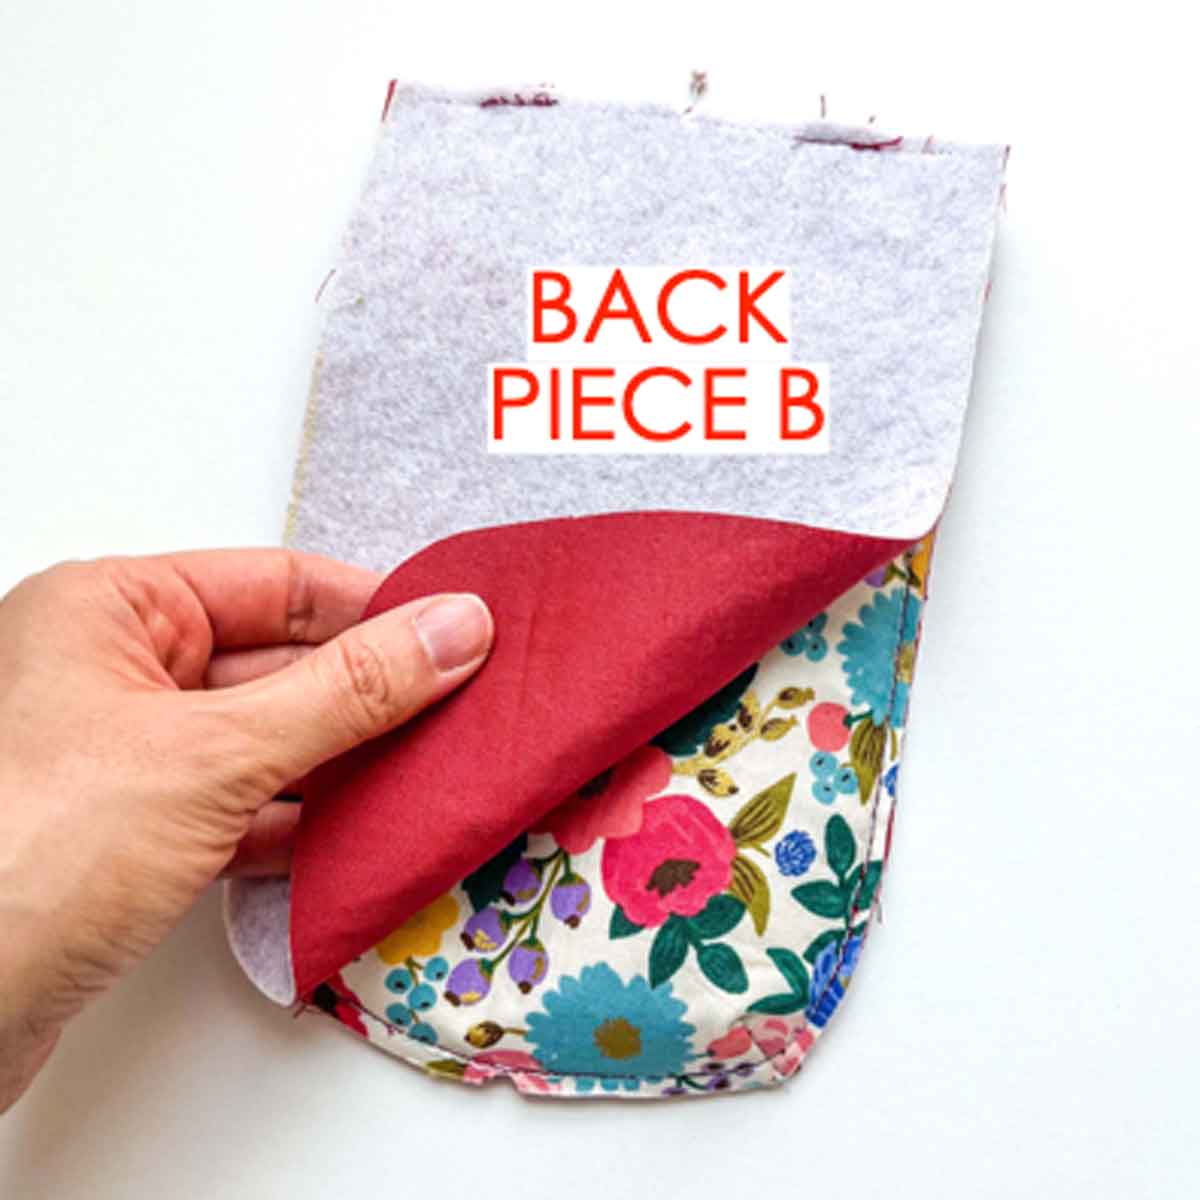
Now place BACK PIECE B over, right sides together.
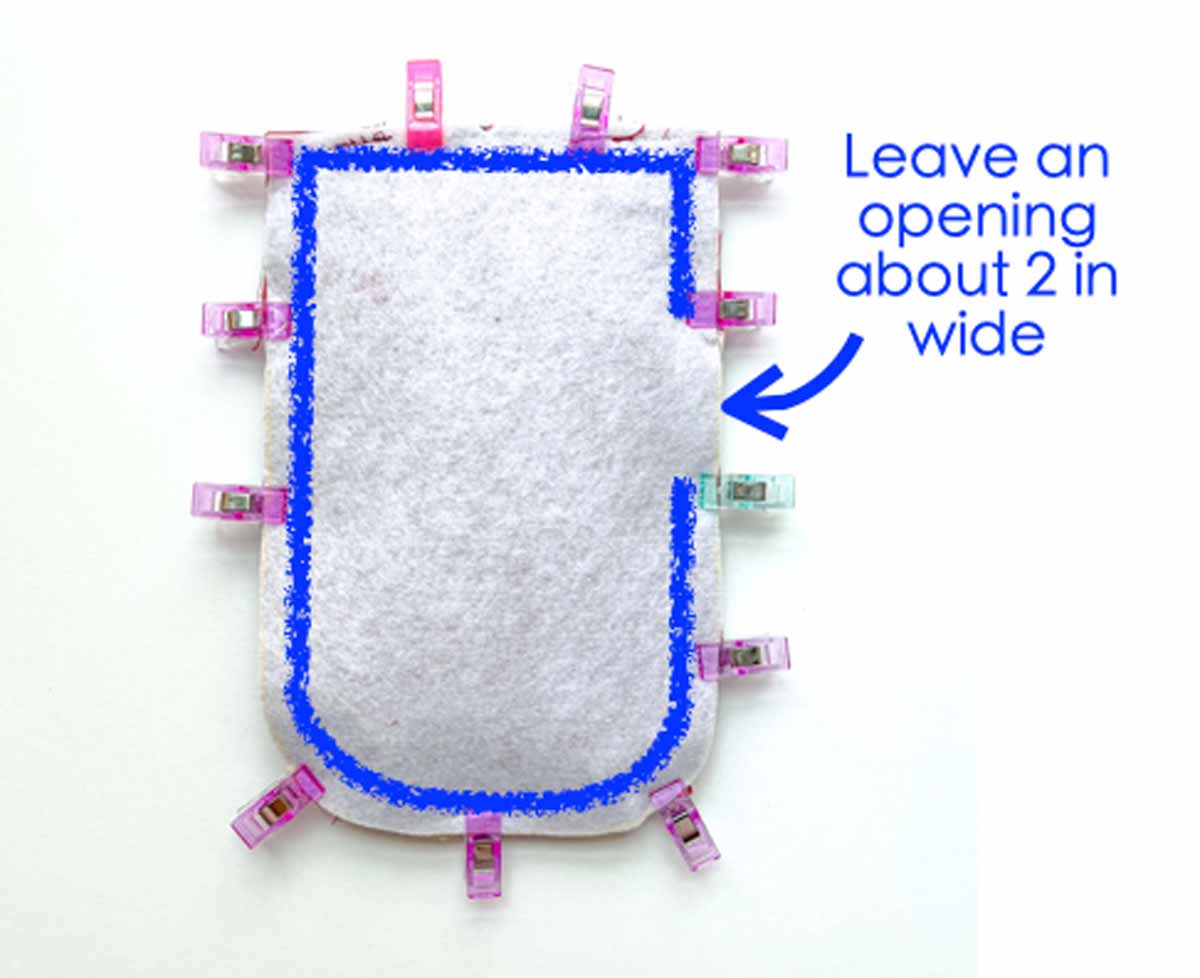
Pin/clip together in place. Sew together at 1/2” (1.27cm) seam allowance, leaving an opening on the side about 2”(5.08cm) wide (blue line). Make sure to back stitch on both sides of the opening.
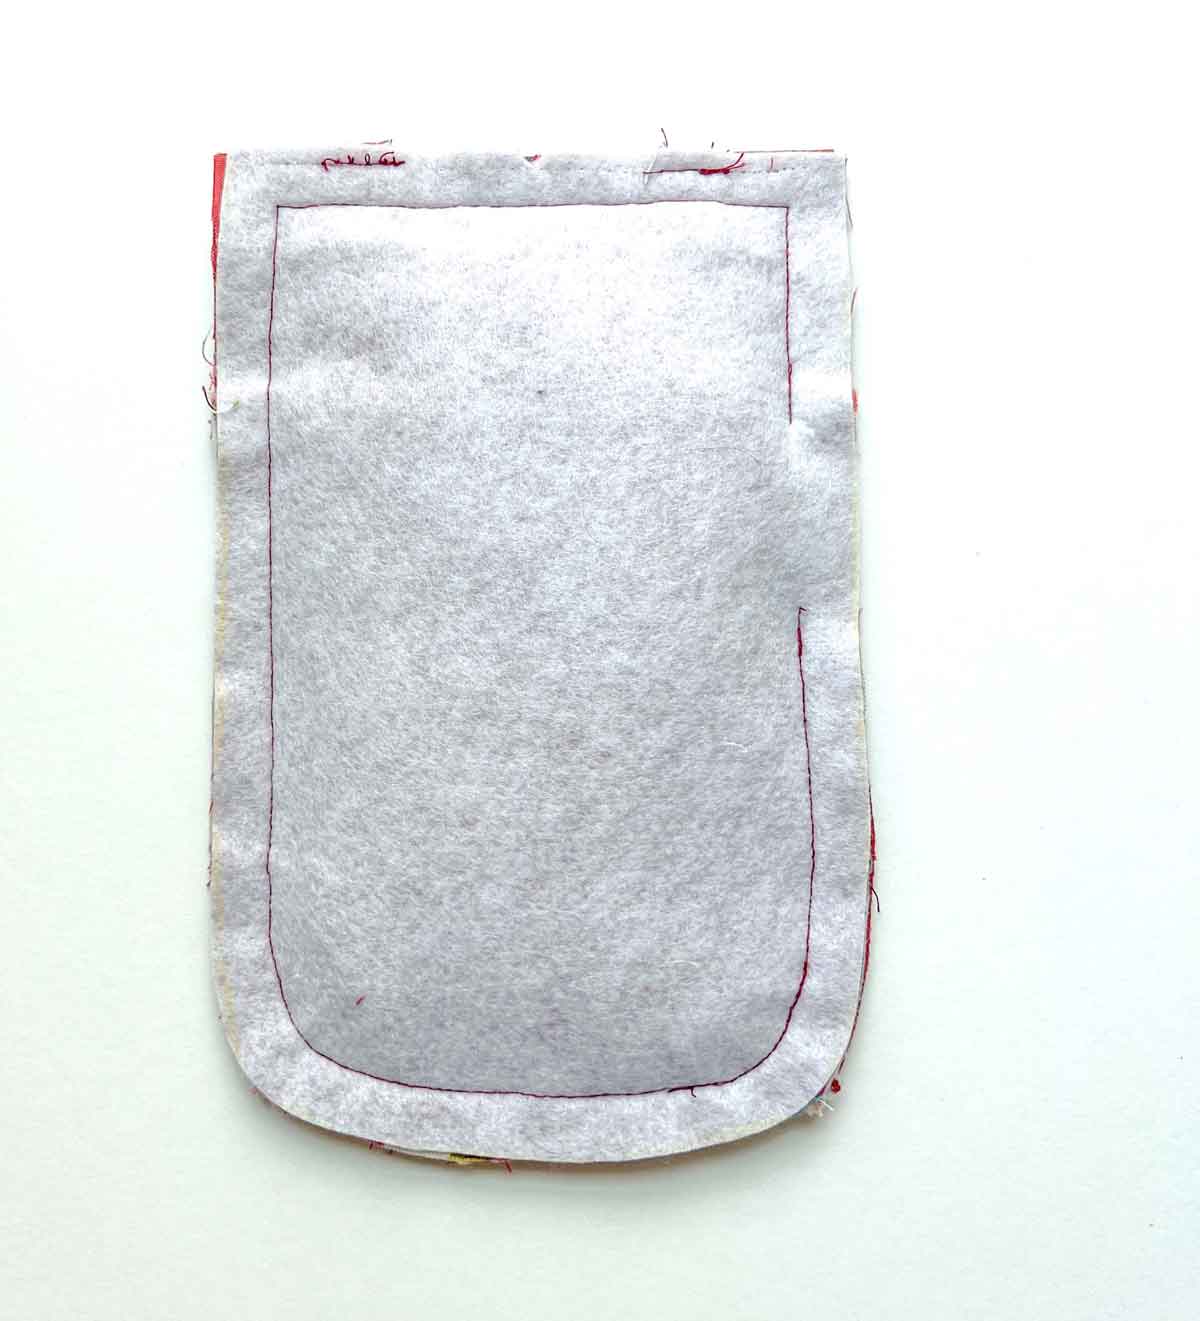
View of bag after everything is sewn together.
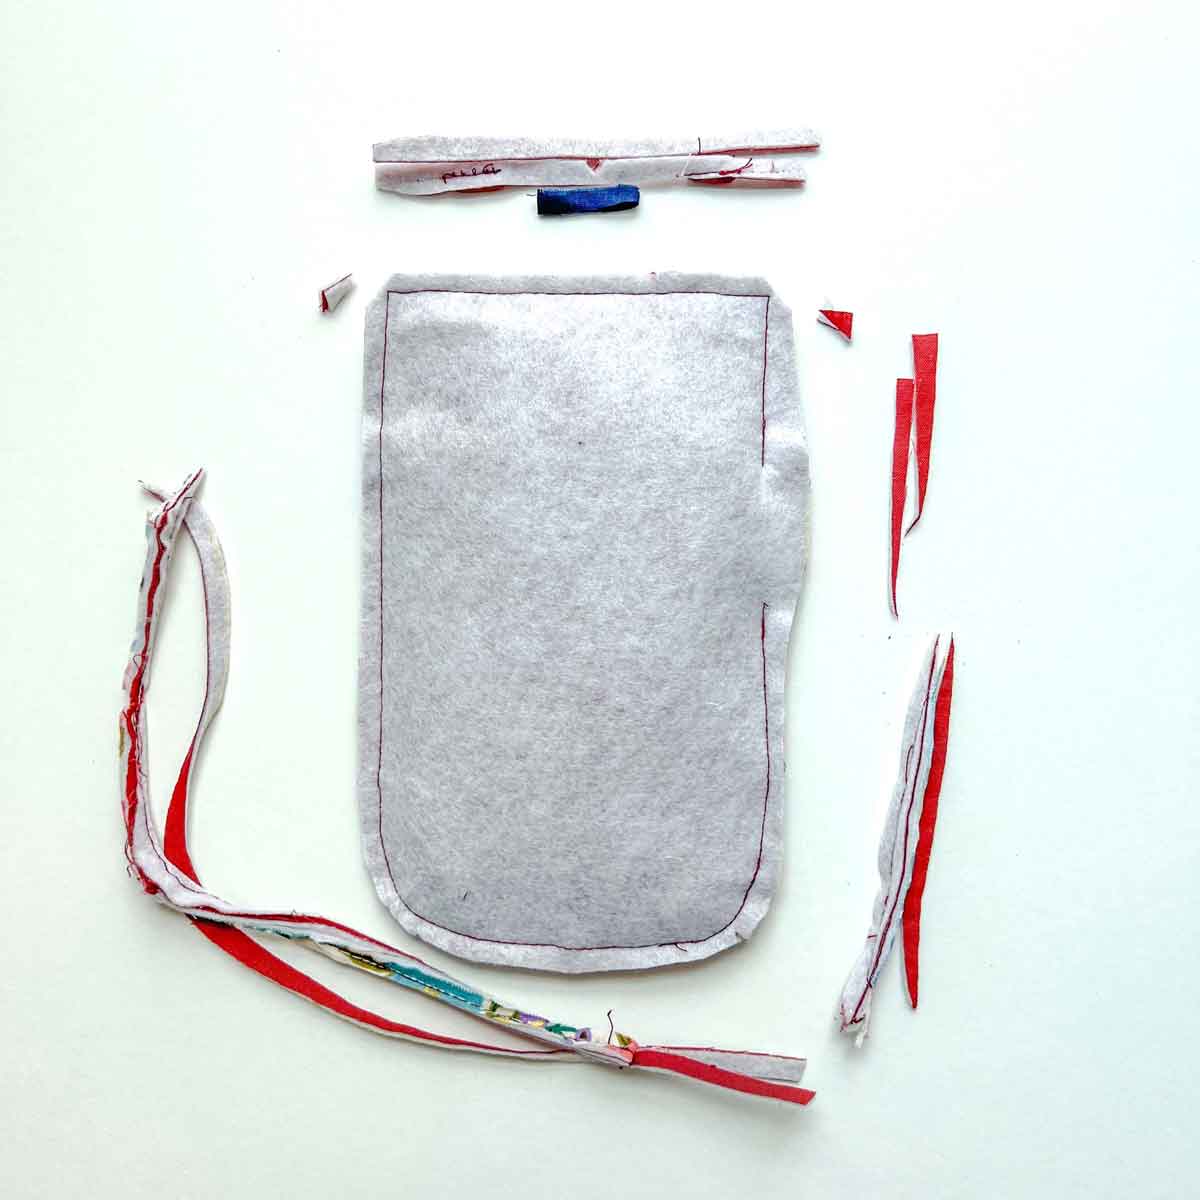
Now trim seam allowance to 1/4”(6mm) and cut corners at a diagonal.
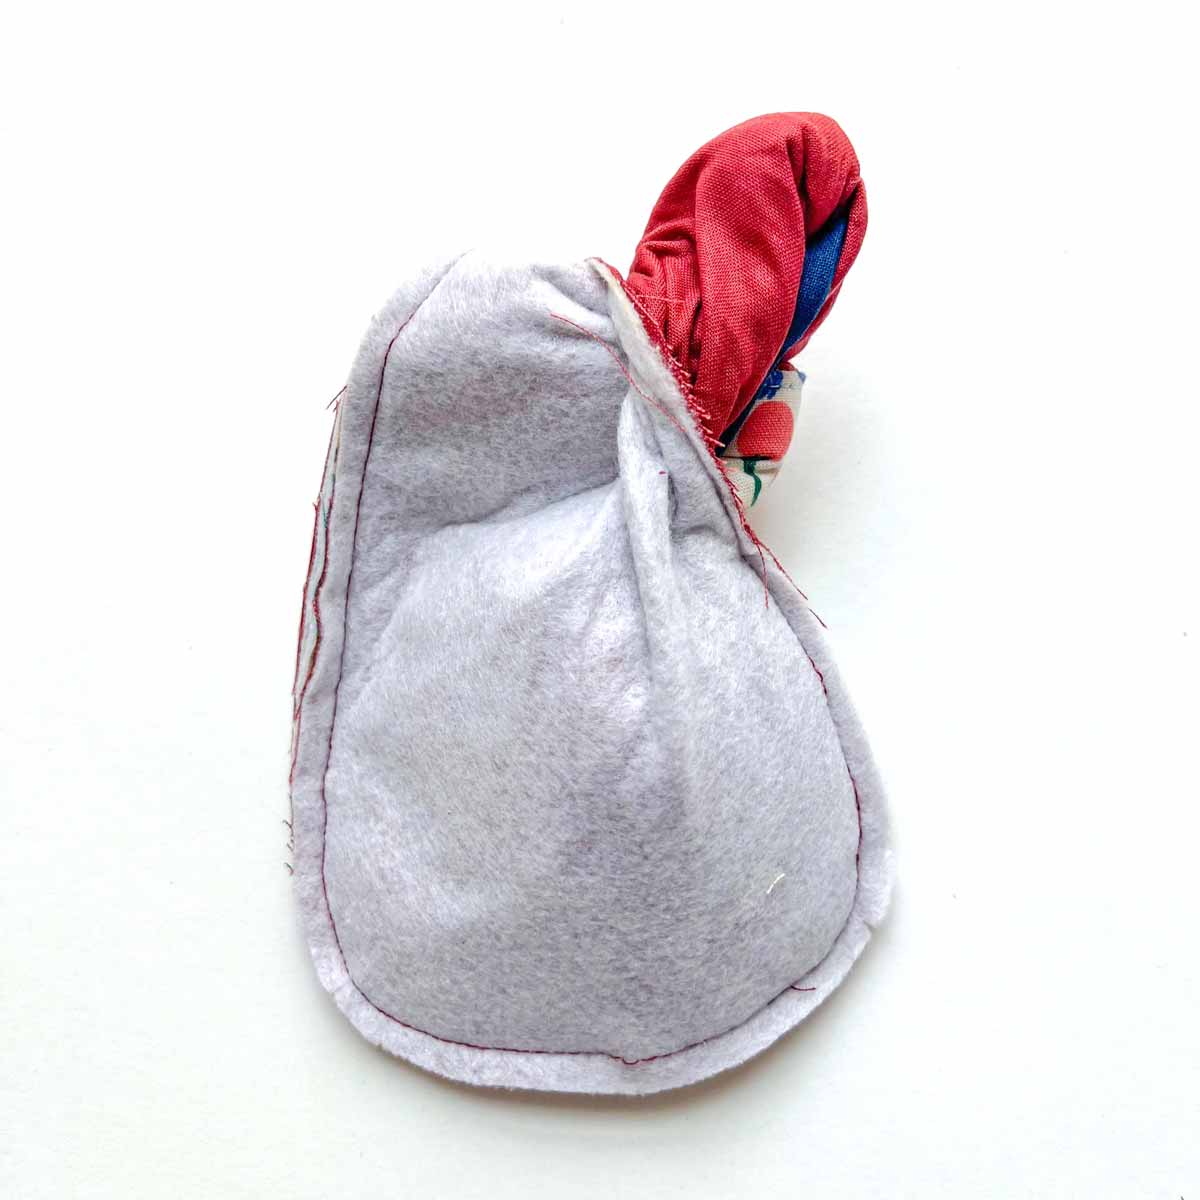
Next, turn bag to right side through the opening.
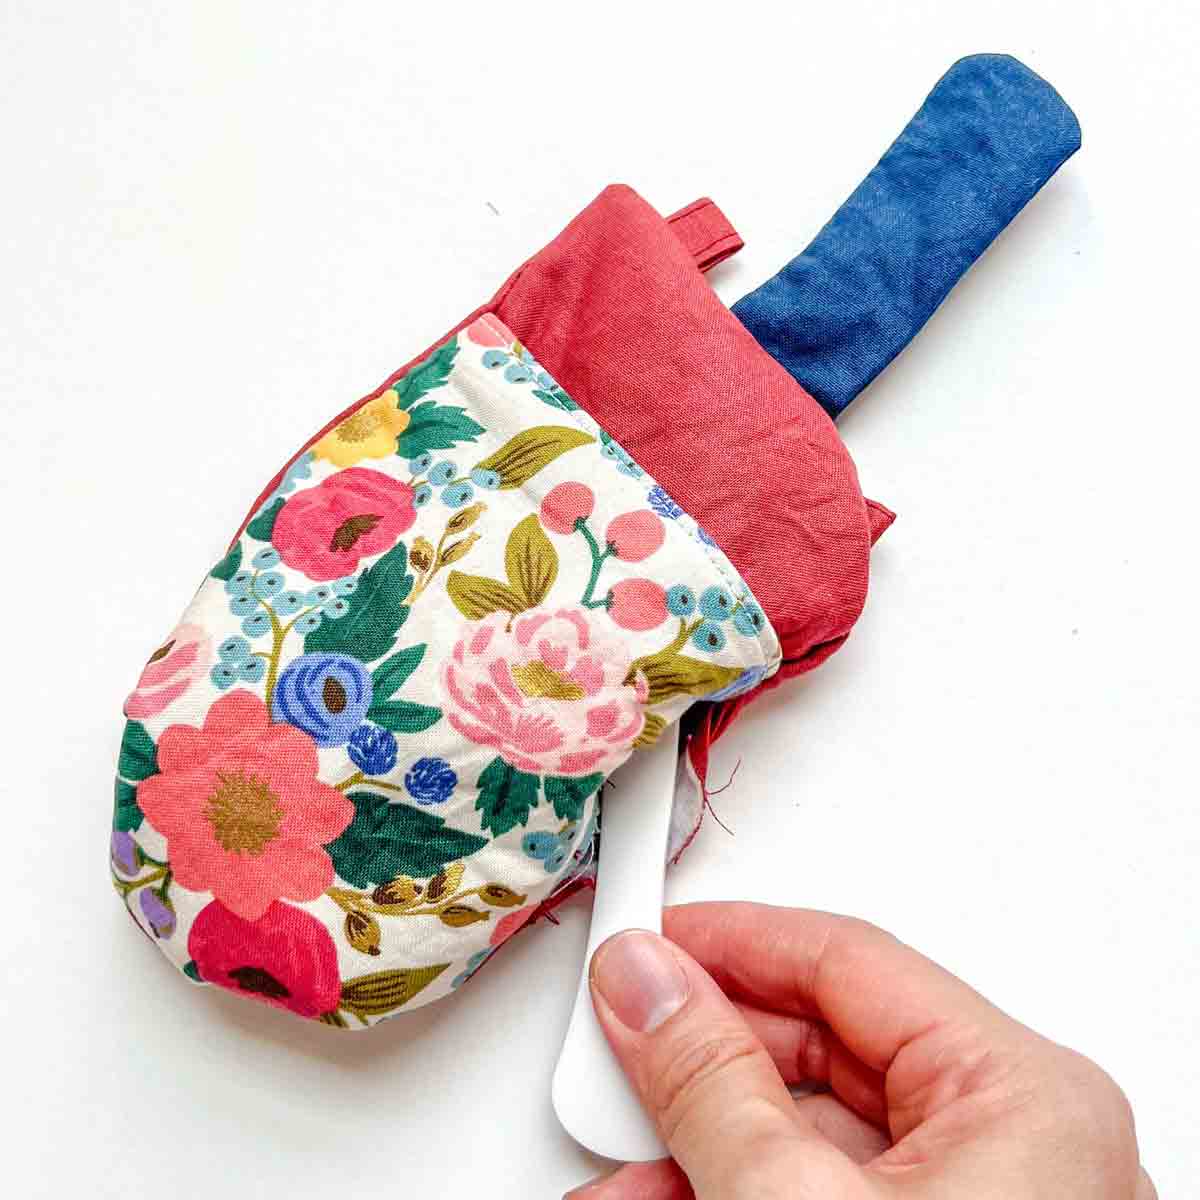
Then use a point turner to push out all the corners.
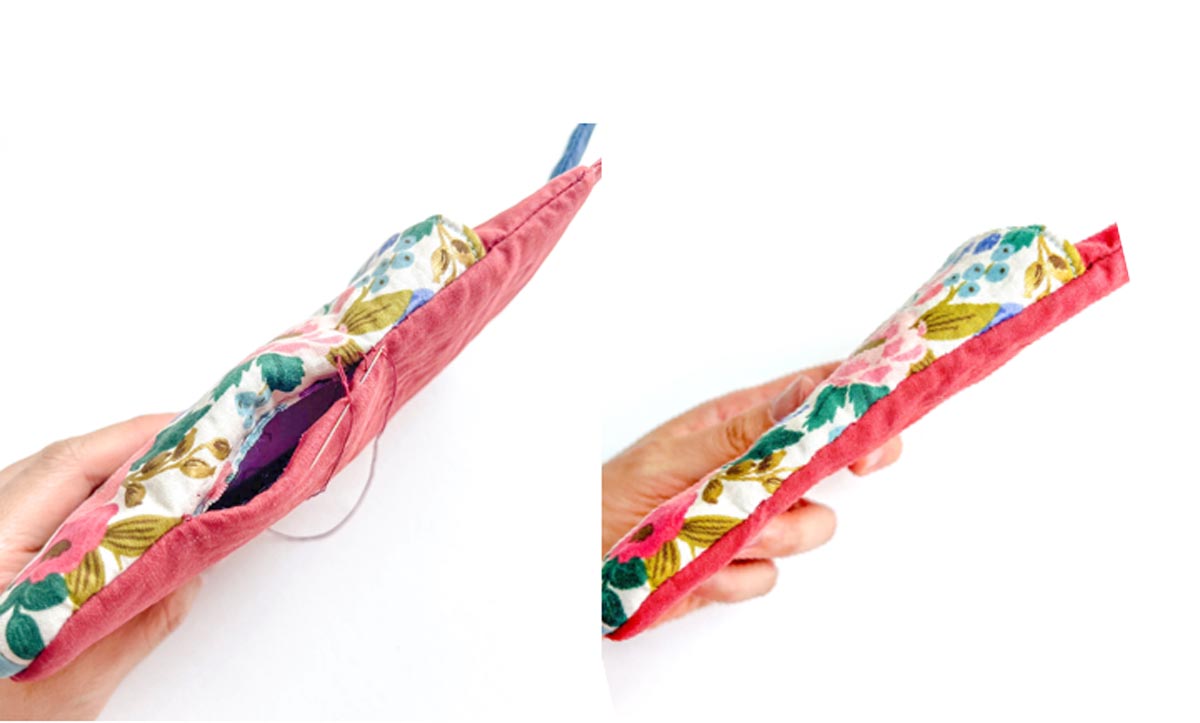
Finally, close the opening using the invisible ladder stitch.
Step 7: Finishing Touches
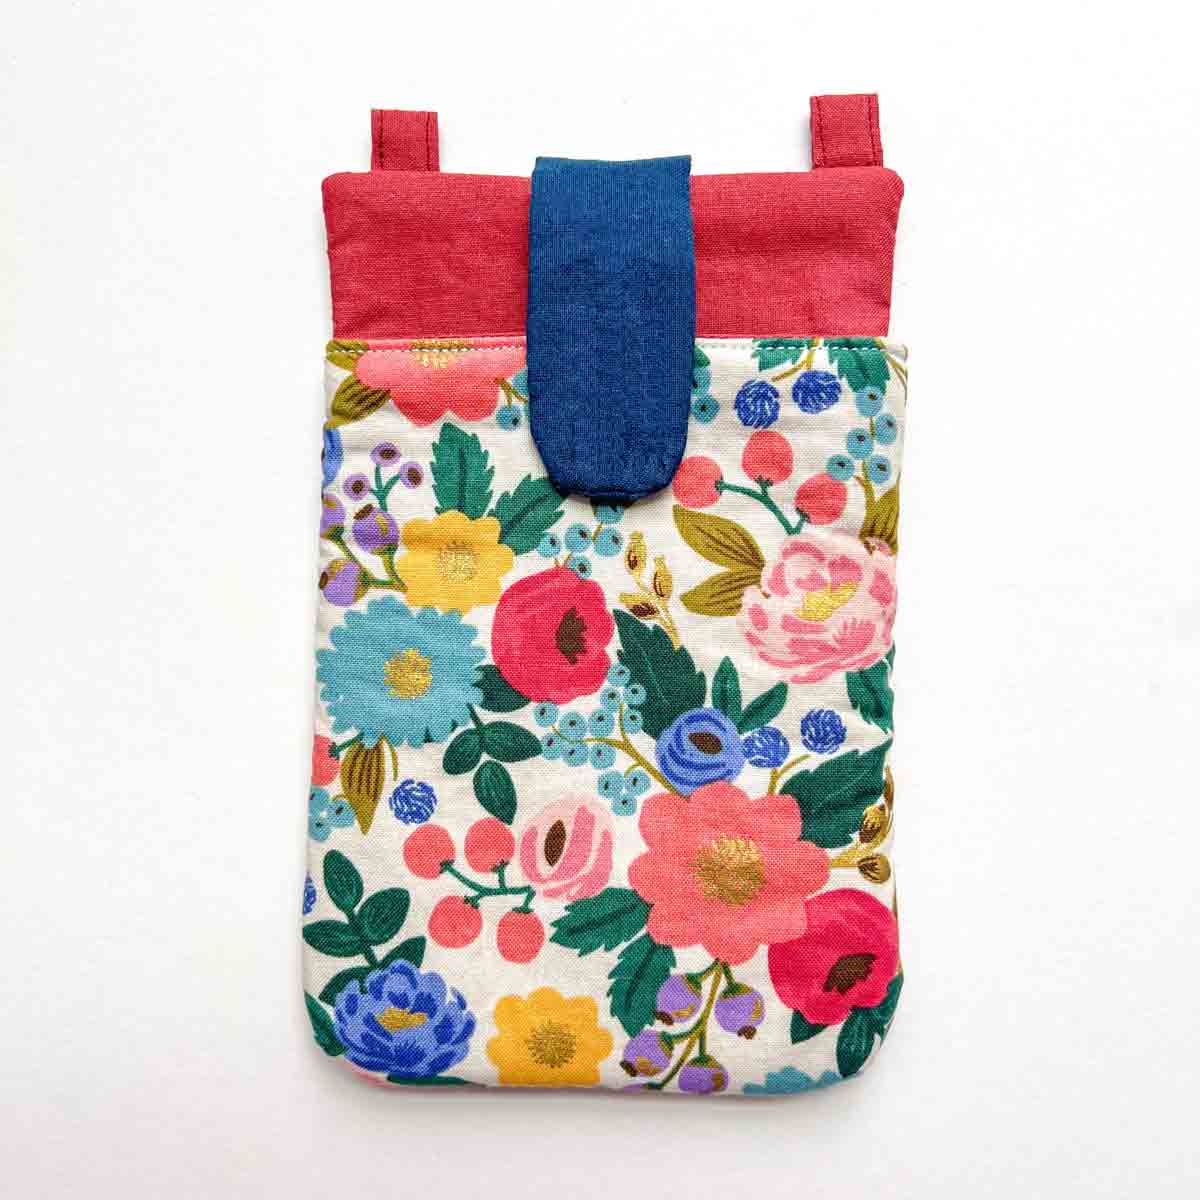
Your cellphone bag will look something like this. Almost done!
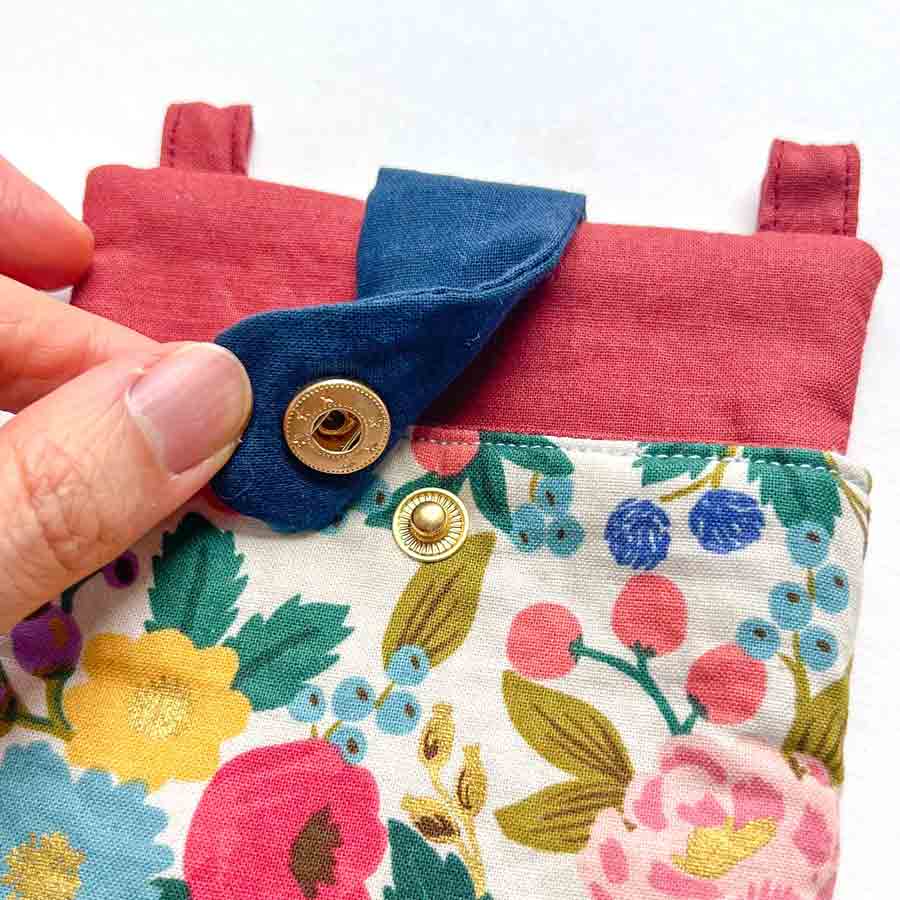
Finally, add a snap of your choice onto FLAP PIECE and POCKET PIECE.
TIP: Check out How to Add a Snap To Fabric if you need help applying snaps.
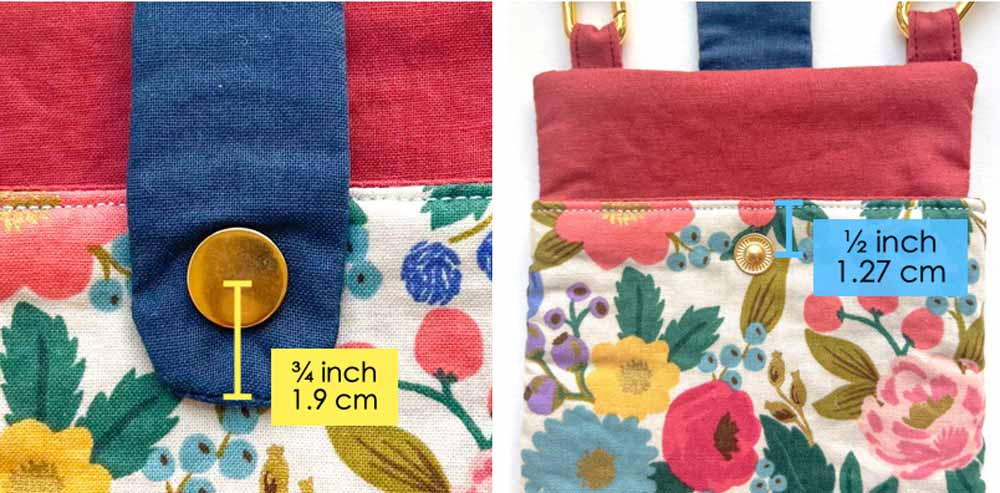
Make sure to put the snaps centered on the FLAP PIECE and POCKET PIECE. For reference the photos show measurements of where I placed my snaps on the flap. However, yours may differ depending on the size of your snaps and where you want to put them.
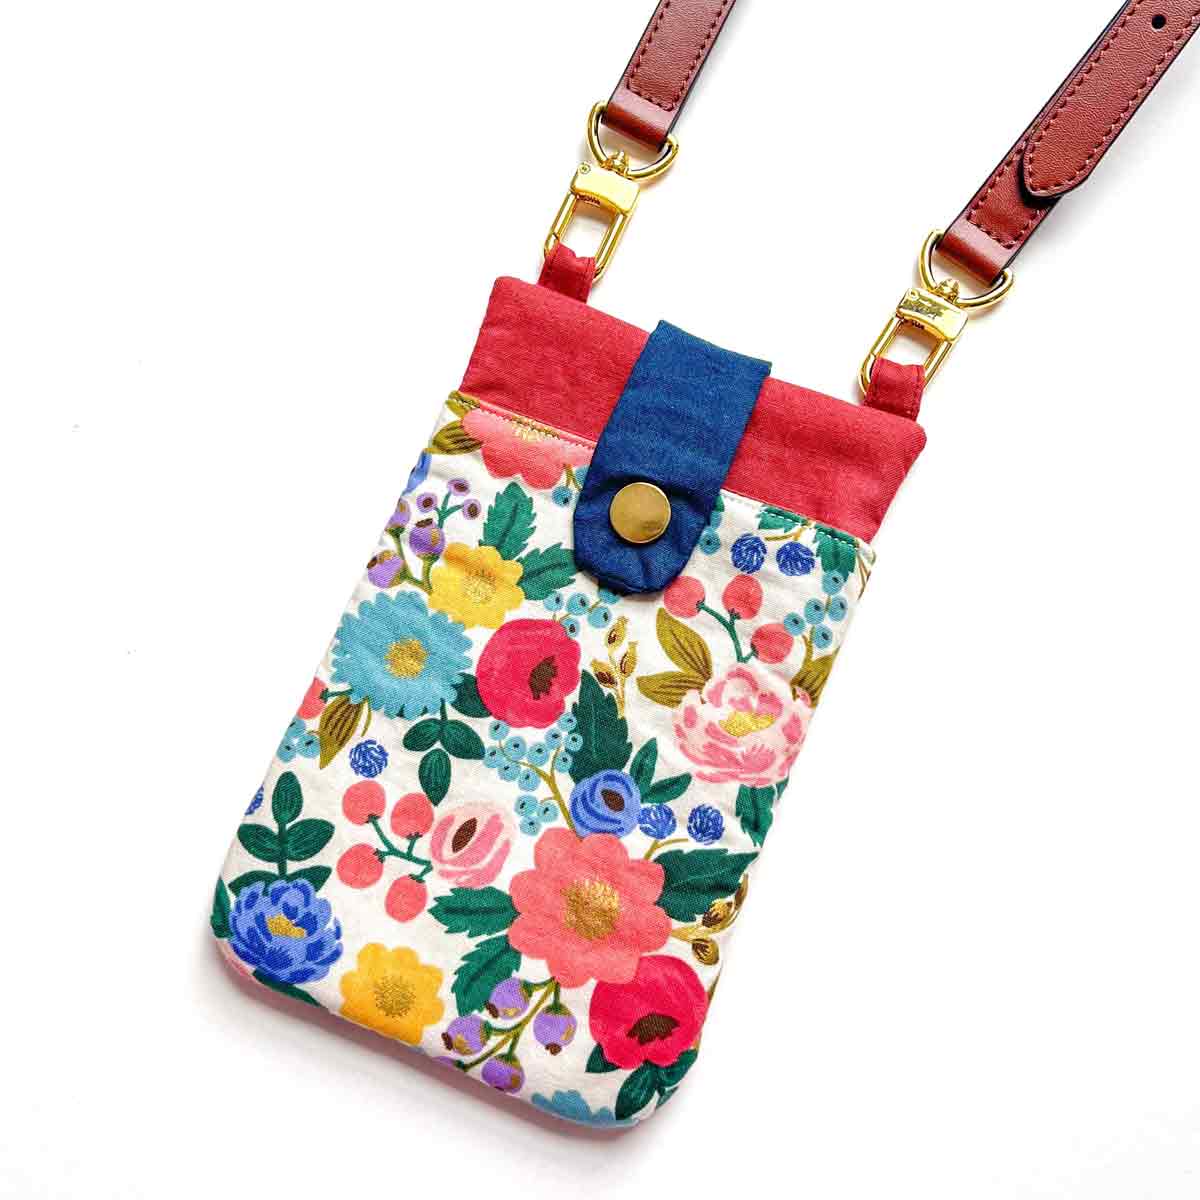
Clip on your your favorite bag strap and tada! Your crossbody cell phone bag is all done!
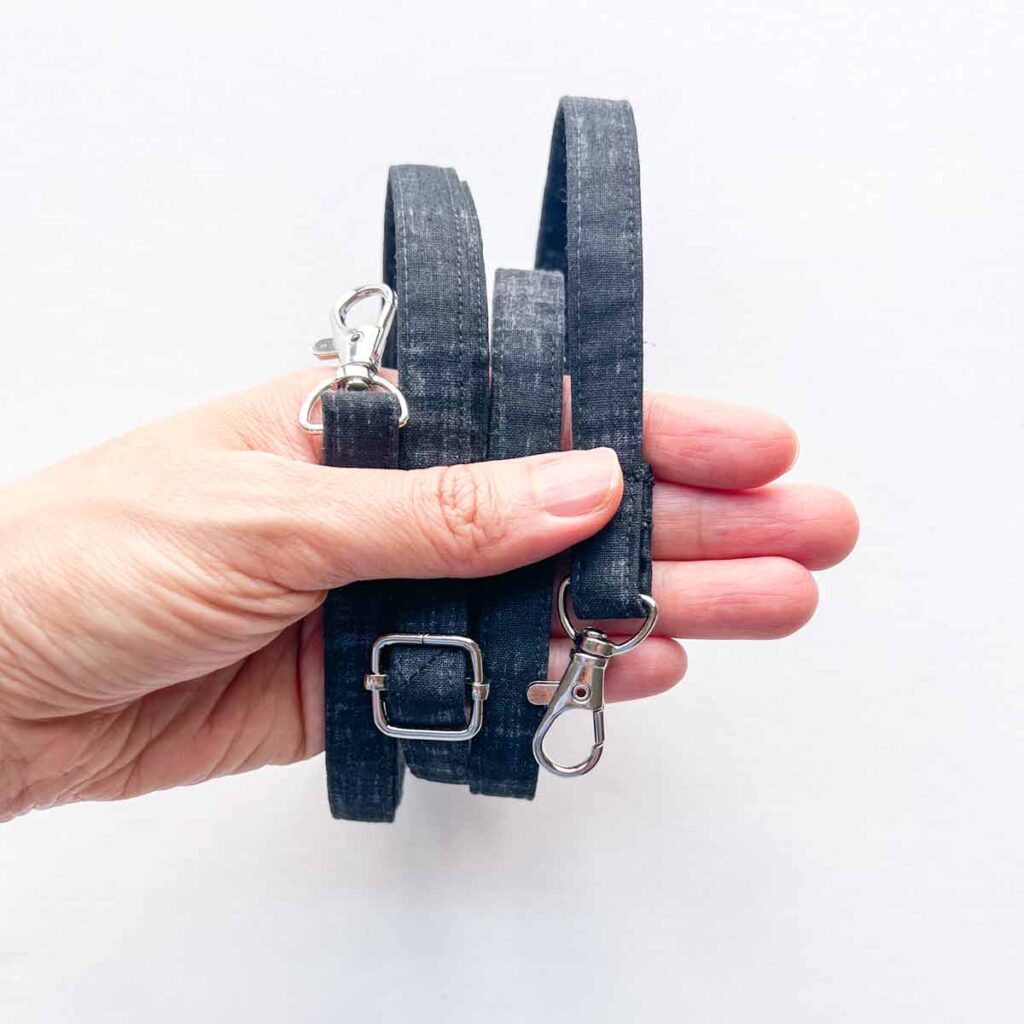
Check out How to Sew an Adjustable Bag Strap if you want to make your own DIY bag strap.
Crossbody Cell Phone Bag PDF Pattern
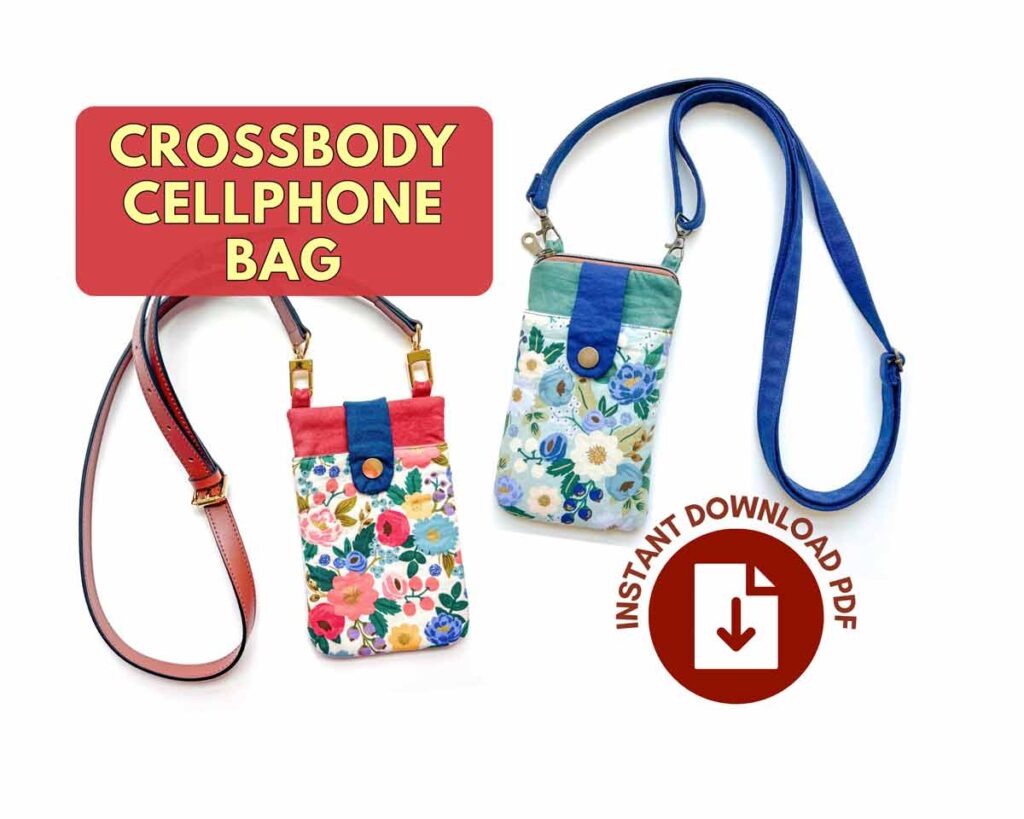
The ad-free, ready-to-print PDF Pattern & Tutorial for the Crossbody Cellphone bag is available in OUR ETSY SHOP. Additionally, it comes with step-by-step tutorial for adding a top zipper and a recessed zipper on the back for extra storage.
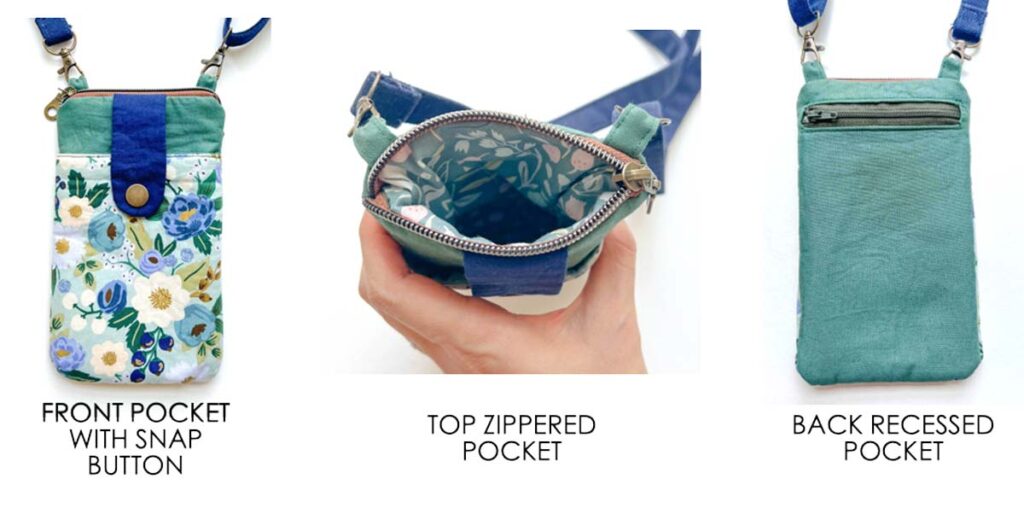
Optional Additions
Want to personalize your crossbody bag? Try adding:
- Zipper closure
- Quilted exterior
- Decorative label
- Tassel zipper pull
- D-ring for keys
Fabric Ideas
This project looks great in:
- Cotton quilting fabric
- Canvas
- Linen
- Cork fabric
- Faux leather accents
- Denim
- Waterproof canvas
Mix coordinating prints for a unique handmade look.
Tips for Success
- Press after every major step for cleaner results.
- Use sewing clips instead of pins when working with thicker fabrics.
- Choose lightweight interfacing if your fabric is already heavy.
- Test the finished size with your phone before sewing the final seams if you’re using an extra-large phone case.
Frequently Asked Questions
What size phone fits in this bag?
A finished bag around 4½” × 7½” fits most smartphones, including larger models with protective cases.
Can beginners make this project?
Absolutely! This is an excellent first bag project because it uses only straight seams and simple construction techniques.
Can I wash the finished bag?
Yes. If made with cotton fabrics and cotton batting or interfacing, machine wash on a gentle cycle and air dry or tumble dry on low.
Final Thoughts
A handmade crossbody cell phone bag is one of those projects you’ll use every day. It’s functional, stylish, and easy to customize to match your favorite fabrics or wardrobe.
Once you’ve made one, you’ll probably find yourself sewing several more for family and friends. They’re quick to make, use very little fabric, and are wonderful handmade gifts for birthdays, holidays, or just because.
Happy sewing!
How to Download Crossbody Cellphone Bag Pattern
To download the Crossbody Cell Phone Bag Sewing Pattern, subscribe to the MindyMakes Email List to receive the password for the Mindy Makes Free Resource Library. No spam! Just updates with more fun sewing projects.
Once you click “submit”, the password will show up on the next page. You will also receive a welcome email with the password in case you forget.
Please allow up to an hour for the welcome email to fly through cyberspace and travel into your inbox. If you still don’t receive the email, make sure to check your junk or spam folders and add my email to your safe list!
Need more help? Be sure to check out this step-by-step guide that shows you exactly how to get the password, enter the library, and download the PDF.
Once inside the library, you will find the pattern listed under section ‘C’ as “Crossbody Cell Phone Bag“. Click on the blue “PDF” button to download.
Need help downloading the pattern? Check out THIS POST for step-by-step tutorial!
How to Make a Crossbody Cell Phone Bag
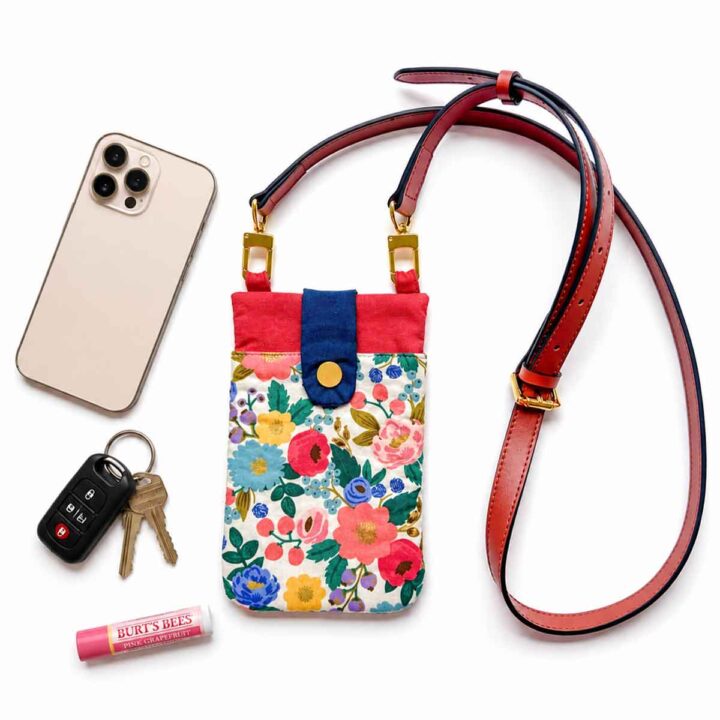
This simple crossbody cell phone bag is the perfect little bag for carrying your cell phone on the go!
Materials
- POCKET FABRIC - 1/4 YARD (0.23 METERS), see note 1
- LINING - 1/4 YARD (0.23 METERS), see note 1
- FRONT FLAP - scrap fabric that fits paper pattern size, see note 1
- BACK PIECE FABRIC - 1/4 YARD (0.23 METERS), see note 1
- FUSIBLE FLEECE
- FUSIBLE INTERFACING
- MATCHING THREAD
- SNAPS (see note 2)
- CLIP ON BAG STRAP (see note 3)
Tools
SEWING TOOLS
Instructions
PREPARING FABRIC PIECES
- Place sticky side of fusible interfacing over wrong side of TAB PIECE.
- Iron it on following manufacture’s instructions.
- Iron on sticky side of fusible fleece to wrong side of BACK PIECE. Repeat for second BACK PIECE.
- Repeat ironing fusible interfacing to wrong side of FRONT POCKET PIECE - EXTERIOR.
- Next, cut out darts on both sides of FRONT POCKET paper pattern.
- Using fabric chalk, trace dart onto wrong side of fabric.
SEWING FLAP PIECE
- First, place the two FLAP PIECE right sides together.
- Next, sew together at 1/2” (1.27cm) seam allowance, leaving an opening on the top.
- Trim seam allowance to 1/4” (6mm) and clip curves.
SEWING LOOPS PIECE
- First, fold LOOP PIECE in half and fingernail press the fold to create midline.
- Second, fold bottom edge to meet midline.
- Third, fold top edge to midline.
- Next, fold entire LOOP PIECE in half so bottom edge matches top edge.
- Finally, stitch LOOP PIECE down, 1/8” (3mm) from both edges. Repeat for second LOOP PIECE.
- Fold LOOP PIECE in half lengthwise and pin/clip to one of the BACK PIECE (doesn’t matter which piece), 1.5”(3.81cm) away from left and right edge, as pictured. Baste LOOP PIECES in place. This piece will become the back of the crossbody cellphone bag and we will now be called BACK PIECE B.
SEWING POCKET PIECE
- First, make sure that FRONT POCKET PIECE - EXTERIOR and FRONT POCKET PIECE - LINING both have darts marked.
- Next, fold darts together so the lines match and pin together on wrong side of fabric.
- Repeat for other dart.
- Sew darts together.
- Next, trim off excess darts.
- Finally, repeat on FRONT POCKET PIECE - LINING.
- Now place FRONT POCKET PIECES right sides together.
- Next, pin/clip together along the top and sew together at 1/2”(1.27cm) seam allowance. Don’t forget to back stitch at both ends.
- Next, edge stitch seam allowance down towards FRONT POCKET PIECE - EXTERIOR.
- Then edge stitch seam allowance at 1/8”(3mm) away from folded edge of FRONT POCKET.
- Fold LINING PIECE so it’s behind EXTERIOR PIECE.
- Next, pin/clip LINING PIECE to EXTERIOR PIECE, wrong sides together. Baste together.
SEWING BAG TOGETHER
- Fold BACK PIECE B in half lengthwise and make a small diagonal snip to mark the midpoint.
- Repeat marking midpoint in the same way for BACK PIECE A, FLAP PIECE, and POCKET PIECE.
- Match midpoint of FLAP PIECE to BACK PIECE A at the top. Pin/clip in place and baste.
- Next, match midpoint of POCKET PIECE to BACK PIECE A at the bottom. Pin or clip in place.
- Then continue pinning/clipping entire POCKET PIECE to BACK PIECE A and baste together.
- Now place BACK PIECE B over, right sides together.
- Pin/clip together in place. Sew together at 1/2”(1.27cm) seam allowance, leaving an opening on the side about 2” (5.08cm) wide. Make sure to back stitch on both sides of the opening.
- Trim seam allowance to 1/4” (6mm) and cut corners at a diagonal.
- Turn bag to right side through the opening.
- Use a point turner to push out all the corners.
- Close the opening using the invisible ladder stitch.
FINISHING TOUCHES
1. Add a snap of your choice onto FLAP PIECE and POCKET PIECE.
2. Clip on your favorite bag strap (or MAKE YOUR OWN) and you are done!
Notes
- I recommend 100% cotton (especially if you are a beginner).
Other recommended fabrics: denim, canvas, cork, medium weight nylon, wool, corduroy.
Not recommended fabrics: knits, stretchy fabric, extra light weight fabrics such as chiffon, tulle, silks. - I used 15mm Metal Spring Snaps in the tutorial, Otherwise Plastic KAM Snaps or Magnetic Snaps are also good options.
- I like THIS ONE with gold hardware and different strap colors. Or make your own with matching fabric!