
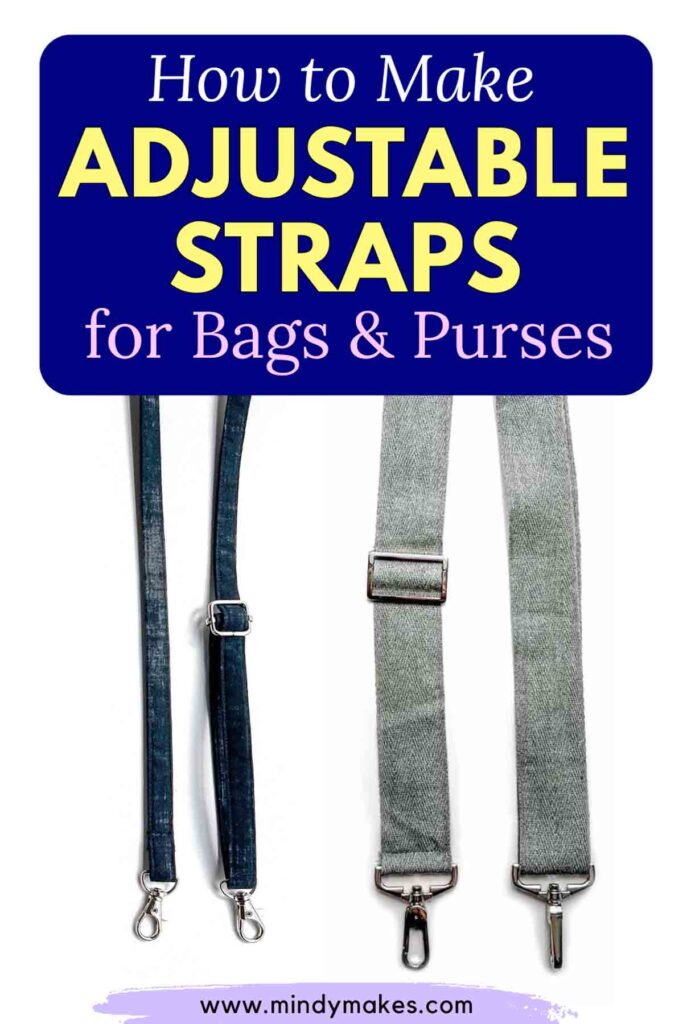
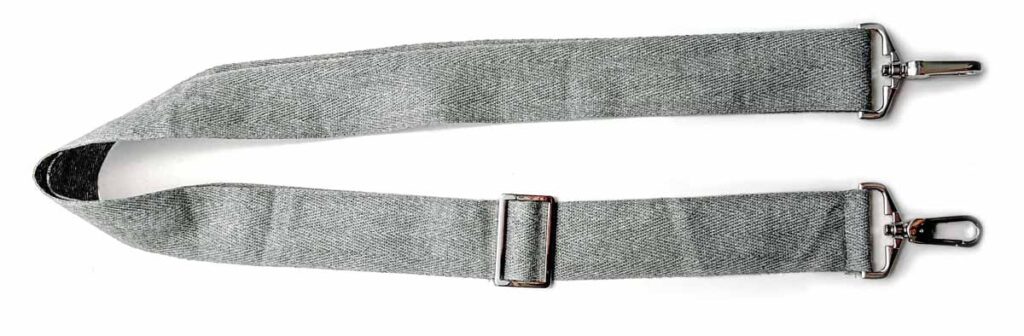
How to Sew an Adjustable Strap for a Bag (Free Pattern)
Always wanted to know how to sew an adjustable strap for bags and purses? This easy step-by-step tutorial will teach how to make bag and purse straps in 3 different variations!
This post may contain affiliate links. Please read my disclosure policy for details. As an Amazon Associate, I earn from qualifying purchases.
Learning how to sew an adjustable strap for a bag is actually very easy. This useful sewing project is great whether you are trying to replace a worn down bag strap or to match a home-sewn bag.
How to Make an Adjustable Bag Strap In 3 Ways
In this tutorial today, I will show you how to make 3 different variations of an adjustable bag strap:
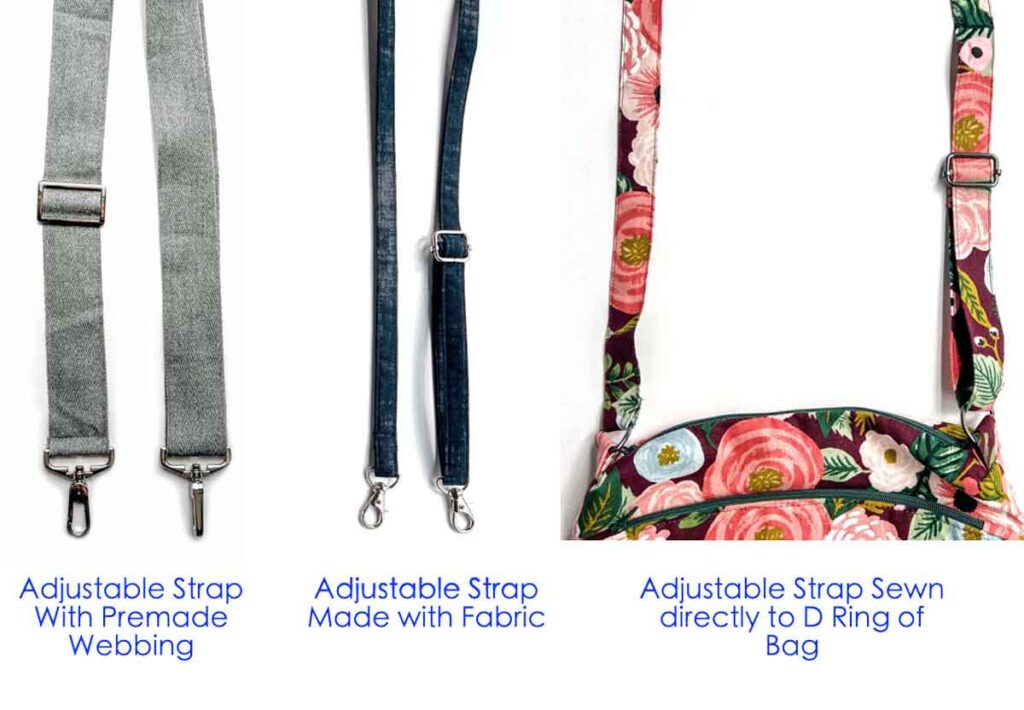
METHOD #1: Bag Straps Using Premade Webbing
- Using store bought webbing makes it a quick and easy sewing project because all you need to do is cut the correct amount of webbing to get started.
- Adding swivel clips makes the bag strap removable. This way, you can easily use the bag strap on another bag, or you can switch out different bag straps to go with your bag.
METHOD #2: Bag Straps Using Fabric
- Learning how make your own bag straps with fabric gives you much more versatility. This way, you can match your purse/bag with the fabric of your choice.
- In addition, you can easily make the bag strap to your desired width becomes sometimes it is hard to find the webbing with the width and color to compliment your bag!
- Swivel clips makes the bag strap removable.
METHOD #3: Bag Straps Using Fabric, without Swivel Clips
- This type of bag straps are looped directly to the D-ring of the bag. This way, you don’t need to purchase extra hardware (swivel-clips).
- With that said, your bag straps are not removable. You will not be able to change out bag straps if you want a different look to your bag or should they start to fray. If you need to replace bag straps, you will simply cut the old ones off and make new ones.
How Much Fabric Do I need to Make Bag Straps?
Fabric Length
In order to make an adjustable bag strap, you will need a strip of fabric that is approximately 25%-50% longer than the length you want your strap to be. This extra 25-50% is what makes your bag strap adjustable.
So for example, if you want a bag strap that is 40″ long, you will cut a piece of fabric that is approximately 50″- 60″ long. In the tutorials below, the fabric (and webbing) lengths are all in this 50 to 60 inch range.
If you’re unsure what is a good length strap for you, the easiest way is to measure a bag strap on an existing bag that you find is a comfortable length for you. Use this measurement and add 25-50% extra length to determine how much fabric to cut.
Note that the extra 25-50% fabric length will cover seam allowance for the ends of the straps. Thus, you don’t need to add another extra 1″ (1.27cm) to account for seam allowance.
Which Direction to Cut Fabric
Keep in mind that you will need to cut the length of bag strap along the selvedge of the fabric. Remember that the selvedge of the fabric is the least stretchy part of a woven fabric. Therefore, it is important your bag strap length is cut along this edge to prevent warping and stretching overtime.
What is Selvedge?
The selvedge is the part of the fabric with the finished edge. It runs along the length of the fabric. This finished edge will feel slightly different (usually stiffer and tigther) than the rest of the fabric.
Additionally, you will sometimes find printed text along the selvedge edge with the content and producer of the fabric.
My Fabric is Not Long Enough
There’s a high chance you won’t have a piece of fabric that is 60″ long (about 1.75 yards of fabric). No problem! In the tutorial below, I show you how to join shorter fabric pieces, specifically 1 yard, together to get the length that you need.
Fabric Width
You will need to cut your fabric 4 times as wide as the desired width of your bag straps. For example, if you want to make a 1″ wide bag strap, you will need to cut your fabric 4″ wide, by whatever length you determined earlier.
Below is a chart for quick reference to figure out how wide to cut your fabric based on the desired width of the finished bag straps:
| FINISHED BAG STRAP WIDTH | 1/2″ | 3/4″ | 1″ | 1.5″ | 2″ |
| HOW WIDE TO CUT FABRIC | 2 inches | 3 inches | 4 inches | 6 inches | 8 inches |
Materials For Adjustable Bag Straps
Materials
- STORE-BOUGHT WEBBING – 60″ or more, or
- WOVEN FABRIC -1 Yard
- FUSIBLE INTERFACING – I like to use a medium weight interfacing.
- MATCHING THREAD
- HARDWARE FOR BAG STRAP – see discussion below
- D-RING – you’ll need 2 per bag
- TRIGLIDE SLIDER – 1 per strap
- SWIVEL CLIPS – you’ll need 2 per strap. Optional, if you want to make removable bag straps
Tools
- HOME SEWING MACHINE – I LOVE my SINGER HEAVY DUTY SEWING MACHINE
- FABRIC SCISSORS – GINGHERS are my favorite. I’ve tried other brands such as Fiskars, but they just don’t compare.
- SEWING PINS and/or SEWING CLIPS
- CLEAR RULER
- FABRIC CHALK
- THAT PURPLE THANG – optional, but extremely useful for guiding fabric into machine
- IRON – I love my Rowenta Iron with a retractable cord for easy storage.
Hardware for Adjustable Bag And Purse Straps
In order to make an adjustable bag strap, you will need the following hardware:

Swivel clips (x2), D Rings (x2), and triglide slider.
There are some workarounds if you prefer not to use all the hardware. For example, if you want to eliminate using swivel clips, you can directly sew the adjustable bag strap to the D ring (see Method #3, below).

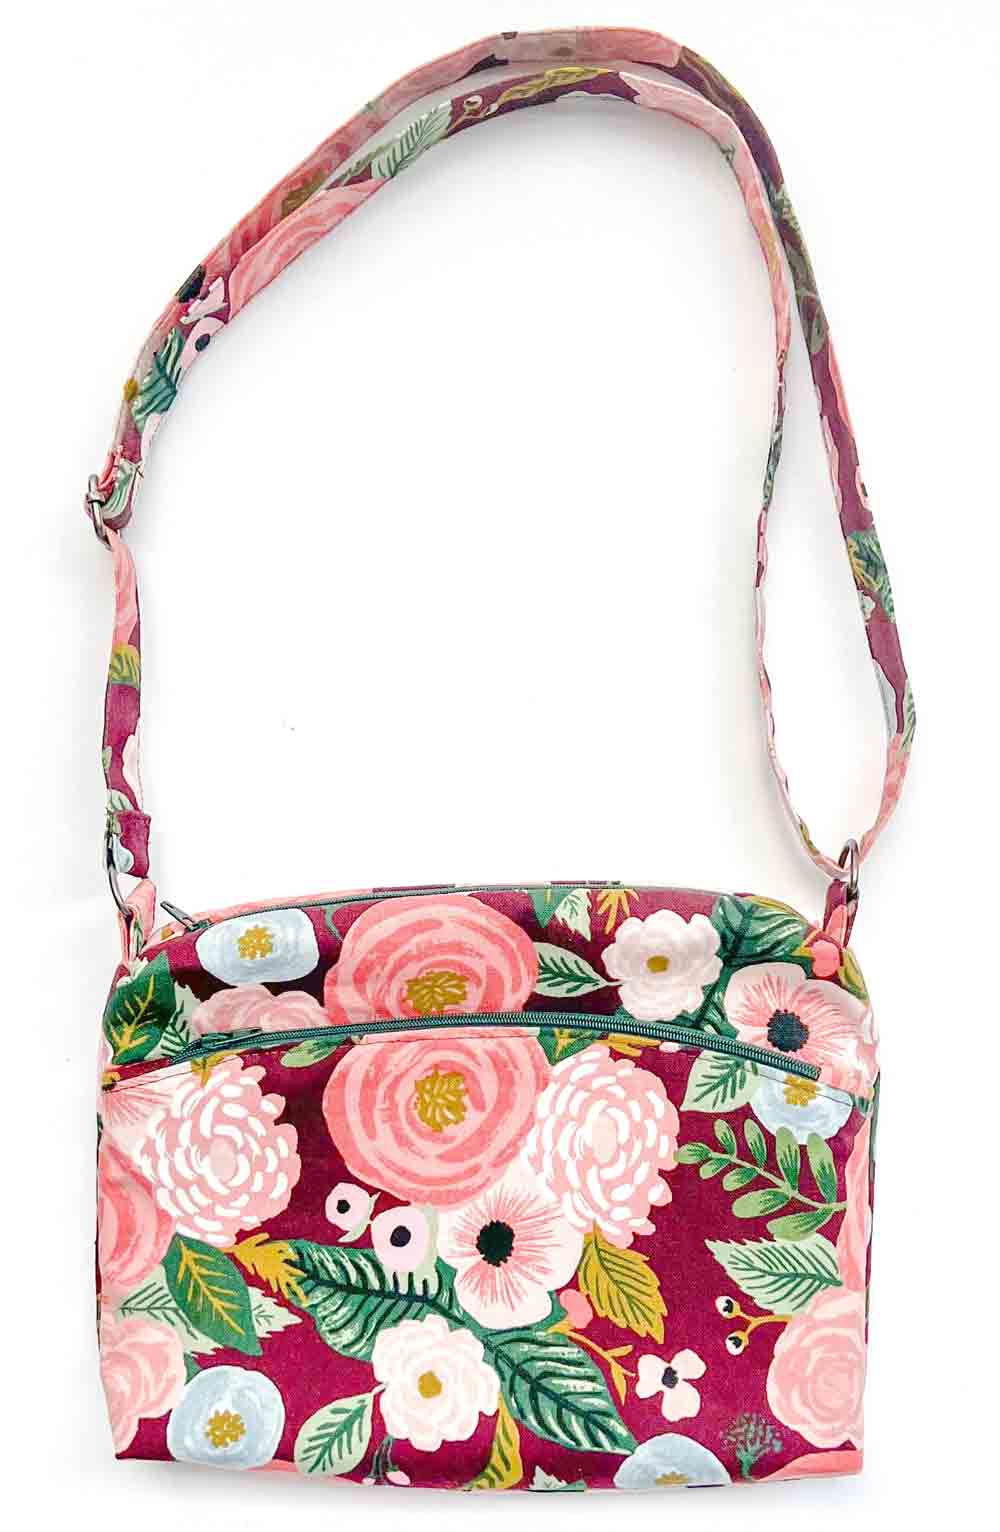
This crossbody bag has adjustable straps that are sewn directly the D-rings, eliminating the need for swivel clips.
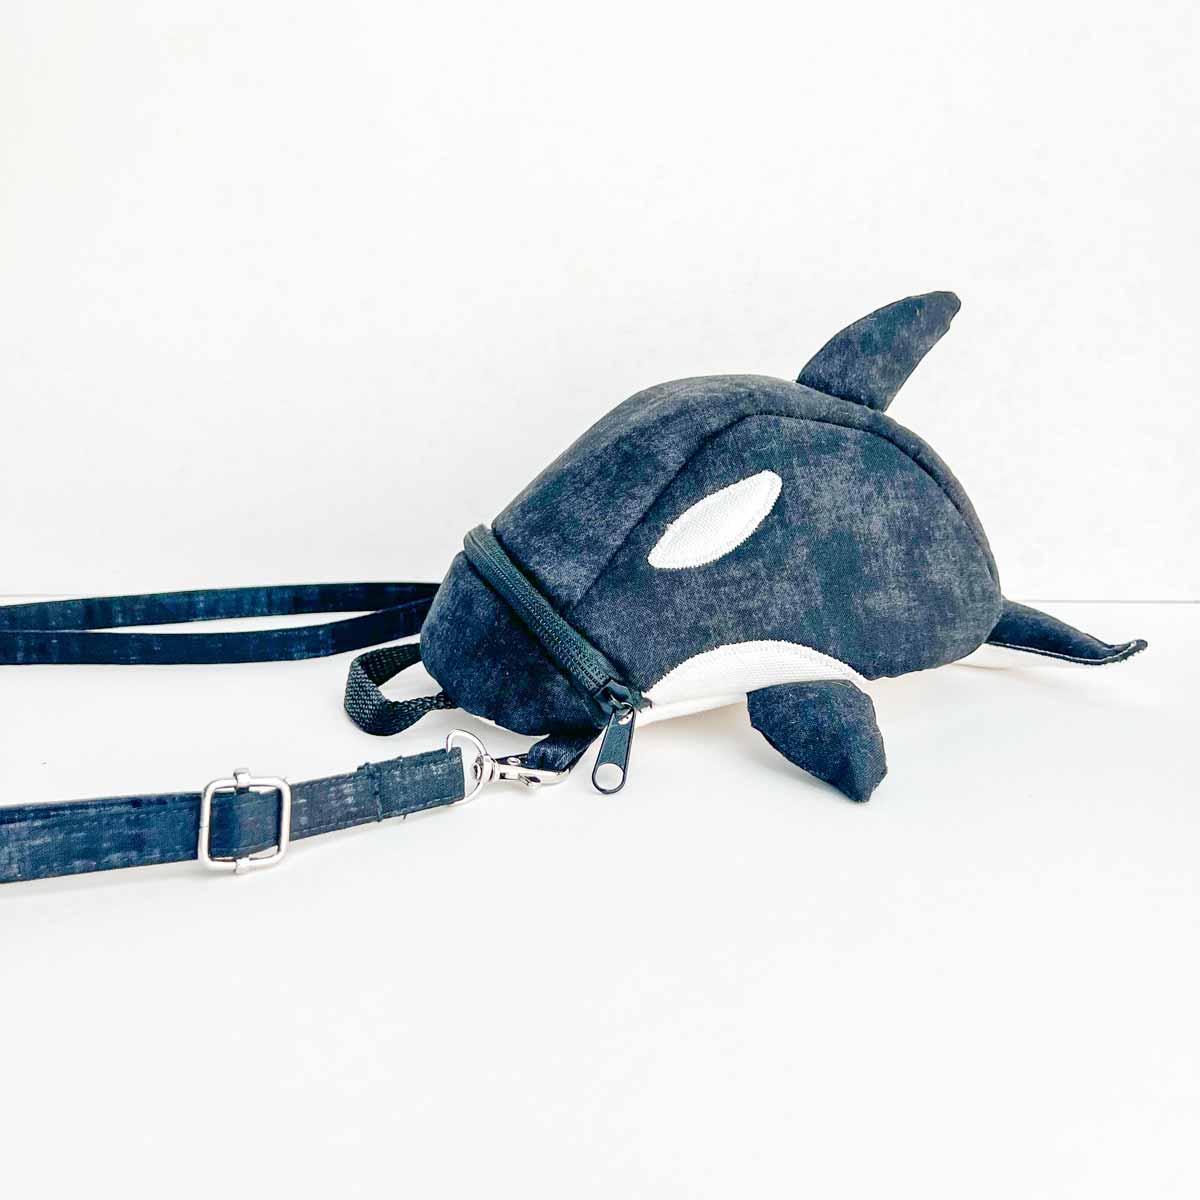
You can also make two fabric loops on your bag without attaching D Rings. Then, you make a bag strap with the swivel clips and clip it directly onto the fabric loops.

This Orca Crossbody Bag shows adjustable bag strap with swivel clips directly clipped onto bag loops, without D-rings.
However, in order to make an adjustable bag strap, you will need a triglide slider. Then, you can decide if you want to just use D rings, just use swivel clips, or use both.

Keep in mind that all the hardware come in different sizes and finish. Make sure you use all the correct sized hardware for the strap size you want to make.
With that said, nowadays, you can easily find hardware kits that come with all 3 hardware, making it super convenient to make bag straps!
This handy kit comes with all 3 pieces of hardware in 15 mm (0.5″), 20mm (0.75″), and 25mm (1″) sizes, all in silver finish. I have the 15mm kit.
This other kit comes in 1″ and 1.5″ sizes and is available in 8 finishes, including brass, bronze, gold, black, gun metal, rainbow, rose gold, and silver. I have the 1″ brass kit.
How to Make an Adjustable Strap with a Slider
Method #1: How to Sew an Adjustable Strap Using Store Bought Webbing
- In this method of making adjustable straps, you use store bought webbing as the strap. This saves time as it eliminates the strap-making step.
- This method adds swivel clips to both ends of the strap, allowing you to switch out the bag straps whenever you want.
First, cut a piece of webbing to your desired length. For this example, I’m using 1.5″ (3.81 cm) wide webbing cut to 60″ (152.4 cm) length.
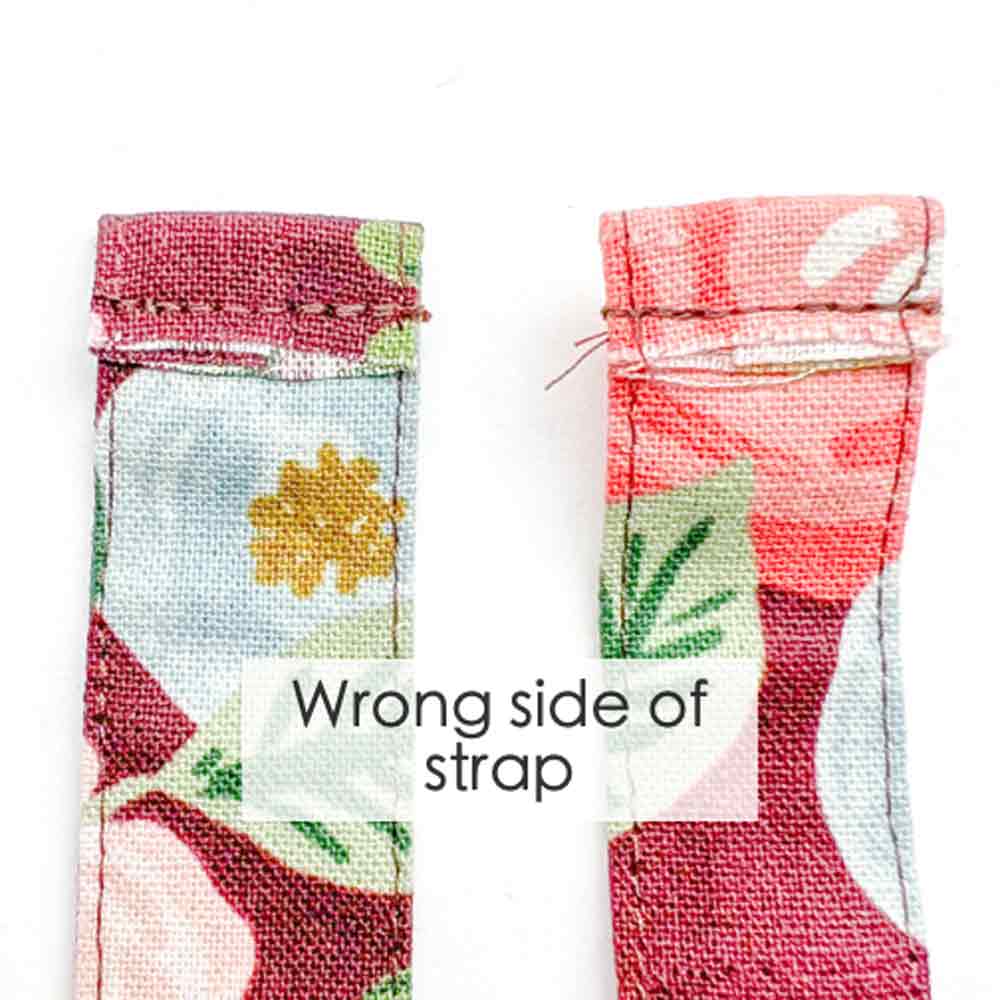
Second, fold down both ends of webbing and stitch about 1/8” (3mm) from fold (black dotted line). We will refer to this side of the webbing (shown in photo) as the wrong side.
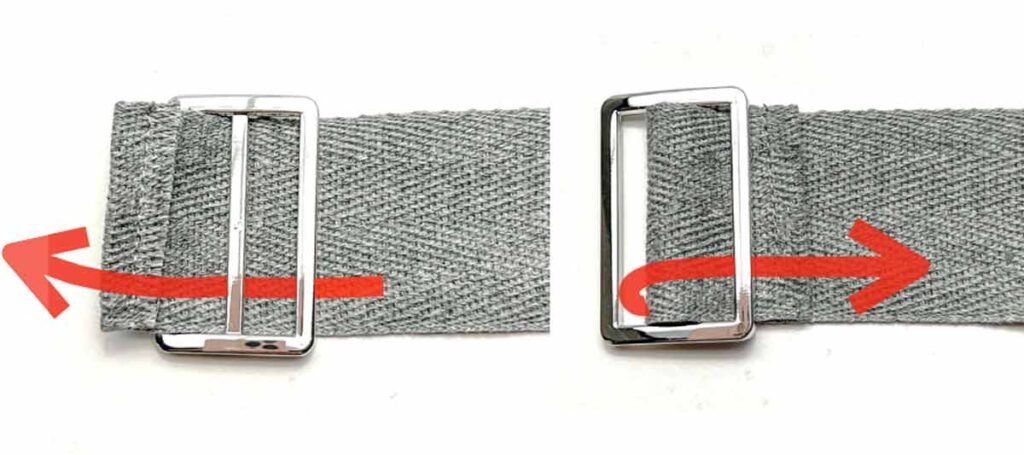
LEFT: Next, with wrong side up, slide one end of the webbing through the center of the slider.
RIGHT: Then pull it under and through right loop of slider so it’s about 0.25 – 0.5 inches (6-12mm) beyond the slider.

Next, stitch down end of webbing to itself, 1/8” (3mm) from folded end (yellow dotted line), as pictured. We will refer to this side of webbing as “SIDE A”.

Next, slide other end of webbing, wrong side up, through swivel clip.

Then pull it all the way through the clip. This end of webbing will be called “SIDE B”.

Next, with SIDE A webbing pointing to the left of slider (LEFT PHOTO), take SIDE B and thread it under right loop of slider.

Then pull up and under left loop of slider (red arrow).

Now thread the end of the webbing over the second swivel clip.

Then stitch down SIDE B to itself.
Your adjustable strap with swivel clips is now finished!
Want to learn how to make an adjustable strap with D-rings? Check out The Duffel Bag Tutorial.
Method #2: How to Sew an Adjustable Strap Using Fabric
- In this method of making adjustable straps, you make the strap with fabric. The advantage is that you can use your favorite fabric to match your bag. Additionally, you can make the straps as wide or thin as you want (sometimes it’s difficult to find the right colored webbing in the correct width).
- This method adds swivel clips to both ends of the strap, allowing you to switch out the bag straps whenever you want.
How to Make a Fabric Bag Strap

In this tutorial, I want to make a 1/2″ wide adjustable bag strap. First cut 2 strips of fabric that measure 2”(5.08 cm) wide and 36” (91.44cm) long (see note below).
Note: I cut the fabric strips that are 36″ (91.44cm) long because I had 1 yard (36″) of fabric. In the next steps I will piece them together and trim them down to the final length of my bag strap, 60″ (154.2cm).
Depending on how much fabric you have, the fabric length you cut may be different.

Cut a strip of fusible interfacing that measures 2” (5.08cm) wide and 60”(152.4cm) long.
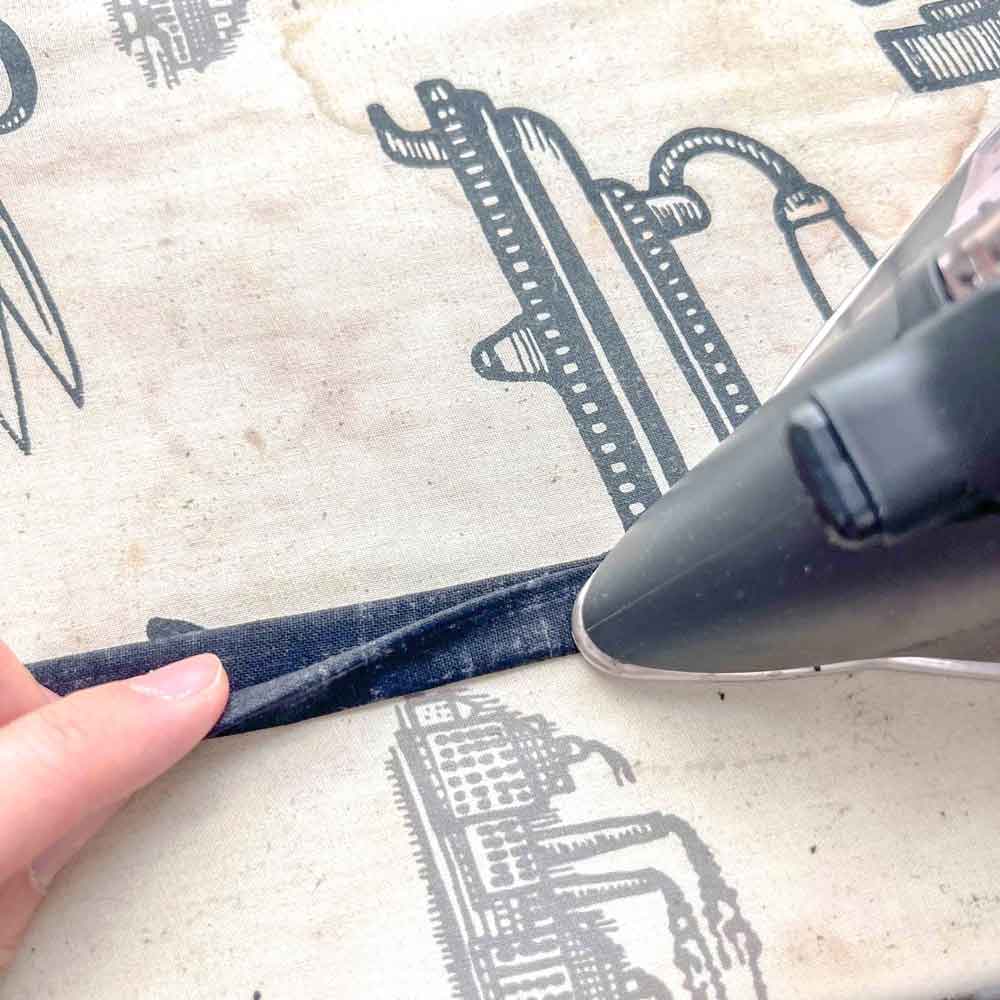
Note: If you use thicker fabric such as denim or canvas, you will not need to use interfacing. I am using a thin cotton fabric in this example.

TOP: Place fabric strips right sides together, perpendicular to each other.
MIDDLE: Using a ruler, mark corner to corner (where the two strips overlap) and sew together. Back stitch on both ends.
BOTTOM: Trim seam allowance to 1/4” (6mm) and press seam open with iron.

TOP: Apply fusible interfacing to wrong side of fabric strip.
MIDDLE: Trim off excess fabric (if necessary) and fold fabric strip in half, press, and open to mark the midline.
BOTTOM: Fold bottom edge up to midline and press, then fold top edge down to midline and press.
Next, fold strap in half once more and press.

Finally, top stitch along both long edges of strap, 1/8” (3mm) from edge.


Your strap is now done!
How do you Thread an Adjustable Strap

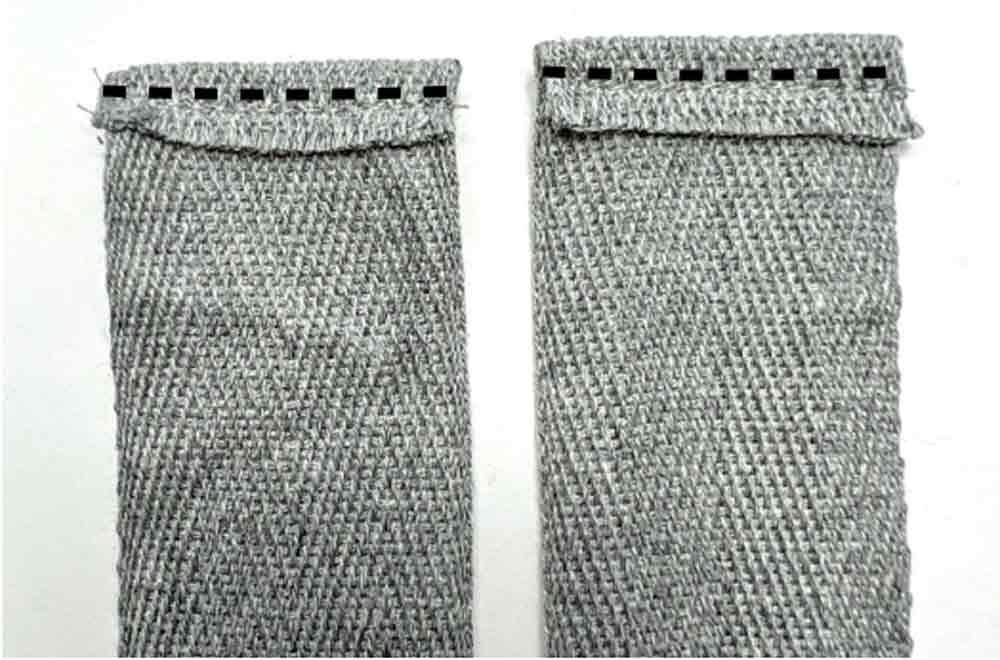
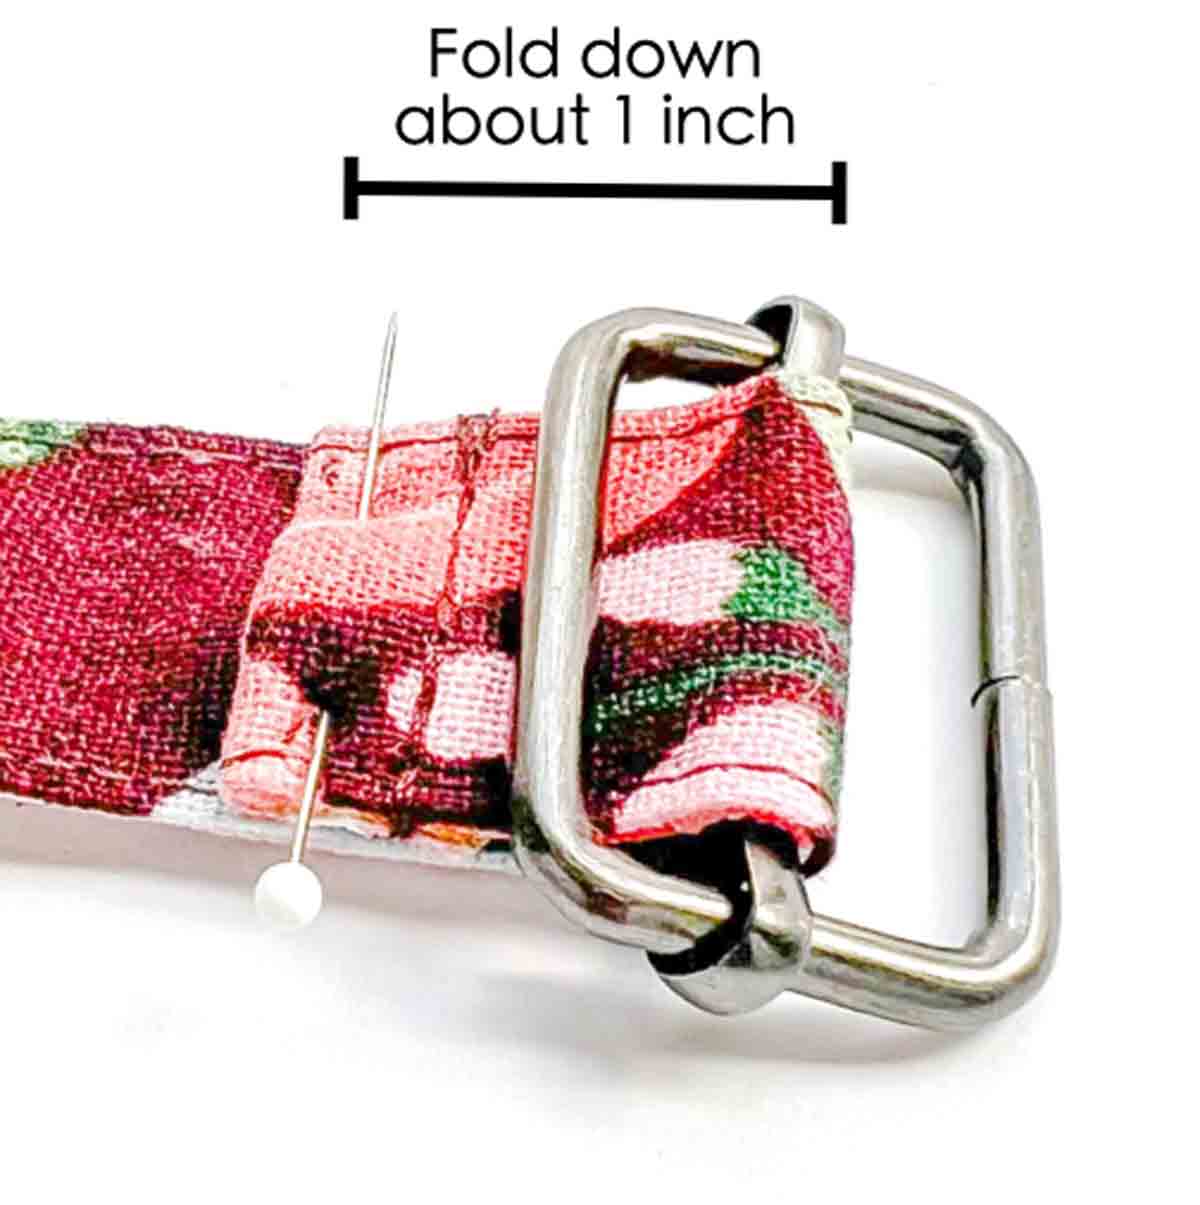
First, fold both ends down about 1/2”(1.27cm), hold in place with clips and stitch in place (yellow line). Backstitch a few times to reinforce.

Next, slide one end of strap under midbar of triglide slider.
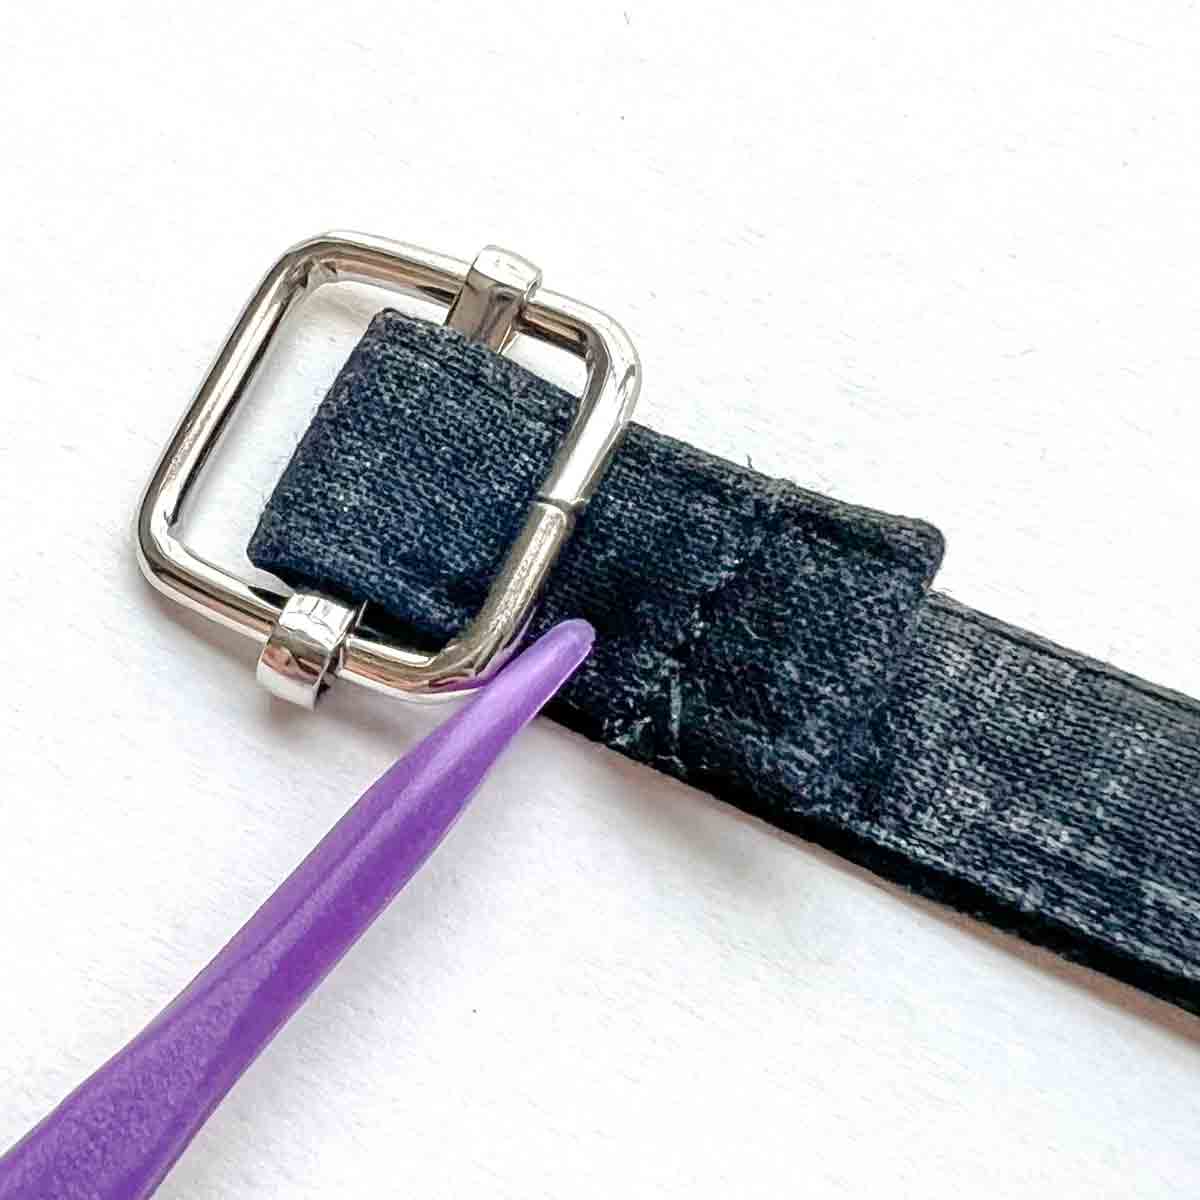
Then, loop the strap over midbar and under right loop of triglide slider.

Stitch in place (yellow lines). Back stitch a few times to reinforce

Next, take other end of strap and thread it through swivel clip.

Your strap will look something like the photo.

Now take that same end of strap and loop it under and through triglide like in the photo.
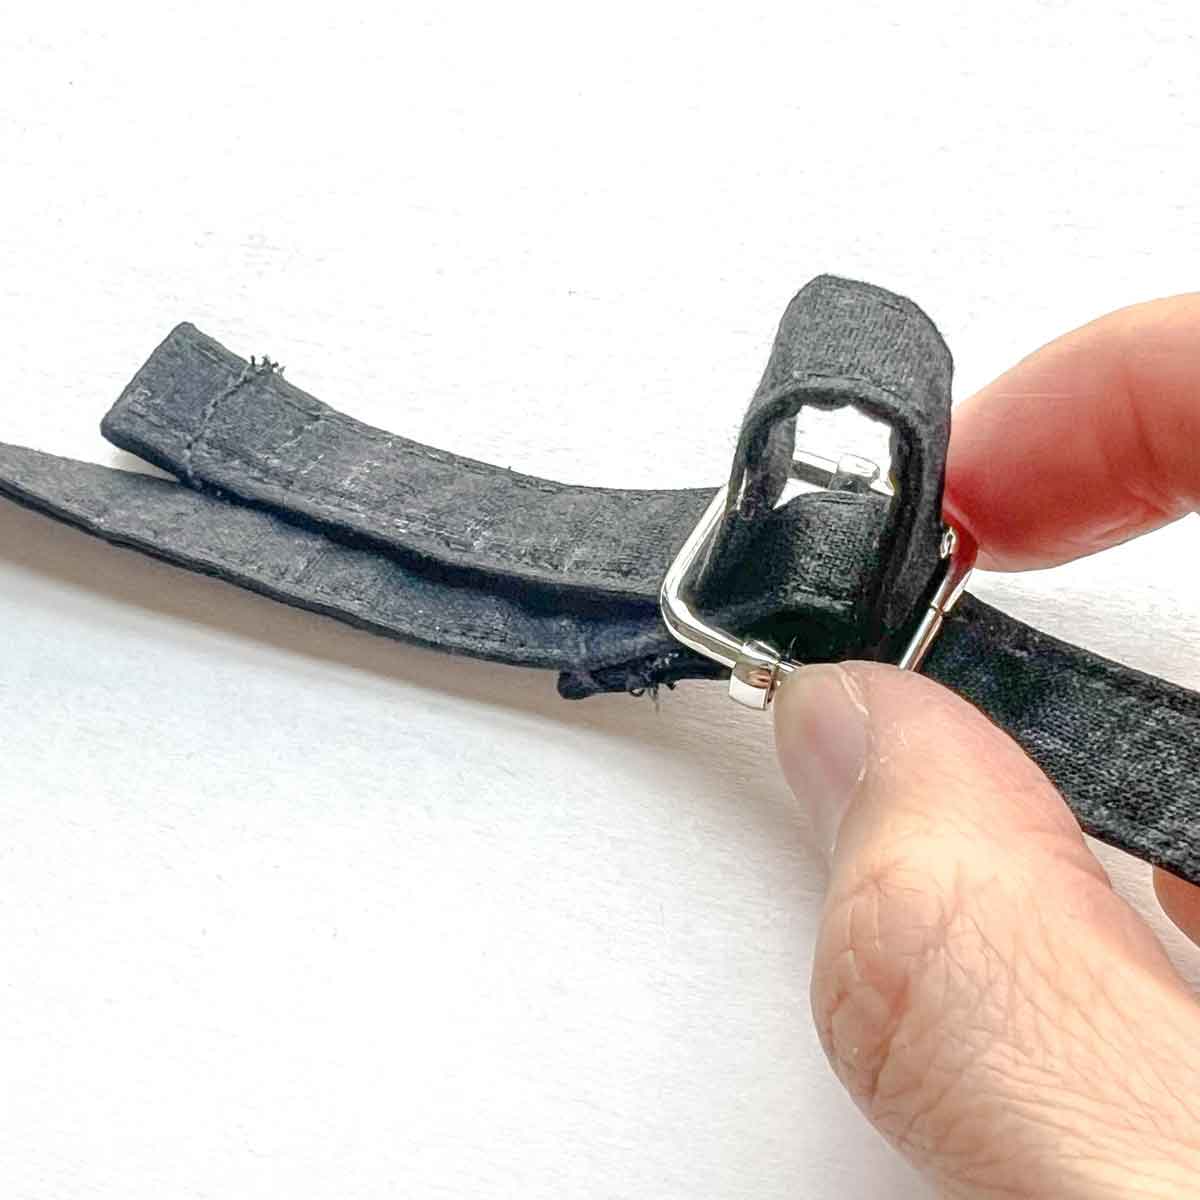
Another view of the strap threaded through the slider.

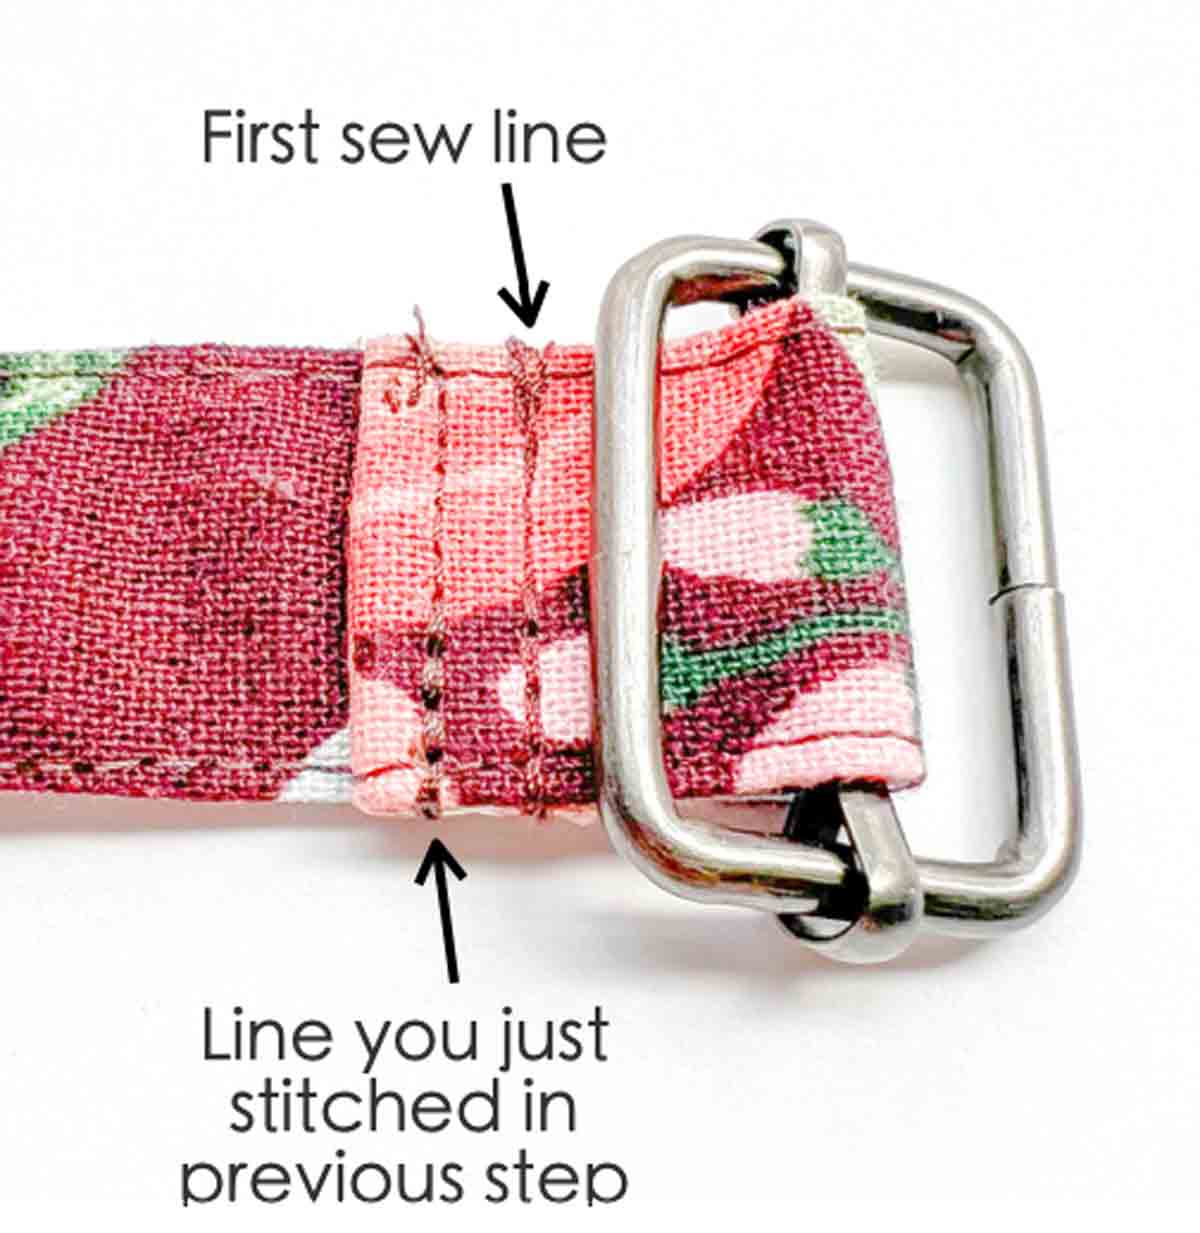
Then slide end of strap over second swivel clip and stitch down, 1/8” (3mm) from folded edge of strap. Back stitch to reinforce.

Finally, make 2 stitch lines to make it extra secure (yellow lines).

Your bag strap is now complete!
Clip it to your bag and you are ready to go!
Interested in the Orca bag pattern? Check it out in MY ETSY SHOP.
Method #3: How to Sew an Adjustable Strap Without Swivel Clips
- In this method of making adjustable straps, you make the strap using fabric and sew it directly to the D-ring (on the bag). The advantage is that you won’t need to purchase extra hardware (swivel clips).
- Use this method if you know you won’t be changing out the bag straps.
- You can use store-bought webbing to save time.

First, make a strap of your desired width according to How to Make a Fabric Bag Strap. This photo shows a 1″ (2.54 cm) wide bag strap.
How to Loop an Adjustable Bag Strap-No Swivel Clips

First gather your supplies. You will need the bag strap and a correct sized triglide slider.
Next, fold one end of the strap down 1/2” (1.27cm) and stitch. Repeat on other end. The stitched down side of the strap with the raw edges will be referred to as the wrong side of strap.

Then, take one end of of bag strap and slide it up and over the middle bar of the strap slider. The right side of the strap will be facing up.

Another view of the long strap correctly going over the center bar of the strap slider.
Next, fold strap over itself, wrong sides together, about 1 inch (2.54cm) and pin in place.

Now stitch strap down, making sure to back stitch a few times to reinforce. That purple thang is a super handy tool to help guide the fabric into the machine.
View of strap sewn to itself. Don’t forget to also stitch down the first sew line for extra reinforcement.

Now take other end of strap, wrong side up, and slide it through one of the D rings. For reference, I threaded the strap over right side strap of the bag (your side right if viewing the bag with the front facing up).
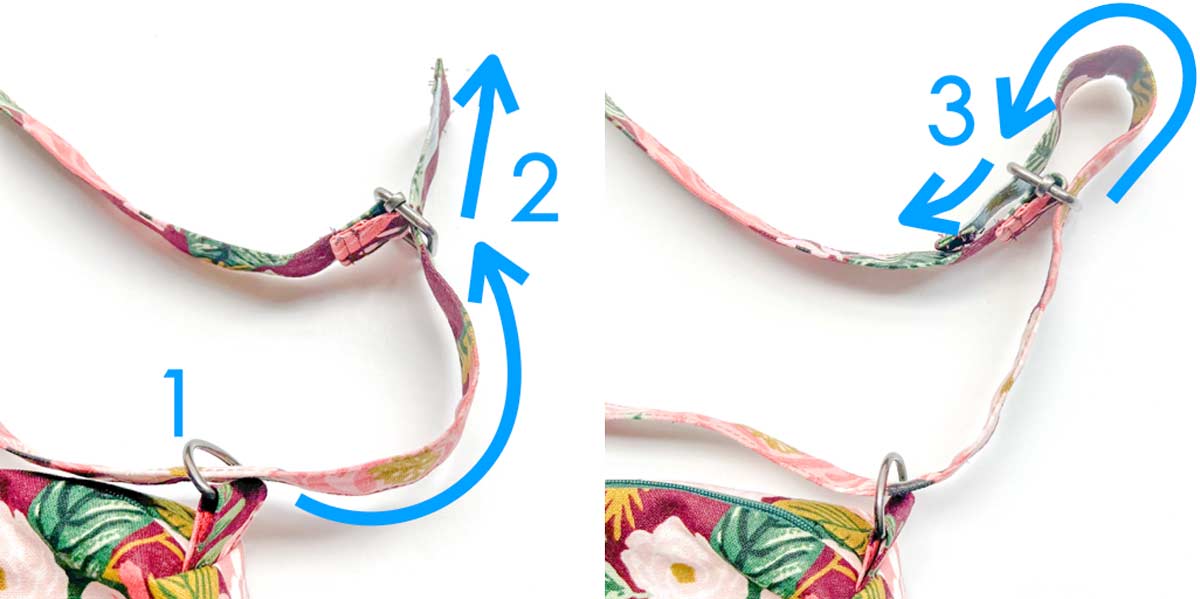
Then pull the strap through (1) and thread it under (2) and over (3) bag slider.
Next, keep pulling the strap through slider. Then thread the strap through D-ring on other side (4), wrong side facing up.
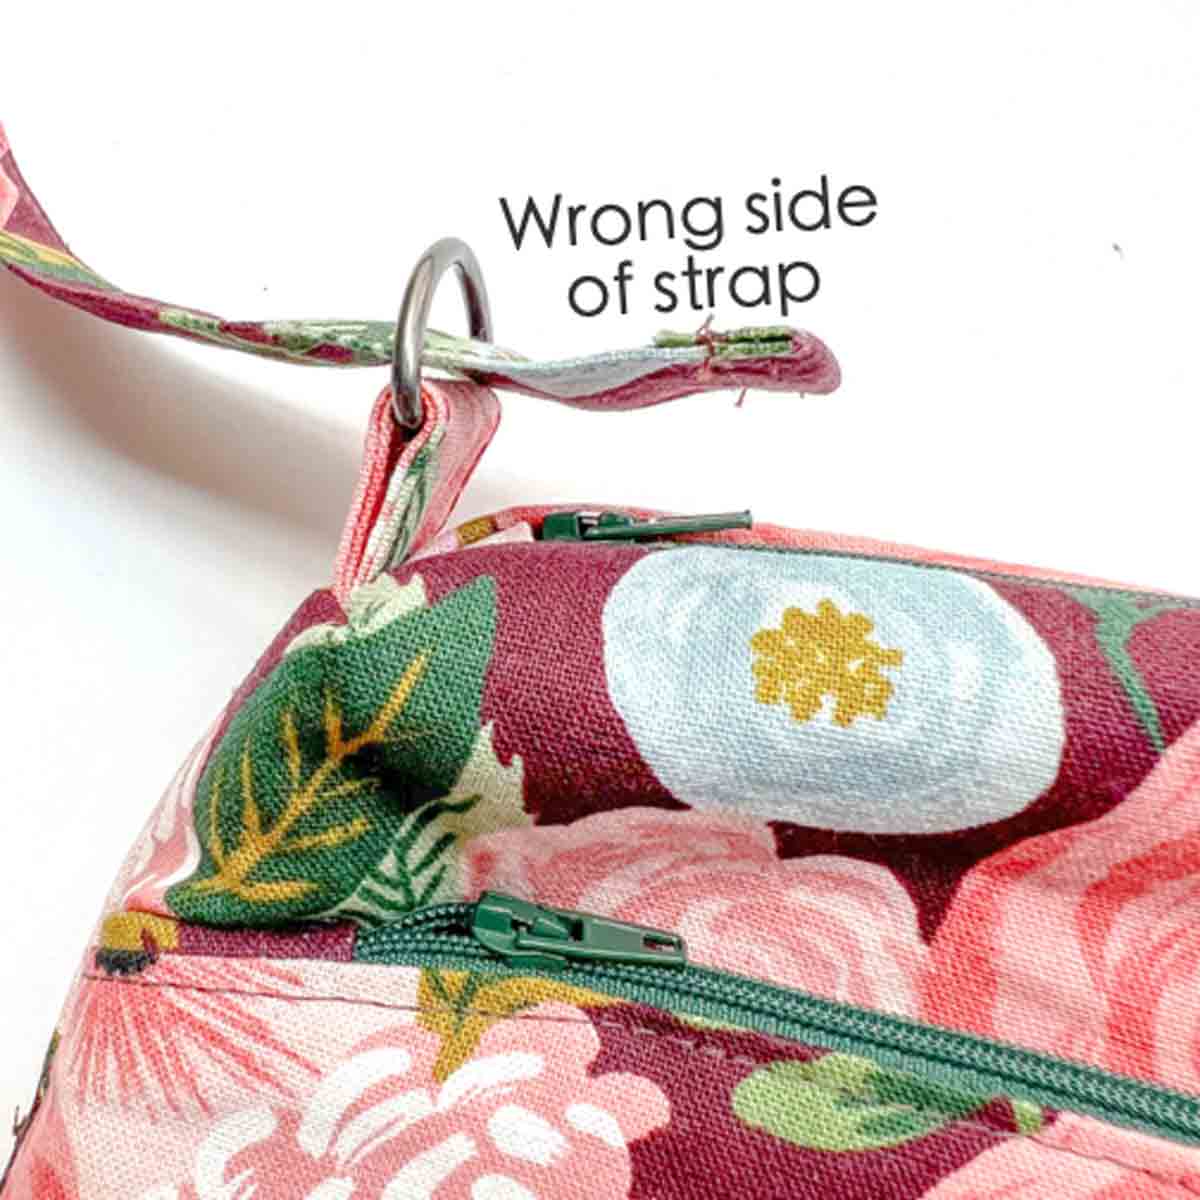
Close up view of strap end threaded through left D-ring. See how the wrong side of the strap is facing the curve of D-ring.
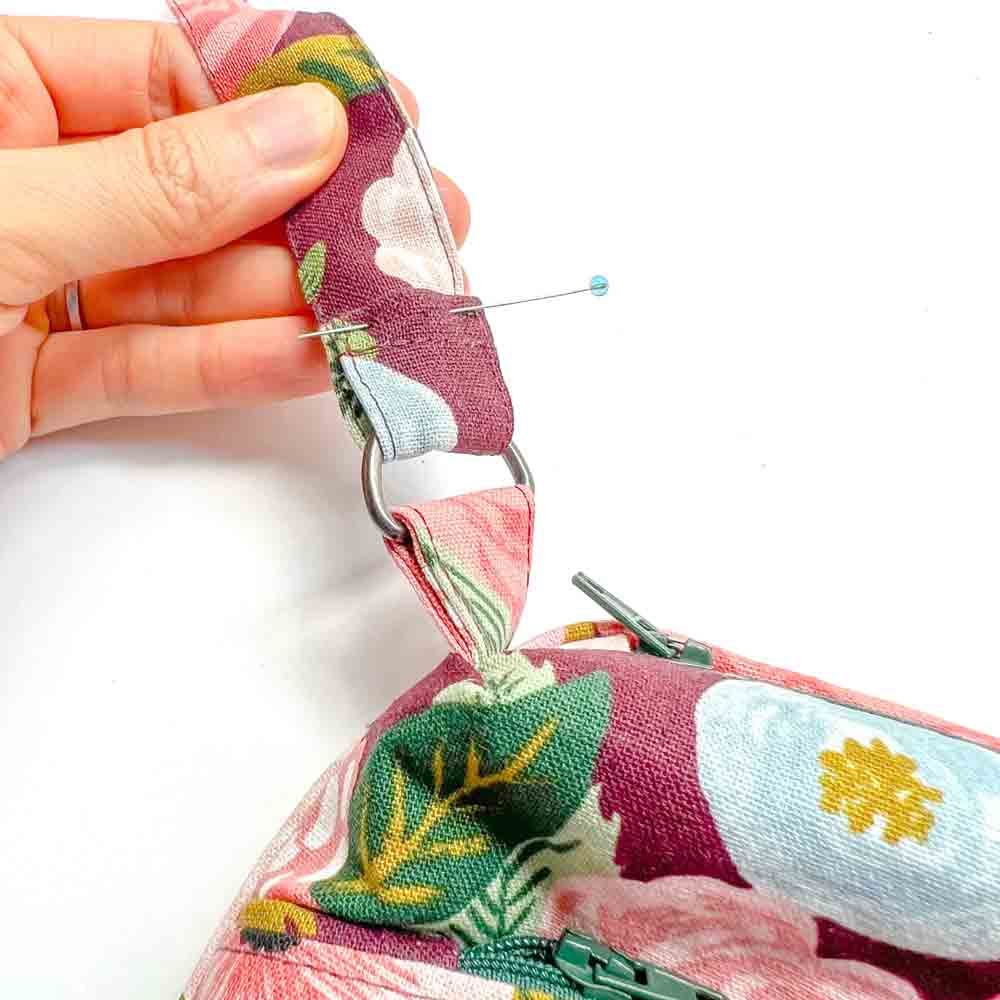
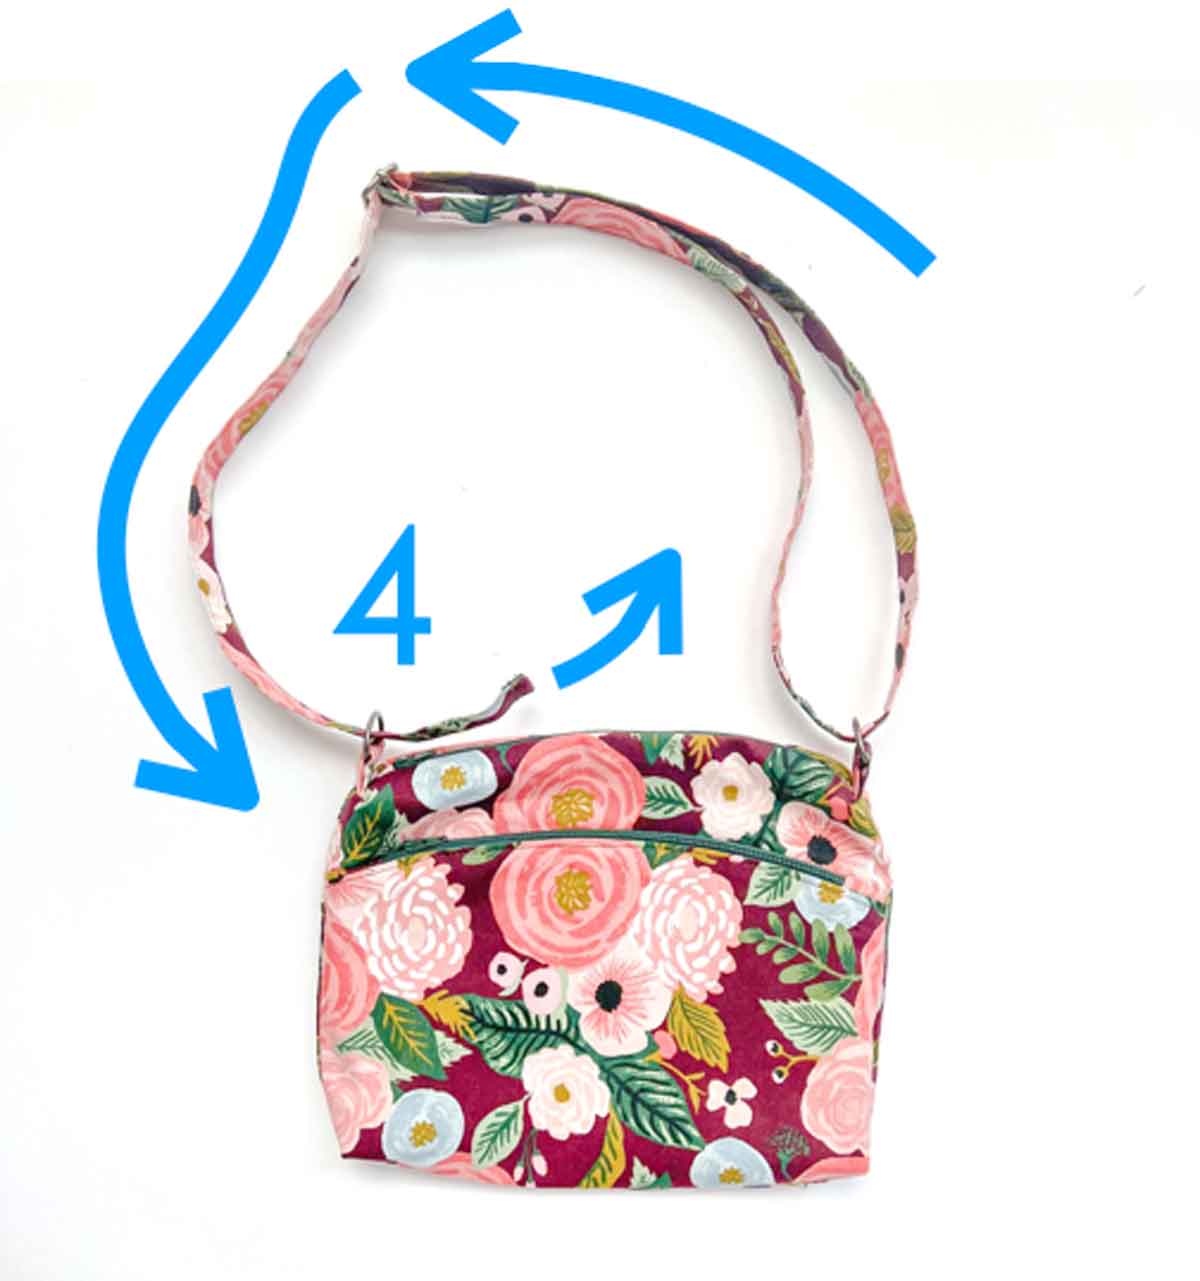
Next, fold strap over itself 1” (1.27cm) and pin in place.

Then sew strap over itself as you did previously. Make sure to backstitch a few times to reinforce.
Tada! You have just learned how to make straps for a bag. Wasn’t that easy?
Now that you know how to sew an adjustable strap for a bag, check out the following Bag Tutorials that go perfectly with an Adjustable Bag Strap:
DIY Adjustable Strap (For Bags & Purses)

Sewing an adjustable strap for bags and purses is easier than you think! Learn how to easily make an adjustable bag strap in 3 ways, depending on your need!
Materials
- STORE BOUGHT WEBBING - 60" or more
- WOVEN FABRIC - 1 Yard
- FUSIBLE INTERFACING
- MATCHING THREAD
- BAG STRAP HARDWARE: D-RING (X2), SWIVEL CLIPS (X2), TRIGLIDE SLIDER (X1)
Tools
Instructions

METHOD #1: ADJUSTABLE BAG STRAP WITH WEBBING
- Fold down ends of webbing and stitch about 1/8” (3mm) from fold.
- Slide one end of the webbing through the center of the slider.
Pull it under and through right loop of slider so it’s about 0.25 – 0.5 inches (6-12mm) beyond the slider. - Stitch down end of webbing at 1/8” (3mm) from from previous fold.
- Slide other end of webbing through swivel clip (folded end facing up) and pull over the clip.
- Take the end of the webbing to the slider and feed it across and over the center bar of the slider.
- Thread the end of the webbing over the second swivel clip and stitch down.
- Shoulder strap is finished.
- Clip shoulder strap to duffel bag and adjust for length as necessary.

METHOD #2: ADJUSTABLE BAG STRAP WITH FABRIC
- HOW TO SEW BAG STRAP WITH FABRIC
- First cut 2 strips of fabric that measure 2”(5.08 cm) wide and 36” (91.44cm) long (see note 1). Skip to step 8 if you do not need to join fabric pieces together.
- Cut a strip of fusible interfacing that measures 2” (5.08cm) wide and 60”(152.4cm) long.
- Place fabric strips right sides together, perpendicular to each other.
- Using a ruler, mark corner to corner (where the two strips overlap) and sew together. Back stitch on both ends.
- Trim seam allowance to 1/4” (6mm) and press seam open with iron.
- Apply fusible interfacing to wrong side of fabric strip.
- Trim off excess fabric (if necessary).
- Fold fabric strip in half lenghtwise, press, and open to mark the midline.
- Fold bottom edge up to midline and press, then fold top edge down to midline and press.
- Fold entire fabric strip in half along the center and press.
- Top stitch first along the open end of the strap. Then, do another row of top stitch along the other long edge. Your top stitch should be about 1/8” (3mm) from the edge. Bag strap is now finished.
- Follow instructions on METHOD #1 to thread bag strap (it's the exact same process) to triglide slider and swivel clips.
METHOD #3: ADJUSTABLE BAG STRAP WITH FABRIC, NO SWIVEL CLIPS
- If using store bought webbing, cut a piece to the desired length. If making your own fabric straps, follow instructions from METHOD #2.
- Fold one end of the strap down 1/2” (1.27cm) and stitch. Repeat on other end. The folded down side of the strap with the raw edges will be referred to as the wrong side of strap.
- Take one end of of bag strap and slide it up and over the middle bar of the strap slider. The right side of the strap should be facing up.
- Fold strap over itself, wrong sides together, about 1 inch (2.54cm) and pin in place.
- Stitch strap down, making sure to back stitch a few times to reinforce.
- Also stitch down the first sew line for extra reinforcement.
- Take other end of strap, wrong side up, and slide it through one of the D rings on the side loops of bag (doesn’t matter which one).
- Pull the strap through and thread it under and over bag slider.
- Continue pulling the strap through the slider. Then thread the strap through D-ring on other side of bag, wrong side facing up.
- Fold strap over itself 1” (1.27cm) and pin in place.
- Sew strap over itself as you did previously. Make sure to backstitch a few times to reinforce.
- Your bag is now finished and ready to use!
Notes
NOTE 1: I cut the fabric strips that are 36" (91.44cm) long because I had 1 yard (36") of fabric. In the next steps I will piece them together and trim them down to the final length of my bag strap, 60" (154.2cm). Depending on how much fabric you have, the fabric length you cut may be different.


Thank you SO MUCH for this blog post! I’ve had several bags made and was scratching my head on how to best make and attach straps on them. I looked at oodles of videos and other tutorials, and they all just made me more confused. Yours nailed it! Can’t thank you enough!
Hi Julie,
Thank you for your kind words and so glad to hear that you found the blog post helpful!