DIY Baby Hat with Bow – for Beginners (Free Pattern)
This post may contain affiliate links. Please read my disclosure policy for details. As an Amazon Associate, I earn from qualifying purchases.
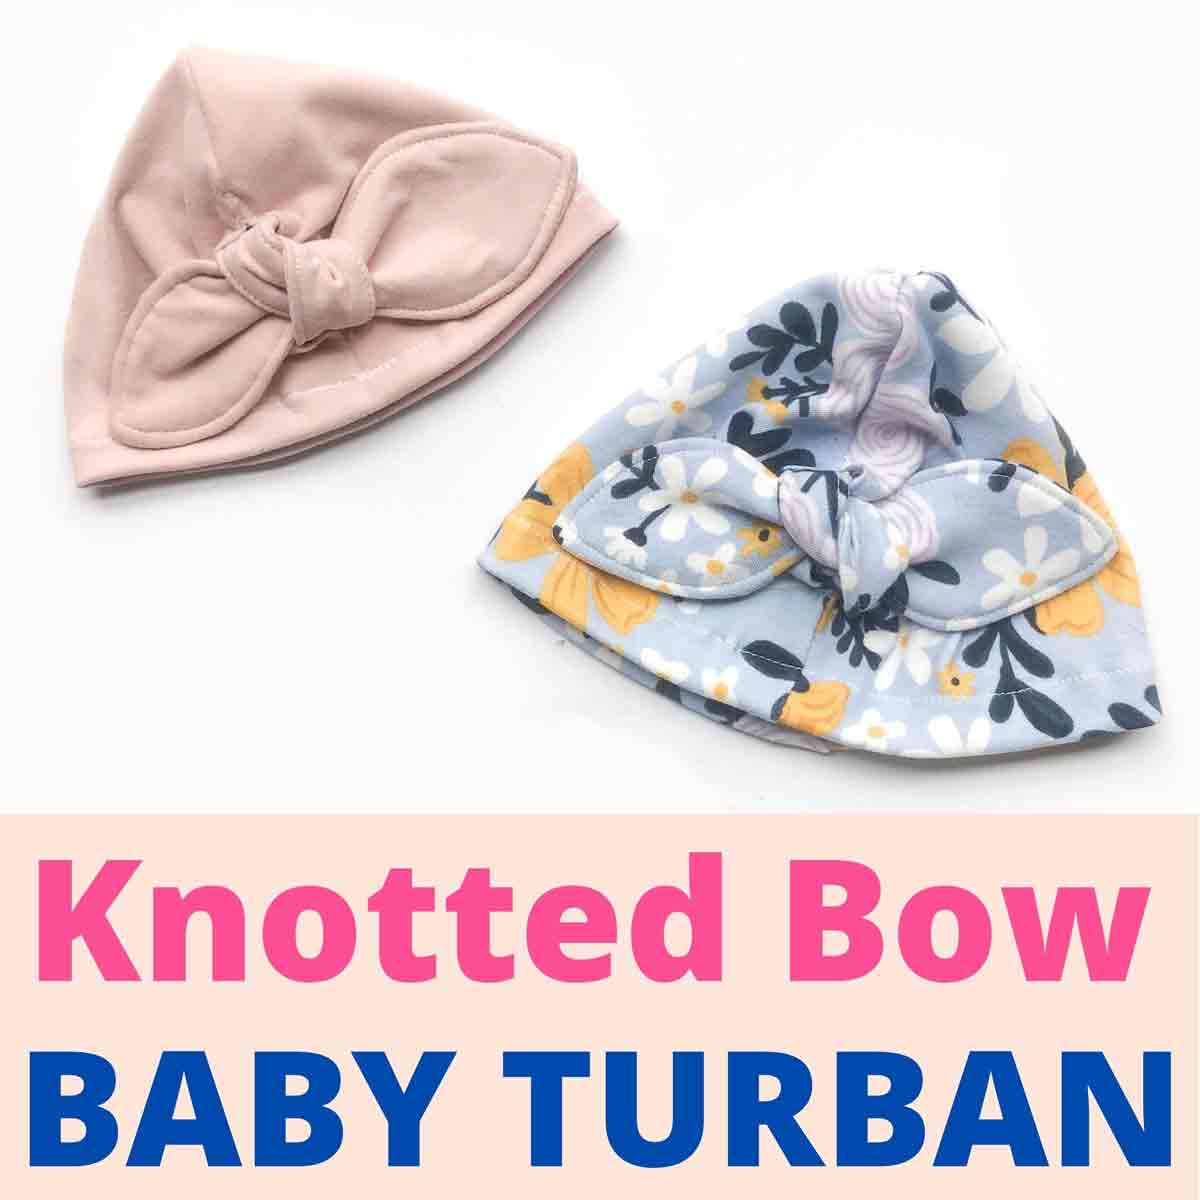
Make this cute DIY Baby Turban with knotted bow using stretchy knit fabric. This easy sewing project is great for beginners who want to learn how to work with knit fabrics!

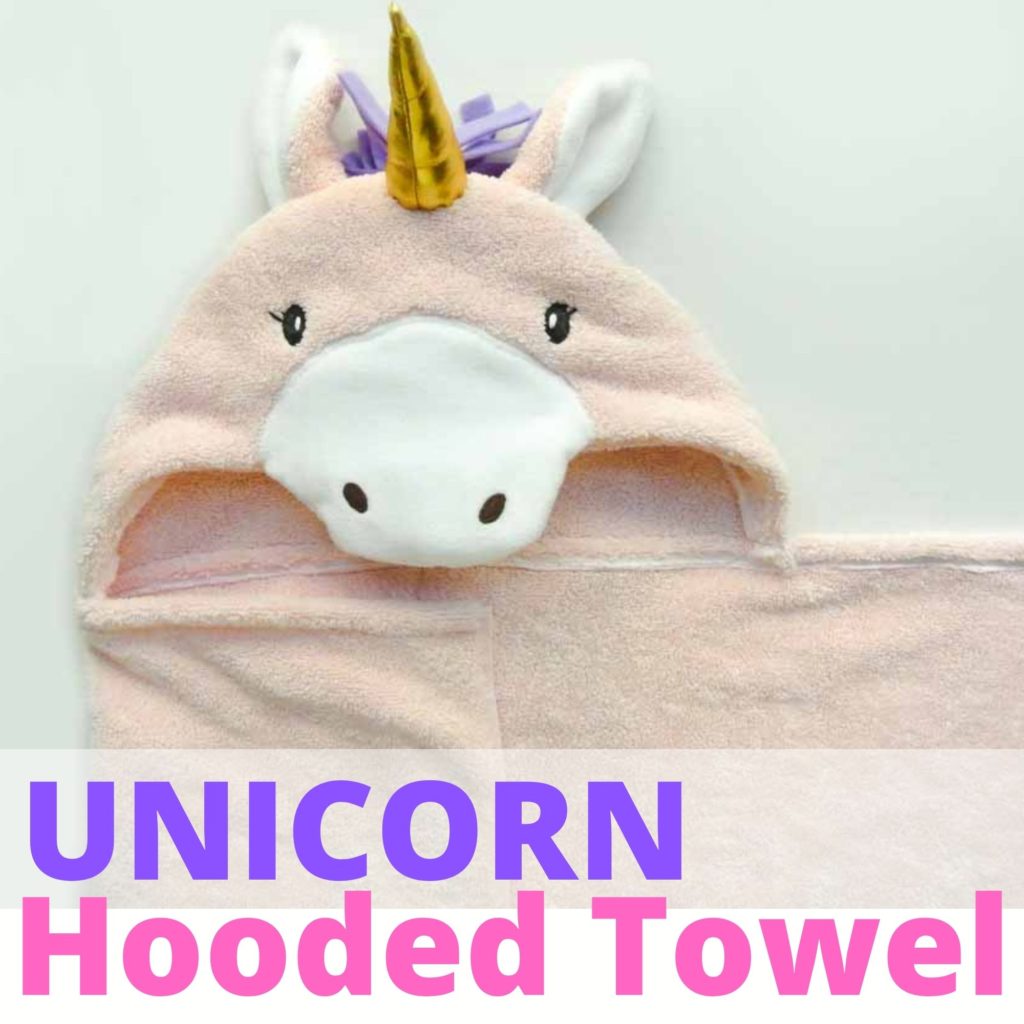
Not too long ago I made a Unicorn Hooded Towel for a friend who had a precious baby girl. It was so fun sewing something pink and girly that I had to make more! (As I mentioned in that post, it seems like most of my mom friends have boys, so I was really itching to make something girly).
Recently, while researching for DIY headband ideas I came across the cutest Mommy and Me Matching Headbands. Since I have a little boy, I decided to make these headband sets as gifts. And while I was at it…why not add a baby turban as well!
In this tutorial I will show you how to make this super easy and adorable baby turban with knotted bow. It matches perfectly with the DIY Knotted Bow Headband. You can make these as Mommy-and-Me sets, big-sis-and me sets, or just by themselves. They are super fun and easy to sew and I just love they way they turn out! I’m hoping more of my friends have girls so I can make more of these!
DIY Knotted Bow Baby Turban Sizing
The pattern sizes for this project are:
- Premie
- 0-3M
- 3-6M
- 6-12M
- 12-24M
Grab it here: Knotted Bow Baby Turban (available in my free resource library)
For this project I recommend using a knit fabric with Spandex (Lycra). Spandex makes the fabric more elastic, but also gives the fabric good recovery one it’s stretched. This helps the baby hat retain its shape over time instead of getting stretched out.
Note that the higher the percentage of Spandex, the better the fabric will recover when stretched. This means that the fabric will feel “tighter” compared to a fabric with less spandex. So a knit fabric with 10% spandex will feel tighter compared to one with only 2% spandex.
With that said, if your fabric contains more than 15% spandex, I recommend going a size up. So if you are making a turban for a 3-6 month old baby, use the 6-12M pattern instead. Otherwise, stick to the sizes listed.
How to Cut out Pattern On Knit Fabric
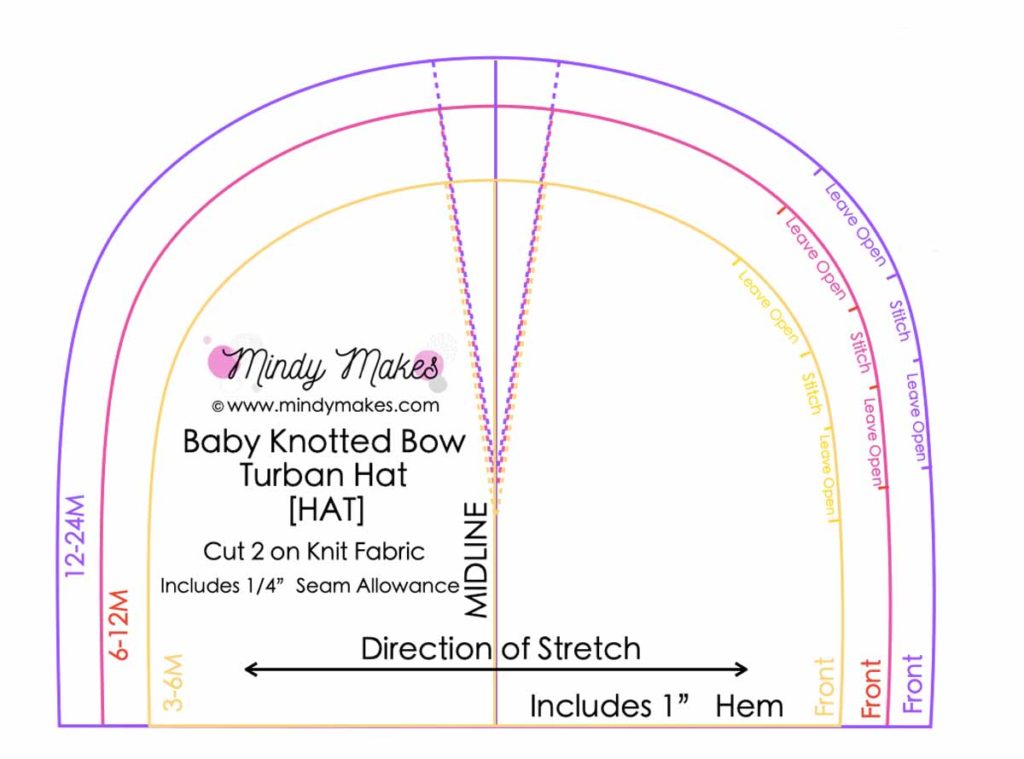
On the pattern you will see an arrow running horizontally across labeled “Direction of stretch”. Place the pattern so this arrow runs along the direction of the fabric’s greatest stretch. To determine where the fabric’s direction of greatest stretch is, we must first understand how knit fabric stretches.
Generally knit fabrics have either a 2 way Stretch or a 4 way Stretch.
2 Way Stretch Knit:


2 Way Stretch Knit – The fabric stretches most along the cut line (perpendicular to the selvedge), with little stretch up and down (along the selvedge). It’s called 2 way stretch because you can stretch the fabric to the left and to the right. For a 2 way stretch knit, align the arrow parallel to direction of greatest stretch, which is perpendicular to the selvedge.
4 Way Stretch Knit:


4 Way Stretch – The fabric stretches equally whether you pull it horizontally (perpendicular to the selvedge) or vertically (along the selvedge). For a 4 way Stretch knit, feel free to lay the pattern in any direction you wish. However, if the knit fabric has a specific design you want on the turban, you will need to place the pattern where you want the design.
What do I Need to Make DIY Baby Bow Turban?
Here are the materials you need to make this easy baby turban hat:
- Pattern: Baby Bow Turban Hat Pattern (available in my free resource library) – get the password by subscribing.
- Knit Fabric -1/2 Yard. For this tutorial I used this and this, both of which are 98% Cotton and 2% Spandex. For the dusty rose colored Mommy-and-Me Set, I used this fabric from Joanns.com that’s 90% Polyester and 10% Spandex.
- Fusible Interfacing – Needed to stiffen the bow-tie which helps keep its shape while wearing. I used ultra lightweight
- Thread – regular good quality polyester or cotton thread. You don’t need elastic thread.
Here are the tools you will need:
- Sewing machine – one that has a zig-zag stitch option or other stretch stitches. Refer to your sewing machine manual if you are unsure
- Serger (optional) – for finishing the raw edge of fabric
- Fabric Scissors – these Ginghers Fabric Shears are my favorite.
- Ball Point Pins or Sewing Clips – ball point pins are ideal as they won’t push out the threads of the knit fabric while pinning. However, you can use regular pins if that’s all you have.
- Ball Point Sewing Needle – helps prevent damaging or breaking knit fibers when you sew.
- Fabric Chalk – for marking fabric
- Clear Ruler
- Iron – for pressing
5 Tips for Easy Sewing With Knit Fabric
- Use a Stretch Stitch – A regular Straight stitch is not flexible and will pop when you stretch it. Stretch Stitches are made by a series of forward and backward stitching, giving it flexibility. This way, the threads won’t pop when you stretch out the fabric. Refer to your sewing machine manual for built-in stretch stitches.
- Use a Zig-Zag Stitch – if your sewing machine doesn’t have stretch stitch function, it will most likely have a zig-zag stitch. The zig-zag stitch is able to expand when the fabric is stretched, thus preventing thread popping.
- Use Ballpoint needles– Ballpoint needles have a smooth round tip, allowing it to slide in between the loops of knit fibers. Sharp needles (Universal needles) on the other hand, can pierce knit fibers and cause holes and tears. So make sure to use ballpoint needles when working with knit fabrics!
- Don’t stretch the fabric while sewing – use your hand to gently guide your fabric into the machine and let the machine move the fabric along. Stretching the knit as you sew will cause wavy seams that don’t go away!
- Test on scrap fabric – try the stitch and needle on the knit you plan to use. Adjust machine settings as needed. This also lets you practice and get to know the feel of your fabric as you feed it into the machine. No one likes to undo stitches, so save yourself that frustration later on by making the mistakes on scrap fabrics now.
For more tips on sewing knit fabrics, check out the post: How to Sew Knits and Stretchy Fabrics
How to Sew Knit Baby Turban Hat

Cut out Pattern pieces on fabric and interfacing. Make sure to mark dart line on wrong side of fabric.
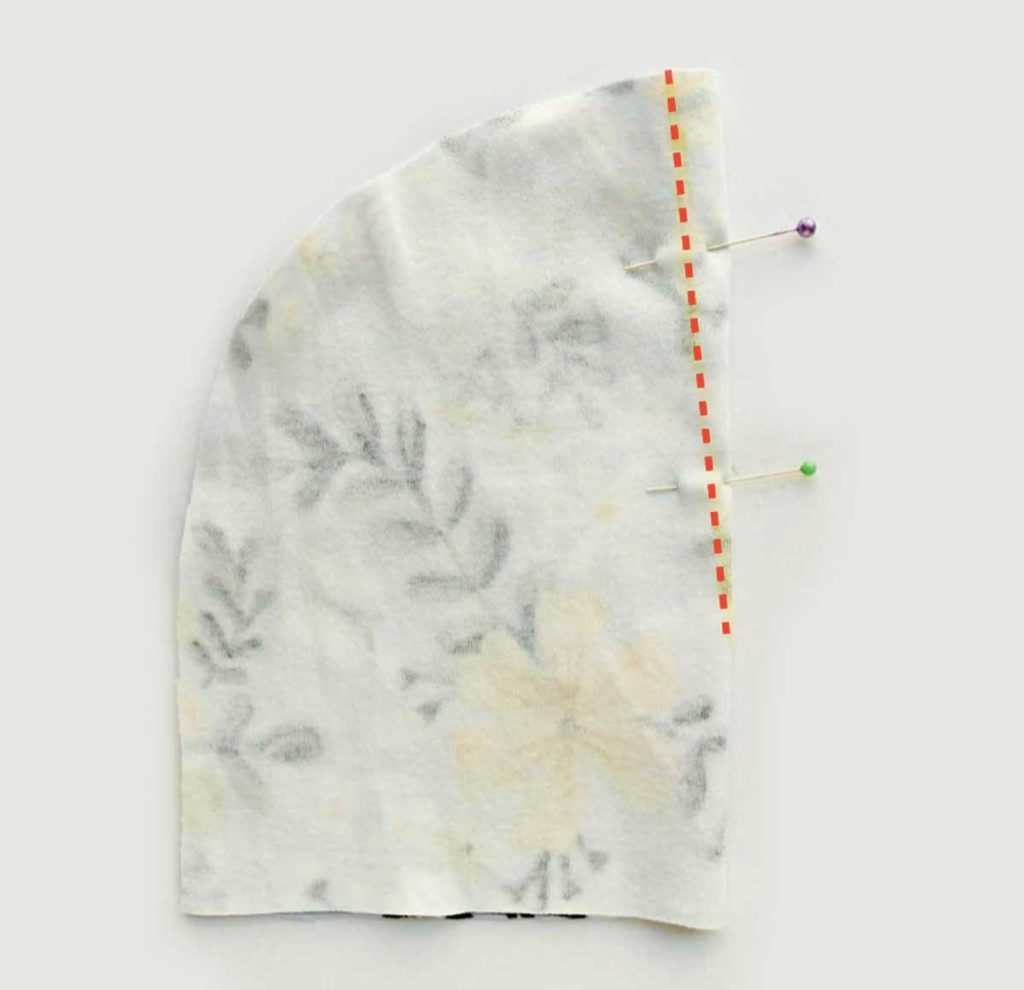
Fold Hat Piece in half, right sides together. Pin and sew dart line (red dotted line). Repeat for other Hat Piece.
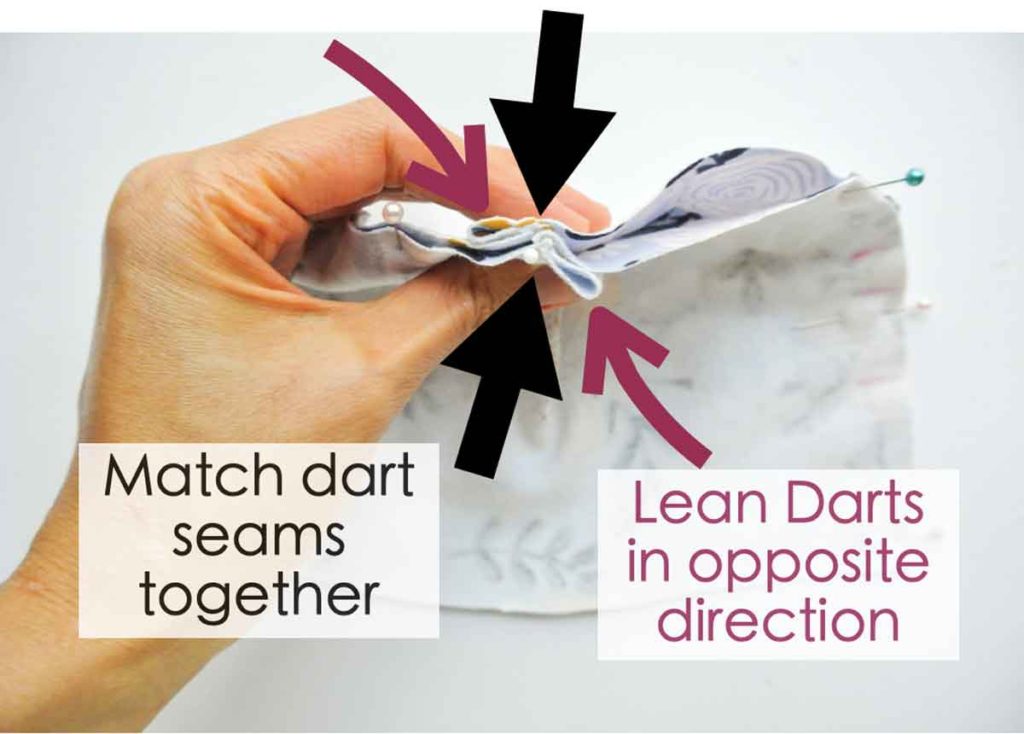
Place Hat Piece right sides together, matching at dart seam. Lean darts in opposite direction and pin.
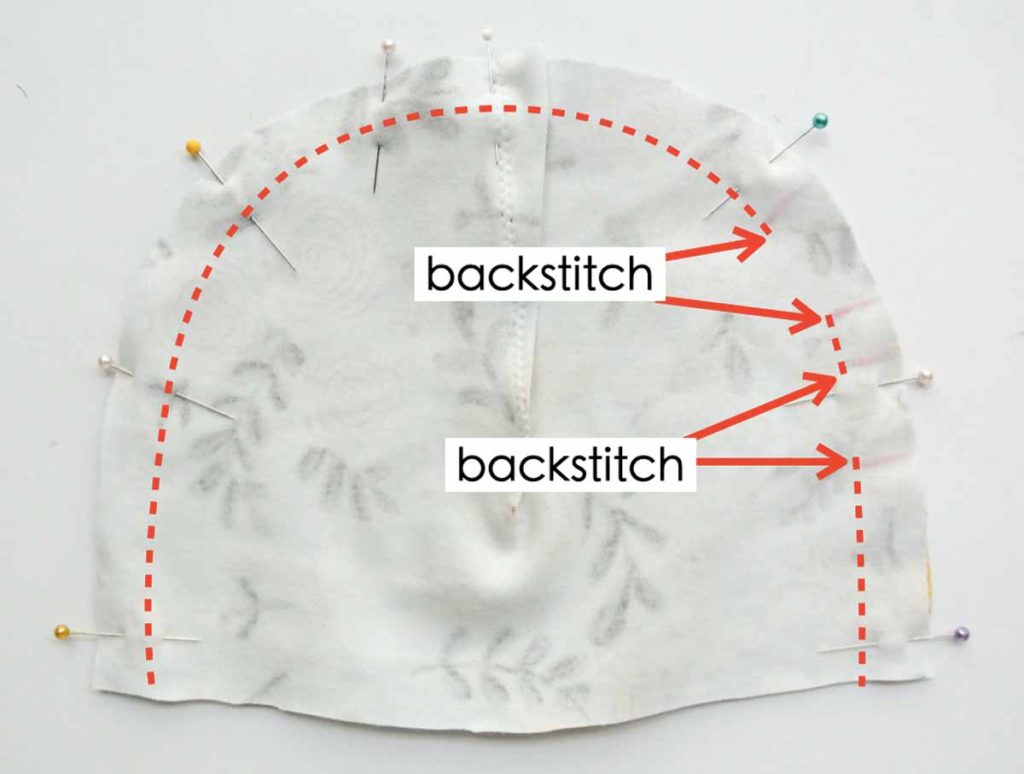
Sew at 1/2” (1.27cm) seam allowance around hat, leaving opening as indicated on pattern (red dotted line). Use stretch stitch as you will be stretching the hat to fit over baby’s head. For more information about stretch stitches, check out How to Sew Knits Fabric or consult your sewing machine manual.
NOTE 1: Back stitch at either end of the opening to make sure the stitch doesn’t come undone at the openings.
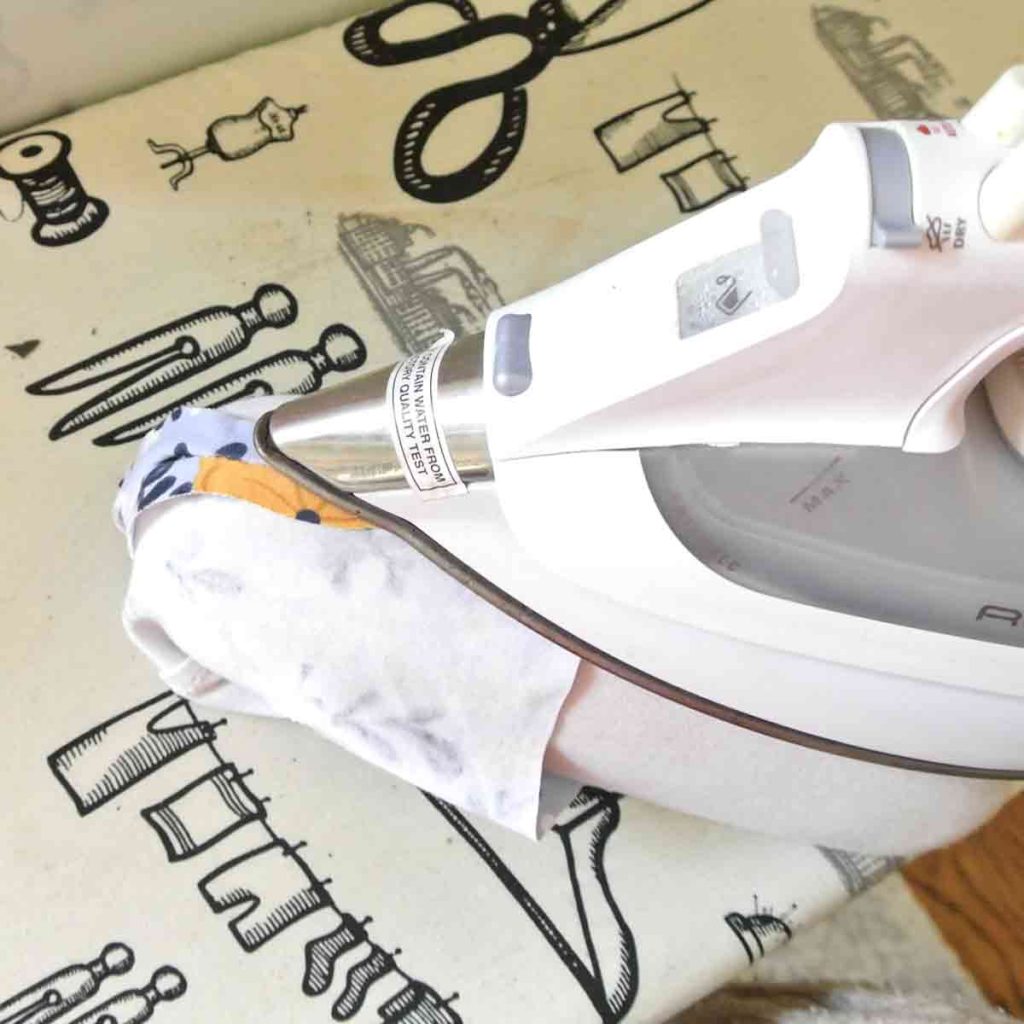
Press seam allowance open with iron and Tailor’s ham.
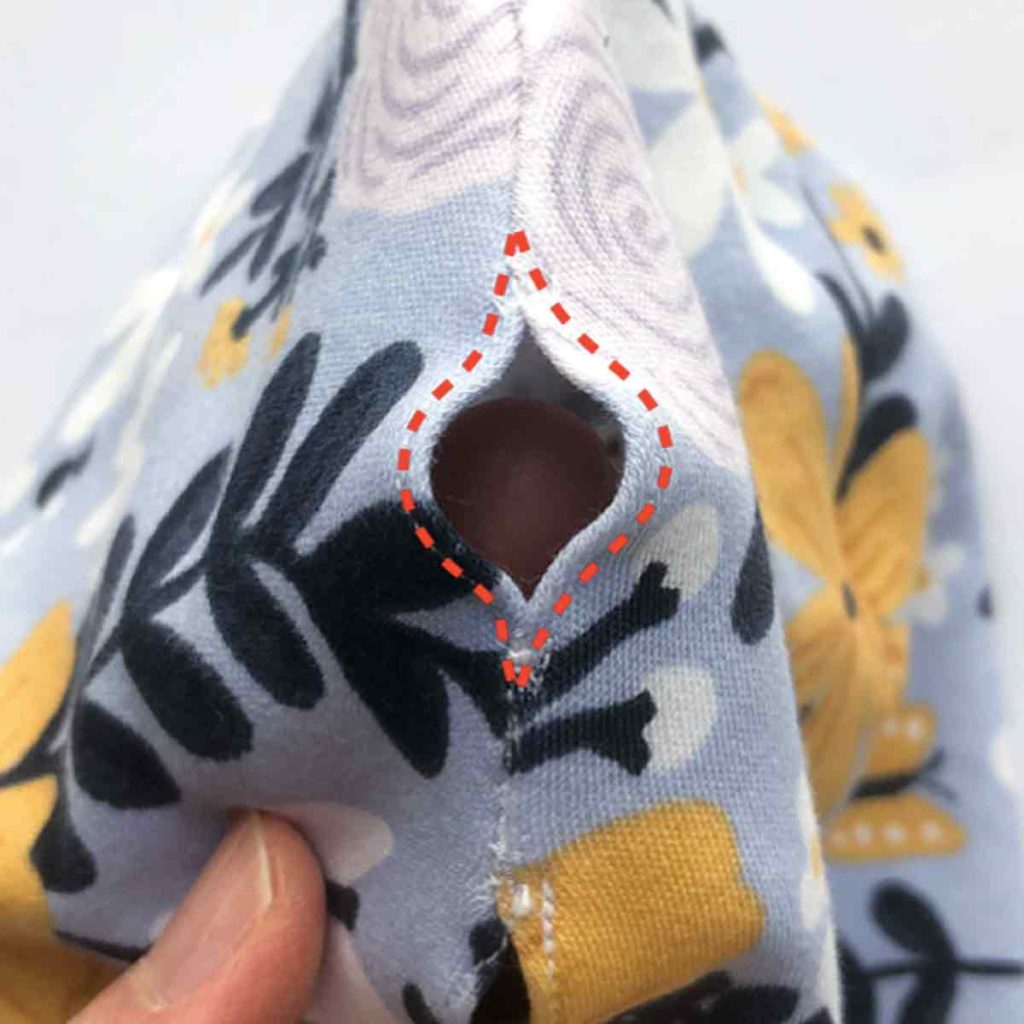
Stitch at 1/8” (~3mm) around opening to keep seams in place (red dotted line). Since you won’t be stretching these holes much, it’s perfectly fine to use a straight stitch here.
Finish hem (bottom of hat) by folding fabric up 1” (2.5cm) and stitching 1/8″ (~3mm) from the edge. Be sure to use a stretch stitch as you will need to stretch this part over baby’s head and you don’t want the threads to pop! Check out How to Sew Knit and Stretchy Fabrics for easy tips on how to sew knit fabrics beautifully.

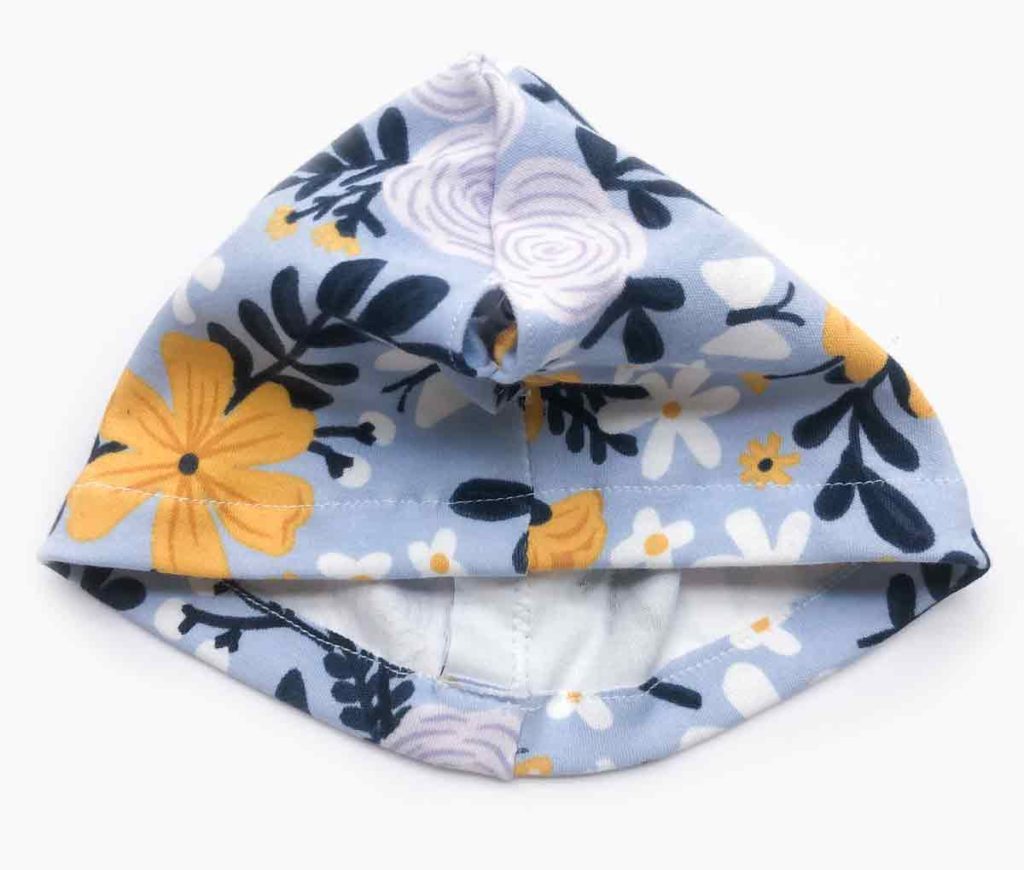
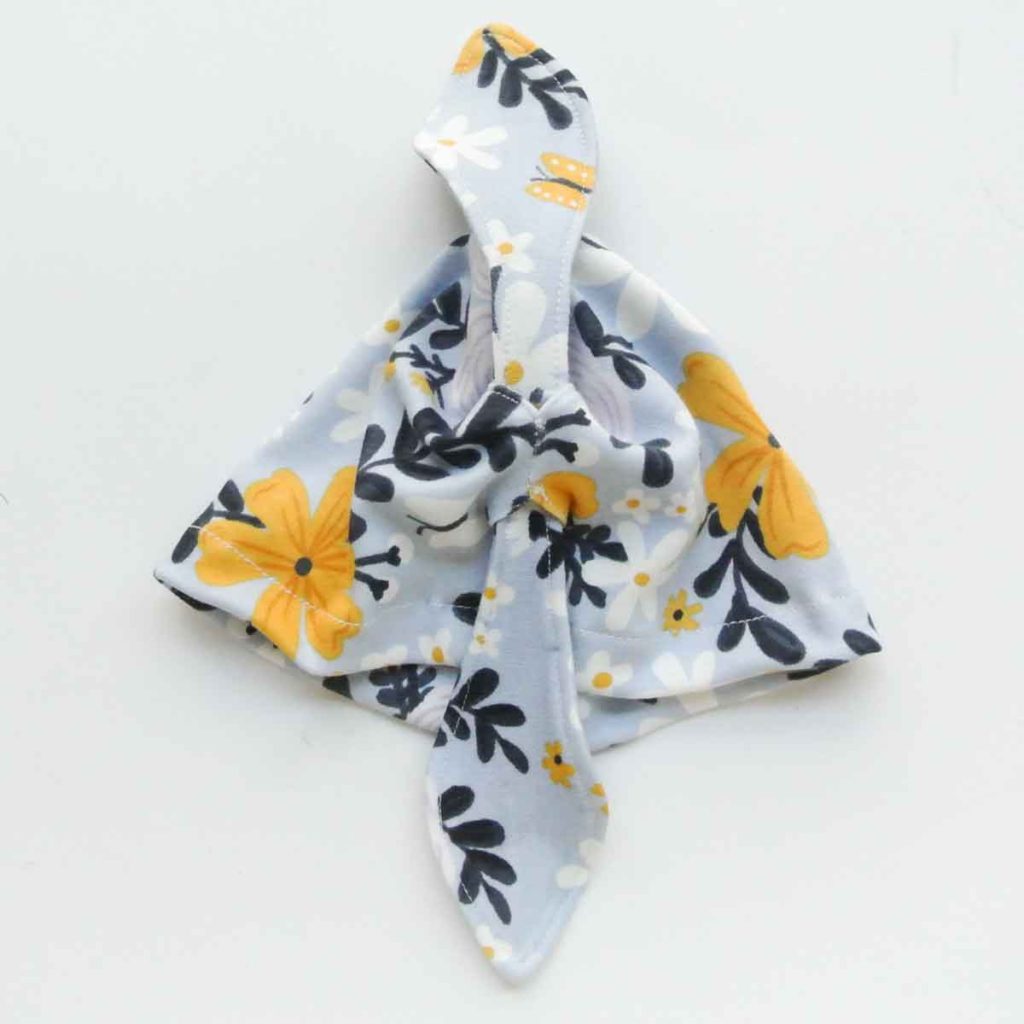
Finished hat and bow-tie. Refer to Simple DIY headband to learn how to sew bow tie.
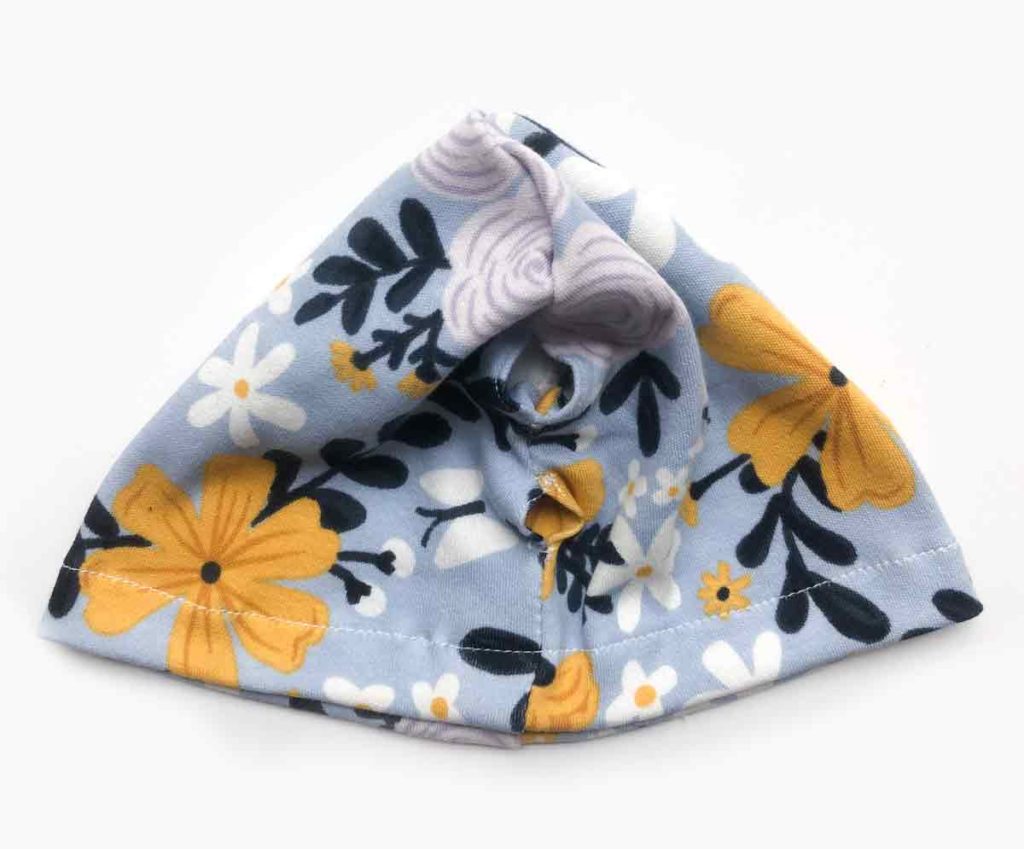
Slip bow tie through both opening on front of baby hat.

Tie a knot.
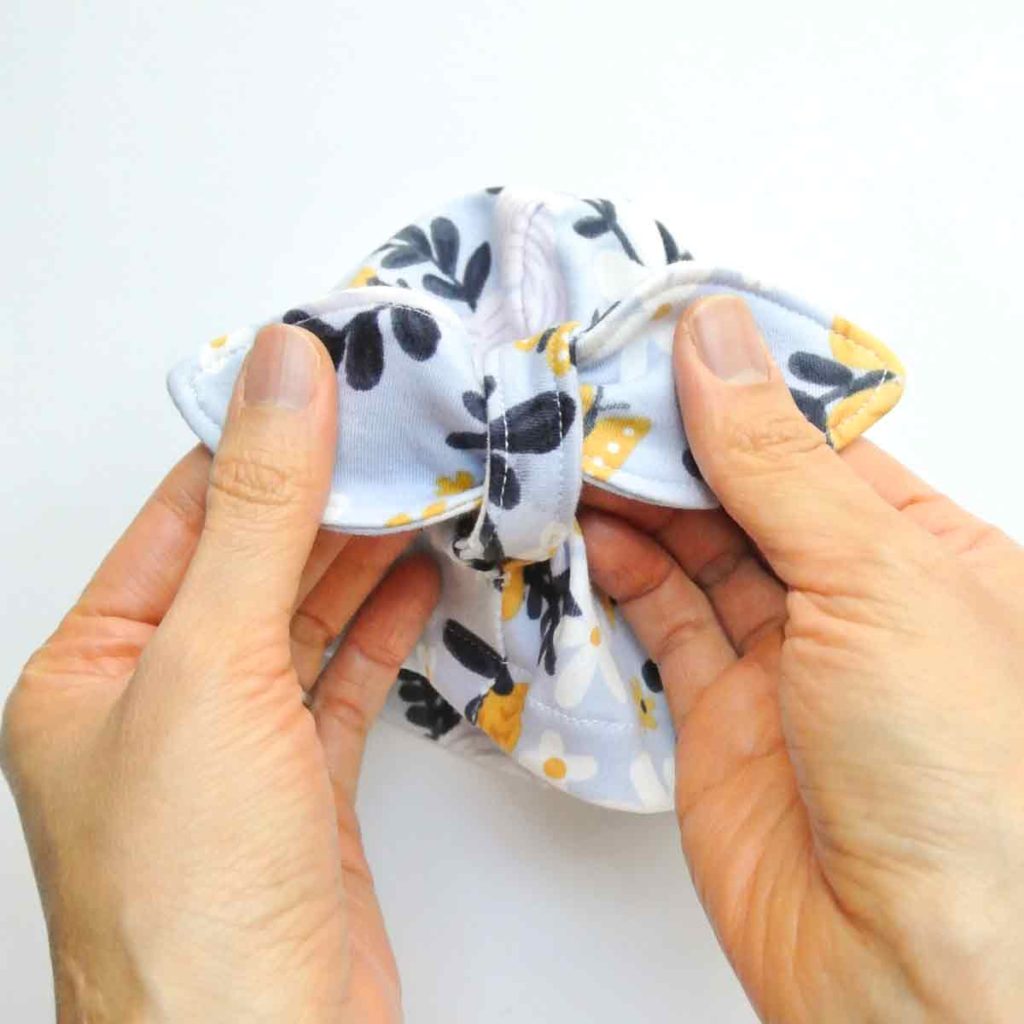
Straighten bow and knot.
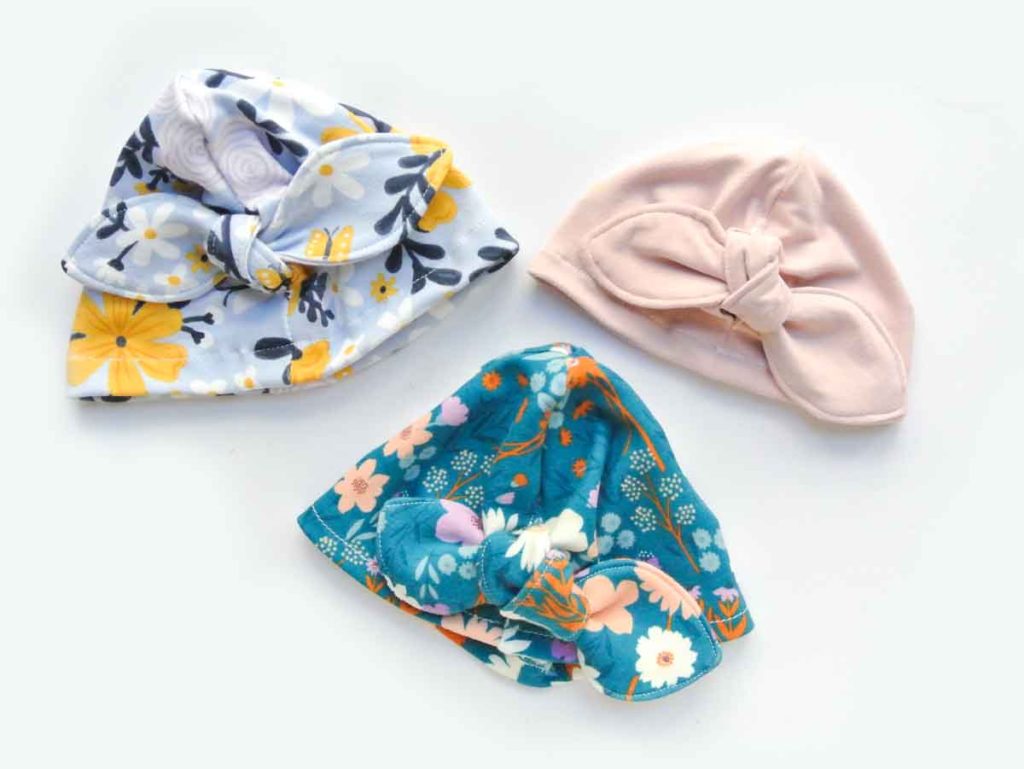
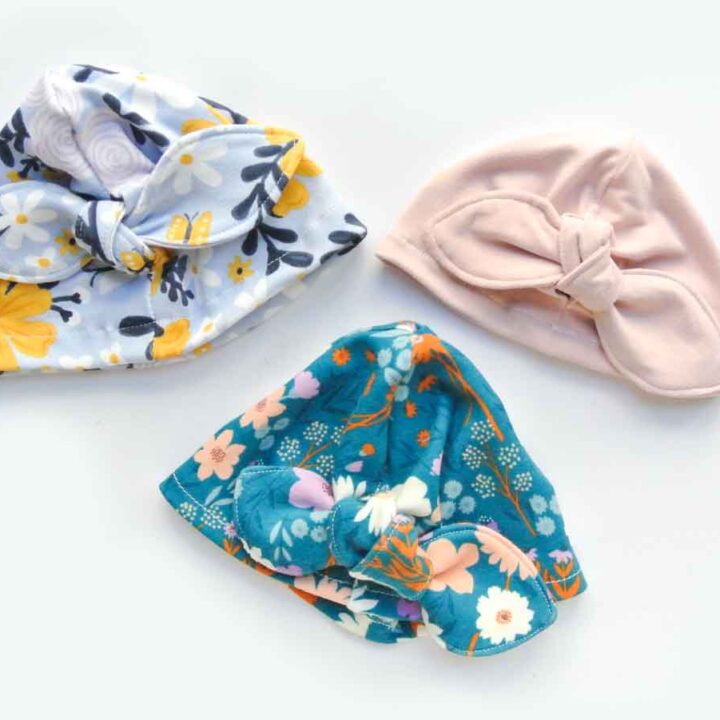
Finished! Wasn’t that super easy? Make them with different prints and colors. Not only are they super functional (keeps baby’s head warm), they are also super fashionable 🙂 Great baby shower or hospital gifts!
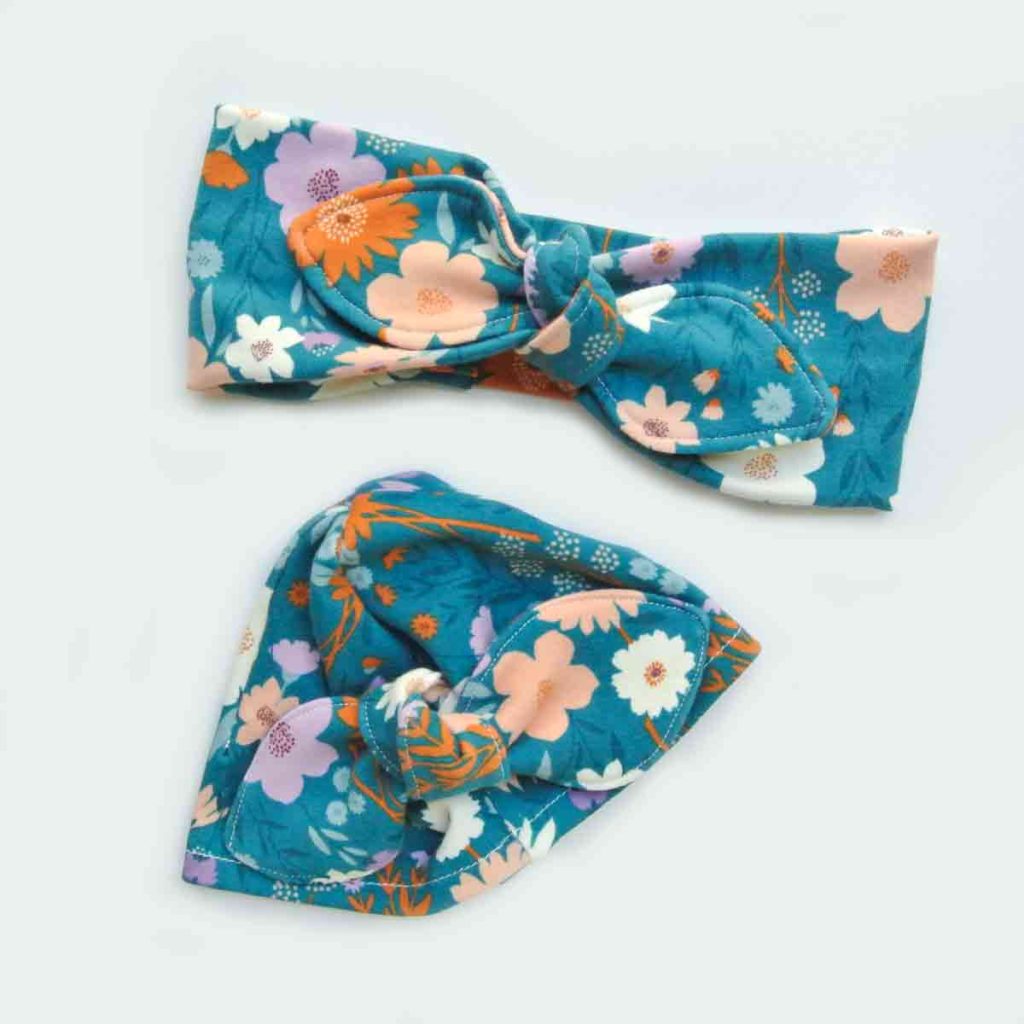
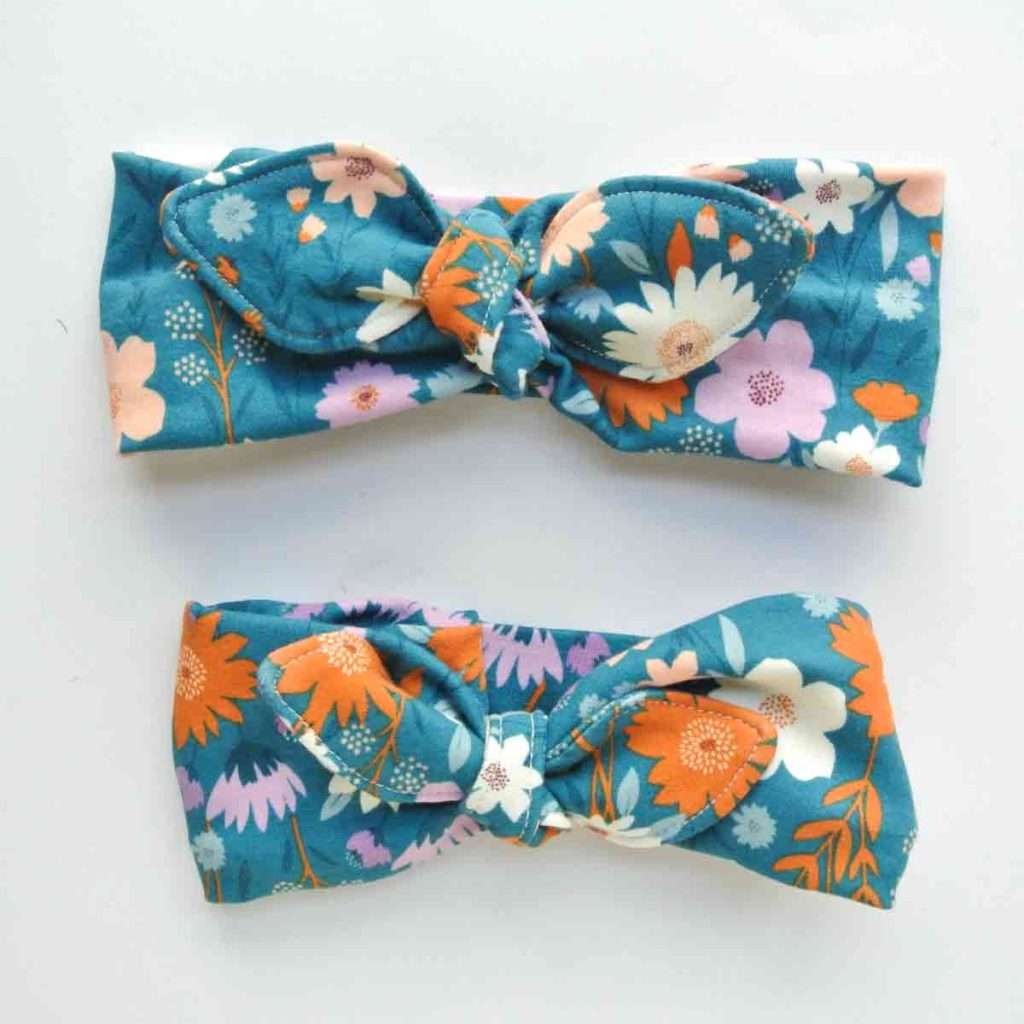
Make a Mommy and Me gift set with Knotted Bow headband and matching baby’s knotted bow hat.
Don’t forget to pin this image for later when you need to sew a last minute gift!

How to Make Baby Hat with a Bow
This DIY baby hat with a bow keeps baby heads warm and is super adorable! This easy sewing project is also great for those who want to learn how to work with knit fabrics.
Materials
- KNOTTED BOW BABY HAT PATTERN
- STRETCH KNIT FABRIC - 1/2 Yard
- FUSIBLE INTERFACING
- MATCHING THREAD
Tools
- SEWING MACHINE
- SERGER (optional)
- FABRIC SCISSORS
- BALL POINT PINS or
- SEWING CLIPS
- BALL POINT MACHINE NEEDLES
- FABRIC CHALK
- CLEAR RULER
- IRON
Instructions
- Cut out Pattern pieces on fabric and interfacing. Make sure to mark dart line on wrong side of fabric.
- Fold Hat Piece in half, right sides together. Pin and sew dart line (red dotted line). Repeat for other Hat Piece.
- Place Hat Piece right sides together, matching at dart seam. Lean darts in opposite direction and pin.
- Sew at 1/2” (12 mm) seam allowance around hat (red dotted line), leaving opening as indicated on pattern. Use stretch stitch as you will be stretching the hat to fit over baby's head (See Note 1). Back stitch at either end of the opening to make sure the stitch doesn’t come undone at the openings.
- Press seam allowance open with iron and Tailor's ham.
- Stitch at 1/8” (~3mm) around opening to keep seams in place (red dotted line). Since you won’t be stretching these holes much, it's perfectly fine to use a straight stitch here.
HOW TO MAKE BOW TIE KNOT
- Cut out 2 bow tie pattern pieces on fabric and 1 piece on fusible interfacing.
- Iron fusible interfacing to wrong side of one of the Bow Tie Piece.
- Sew Bow Tie Piece, right side together at 1/2” (1.27cm) seam allowance leaving an opening at the middle. Make sure to back stitch at either side of the opening.
- Clip curves.
- Trim seam allowance down to about 1/4” (6 mm).
- Use a pair of blunt scissors (or a chopstick) and push the sides of the bow inward towards the opening. This helps make it easier to turn bow tie to the right side.
- Turn bow tie to right side and use scissors to gently poke out the tips.
- Close opening with hand needles using Invisible Ladder Stitch. If you don’t want to close the hole by hand, you can skip this step. The top stitching in the next step will also close the hole.
- Give the bow a good press.
- Top stitch at 1/8” (3mm) away from edge of bow tie (see note 2).
- Slip bow tie through both opening on front of baby hat, tie a knot and you are done!
Notes
- For more information about stretch stitches, check out How to Sew Knits Fabric or consult your sewing machine manual.
- When top stitching, make sure the interfaced piece is on the bottom (facing feed dog). The interfaced piece won't stretch compared to the non-interfaced piece which will make for a fuss-free sewing process.
your library is password protected and patterns are not accessible
Hello!
Please click on the “Mindy Makes Library” button on the top right of the homepage to subscribe to our mailing list and you will be provided the password to access the library. Thank you so much!
Why cant I get pattern?
Hi Maria,
The printable is available in the our Free Resource Library. Subscribe Here to receive the password. Thank you!