How to Sew Knits and Stretchy Fabric on a Home Sewing Machine (10 Easy Hacks)
This post may contain affiliate links. Please read my disclosure policy for details. As an Amazon Associate, I earn from qualifying purchases.
Sewing with knit fabric is easier than you think. And you can do it all with your home sewing machine. No Serger required! Read on to learn the basics and you will be whipping up beautiful knits projects in no time!

You’ve always wanted to sew with stretchy knit fabrics but didn’t know where to start. Or perhaps you heard horror stories of sewing with knits. The machine ate my fabric and I had to cut it out! My seams are so wavy and I can’t iron them out! GAHHHH!!!
When I first started sewing knits I was the same way too. In fact, I was so scared that I never tried until I took a knits course at my Fashion program. We learned to sew T-shirts, leggings, and even bathing suits! It was so much fun! We learned to use the Overlock (Serger) machine and at the end of the course, I HAD to get one.
While I do love my Overlock Machine, over the years I’ve also learned that a regular sewing machine can sew knits just as well. No, it will never be able to trim the fabric as you sew (like a Overlock), but it really works great. These days I prefer it to my Overlock because honestly, I am just too lazy to change machines sometimes.
Regular sewing machines these day have so many options for sewing knit fabrics that you won’t miss the Overlock at all. (Okay, minus the fabric trimming function…). In today’s tutorial, I will show you my TOP TIPS for sewing knit fabrics beautifully with your home sewing machine.
I do (HIGHLY) recommend investing in some knit sewing tools such as ballpoint or stretch needles and a walking foot. They are much more affordable than getting a Serger and you will find them worthwhile.
Say goodbye to wavy seams and ugly knit projects! Once you learn how to sew knits, you might just find yourself preferring them to sewing woven fabrics!
Let’s get started!
Stitch Type Matters!
First and foremost, DO NOT use a regular straight stitch on your machine. A straight stitch has no “give” and will pop once you stretch the fabric (photo below)

With that said, however, you could probably get away with a straight stitch when sewing an area that won’t be stretched much (for example, a side seam on a loose T-shirt).
Instead, use a Stretch Stitch, which are designed specifically for knit fabrics. This way the thread won’t pop as soon as you stretch your fabric.
The two most common stretch stitches are Straight Stretch Stitch and Reinforced Zigzag Stitch. Machines generally will have several stretch stitch options. Refer to your manual (or look for the online manual) for types of stretch stitch your machine comes with.
Straight Stretch Stitch
The Straight Stretch Stitch looks like a row of three parallel dashed lines. It is created by a series of 3 stitches that go forward, backward and forward again, allowing the stitch to stretch.

- Has the appearance of a straight stitch
- Good for firm and stable knits
- Not as good for flimsy/limp knits that do not have much structure as it will be difficult to sew straight.
- Leaves an obvious stitch line because of its repetitive back and forth stitches – Good for seams that will be hidden. If using this stitch on a hem, make sure to match the thread color well (go one shade darker if you can’t find exact match).
- Good for stitching areas where you need to press open the seam allowance
- Takes more time to sew because it’s made up of a series of stitches. Also, very difficult to take out stitches if you make a sewing mistake!
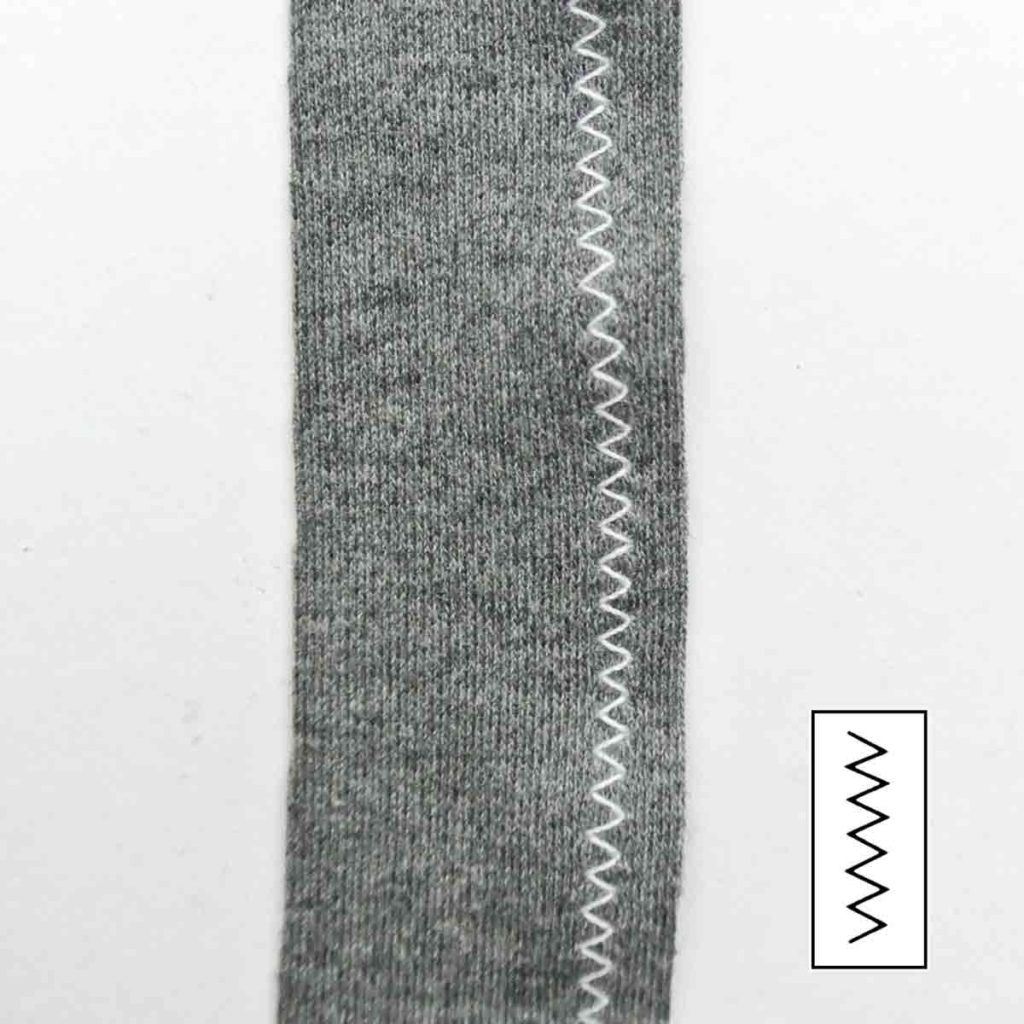
Reinforced Zigzag Stitch
The Reinforced Zigzag Stitch looks like a row of three dashed zigzags and is created by a series of forward and backwards zigzag stitch

- Depending on the machine, you may be able to adjust the zigzag width and length
- Can act as a a seam stitch while hemming edge of fabric at the same time. Since knit fabric doesn’t fray, this is only an advantage for woven fabrics that fray.
- Recommend to use with a stabilizer underneath to prevent fabric distortion/warping
- Leaves thick stitch lines if used as a hem stitch. This is good as a decorative stitch if you choose a non-matching thread color.
- Not recommended for seams that need to be pressed open flat.
- Allows more stretching of fabric compared to straight elastic stitch.


With a straight elastic stitch, a 3″ piece of fabric can stretch to 3.5″ before it won’t stretch anymore. That’s a 16% stretch.


A 3″ reinforced zigzag stitch can stretch to 3.75″. That’s a 25% stretch, which is more than using a straight stretch stitch. Keep this in mind when you are deciding what type of stitch to use.
Zigzag Stitch
If your machine doesn’t have a stretch stitch, chances are it will have the zigzag stitch.
- The zigzag stitch is flexible so it won’t pop when you stretch the seam.
- Can be adjusted for length and width to achieve different purposes in knit fabrics (see below)


LEFT: Use a long and narrow zigzag (Length = 4, Width = 1) if you want the stitch to closely resemble a straight line. This allows you to press open seams.
RIGHT: Use a short and wide zigzag(Length = 1, Width = 4) for maximum stretch (keep reading!)


As you can see from the photo above, a long and narrow zigzag allows the fabric to stretch from 3″ to 3.5″, about a 16% stretch.


When using a short and wide zigzag, you are able to stretch the knit from 3″ to 4″. That’s a 30% stretch! Almost double the stretch compared to using a long and narrow zigzag.
So depending on what you need your stitch to do (for example, a stitch around a neckline is going to need a lot more stretch than one on the side seam), you can adjust accordingly. This makes the zigzag stitch extremely versatile! No wonder it’s an option on most sewing machines!
Use Specialized Needles
When sewing knits, you should use specialized needles such as Ballpoint/Jersey Needles or Stretch needles. While you can use universal needles in a pinch, this is not ideal. Universal needles are sharp, which can pierce through the knit fabric fiber and snag the fiber, leaving unsightly holes and tear (NOOOOO!)
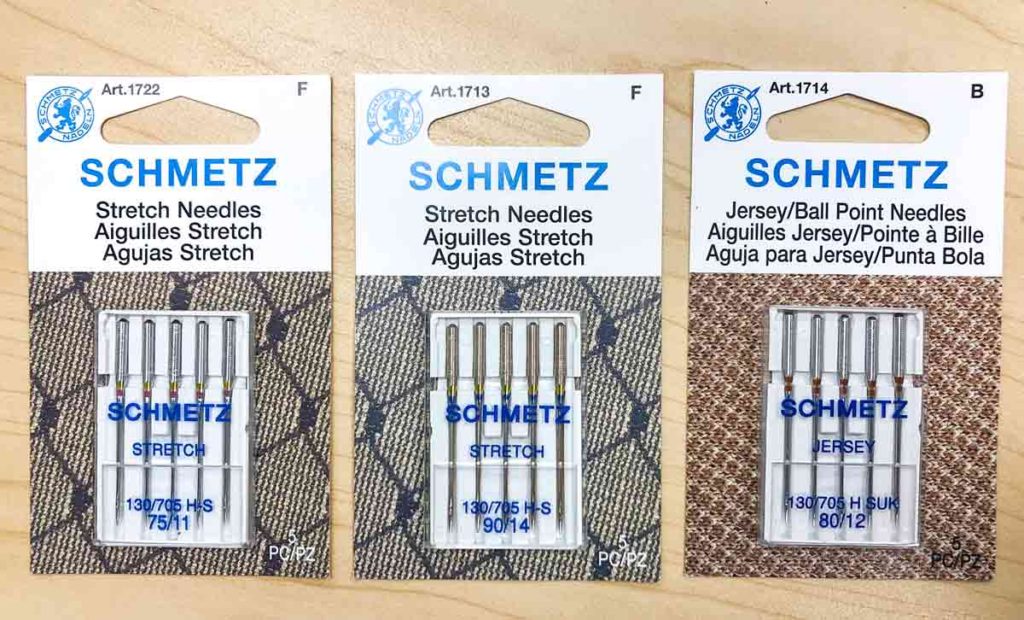
Ballpoint Needles (Jersey Needles)
As the name implies, the tip of the needle is round like a “ball point”. When the ballpoint needle hits the fabric fibers, it will glide into an empty loop instead of piercing through the fiber (the case when you use a sharp needle), which will cause snaps and holes in the fabric.
Ballpoint needle sizes come in 70/10 to 100/16 – Use smaller needles for lightweight knits and larger needle for heavy weight knits
It is especially important to use ballpoint needles for sewing knit fabric containing spandex (brand name Lycra), or very fine knits versus regular needles.
Stretch Needles
The tip of stretch needles are less rounded than ballpoint needles, which is why ball point needles are more ideal for sewing knits.
However, the advantage of using stretch needles is that they have a longer scarf, which minimizes skipped stitches. The scarf is the indentation above the eye of a sewing needle. A long scarf helps the bobbin hook (below throat plate) to loop the top thread more easily, so you will have less likelihood of skipped stitches
If you notice skipped stitches, switch to stretch needles and that may solve the problem!
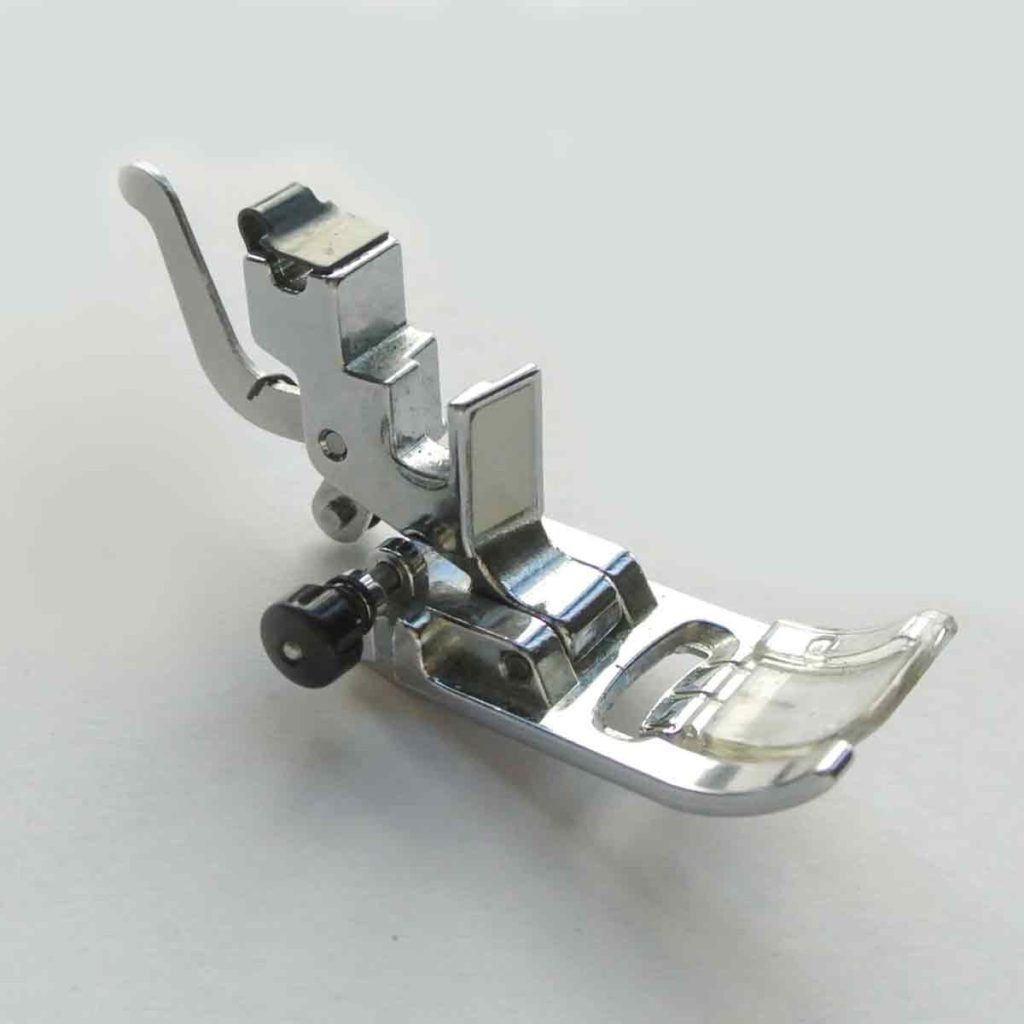
Use a Walking Foot
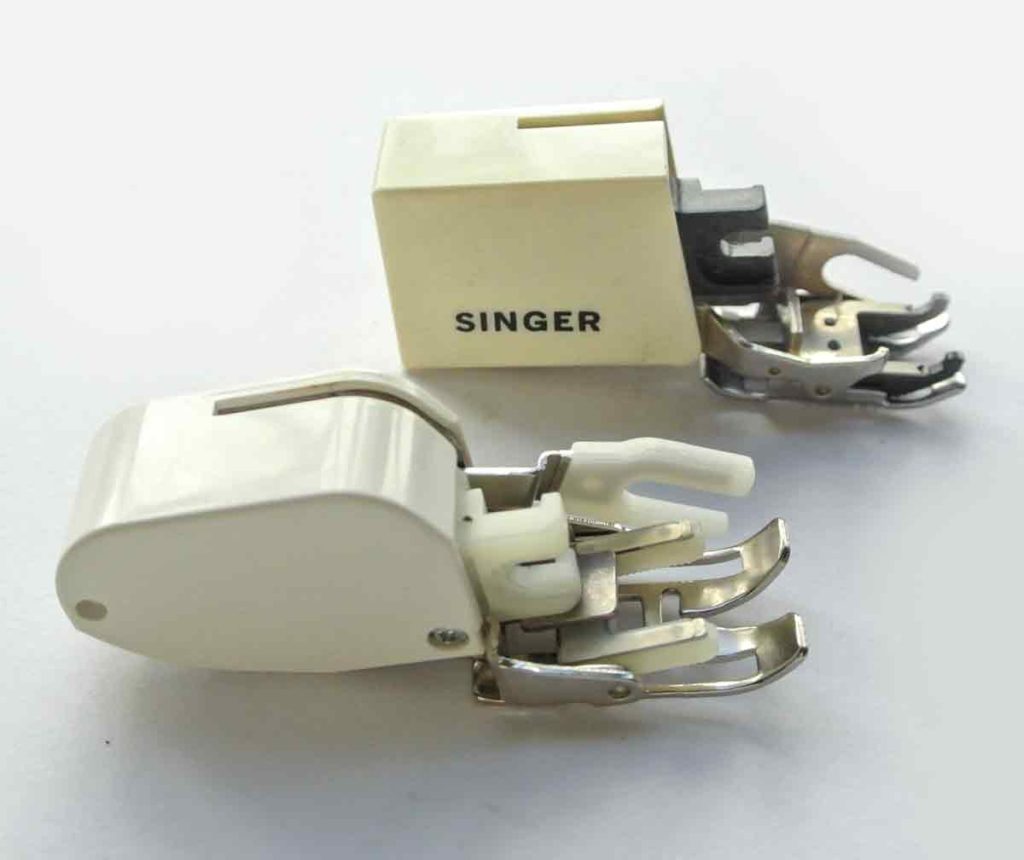
A walking foot is also known as an Even Feed Foot:
- Consists of a set of feed dogs on the foot itself
- The double action of two feed dogs (one on top and one of bottom) will feed two layers of fabric through the machine at the same rate in an even fashion.
- Prevents fabric from being stretched as it feeds through the machine to be sewn
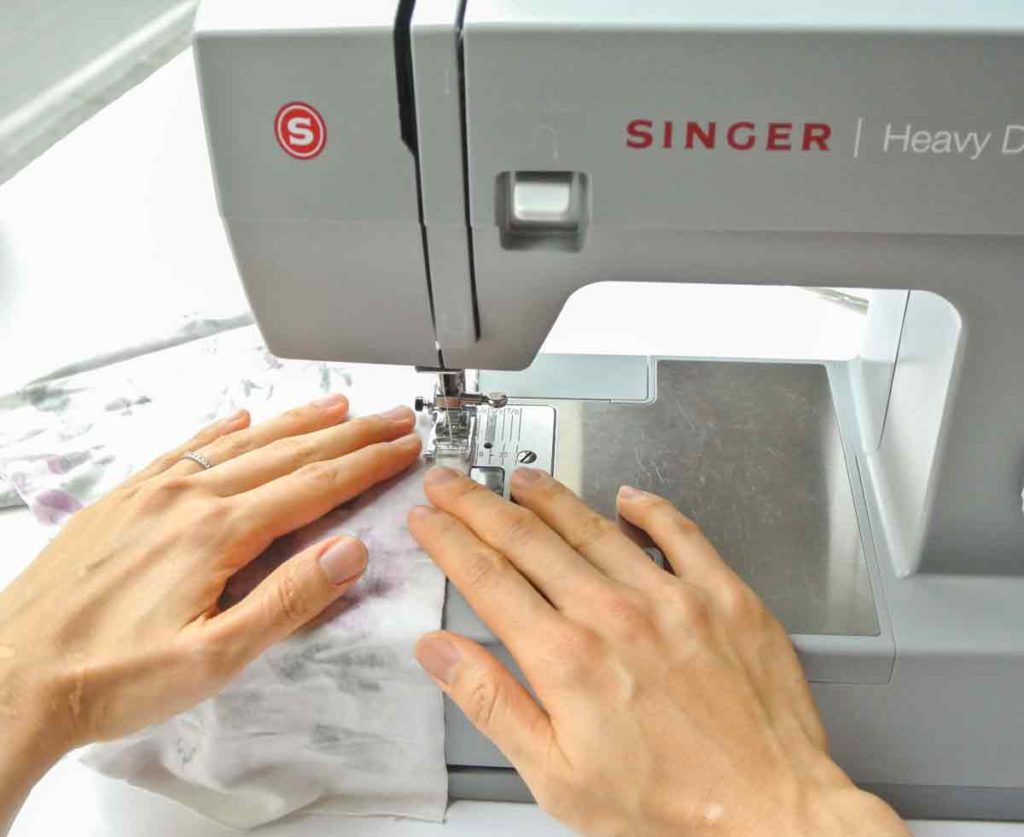
Below is a comparison of the stitching when using a regular pressure foot versus a walking foot:
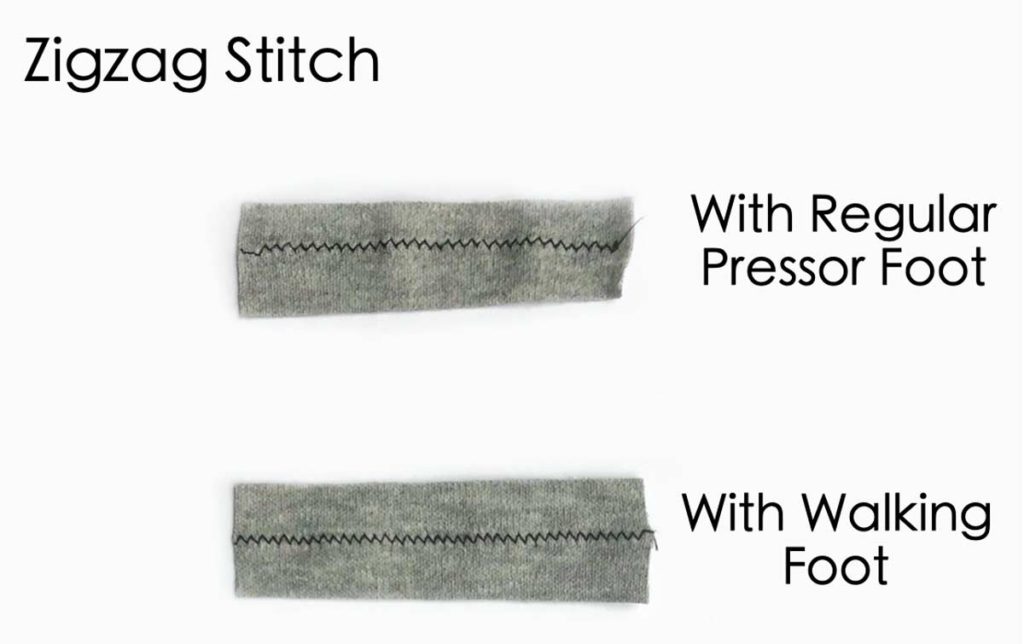
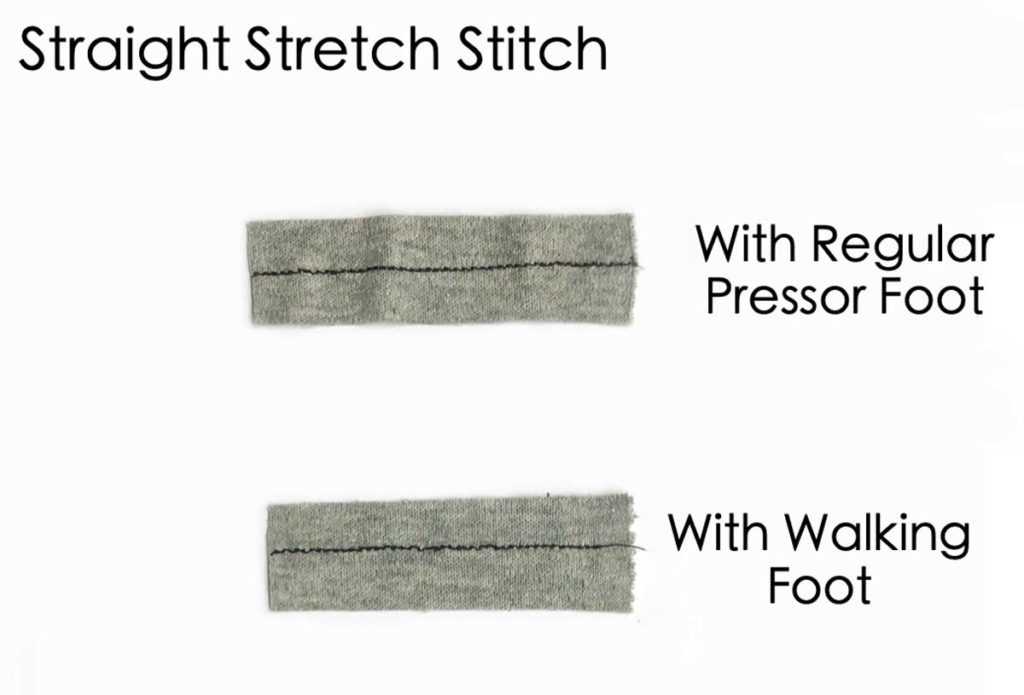
See how much evenly the fabric lays when you use a walking foot! With a regular pressor foot, you WILL get the unsightly puckering of the fabric.
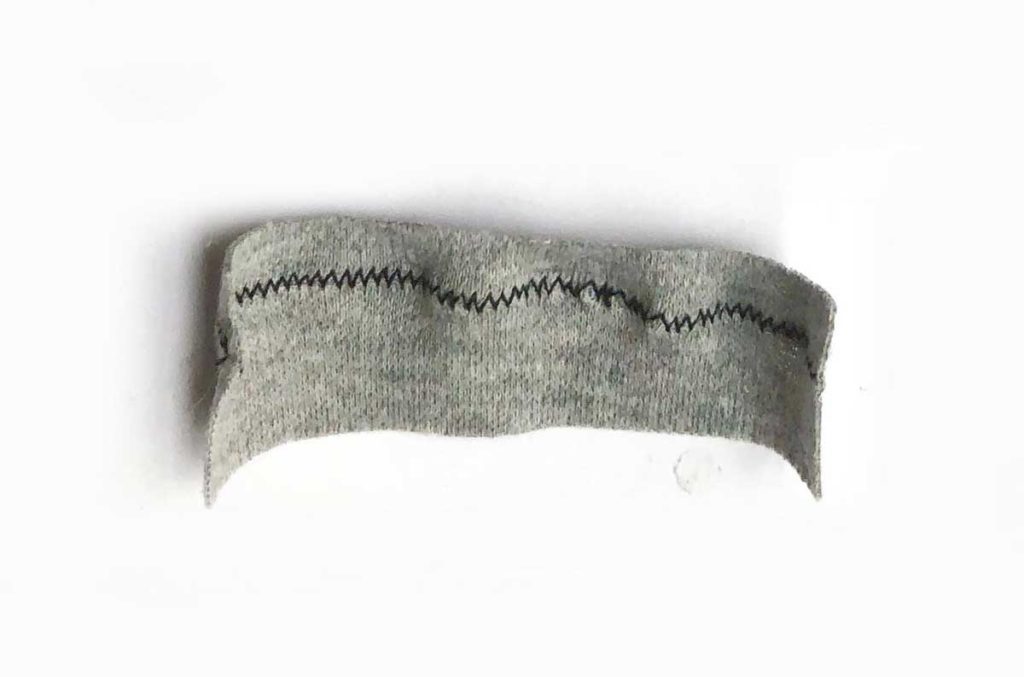
This is even more pronounced when you use a tight zigzag stitch (see below). The entire piece of fabric curls up. Yikes! While pressing can ease this a little bit, it won’t be perfect.
A walking foot is definitely a good investment for sewing knits. On top of that, it is also great (I’d say MUST-HAVE) for quilting and sewing thick fabrics. I highly recommend getting a walking foot if are an avid sew-er!
Adjust Pressure on Pressor Foot
The presser foot of a sewing machine holds the fabric in place while the feed dog underneath moves the fabric during sewing.
- If the presser foot is pressing very tightly against the feed dog, it may cause the fabric to stretch as you sew. The result will be a warped seam with ripples.
- Fortunately, you can easily adjust the pressure of the presser foot. Refer to you manual for the adjustment dial.
- Play around with decreasing and increasing the pressure to see how the stitching comes out. Different knit fabrics will require more or less tension than others.
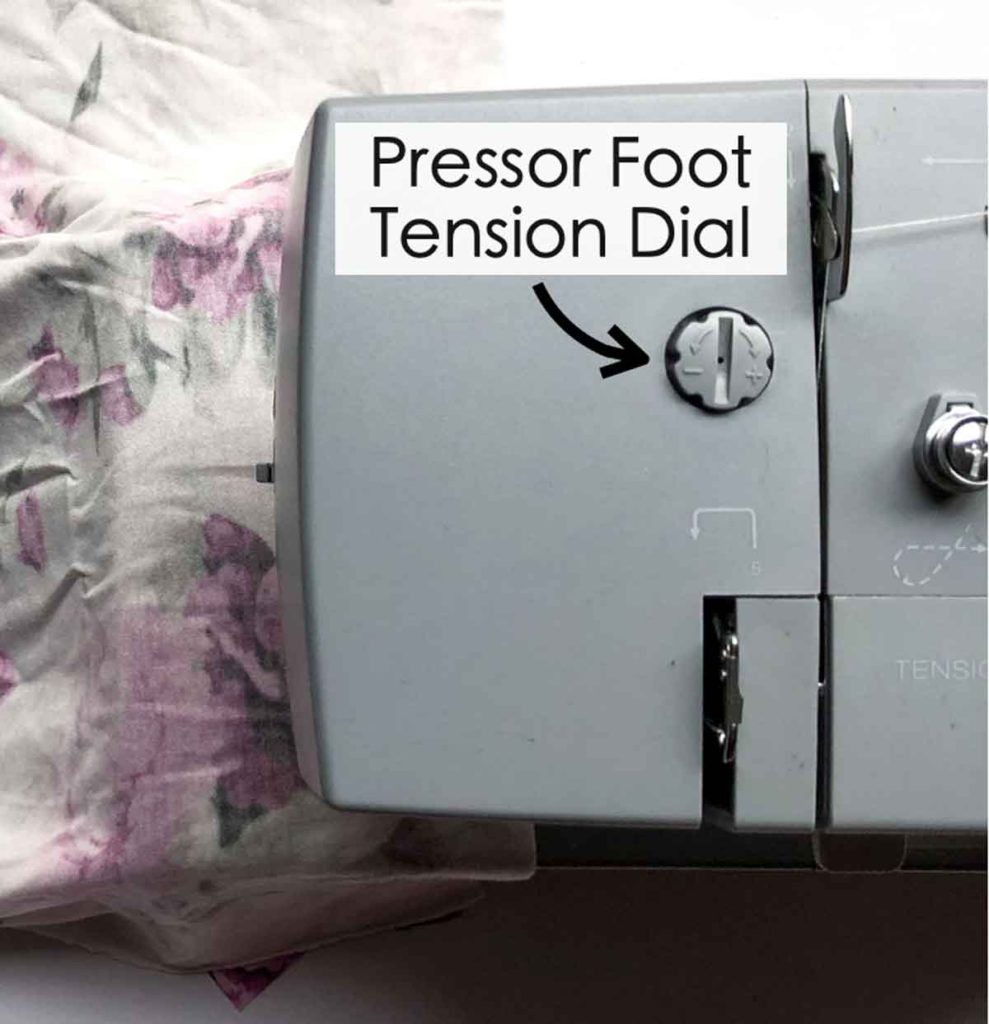
View of presser foot tension dial on my Heavy Duty Singer 4452.
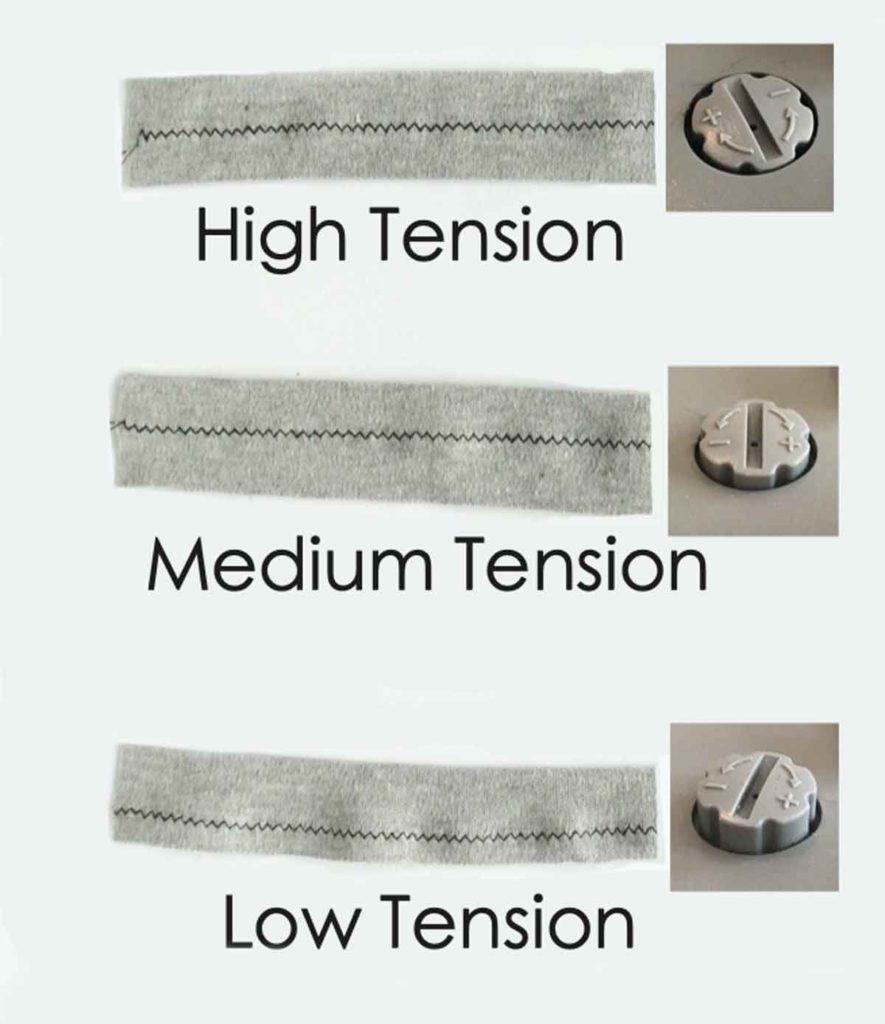
Photo shows zigzag stitch sewn using different tension levels with the view of tension dial on right. For this specific knit fabric, a medium weight cotton, the low tension resulted in the most puckering while the high tension came out the nicest. This may be different when using a another type of knit. That’s why it’s so important to test on scrap fabric before starting your actual project!
Test on Scrap Fabric
It’s always a good idea to test sew the fabric before starting your actual fabric. I can’t stress how important this is! There are so many types of knits out there (with different characteristics) that what works on one knit fabric may not work on another.
- Try different machine settings and needles sizes before starting your actual project.
- Get to know your fabric and how it feels as you sew. Does the fabric slide around the plate and need more guidance in order sew straight? Or is the fabric more firm and stable?
- See how the stitches come out and adjust stitch length, width, and tension as needed.
- Also note how the stitches come out as you sew along the stretch direction and against it.
- 2-Way Stretch Fabrics stretch differently when you pull it side-to-side versus up-and down. you may need to adjust machine settings when you turn corners. Play around with your machine to find the best settings.
- 4-way stretch Fabrics will stretch equally in all directions.. In this case you won’t need to worry about adjusting machine settings whichever direction you sew.
Don’t Stretch the Fabric While Sewing
Don’t pull the fabric from behind or try to push the fabric into the presser foot and feed dog as you sew. Knits that have been stretched during sewing tend to stay wavy, even with good pressing. Instead, gently guide your fabric into the machine and let the machine move the fabric along. This will produce a nice flat seam.
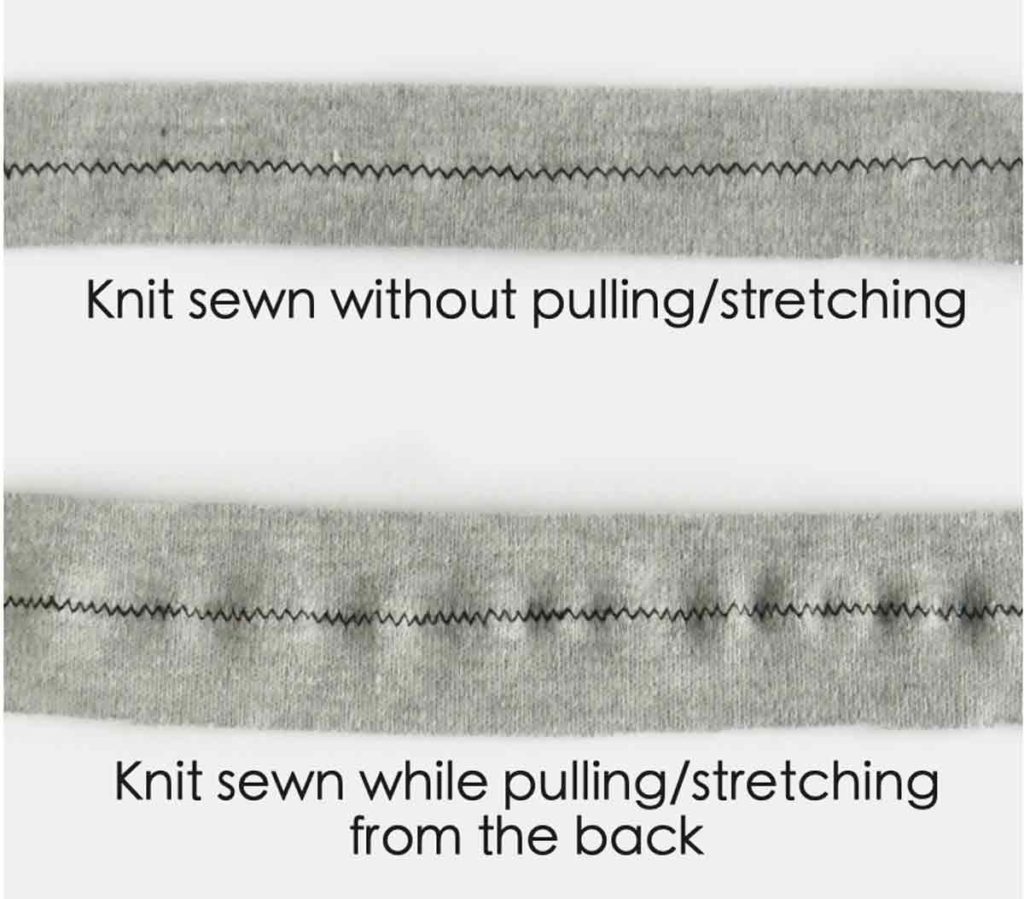
See how much puckering is created when you pull/stretch the fabric as you sew (bottom). I hope this photo reminds you to just gently guide your fabric into the machine on your next knit sewing project!
Don’t Let the Fabric Fall as You Sew
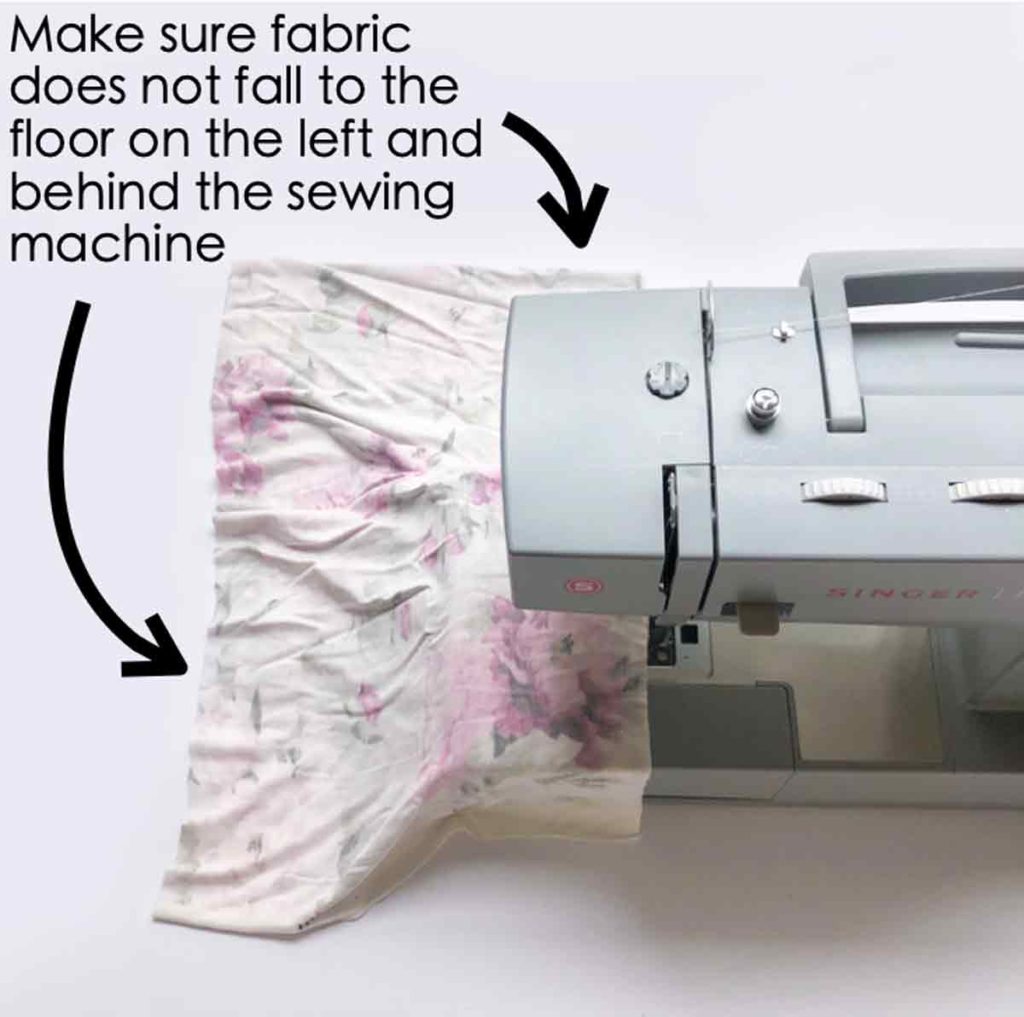
Support the weight of the fabric from behind and to the left (ideally with a big table). If the fabric falls to the floor, the extra weight of the fabric will cause stretching, leading to uneven seams.
This is more of an issue when you are working with large amounts of fabric (for sewing garments). For simple projects just as small accessories, this is less of an issue.
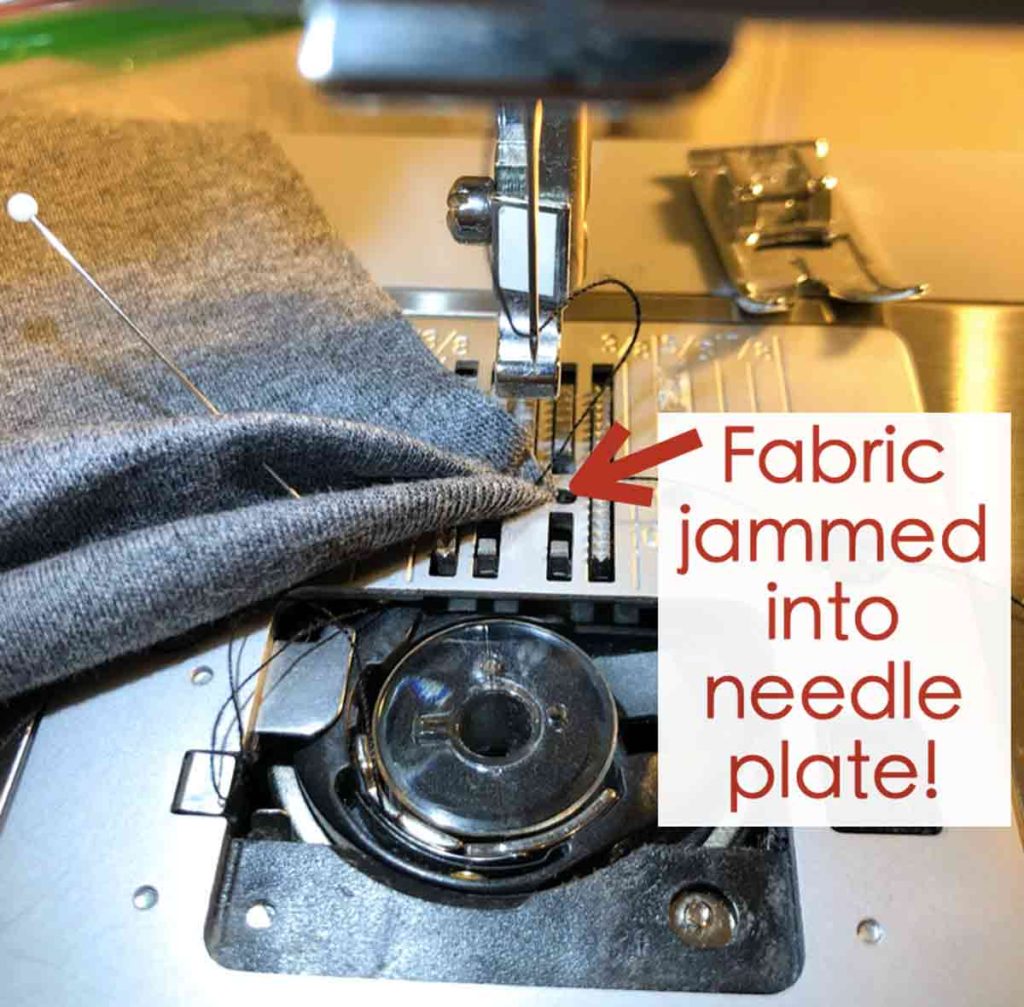
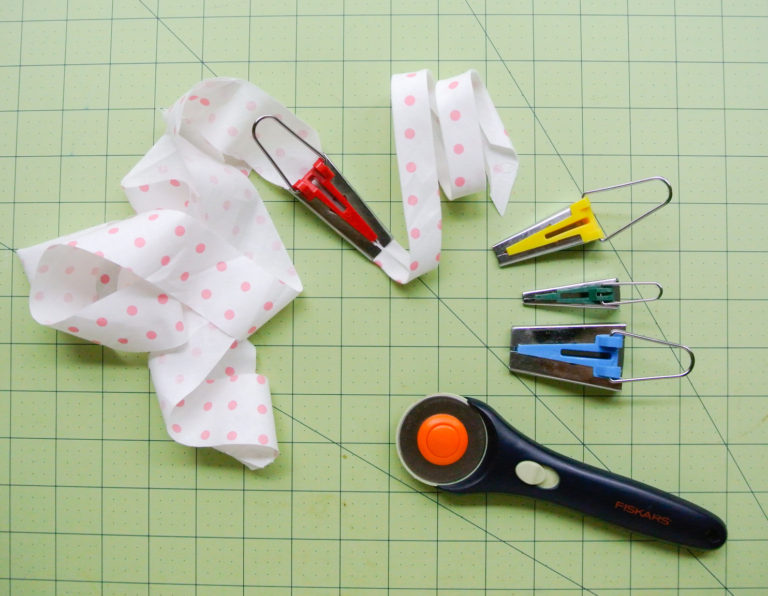
Add Tissue Paper to Start Sewing
It’s no fun when sewing knits that the needle pushes the fabric into the needle (throat) plate! This is especially common when working with thin/lightweight knits.
To avoid this situation, simply tuck a piece of tissue paper (the kind for stuffing into a gift bag) under the fabric when you start sewing. The tissue paper adds stability to the fabric so it doesn’t get pushed into the metal plate by the force of the needle.
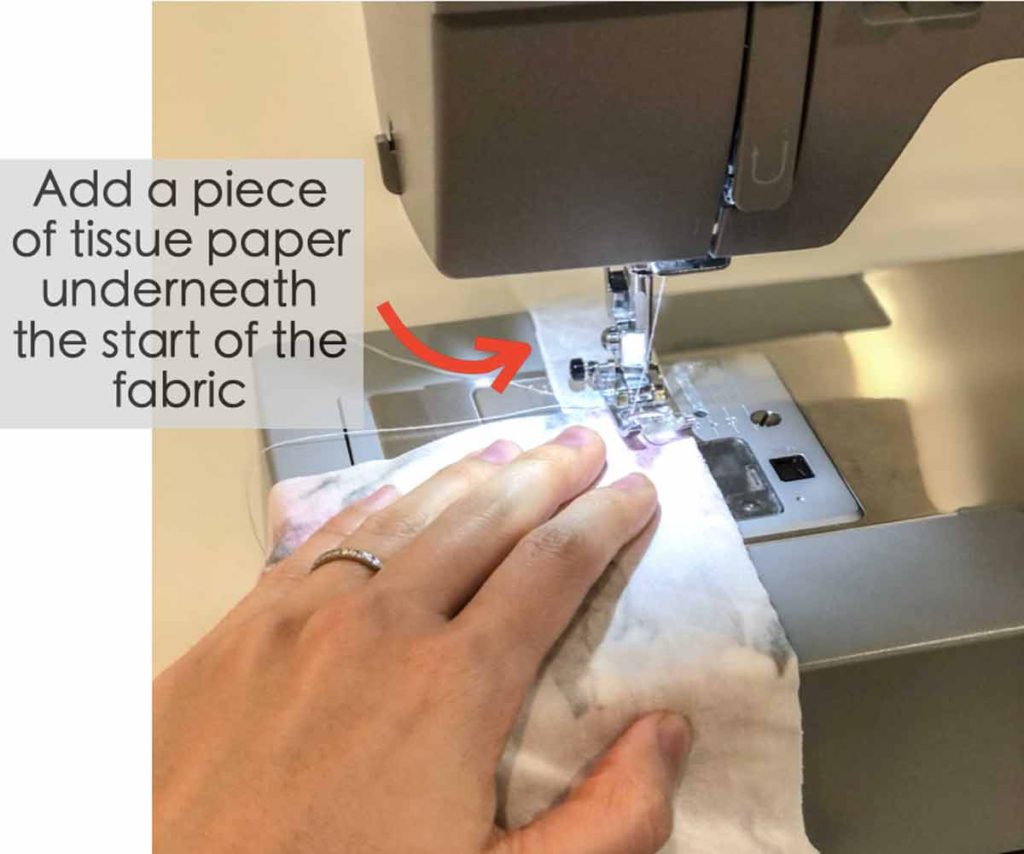
Once you are done sewing, gently tear off the tissue paper and you are done!
This tissue paper trick is also very handy for other parts of the seam (not just at the beginning), especially if you are working with very thin or lightweight knits. However, do note that if you use a zigzag stitch (or reinforced zigzag), it may be difficult to pick out the tissue bits stick in between.
Press your seams!
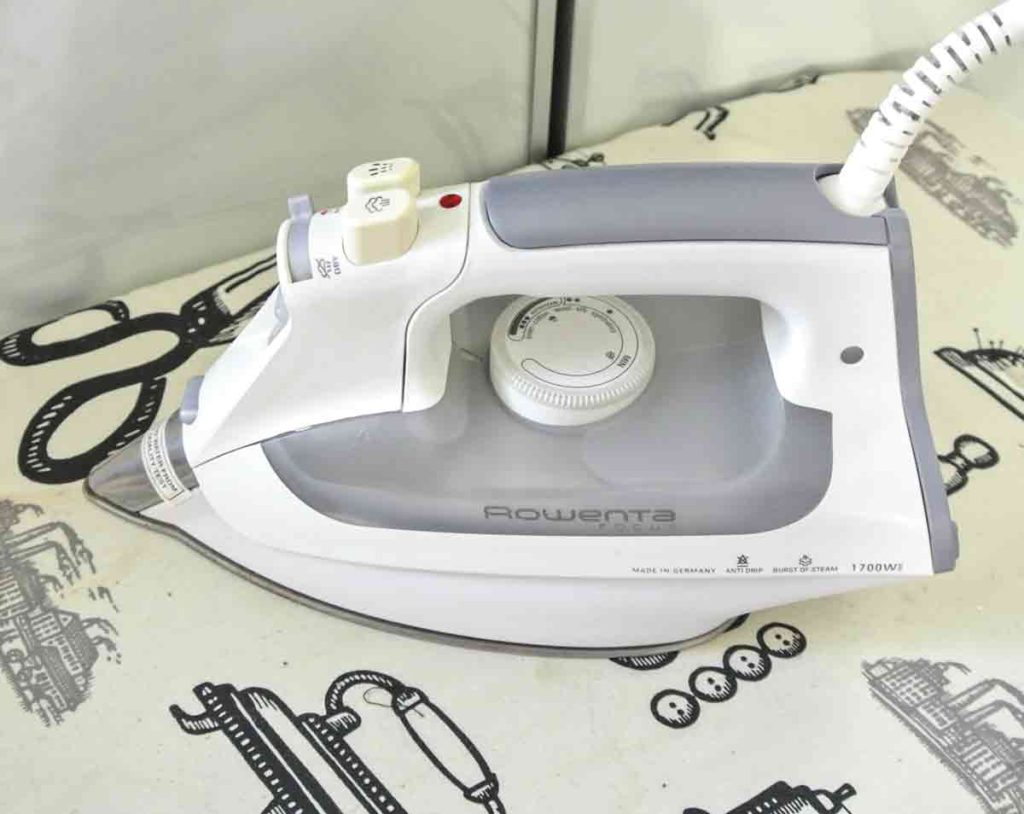
If at the end you still have some uncooperative seams that refuse to lay flat, give it a good press and that may do the trick!
The proper way to press fabric (as opposed to ironing) is as follows:
- Place your fabric on ironing board, laying it as flat as possible
- Place hot iron with steam over fabric and count “one one-thousand, two one-thousand, three one-thousand..” up to 5 seconds
- Remove iron by lifting it straight up and moving on to the next section.
- Ideally, let the fabric cool before taking it off the ironing board. This is the perfect time to use a tailor’s clapper. Alternatively, you could get some 1″ x 2″ wooden planks cut from your local hardware stores and use that instead.
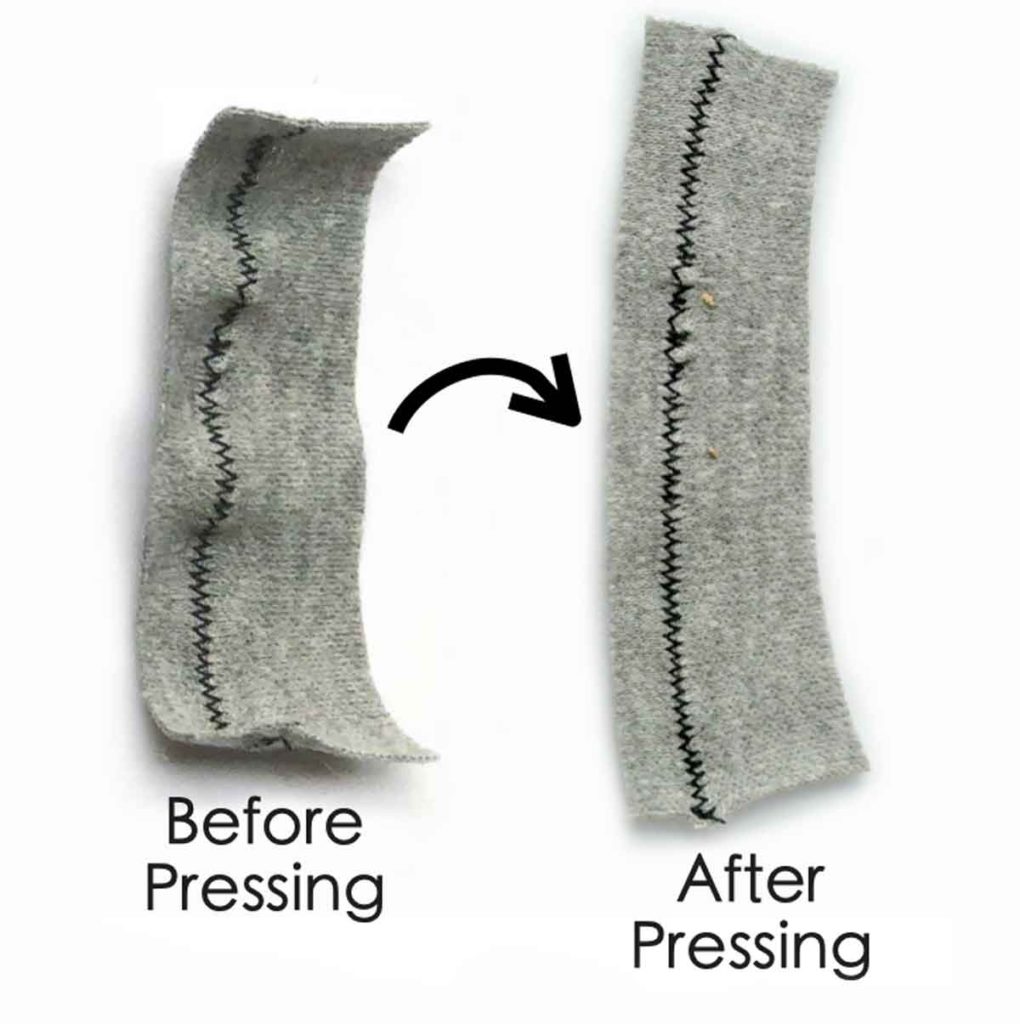
See how much better the fabric looks after pressing. You can still notice some slight puckering, but it’s a big improvement!
Finally…Practice Makes perfect
I’m sure you’ve all heard of the 10,000 hour rule.
According to this rule coined by Malcom Gladwell, “it takes 10,000 hours of intensive practice to achieve mastery of complex skills and materials, like playing the violin or getting as good as Bill Gates at computer programming”.
This applies to sewing knits as well! Not that you will reach 10k hours of sewing knits and stretchy fabric in your life…but the more you practice, the better you will get at it! I promise!
So don’t give up if the first few times your knits turn out puckered, or the machine eats it every time you start sewing. Just follow the tips above and be patient with yourself. Before you know it, your seams will come out nice and flat.
Who knows, you may even start to prefer knit fabric over wovens (say goodbye to fraying seams!).
10 Easy Hacks to Sew Stretchy Fabric
Sewing with knit fabric is easier than you think. And you can do it all with your home sewing machine. No Serger required!
Tools
- SEWING MACHINE with zigzag stitch
- BALLPOINT/JERSEY NEEDLES
- STRETCH NEEDLES
- WALKING FOOT
- TISSUE PAPER
- TAILORS CLAPPER
- IRON
Instructions
1. Use the Correct Type of Stitch
- Straight Stretch Stitch
- Reinforced zigzag stitch
- Zig Zag Stitch
2. Use Specialized Needles.
- Ballpoint/Jersey Needles
- Stretch Needles
3. Use a Walking Foot
- The double action of two feed dogs (one on top and one of bottom) on the walking foot helps to feed two layers of fabric through the machine at the same rate in an even fashion.
- Also Prevents fabric from being stretched as it feeds through the machine to be sewn
4. Adjust Pressure on Presser Foot
- If the presser foot is pressing very tightly against the feed dog, it may cause the fabric to stretch as you sew. The result will be a warped seam with ripples.
- Refer to sewing machine manual for where your adjustment dial is
- Play around with decreasing and increasing the pressure to see how the stitching comes out. Different knit fabrics will require more or less tension than others.
5. Test on Scrap Fabric
- Try different machine settings and needles sizes before starting your actual project.
- Get to know your fabric and how it feels as you sew. Does the fabric slide around the plate and need more guidance in order sew straight? Or is the fabric more firm and stable?
- See how the stitches come out and adjust stitch length, width, and tension as needed.
- Also note how the stitches come out as you sew along the stretch direction and against it.
6. Don't Stretch the Fabric While Sewing
- Don’t pull the fabric from behind or try to push the fabric into the presser foot and feed dog as you sew.
- Instead, gently guide your fabric into the machine and let the machine move the fabric along. This will produce a nice flat seam.
7. Don't Let the Fabric Fall as You Sew
- Support the weight of the fabric from behind and to the left (ideally with a big table).
- If the fabric falls to the floor, the extra weight of the fabric will cause stretching, leading to uneven seams.
- More of an issue when you are working with large amounts of fabric (i.e sewing garments).
- For simple projects just as small accessories, this is less of an issue.
8. Use Tissue Paper at the Start of Sewing
- Tuck a piece of tissue paper under the fabric when you start sewing.
- The tissue paper adds stability to the fabric so it doesn't get pushed into the metal plate by the force of the needle.
9. Press with Hot Steam Iron
- Place your fabric on ironing board, laying it as flat as possible
- Place hot iron with steam over fabric and count "one one-thousand, two one-thousand, three one-thousand.." up to 5 seconds
- Remove iron by lifting it straight up and moving on to the next section.
- Ideally, let the fabric cool before taking it off the ironing board. This is the perfect time to use a tailor's clapper.
10. Practice Makes Perfect
- Be patient with yourself and don't give up.
- The more you do it, the easier it becomes!
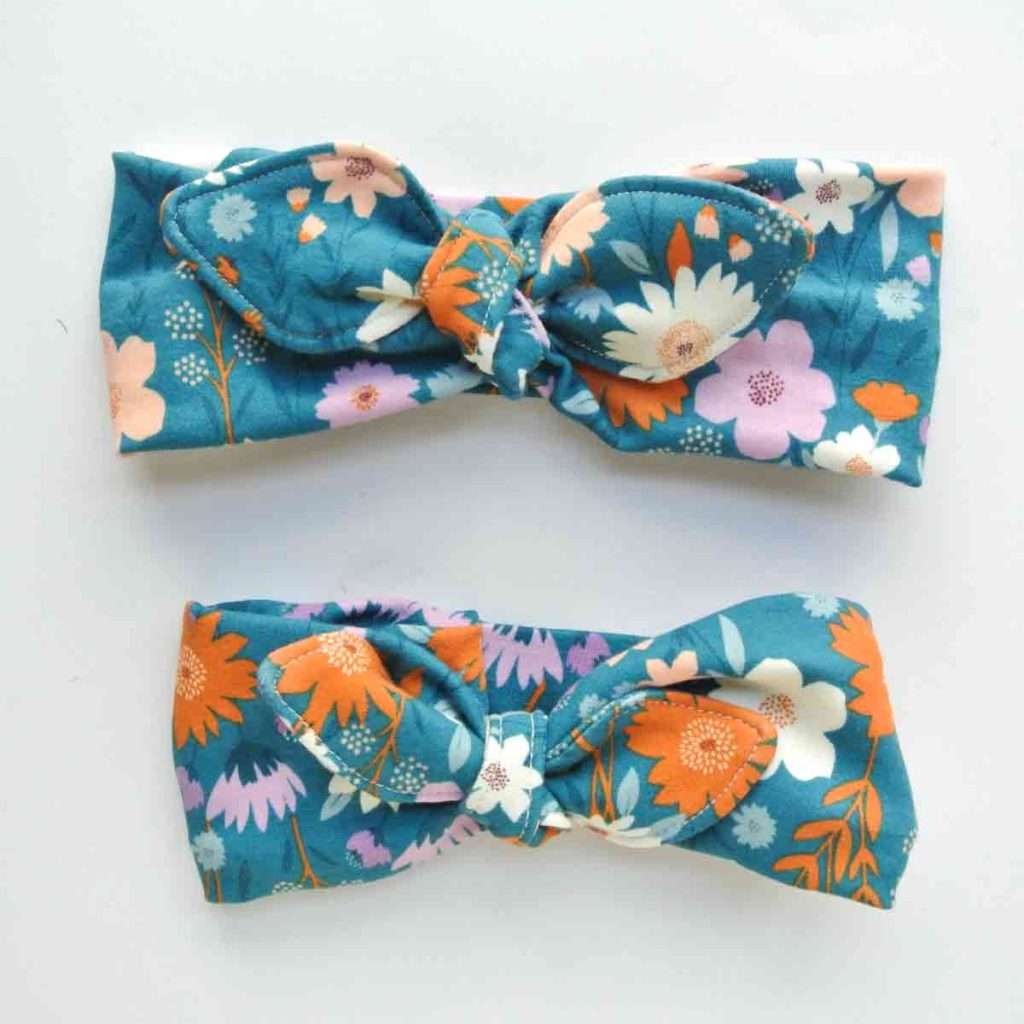
Ready to try your hand at sewing knit fabrics? Check out the following projects that are perfect for beginners!

One of the best tips is to STARCH THE FABRIC before sewing. Very important for a very soft knit. It helps secure those edges from rolling on a single knit and gives a less slippery surface. Regular spray starch applied heavily will do, but I prefer liquid starch. Press the fabric after ironing, let it dry flat. You want it to feel like paper.
Hi Ann!
Thank you for sharing this lovely tip! I will need to try it out!
Very helpful tips for sewing with knit fabrics- so glad I read this first!
Hi Thelma,
I’m so happy to hear you found these tips helpful! Best wishes to all your future knit sewing endeavors!
Thanks so much! Great tips for streeeetttcchhhyy kknnniiitttssssss!
I’m so glad you found the tips useful!
How do you get a stretch stitch on an ordinary sewing machine?? There is only option to change the length of the stitches and tension of the bobbin.
Hi Yvonne,
Does your ordinary sewing machine have a zig zag stitch function? You can definitely use that as a stretch stitch. Otherwise, check your machine’s usual manual to see if there are any stretch stitches available. Hope that helps!
Can you use a lightweight stabilizer?
I make memory bears, pillows, etc. Sometimes I get some thin blouses. I usually stabilize t shirts for pillows.
Yes lightweight stabilizer should help as well!
My complaint is with the sewing machine needle manufacturers. Adding a colour-coded marking for stretch/ballpoint needles would be so helpful. When I look at my needle ‘stash’, I cannot tell the difference between regular and specific needles.
Hi Dawn,
That is a good idea! It would be very helpful! You should consider contacting customer service at the sewing machine needle company and let them know.