DIY Water Bottle Holder
Difficulty: Intermediate
Time: 1-2 hours
Techniques: Sewing circle into cylinder, Finish raw edge with bias tape
In the past 6 months, my toddler has already murdered two plastic water bottles via releasing them from heights water bottles shouldn’t be released from. I finally ordered him another water bottle, and was determined this one would not suffer the same fate as it’s predecessors.
Originally the plan was just to make a padded water bottle cover. However, I found some insulated fabric, and decided to put them to use. As I sewed, it seemed that the cover needed some straps. The result is a insulated water bottle carrier!
This project wasn’t the easiest, as I had to re-remember how to sew circles to straight lines (think: setting a sleeve). I think I sewed the circle to straight line combo about 10 times before finally getting it right. But practice makes perfect, so it was definitely not wasted (albeit frustrating). In this tutorial I share some tips that should make your sewing experience much easier!
The measurements in this tutorial are for the Camelbak Eddy Kid’s water bottle as that is the one I made. However, if you need one for a different sized water bottle, I have a quick overview for how to do so in the tutorial below.
MATERIALS:
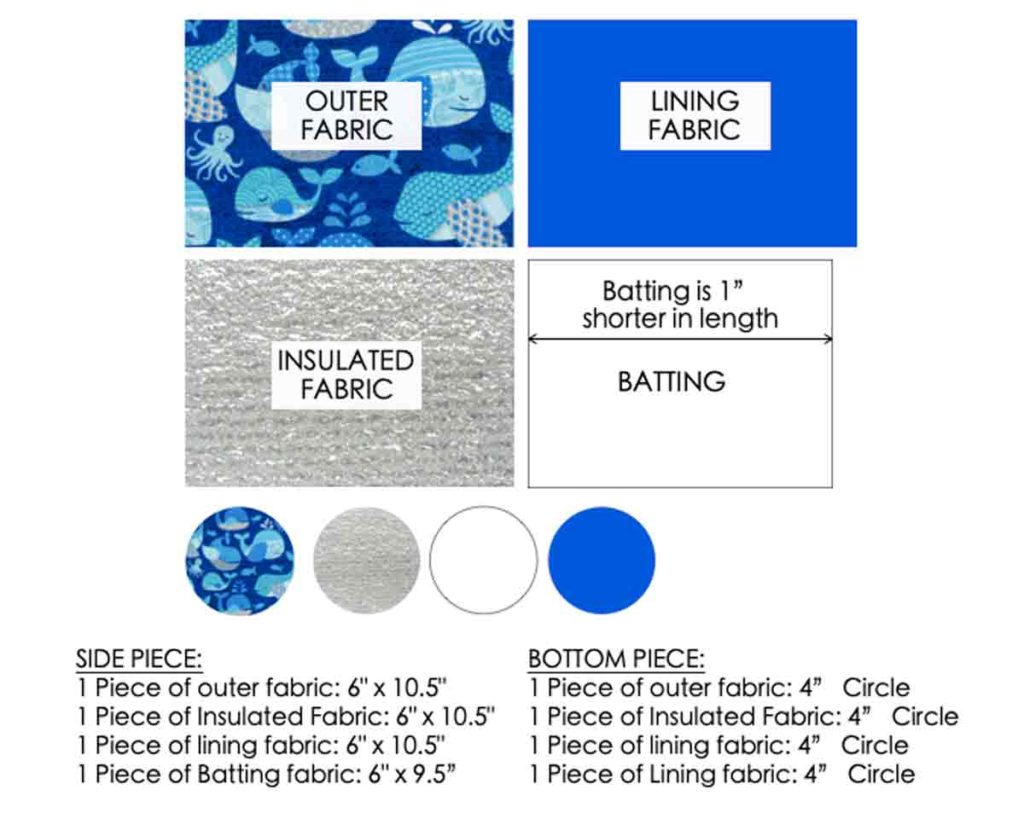
1/3 Yard Outer Fabric of choice (I used this)
1/3 Yard Insulated Fabric
1/3 Yard Batting
1/3 Yard Lining
1/2″ Double fold Bias tape (or learn to make your own here)
1″ Cotton Belting of matching color for handle straps
TOOLS:
Sewing Machine
Fabric Scissors
Chalk for marking fabric
Ruler
Measuring Tape
Thread of matching color
Needle
How to Make Pattern for DIY Water Bottle Holder:

- Measure diameter of bottom of water bottle and add 1/4″. The bottom of my water bottle is about 2.75″, so adding 1/4″ to that makes my diameter 3″.
- Now find the circumference of the circle. Remember circumference = diameter*π. So 3 x 3.14159 = 9.42477, which is approximately a little less than 9.5″. I just used 9.5″ to make it easier. Since the side piece has two 1/2″ seams, you will add 1″ to your circumference: 9.5″ + 1″ = 10.5″, which is the width of the side piece.
- The length of the side piece depends on how tall you want the water bottle cover to be. Mine was 5″, so add 1″ seam allowance to that (you have a seam at the bottom to sew to the circular piece, and another seam at the top for the bias binding). With these calculations, you will have a side piece that measures 6″ x 10.5″
- Don’t forget to add seam allowance for your round bottom piece too! Simply add 1″ to your diameter, so 3″ + 1″ = 4″. This means that my bottom piece was a 4″ circle.
Cutting Fabric:
Cut out Pattern Pieces
How to Sew Insulated Water Bottle Carrier:
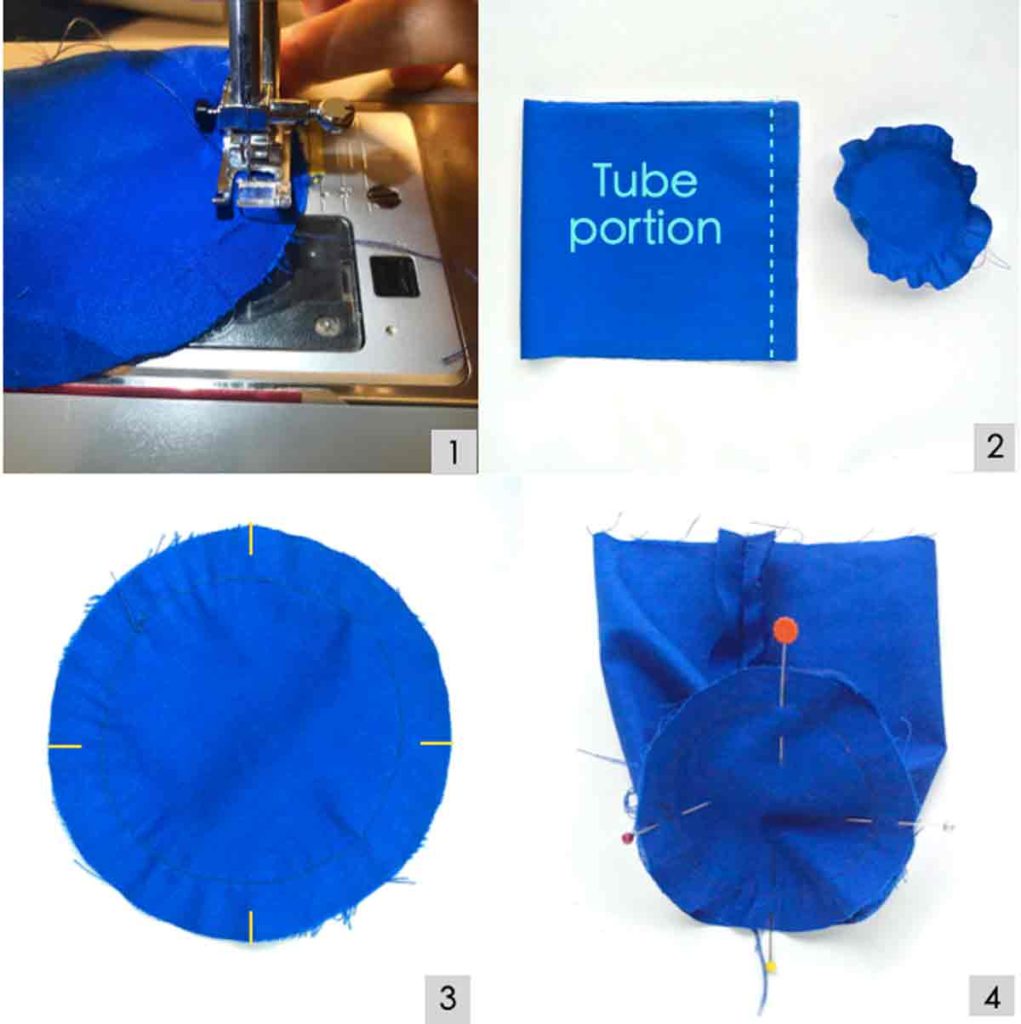
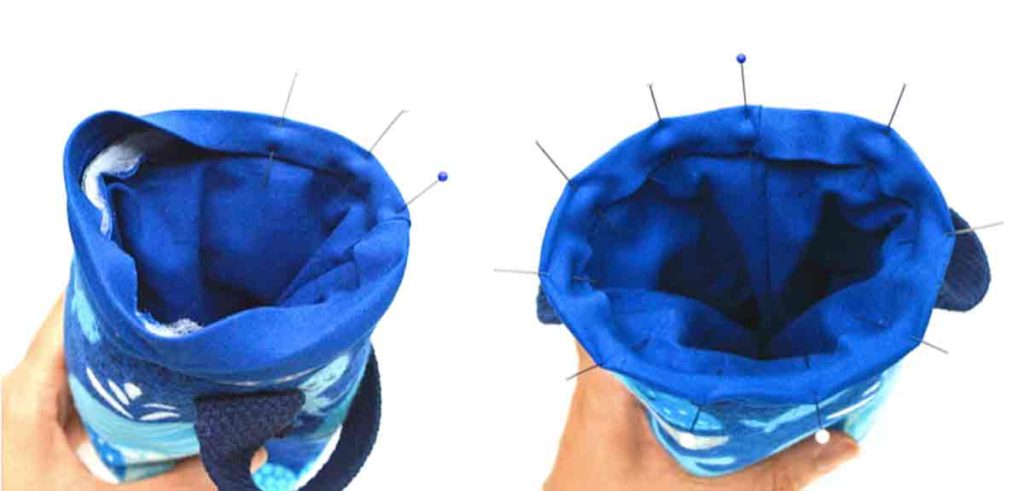
- Keeping finger behind feed dog, stay stitch bottom round piece of cotton lining at 1/4”from edge. This helps “bunch” the circle together so it’s easier to sew into top tube portion of lining (in photo 2)
- Fold rectangular lining piece in half and stitch at 1/2” seam allowance (light blue dotted line). This will form the tube portion.
- Mark off circle into fourths (yellow line), and do the same for tube.
- Pin circle to tube at the the marked fourths.
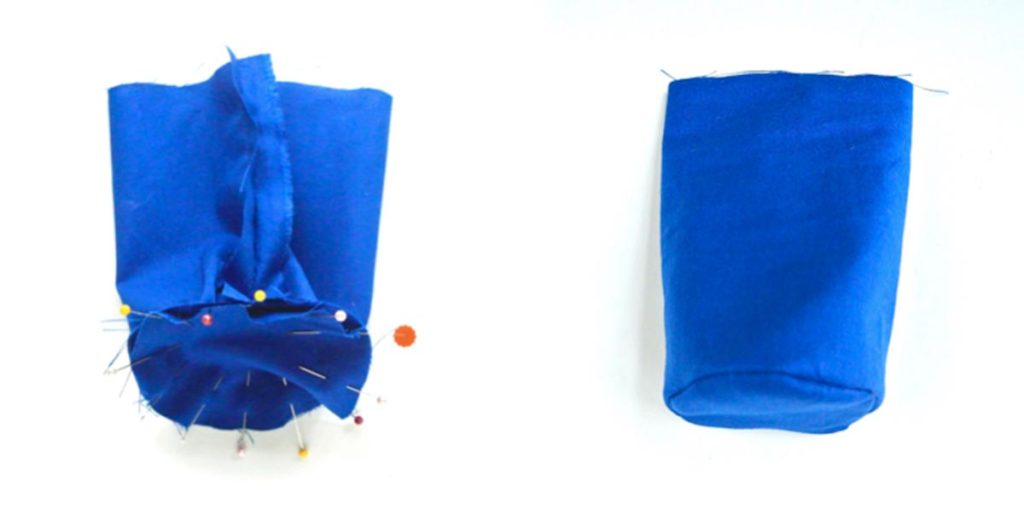
LEFT: Pin entire circle to tube and sew at 1/2” seam allowance
RIGHT: View of finished lining. See how the seam is smooth and has no puckers.
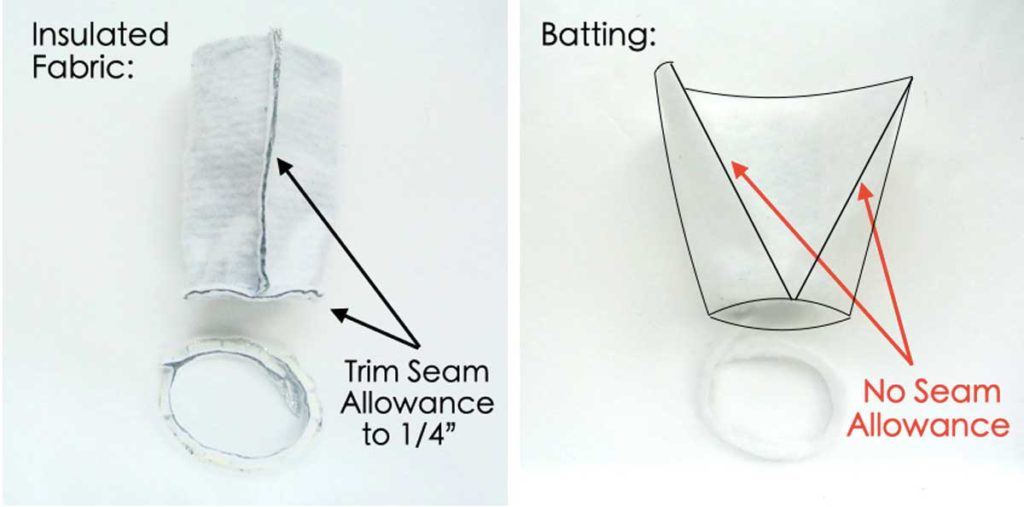
LEFT: Repeat for insulated fabric and trim seam allowance to 1/4”
RIGHT: For batting, sew circle to rectangle piece and trim seam allowance to 1/4” . Rectangular piece of batting does not have seam allowance on sides, so no need to sew in half first. This helps eliminate bulk.
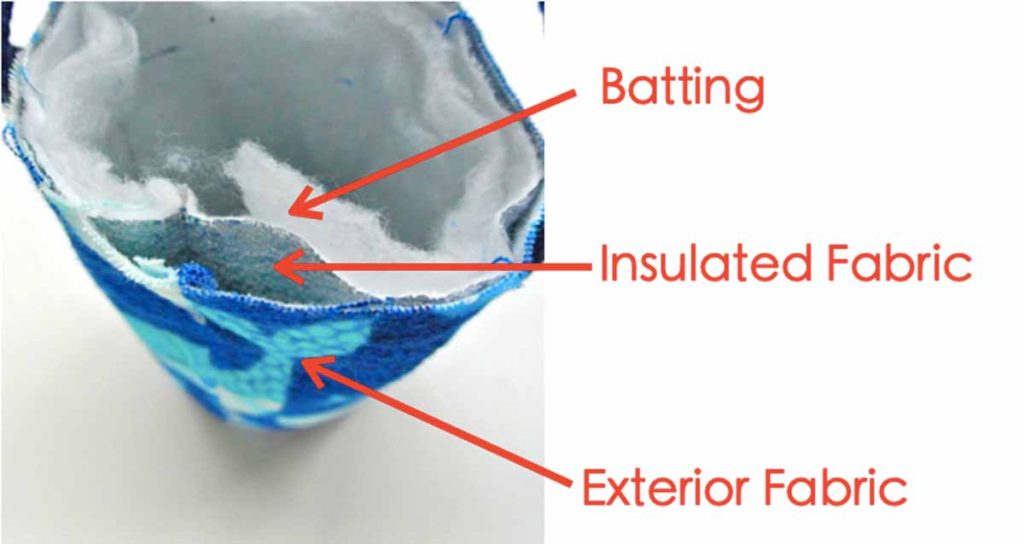
Place layers of water bottle holder together as shown, lining them up at the seam.
How to Sew Handle to Water Bottle Bag:
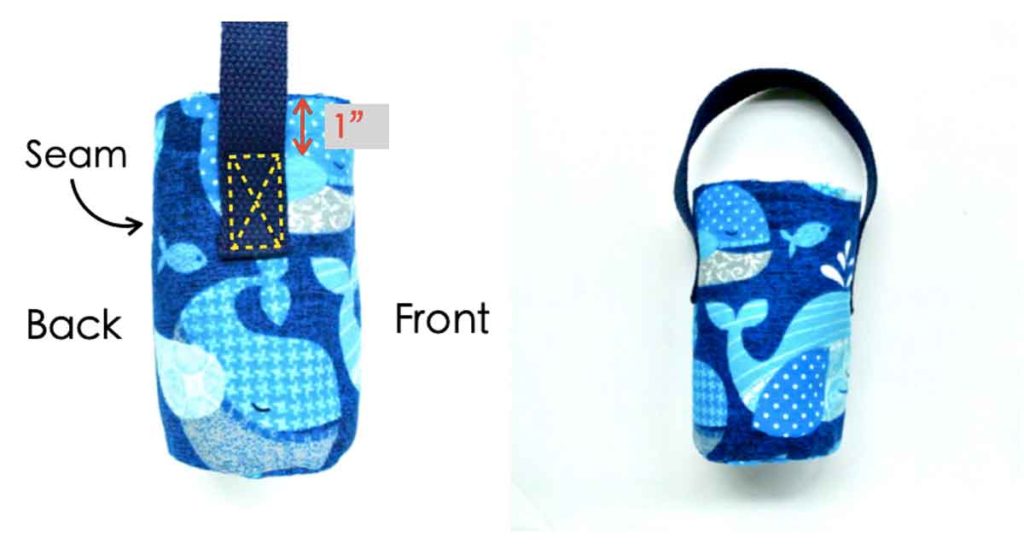
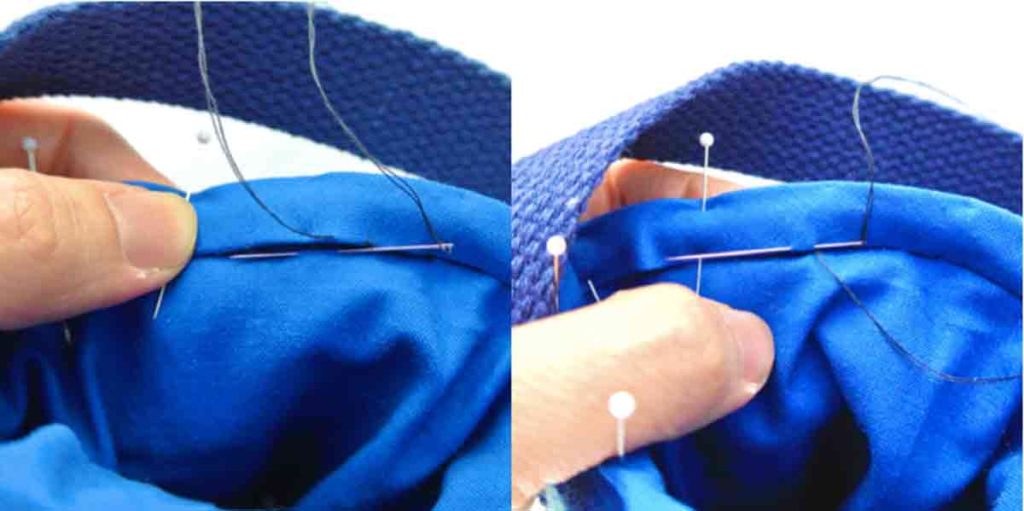
LEFT: Sew straps on water bottle holder (yellow dotted box). I started sewing about 1” down from top edge of bottle holder. However, because my bottle diameter was so small (~3”) it was quite difficult to sew! For a small bottle, I would probably sew 1/2” from the top edge next time.
RIGHT: Front view of bottle holder after straps are sewn in.
How to Finish Water Bottle Carrier with Bias Tape:
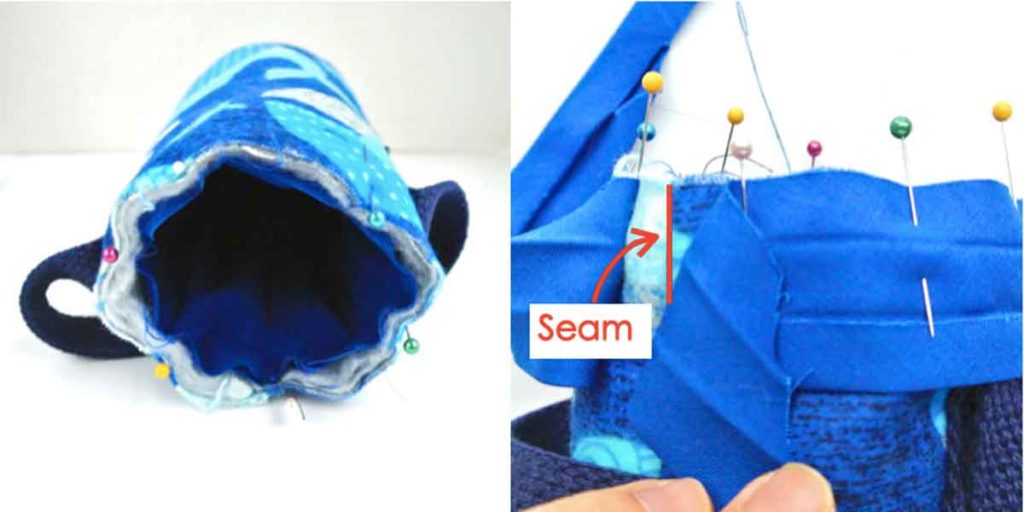
LEFT: Place lining into interior of bottle holder (right side up) and pin in place
RIGHT: Unfold top flap of bias tape. Leaving about 1-2”excess bias tape past seam, pin bias tape to bottle top edge of bottle holder start at seam.
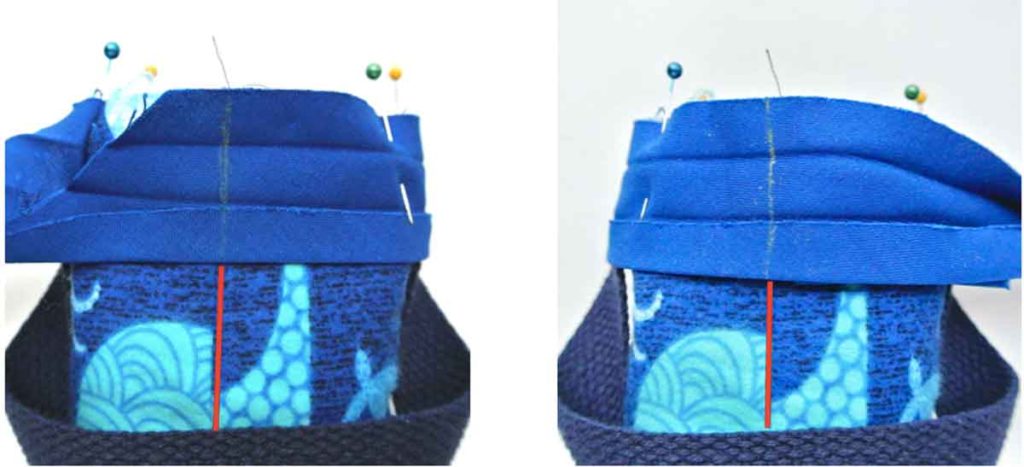
LEFT: Place right side of bias tape past seam (red line) and mark seam on bias tape (yellow chalk line)
RIGHT: Place left side of bias tape past seam (red line) and mark seam on bias tape (yellow chalk line)
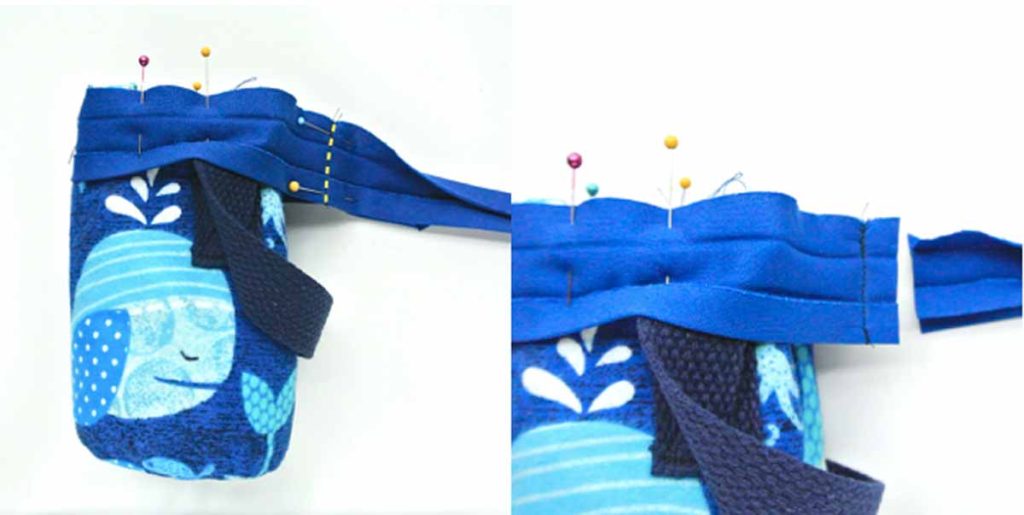
LEFT: Match left and right chalk lines together and sew bias tape together (yellow dotted line)
RIGHT: Trim excess bias tape off, leaving 1/2”past seam
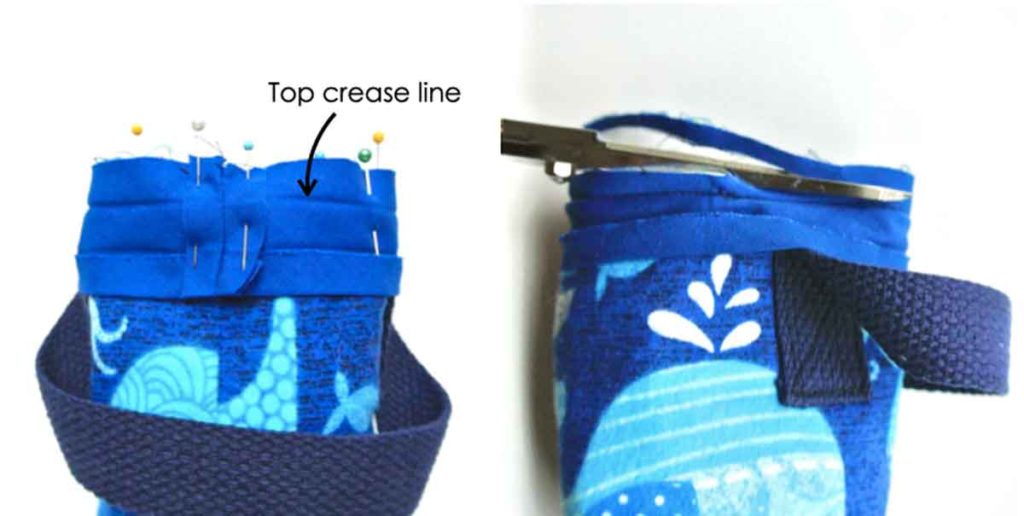
LEFT: Open bias tape seam (that was just sewn) and pin rest of bias tape to bottle holder. Sew at top creased line of bias tape.
RIGHT: Trim 1/8” off top edge
Fold bias tape over top edge of bottle holder and pin in place.
Hand stitch bias tape down on lining side.


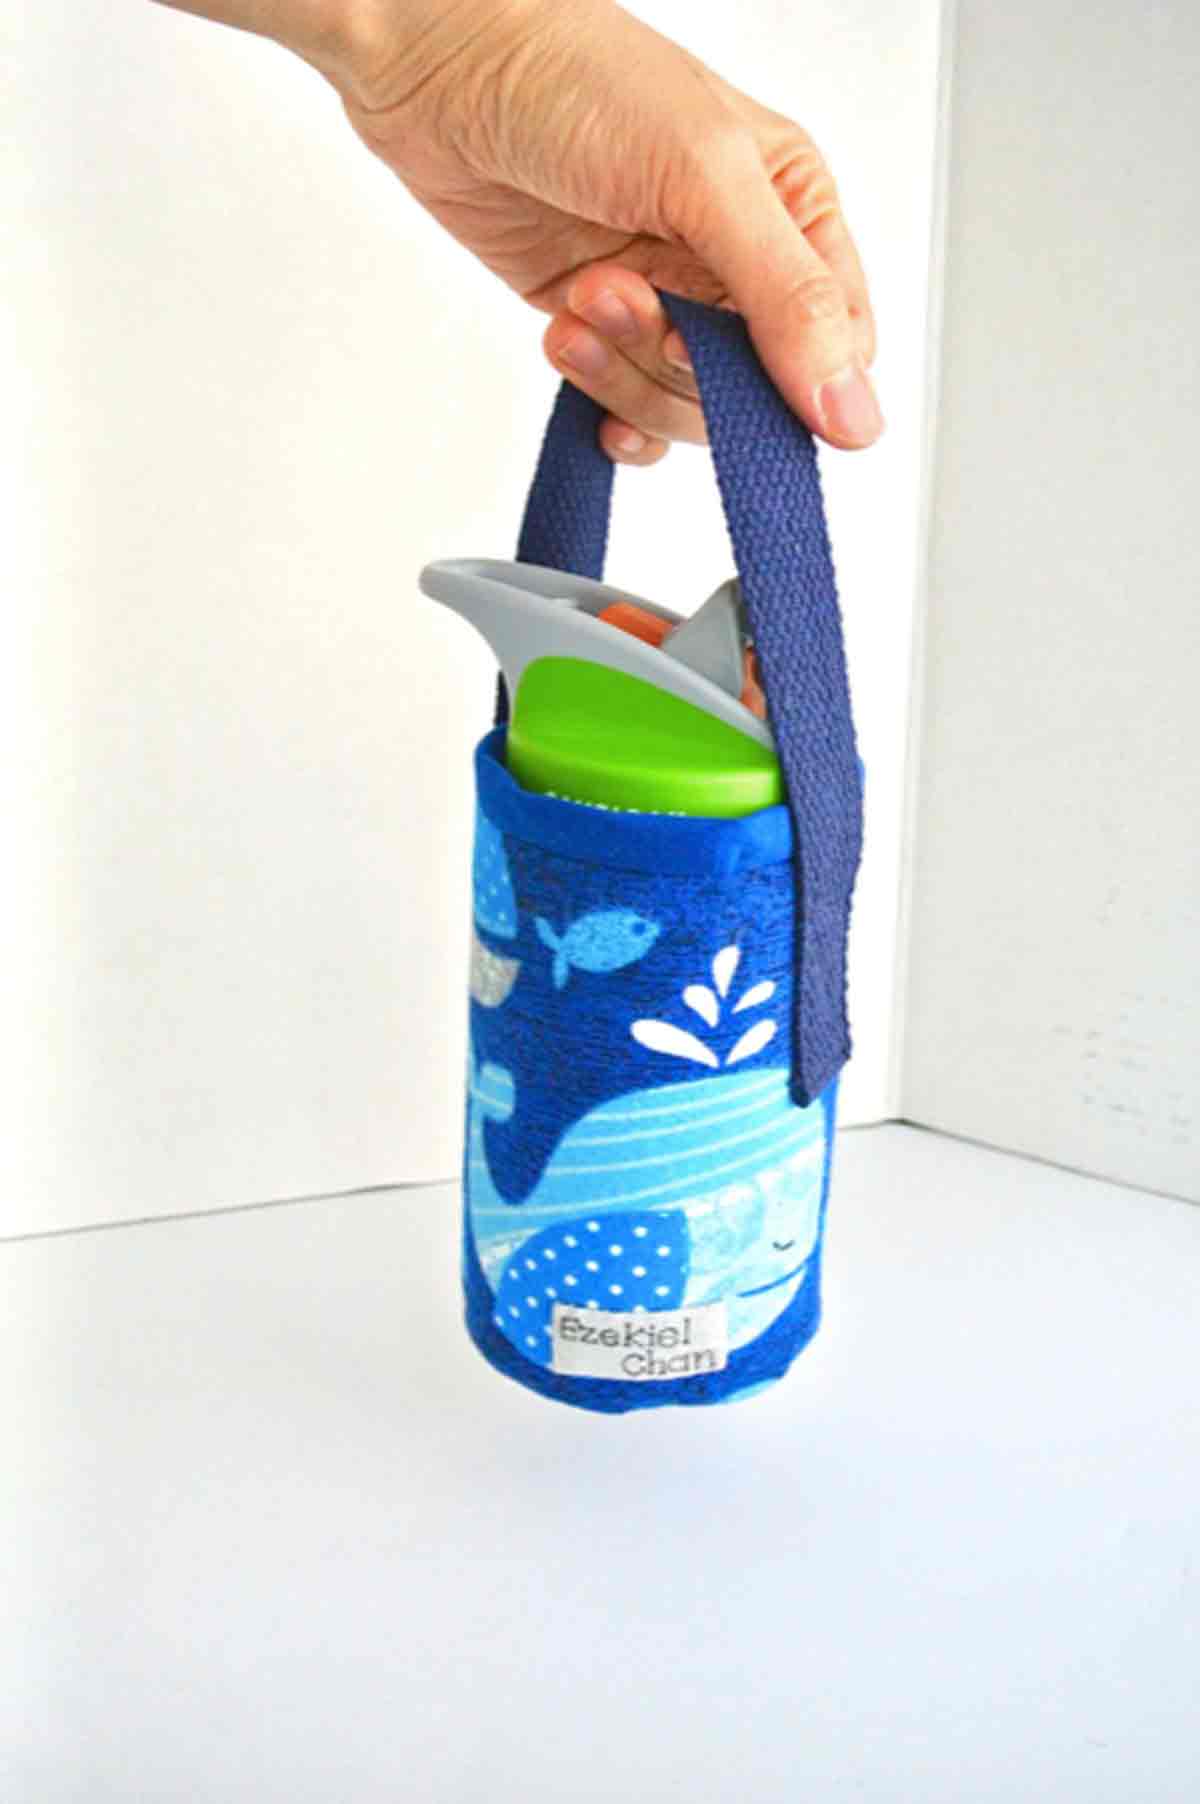
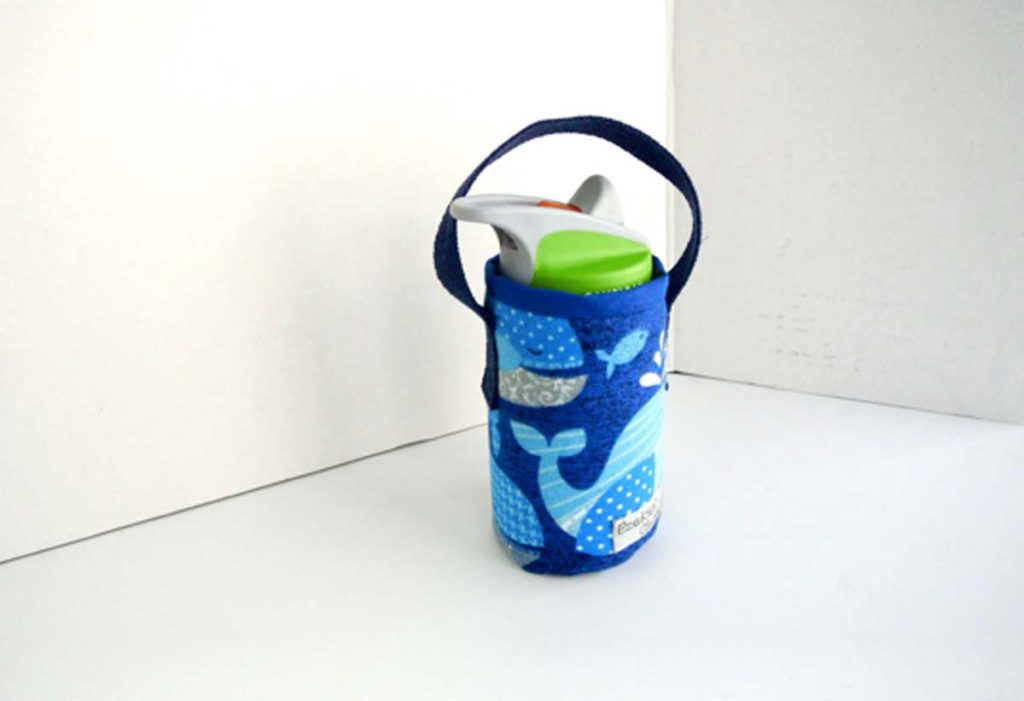
Finished Views. I decided to add a small name tag because all kids (and adults alike) need their stuff labeled!
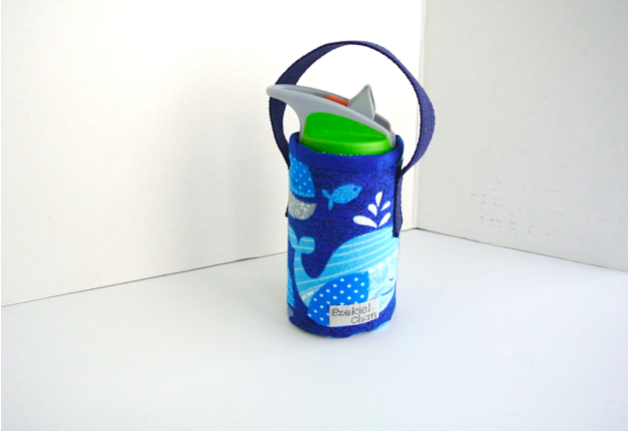
This handy little water bottle bag holder has been very useful for our morning walks. It’s already great because Barnaby enjoys carrying it himself.
Let me know in the comments below if you made this, or have any questions! Happy sewing 🙂
Thank you so much for posting this. I was asked to make one for a friend’s little boy and this helped me so much! I knew most of the steps, except how to figure the size of the rectangle. I have sewn for more than 50 years and am still learning!
Hi Torry,
So glad to hear that!