How to Make a Pick Stitch – A Beginner’s Guide
The pick stitch is a type of back stitch made of short, almost invisible stitches and long spaces on the right side of the fabric.
The term “pick stitch” is very often used interchangeably with the the term “prick stitch“. Even in sewing communities, the name pick stitch versus prick stitch is a topic of hot debate.
What’s the Difference Between a Pick Stitch Versus a Prick Stitch?
According to The Reader’s Digest “New Complete Guide to Sewing” (which by the way, is an excellent sewing book for beginners!) “While they are very similar, they are different stitches.”
As you will see from the photo, the Pick stitch is not visible on the wrong side of the sewing project (it does not go through all layers of fabric) whereas the Prick stitch is visible (it goes through all layers of fabric).
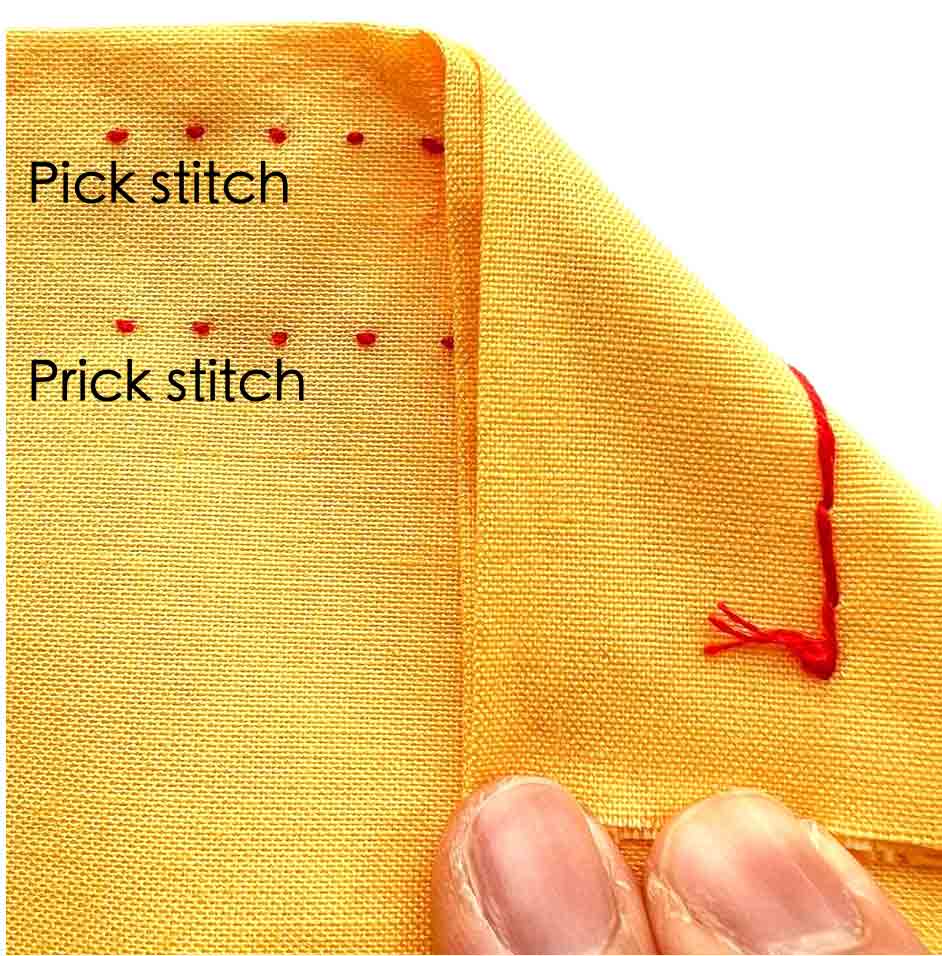
In today’s step-by-step tutorial, I will show you how to make both the Pick stitch and the Prick Stitch. The process is exactly the same, just whether or not your thread goes through all fabric layers or not.
What is a Pick Stitch USED FOR?
- Making Hems
- Used for decorative purposes on shams, quilts, and blankets – can be made with matching or contrasting thread
- Ideal for topstitching and hand under stitching (to prevent facings from rolling up)
- Commonly found along lapel edges, pockets, and vest edges of high end men’s suits

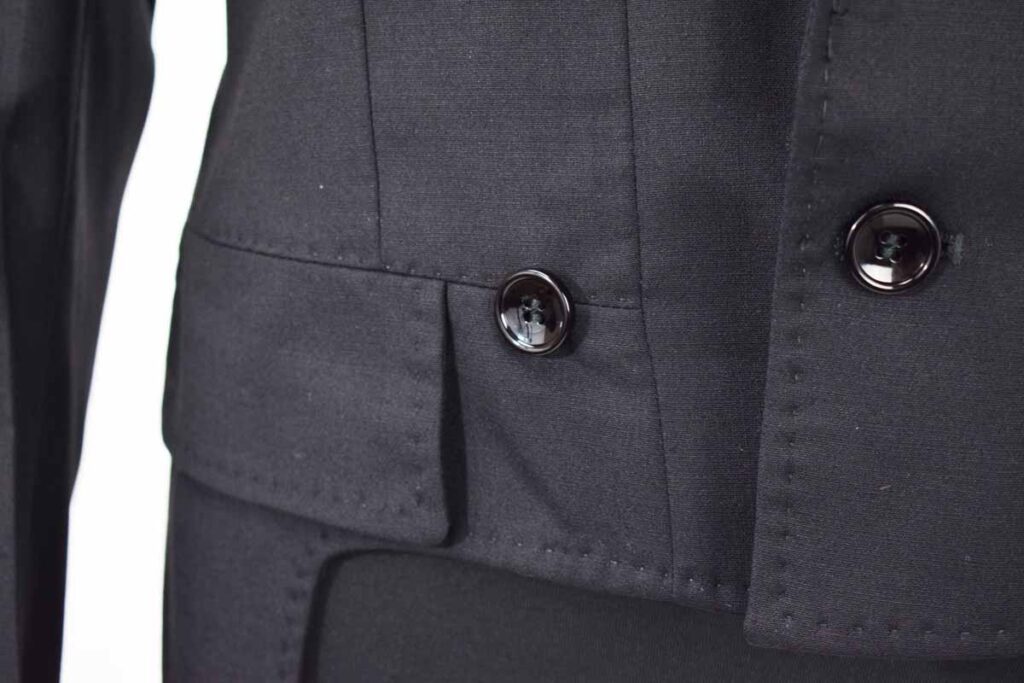
LEFT: You will often find pick stitch done on edges of lapels for luxury men’s suits
RIGHT: Pick stitch used decoratively on hems, pockets, and edges of high quality men’s clothing.
What is a PRick Stitch USED FOR?
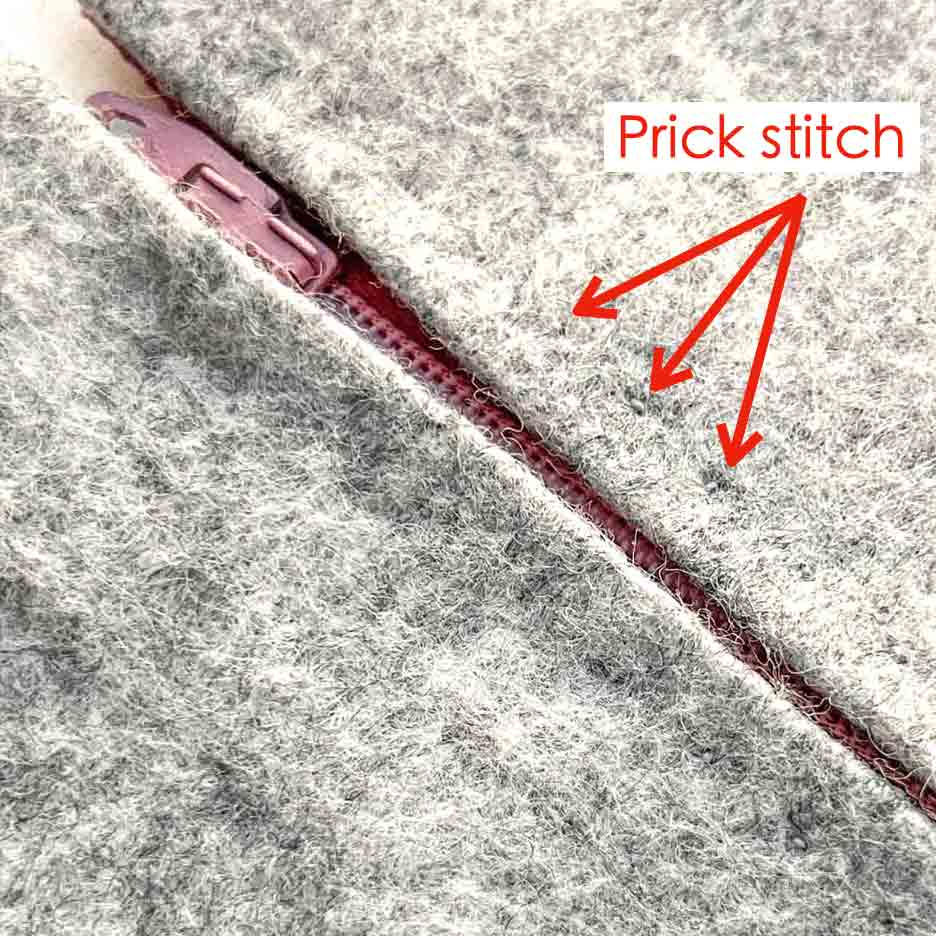
You will mainly use the prick stitch to hand-pick a zipper. See how you really have to look carefully to see the prick stitches done on this zipper!
Additionally, you can use a contrasting thread or add beads for decorative purposes. This will give your zipper a very unique look!
materials/tools
- HAND SEWING NEEDLES
- THREAD – Polyester or Cotton
- FABRIC
- SMALL SHARP SCISSORS
- PENCIL and RULER – to mark fabric prior to making stitches
How to Sew a Pick Stitch: EASY STEP-by-STep
When making a pick stitch, try to keep the stitch size and spacing as even as possible for a uniform look. Of course, for decorative purposes you can vary the stitch size and length to your liking.
To make sure your stitches are orderly, you can always mark the fabric (before you start) to indicate where the stitches need to go.
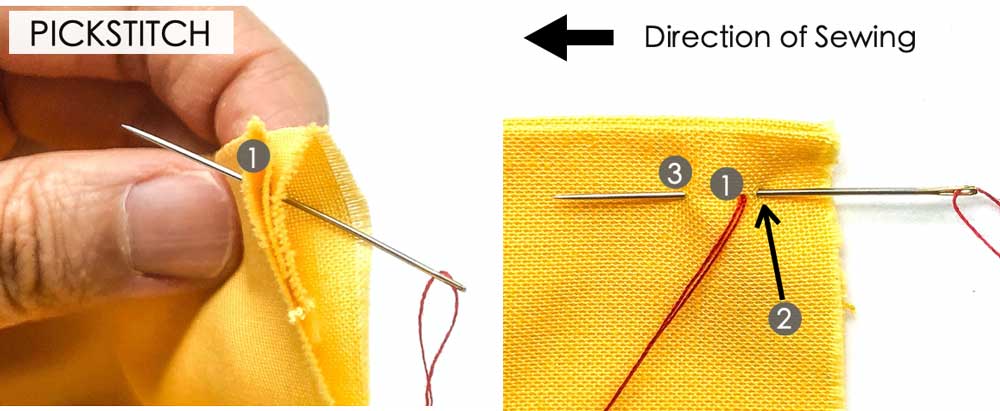
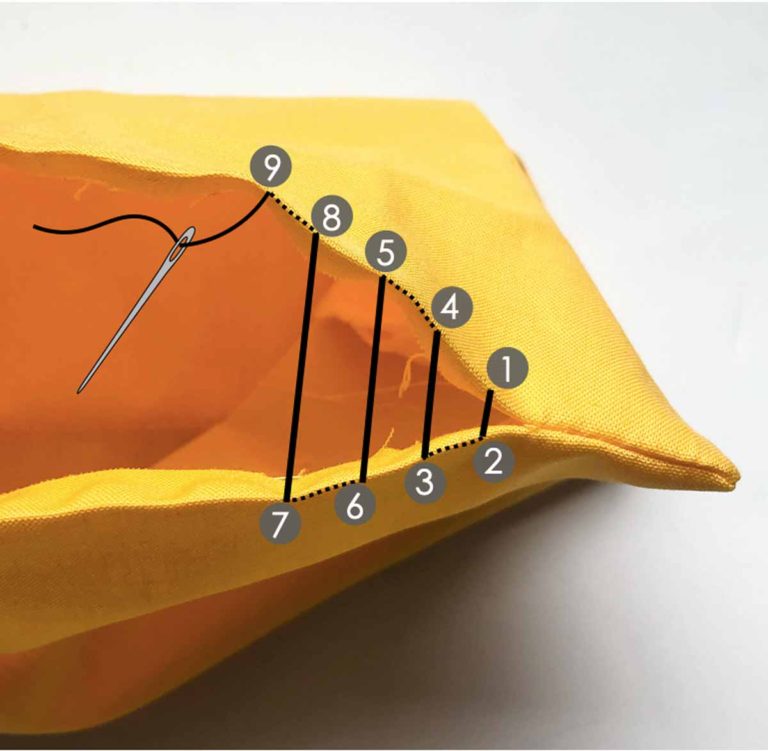
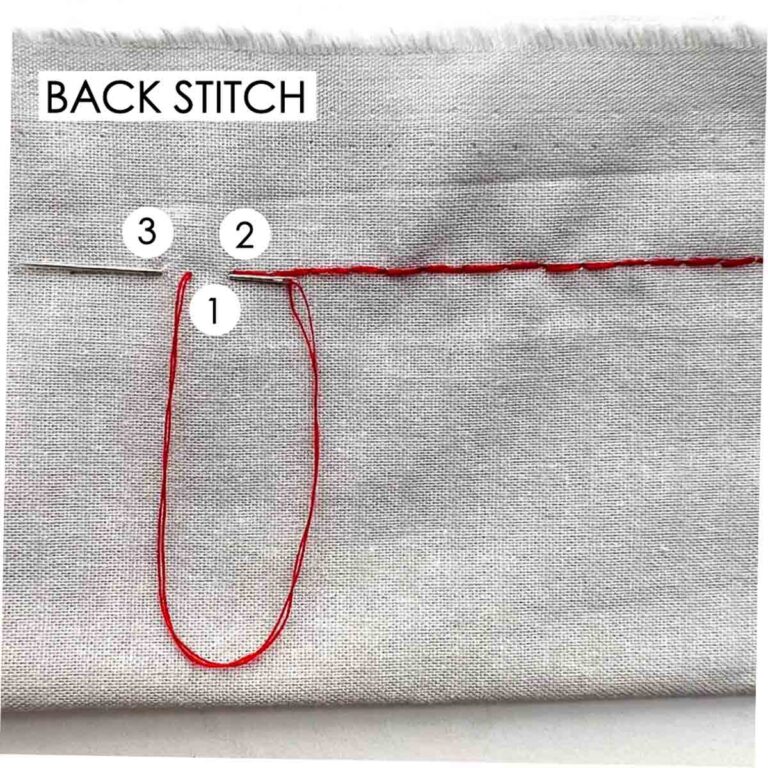
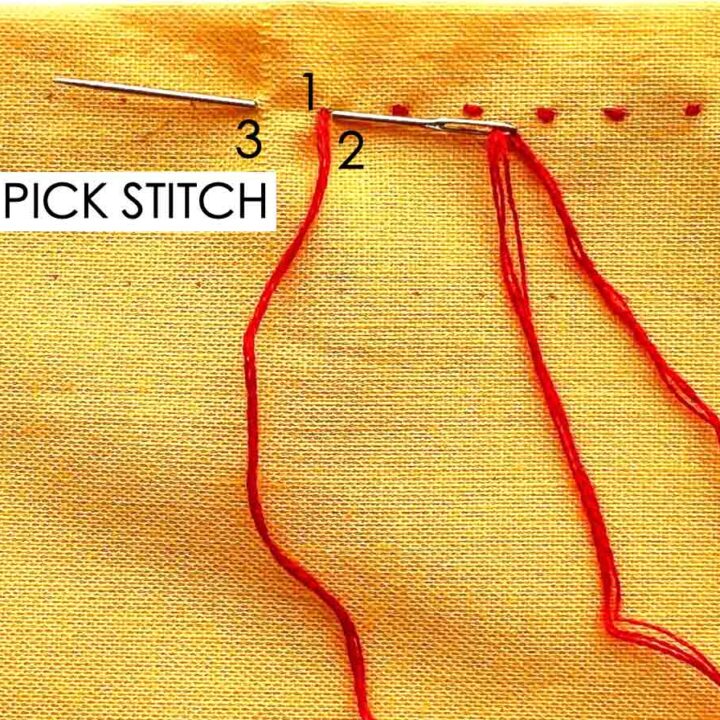
LEFT: Insert needle through fabric (1) without catching the most bottom layer
RIGHT: Insert needle (2) a few fabric threads behind where thread came out (1), making sure not to catch the bottom fabric layer. Bring needle out (3) to fabric front 1/8 – 1/4 inch (3-6mm) from where thread emerges (1).

LEFT: Continue making stitches this way, going from right to left (for a right handed operator). Make sure you don’t catch the bottom layer of fabric as you go.
RIGHT: See how the stitch is invisible on the bottom layer.
How to Sew a Prick Stitch: EASY STep-By-SteP
You will make the prick stitch in the exact same way as the pick stitch. The only difference is that the stitches go through all layers of fabric. Therefore, stitches are visible on the back side of fabric.
TIP: Mark your fabric before you start to indicate where the stitches should go. This will ensure even stitch size and spacing for a uniform look.
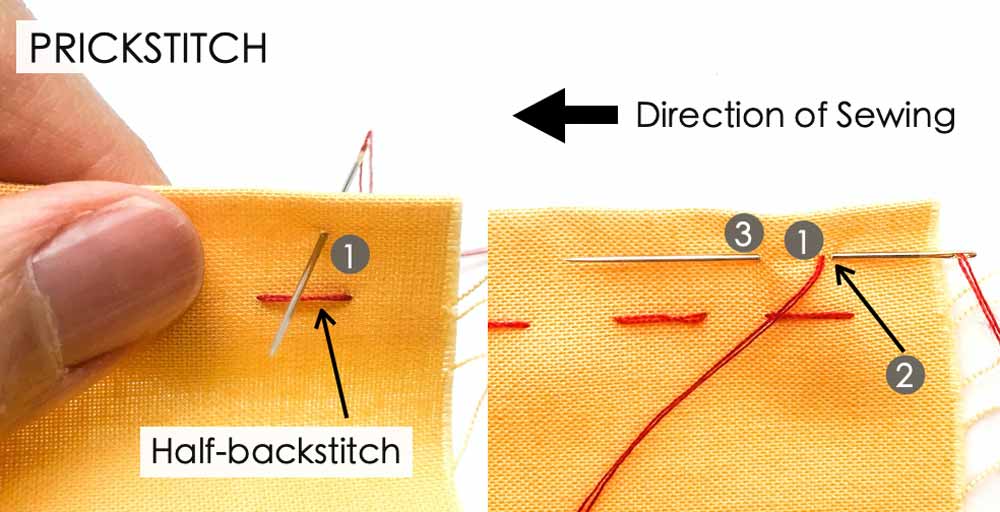
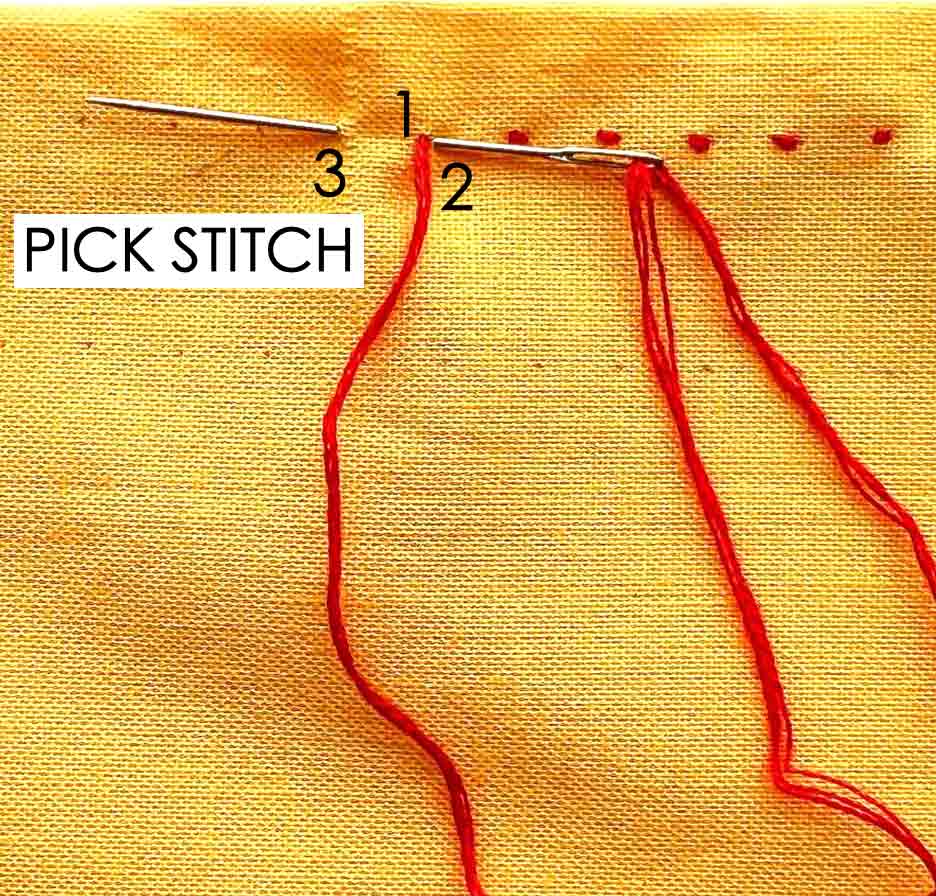
LEFT: Bring knotted needle from back to front (1) and pull through. Bottom thread shows regular half-backstitch for comparison
RIGHT: Insert needle (2) through all fabric layers a few fabric threads behind where thread came out (1). Bring needle out (3) to fabric front 1/8 – 1/4 inch (3-6mm) from where thread previously pulled out (1).
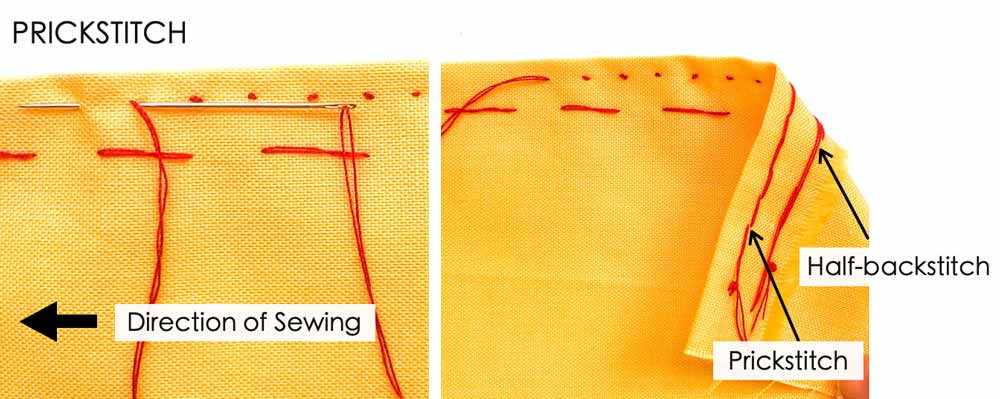
LEFT: Working from right to left, repeat making these stitches, keeping the size and spacing even.
RIGHT: From the back you can see the stitches
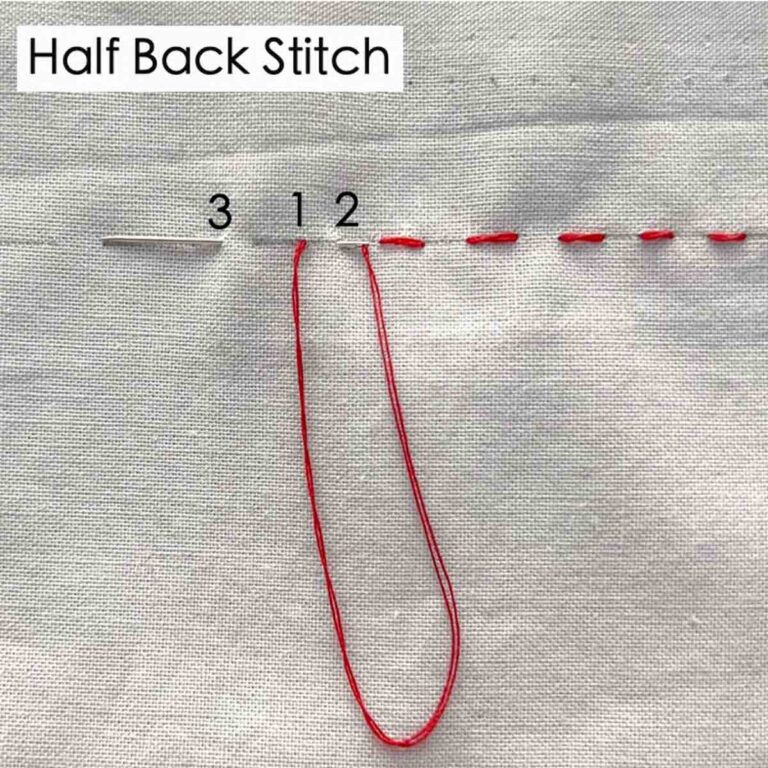
NOTE: See how much smaller the prick stitch is compared to the half-backstitch
How to Sew a Pick Stitch and a Prick Stitch
The pick stitch is a type of back stitch with short stitches on the front and long spaces in between. This stitch does not go through all layers of fabric and thus threads are not visible on the back. A very similar stitch is the prick stitch. The only difference is the threads go through all fabric layers and is visible on the back.
Materials
- HAND SEWING NEEDLES
- THREAD - polyester or cotton
- FABRIC
- SMALL SHARP SCISSORS
- PENCIL & RULER - to mark fabric
Instructions
- Thread hand sewing needle and tie a knot. You can use single or a double thread. For decorative purposes you may want to use more strands (pulled from embroidery floss).
- Use a pencil and ruler to draw a dotted line on the fabric to mark where the stitches will go. For the tutorial I marked dots spaced 1/4" (6mm) apart. (see note 1).
- Insert needle through fabric from back to front without catching the bottom layer
- Insert needle a few fabric threads behind where thread came out (step 1), making sure not to catch the bottom fabric layer.
- Bring needle out of fabric 1/8 - 1/4 inch (3-6mm) in front of where thread emerges (step 1).
- Continue making stitches this way, going from right to left (for a right handed operator). Make sure you don't catch the bottom layer of fabric as you go.
- Tie a knot at the end of your stitches
- Bring knotted needle from back to front of fabric and pull through.
- Insert needle through all fabric layers a few fabric threads behind where thread came out (step 1). Bring needle out of fabric 1/8 - 1/4 inch (3-6mm) in front of where thread was previously pulled out (step 1).
- Working from right to left, repeat making these stitches, keeping the size and spacing even.
- Tie a knot at the end of your stitches.
HOW TO MAKE A PICK STITCH
HOW TO MAKE A PRICK STITCH
The prick stitch is done exactly the same way as the pick stitch. The only difference is that the thread goes through all layers of fabric, including the bottom one. As a result you will see the back stitches on the bottom of the fabric.
Notes
- Marking your fabric beforehand ensures evenly sized and spaced stitches. Of course, for decorative purposes you can vary the stitch size and length to your liking.
Related Articles:
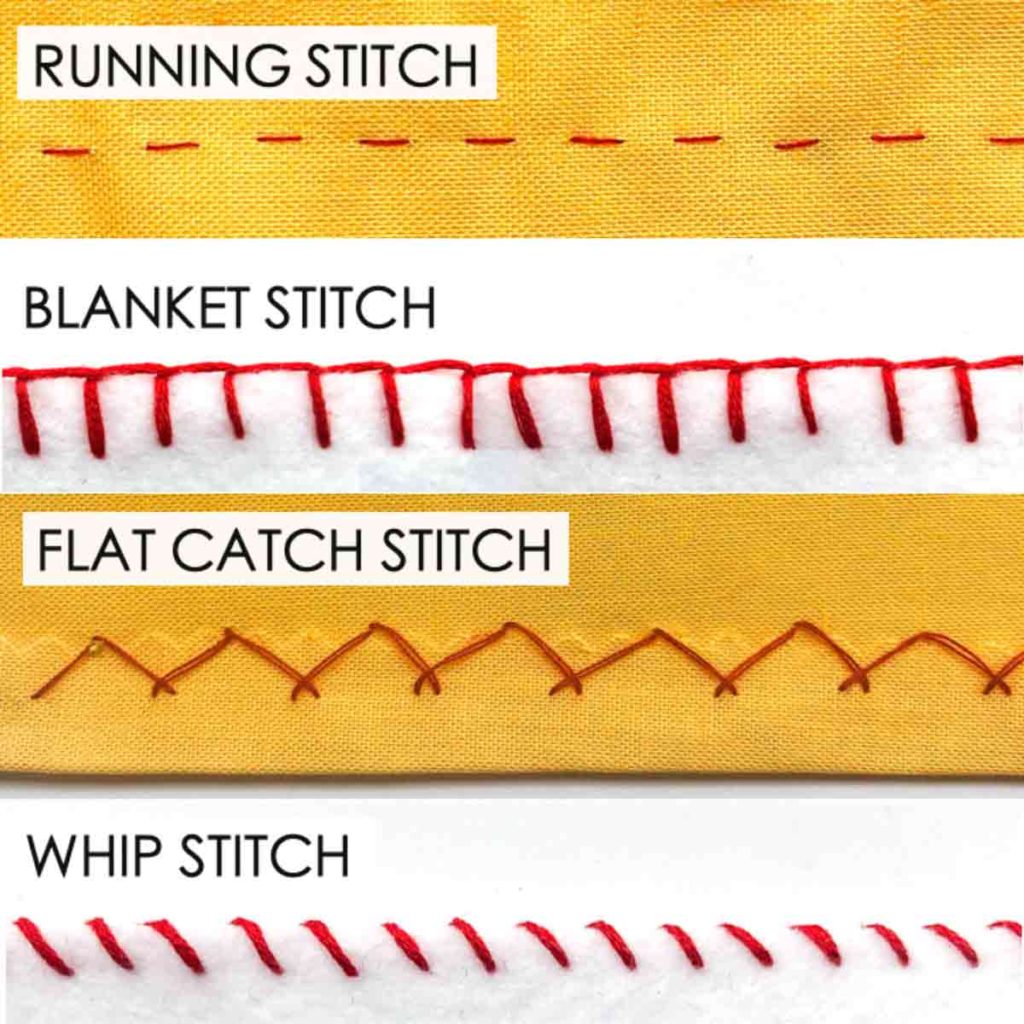
19 Essential Hand Sewing Stitches to Sew Just About Everything

How to Sew A Half Back Stitch
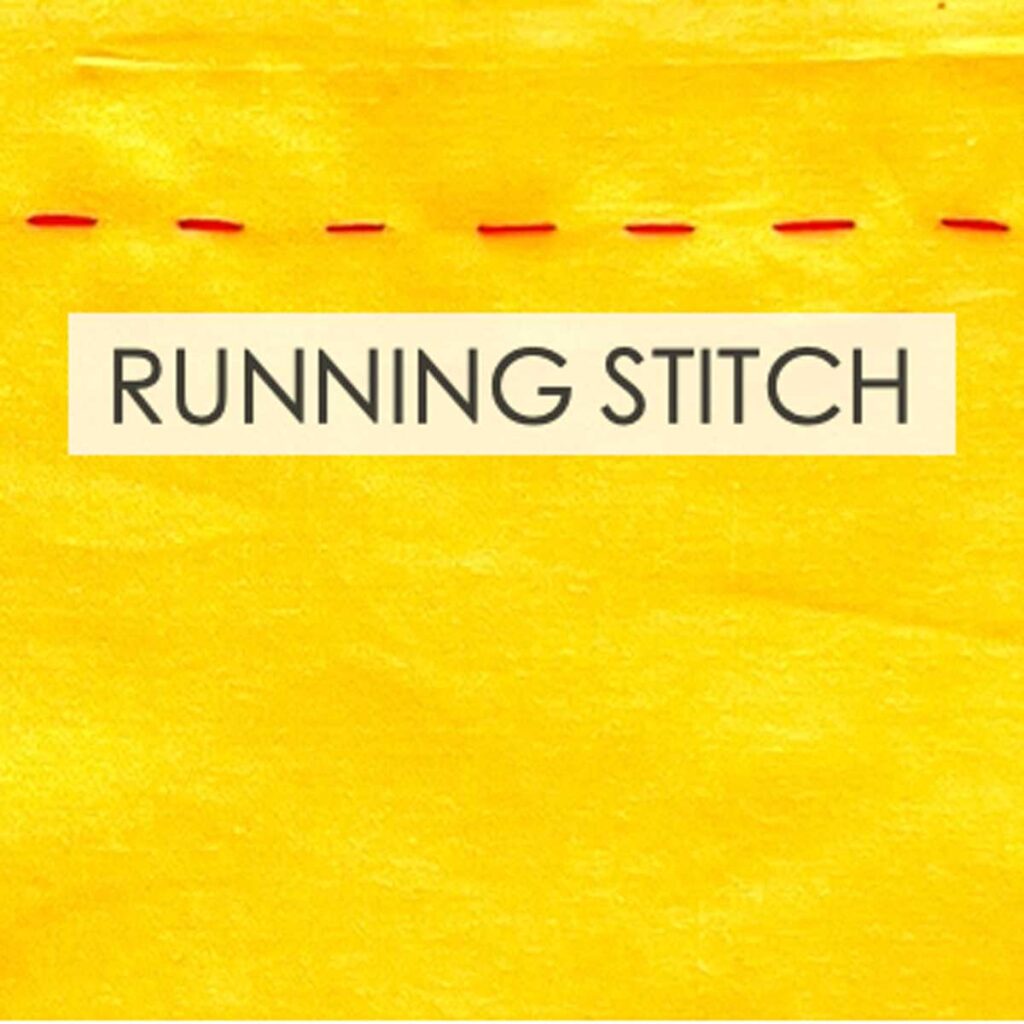
How to Sew a Running Stitch