How to Sew an Overhand Stitch
This post may contain affiliate links. Please read my disclosure policy for details. As an Amazon Associate, I earn from qualifying purchases.
The overhand stitch is a type of hand sewing stitch that passes vertically over two finished edges. Follow along the step-by-step tutorial to learn how to sew this simple but useful stitch!
What is the Overhand Stitch?
The overhand stitch is a basic hand sewing stitch that passes vertically over two finished edges. The stitches are close together and uniform in length and size. It is often used to sew two finished edges together.
Additionally, it can be used to attach lace or ribbon to a garment.
It is also frequently used to close two raw fabric edges together, making it resemble a french seam. For example, you may find this stitch on the wrong side of garments where the sleeves attach to the armhole.
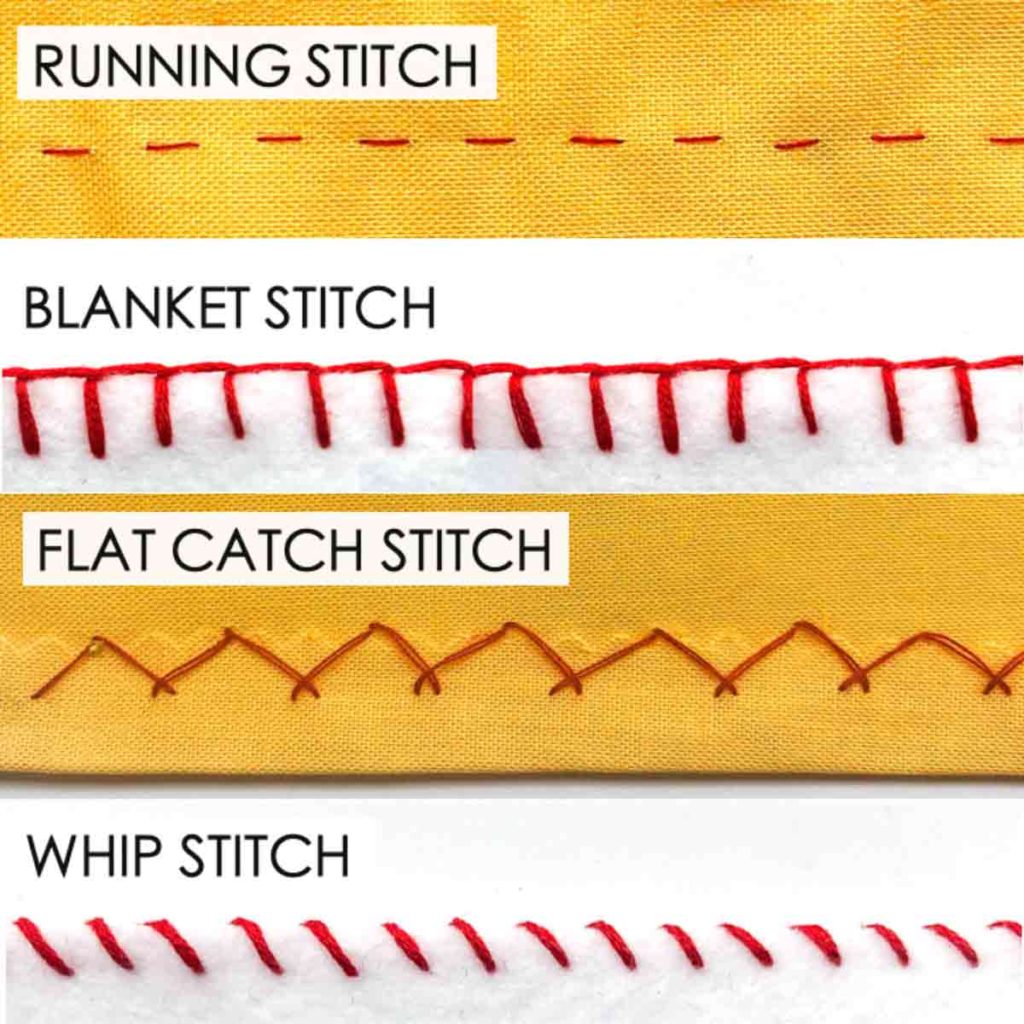
While this stitch may sound familiar, it is not to be confused with the whip stitch or the overcast stitch.
Overhand Stitch Versus whip stitch – What’s the Difference?
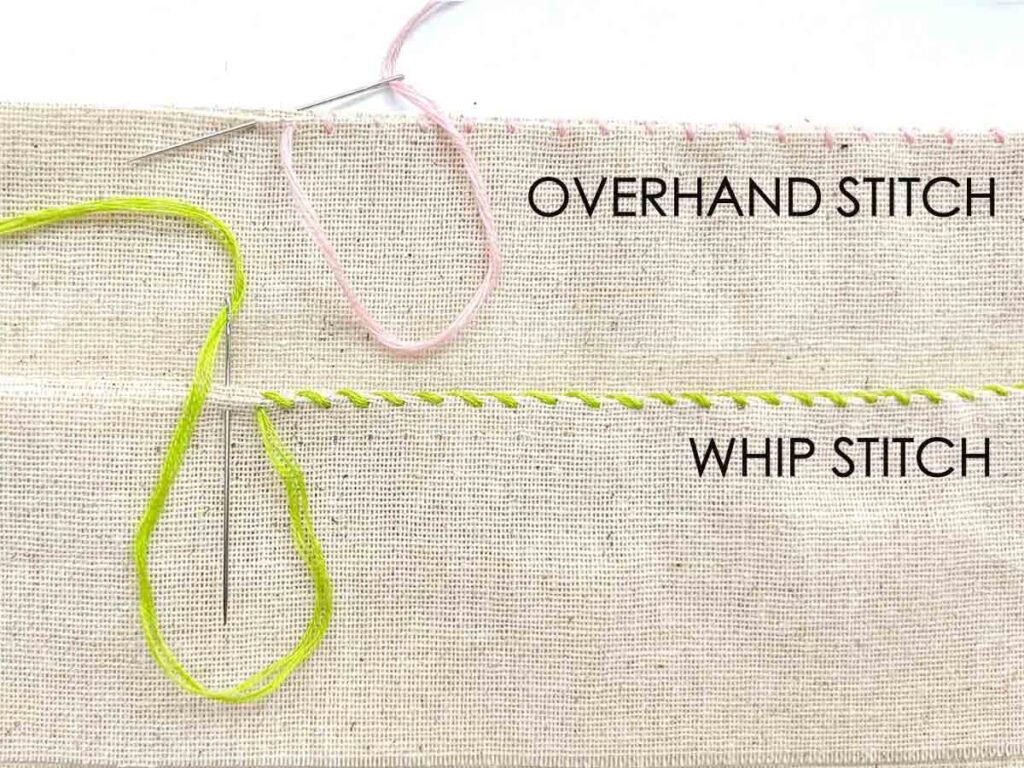
The whip stitch is a variation of the overhand stitch. While the two are very similar, they are also different in the way they are made and their function.
First, both the overhand stitch and the whip stitch are done by passing over the edges of fabric.
Second, the overhand stitch joins two finished edges together. Contrarily, the whip stitch is used to either join two finished edges together or to fasten an unfinished edge to a flat surface (in the case of applique).
Finally, the whip stitch differs from the overhand stitch in the way it is made. When you sew a whip stitch, you hold the needle straight as you insert it into the fabric. To make the overhand stitch, you insert the needle diagonally through the fabric to make each stitch.
Note also how the overhand stitch looks like a series of straight stitches whereas the whip stitch looks like a series of diagonal stitches.
What is the Difference Between The Overhand Stitch and the overcast stitch?
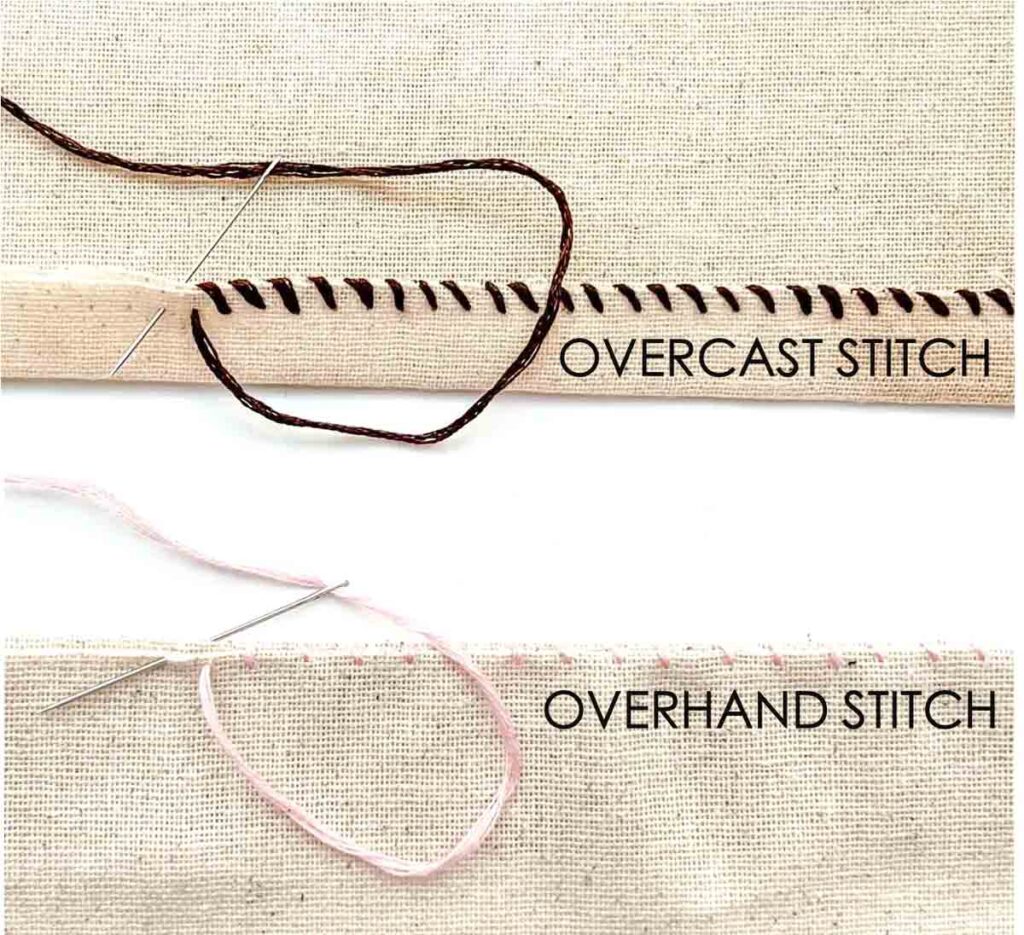
The overhand stitch and the overcast stitch are very similar in that the operator inserts the needle diagonally through the fabric each time to take a stitch.
However, the overcast stitch is used to go over raw fabric edges to prevent fraying whereas the overhand stitch is for attaching two finished edges together.
Now that we have clarified what the overhand stitch is, let’s take a look at how to make this easy stitch!
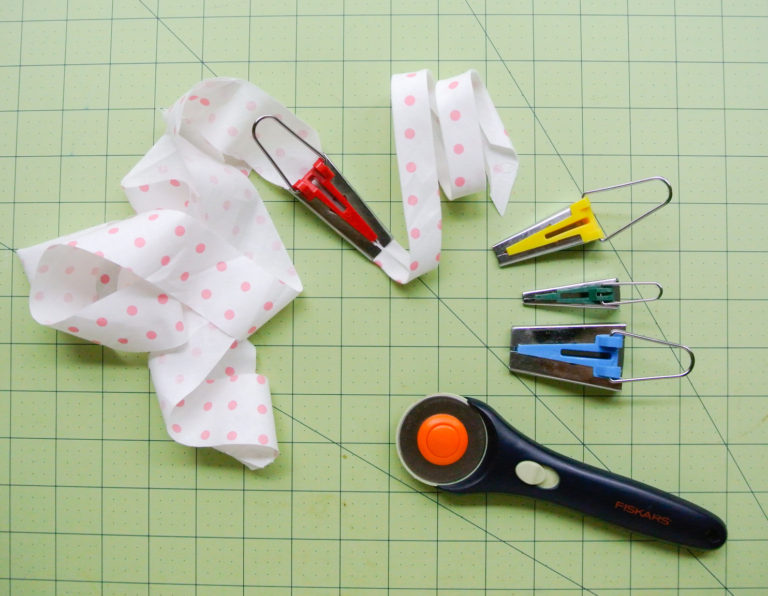
materials/tools
- HAND SEWING NEEDLES
- THREAD – Polyester or Cotton
- FABRIC
- SMALL SHARP SCISSORS
- PENCIL and RULER – to mark fabric prior to making stitches
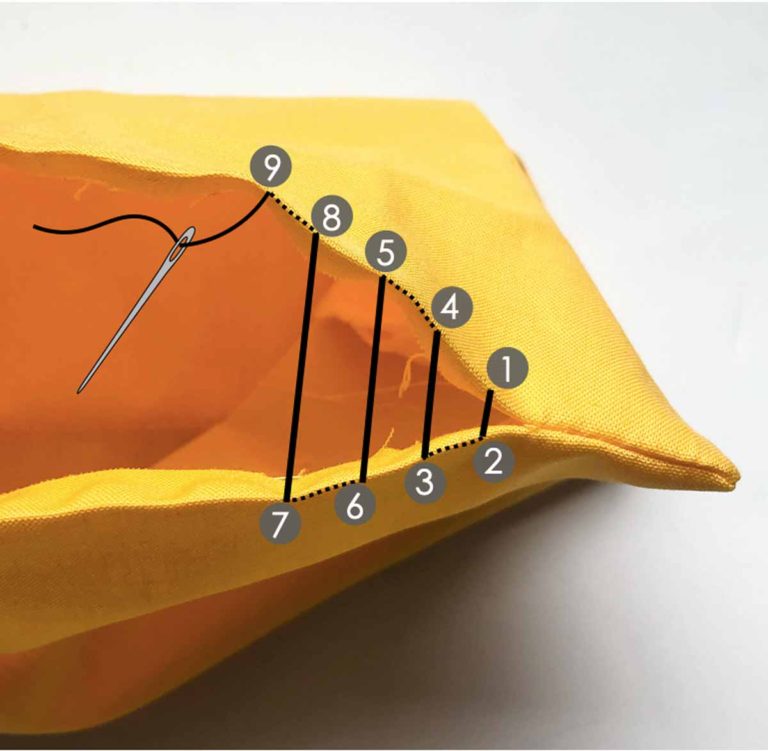
How to DO OVERHAND STITCH: Easy Step-by-Step Tutorial
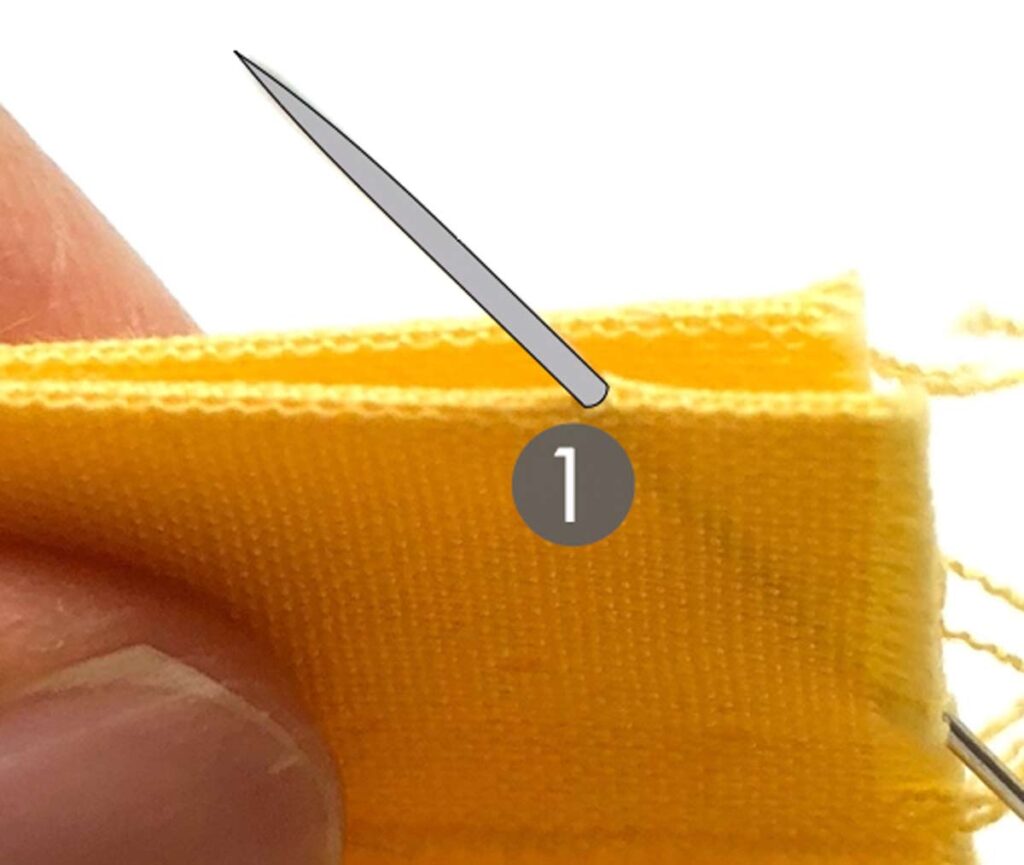
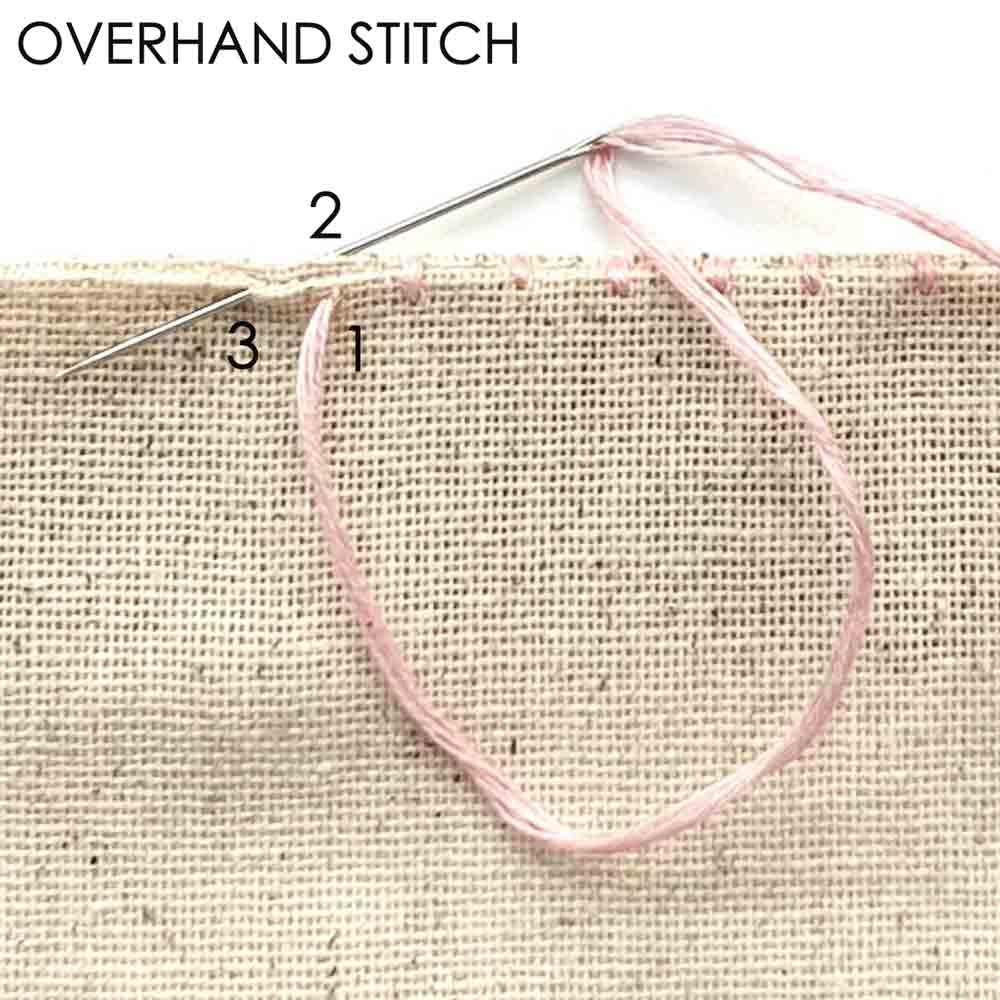
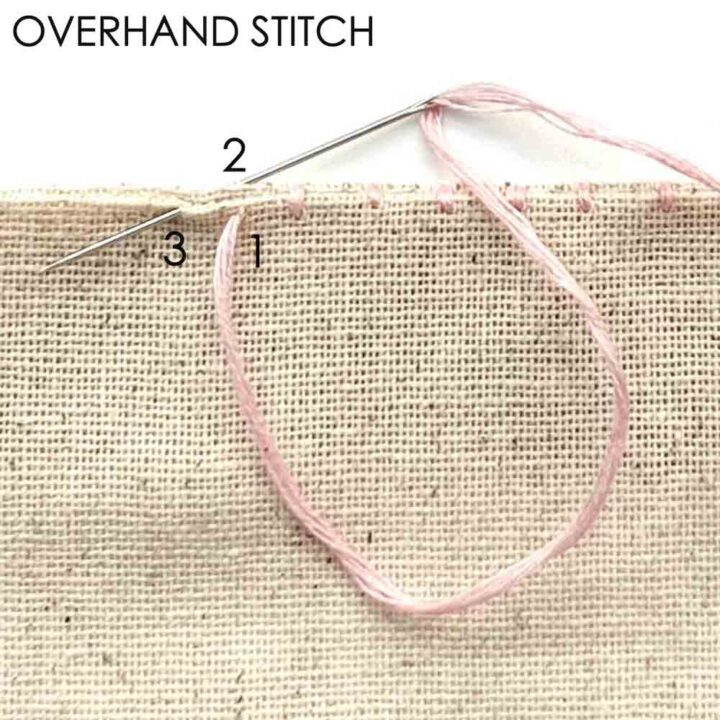
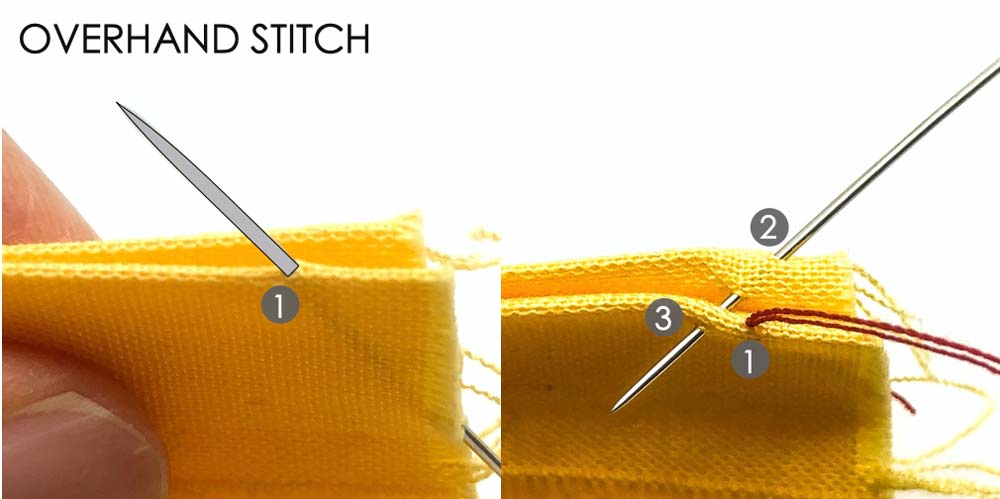
Insert knotted needle through front edge of fabric (1) and pull thread through.
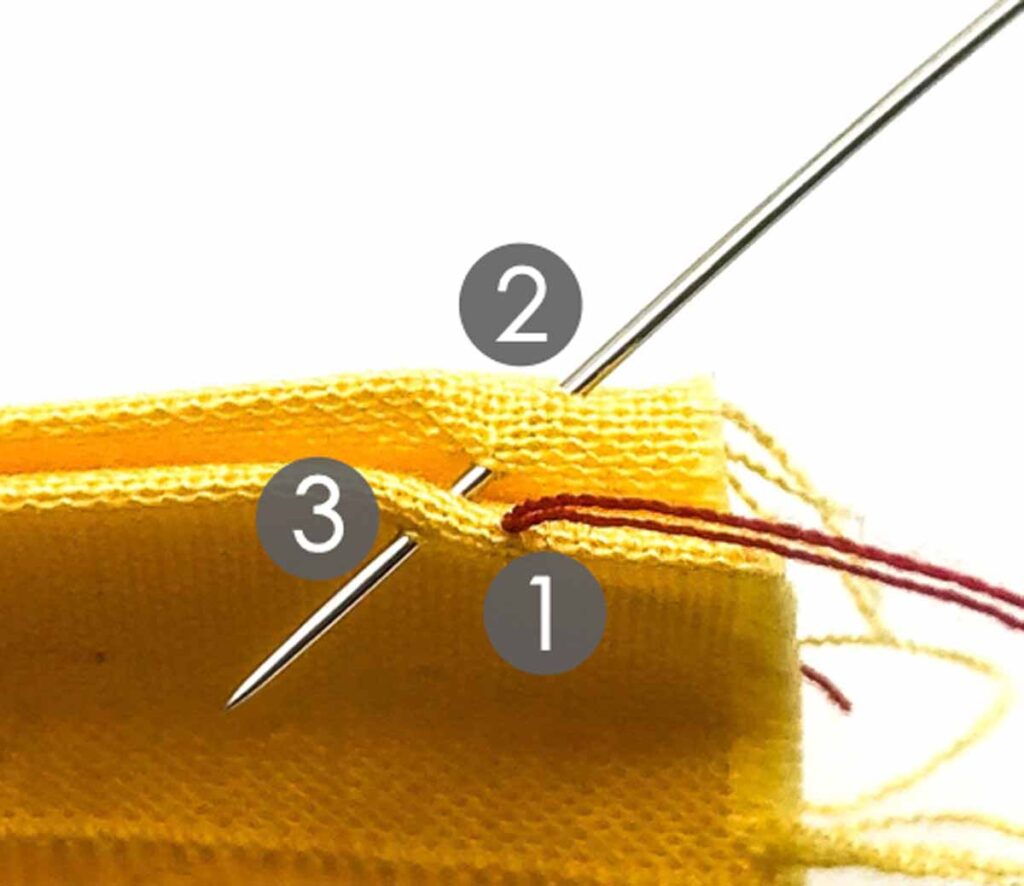
Insert needle through back edge of fabric (2), directly behind where thread came out in (1). Bring needle diagonally to front fabric edge (3).
NOTE: To keep the stitches small and uniform, the distance between (1) and (3) should not exceed 0.25″ (6.35mm)

Pull thread through. Take another stitch from the edge of back fabric (4) to front fabric edge (5).
NOTE: Your stitches will appear shorter and smaller if you take your stitch (5) very close or exactly at the front fabric edge. If you take a stitch a little below from front fabric edge, the stitches will appear longer and bigger.

Continue repeating the stitches, keeping the stitch size and space small and uniform.
How to Do The Overhand Stitch
The overhand stitch is a type of hand sewing stitch that passes vertically over two finished edges. Follow along the step-by-step tutorial to learn how to sew this simple but useful stitch!
Materials
- FABRIC
- THREAD - polyester or cotton
Tools
- HAND SEWING NEEDLES
- SMALL SHARP SCISSORS
- PENCIL and RULER - for marking fabric
Instructions
-
 Insert knotted needle through front edge of fabric and pull thread through. Insert needle through back edge of fabric, directly behind where thread came out (1). Bring needle diagonally to front fabric edge, no more than 1/4" (6.35mm) to the left of where thread came out (step 1).
 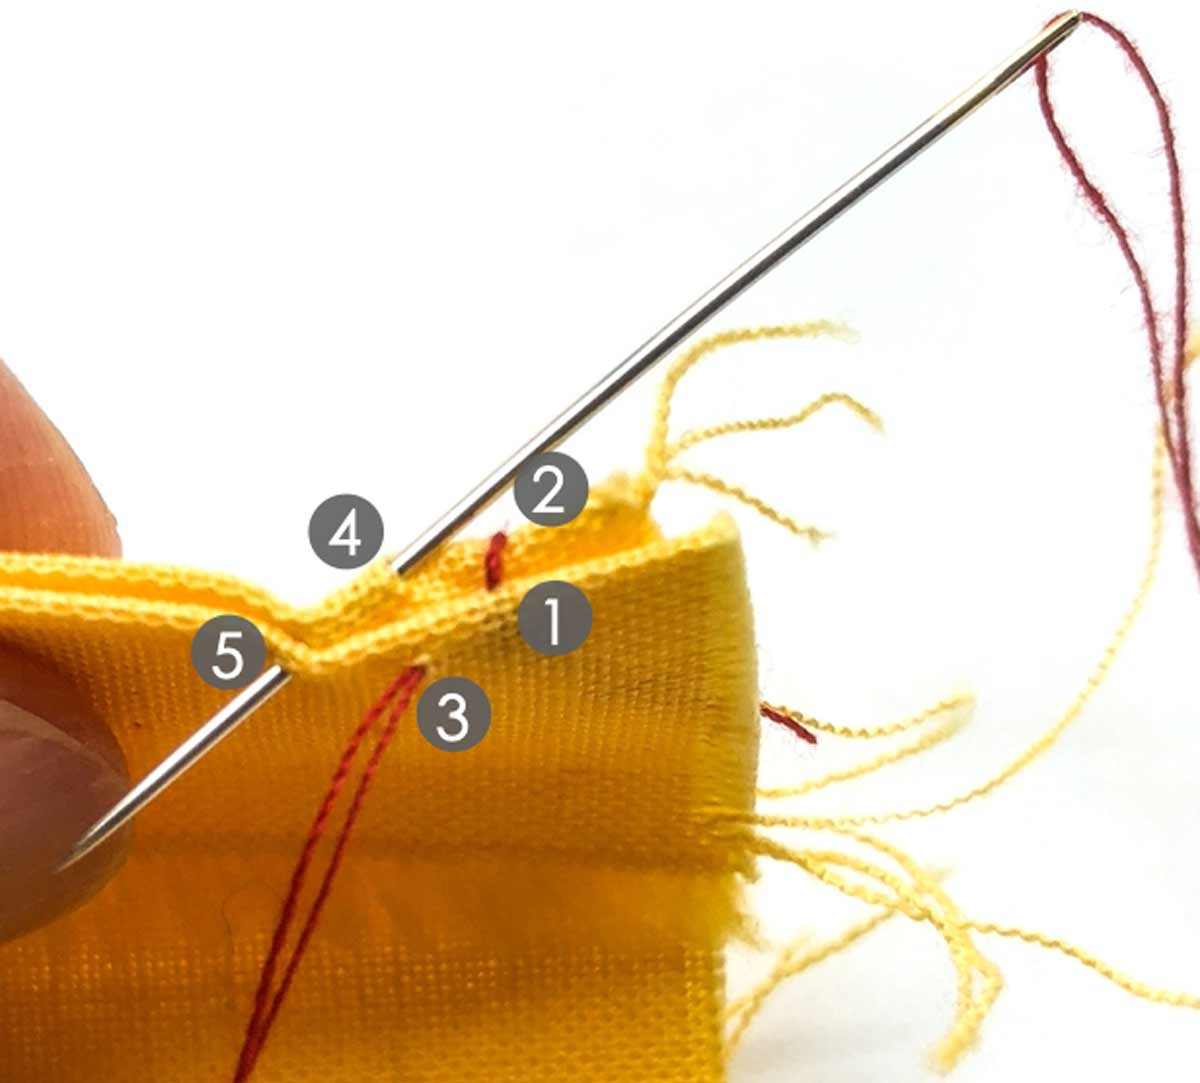 . Pull thread through (3). Repeat taking another stitch directly behind (3) and bringing needle diagonally to front edge of fabric (5).
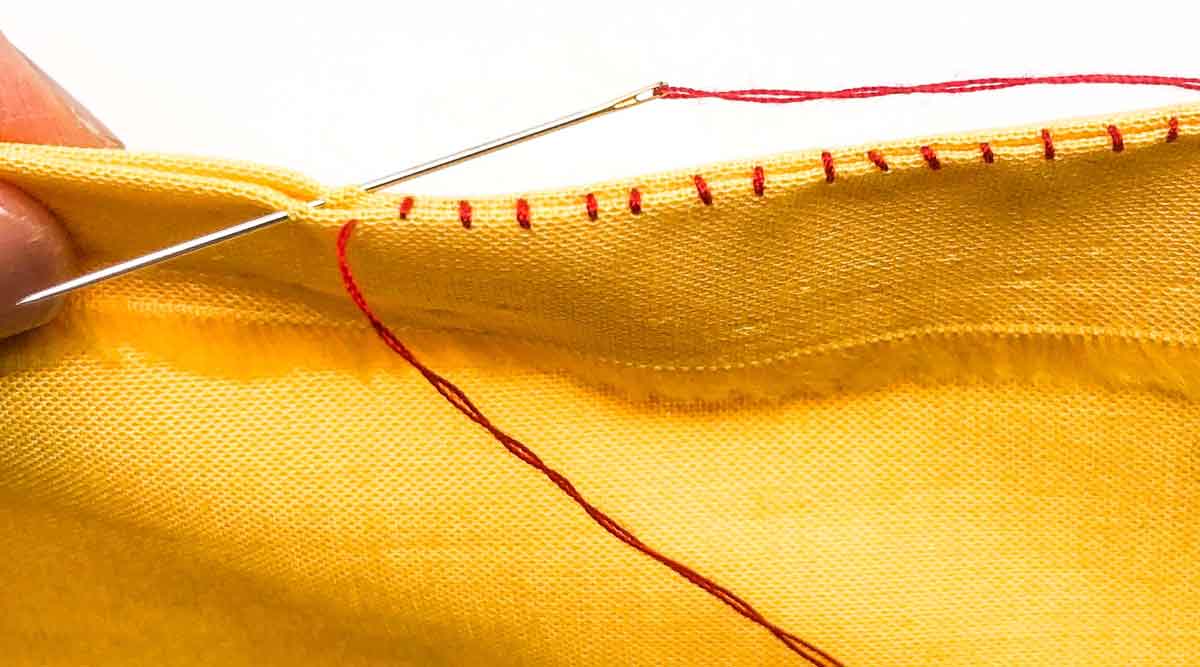 Continue repeating the stitches, keeping the stitch size and space small and uniform.
- You will end up with a series of small straight stitches that passes through the front and back fabric edge.
- Tie a knot when you reach the end of the fabric and you are done.
Related Articles:
19 Essential Hand Sewing Stitches to Sew Just About Everything
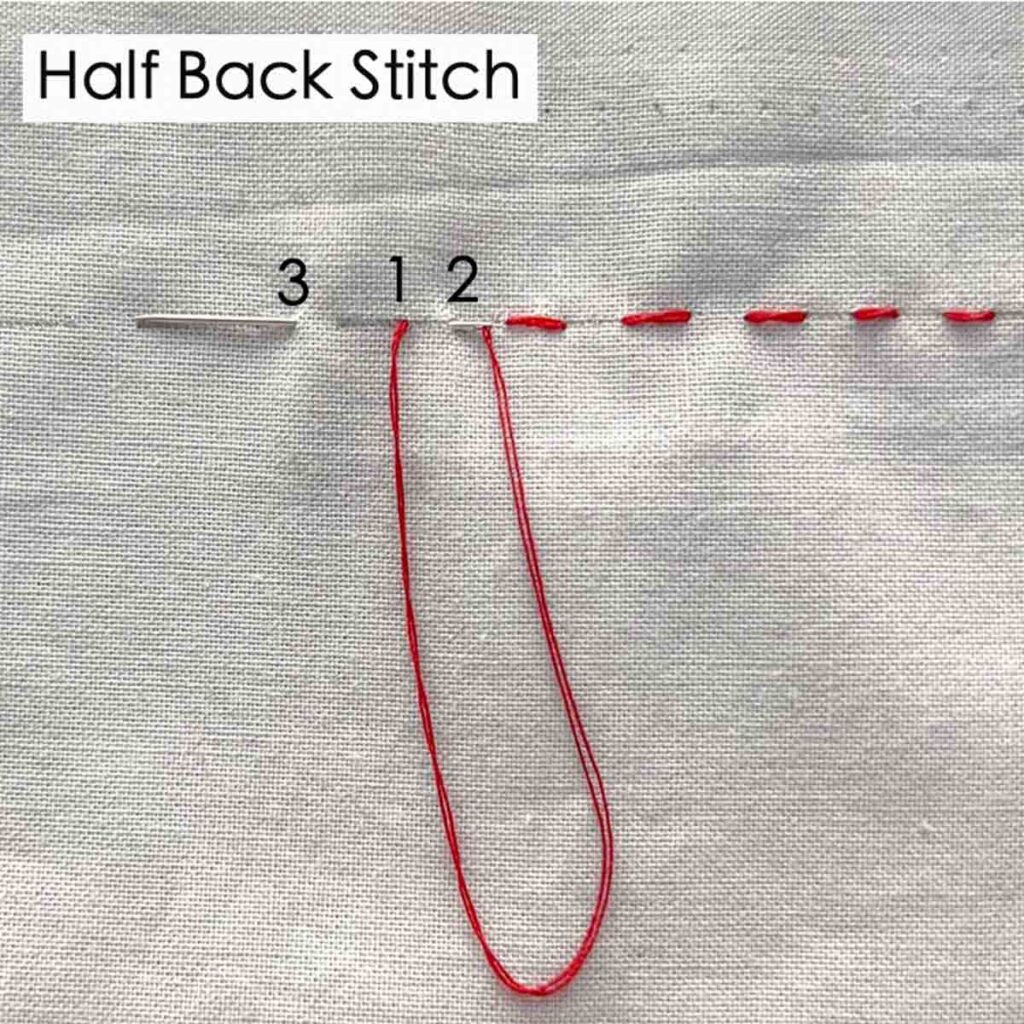
How to Sew A Half Back Stitch
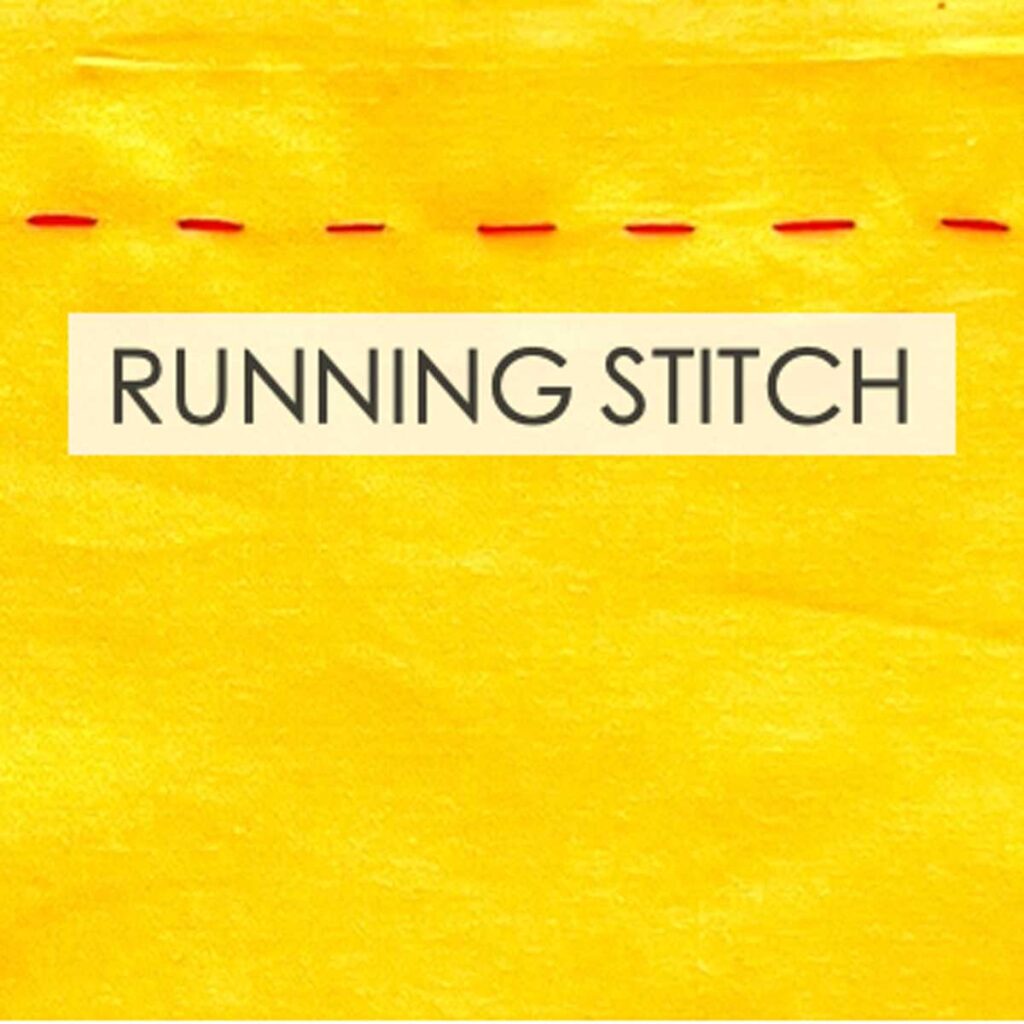
How to Sew a Running Stitch


Was looking for an example of this stitch since i was looking at the 1903 ladies home journal and a garment i saw asked to use this stitch! Im in university for costume design and i have NEVER heard of this stitch and im going to practice it now! ੈ♡˳
I love this. I was looking at some 1905 sewing instructions and the explanation for overhanging was horribly vague 🥲 love these easy instructions