How to Do a Whip Stitch For Beginners (Step-by-Step)
The whip stitch is an essential hand sewing stitch made of a series of small diagonal stitches. It is useful for joining seams, sewing hems, as well for appliques.
This post may contain affiliate links. Please read my disclosure policy for details. As an Amazon Associate, I earn from qualifying purchases.
What is a Whip Stitch?
A whip stitch is a simple hand stitch made of small, even stitches that goes between two finished edges to join them together. This essential hand sewing stitch is also used to attach an unfinished edge to a flat surface (appliqué) or a straight edge (hem).
The whip stitch is a variation of the overhand stitch. The main difference is that the needle inserts straight into the fabric when you make the whip stitch. The overcast stitch, on the other hand, is made with the needle inserting diagonally into the fabric.
What is the Purpose of a Whip Stitch?
The whip stitch has a wide variety of uses including appliqué, closing seams (such as pillows and cushions), and making hems. It is also commonly used to to join crochet pieces together.
Furthermore, the whip stitch can be used as a decorative stitch either in appliqué designs or in leather garments and accessories. It can also be used as an embroidery stitch for decorative purposes.
How do YOU DO A Whip Stitch?
Always wondered how to whip stitch by hand? Follow along this step-by-step tutorial to learn exactly how to do that.
Materials/Tools:
- HAND SEWING NEEDLES
- THREAD – Polyester or Cotton. Alternatively, use embroidery thread to achieve thicker, decorative stitches.
- FABRIC
- SMALL SHARP SCISSORS
- PENCIL and RULER – to mark fabric prior to making stitches
Whip Stitch Width and Length
When you make a whip stitch for seams, closing holes, as well as hems, the stitches are generally about 1/8″ – 1/4″ (3mm – 6mm) long. Stitch width (how far apart the stitches are from each other) are also in this same range.
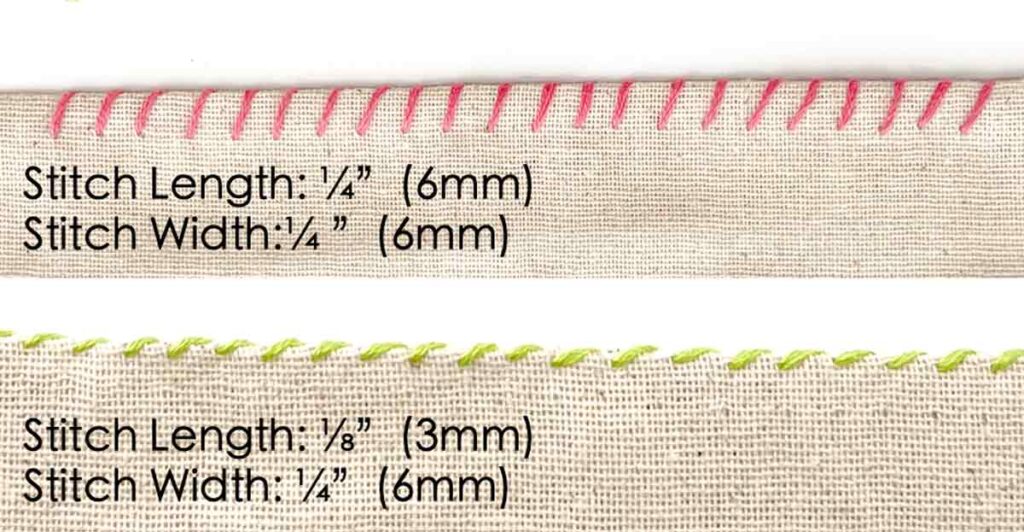
Photo shows how varying the stitch length will make a difference as to how noticeable the stitches appear on fabric.
With that said, however, you can always change up stitch width and length depending on your project, the look you want to achieve, and/or the type of fabric used.
For example, for decorative purposes, you may make stitches that are closer or farther apart, depending on “the look” you desire.
For applique purposes, you may want to use tiny stitches with matching thread spaced closely together so they appear almost “hidden”. Or, you may choose to use embroidery floss of contrasting color with longer stitches to accentuate the outline of the applique.
The key however, is to keep your stitch widths and lengths as even as possible. This way, your stitch will look neat and uniform.
Stitch Direction
For a right handed operator, you will go from right to left. This means that successive stitches are made to the left of the previous one. The following tutorial will be done going right to left.
For a left handed operator, you will go from left to right. However, these are just guidelines. Stitch whatever direction is most comfortable for you!
Whip Stitch: A Step-by-Step Guide
For this tutorial, I will be showing you how to stitch two finished edges together.
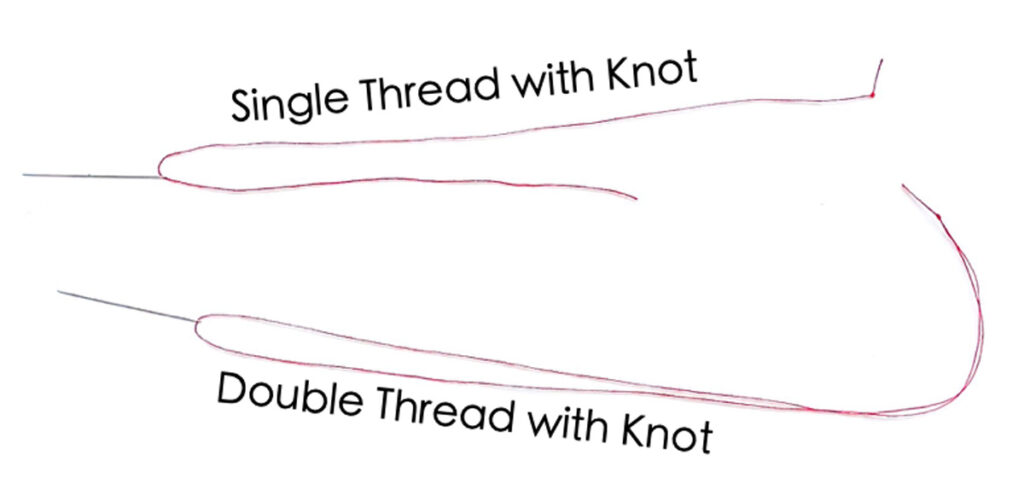
Thread a needle and tie a knot at the end. You can either use a single thread or a double thread. For decorative purposes, you can also use embroidery floss with 4-6 strands to achieve thick stitches.
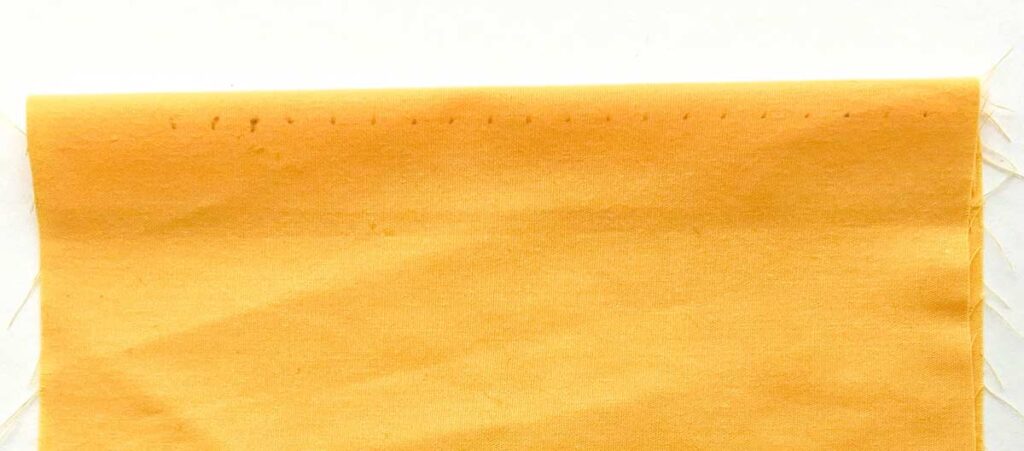
Before starting (and especially if you are a beginner), use a pencil to mark dots on the fabric to know where each successive stitch goes. This will ensure that your stitch length and width will be evenly spaced apart.
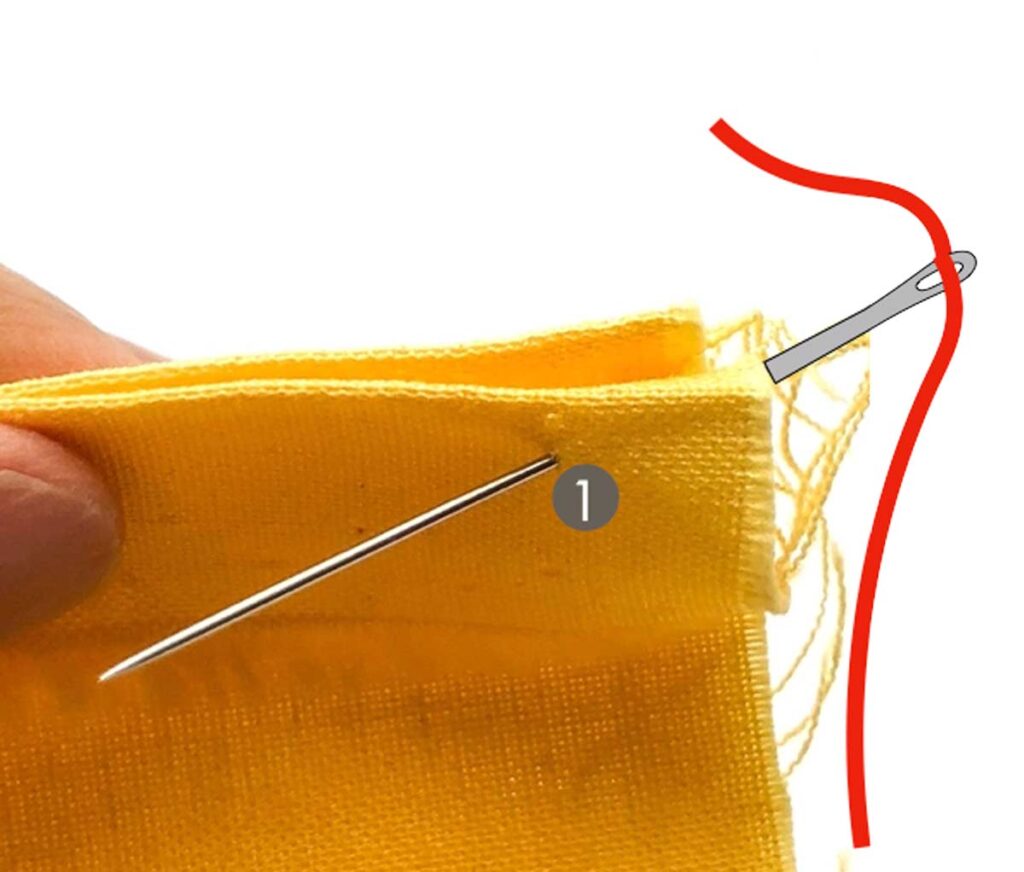
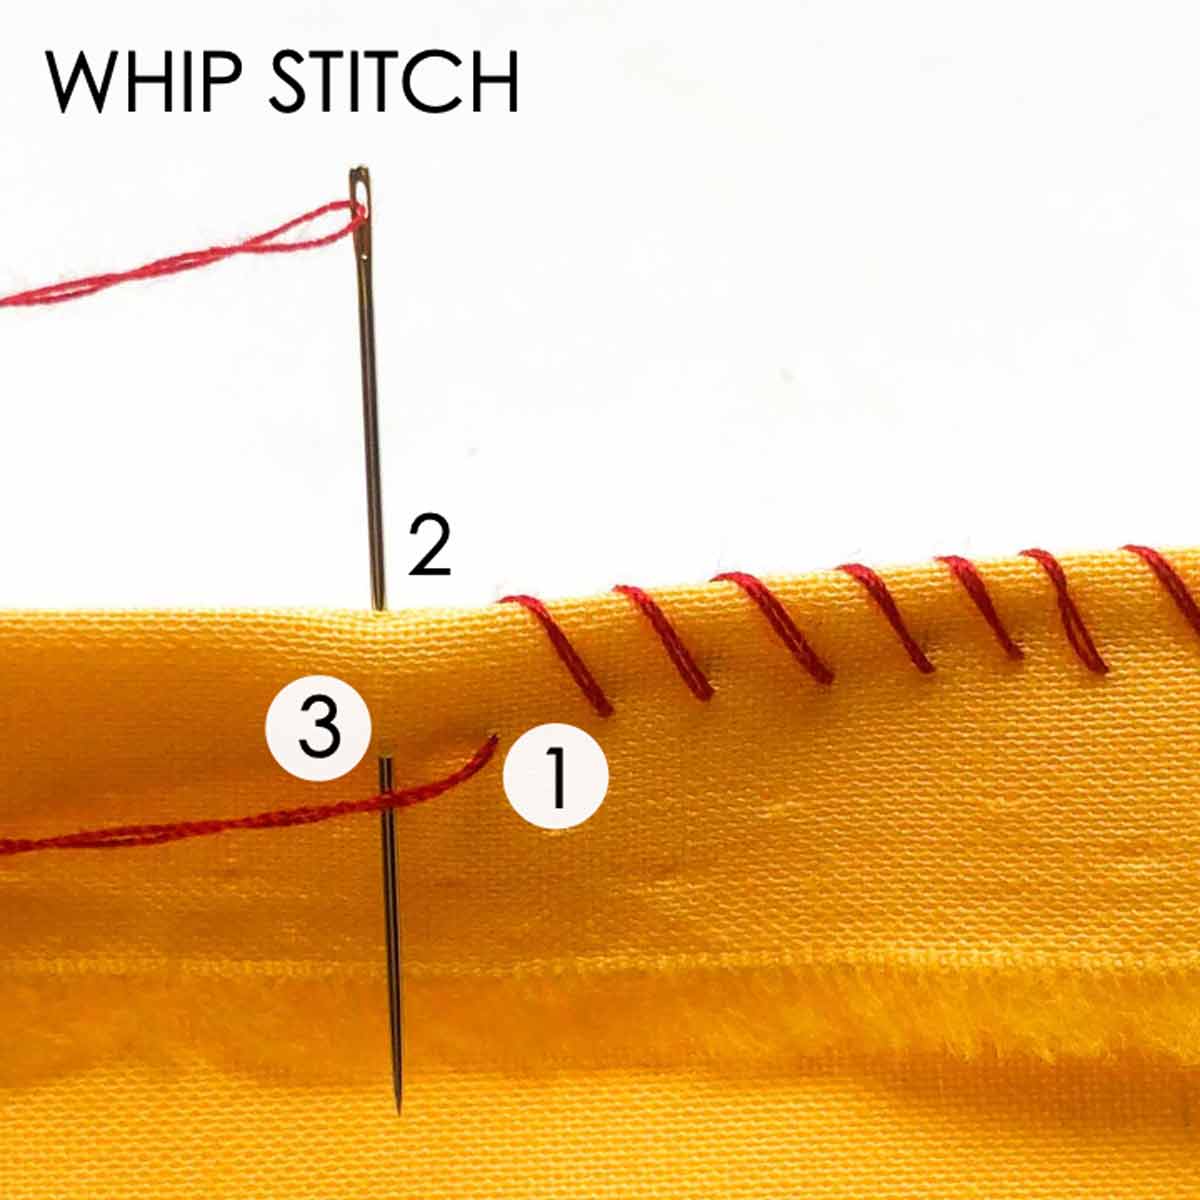
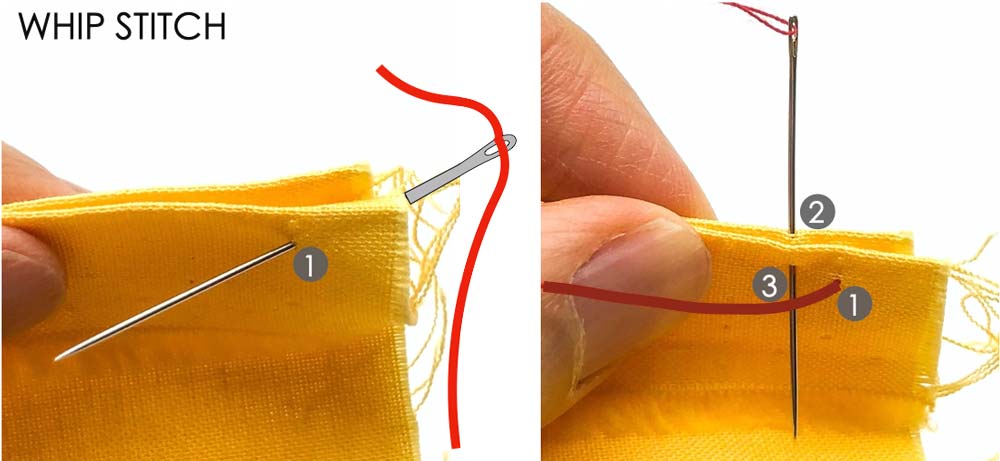
Insert needle through fabric piece closest to you (1) and pull thread through.
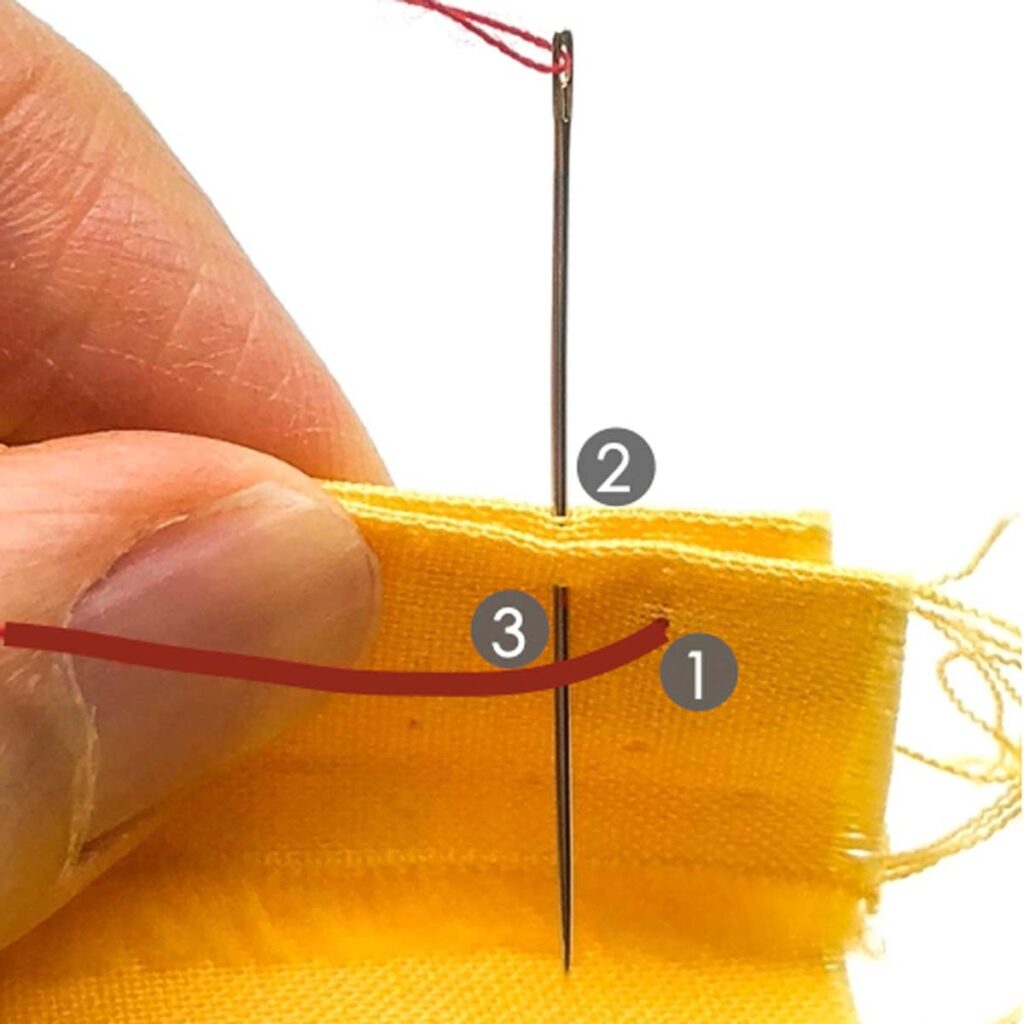
Holding the needle straight (this means perpendicular to fabric edge), bring needle through back edge to front edge (2) and (3). The point of insertion through the back edge (2) is between 1/8″ -1/4″ (3mm – 6mm) to the left of where thread came out in (1). See how the needle is passing under the thread.

Pull your thread through. Yay! You have just made your first whip stitch!
NOTE: How far you take the stitch on the front fabric (3) will determine how “long” your stitch length appears to be. In other words, the further the distance between (3) and the top edge of front fabric, the longer the whip stitch will look.
Now take another stitch on the back fabric piece (4), and bring it to the front fabric edge (5).
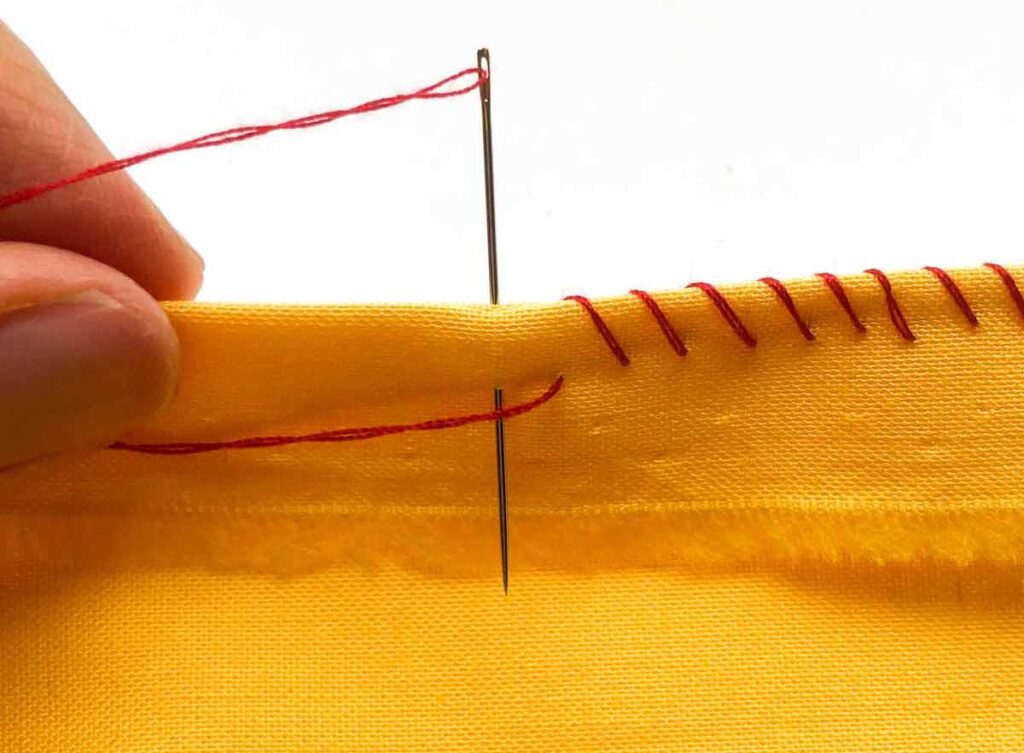
Repeat making these stitches, keeping the size and spacing uniform. Again, note that the closer the stitches are to the edge of the fabric (smaller stitch length), the less noticeable the stitches will be.
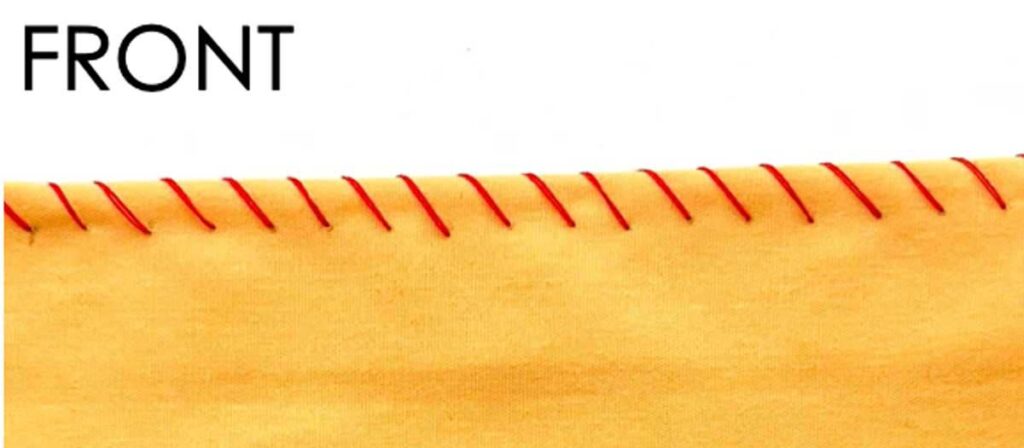
Finished! View of whip stitch from the front.

See how on the back, the stitches are not very noticeable.
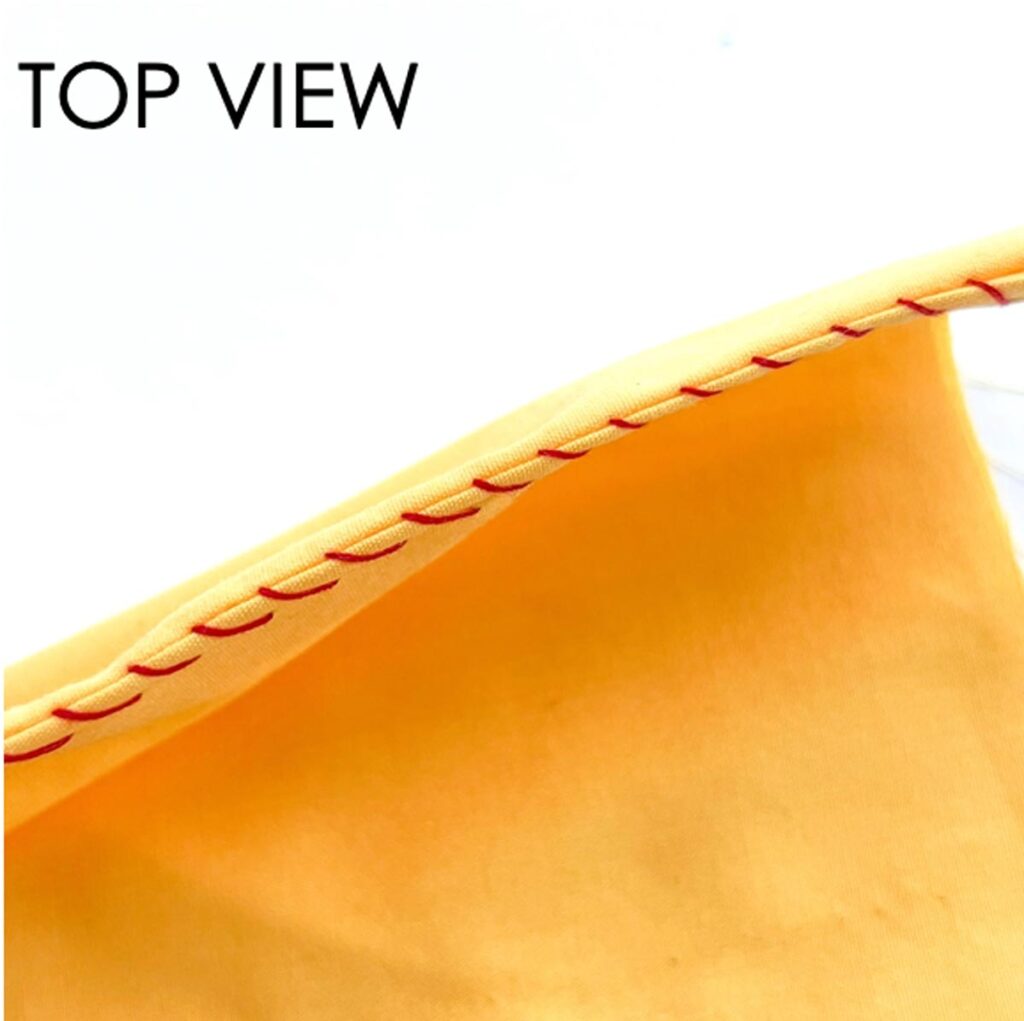
Finished whip stitch viewed from the top to bring two finished edges together.
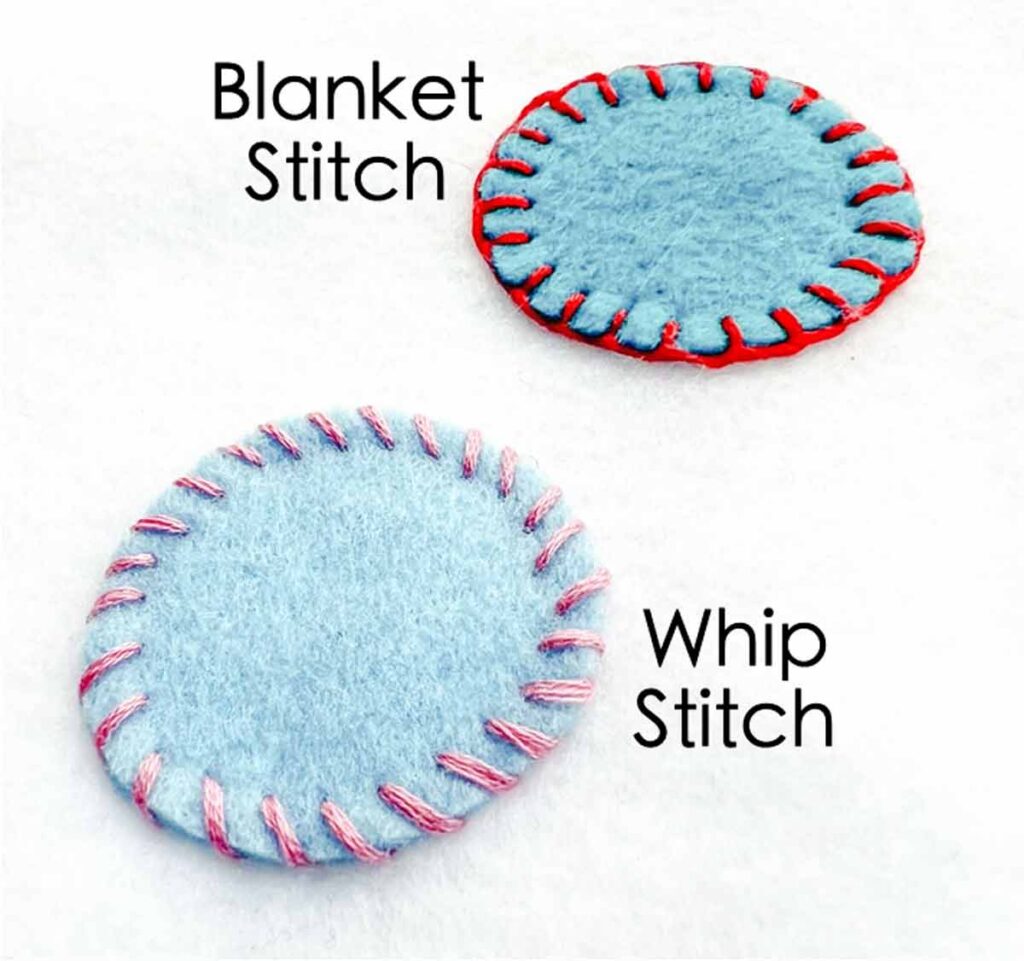
How do You Felt Edges with Whip Stitch
The process of joining felt edges with a whip stitch is extremely simple. This is a common stitch used to hand sew small felties or felt plush.
It’s the same step of inserting the needle straight from the back edge and then bringing it to the front.
Each successive stitch creates a small diagonal stitch that loops over the felt edges and joins them together.
What is the difference Between a Running Stitch and a Whip Stitch?
Similarities
Both the whip stitch and the running stitch can be used to join fabric edges as well as to hem garments. Additionally, both stitches can be used as an embroidery stitch to create designs and patterns.
Differences
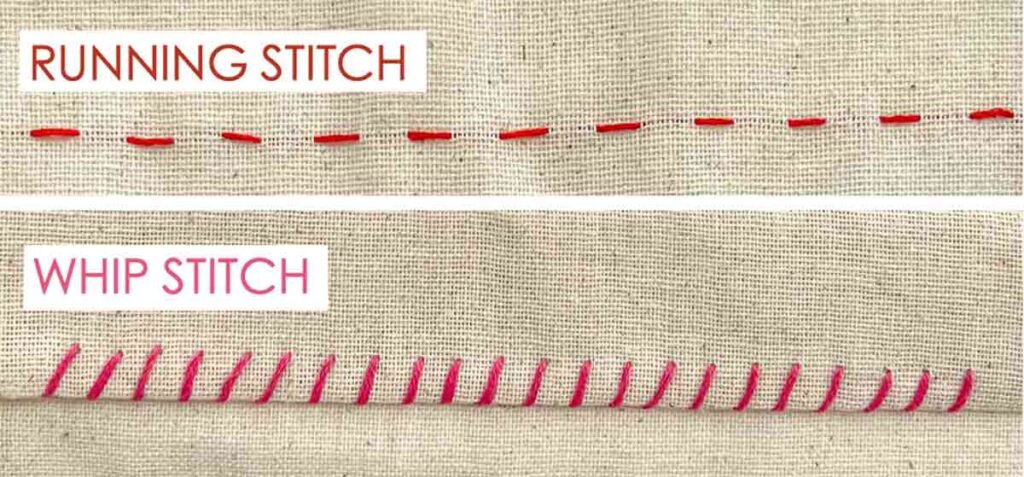
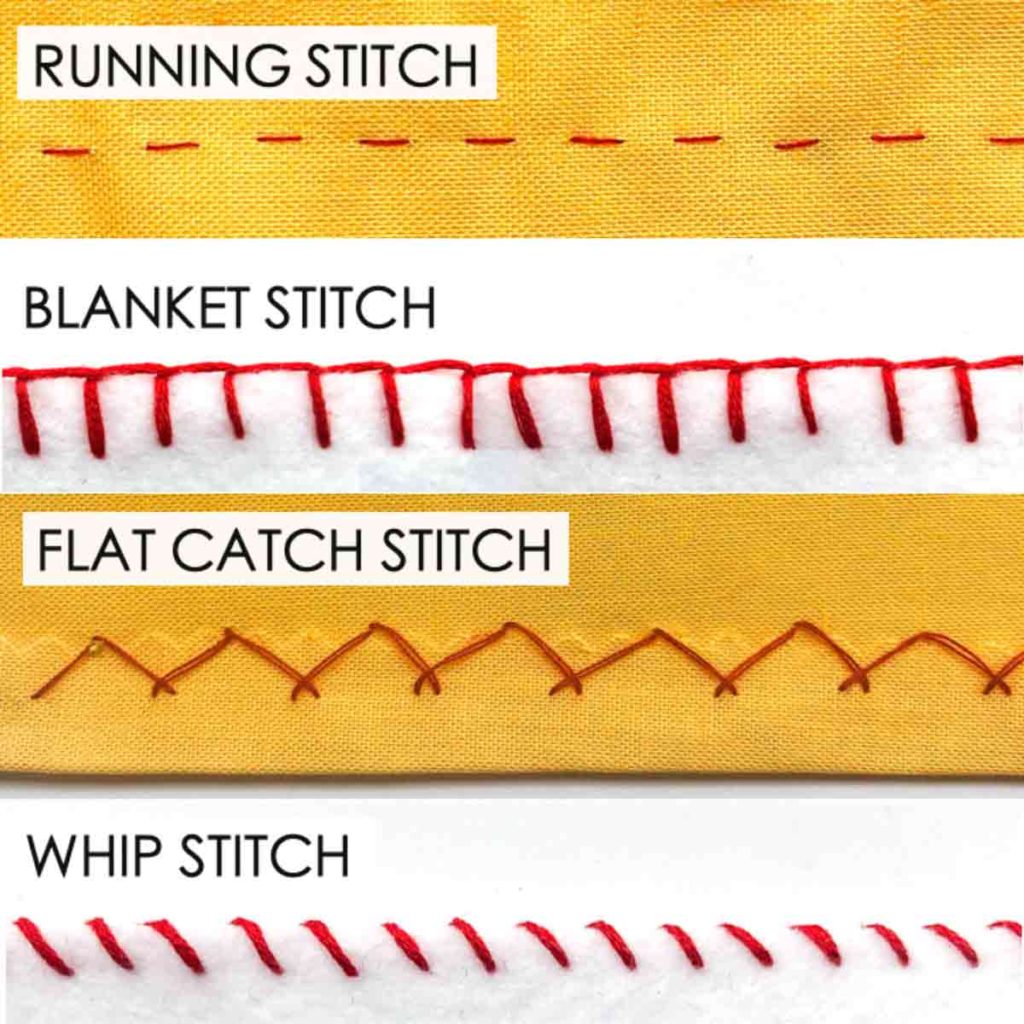
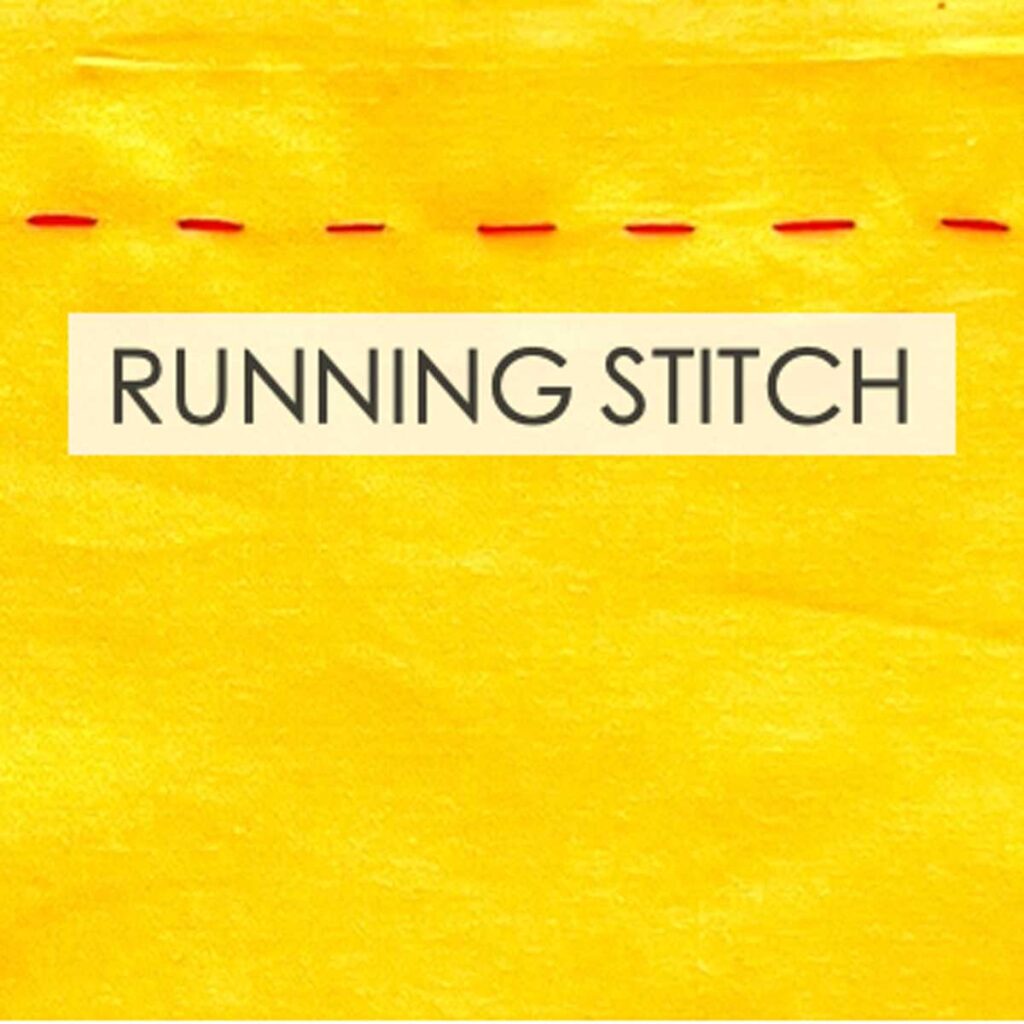
Visually, the running stitch appears as a series of horizontal stitches whereas the whip stitch appears as a series of diagonal stitches along the fabric edge.
The running stitch can also be done anywhere on fabric and is not only found along fabric edges.
Furthermore, the running stitch is an all-purpose hand stitch whereas the whip stitch is mainly for joining fabric edges and hemming. For example, you would commonly use the running stitch for creating tucks and gathers. However, you would not use the whip stitch for such purposes.
What is the difference Between a Whip Stitch and a Blanket Stitch?
Similarities
Just like the blanket stitch, the whip stitch can be used to join two finished edges together. Additionally, both of these stitches can be used for decorative purposes along the fabric edge.
Differences
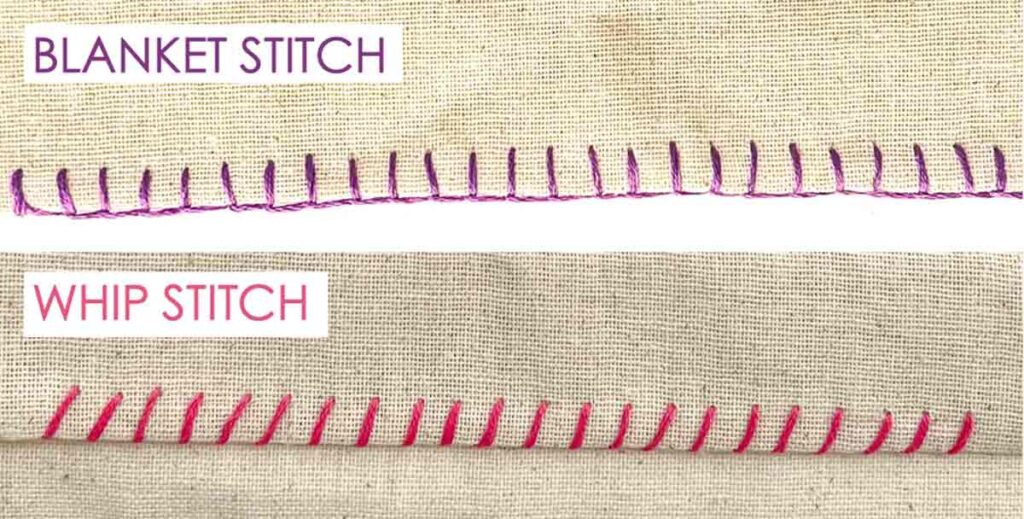
Visually, the whip stitch appears as a series of small diagonal stitches. The blanket stitch, on the other hand, appears as a series of straight stitches. In addition, the blanket stitch creates an extra line of thread that lays over the fabric edge. This addition adds yet another decorative element to your sewing project.
How to Make a Whip Stitch

The whip stitch is an essential hand sewing stitch made of a series of small diagonal stitches. It is useful for joining seams, sewing hems, as well for appliques.
Materials
- HAND SEWING NEEDLES
- THREAD - polyester or cotton (see note 1)
- FABRIC
- SMALL SHARP SCISSORS
- PENCIL and RULER - to mark fabric where stitches will go
Instructions
 LEFT: Insert needle through fabric piece closest to you (1).
RIGHT: Holding the needle straight (perpendicular to fabric edge), bring needle through back edge to front edge (2) and (3). The point of insertion into the back edge (2) is slightly to the left of where thread came out (1). The needle will go under the thread as you pull it through.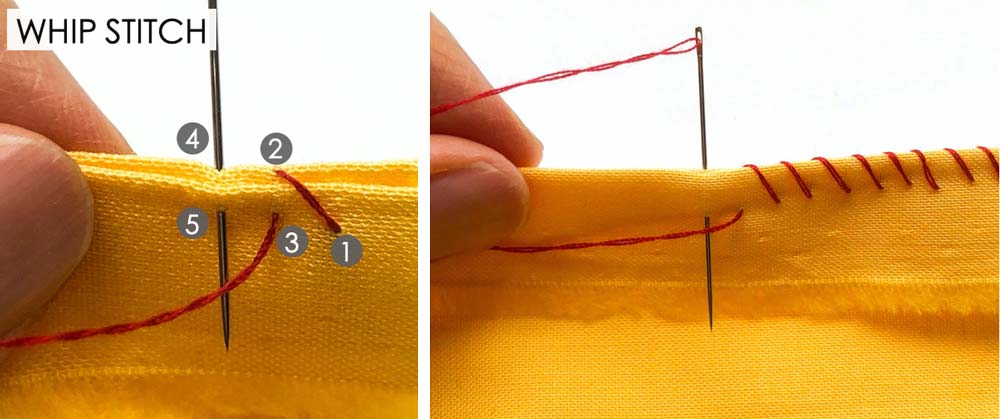 Repeat making these stitches, keeping the size and spacing uniform (see note 2).
 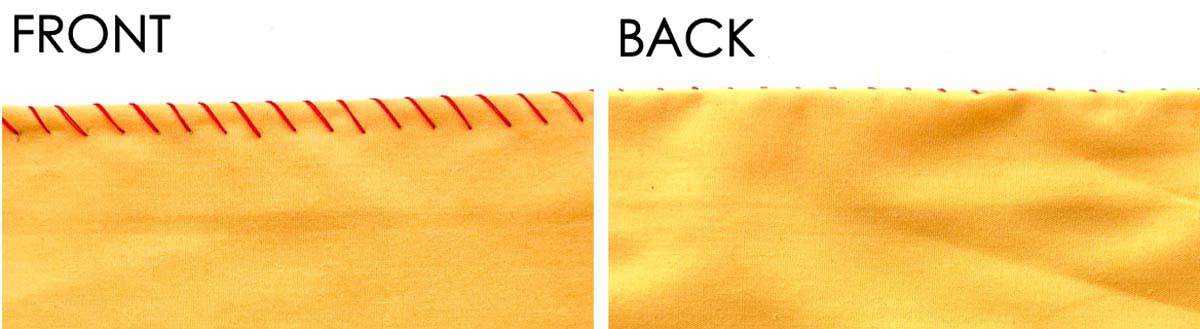 Tie a knot at the end and you are done! See how the front and back of the whip stitch looks very different.
Notes
- You can also use embroidery thread if you want to achieve thicker stitches for decorative purposes.
- The closer the stitches are to the edge of the front fabric piece, the less noticeable the stitches will be.
That’s it guys! I hope you enjoyed the tutorial and learned a new stitch today! Check out the following for more hand sewing stitch tutorials.
Related Articles:
19 Essential Hand Sewing Stitches to Sew Just About Everything
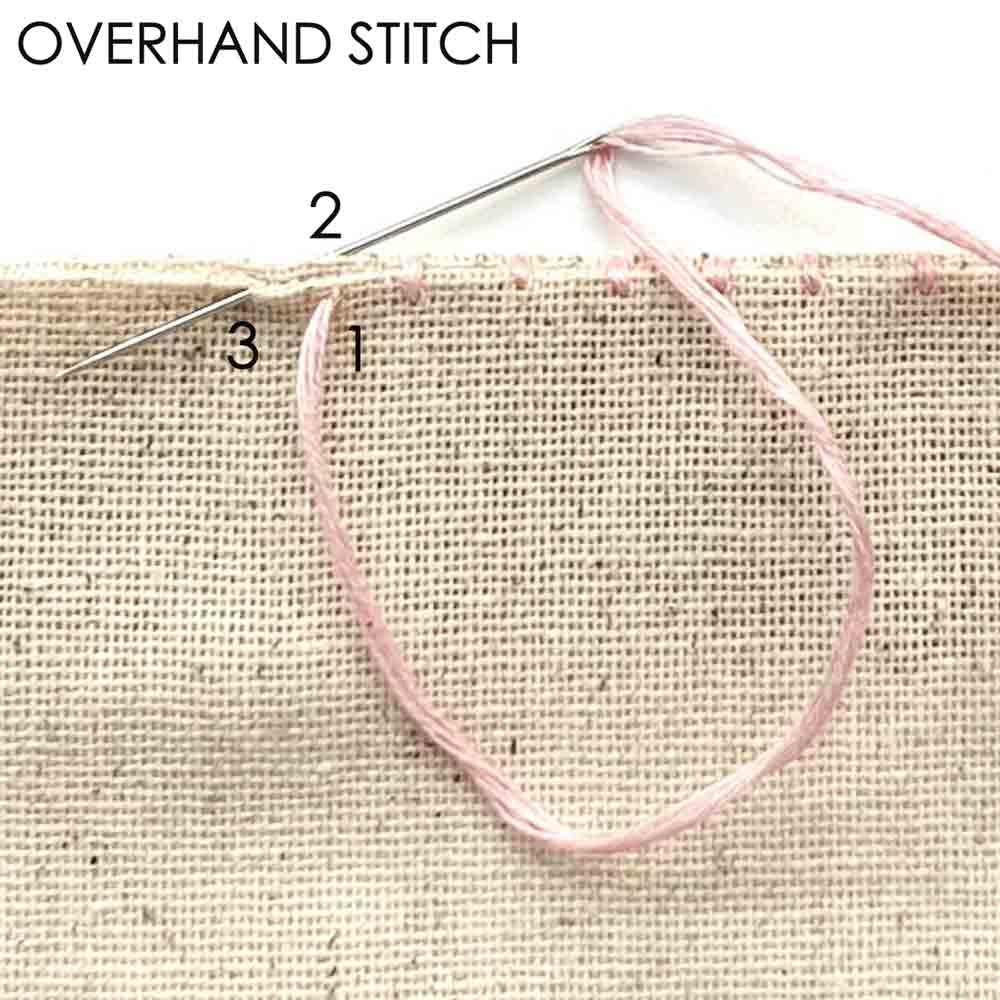
How to Sew An Overhand Stitch
How to Sew a Running Stitch