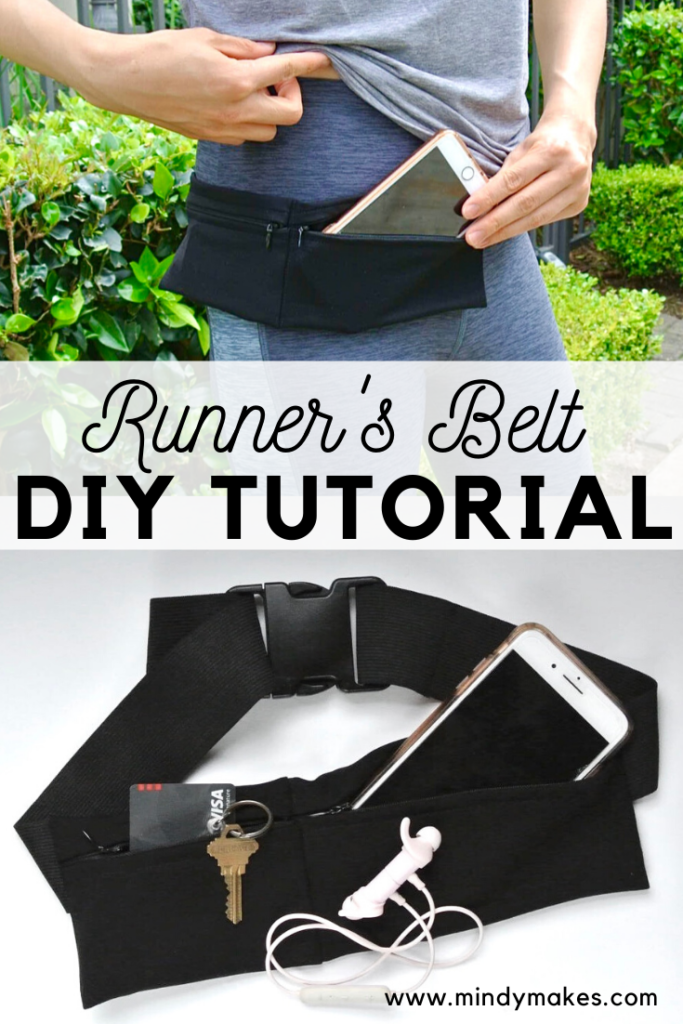
Runner/Biker/Hiker’s Belt Tutorial
Difficulty: Easy-Intermediate
Time: 1 hour
A while back I had gone running while staying at a friend’s place and she let me borrow her running belt. I really liked it because it fit more than my running armband, and it didn’t make me feel like I had one “heavy” arm as I ran. Nevertheless, since I run at the gym most of the time I didn’t feel the need to get one.
However, with the recent lock-down and gyms being closed, I’ve been running outdoors. At first I tried to stuff my phone in the side of my tights but they would end up by my hips. Then I tried stuffing it on the side of my thighs and they would end up by my knees. Eventually I stuffed it on the side of my ankles and the phone popped out the bottom of my tights *gasp* during my run. It was time for a runner’s belt.
I saw a few tutorials online for a runner’s belt. However, I didn’t want something I had to pull up my legs (or over the top of my head), which were the only tutorials I saw. I wanted something I could just strap over my hips to put on, and remove the same way (like the one my friend had). Thus came about this belt!
Since I also don’t carry much on my runs, I just made two pouches, one for my phone and one for keys/credit cards/chap stick. However, you can easily add more pouches to the belt if you would like more compartments to carry other goodies. Let’s get started!
MATERIALS:
1/3 Yard Spandex Fabric* (for example this one)
Two 10″ (or longer) invisible zippers
2″ Elastic** (24″-36″ Length)
2″ Buckle (I got mine on Amazon)
TOOLS:
Sewing Machine
Zipper Foot (regular/invisible)
Matching Thread
Fine Pins
NOTES:
*I recommend using a thick performance Spandex fabric as this type of fabric is more “stiff” and retains it’s shape better. This is good as you will be putting phones/keys/etc into the pouches and you want the pouch to keep its shape while you are moving/running.
**You can also sew a 2″ belt with the spandex fabric if you don’t have any 2″ elastics on hand. Simply cut a piece of fabric 5″ x 20″, fold in half and stitch at 1/2″ seam allowance. Turn the fabric to the right side and you have yourself a 2″ belt.
INSTRUCTIONS:
CUTTING FABRIC:

Cut two pieces of Spandex fabric:
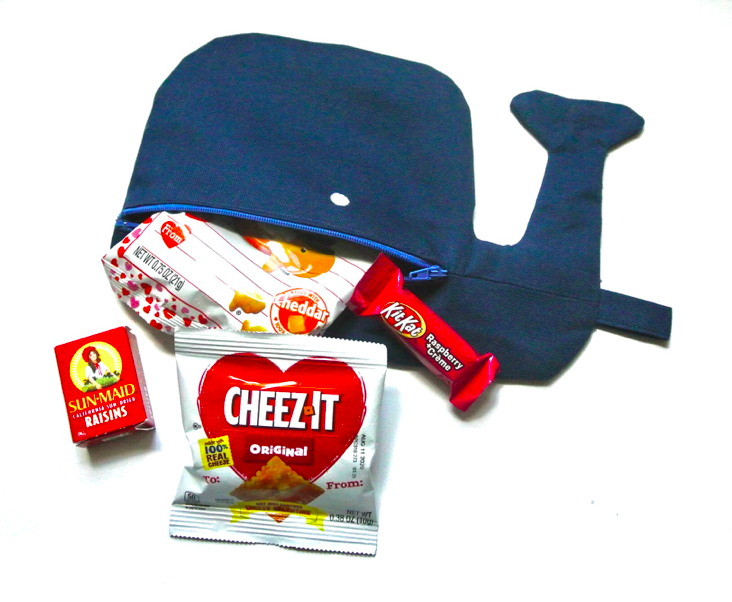
[Piece A] 8.5” x 9”: For storing phone. Fits phones up to 7”x 4”
[Piece B] 6” x 9”: For storing keys/credit cards
SEWING ZIPPER:
Sew invisible zipper onto [Piece A] and [Piece B]. For help sewing invisible zipper, check out this tutorial.
SEWING POUCH:
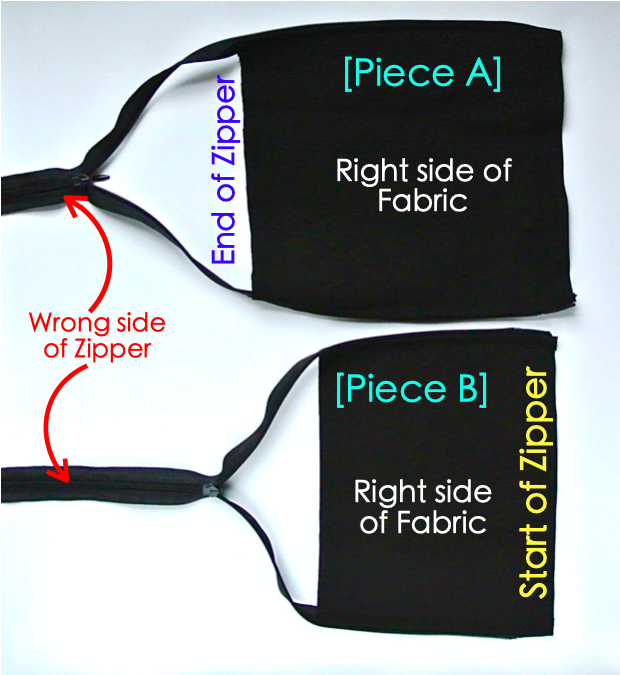
LEFT: Open zipper and lay [Piece A] and [Piece B] down with Right side of fabric facing up. The wrong side of zipper will be facing up.
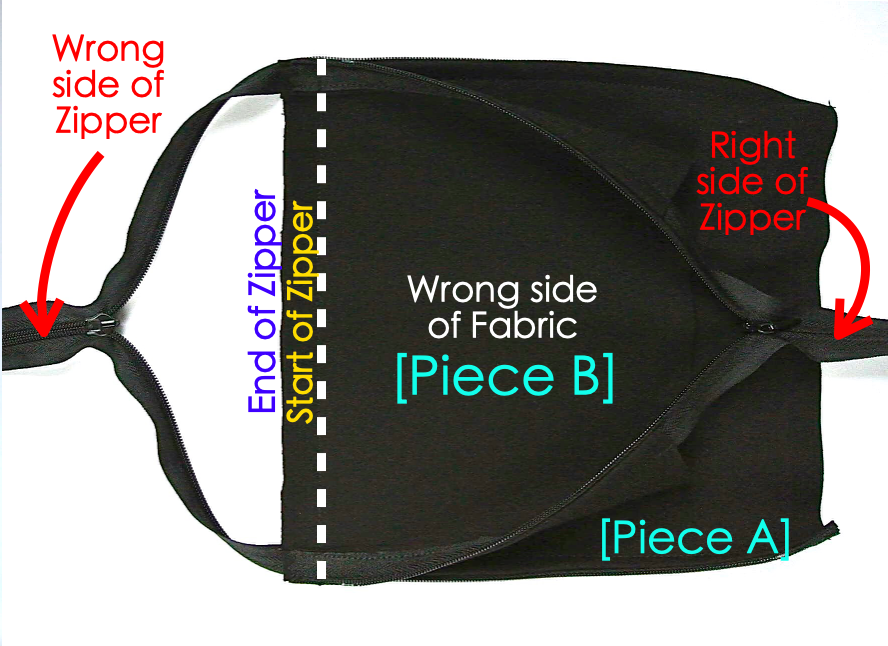
RIGHT: Flip [Piece B] over so the wrong side of the fabric faces up. Place [Piece B] on top of [Piece A], right sides together. as pictured. Match “end of zipper” of [Piece A] with “start of zipper” of [Piece B] as pictured and sew at 1/2” seam allowance (white dotted line)
SEWING ELASTIC:
To determine how long of elastic you need, take your hip measurement and subtract it by 13.5″ (that’s the width of the pouch). Next, subtract 2″ from this measurement (because elastic is stretchy) and that’s the length of elastic you need:
[Hip Width] – 13.5″ – 2″ = [Length of Elastic]
Cut a piece of elastic of desired length, fold it in half and cut it again to get two equal pieces of elastic. Since elastic is stretchy and the belt is adjustable, the length of elastic doesn’t have to be exact. If you are sewing your own belt portion (instead of using elastic), just use the measurement: [Hip Width] – 13.5″ = [Length of Belt]
If you rather wear the belt around your waist, take your [waist measurement] and use the formula above, replacing [Waist Measurement] for [Hip Width]. However, since the belt is adjustable, you could still the [Hip Width] measurement calculation and be able to wear it on your waist.

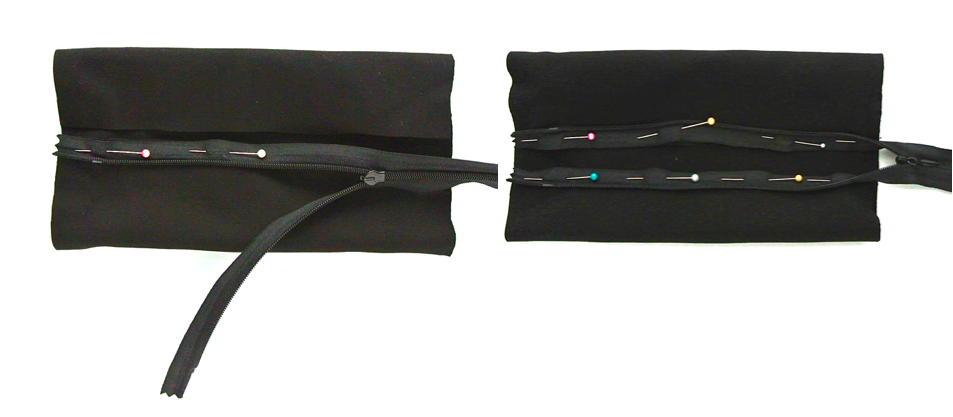
LEFT: With pouch inside out, position so that top edge of pouch is 1” away from zipper. Pin elastic in on left side of pouch, matching top edge of elastic with top edge of pouch. Photo shows zipper open so you can see the elastic.
RIGHT: Repeat on right side of pouch. Yellow dotted lines shows where the elastic lays. Stitch 1/2” seam allowance on both sides of pouch with zippers closed (red dotted line)
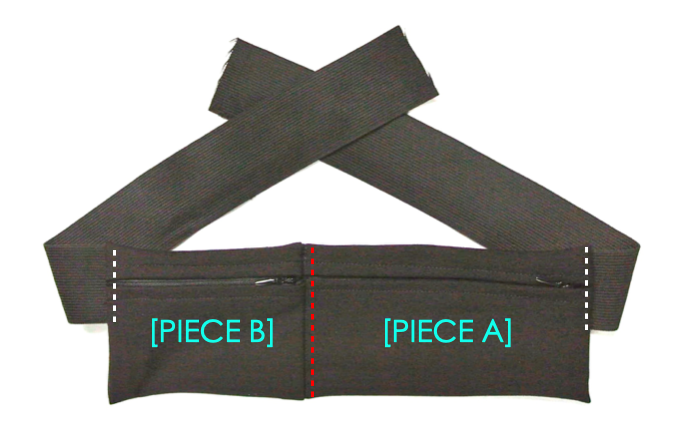
LEFT: Turn pouch to right side by opening one of the zippers. Stitch a line along junction of [PIECE A] and [PIECE B] (red dotted line). Also stitch along the sides where elastic inserts into pouch (white dotted lines) to stabilize elastic in place.
LEFT: Slide elastic strap through buckle as pictured.
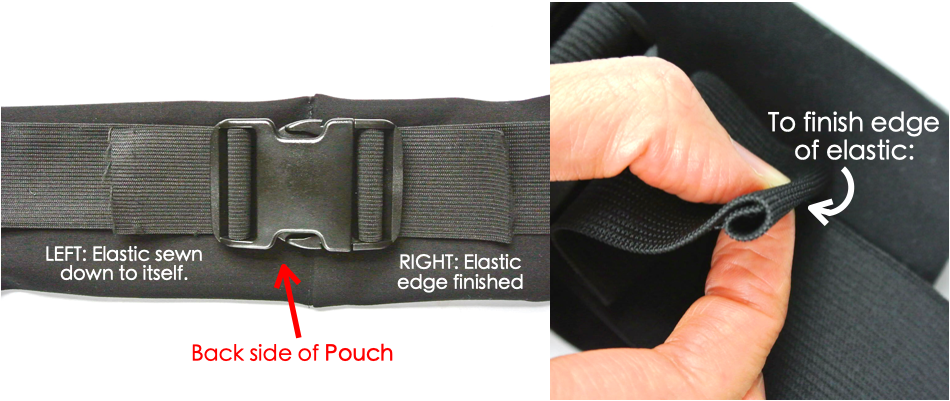
RIGHT: My buckle is adjustable on both sides. On one side we will sew elastic down and the other side we will finish the elastic edge so it’s adjustable. In the photo you are looking at the back side of the running pouch. I sewed down the left elastic and finished the edge on the right side.
RIGHT: To finish edge of elastic, fold 1/4”down, and fold in another 1/4” and sew.
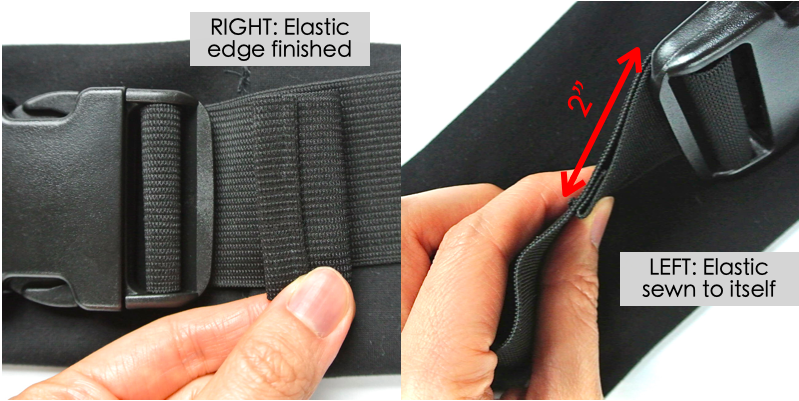
RIGHT: To the left of buckle, fold elastic 1/2”in and sew elastic down to itself. Length from buckle to folded edge of elastic is approximately 2”
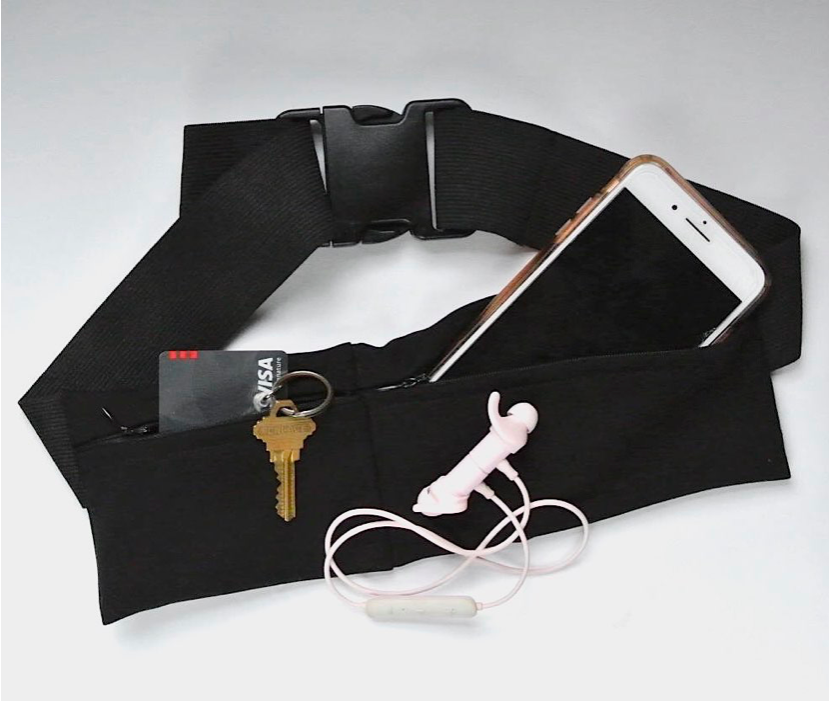
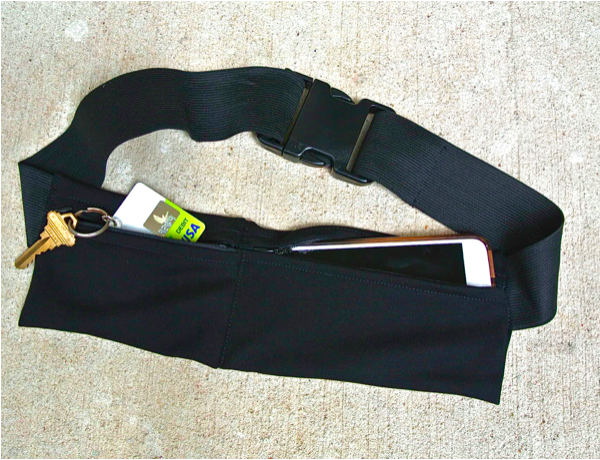
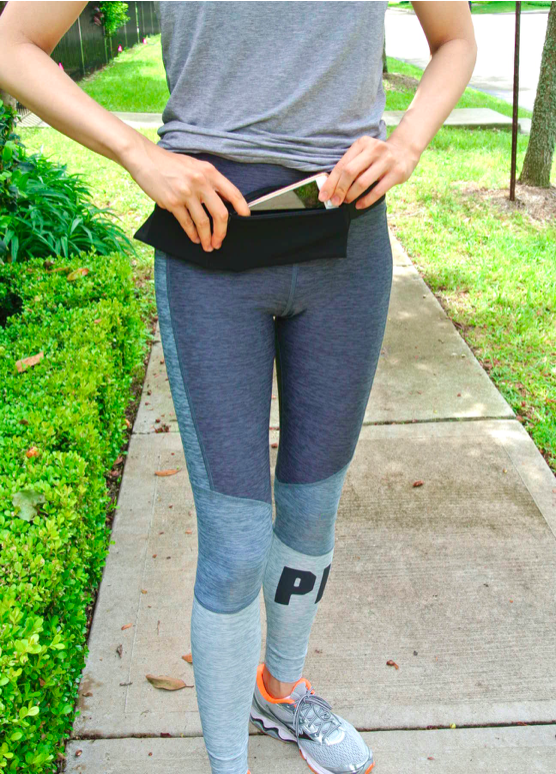
Finished view of Runner’s belt. Great for storing phone/keys/cards/cash while staying active!
Ready for a great audio book to pump up my run! Also, if you are John Piper fan (like me), I highly recommend his new book “Coronavirus and Christ” that accompanied me through several runs.
Let me know in the comments below if you made this. Happy Sewing 🙂