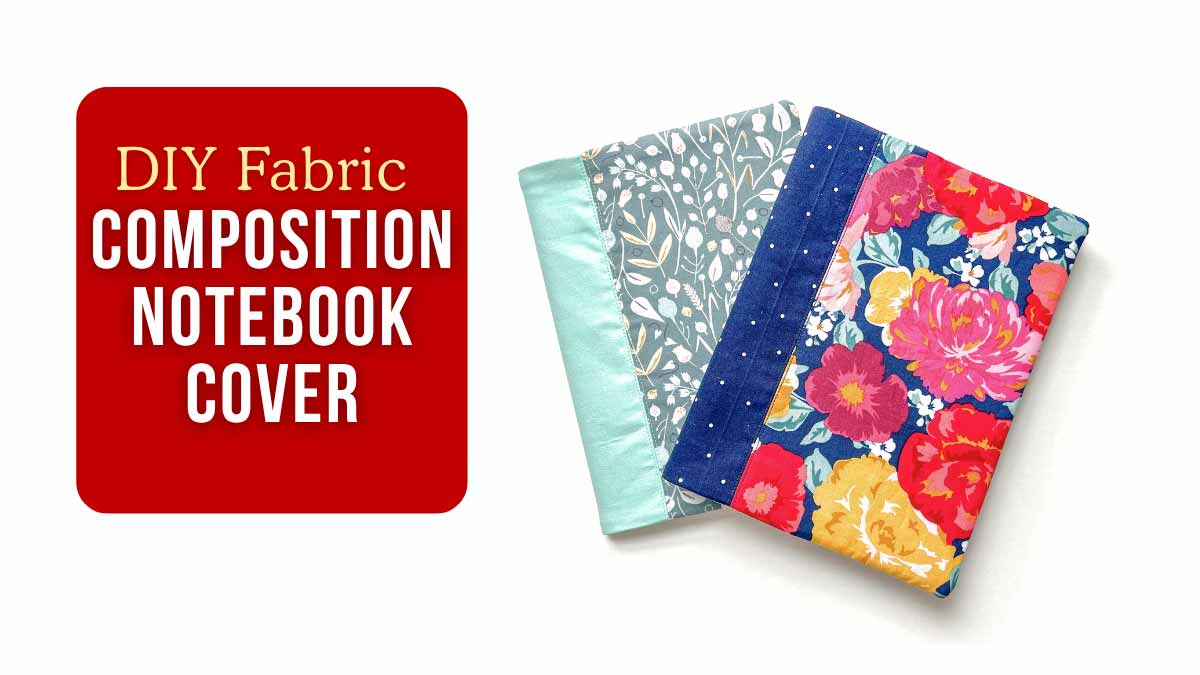
How to Make a Composition Notebook Cover (Free Pattern)
Learn how to make a simple DIY composition notebook cover with your favorite fabric to give your notebooks a stylish makeover!
This post may contain affiliate links. Please read my disclosure policy for details. As an Amazon Associate, I earn from qualifying purchases.
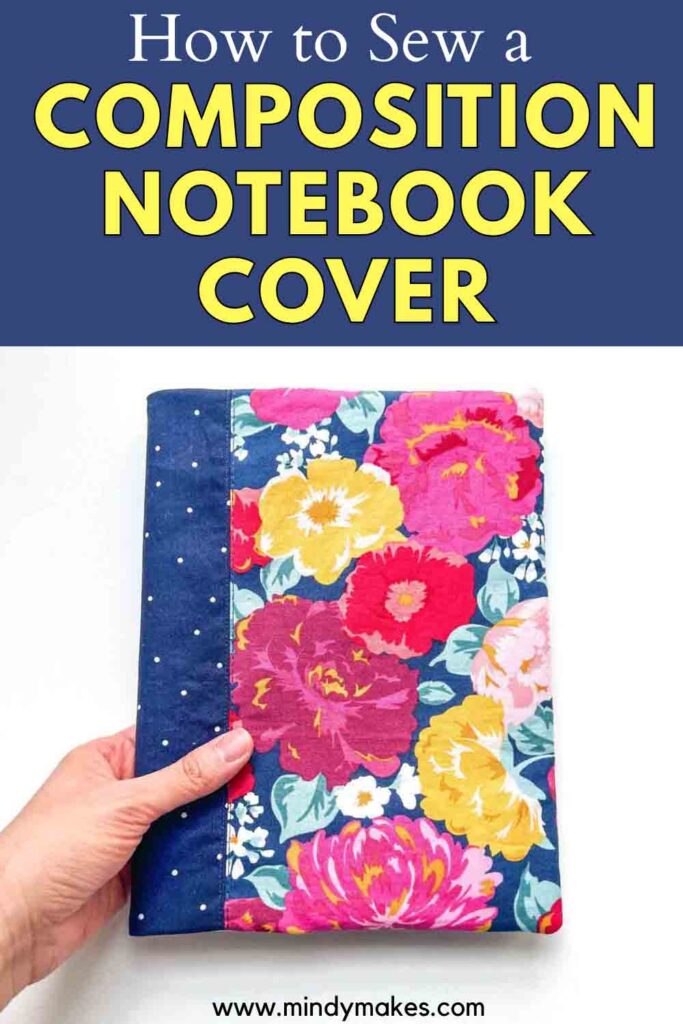
A fabric notebook cover is a simple sewing project that can be customized with your favorite fabric, colors, and prints. It also makes a great back-to-school sewing project, teacher gift, or handmade gift for kids.
This composition notebook cover sewing tutorial is beginner-friendly and can be made with just a few basic sewing supplies. Once you know how to make one, you can sew several covers to match different notebooks, school subjects, or seasons.
Why Make a Fabric Composition Notebook Cover?
A fabric notebook cover is a fun way to personalize an ordinary composition notebook. Instead of having a plain notebook, you can choose a fabric that matches your personality or school supplies.
These covers are also:
- Easy to sew
- Great for beginner sewists
- Reusable
- Washable, depending on the fabric and construction
- Perfect for back-to-school
- Easy to customize
- A great scrap-fabric sewing project
You can even make several and give them as handmade gifts!
Composition Notebook Cover Dimensions
Please note that dimensions are approximate and your final project may differ slightly from the dimensions listed below.
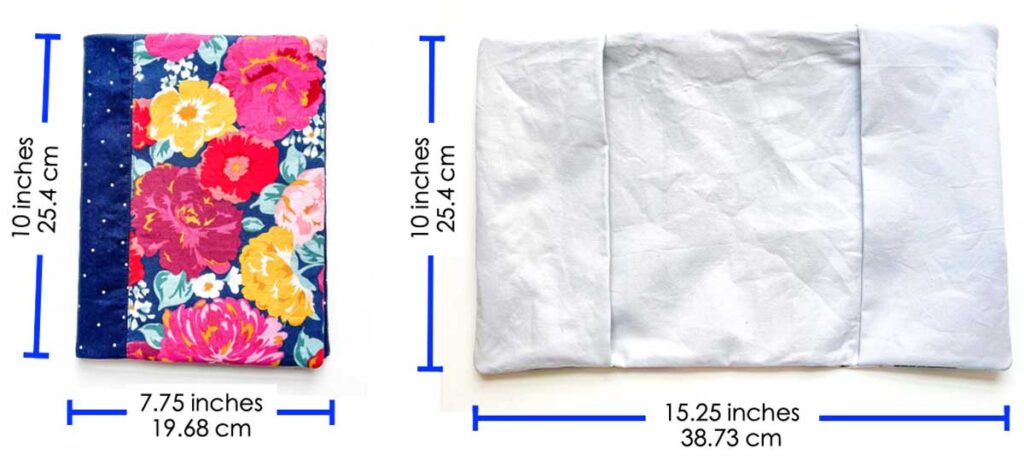
- Notebook cover measures approximately 7.75 inches (19.68 cm) wide and 10 inches (25.4 cm) tall when closed.
- Notebook cover measures approximately 15.25 inches (38.73 cm) wide and 10 inches (25.4 cm) tall when opened.
This notebook cover fits standard composition books that measure 7.5 in x 9.75 in (19.0 cm x 24.7 cm).
Materials
- EXTERIOR FABRIC – ⅓ Yard (0.3M), see fabric recommendations, in FAQs.
- BINDING FABRIC – a piece that measures 4.5” x 10.75”(11.43 cm x 27.8 cm). If purchasing fabric, ⅓ Yard (0.3M) – see fabric recommendations, in FAQs.
- LINING – a piece that measures 16.25”x 10.75”(41.27 cm x 27.8 cm). If purchasing fabric, ⅓ Yard (0.3M) – see fabric recommendations, in FAQs.
- INNER FLAP FABRIC – ⅓ Yard (0.3M) – see fabric recommendations, in FAQs.
- FUSIBLE INTERFACING
- MATCHING THREAD
Tools
- HOME SEWING MACHINE
- FABRIC SCISSORS
- SEWING CLIPS
- CLEAR RULER
- FABRIC CHALK
- POINT TURNER
- THAT PURPLE THANG – optional, but very handy
- HAND SEWING NEEDLES – to hand close opening
- IRON – for pressing. I love my Rowenta Iron with Retractable Cord for easy storage.
Composition Notebook Cover Pattern
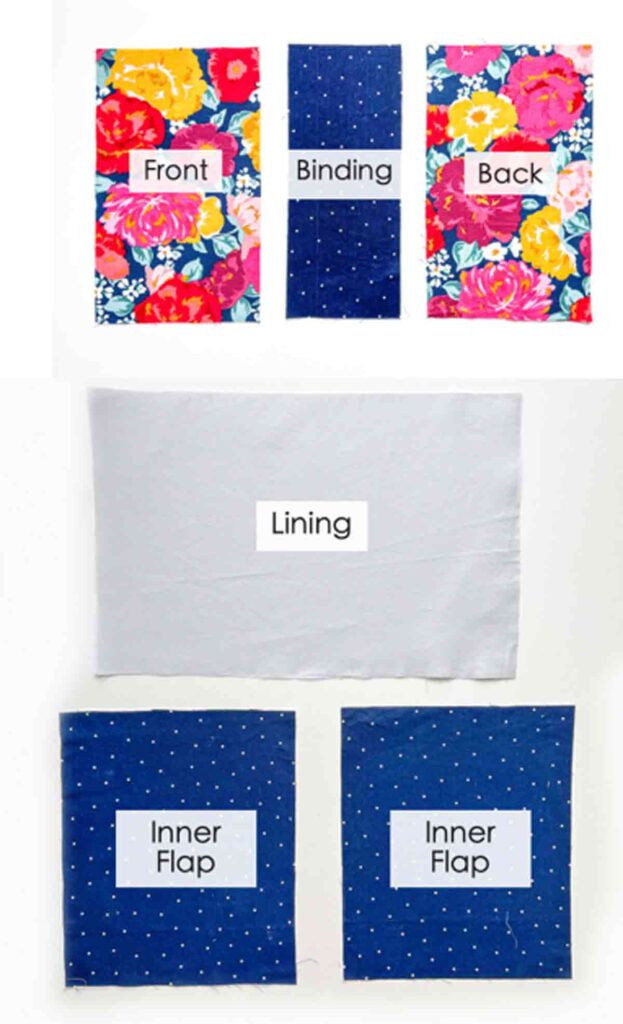
Cut out the following fabric pieces:
- FRONT – 6⅜” x 10.75”(16.19 cm x 27.8 cm)
- BINDING – 4.5” x 10.75”(11.43 cm x 27.8 cm)
- BACK – 6⅜ x 10.75”(16.19 cm x 27.8cm)
- LINING – 16.25”x 10.75”(41.27 cm x 27.8 cm)
- INNER FLAP (x2) – 9”x 10.75”(22.86 cm x 27.8 cm)
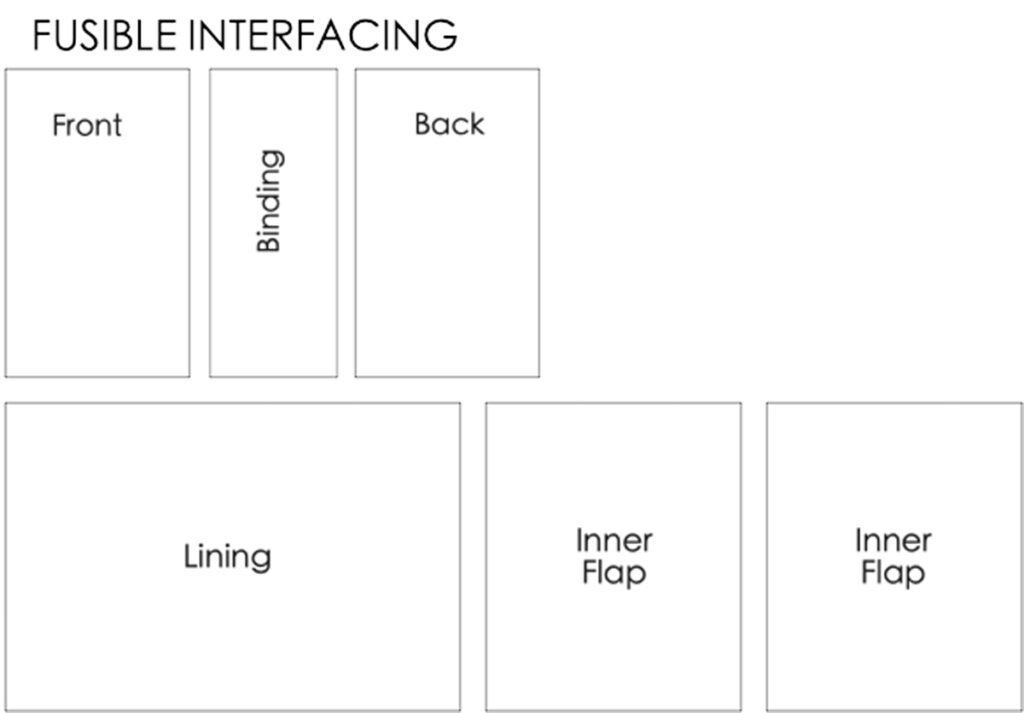
Cut out the following fusible pieces:
- FRONT – 6⅜” x 10.75”(16.19 cm x 27.8 cm)
- BINDING – 4.5” x 10.75”(11.43 cm x 27.8 cm)
- BACK – 6⅜ x 10.75”(16.19 cm x 27.8cm)
- LINING – 16.25”x 10.75”(41.27 cm x 27.8 cm)
- INNER FLAP (x2) – 9”x 10.75”(22.86 cm x 27.8 cm)
How to Sew a Composition Notebook Cover
Before you start, make sure to fuse interfacing to wrong side of fabric following the manufacturer’s instructions.
Sewing Exterior Cover
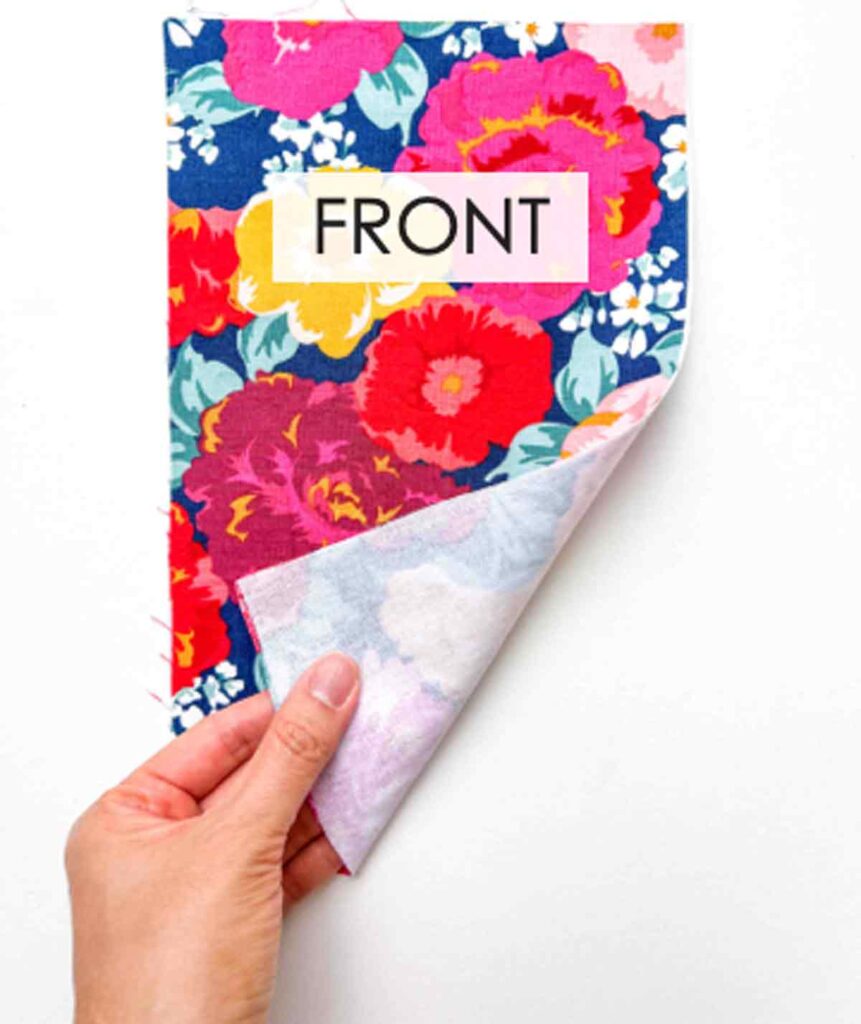
First, take FRONT and lay it facing up.
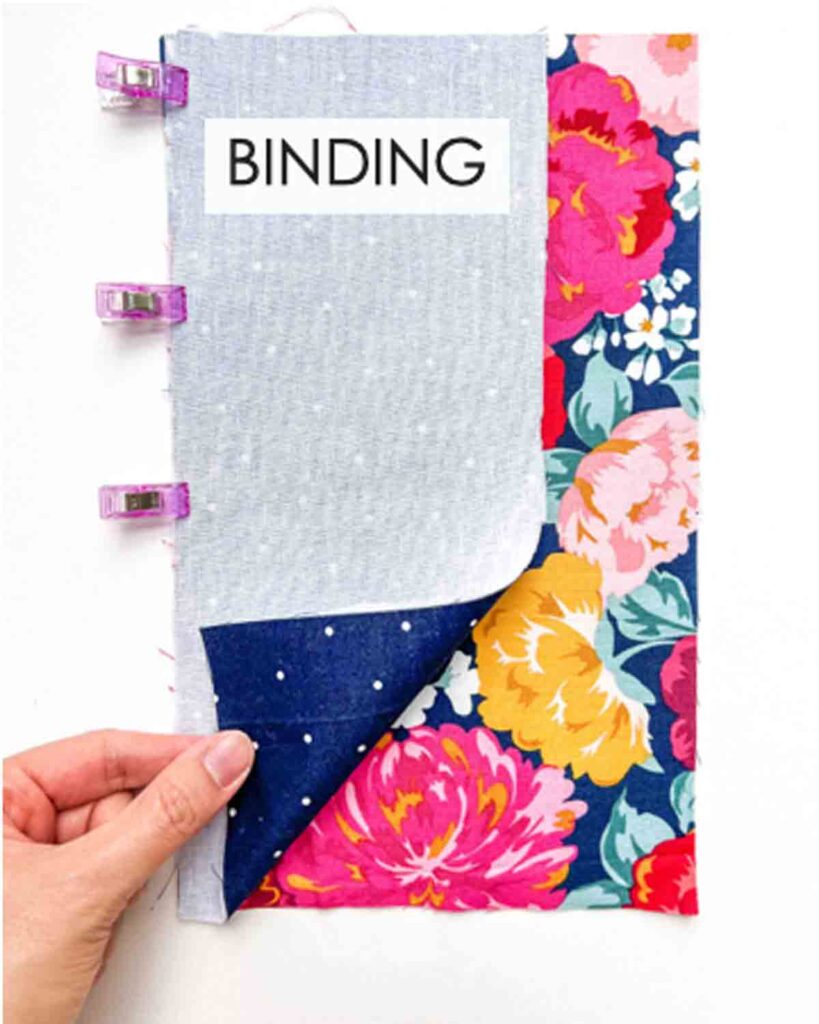
Second, place BINDING and FRONT right sides together, matching at the left.
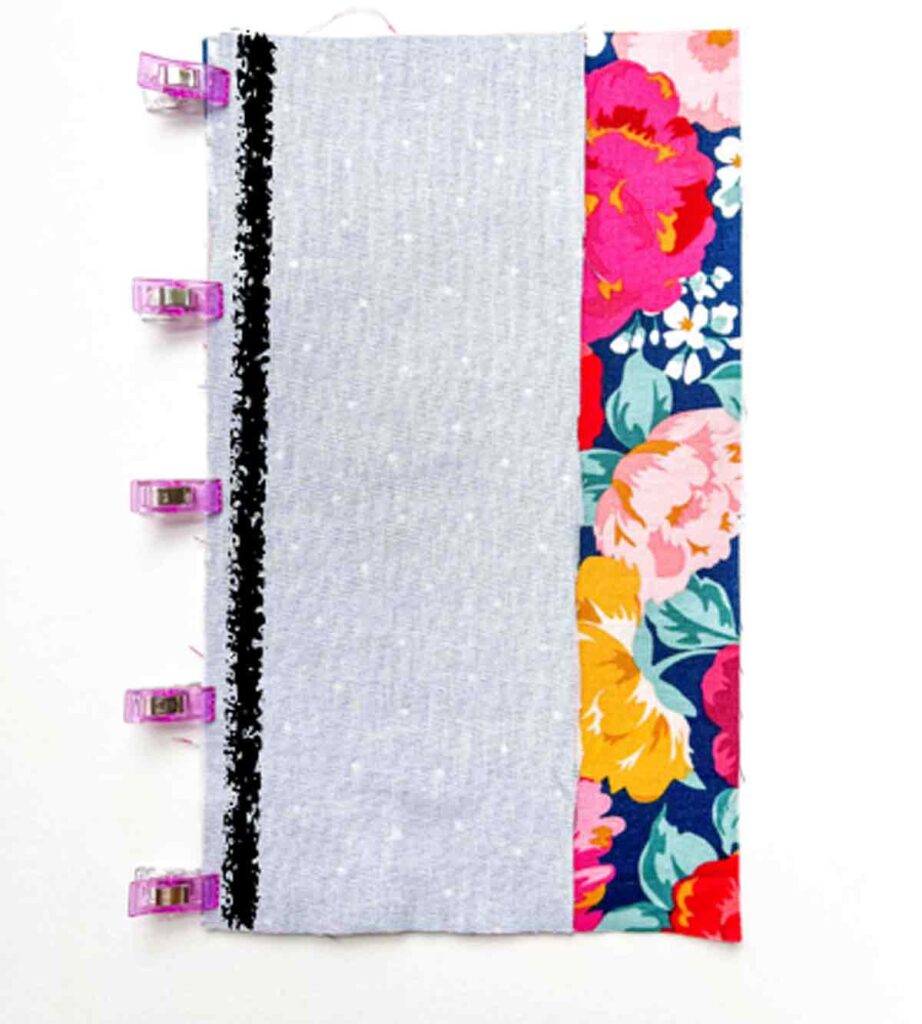
Next, hold in place with clips (or pins) and sew at ¼ inch (6mm) seam allowance (black line).
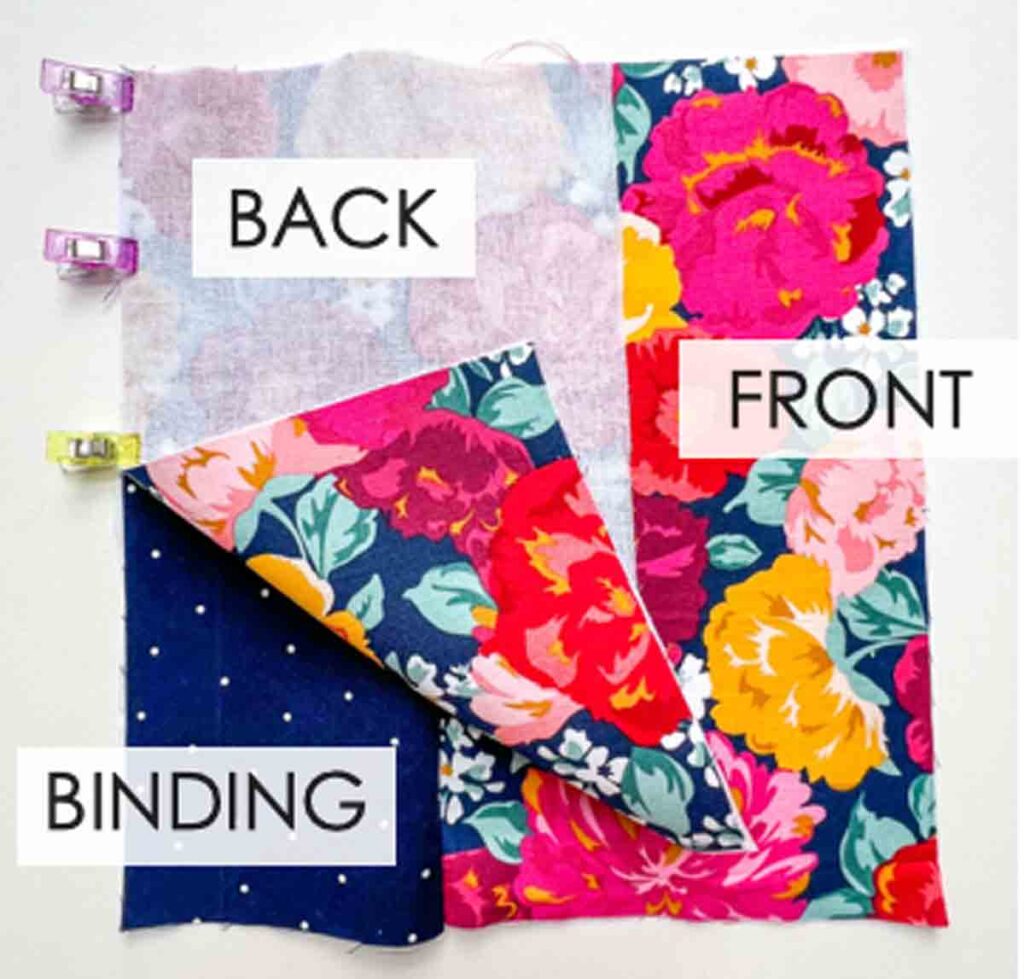
Now place BACK over BINDING right sides together, matching at the left edge.
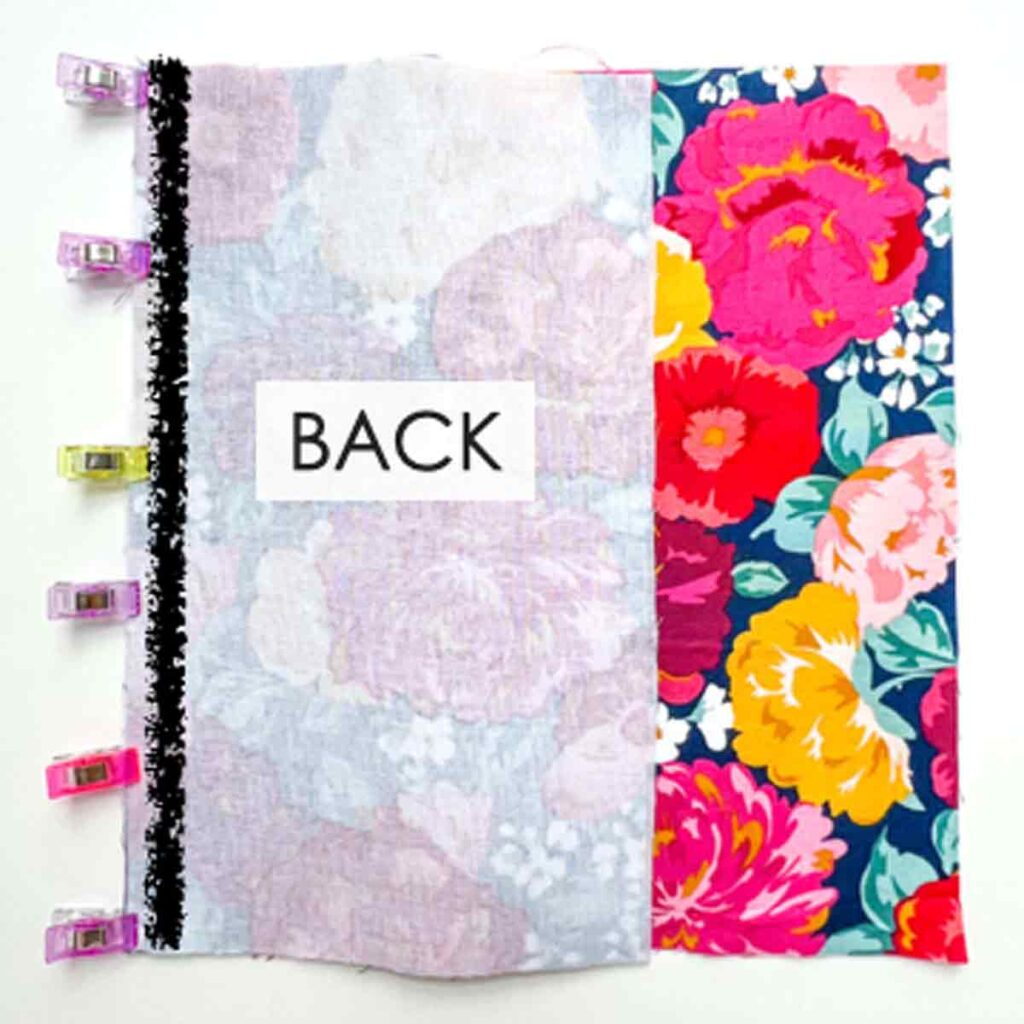
Next, hold in place with clips (or pins) and sew together at ¼ inch (6mm) seam allowance (black line).
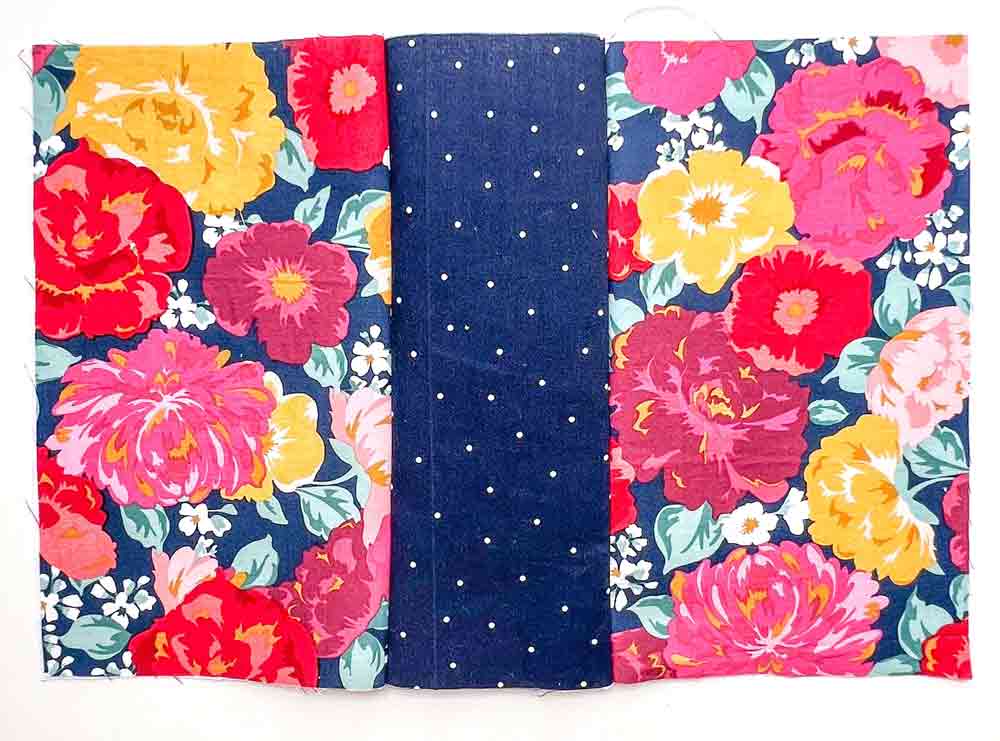
The EXTERIOR PIECE of notebook cover will look something like the photo.
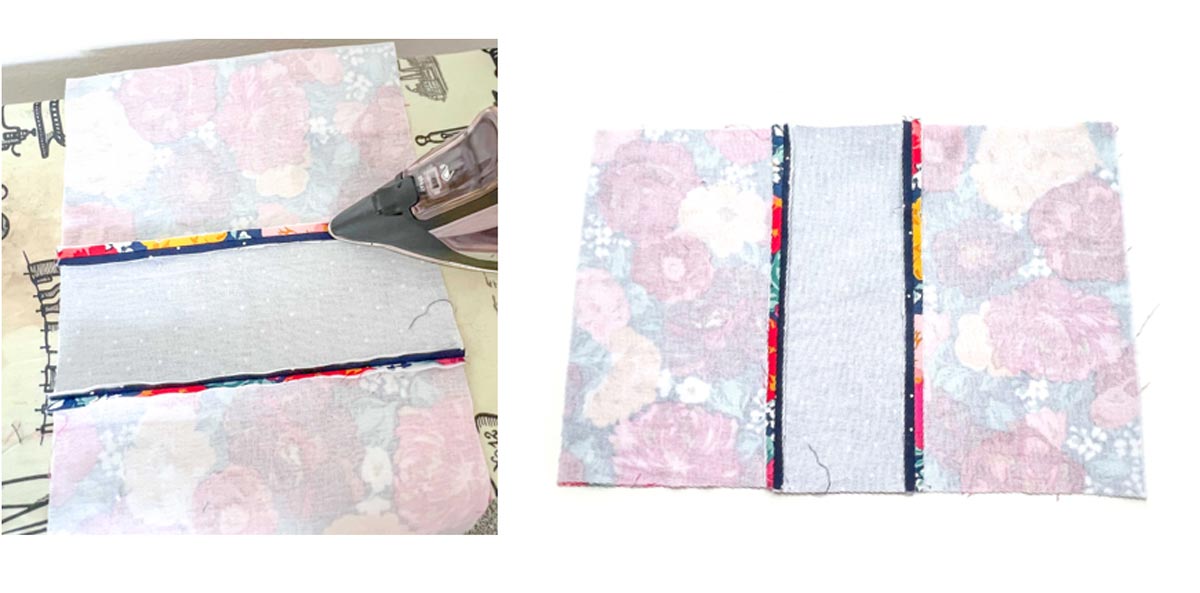
Now flip EXTERIOR PIECE to wrong side and press open both seam allowances.
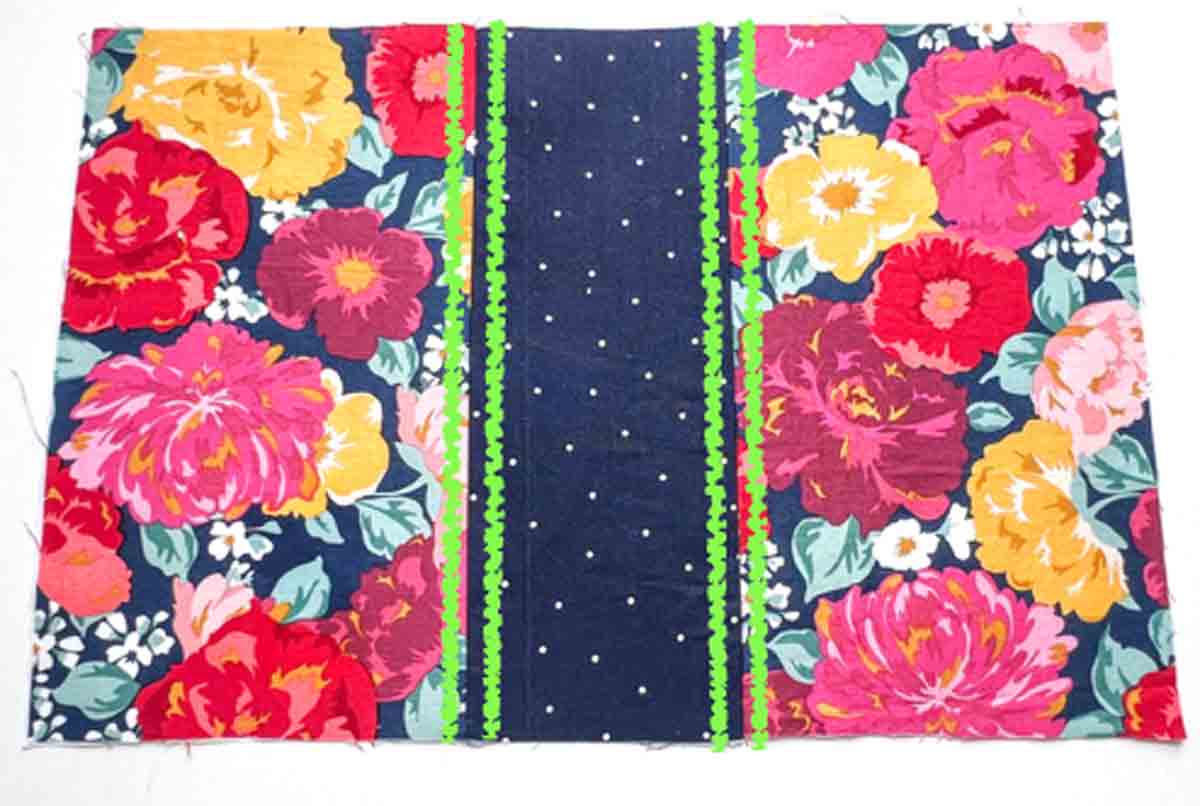
Next, edge stitch on both sides of the seam, a distance of ⅛”(3mm) away (green lines).
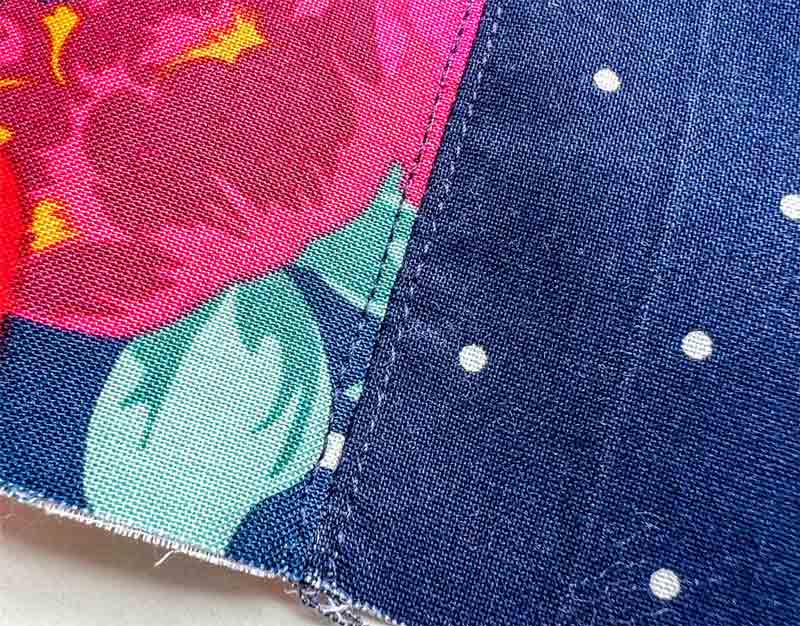
Closeup view of edge stitch.
Sewing Inner Flaps
First, place EXTERIOR PIECE right side up.
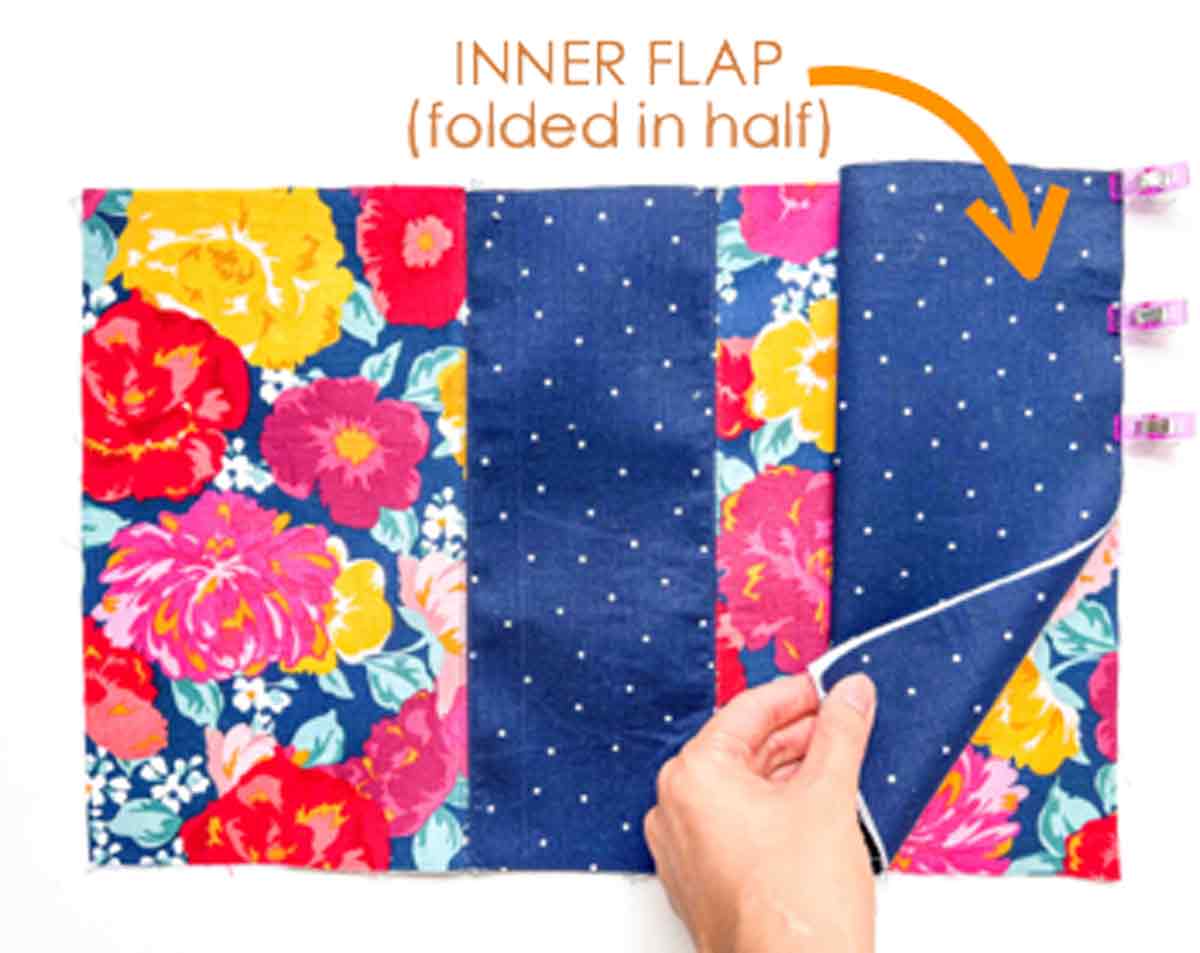
Second, fold INNER FLAP in half (along the length) and place it over EXTERIOR PIECE, lining up on the right edge, as pictured. Make sure the fold of inner flap is on the left.
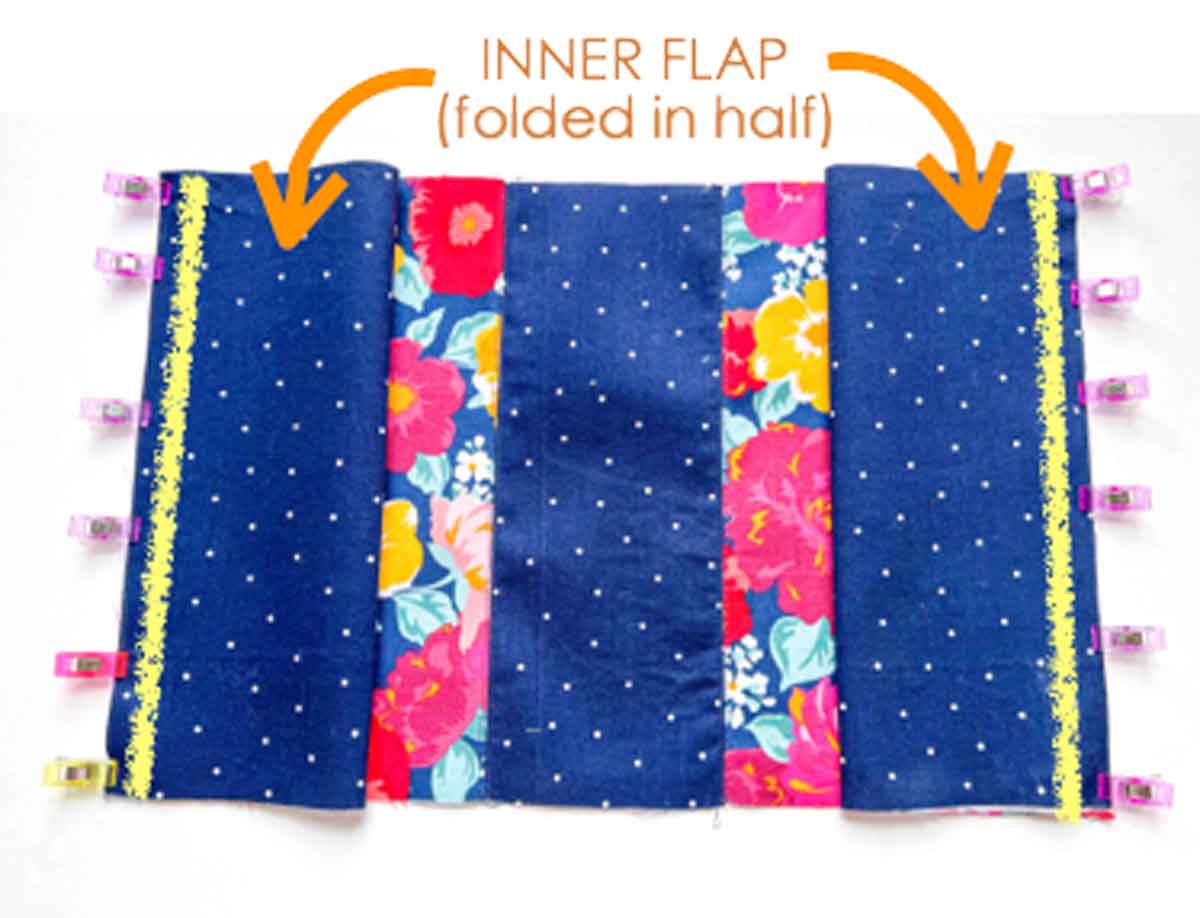
Next, fold second INNER FLAP in half and line it up with left side of EXTERIOR PIECE. Note that the fold of inner flap faces each other. Hold in place with clips and baste (yellow lines).
Marking Lining
Next, before sewing the notebook cover all together, we first need to mark the sew line on wrong side of lining.
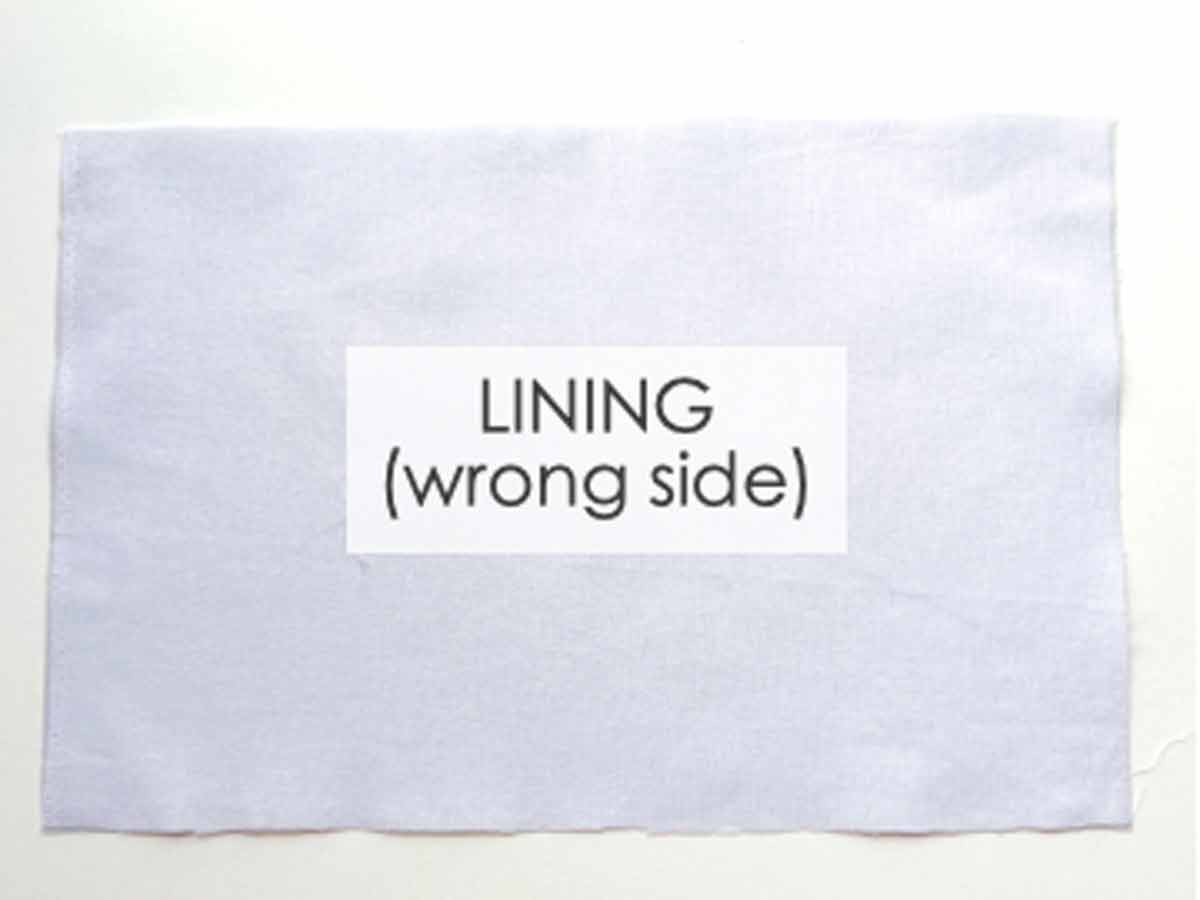
First, lay LINING wrong side up.
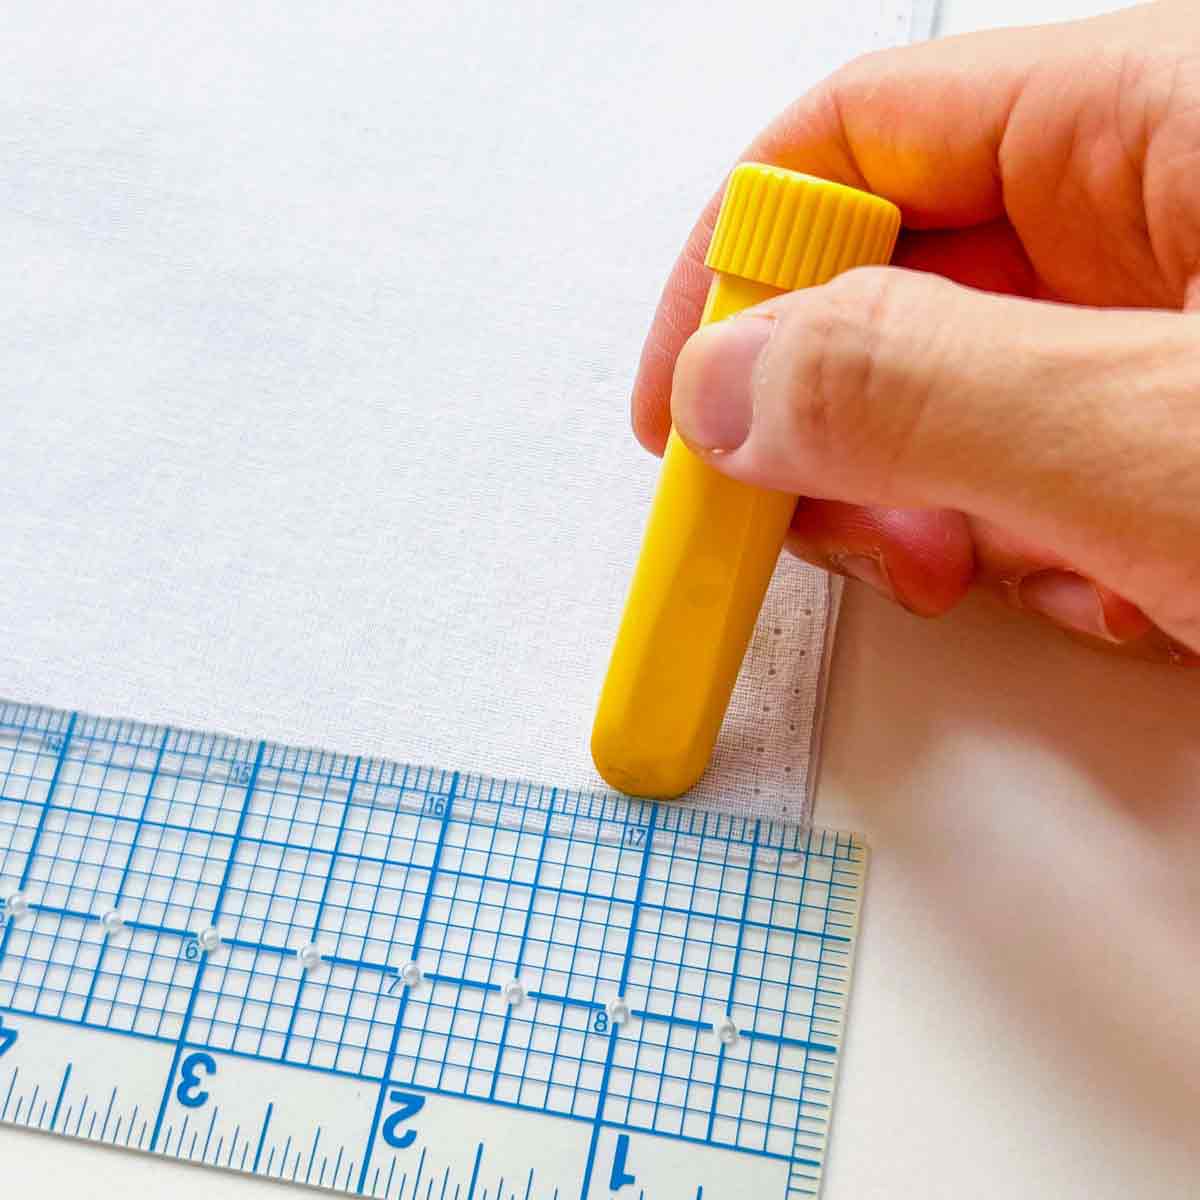
Second, using clear ruler and fabric chalk, mark ¼ inch (6mm) sew line on wrong side of LINING.
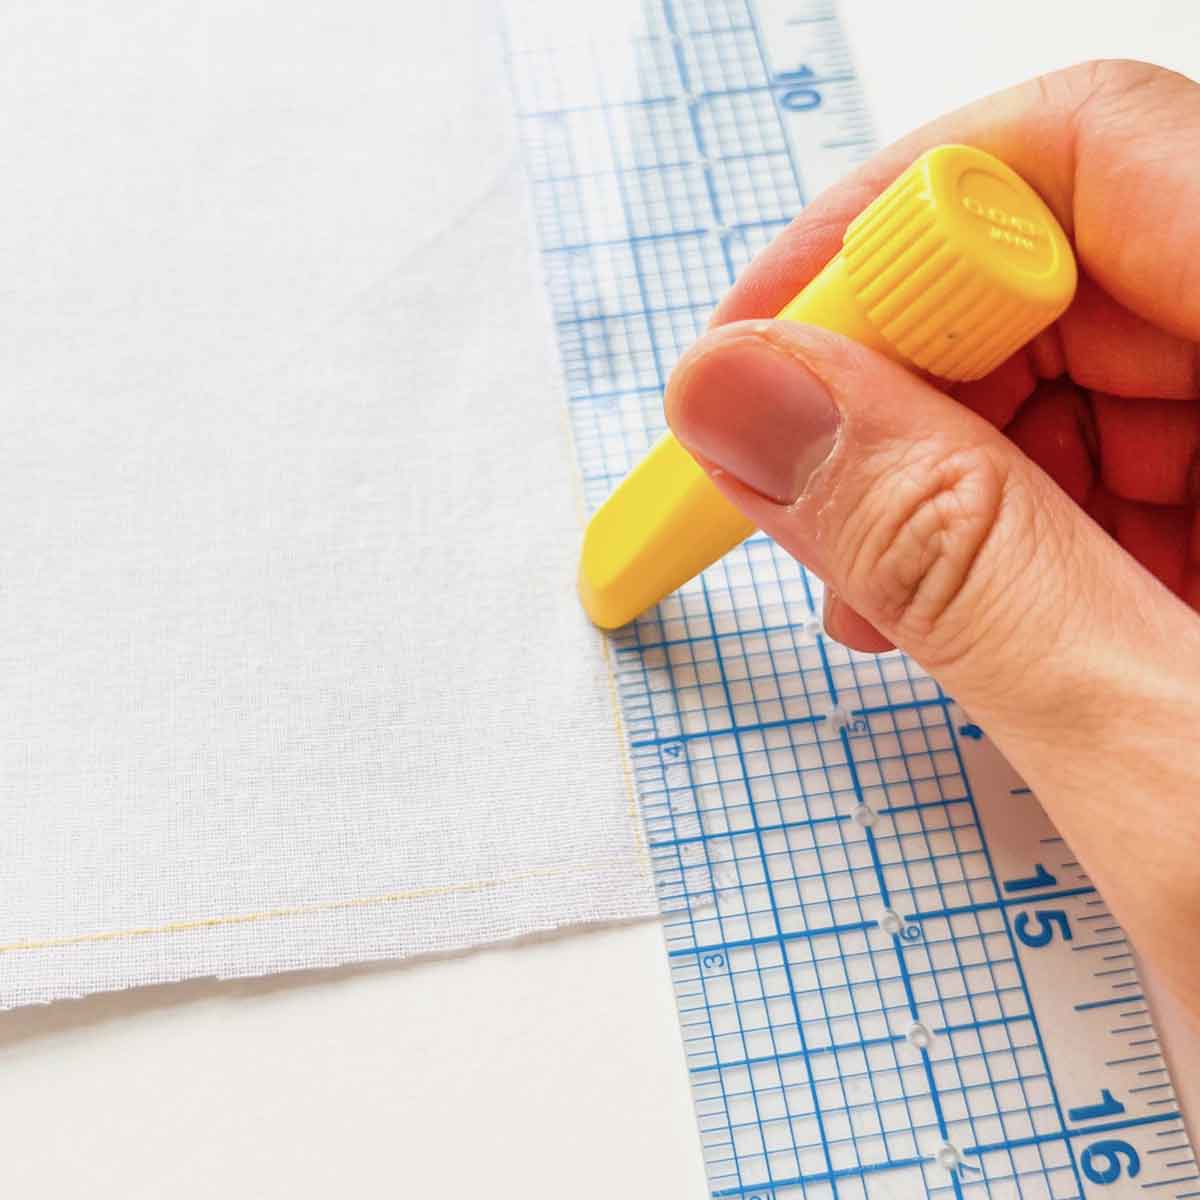
Continue marking ¼ inch (6mm) sew line.
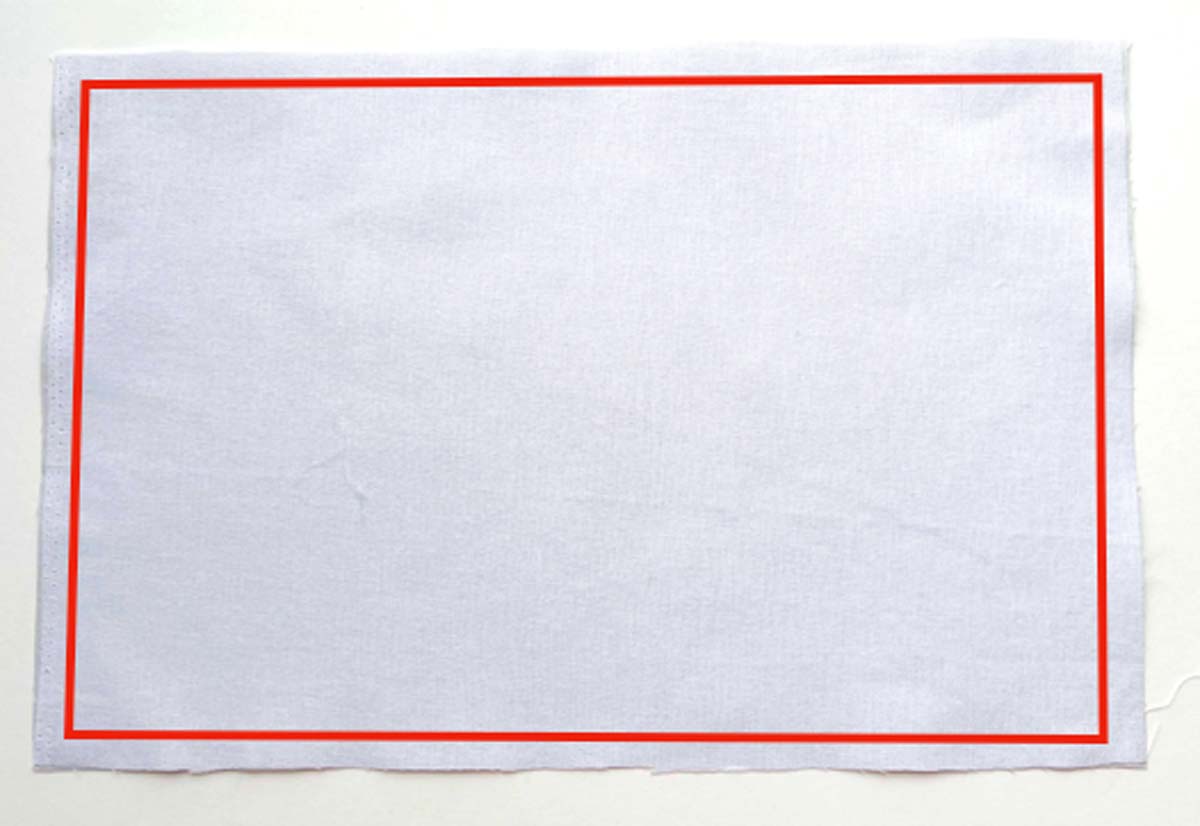
Now at this point, you will have marked a rectangular box around the entire LINING, ¼ inch (6mm) from all the sides (red rectangle).
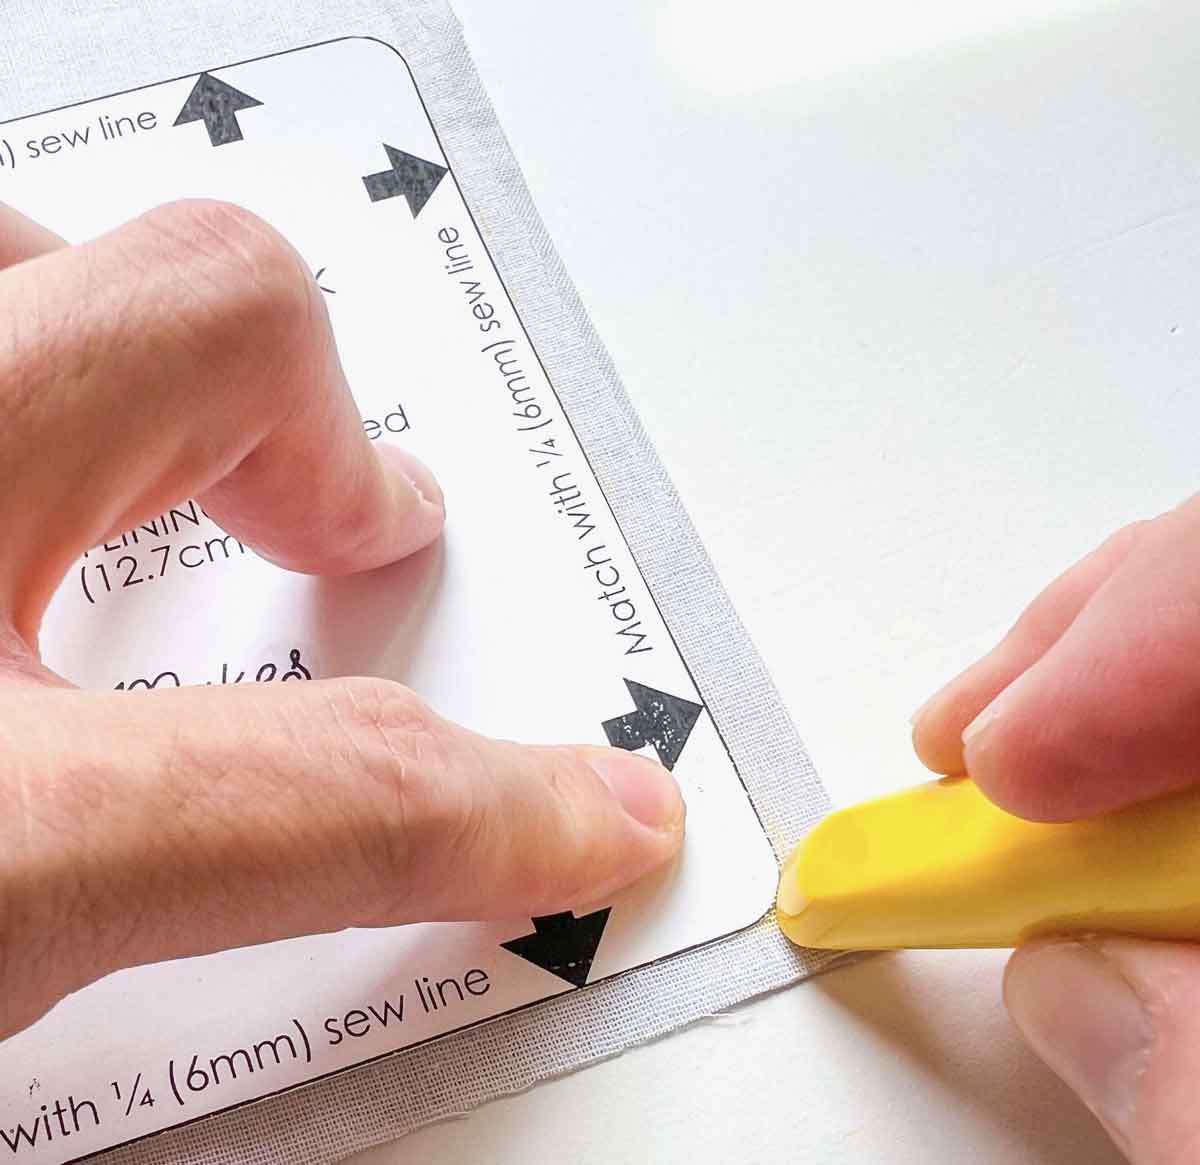
Now print and cut out ROUNDED CORNER TRACING PATTERN. Match arrows with ¼”(6mm) sew line at the corner of LINING. Use this pattern to create rounded corners (where it was originally a 90 degree corner).
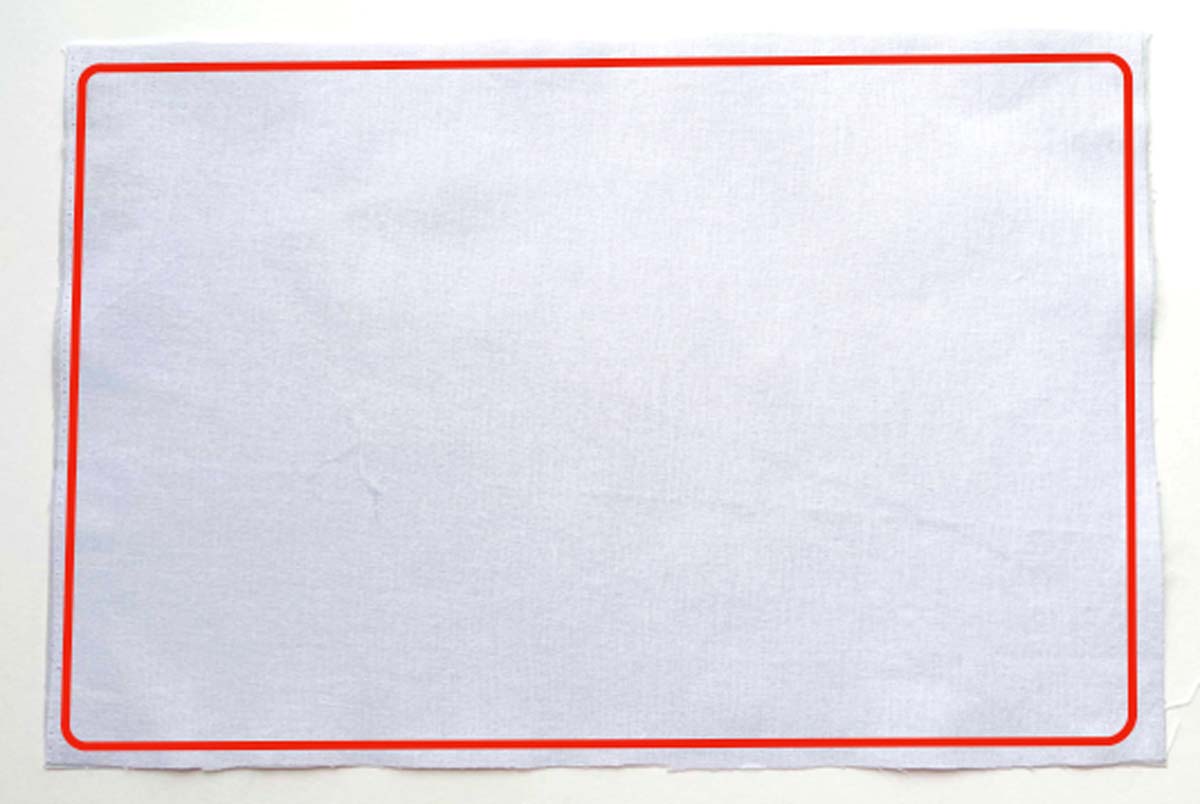
Repeat on all 4 corners. The sew line on LINING will look something like the photo (again, I added a red box in the photo so you can see better).
Sewing Notebook Cover Together
Now that our LINING is marked correctly, we are ready to sew the entire cover together!
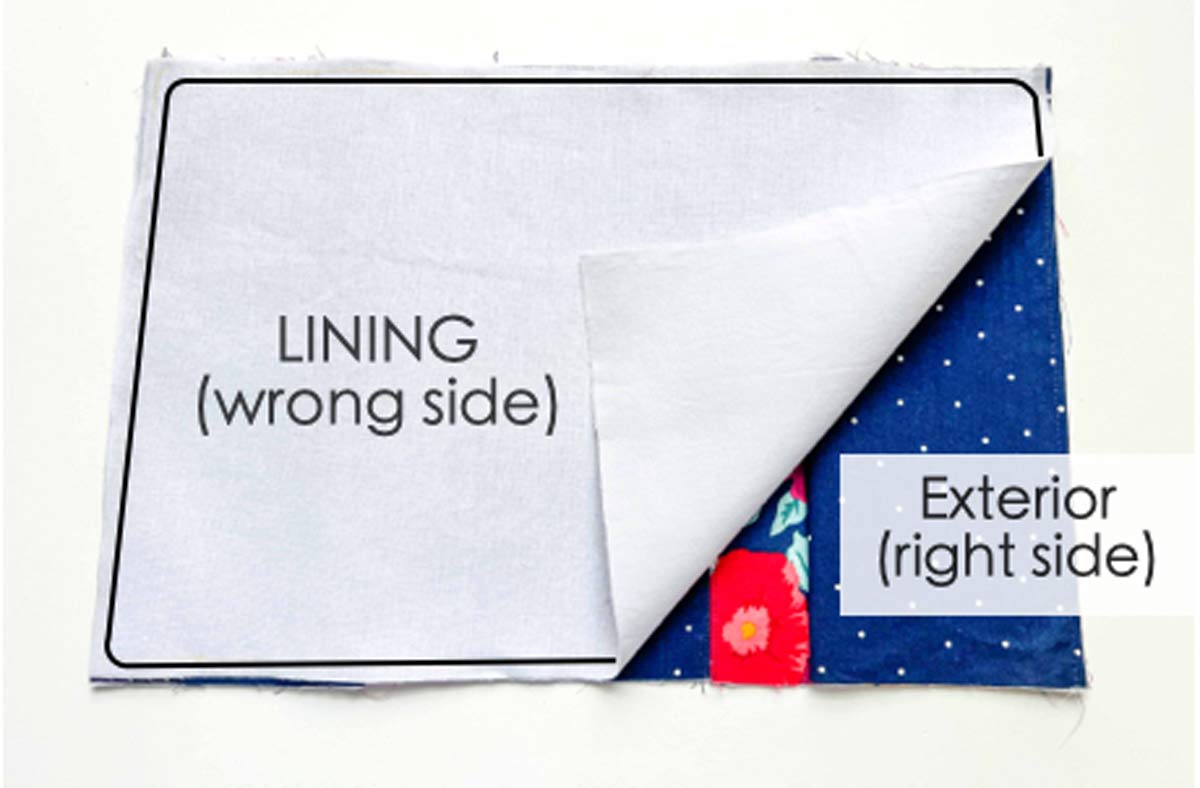
First, place LINING and EXTERIOR PIECE right sides together.
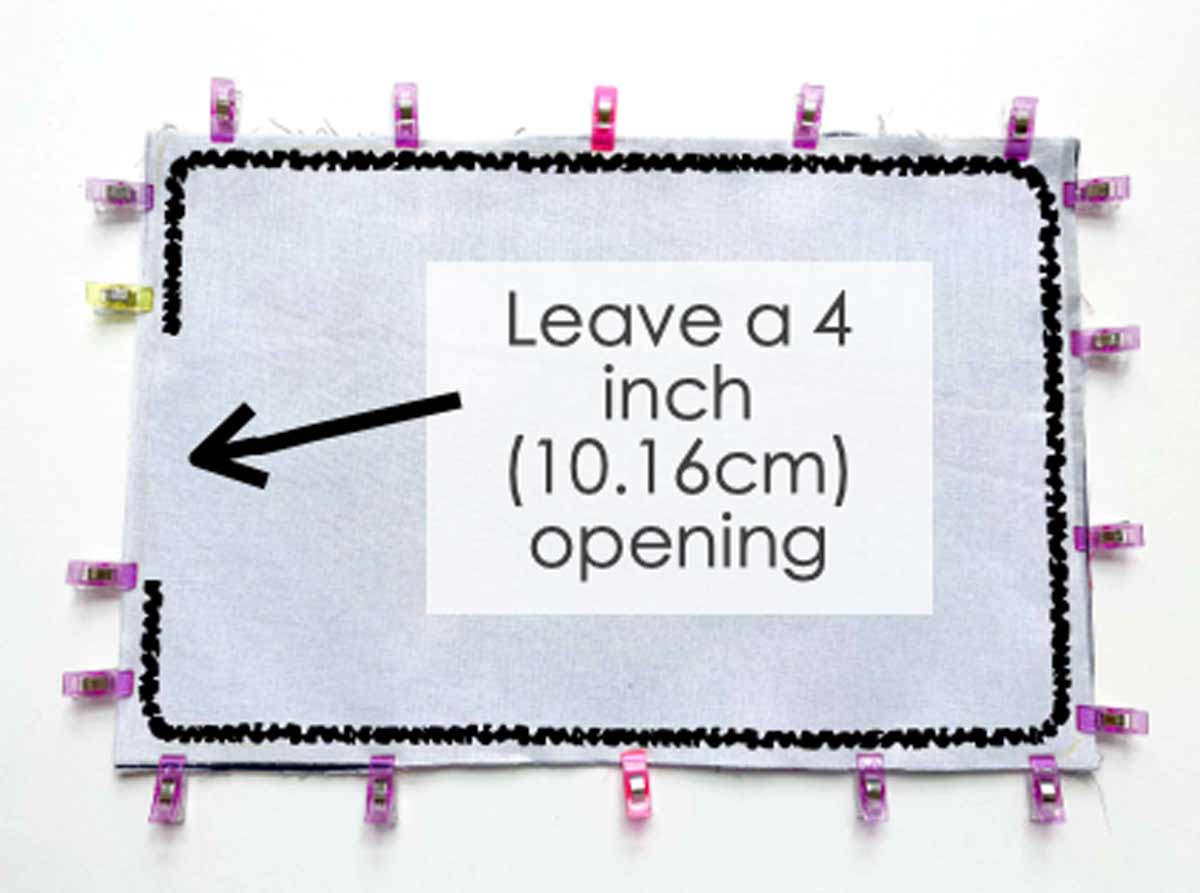
Second, hold in place with clips and sew at ¼ inch (6mm) seam allowance, leaving a ~4 inch (10.16cm) opening on the side (black line). Don’t forget to back stitch on both ends of opening.
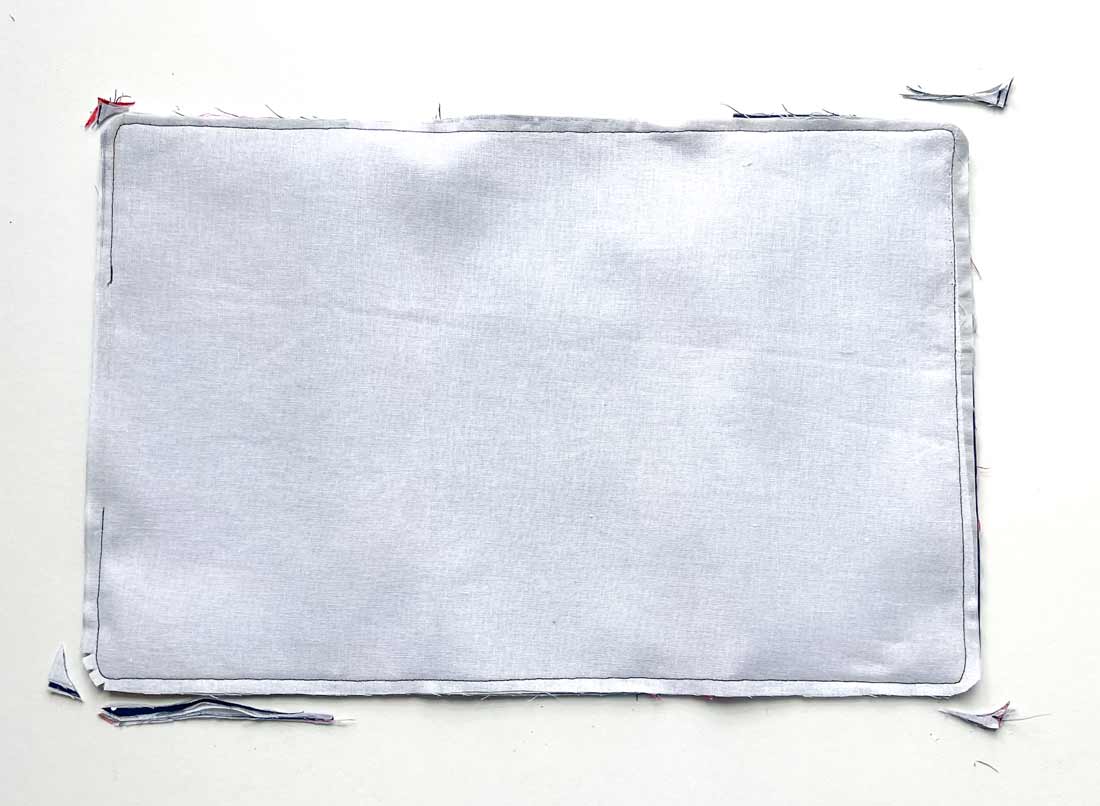
Next, trim corners so they are rounded (and any excess seam allowance down to ¼ inch (6mm), if necessary).
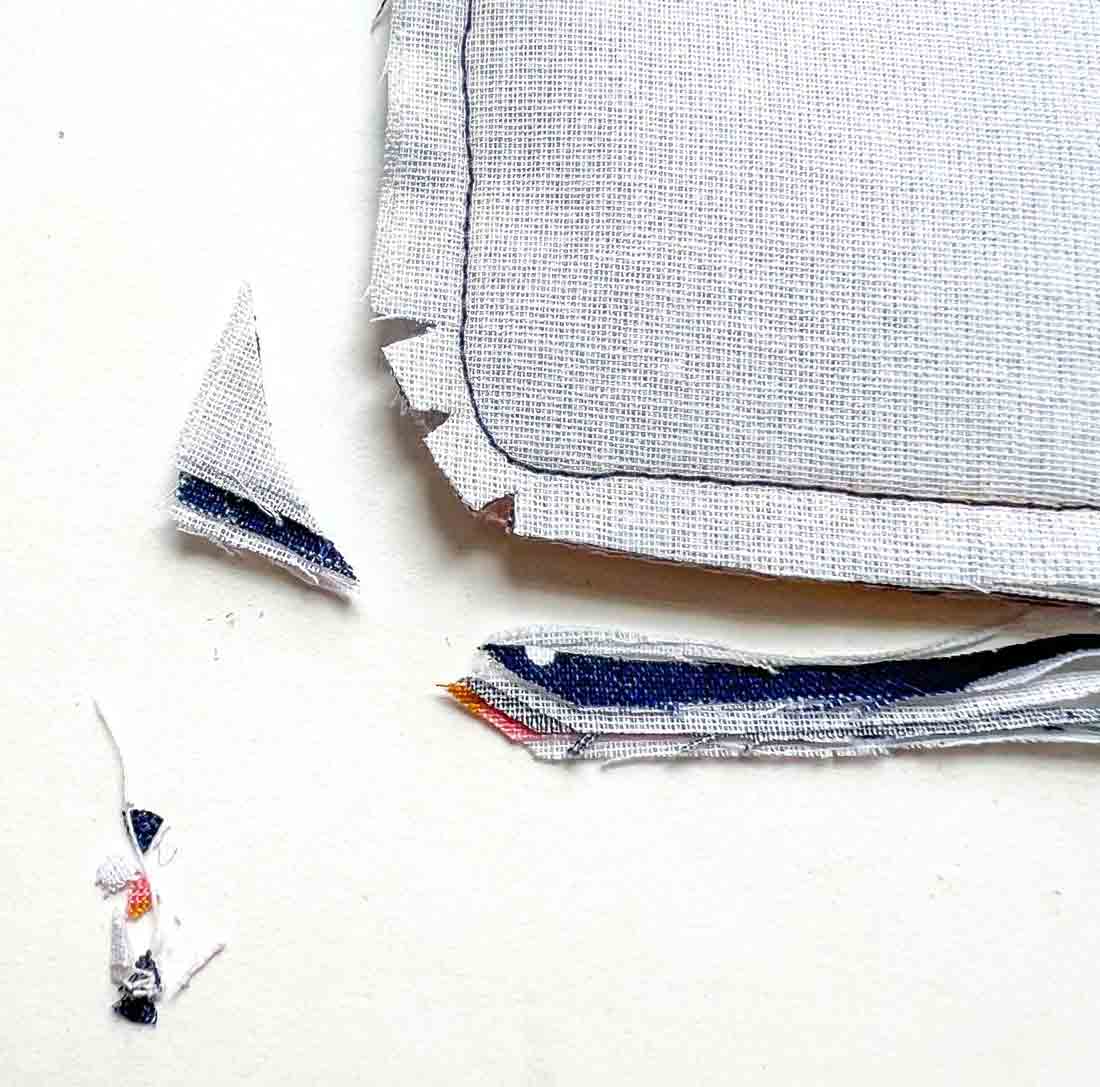
Now clip the curves. (Note, in the photo I made notches so it’s easier to see. However, you can just clip the corners, you don’t have to make notches).
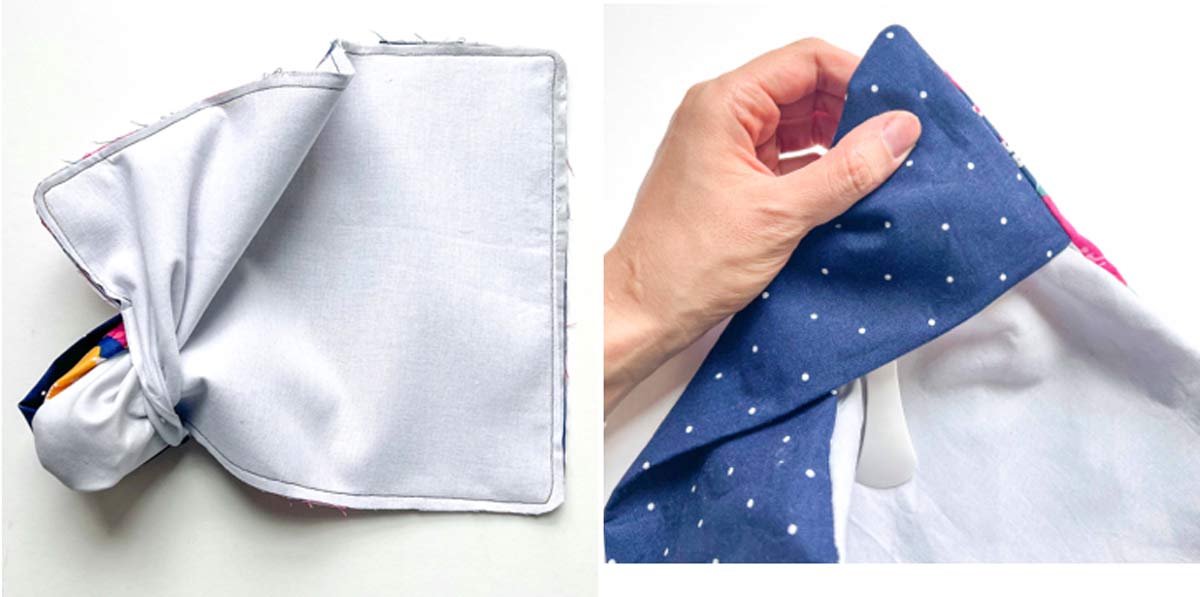
Next, turn notebook cover to right side through opening and poke out the corners using a point turner.
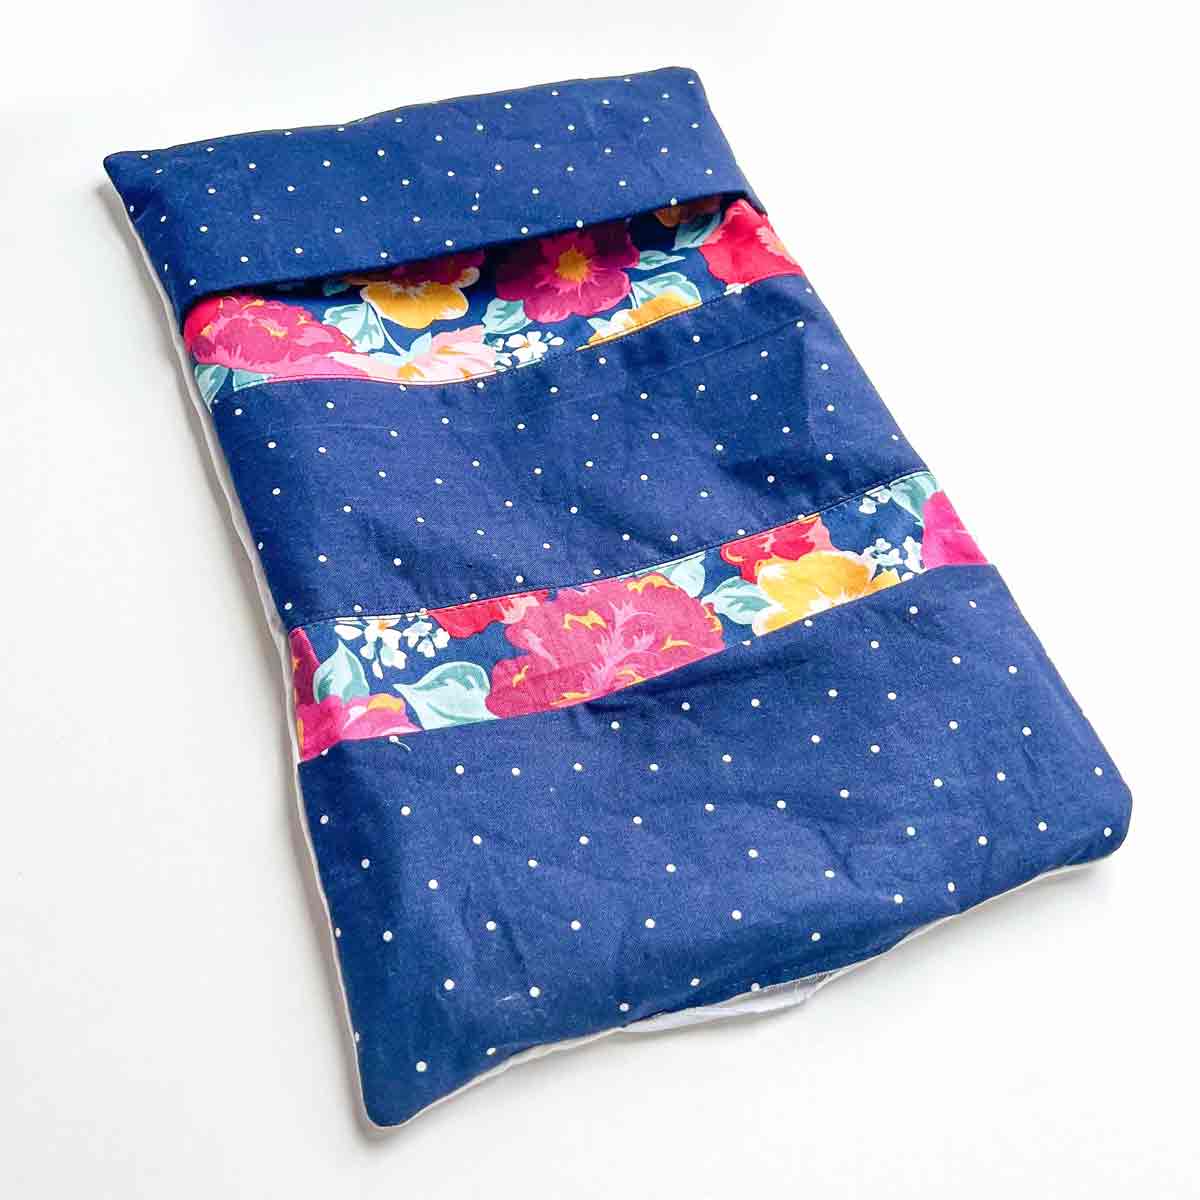
Now your notebook cover will look something like this photo.
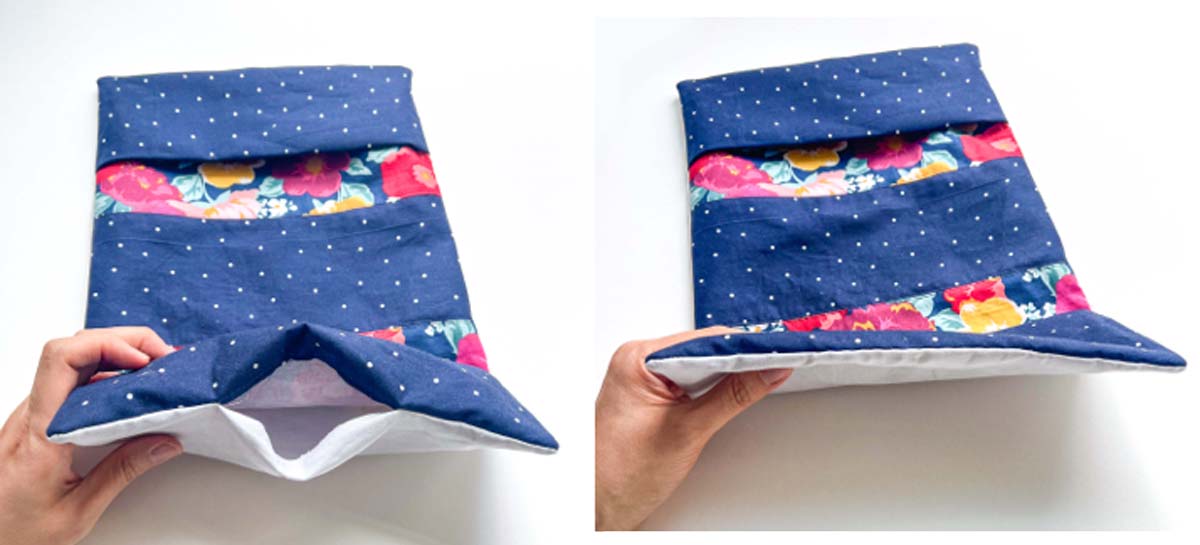
Next, close opening using invisible ladder stitch.
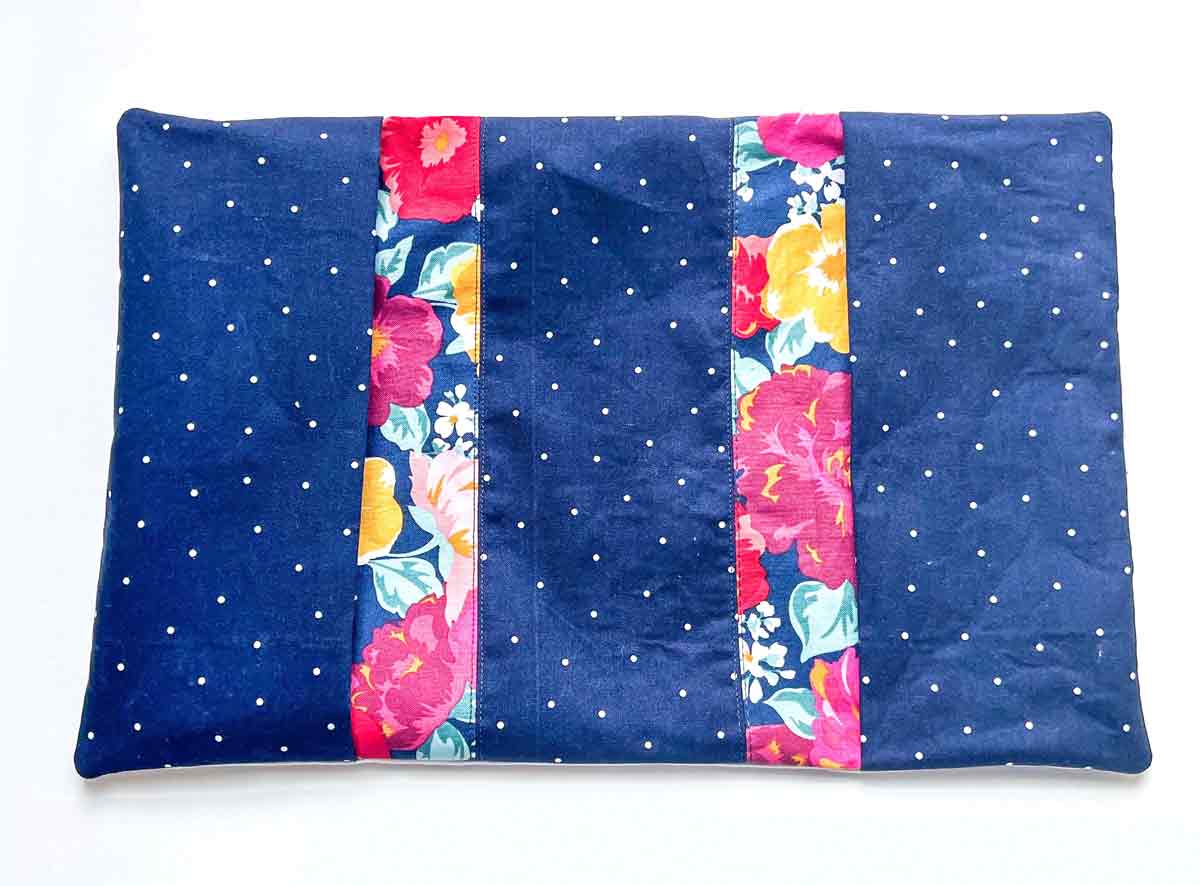
At this point, your notebook cover will look something like the photo, with inner flaps turned to the exterior.
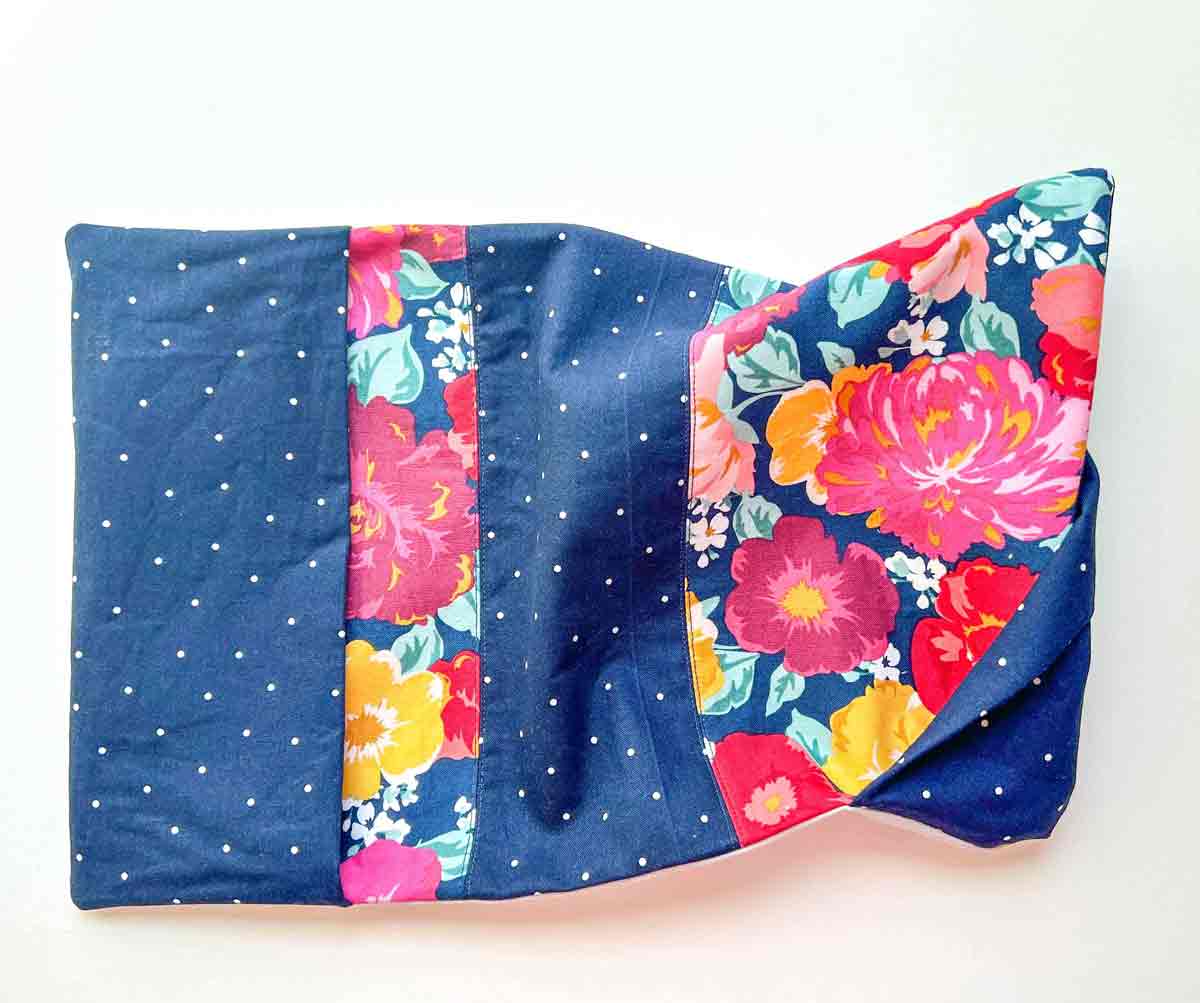
Next, turn inner flaps so it faces interior of notebook cover.
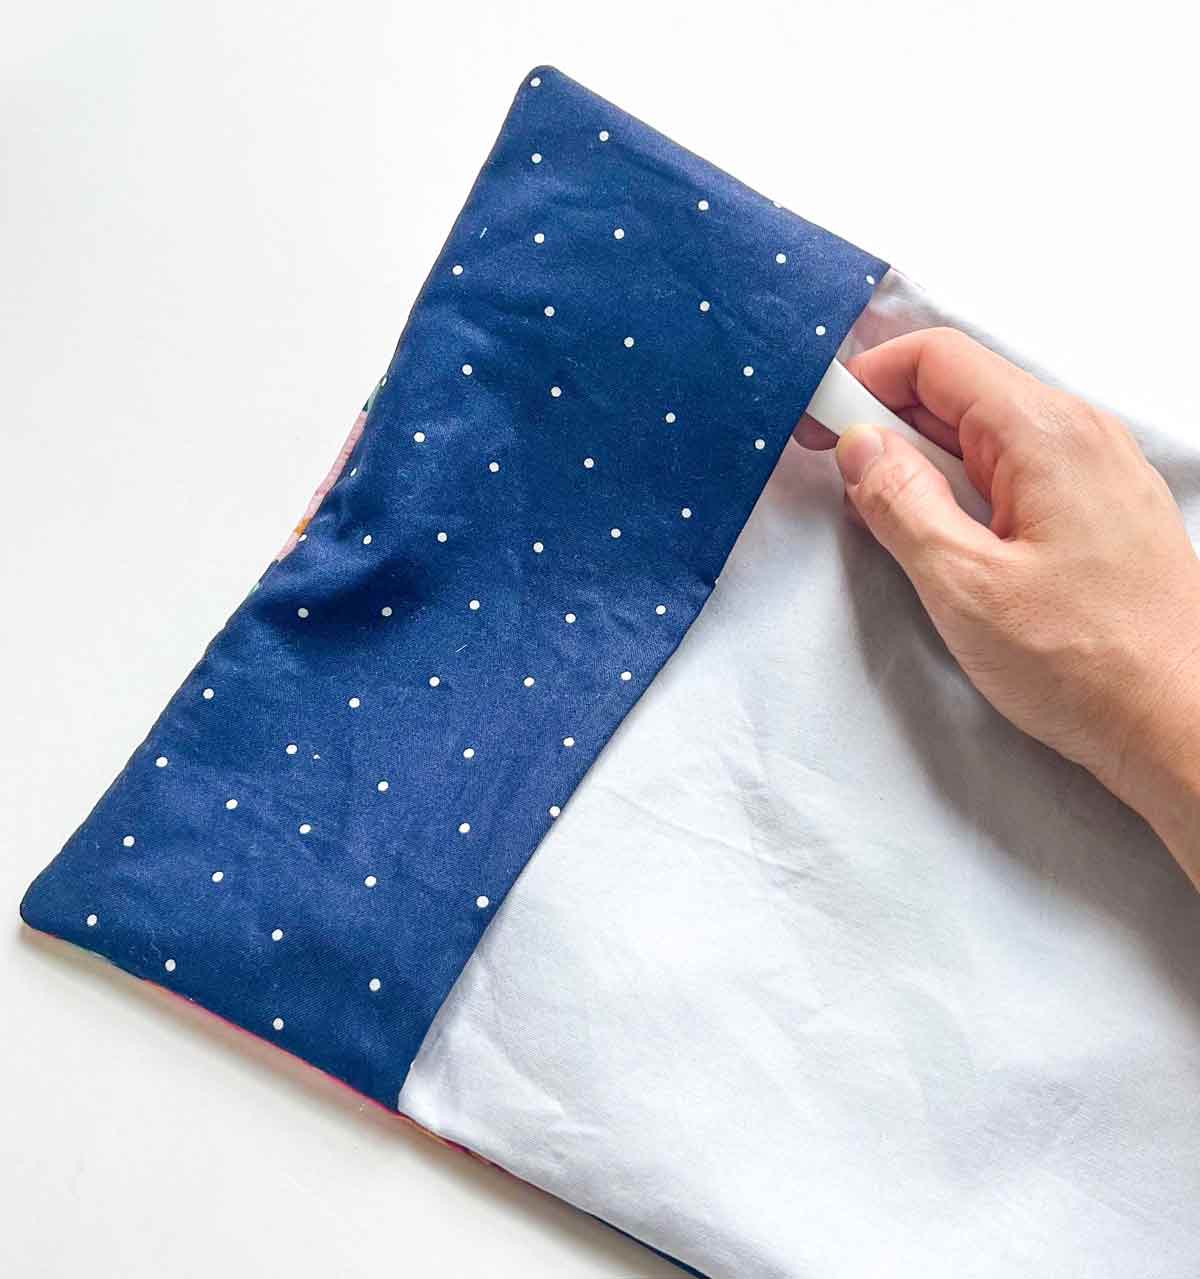
Then, use point turner to poke out the corners again.
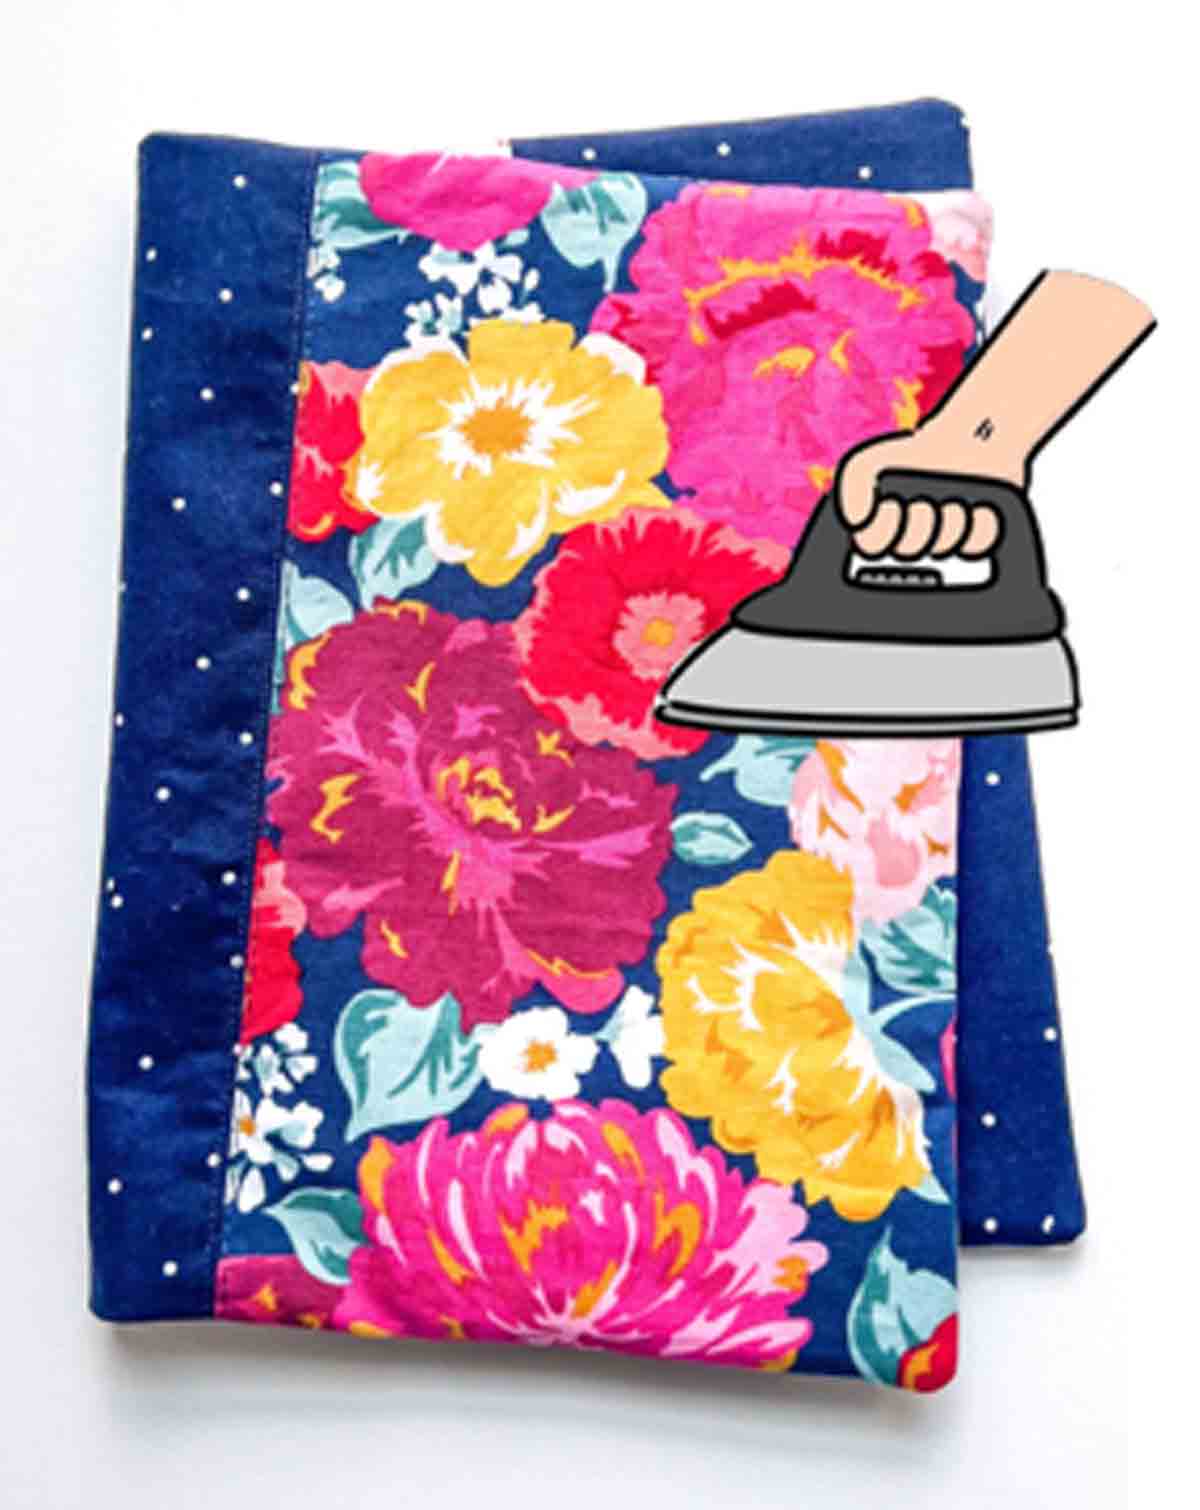
Now give your cover a good press all around.
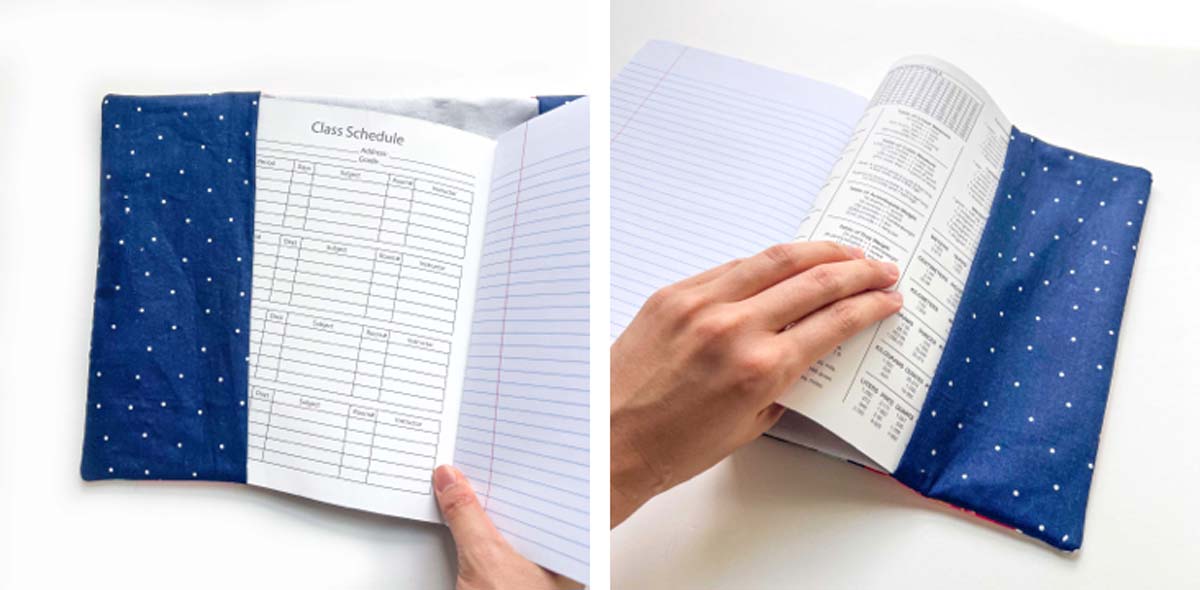
Finally, tuck the notebook into each of the inner flaps.
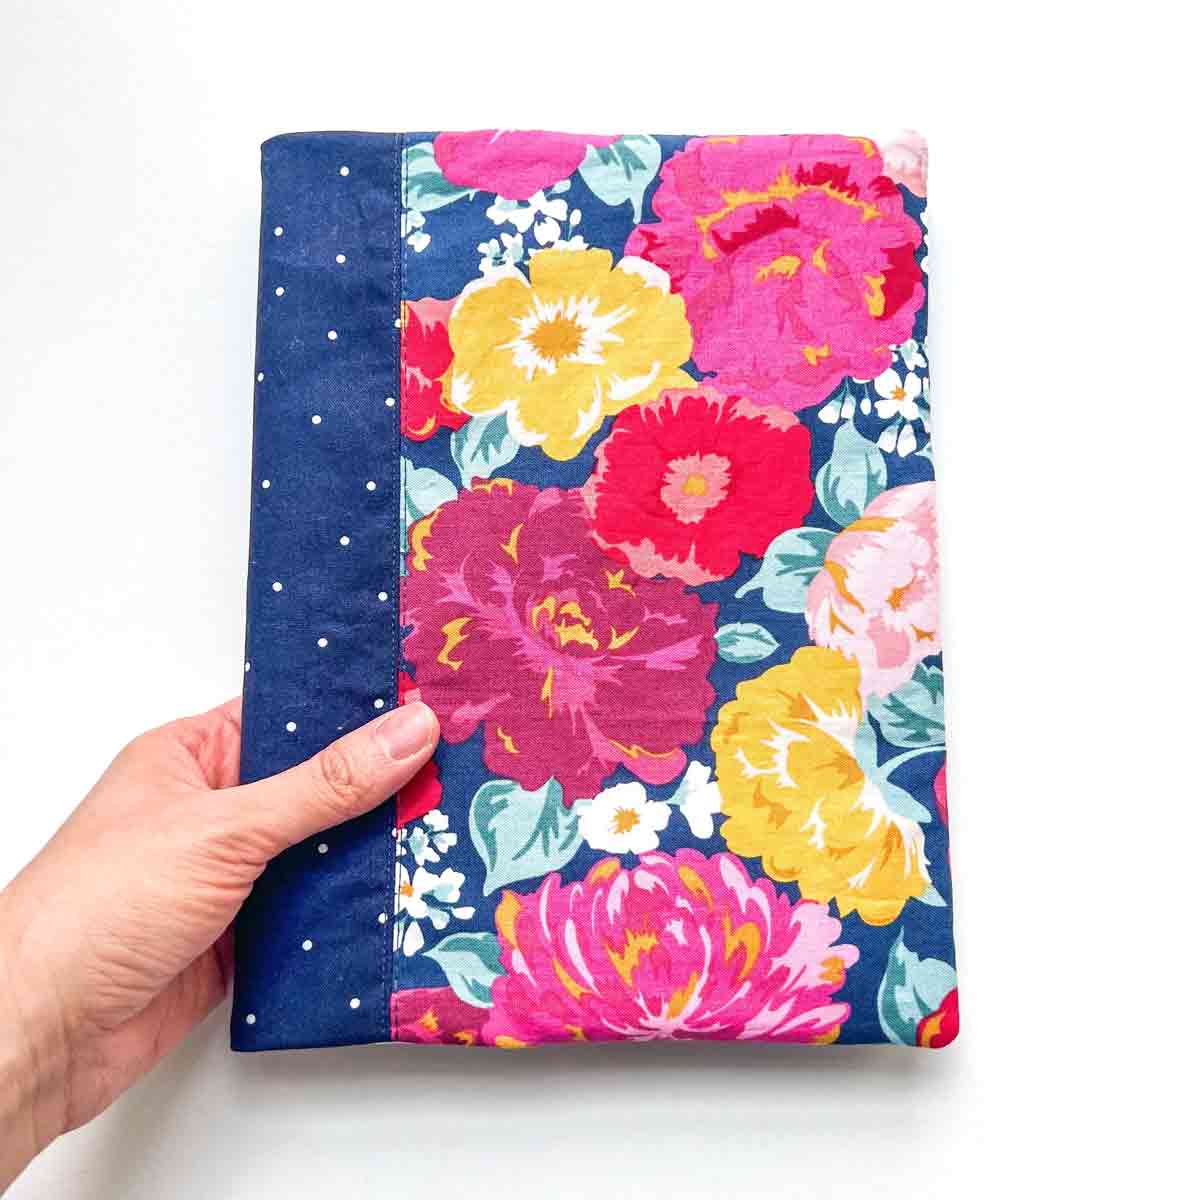
You are finished! Good job!!
Notebook Cover PDF Tutorial
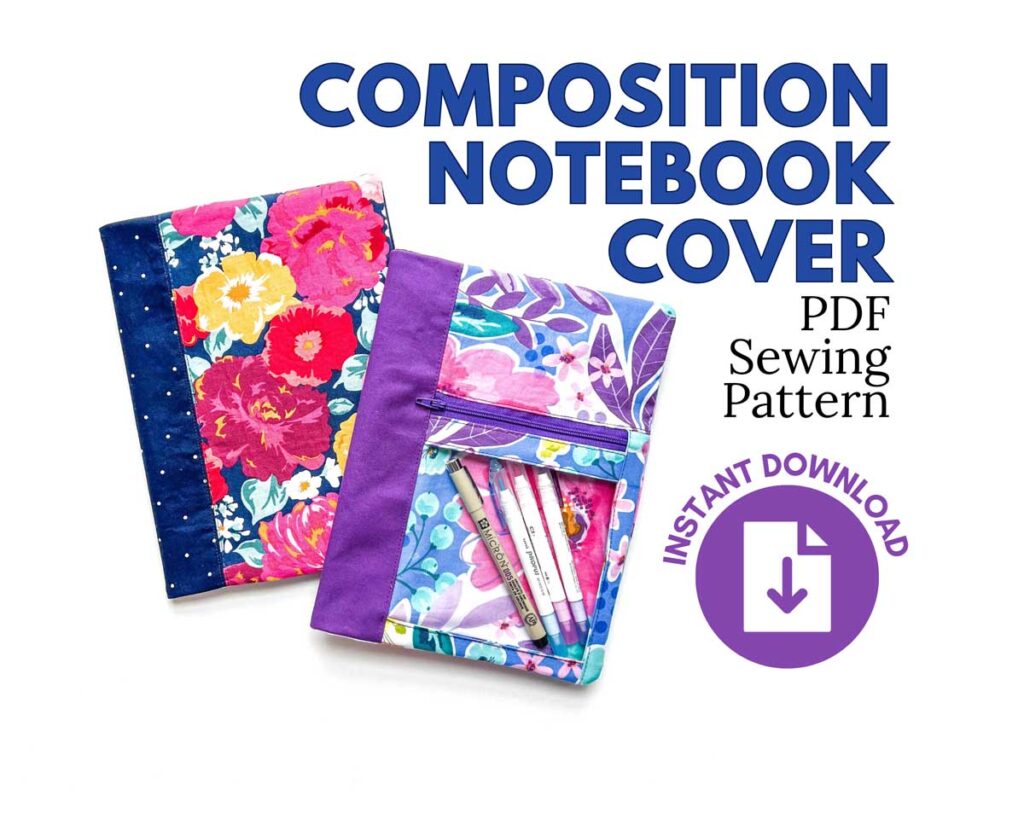
Want the PDF version of this composition notebook tutorial? Grab it on ETSY so you can print and keep a copy next to your sewing machine.
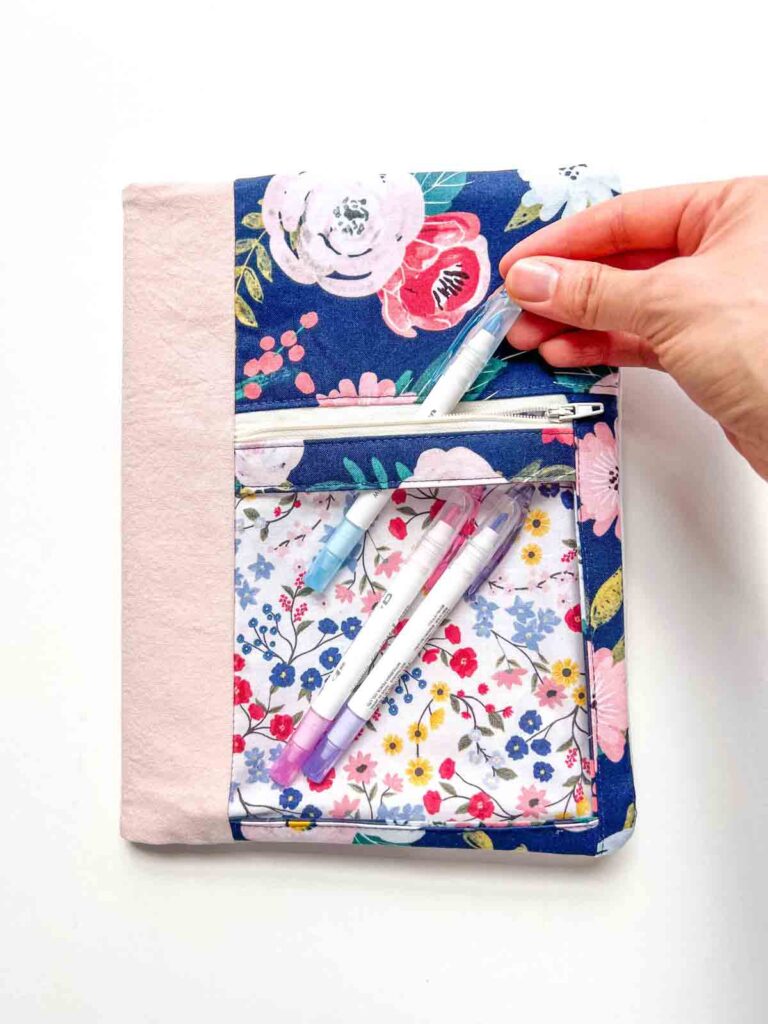
Additionally, you will receive step-by-step tutorial for how to sew a notebook cover with a see-through front zipper pocket to store pens, highlighters, and other stationary!
Optional Ways to Customize Your Notebook Cover
One of the best things about sewing your own notebook cover is that you can customize it however you like.
Add a Name
Personalize the cover with an embroidered name, appliqué, or iron-on-vinyl. This is especially cute for children’s school notebooks.
Add a Bookmark
Sew a piece of ribbon into the top seam of the cover before closing it to create a built-in bookmark.
Add a Small Pocket
For an extra useful feature, add a small pocket to the inside of the cover for pencils, sticky notes, bookmarks, or other small school supplies.
Make Seasonal Covers
Make different covers for different times of the year. Floral fabrics are perfect for spring, while Halloween, Christmas, and patriotic fabrics can make fun seasonal notebook covers.
Tips for Sewing a Composition Notebook Cover
Use quilting cotton. It is easy for beginners to sew and comes in countless colors and patterns.
Press as you sew. A good pressing can make a homemade project look much more polished.
Backstitch your seams. This helps keep the stitching from coming undone.
Don’t skip trimming the corners. Removing some of the excess fabric from the corners will make them easier to turn neatly.
Frequently Asked Questions
What fabric is best for a composition notebook cover?
100% Cotton fabric is a great choice for a composition notebook cover because it is lightweight, easy to sew, and available in many different prints.
Other recommended fabrics include denim, canvas, linen, cork, wool, corduroy, and woven fabrics.
I would generally stay away from knits, stretchy fabric, burlap, and extra light weight fabrics such as chiffon, tulle, silks.
Can a beginner sew a composition notebook cover?
Yes! A composition notebook cover is a relatively simple sewing project and is suitable for beginners who know basic sewing machine techniques.
Do I need interfacing for a fabric notebook cover?
No, interfacing is optional. It can be added if you want your cover to have more body and structure. However I do recommend it if you are using lightweight fabrics.
Can I wash a fabric notebook cover?
If you use washable fabric and materials, the cover can generally be washed. Follow the care instructions for the specific fabric and interfacing you use.
Make a Cover for Every Notebook!
A fabric composition notebook cover is a quick and practical sewing project that’s perfect for beginners. Choose a fun fabric, customize it with your favorite details, and turn an ordinary composition notebook into something unique.
Whether you’re making one for yourself, your child, a student, or a teacher, this DIY composition notebook cover is a fun project to sew any time of year—but it’s especially useful when getting ready for a new school year.
Happy sewing!
How to Download Rounded Corner Tracing Pattern
To download the COMPOSITION NOTEBOOK ROUNDED CORNER TRACING PATTERN, subscribe to the MindyMakes Email List to receive the password for the Mindy Makes Free Resource Library. No spam! Just updates with more fun sewing projects.
Once inside the library, the pattern will be under section “N” as “Notebook Cover Pattern”
Once you click “submit”, the password will show up on the next page. You will also receive a welcome email with the password in case you forget.
Please allow up to an hour for the welcome email to fly through cyberspace and travel into your inbox. If you still don’t receive the email, make sure to check your junk or spam folders and add my email to your safe list!
Need more help? Be sure to check out this step-by-step guide that shows you exactly how to get the password, enter the library, and download the PDF.
How to Sew a Composition Notebook Cover
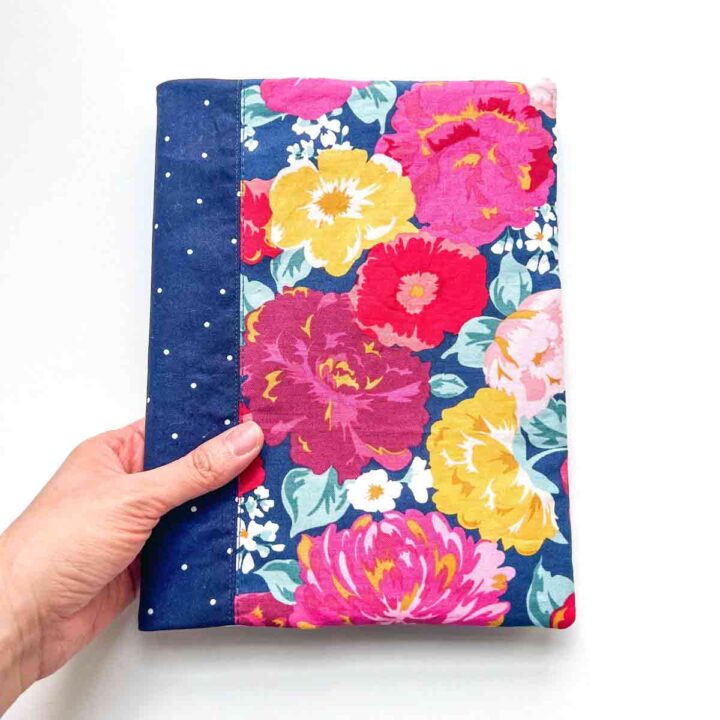
Give your school supplies a fun handmade makeover with this easy DIY composition notebook cover!
Materials
- EXTERIOR FABRIC - ⅓ Yard (0.3M), see note 1 for fabric types.
- BINDING FABRIC - a piece that measures 4.5” x 10.75”(11.43 cm x 27.8 cm). If purchasing fabric, ⅓ Yard (0.3M) - see note 1 for fabric types.
- LINING - a piece that measures 16.25”x 10.75”(41.27 cm x 27.8 cm). If purchasing fabric, ⅓ Yard (0.3M) - see note 1 for fabric types.
- INNER FLAP FABRIC - ⅓ Yard (0.3M) - see note 1 for fabric types.
- FUSIBLE INTERFACING
- MATCHING THREAD
Tools
Instructions
PREPARING FABRIC PIECES
- Cut out all fabric pieces according to pattern dimensions.
- Cut out all interfacing pieces according to pattern dimensions.
- Fuse interfacing to wrong side of fabric, following manufacturer's instructions.
SEWING EXTERIOR OF COVER
- Place BINDING and FRONT right sides together, matching at the left.
- Hold in place with clips (or pins) and sew at ¼ inch (6mm) seam allowance.
- Place BACK over BINDING right sides together, matching at the left edge.
- Hold in place with clips (or pins) and sew together at ¼ inch (6mm) seam.
- Flip EXTERIOR PIECE to wrong side and press open both seam allowances.
- Edge stitch on both sides of the seam, a distance of ⅛”(3mm) away from the seam.
SEWING INNER FLAPS
- Place EXTERIOR PIECE right side up.
- Fold INNER FLAP in half lengthwise and place it over EXTERIOR PIECE, lining up on the left and right edge. Make sure that the fold faces each other.
- Hold in place with clips and baste.
MARKING LINING
- Using clear ruler and fabric chalk, mark ¼ inch (6mm) sew lines on entire wrong side of LINING.
- Print and cut out ROUNDED CORNER TRACING PATTERN.
- Match arrows with ¼”(6mm) sew line at the corners. Use this pattern to trace the rounded corners.
- Repeat on all 4 rectangular corners.
SEWING NOTEBOOK COVER TOGETHER
- Place LINING and EXTERIOR PIECE right sides together.
- Hold in place with clips and sew at ¼ inch (6mm) seam allowance, leaving a ~4 inch (10.16cm) opening on the side. Back stitch on both ends of opening.
- Trim corners so they are rounded (and any excess seam allowance down to ¼ inch (6mm), if necessary).
- Clip curves.
- Turn notebook cover to right side through opening and poke out the corners using a point turner.
- Turn inner flaps so it faces inside of notebook cover.
- Use point turner to poke out the corners and give your cover a good press.
- Tuck the notebook into each of there inner flaps
- Finished!
Notes
NOTE 1: I recommend 100% cotton (especially if you are a beginner).
Other recommended fabrics: denim, canvas, linen, cork, wool, corduroy, and other woven fabrics.
Not recommended fabrics: knits, stretchy fabric, burlap, extra light weight fabrics such as chiffon, tulle, silks.
More Sewing Projects You’ll Love