How to Sew a Patch On (2 Ways)
Stop taking your clothes to the tailor! This simple DIY tutorial will show you how to add an embroidered patch by hand AND with a sewing machine.
This post may contain affiliate links. Please read my disclosure policy for details. As an Amazon Associate, I earn from qualifying purchases.

Recently, a friend asked if I could help sew on some patches to her son’s Boy Scout Uniform.
Since she needed it same day, my friend said she understood if I didn’t have time and she could bring it to the tailor. But honestly, sewing on patches is a very simple task! I told her, “Don’t bring it to the tailor! Bring it over!”
Today, I will be showing you step-by-step how to easily sew a patch onto your clothes. Just in case you also have a friend who needs this service last minute or, perhaps you need it for yourself (or your kids)!
For this tutorial, there are 2 methods for How to Sew a Patch On. (Click on the link to jump to that section).
Materials & Tools
- HOME SEWING MACHINE – if planning to machine sew the patch on.
- EMBROIDERY SCISSORS
- SEWING PINS and/or SEWING CLIPS
- THAT PURPLE THANG – optional, but extremely useful for guiding fabric into machine
- IRON
- HAND SEWING NEEDLES – if planning to hand sew the patch on.
- THIMBLE – super helpful if planning to hand sew.
- MATCHING THREAD
Taking a Look at Your patch

These are the two boy scout patches that needed to be sewn onto the sleeves of the uniform.

When you flip the patch over, you’ll notice that there’s a shiny layer over the entire patch. This means that the patch comes with an iron-on-adhesive.
Most store-bought patches that I’ve seen these days have a shiny backing, making it iron-on. In the case where the back of the patch appears dull or matte, it means that the patch is meant to be sewn-on.
Alternatively, you could also use fabric glue, or double sided iron-on adhesive to apply the patch.
However, sewing a patch on will be much more secure than just ironing it on. Repetitive wearing and washing could cause the patch to come undone. Plus, the existing patches on the uniform were also stitched on, so I decided to follow suit.
Sewing on Patches with a Sewing Machine
First, check the fabric material and care tag on the piece of clothing you’ll be ironing the patch on.

In my case, the scout uniform has an iron symbol with one dot, which means to iron on low temperature. This would be the synthetics/delicate setting on your iron.

Next, place the patch where you want it and iron it on. Be sure to cover the patch with a thin cloth (or ironing paper) so the iron doesn’t directly touch the patch. This helps protect the patch from any dirty residues on the iron. I am using a teflon ironing paper to protect the patch.
NOTE: When ironing, cover the entire patch with the iron (whenever possible), and hold it down with firm pressure for about 30 – 60s. Don’t slide the iron around as you want to fully activate the adhesive by holding the iron in place.

View of patch ironed on to sleeve. Technically, at this point you can be done. However, sewing the patching down will is definitely WAY more secure, and you don’t have to worry about the patch coming off in the wash.

So now, since we will be sewing on the sleeve, take off the removable extension table on your sewing machine reveal the free arm.

Using matching thread, stitch the patch to the sleeve around the border or the patch. I am stitching right on the inside of the satin stitch that borders the patch.

Since this is a rectangular patch, pivot at the corners and continue sewing until you’ve gone around the patch once.
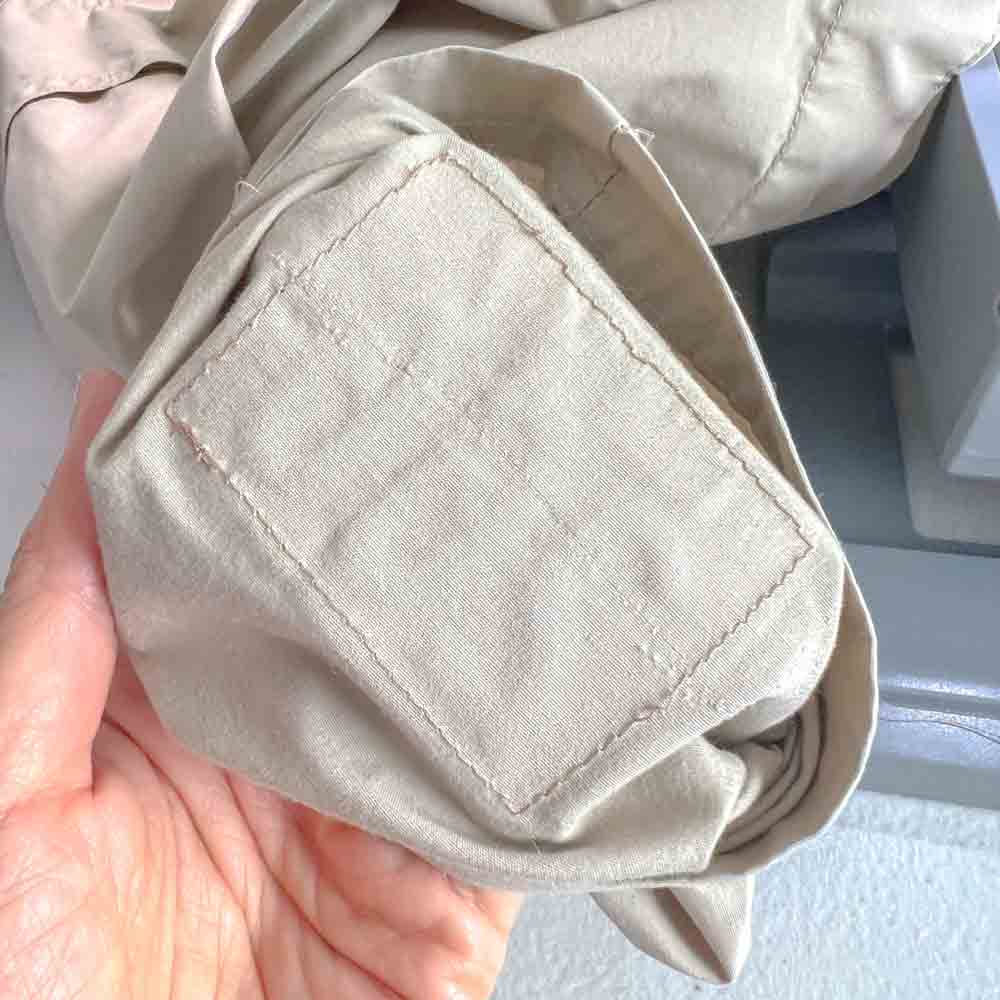
Once you reach the end of the patch, sew a little beyond where you started and back stitch a few times. Photo shows view of patch sewn to the sleeve (from inside of the sleeve).
NOTE: If you think your patch needs extra reinforcement, feel free to sew around the patch another time.

Front view of sewn patch. Finished!

If your patch doesn’t have an iron-on adhesive on the back (and you don’t have any fabric glue or iron-on-adhesive), use pins to hold the patch in place. Then, repeat the same process and sew it on.

Yay! finished!
How to Sew on a Patch by Hand
Don’t have a sewing machine? Or don’t want to take it out and set it up? No worries! The following tutorial will show you step-by-step how to hand stitch a patch by hand.
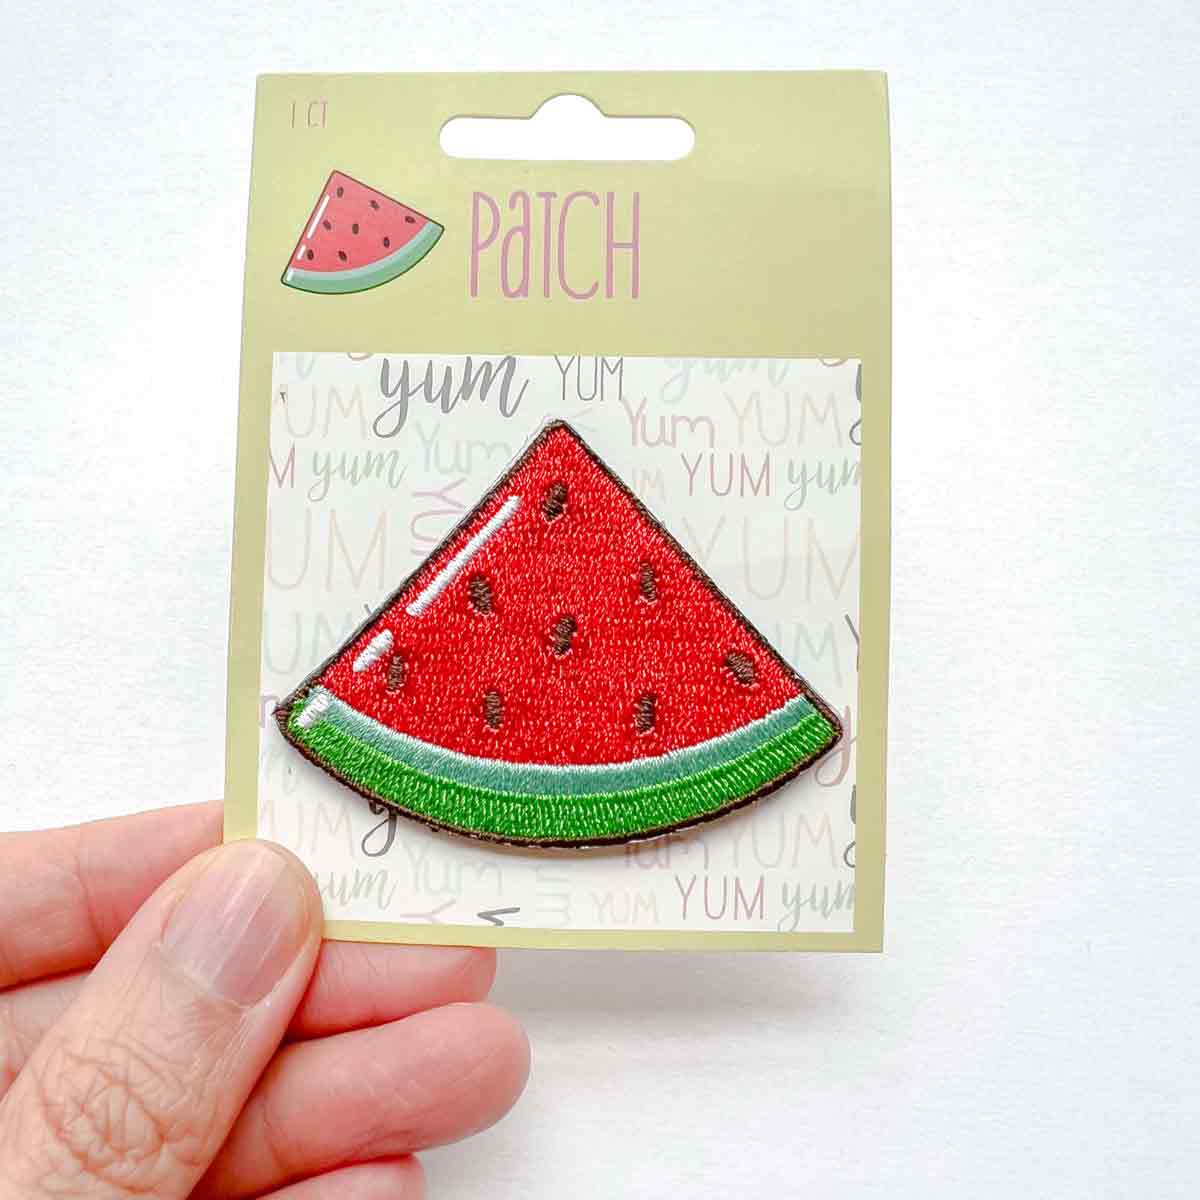
For today’s tutorial, we will be sewing this watermelon patch that I found at the dollar section of Target.
When you flip the patch around, you see that it is an iron-on patch with instructions. However, because stitching the patch down is still more secure, we will not be ironing the patch on today.
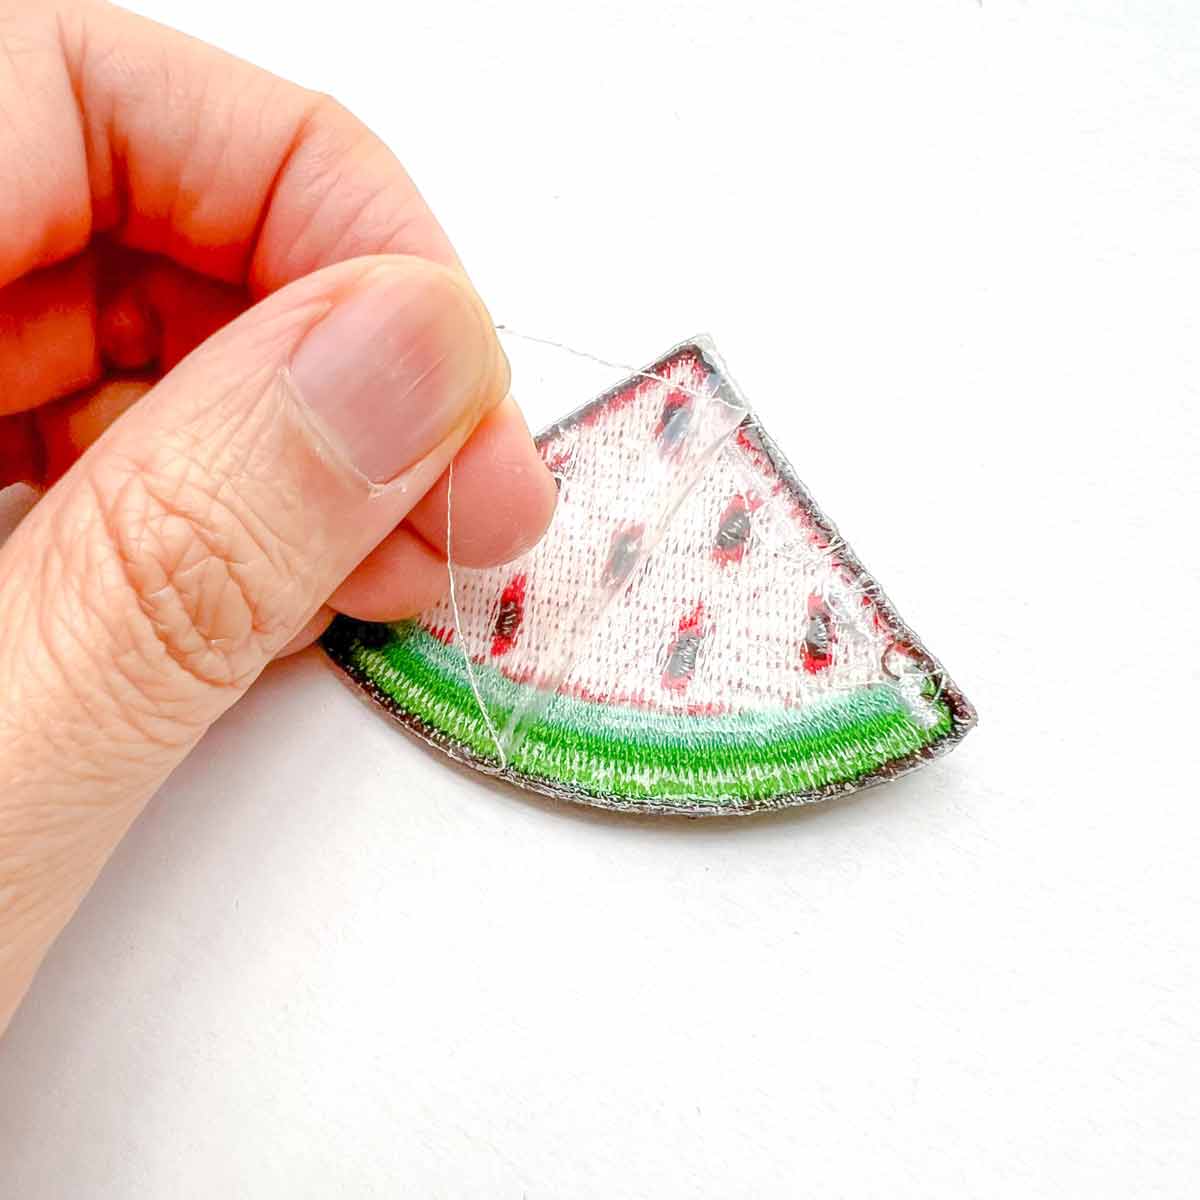
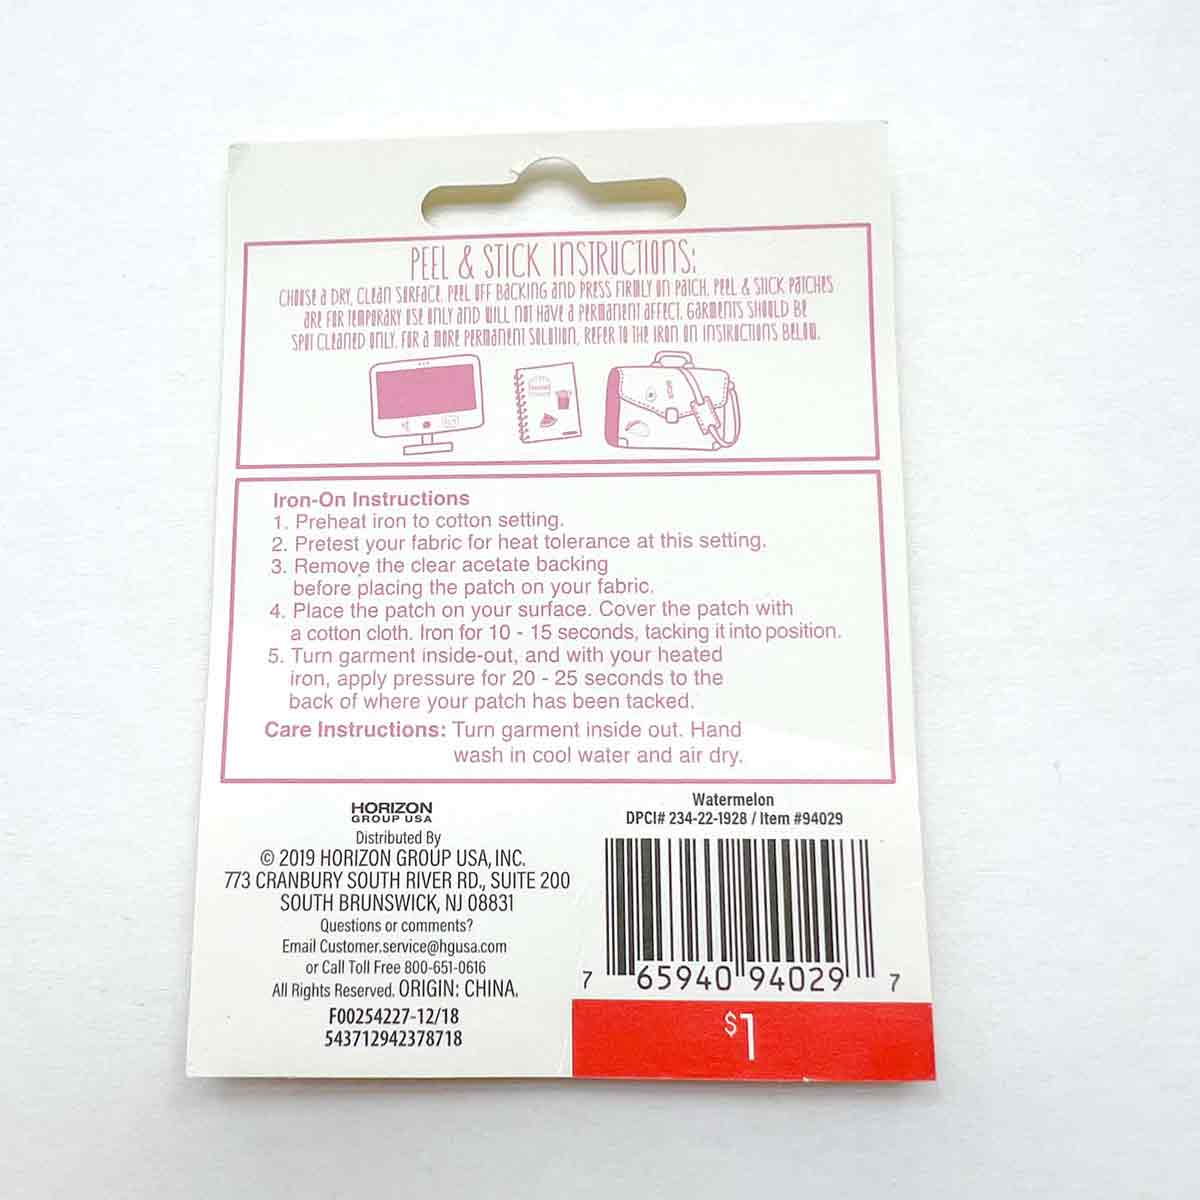
First, as the instructions indicate, we will remove the clear acetate backing on the back of the patch.
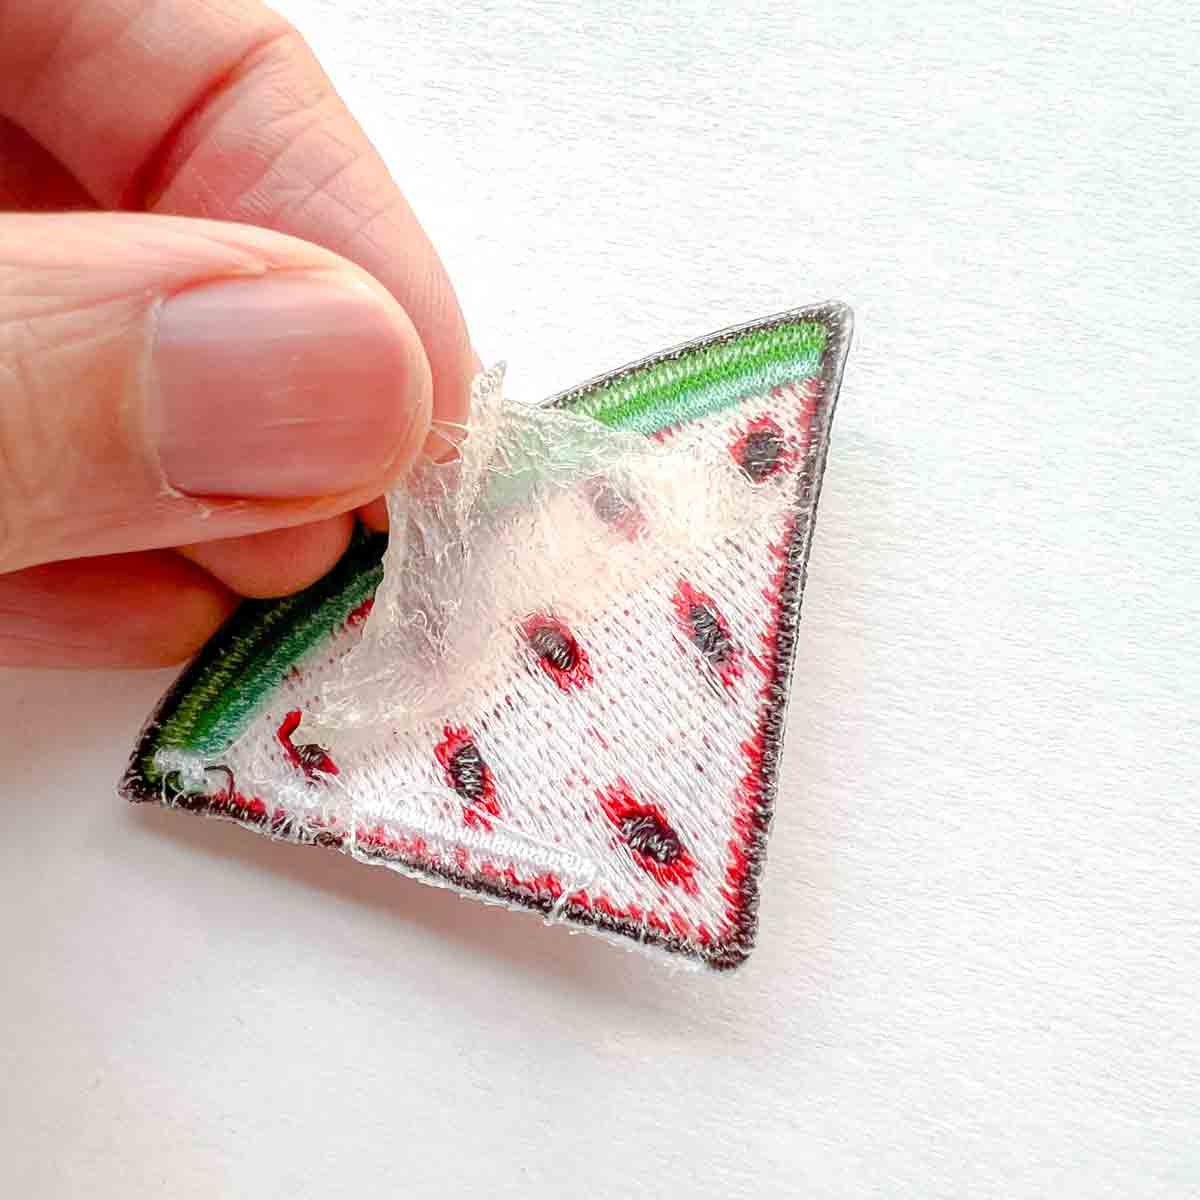
Next, since we are hand stitching, I highly recommend removing the iron-on adhesive layer from the back of the patch. Patches are so hard and thick, we don’t need another layer of resistance as we try to push the needle through!
Additionally, some iron-on adhesive can stick to your needle, causing unnecessary gunk build-up.

Then, pin the patch securely to where you want it on the garment. I chose to put the watermelon on the back of the jeans pocket.
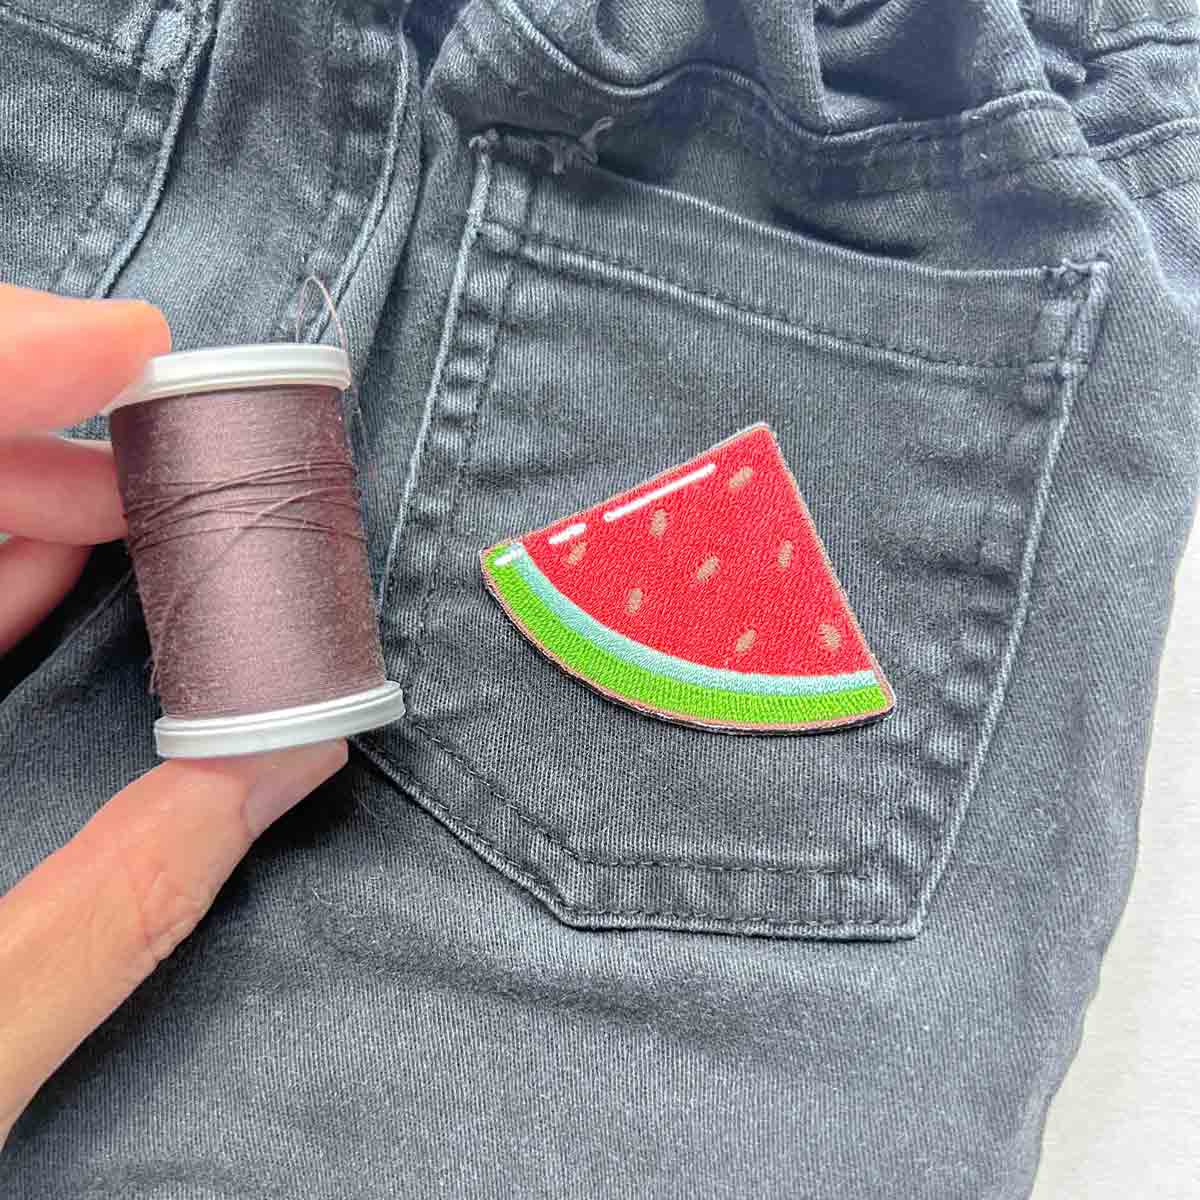
In general, choose a thread that matches the color of the satin stitched border around the patch. However, for tutorial purposes I will be using a contrasting thread for better visualization.
Best Stitches for Patches by Hand
There are many beautiful hand sewing stitches you can use to sew a patch on.
For starters, the WHIP STITCH is a simple and easy stitch that gets the job done.
- With the whip stitch, you always take a stitch from the right side of the garment and patch. This way, you can keep sewing with your patch right side up the entire time.
- This is an advantage (especially for beginners) versus having to flip to the other side of the fabric to see where your next stitch needs to go.
- Therefore, the whip stitch is my first go-to stitch for hand sewing patches!
For another simple stitch that adds a decorative touch, the BLANKET STITCH is also a good choice.
- The blanket stitch creates a thread loop that borders the patch.
- This is especially useful if you want to add a decorative element around your patch.
- Using contrasting thread would enhance the patch and the blanket stitch.
Other stitches that are suitable for hand sewing patches include:
- Running stitch – Same as the straight stitch on a sewing machine, except done by hand.
- Back stitch – Strong and durable. Especially ideal for patches that will go through lots of wear.
In today’s tutorial, I will be showing you specifically how to sew on a patch to a pair of jeans using a whip stitch and a blanket stitch.
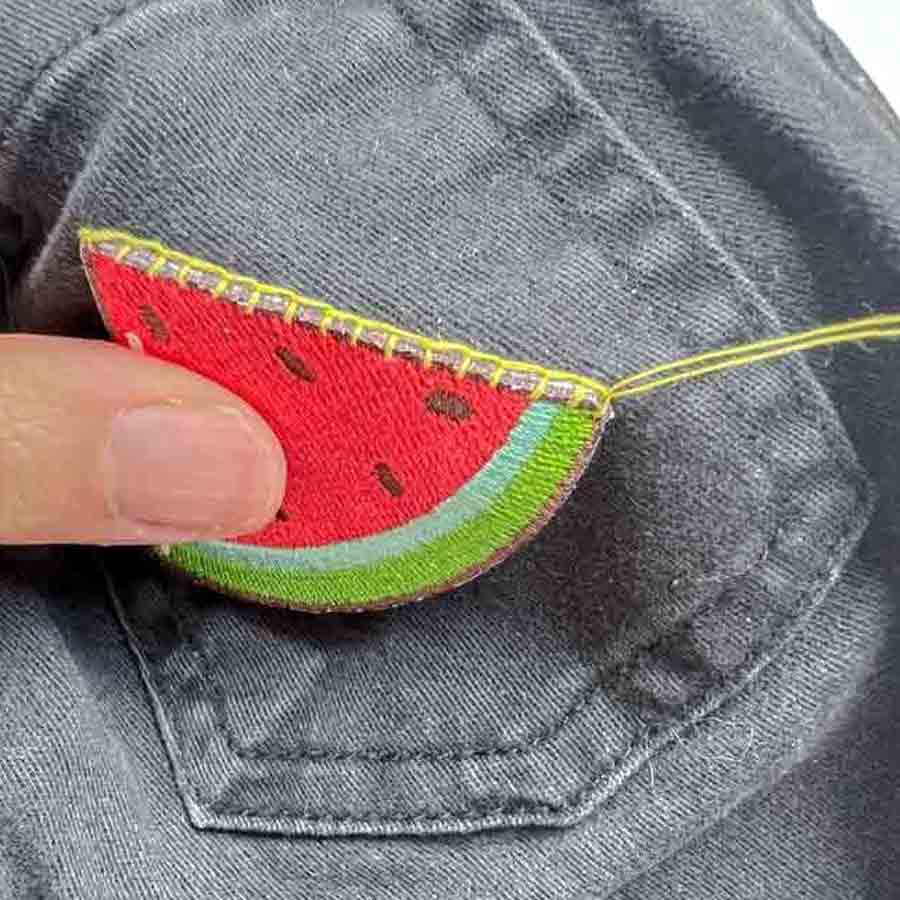
Photo shows the difference between a blanket stitch and a whip stitch.
How to Hand Stitch a Patch – Whip Stitch
First, thread a hand needle and tie a knot. I am using double threaded polyester thread in yellow so it’s easier for you to see.
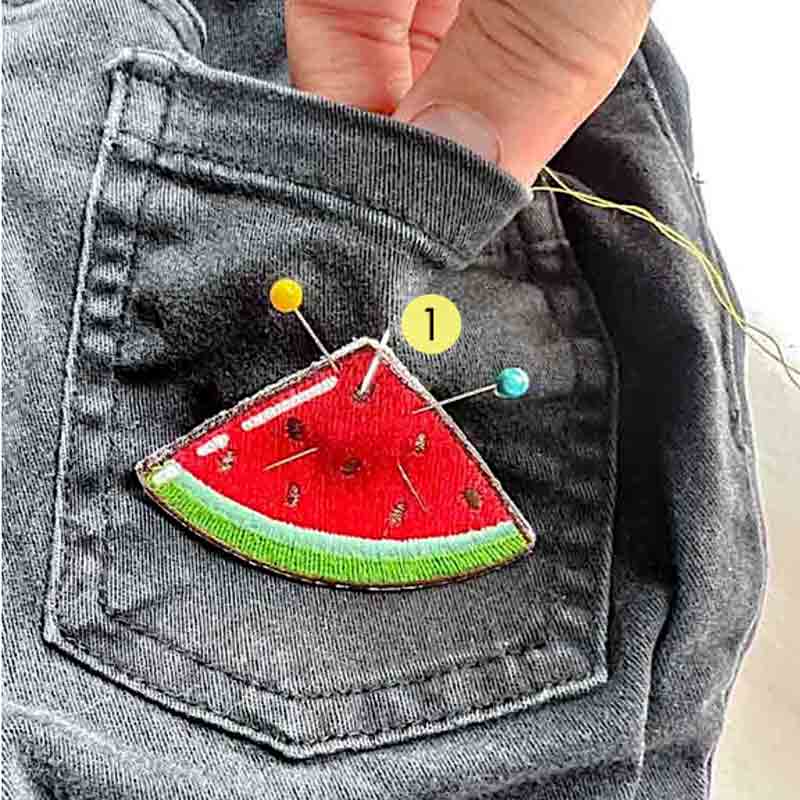
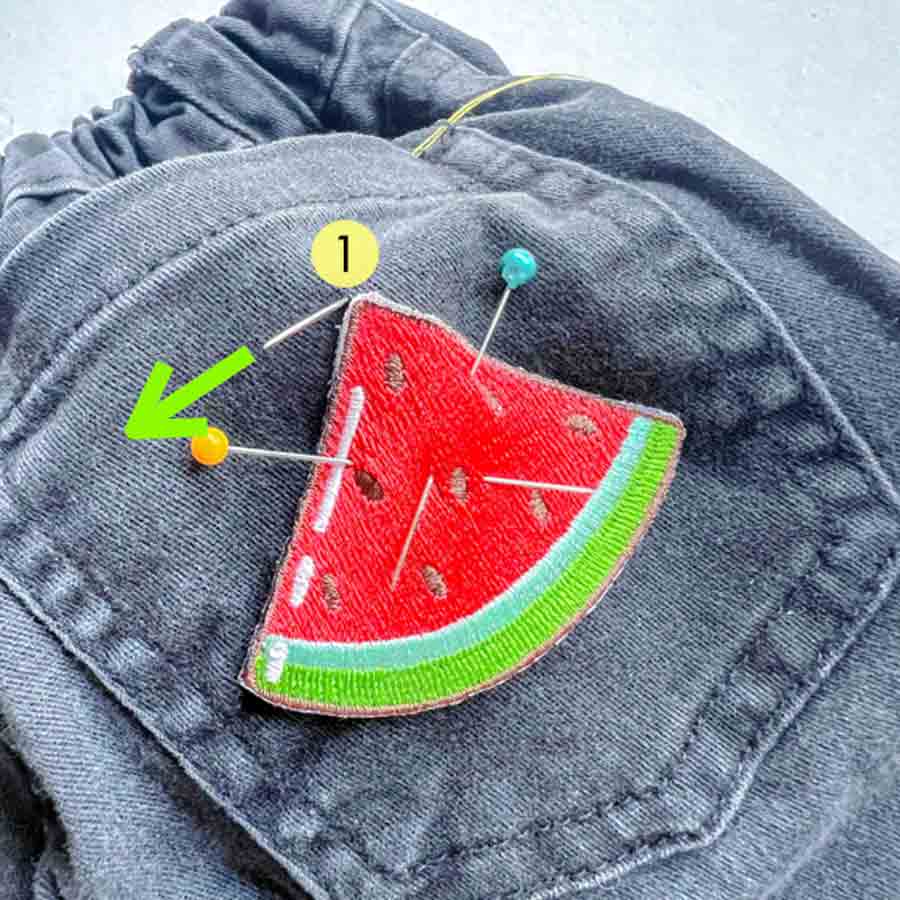
Next, bring the needle from the garment through the patch at the border of the satin stitch (1) and pull through. I started my first stitch from one of the corners. However, if you have a round patch you can start wherever you like.
NOTE: If you are having a hard time pushing the needle through, use a thimble. This will make your life SO MUCH EASIER, especially if your patch is very stiff and thick.

Then, take a stitch a small distance away (~1/8″ or 3mm) through the garment (2) and patch (3) again.
NOTE: You can make the stitch spacing slightly wider if you like (up to 1/4″ or 6mm). However, I wouldn’t go beyond this because then your patch won’t be very securely sewn down.
Remember, the tighter your stitches are, the more secure it is.
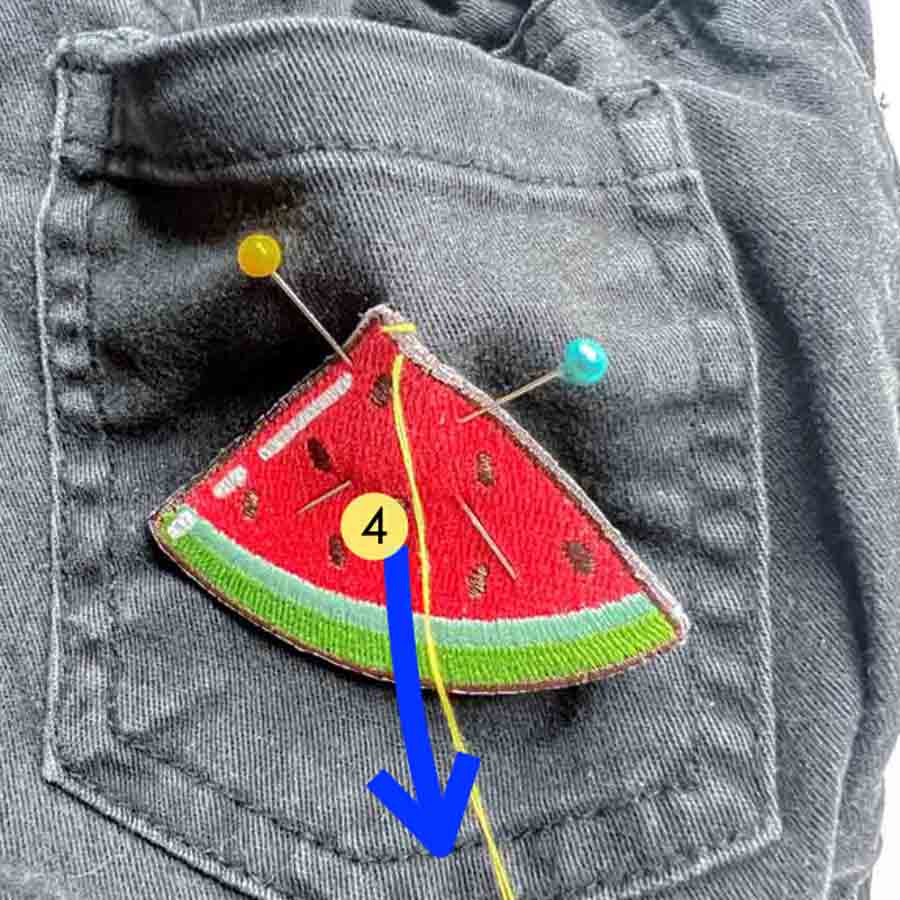
Now pull thread through (4). You have just made your first whip stitch on the patch.
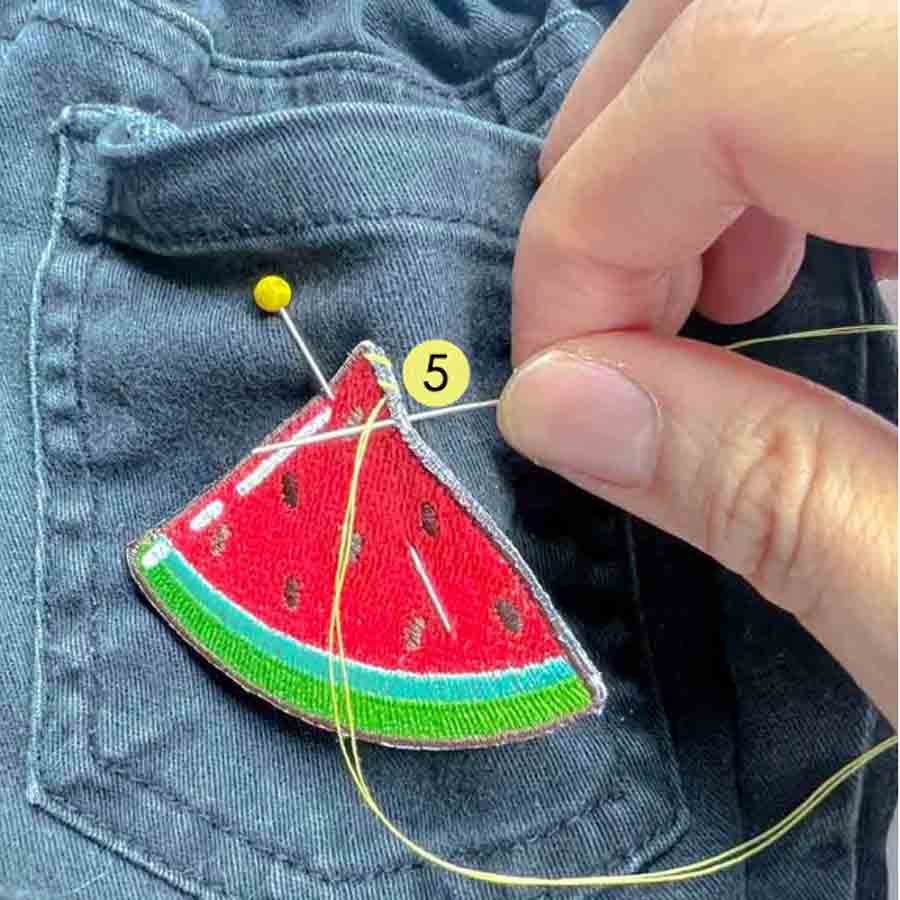
Next, continue this process (5).

Keep going. Make sure to keep the stitch distance the same for a uniform look. Continue until the patch is completely sewn down to the pants pocket. Tie a knot and you are done!
For more information on the whip stitch, check out How To Make a Whip Stitch.
How to Hand Stitch a Patch – Blanket Stitch
Again, thread a needle and tie a knot. I am using double threaded polyester thread in yellow for better visualization.
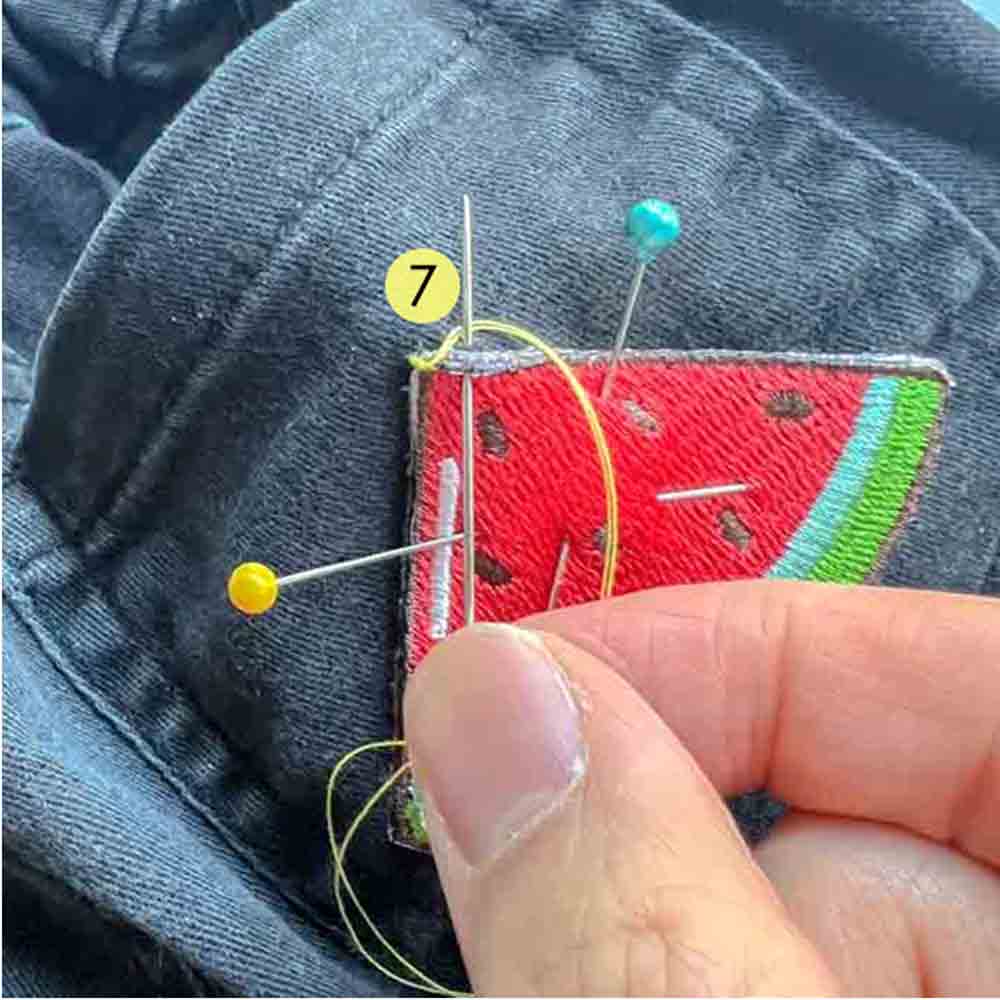
First, bring needle out to right side of garment (1).

Next, take a stitch from right side of patch (2) through garment (3), coming out where your thread came out (1).

Now take your thread and loop it behind the needle (4).

Now pull the thread through (5). You have just created the anchor stitch for the blanket stitch.
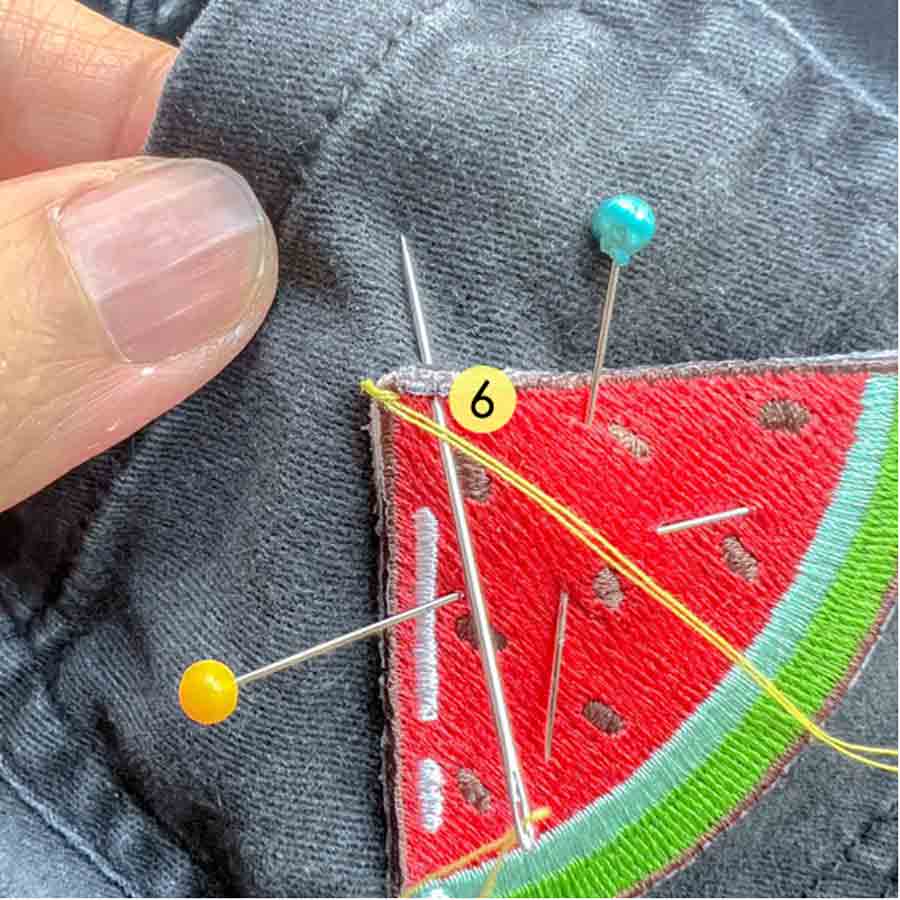
Next, take another stitch from front of patch through garment (6).
Again, pull loop the thread behind the needle (7).
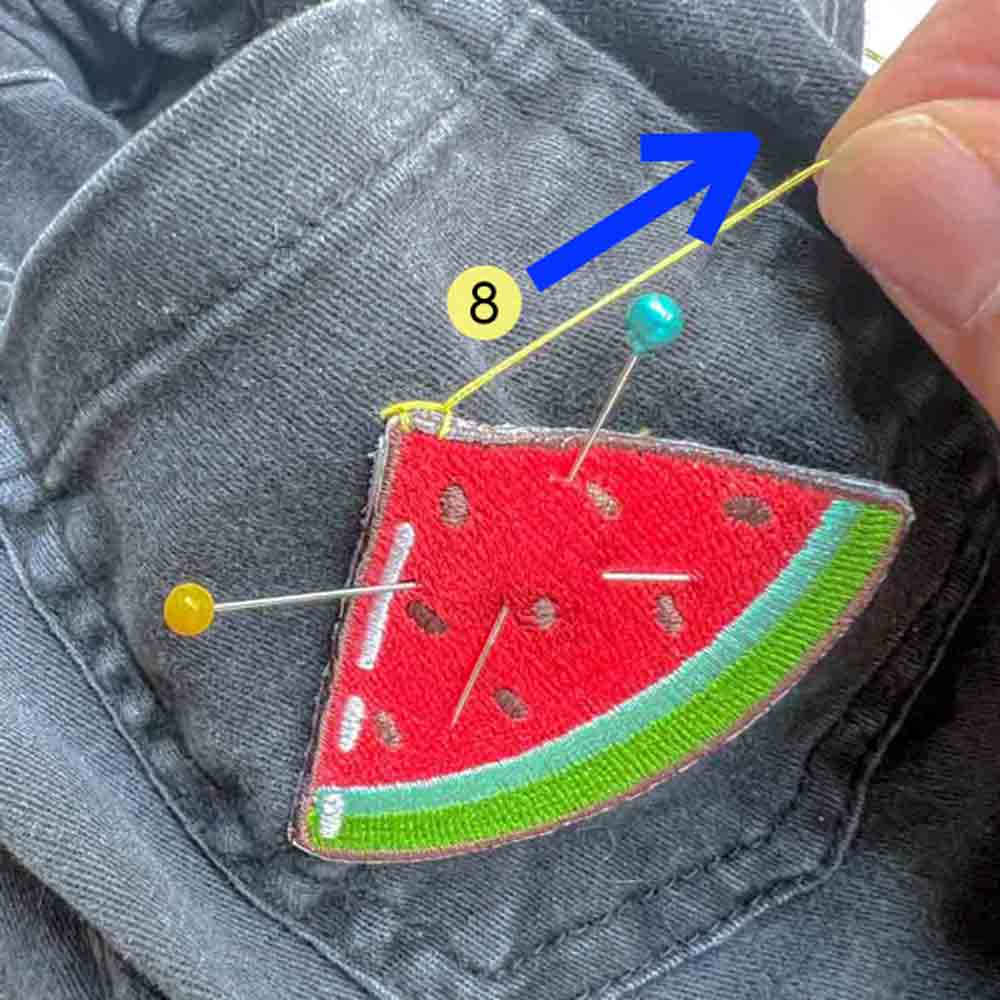
Now pull through (8). You have just made your first blanket stitch!
Continue making blanket stitches, keeping stitch distance the same for a uniform look. Keep going until the patch is completely sewn down to the pants pocket. Tie a knot and you are done!
For more information on the blanket stitch, check out How to Make a Blanket Stitch.
Now that you’ve learned how to sew a patch on using 2 different methods, you are ready to sew some onto your kid’s uniforms or help a friend out. Happy Sewing!