How to Sew a Padded Glasses Case (Free Pattern)
This simple eye glasses case pattern is easy to make out of your favorite fabric. Glasses case has a flap closure and quilted padding to keep your glasses safely protected.
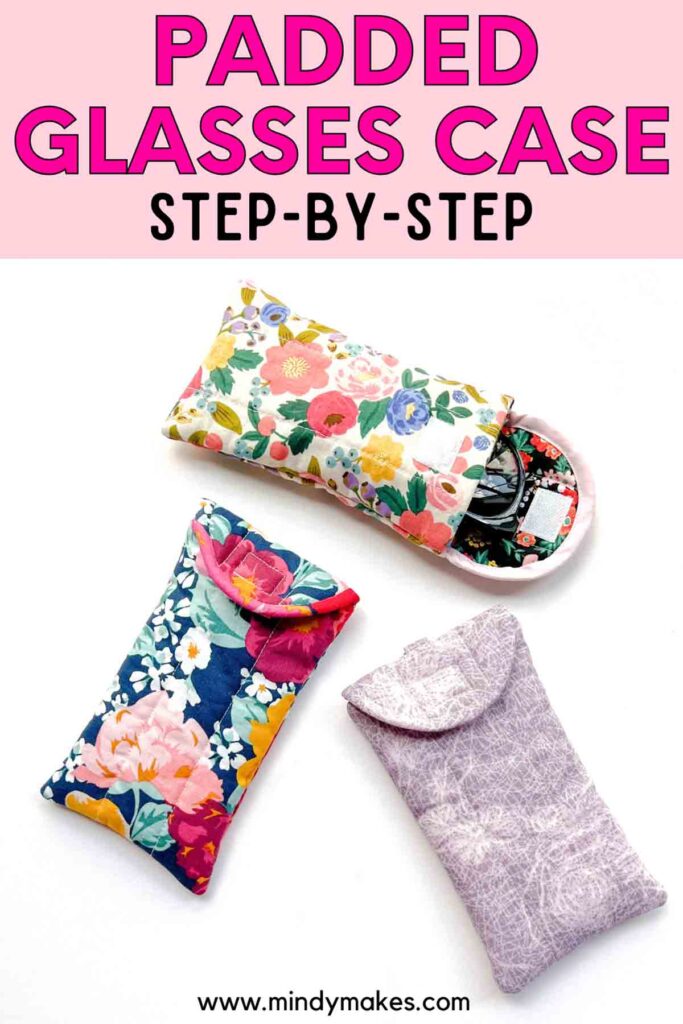
Always looking for a glasses case? This simple fabric eyeglass case is easy to make and perfect for reading glasses, blue light glasses, or your favorite fashionable shades. Make them in your favorite fabric with matching binding to keep your glasses safe stored in the prettiest of pouch!
Sewing Pattern for Eyeglass Case
Today’s easy tutorial will be a simple padded glasses case. The padding is added by quilting your fabric fabric with batting to add extra thickness to your glasses case.
In addition, the eyeglass case pattern has a flap on top with Velcro closure. This way, you don’t have to worry your glasses might accidentally slide out of the pouch inside your bag.
How Big is this Padded Glasses Case?
Please note that dimensions are approximate and your final project may differ slightly from the dimensions listed below.
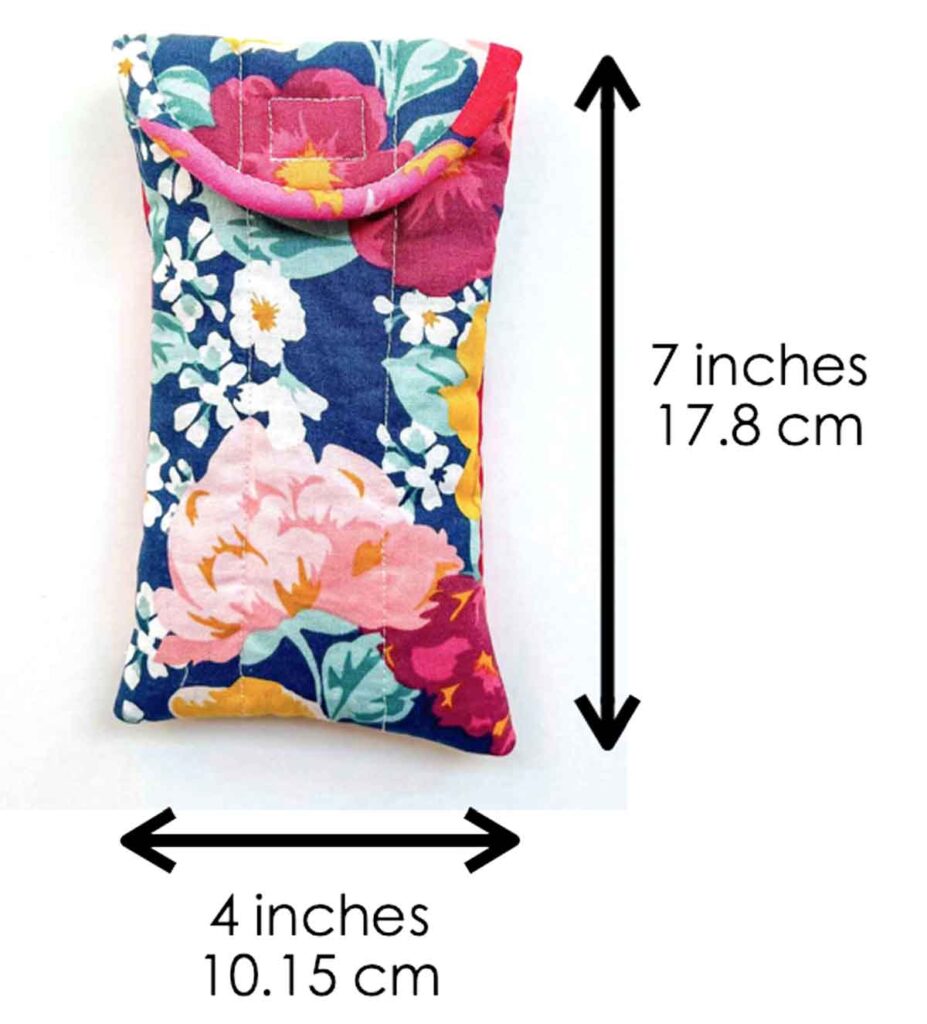
Glasses pouch measures approximately 4 in (10.15 cm) across and 7 in (17.8cm) in length. Width of pouch is approximately 0.75” (1.9cm).
What Do I need for this Easy Sewing Project?
Materials
- EXTERIOR FABRIC (I recommend cotton) – 1/4 yard.
- LINING FABRIC (I recommend cotton) – 1/4 yard
- EXTRA LOFT BATTING
- 3/4” (18mm) WIDE BIAS TAPE – store bought or make your own!
- 3/4” SEW ON VELCRO or PLASTIC SNAPS
- BASTING ADHESIVE
- 1/2” D-RING
Tools
- HOME SEWING MACHINE
- FABRIC SCISSORS – these Ginghers are my favorite.
- WALKING FOOT – helps holds multiple fabric layers together and prevents fabric from shifting as you quilt so you won’t get unsightly puckering and misalignment.
- SEWING PINS or SEWING CLIPS
- CLEAR RULER – I have the Dritz See Through Sewing Ruler 2 x 18 inch
- FABRIC CHALK – I really like the Clover Chaco Chalk Liner for marking. It’s thin thin, marks well, and easy to use!
- POINT TURNER – optional, but useful to push out beautiful corners
- MATCHING THREAD
- HAND SEWING NEEDLES
- IRON – I love my Rowenta Iron with a retractable cord for easy storage
Sewing Pattern for Eyeglass Case
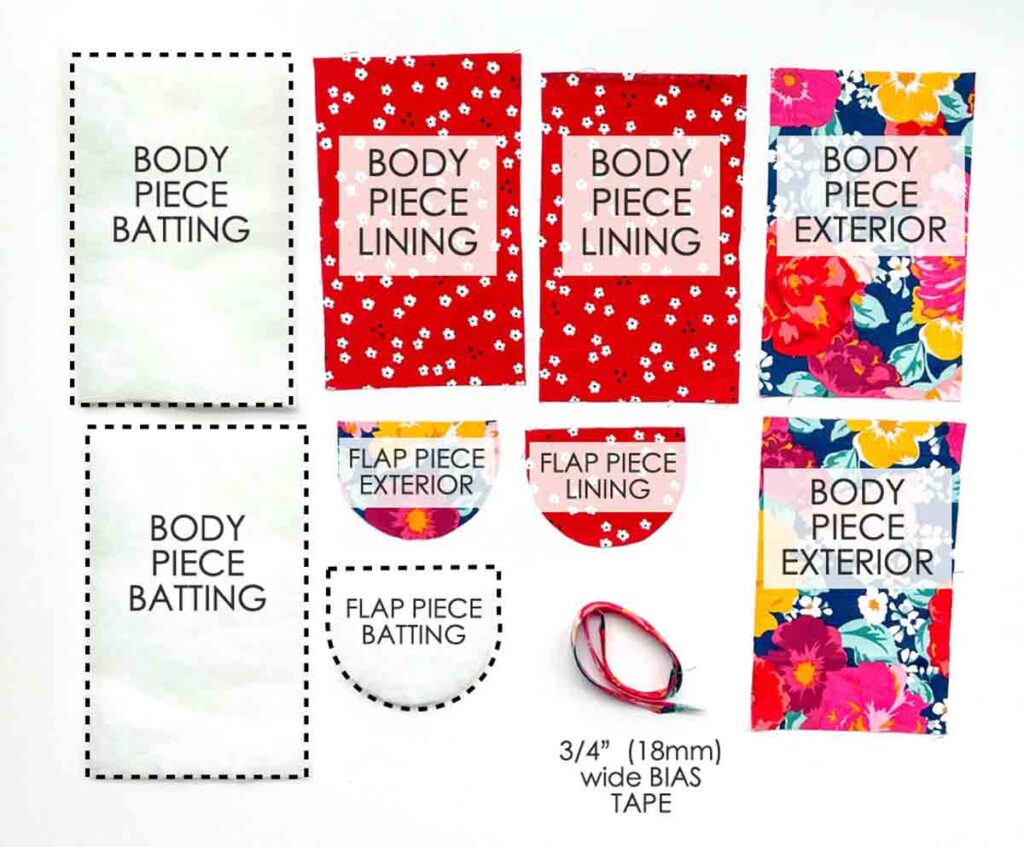
Cut out the following Pattern Pieces:
- BODY PIECE EXTERIOR (X2)
- BODY PIECE LINING (X2)
- BODY PIECE BATTING (X2) – Doesn’t have to be exact, just make sure to cut 2 pieces slightly larger than the pattern. We will trim them down later.
- FLAP PIECE EXTERIOR (X2)
- FLAP PIECE LINING (X1)
- FLAP PIECE BATTING (X1)
How to Sew Eyeglass Case
Prepping Fabric Pieces
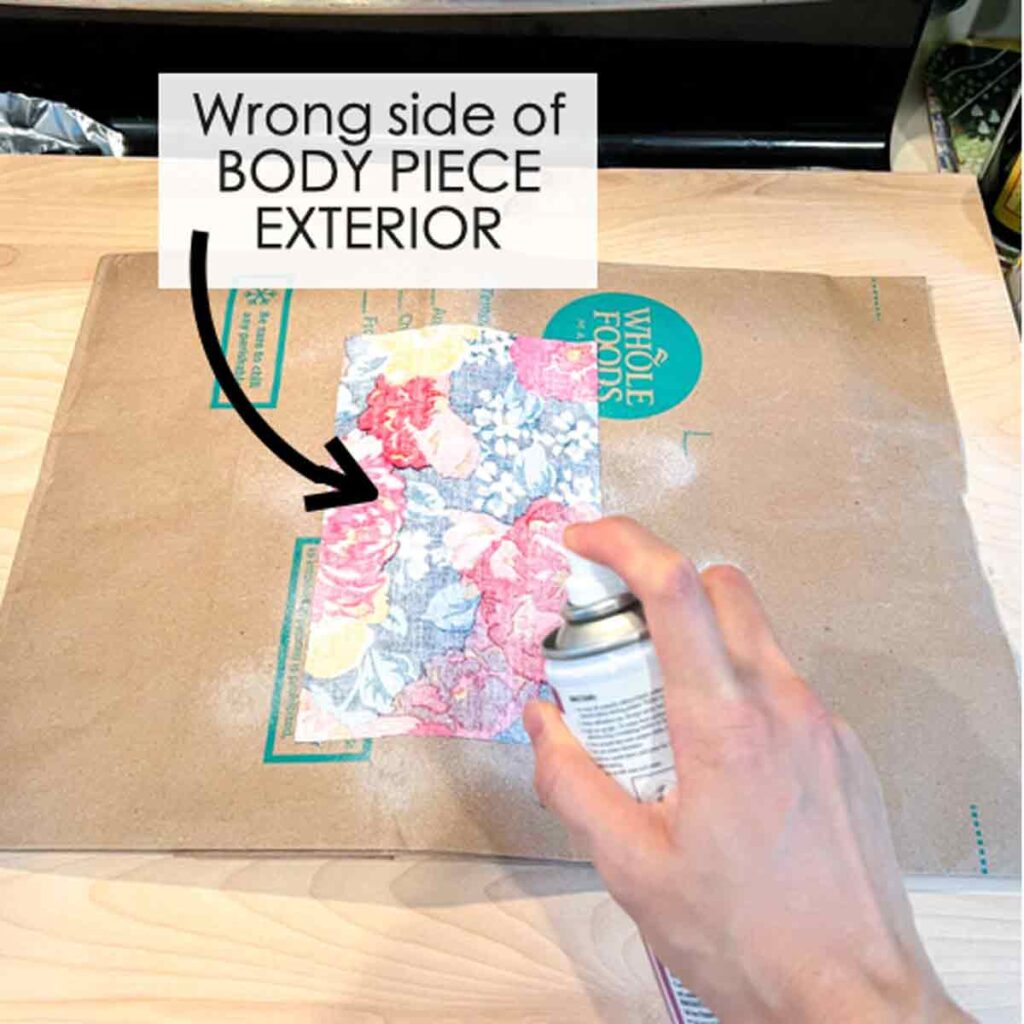
First, spray wrong side of EXTERIOR BODY PIECE with basting adhesive.
Second, stick it onto the batting piece. See how the batting piece is slightly larger than the fabric.
NOTE: I recommend spraying the basting adhesive over something disposable (i.e. paper grocery bag, disposable tablecloth, etc), under a well ventilated area. I’m spraying under my kitchen vented hood.

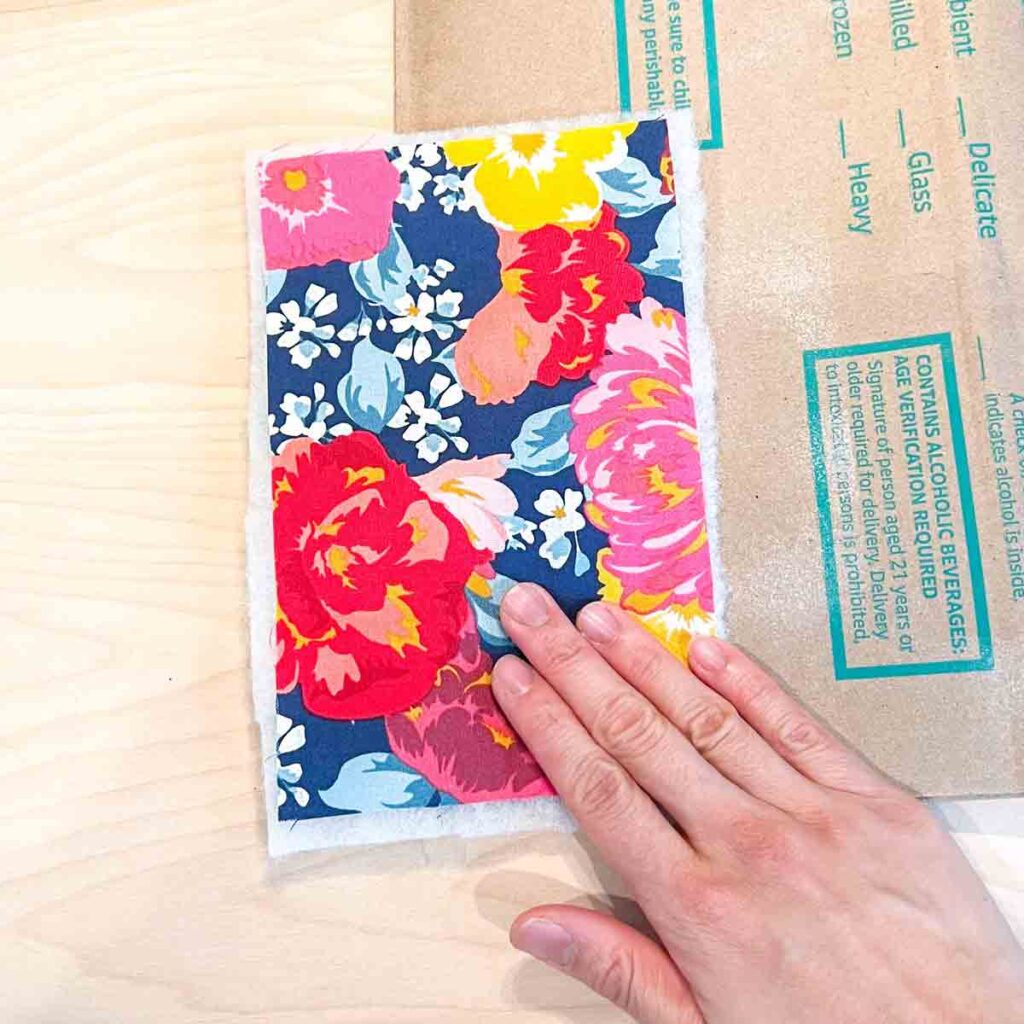
Next, spray wrong side of FLAP PIECE EXTERIOR.
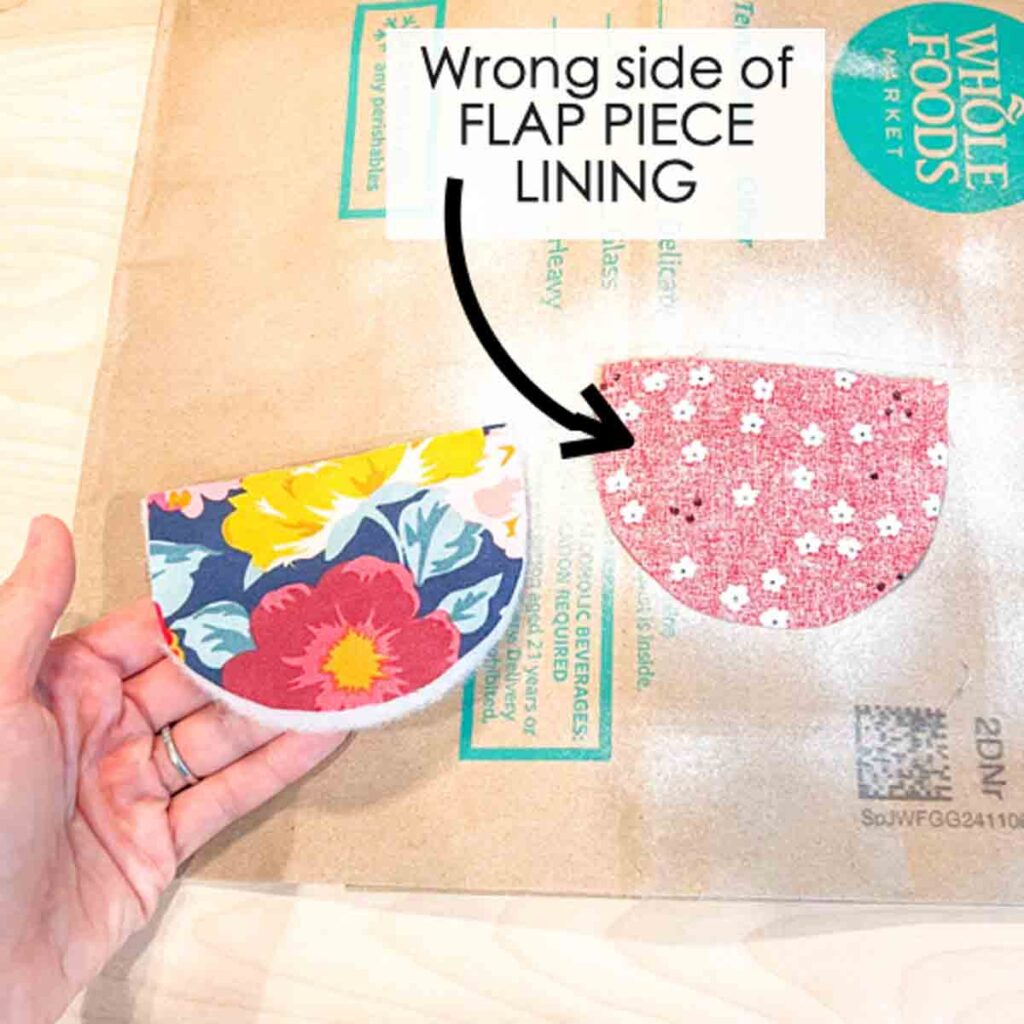
Then stick it onto the batting and spray on wrong side of FLAP PIECE LINING.
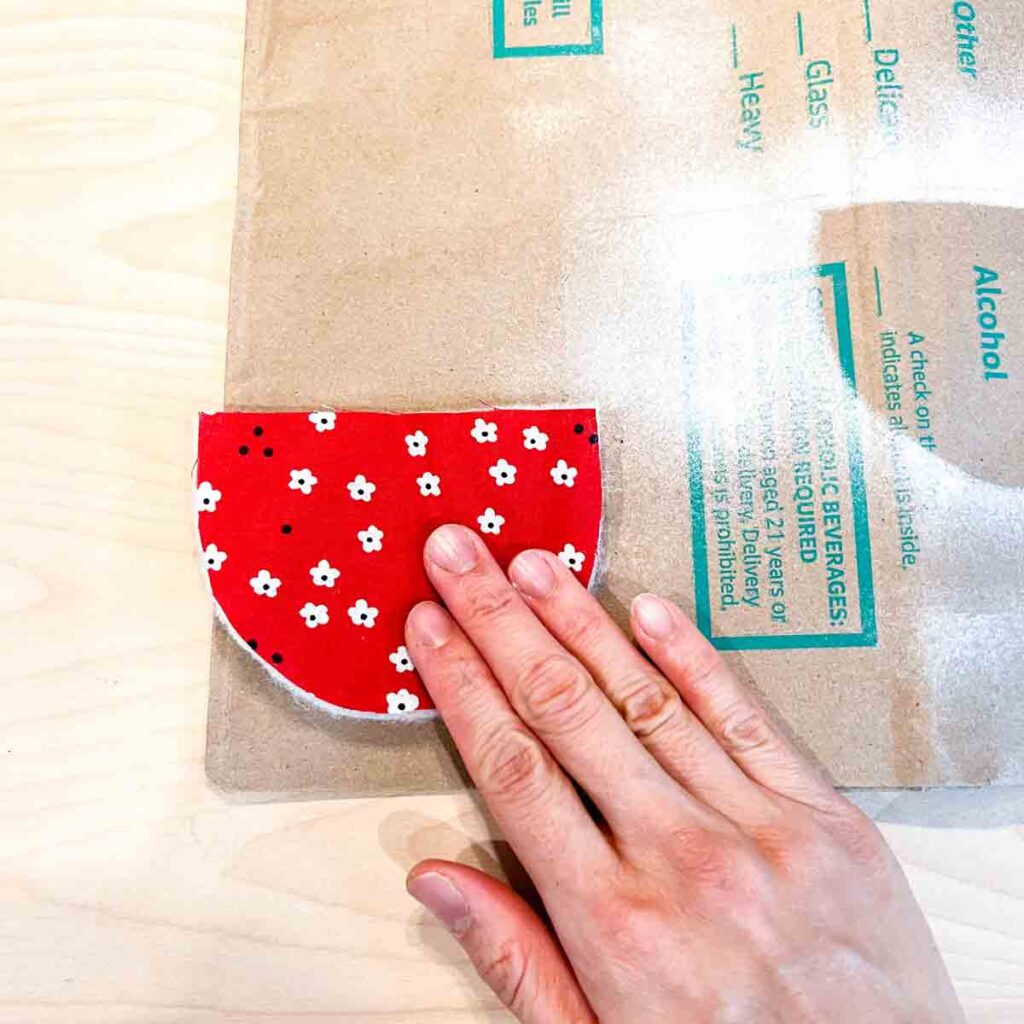
Next, stick LINING FLAP PIECE to other side of batting.

Now, your FLAP PIECE BATTING will have two pieces of fabric stuck on, one on the front and one on the back.

Finally, trim excess batting from BODY PIECE EXTERIOR. Repeat on other piece.
Sewing Quilt Lines on Glasses Case

First, flip BODY PIECE EXTERIOR to wrong side and mark a line 1.75 in (4.44cm) from both edge. This marks the stitching line for quilting.
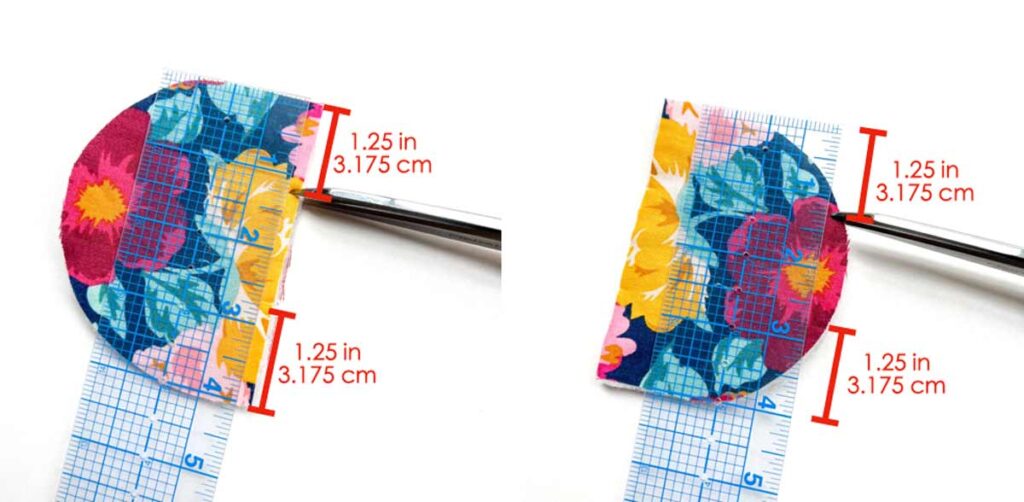
Next, On FLAP PIECE, mark 1.25 in (3.175cm) from both edges by making a small notch with scissors. Do this at the top of the FLAP (left photo) and at the bottom (right photo).

Then, connect the notches by marking with fabric chalk (yellow lines). This will be your quilting stitch lines.

Next, use a walking foot to quilt the batting to the fabric following the stitch lines. Do this for the BODY PIECES and FLAP PIECE.
Your fabric pieces are now quilted!
How to Bias Bind the Flap
Check out the video tutorial below to see how to do the bias binding. Then, follow along the photo tutorial to do it step-by-step.

First, unfold right side of bias tape.
Second, pin bias tape to FLAP PIECE (exterior fabric facing up), right sides together. Matching at the edges.
Then, sew bias tape to FLAP PIECE (yellow line) along told line of bias tape (approx. ⅜ in or 9.5mm).

Next, trim off excess bias tape along top of the FLAP PIECE.

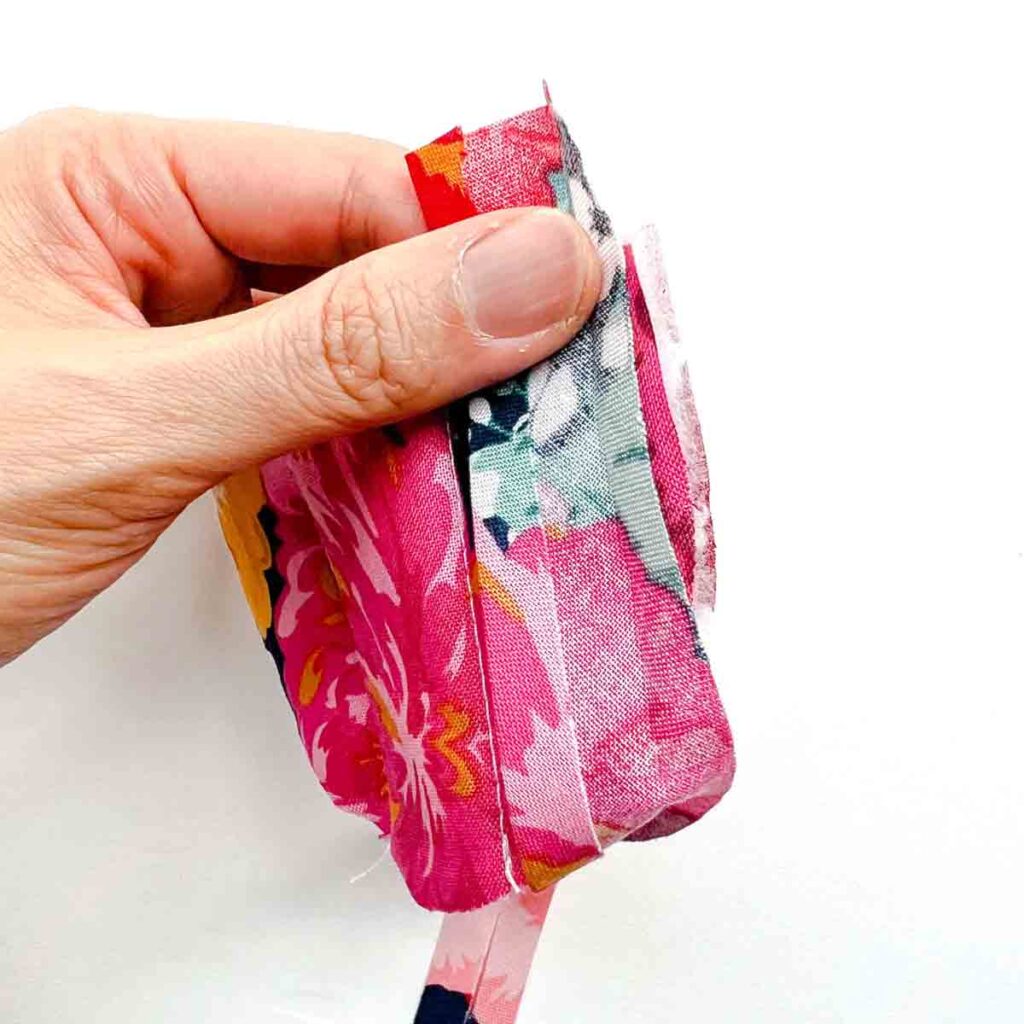
Now your flap piece will look something like the photo (front and back view). In the next step, we are going to fold the bias binding from the front to the back so that it covers the stitch line.
Now continue by folding bias binding over seam allowance to the back (lining side) so it covers the stitch line.
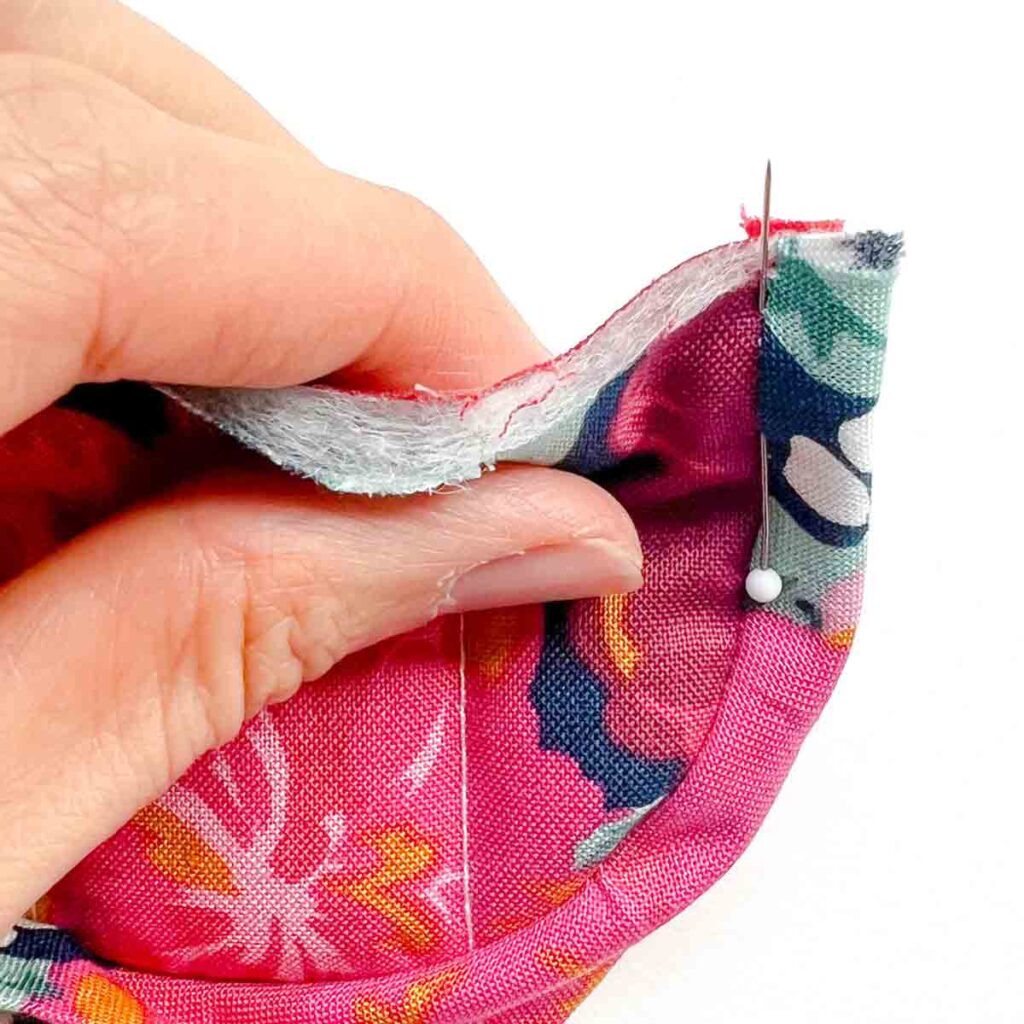
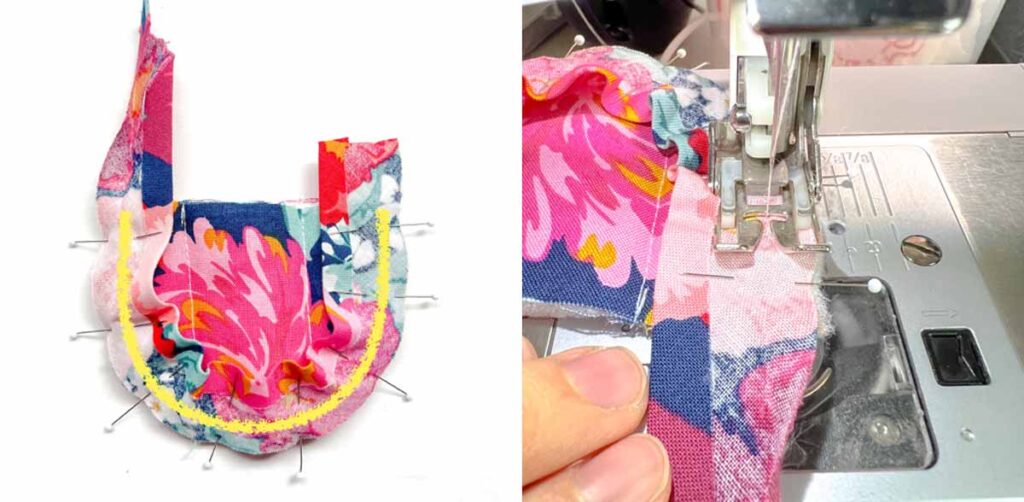
Next, pin bias binding in place (from the front side).

Another view (from the top) of bias binding wrapped over seam allowance and pinned in place.

Repeat until bias binding covers entire curve of FLAP PIECE.
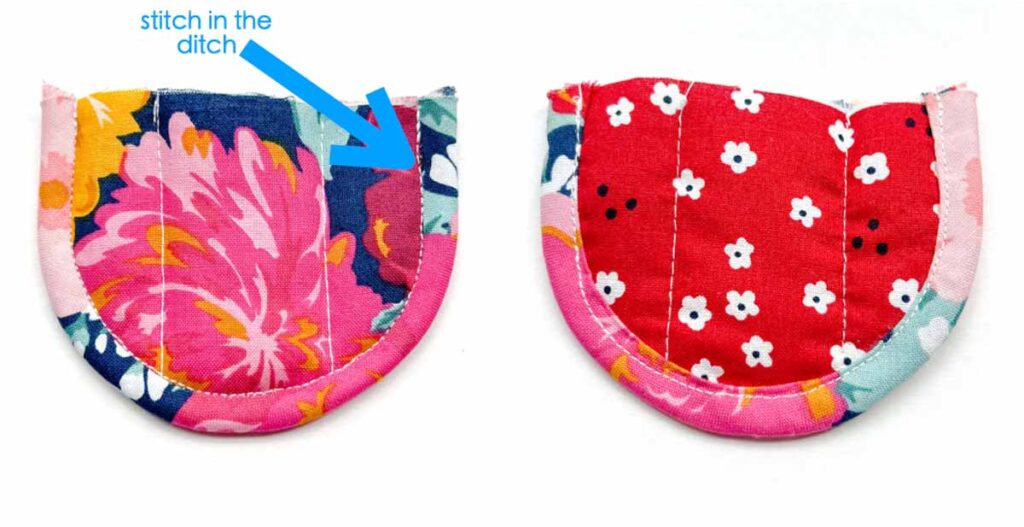
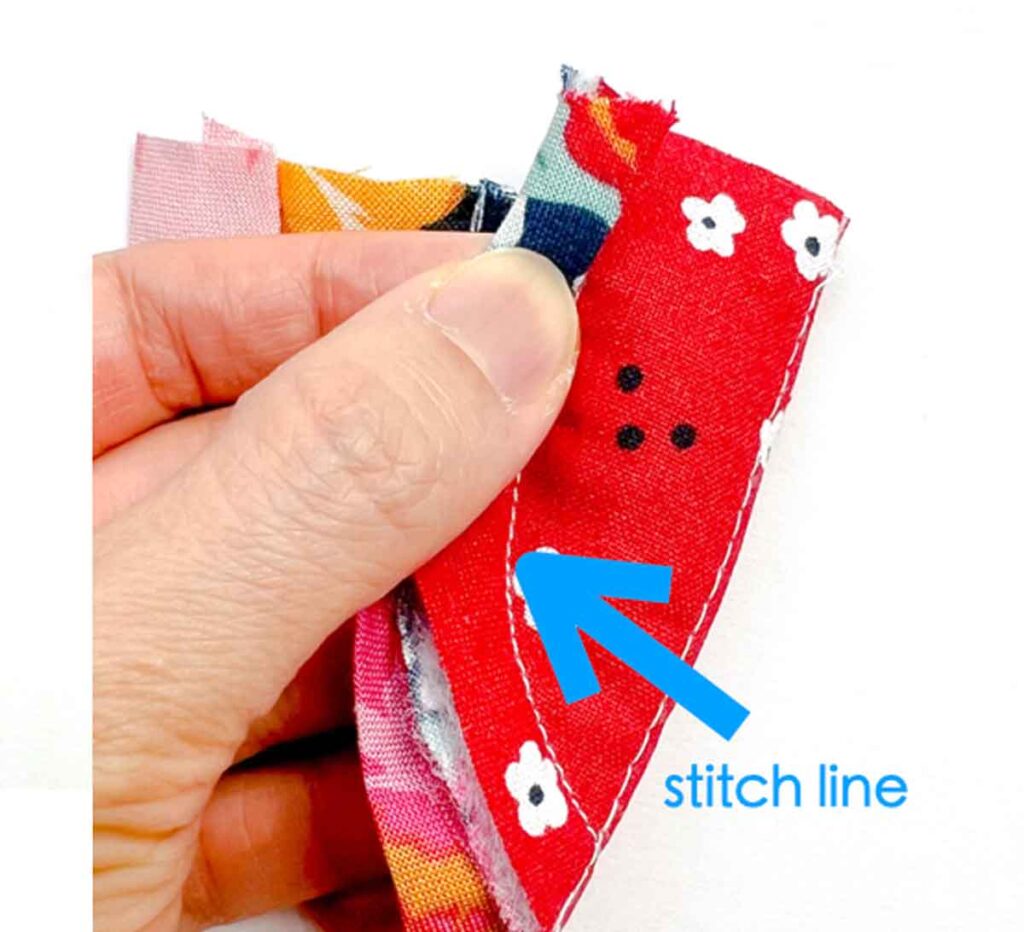
Stitch in the ditch and you are done! Don’t forget to back stitch at the start and end of your stitch.
Sewing Glasses Case Together
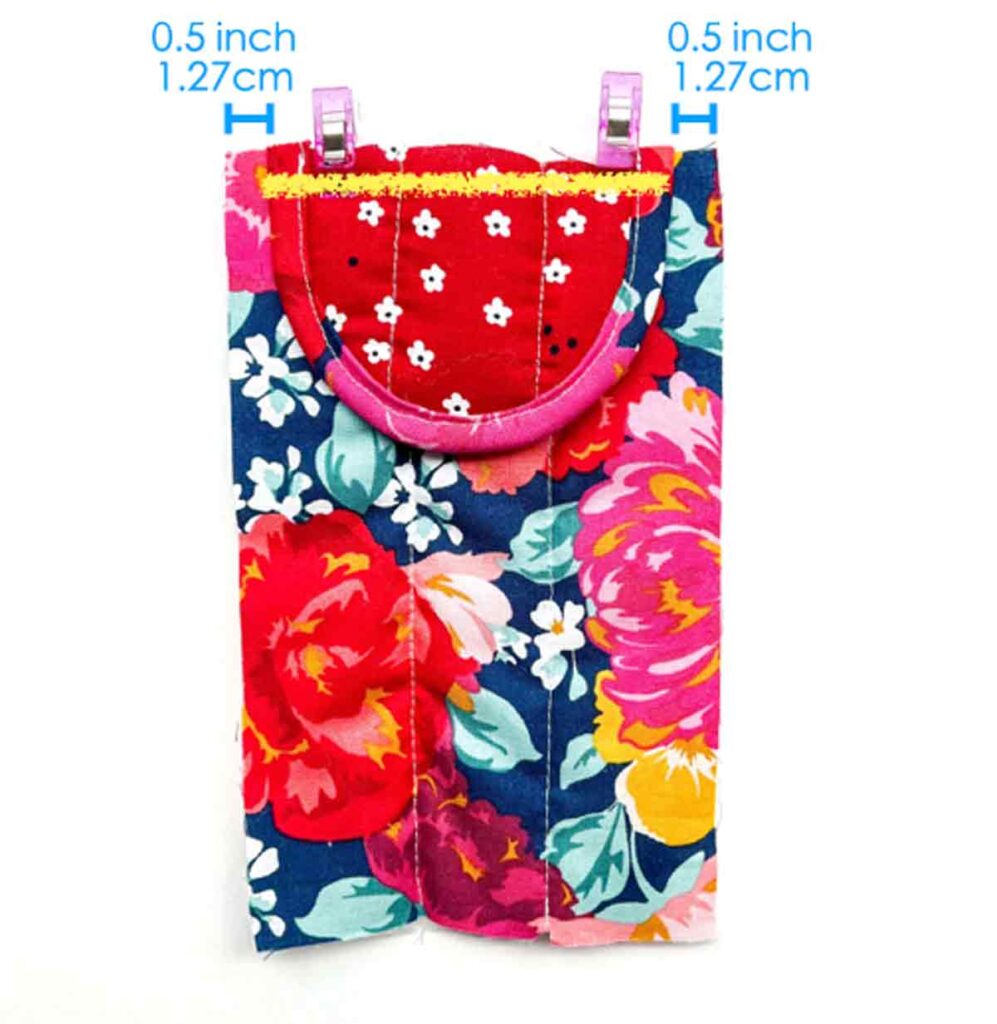
Place FLAP PIECE and BODY PIECE – EXTERIOR right sides together, 1/2” (1.27cm) from edge. Hold in place with pins or clips and machine baste together.

Place BODY PIECE – LINING over, right sides together.

Hold in place with pins/clips and sew at 1/2” (1.27cm) seam allowance (yellow line).

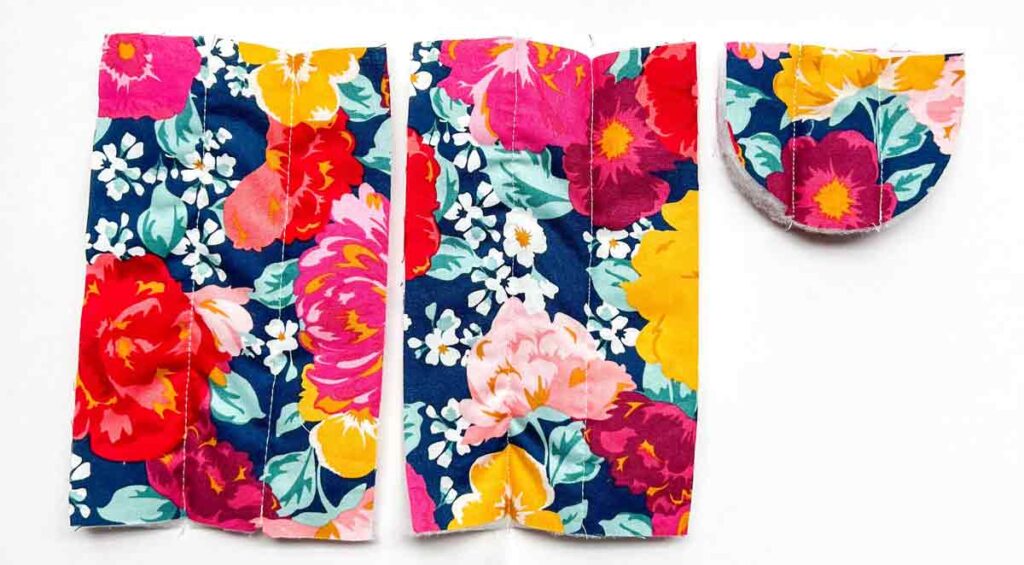
Repeat on other side. You will end up with 2 fabric pieces like the photo. The piece with the flap will be called “BACK PIECE” and the one without the flap “FRONT PIECE”.

Next, sew Velcro (loop end) onto exterior fabric of FRONT PIECE, ⅝ inch (1.58 cm) below seam line, and centered, approximately 2” (5cm) from the sides.

Place FRONT PIECE and BACK PIECE right sides together, lining with lining and exterior fabric to itself.
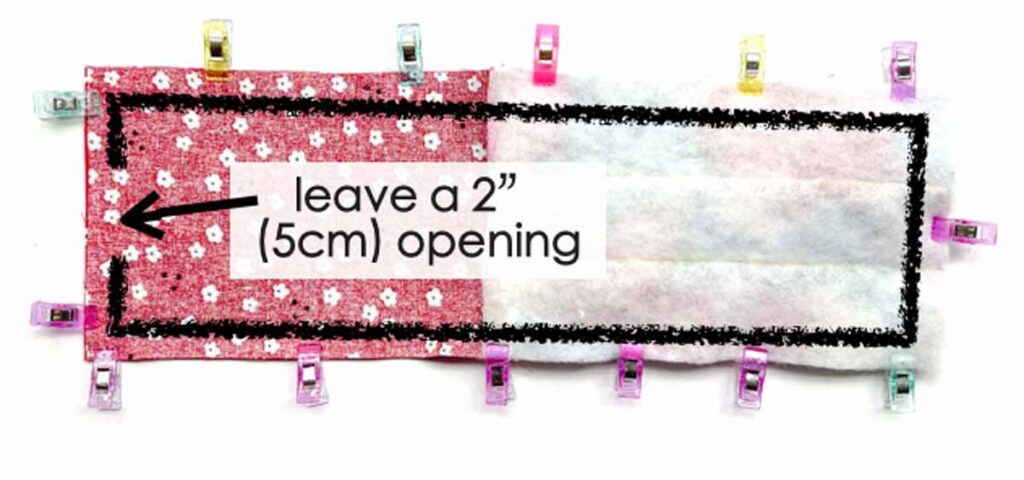
Hold in place with pins/clips. Sew together at 1/2” (1.27cm) seam allowance, with ~2” (5cm) opening at the bottom of lining. Back stitch at both ends of opening.
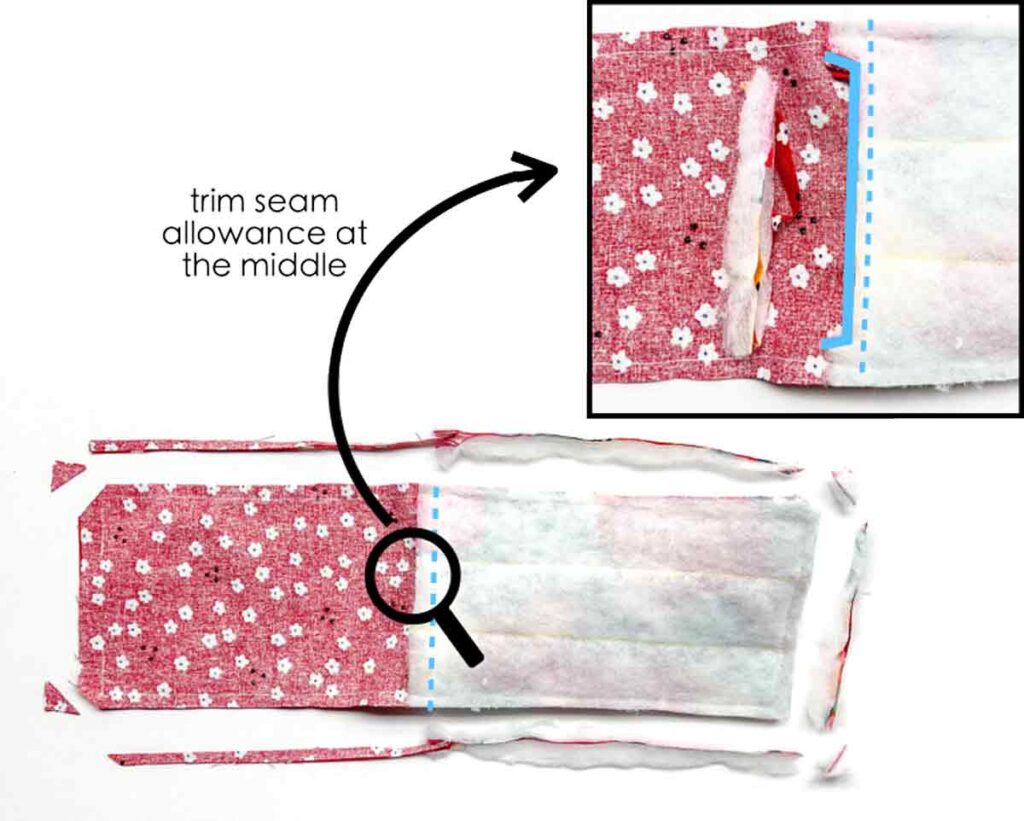
Clip corners and trim seam allowance down to 1/4”(6mm).
Also trim seam allowance at the middle (where lining is sewn to exterior fabric) by cutting a ] shape. This eliminates bulkiness at the top of glasses pouch. Repeat on other side of bag.

Turn glasses pouch to right side through opening on lining.

Use a point turner to push out the corners.
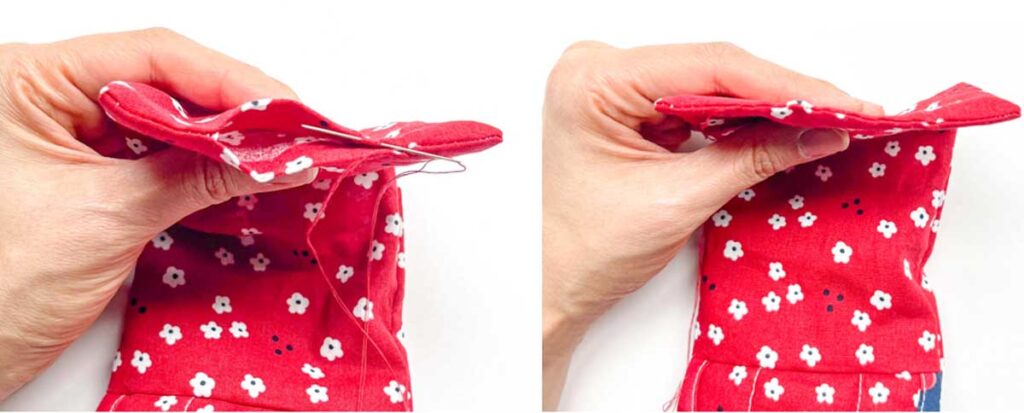
Close opening with invisible ladder stitch.

Push lining into pouch. Almost done!

Sew Velcro (hook side) onto lining side of FLAP, approximately 1/2” (1.27cm) from top, and centered.

Your fabric glasses case is now finished!
Free Glasses Case Sewing Pattern
To get a copy of the FREE Puffy Glasses Case PDF Pattern, subscribe to the MindyMakes Email List to receive the password for the Mindy Makes Free Resource Library. The Glasses Case Pattern is listed under section ‘G’ of the library as “Glasses Case Pattern”.
Once you click “submit”, the password will show up on the next page. You will also receive a welcome email with the password in case you forget.
Please allow up to an hour for the welcome email to fly through cyberspace and travel into your inbox. If you still don’t receive the email, make sure to check your junk or spam folders and add my email to your safe list!
Need more help? Be sure to check out this step-by-step guide that shows you exactly how to get the password, enter the library, and download the PDF.
Lanyard glasses case
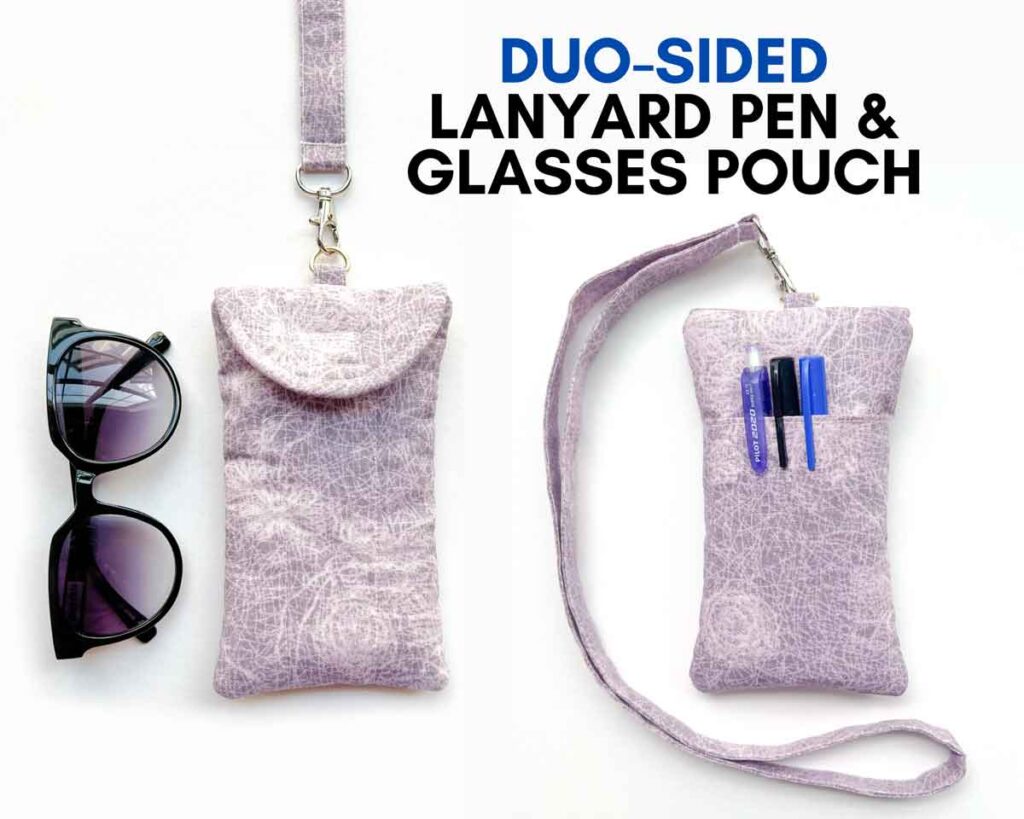
Want to add a lanyard hook to the glasses case so you can wear it everywhere with you? This is extremely helpful if you are like me and always seem to misplace…uh…everything!
Check out the Duo Sided Lanyard Pen and Glasses Pouch Sewing pattern in My Shop. It comes with ad-free PDF Glasses Case Sewing Tutorial AND Lanyard Sewing Pattern & Tutorial. Print a copy to keep next to you for easy reference as you sew.
How to Sew a Glasses Case

Learn to make a simple padded eyeglasses case to keep your glasses safe and sound.
Materials
- EXTERIOR FABRIC - 1/4 Yard
- LINING FABRIC - 1/4 Yard
- EXTRA LOFT BATTING - 1/4 Yard
- 3/4" (18mm) WIDE BIAS TAPE - Make Your Own!
- 3/4" SEW ON VELCRO
- BASTING ADHESIVE
Tools
Instructions
- Download, print, and cut out paper pattern pieces (available in the MindyMakes Library).
- Cut out fabric and batting according to paper pattern pieces.
- Spray wrong side of EXTERIOR PIECE with basting adhesive and stick it onto the batting piece.
- Spray wrong side of FLAP PIECE EXTERIOR, stick it onto the batting, then spray on wrong side of FLAP PIECE LINING.
- Stick LINING FLAP PIECE to blank side of batting.
- Your FLAP PIECE BATTING will now have two pieces of fabric stuck on, one on the front and one on the back.
- Trim excess batting from BODY PIECE EXTERIOR. Repeat on other piece.
- Flip BODY PIECE EXTERIOR to wrong side and mark a line 1.75 in (4.44cm) from both edge. This marks the stitching line for quilting.
- On FLAP PIECE, mark 1.25 in (3.175cm) from both edges by making a small notch with scissors.
- Connect the notches by marking with fabric chalk. This will be your quilting stitch lines.
- Use a walking foot to quilt the batting to the fabric following the stitch lines. Do this for the FLAP PIECE and both of the BODY PIECES.
- Your fabric pieces are now quilted!
- Unfold right side of bias tape.
- Pin bias tape to FLAP PIECE (exterior fabric facing up), right sides together, matching at edges.
- Sew bias tape to FLAP PIECE along told line of bias tape (approx. ⅜ in or 9.5mm)
- Trim off excess bias tape along top of the FLAP PIECE.
- Wrap bias binding over seam allowance to the back (lining side) so it covers the stitch line.
- Pin bias binding in place from the front side.
- Repeat until bias binding covers entire curve of FLAP PIECE.
- Stitch in the ditch and you are done! Don’t forget to backstitch on both ends.
- Place FLAP PIECE and BODY PIECE - EXTERIOR right sides together, 1/2” from edge. Hold in place with pins or clips and machine baste together.
- Place BODY PIECE - LINING over, right sides together.
- Hold in place with pins/clips and sew at 1/2” (1.27cm) seam allowance.
- Repeat on other side. The piece with the flap will be called “BACK PIECE” and the one without the flap “FRONT PIECE”.
- Next, sew velcro (loop end) onto exterior fabric of FRONT PIECE, ⅝ inch (1.58 cm) below seam line, and centered, approximately 2” (5cm) from the sides.
- Place FRONT PIECE and BACK PIECE right sides together, lining with lining and exterior fabric to itself.
- Clip corners and trim seam allowance down to 1/4” (6mm). Also trim seam allowance at the middle (where lining is sewn to exterior fabric) by cutting a ] shape. This eliminates bulkiness at top of glasses pouch. Repeat on other side of bag.
- Turn glasses pouch to right side through opening on lining.
- Use a point turner to push out the corners.
- Close opening with invisible ladder stitch.
- Sew velcro (hook side) onto lining side of FLAP, approximately 1/2” (1.27cm) from top, and centered.
- Puffy Glasses Case finished!
BEFORE YOU GET STARTED
PREPARING FABRIC
SEWING QUILT LINES ON GLASSES CASE
BIAS BIND FLAP
SEWING GLASSES CASE TOGETHER