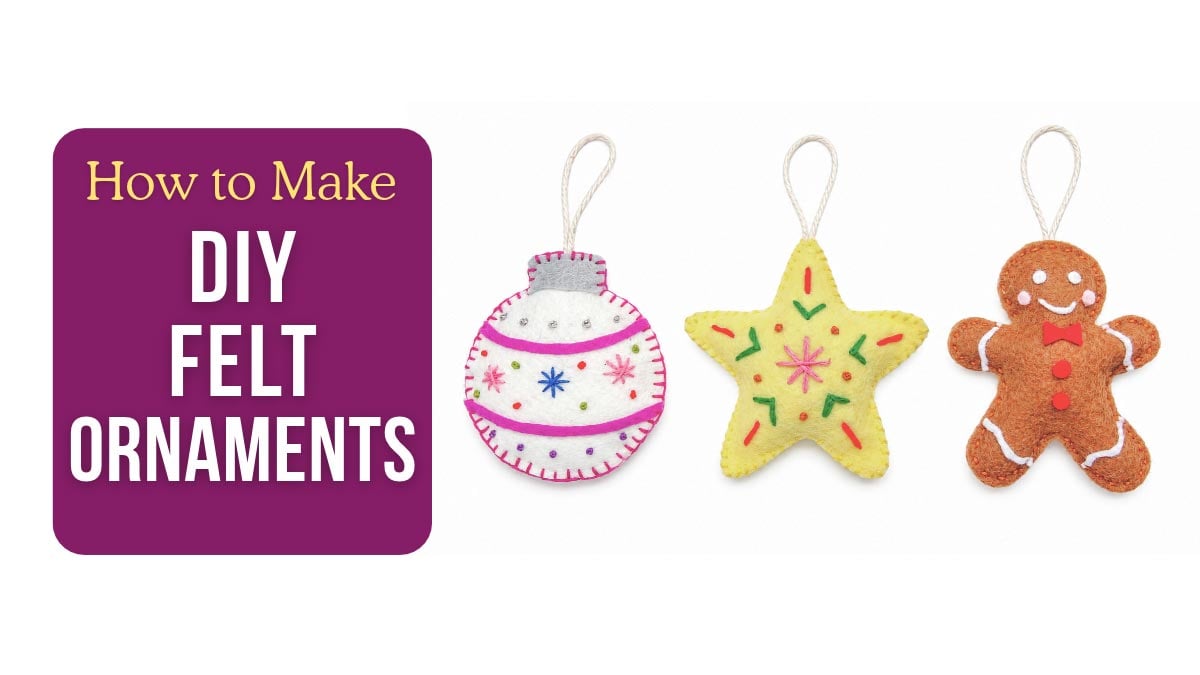
How to Make DIY Felt Ornaments (Free Pattern)
Looking for a fun and easy Christmas sewing project? These DIY felt ornaments are the perfect way to add a handmade touch to your Christmas tree!
This post may contain affiliate links. Please read my disclosure policy for details. As an Amazon Associate, I earn from qualifying purchases.
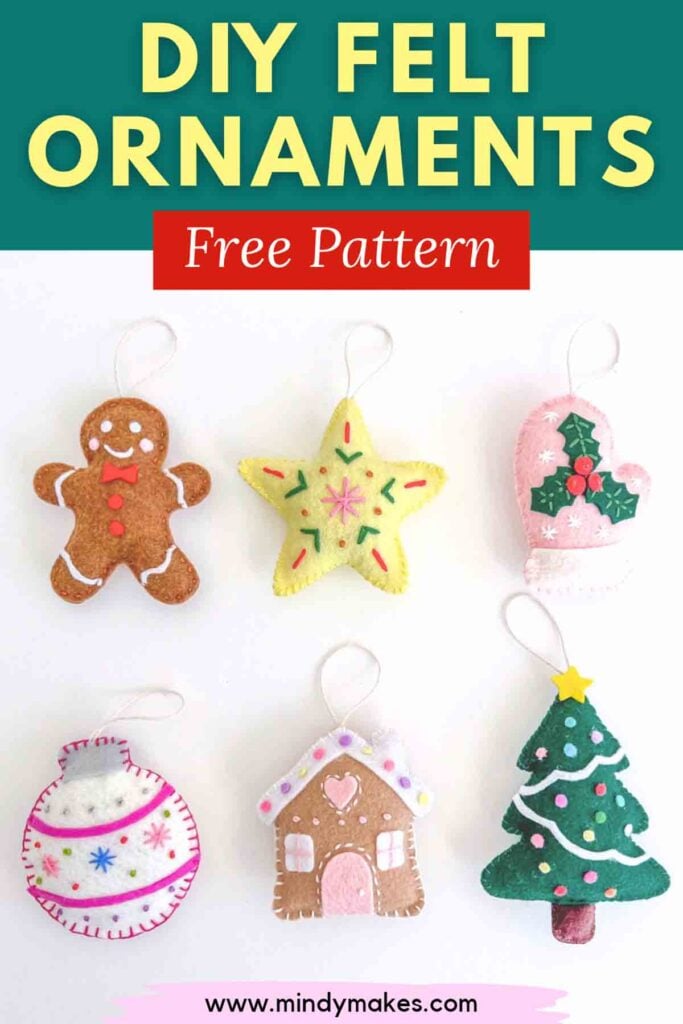
Felt ornaments are such fun things to make during the holiday season! They are inexpensive, easy to customize, and don’t require a lot of sewing experience. You can make them in your favorite Christmas colors, add decorative embroidery, or personalize them with buttons, beads, and other embellishments.
In this tutorial, I’ll show you how to make a cute pair of felt mitten ornaments step-by-step. These little mittens feature soft white cuffs and decorative stitching, making them a sweet addition to your Christmas tree or a handmade gift for friends and family.
Why You’ll Love These DIY Felt Ornaments
- Beginner-friendly: This is a simple sewing project that is perfect for beginners.
- Inexpensive supplies: All you need is felt, embroidery floss, a needle, and a few basic sewing supplies.
- Easy to customize: Choose your favorite felt colors and add embroidery, buttons, or other decorations.
- Great handmade gifts: These felt mittens make thoughtful gifts, stocking stuffers, or gift toppers.
- Perfect for Christmas decorating: Hang them on your Christmas tree, add them to a garland, or use them to decorate holiday packages.
Supplies Needed to Make Felt Mitten Ornaments
Before getting started, gather the following supplies:
- CRAFT FELT – see FAQ below for the type of felt to use.
- EMBROIDERY FLOSS
- EMBROIDERY NEEDLE
- FABRIC SCISSORS – make sure they are nice and sharp so you can cut details with crisp, clean edges.
- EMBROIDERY SCISSORS – optional, good for cutting small details
- FABRIC CHALK or PENCIL.
- FABRIC GLUE
- POLYESTER FIBERFILL
- RIBBON, TWINE, or YARN – for hanging.
- EMBROIDERY HOOP – optional, if adding detailed embroidery.
How to Make Felt Mitten Ornaments Step-By-Step
These felt mitten ornaments are made by sewing two mitten-shaped pieces of felt together and adding a decorative cuff. You can make each mitten a different color or create a matching pair.
Step 1: Cut Out Your Felt Mitten Shapes
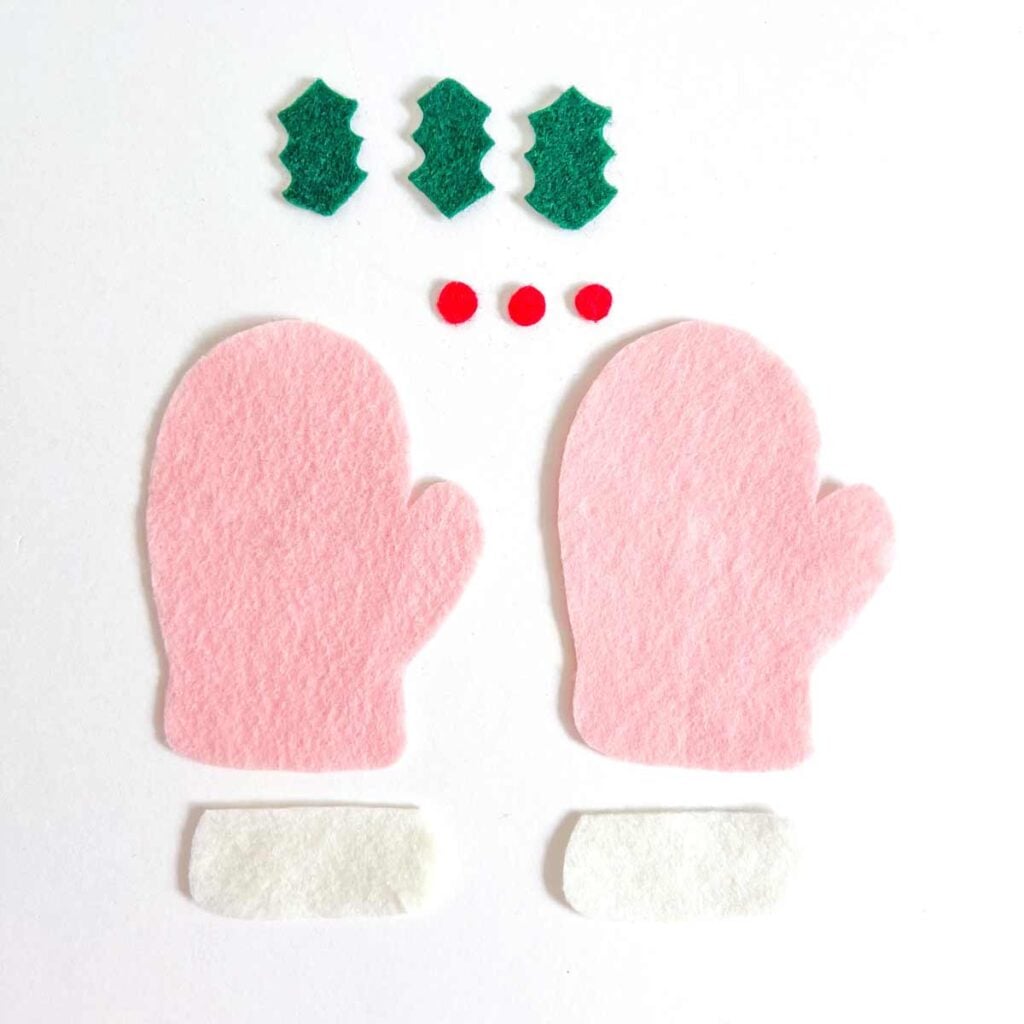
Cut out all pattern pieces of ornaments on felt.
Step 2: Embroider Details
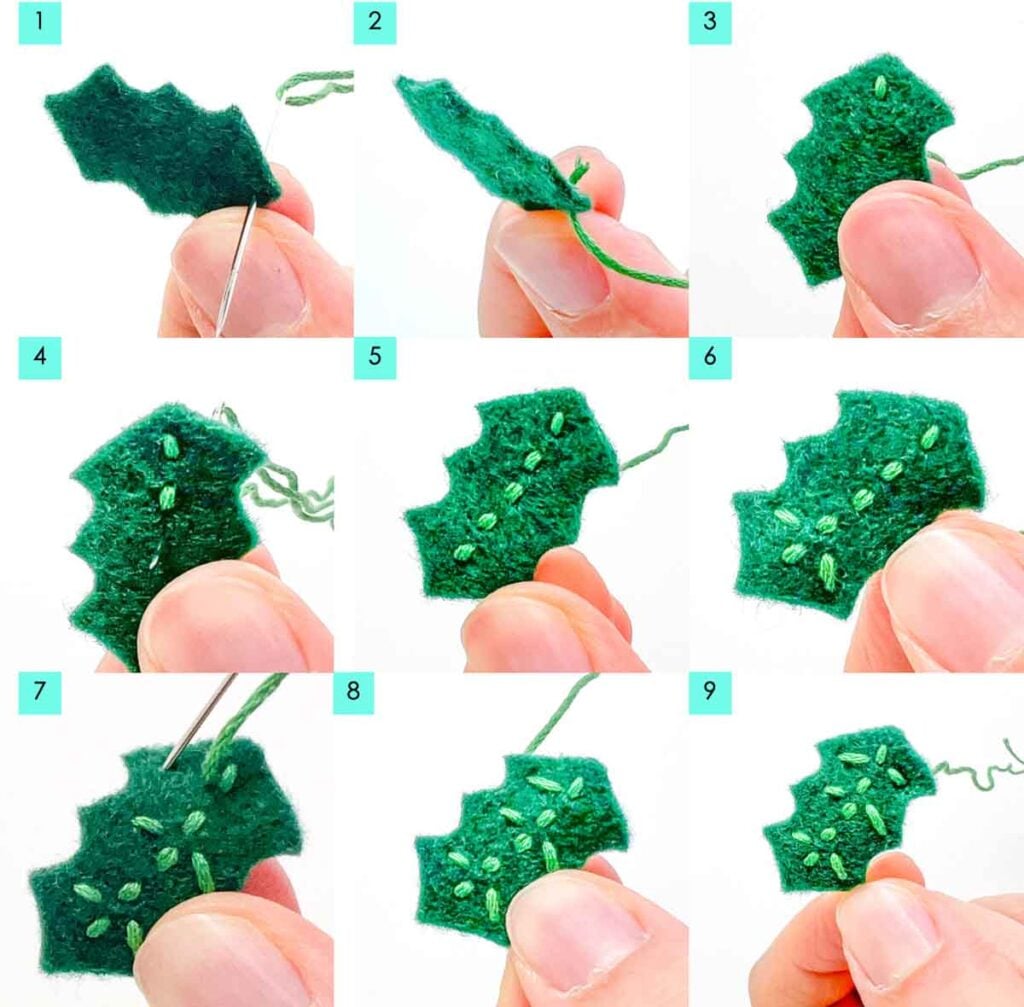
Next, use embroidery floss to stitch the veins onto the leaves.
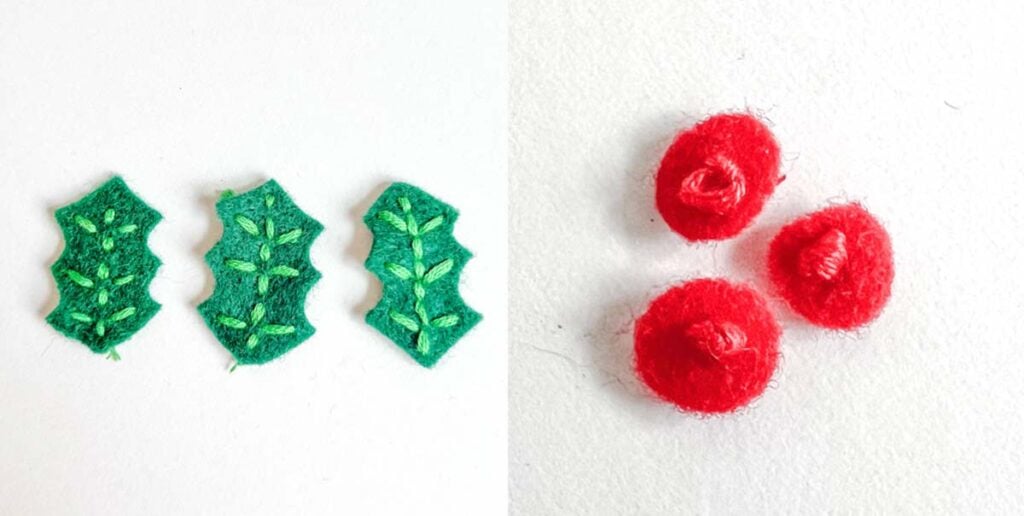
LEFT: Repeat for all 3 holly leaves.
RIGHT: I decided to make a French knot on each of the berries to give it more texture. Otherwise you can just leave the red felt circles as is.
Step 3: Gluing Designs to Your Felt Mittens
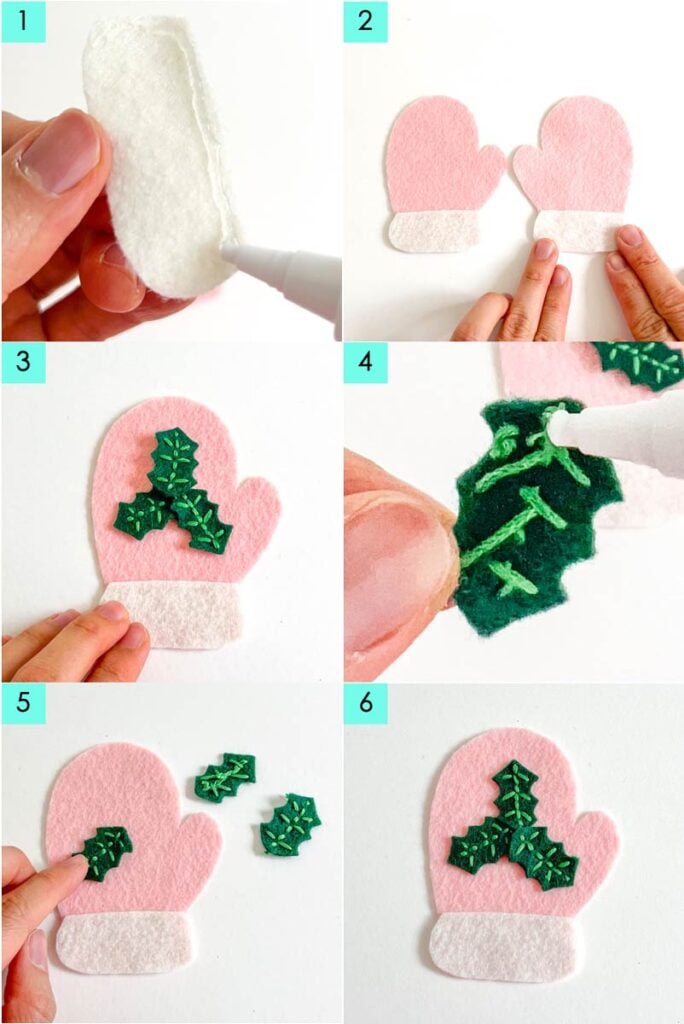
(1) and (2): Next, apply fabric glue to the cuffs onto the mittens and glue it onto the mittens.
(3): Arrange holly leaves onto mitten the way you like it.
(4), (5), (6): Apply fabric glue to wrong side of leaves and glue them back onto the mitten.
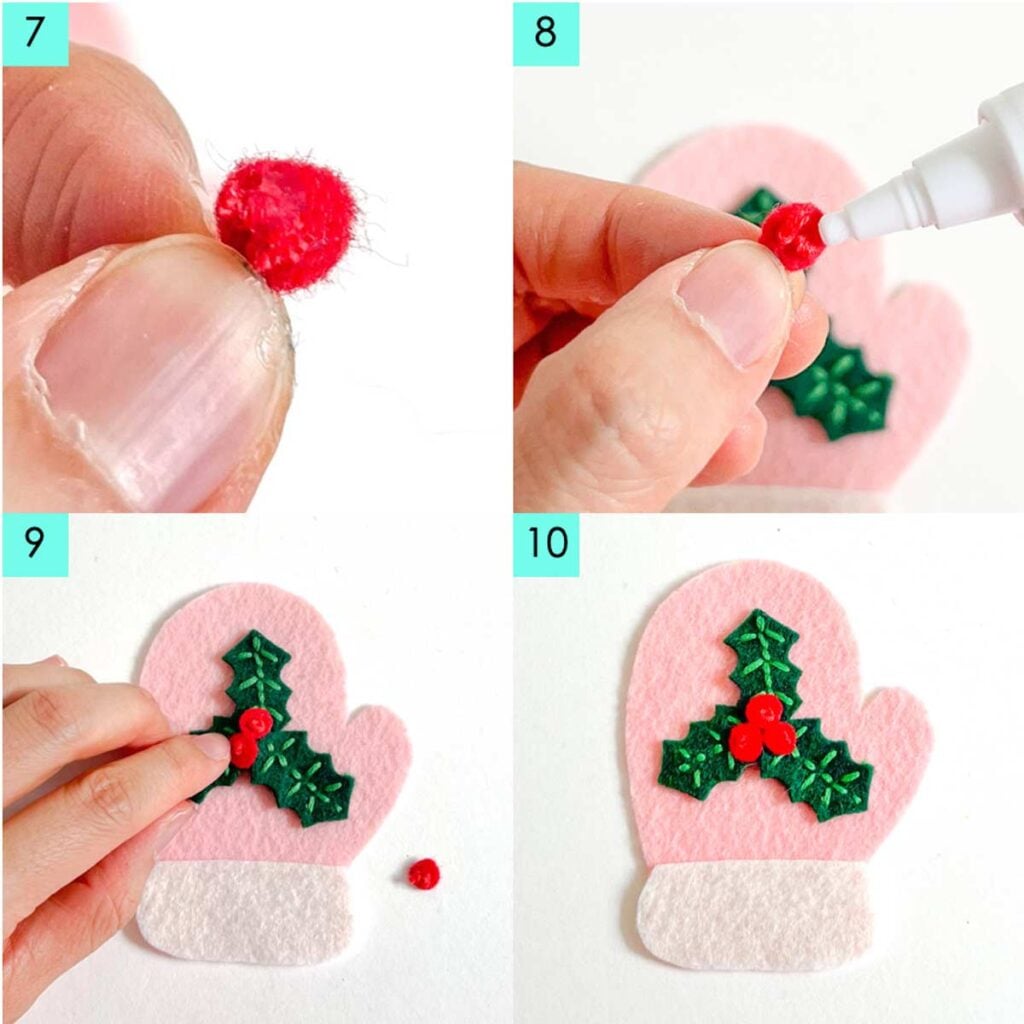
Next, apply glue to wrong side of berries and glue them on in the middle of leaves.
Step 4: Making Snowflake Stitches
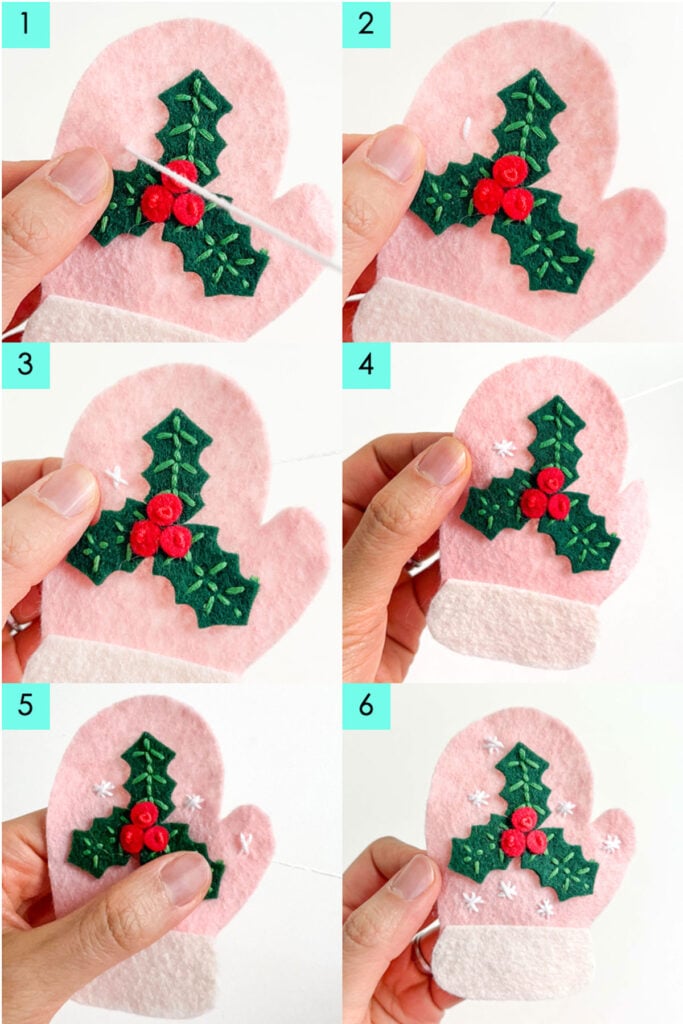
Now sew little asterisks around the holly to make snowflakes.
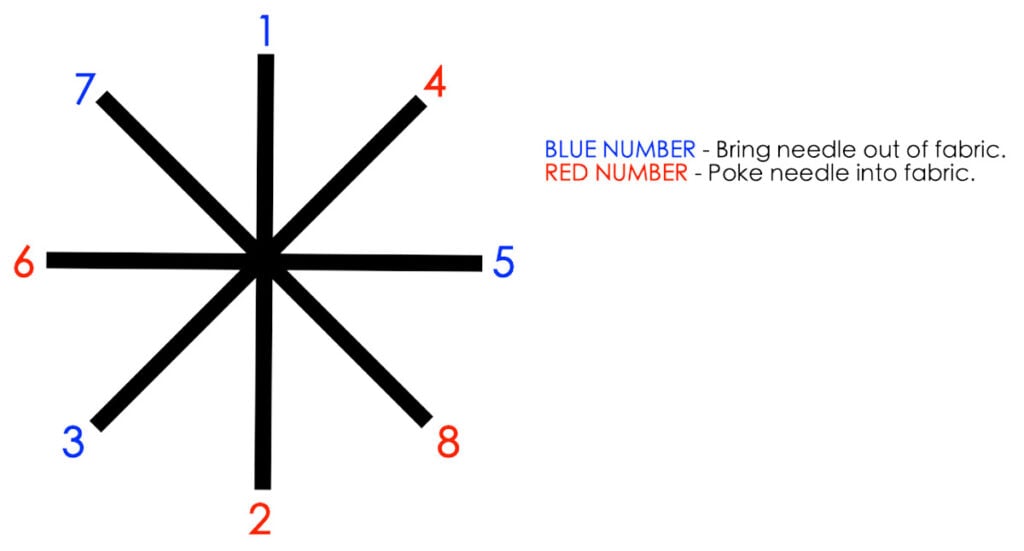
This diagram shows you the order of how to make little asterisks. Blue numbers indicate the thread coming out the fabric (from wrong side of fabric to right side). The red numbers indicate the thread going into the fabric (from right side of fabric to wrong side.
Here are some other ideas for decorating your mittens:
- Polka dots: Add small French knots or tiny felt circles. You can even use glittery embroidery floss to add sparkle!
- Hearts: Cut out small felt hearts and stitch them onto the front.
- Stars: Use embroidery floss to create small star designs.
- Buttons: Sew a few small decorative buttons onto the mitten.
Step 5: Add a Hanging Loop
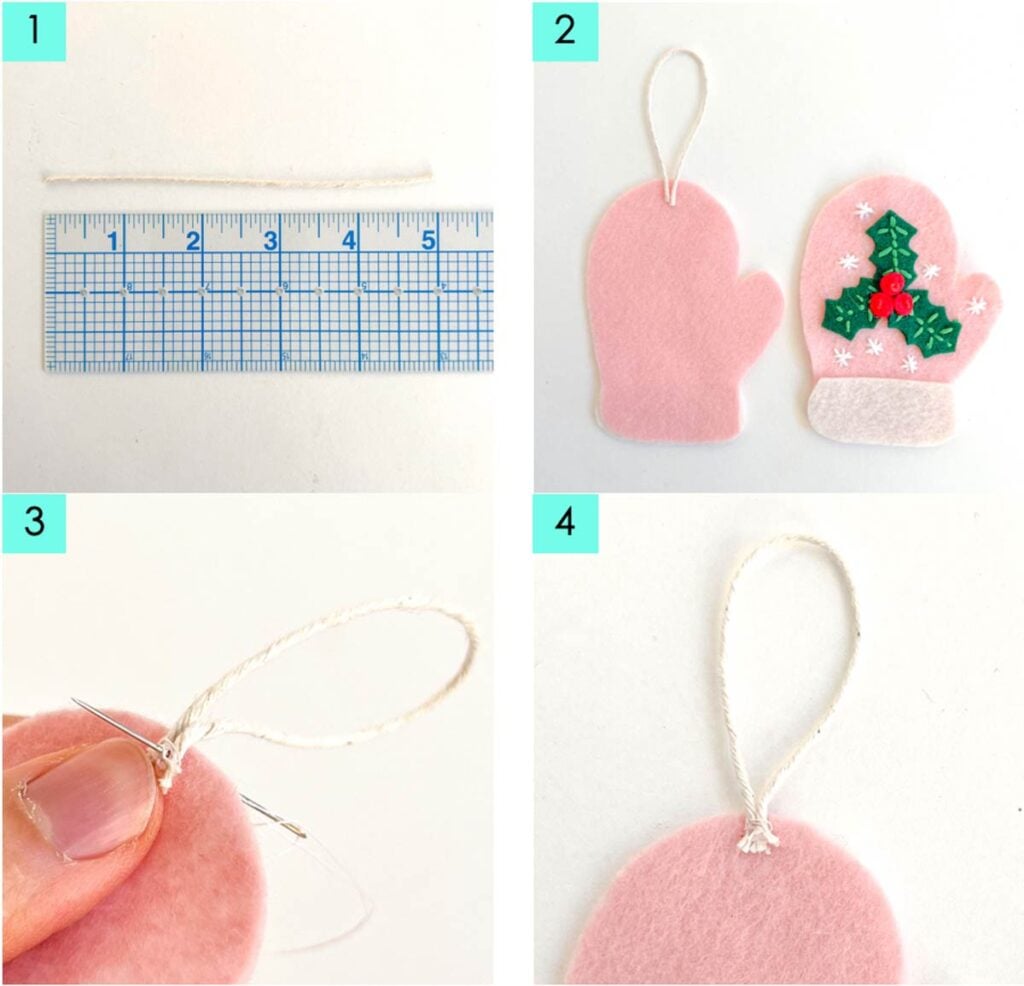
(1): Cut a piece of twine, thread or ribbon about 5 inches (12.7 cm) long. This will form the string loop at the top of the ornament.
(2): The twine will be sewn to wrong side of fabric, at center top.
(3): Use matching thread to sew your twine in.
(4): View of twine sewn to wrong side of felt.
Step 6: Sewing Ornament Together
Once you’ve finished decorating the front of your mittens, it’s time to sew the pieces together.
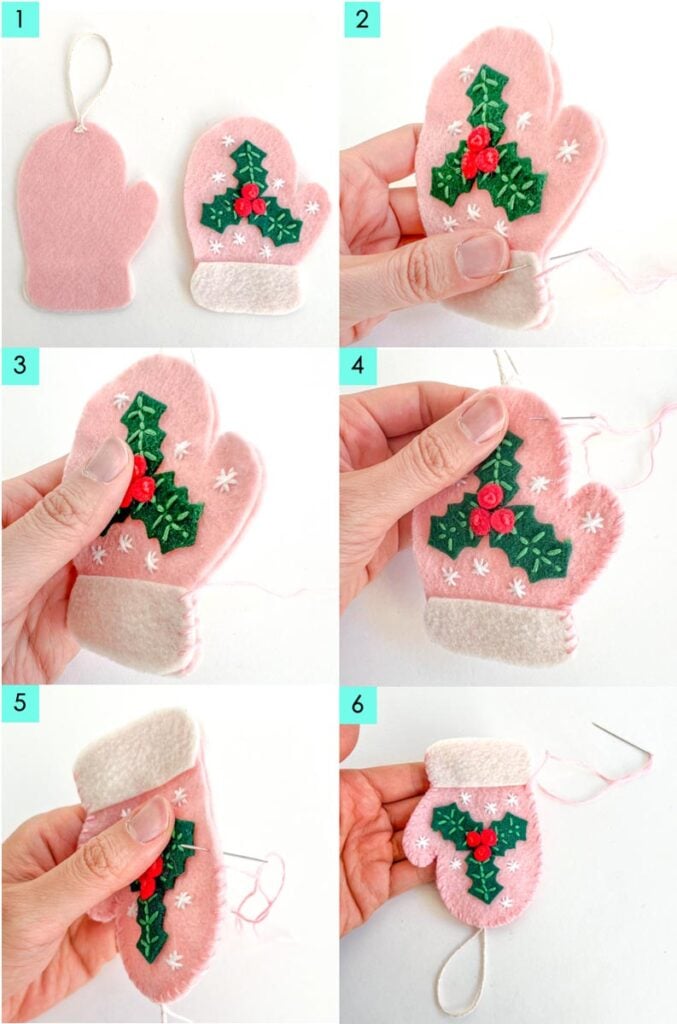
Place the mittens wrong sides together, making sure the edges line up.
Using embroidery floss, sew around the outside edge of the mitten with a decorative stitch of choice. In the example I am using a whip stitch.
However, other decorative stitches such as a running stitch or blanket stitch (see examples here) are also good options.
Make sure to leave an opening if you plan to stuff your ornament (next step).
TIP: Try to keep your stitches evenly spaced for a neat, finished appearance. In the tutorial the stitches are about ⅛ in (3mm) away from the edge and ⅛ in (3mm) spaced apart.
Step 7: Add Stuffing
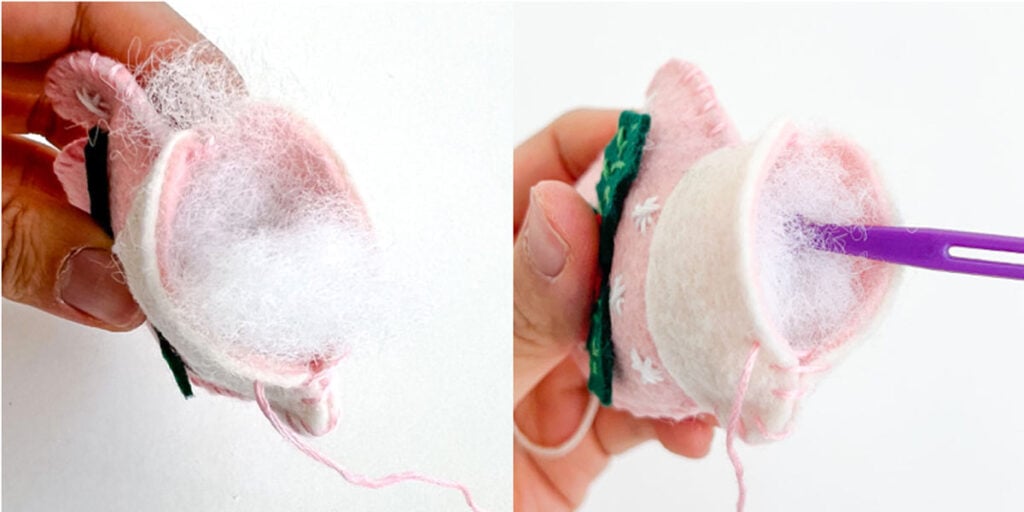
Next, stuff ornament with fiberfill. Use that purple thang (or chopsticks, or back of pen) to gently push the fiberfill into the mitten, spreading it evenly throughout the shape
NOTE: The amount of fiberfill you will use depends on how your want your ornament to look. Use more fiberfill and your ornament will look rounder and more “puffy”. Use less fiberfill for a flatter look. I don’t recommend overfilling your ornament as it creates a curved looking ornament that distorts its aesthetic appeal.
Alternatively, ff you prefer flat felt ornaments, you can skip this step.
Step 8: Finish Sewing the Mittens
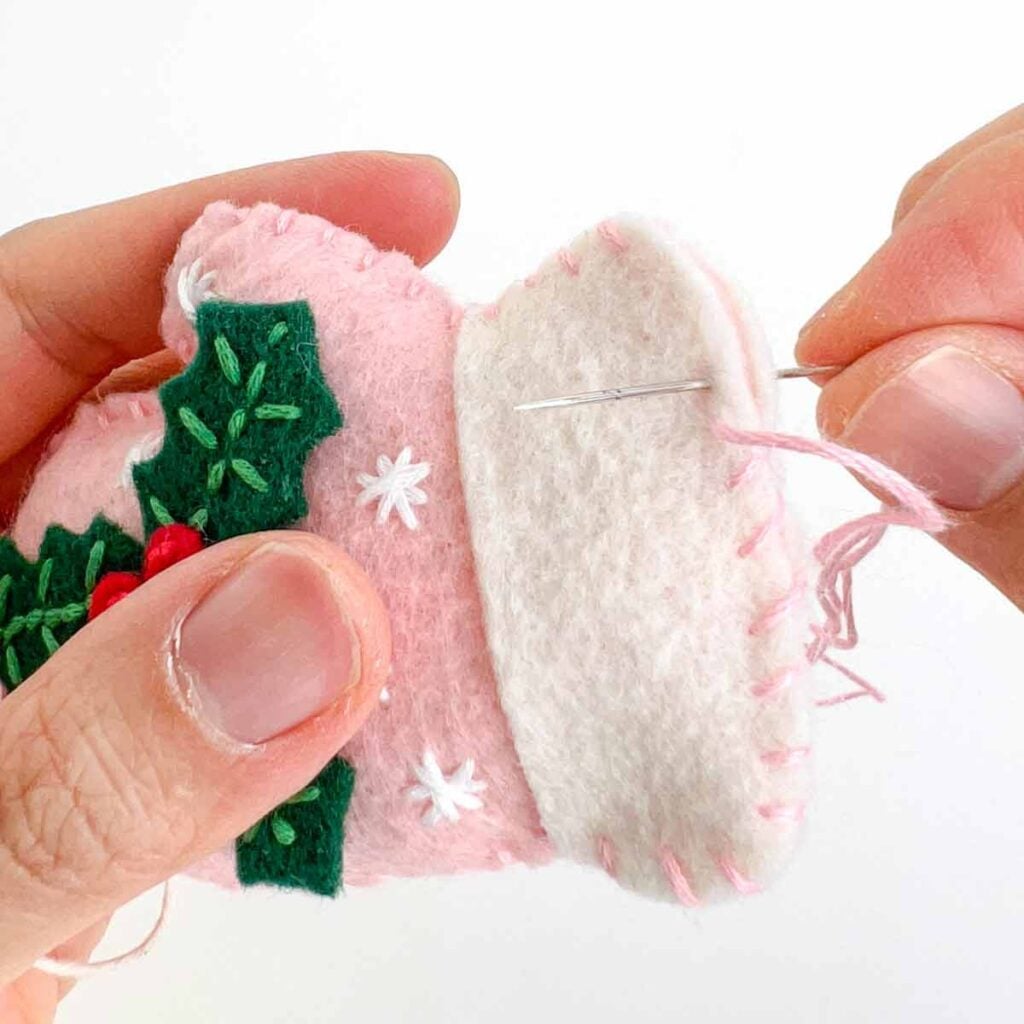
Next, continue stitching your ornament close.
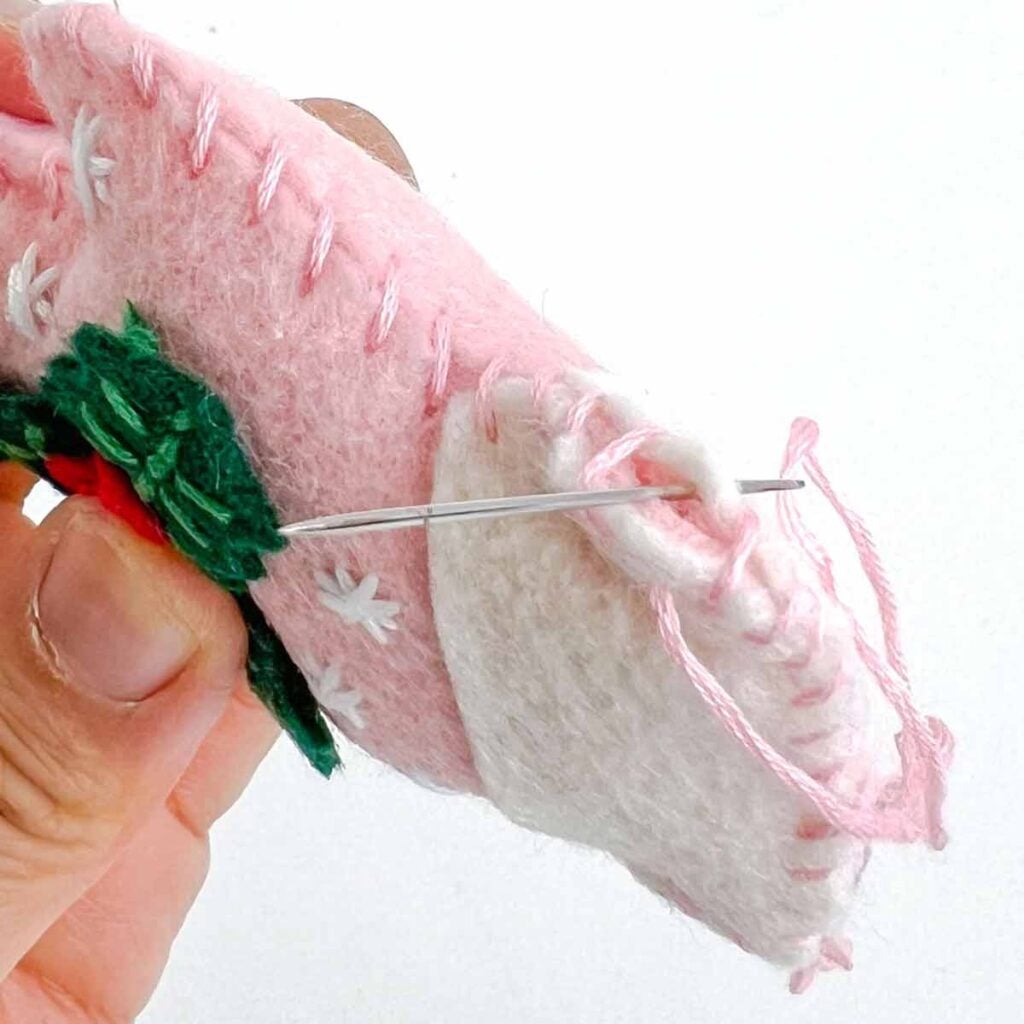
Once you reach the end, bring the needle through to the wrong side of felt.
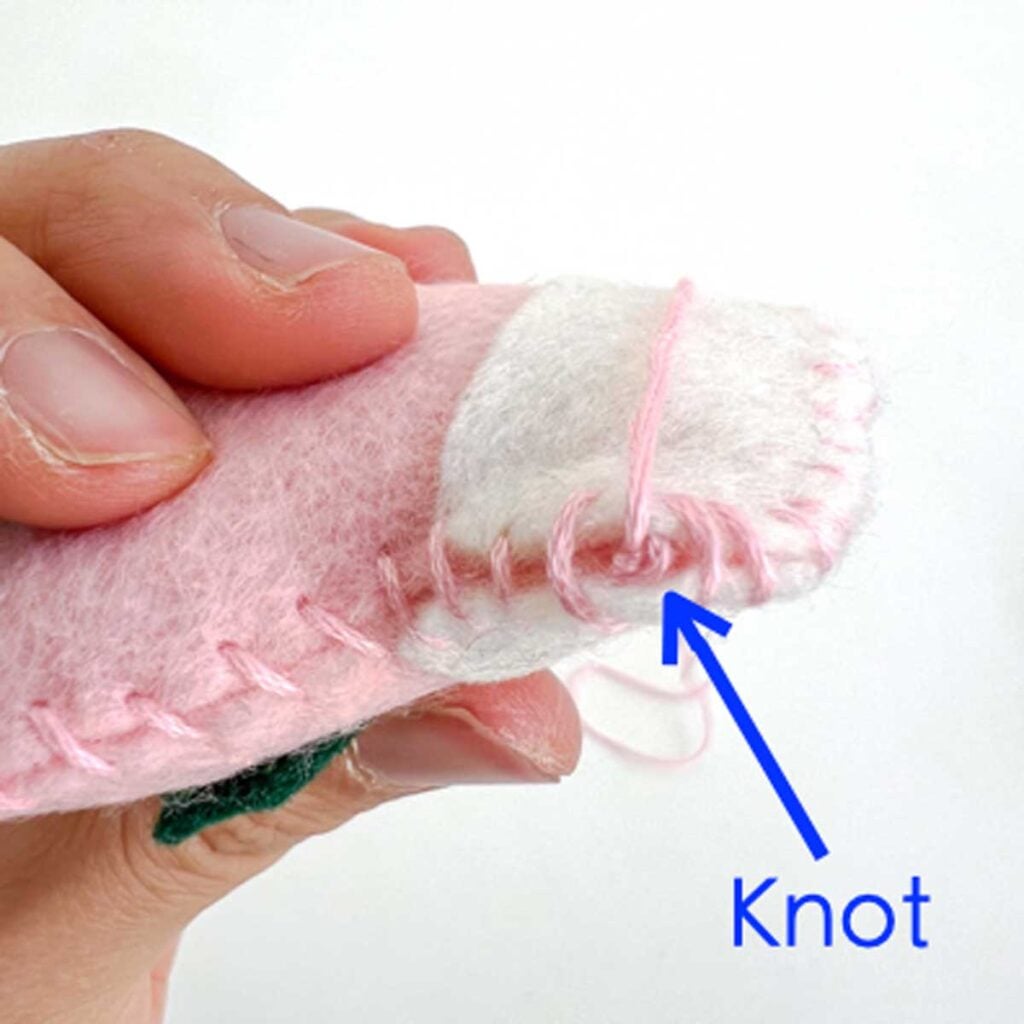
Tie a knot at the end of the thread.
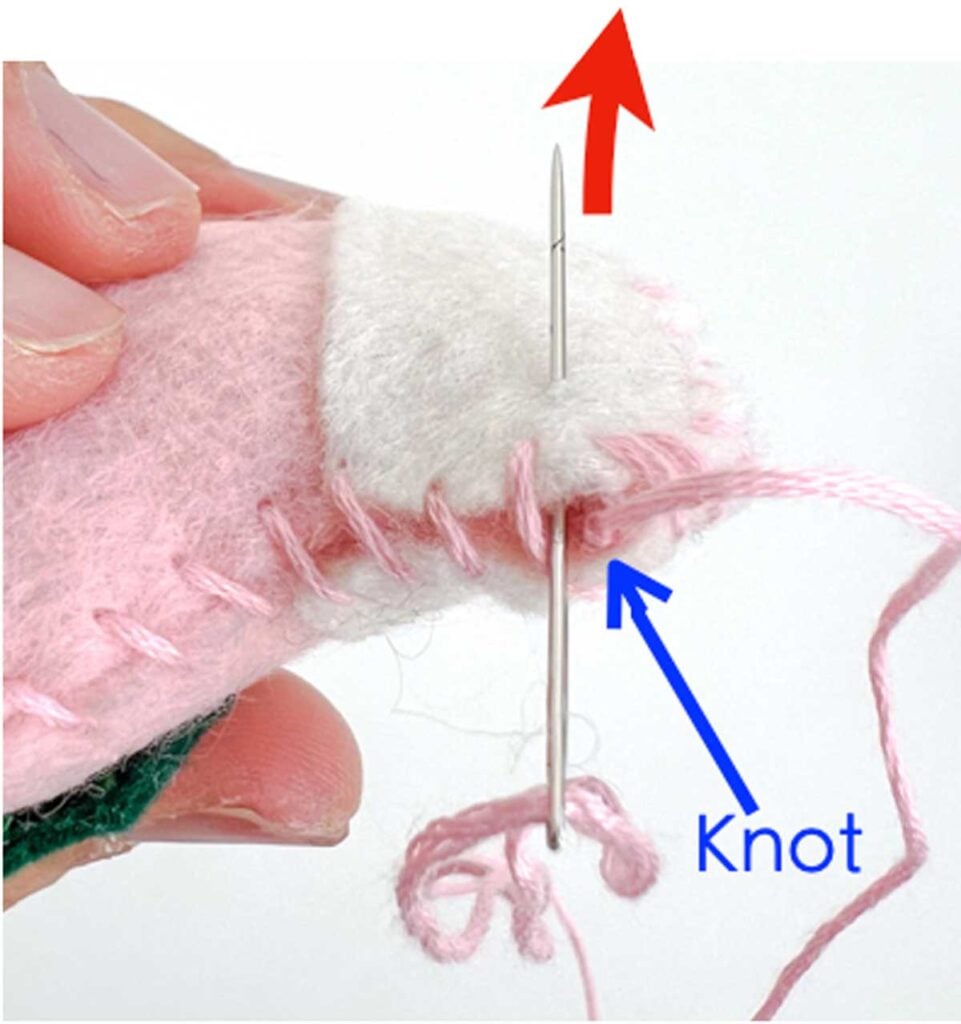
Finally, bring needle to right side of felt a distance away from the knot. Pull thread through (red arrow) and cut off excess thread where it exits the fabric.
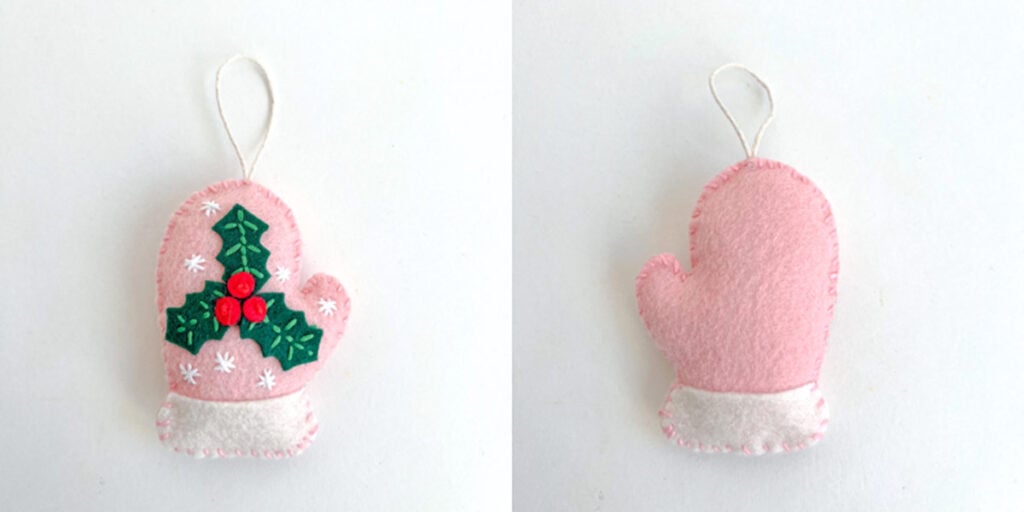
You are finished! Front and back view of mitten ornament.
How to Make Other Felt Ornaments
In this tutorial, I’ve shown you step-by-step how to make a felt mitten ornament. For the other shaped ornaments, feel free to customize the design however you wish.
There are endless ways to decorate your felt ornaments, which is why they are such fun sewing projects.
To give you some ideas, I’ve included pictures of the felt ornaments that I designed to my liking. These ornaments are all made using either felt cut-outs and embroidery stitching, or a combination of both. You can also add beads, buttons, sequence, yarn, glitter and more!
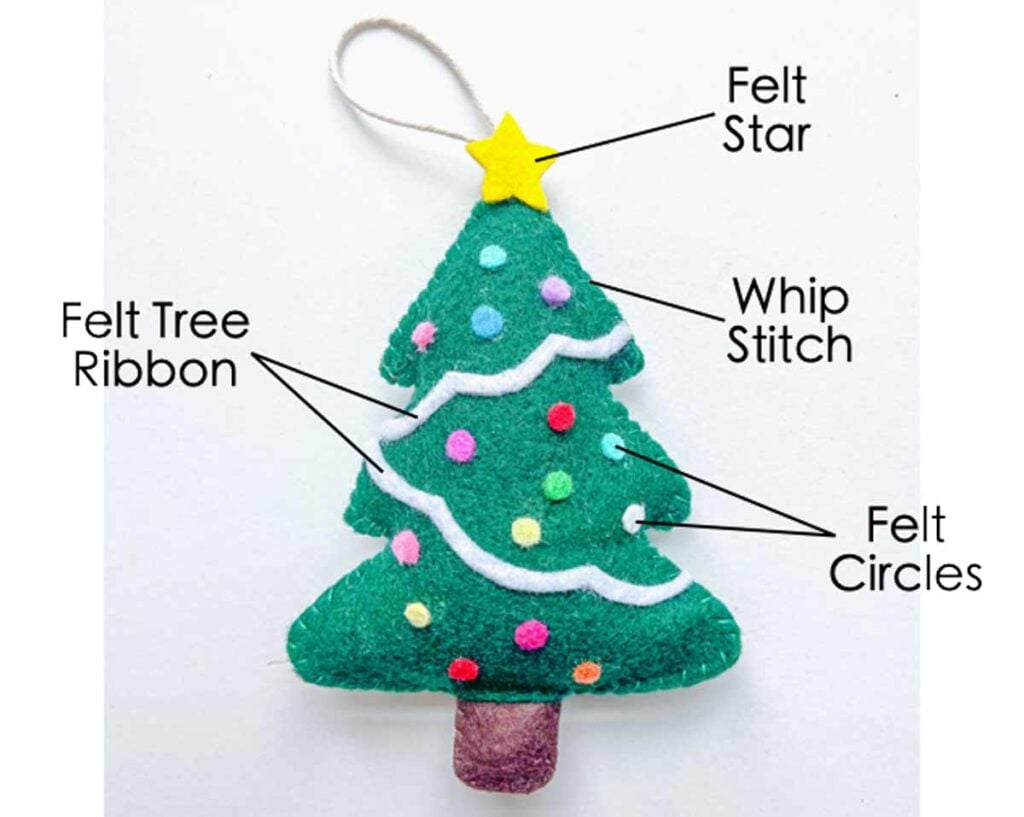
The Christmas tree ornament is made completely using felt cut outs.
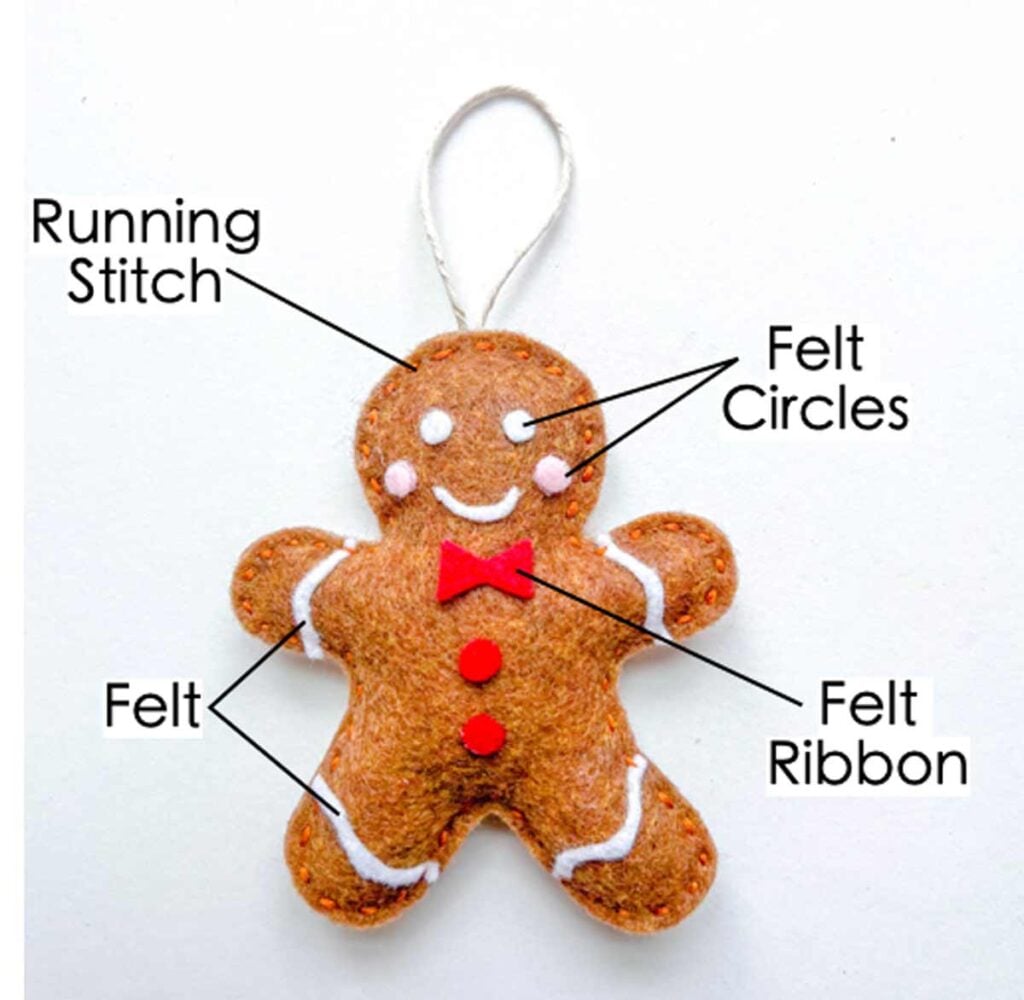
All the details on this cute little gingerbread ornament is made with felt cut-outs. However, you could use tiny craft buttons (for gingy’s buttons) as well as tie a ribbon for the bow-tie.
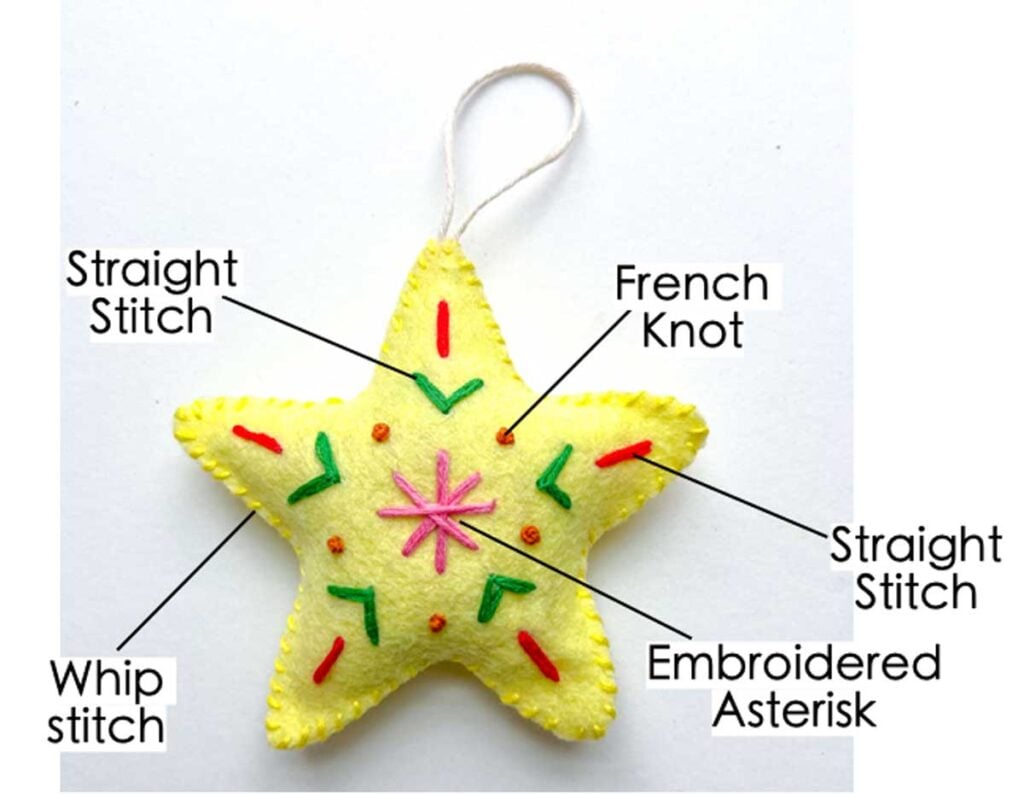
The DIY star ornament is decorated completely with embroidery floss. Note that I went over all the embroidery stitches again (with another 6 strands of embroidery floss) so the details would come out thicker and more prominent.
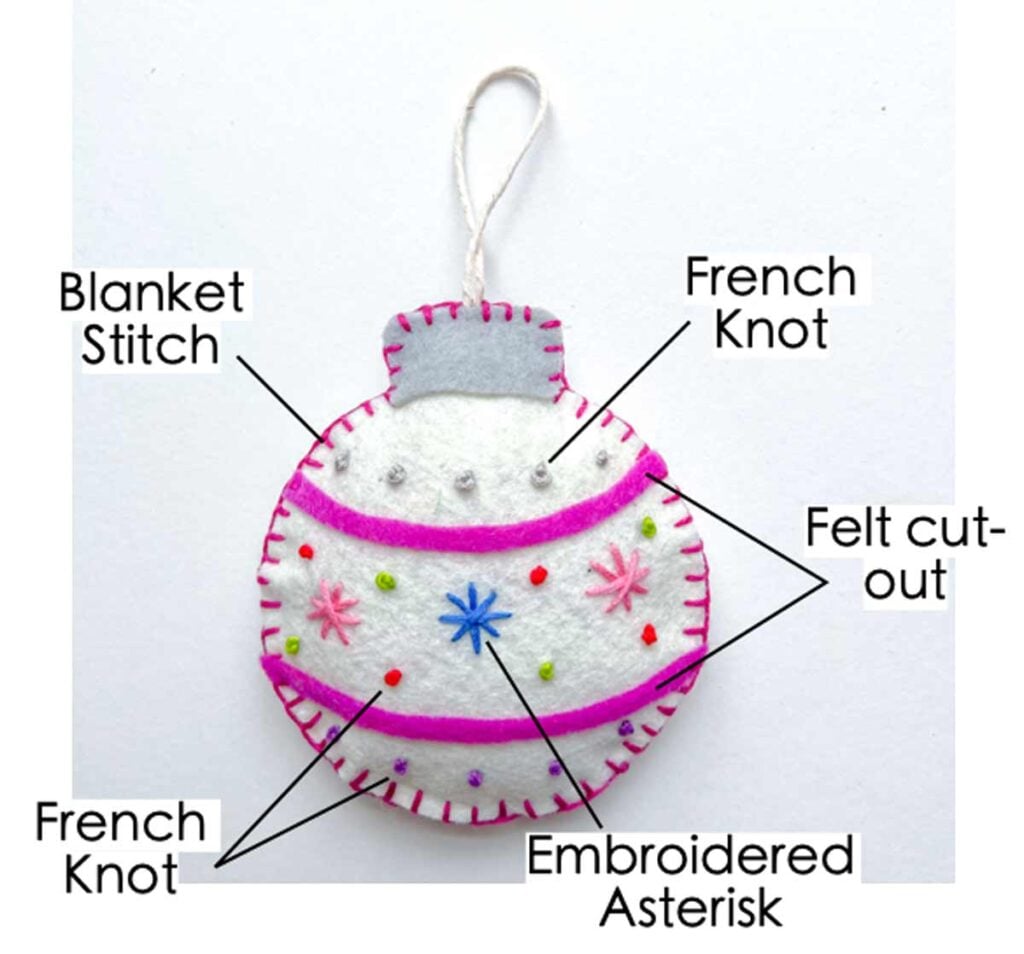
This DIY Felt ornament is decorated using a combination of felt cut outs and embroidery stitching.
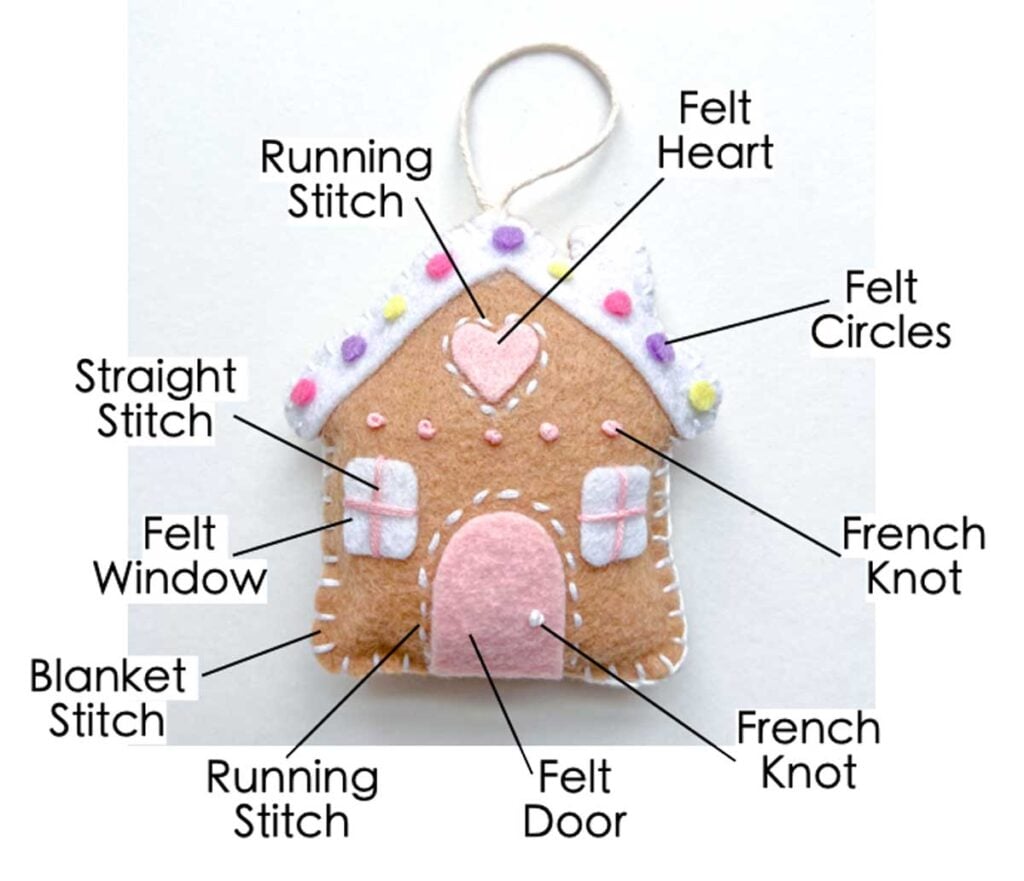
Finally, this DIY felt house ornament contains a combination of cut-outs and embroidery stitching.
Time to get creative! The sky is the limit when it comes to how you want to decorate your ornaments.
DIY Felt Ornaments Pattern
Included in this pattern are a set of 6 Christmas themed felt ornaments. This includes a star, a gingerbread man, a Christmas tree, an ornament, a house, and a mitten.
How to Download DIY Felt Ornament PDF
To download this set of FELT ORNAMENTS PATTERN, subscribe to the MindyMakes Email List to receive the password for the Mindy Makes Free Resource Library. No spam! Just updates with more fun sewing projects.
Once inside the library, the pattern will be under section “F” as “Felt Ornaments”.
Once you click “submit”, the password will show up on the next page.
Need more help? Be sure to check out this step-by-step guide that shows you exactly how to get the password, enter the library, and download the PDF.
Tips for Making Felt Ornaments
Here are a few tips to help your felt ornaments turn out beautifully:
- Use sharp scissors: Felt can be difficult to cut cleanly with dull scissors. Sharp scissors will help you achieve smooth edges.
- Keep your stitches consistent: Try to keep your stitches evenly spaced around the mitten.
- Decorate before assembling: It’s much easier to add embroidery and other embellishments while the felt pieces are still flat.
- Don’t overstuff: If you’re making stuffed ornaments, use just enough stuffing to give the mittens a little dimension without stretching the felt.
- Use coordinating thread: Choose embroidery floss that complements your felt colors for a polished look.
Frequently Asked Questions About DIY Felt Ornaments
What type of felt is best for making Christmas ornaments?
Craft felt is a good choice for this project as they are inexpensive, easy to find, and available in all sorts of colors. Wool-blend felt is more luxurious and has a softer feel.
Craft felt will pill over time with excess contact friction whereas wool-blend felt tends not to. However, since ornaments generally do not undergo a lot of handling and rubbing, we are not too worried about pilling.
Do I need a sewing machine to make felt ornaments?
No! Felt ornaments are perfect for hand sewing. You can use simple embroidery stitches, such as a running stitch or blanket stitch, to sew the pieces together. Since felt doesn’t fray, you don’t need to finish the edges.
Can I make felt ornaments without stuffing?
Absolutely! These ornaments look adorable both flat and lightly stuffed. If you prefer a flatter ornament, simply sew the two felt pieces together without adding stuffing.
What hand sewing stitch should I use for making felt ornaments?
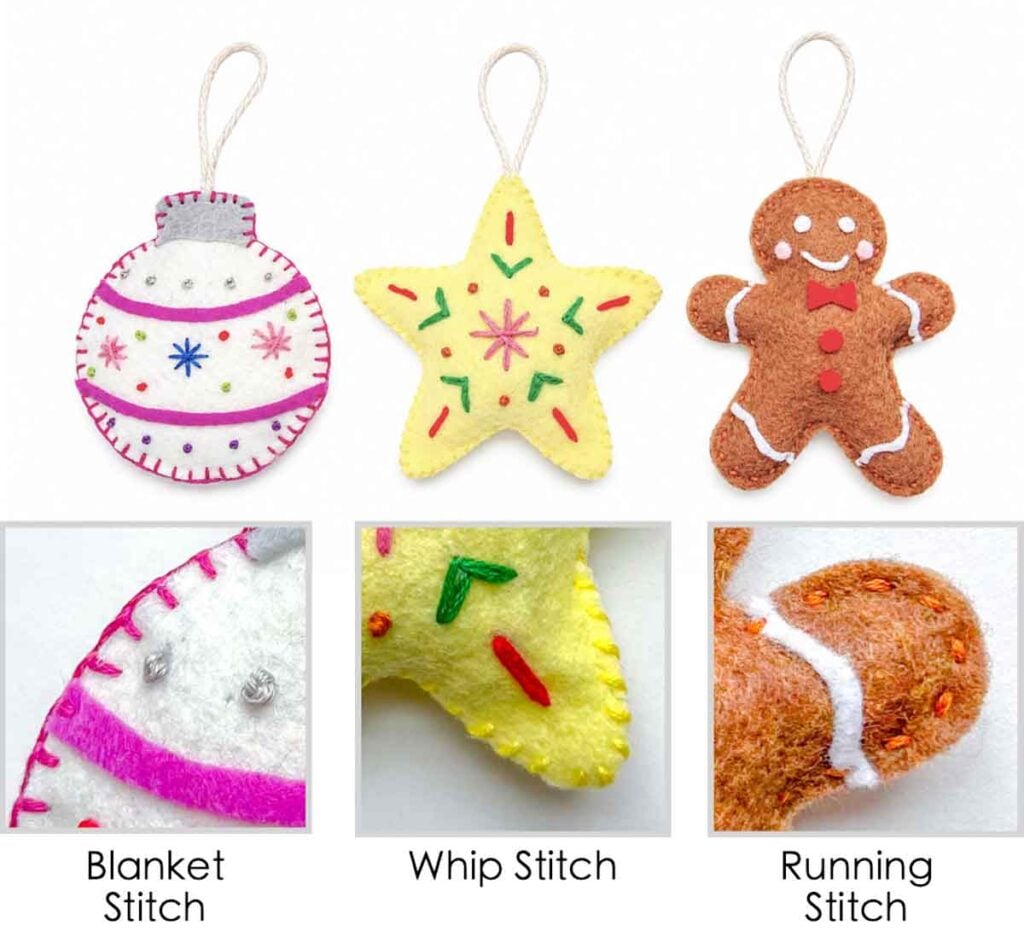
The blanket stitch, whip stitch, and the running stitch are all good hand sewing stitches for sewing your felt ornament.
For a different decorative look, you could also use a half back stitch, a simple back stitch or a pick stitch.
What can I use to hang felt Christmas ornaments?
You can use ribbon, baker’s twine, embroidery floss, or thin decorative cord. Simply create a small loop and securely attach it to the top of your ornament.
Are felt ornaments good for beginner sewing projects?
Yes! Felt ornaments are one of the easiest sewing projects for beginners. The shapes are simple, the materials are inexpensive, and you can practice basic hand-sewing stitches while creating something festive.
Final Thoughts
Making your own DIY felt ornaments is a fun and easy way to add a handmade touch to your Christmas decorations.
You can experiment with different felt colors, embroidery designs, and embellishments to create a collection of unique handmade ornaments. They also make wonderful handmade gifts for family and friends!
Happy sewing and Merry Christmas!