
How to Do the Blanket Stitch: Step-by-Step Photo Tutorial
Always wanted to learn how to do the blanket stitch? This easy tutorial will show you how to blanket stitch by hand from start to finish!
The blanket stitch can also be referred to as a cable stitch or a crochet stitch.
Traditionally, the blanket stitch is an embroidery stitch used for decorative purposes. However, it can also be used in clothing construction.
These days, the most common place you have probably seen a blanket stitch is on the edges of a blanket. The row of even vertical stitches with a looped horizontal stitch on the edge is a blanket stitch.
When properly done, the blanket stitch is visible on either sides of the blanket and looks identical from the front and the back.
What is Blanket Stitch Used For?
Securing Fabric Edges
Another original purpose of the blanket stitch is for securing the raw edges of blankets. In addition, it can also be used to keep hems in place as a tacking stitch.
Needle Lace
The blanket stitch is also used in needle lace work to add decorative touches such as loops, picots, or buttonhole bars.
Embroidery
As mentioned above, the blanket stitch is used in embroidery as a decorative stitch for outlining shapes, edges, or for appliqué purposes.
Blanket Stitch Versus Buttonhole Stitch
The blanket stitch is similar to the buttonhole stitch in they way the stitches are made. However, the two are not the same. The buttonhole stitch is a “covering” stitch used by tailors to go over the edges of a handmade buttonhole.
In the blanket stitch, the previous stitch hooks over the next stitch. In contrast, the buttonhole stitch wraps around the next stitch.
This little extra “wrapping” of the subsequent stitch awards more durability to the buttonhole stitch. This is important to endure those repetitive frictional forces caused by buttoning and unbuttoning one’s garment.
Furthermore, buttonhole stitches are made right adjacent to each other with no space between. This series of repetitive stitches also adds to the strength and durability of the buttonhole stitch.
Additionally, variations of the blanket stitch are used to creative beautiful decorative shapes and textures in embroidery.
How to Choose Thread For This Stitch?
Since the purpose of the blanket stitch is mostly decorative, we generally want to use a thicker thread such as embroidery floss or yarn.
This way, the thickness of the thread will be more visible in contrast to the fabric. Also, using a thicker thread adds texture to your sewing project, further enhancing its aesthetic appeal.
It is also a good idea to match the weight of your fabric to the thickness of your threads. For example, embroidery floss is suitable for medium weight linens while yarn is appropriate for heavy weight wool and fleece fabric.
Finally, depending on the “look” you want for your sewing project, you may choose to use a contrasting thread color. Again, this serves to highlight the beautiful hand sewn stitches when viewed in contrast to the fabric.
Preparations Before We Start
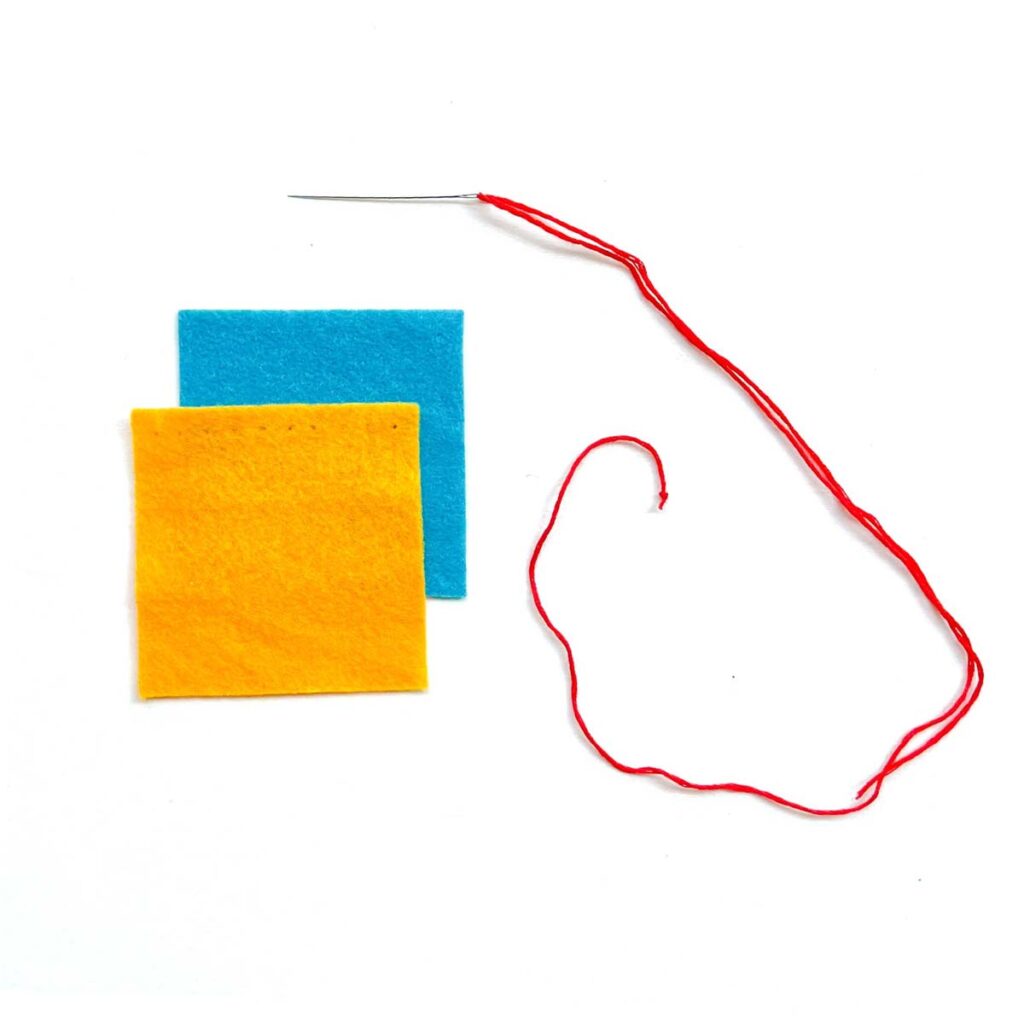
First, gather all supplies. A threaded hand sewing needle with a knot at the end and 1 or 2 pieces of fabric. I am using embroidery floss and felt fabric.
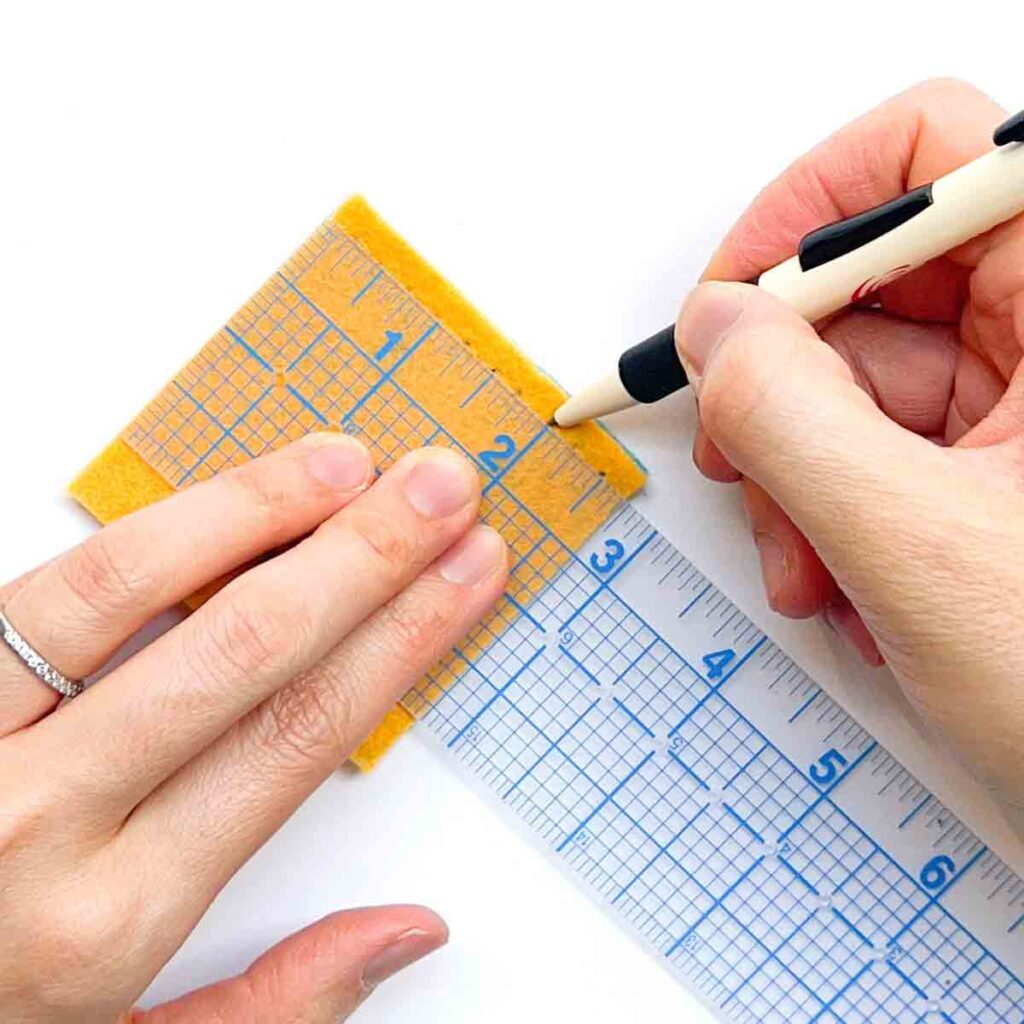
Next, for practicing purposes, you can mark your fabric so that your stitches will be even. In my example I am marking small dots with a pencil that are 1/4” from the edge and spaced 1/4” apart.

View of marked fabric.

Alternatively, you can use masking tape or plain washi tape and make the marks directly on the tape. Then stick the tape the distance you want the stitches to be away from the edge.
NOTE: Traditionally, the blanket stitch is made the same distance away from the edge as they are apart from each other. In order words, the stitch length and stitch spacing is the same.
However, for decorative purposes, feel free to vary the stitch length as well as the distance between stitches to achieve the look you desire.
How to Blanket Stitch 2 Pieces of Felt Together?
In this section of the tutorial, you will learn step-by-step how to blanket stitch 2 pieces of felt together at the edge.
You will learn the following techniques (click on link to jump to section):
- How to Start a Blanket Stitch
- How to Make a Blanket Stitch
- How to Blanket Stitch around Corners
- What to Do When You Run Out of Thread
- How to Tie Off Blanket Stitch
NOTE: In this tutorial, I are taking stitches from front to back, right to left as I am a right handed operator. However, you may find that going from left to right works better for you. Sew in the direction most you find most comfortable
How to Start a Blanket Stitch

First, poke your needle through the back piece of fabric at the same point as where you marked the first dot on the top piece of fabric. In this example, the needle is poked through 1/4” from the top and 1/4” from right edge.

Next, pull your thread all the way through until it stops at the knot.

View with top piece of fabric back in place.

Next, insert your needle from front to pack through the marked dot.

Then pull thread through. Your stitch will now look like in the photo.

Back view.

Next, insert needle from right to left through the loop stitch.

Top view.

Then pull thread through. Your anchor stitch is now complete.
Back View.
How to Make a Blanket Stitch

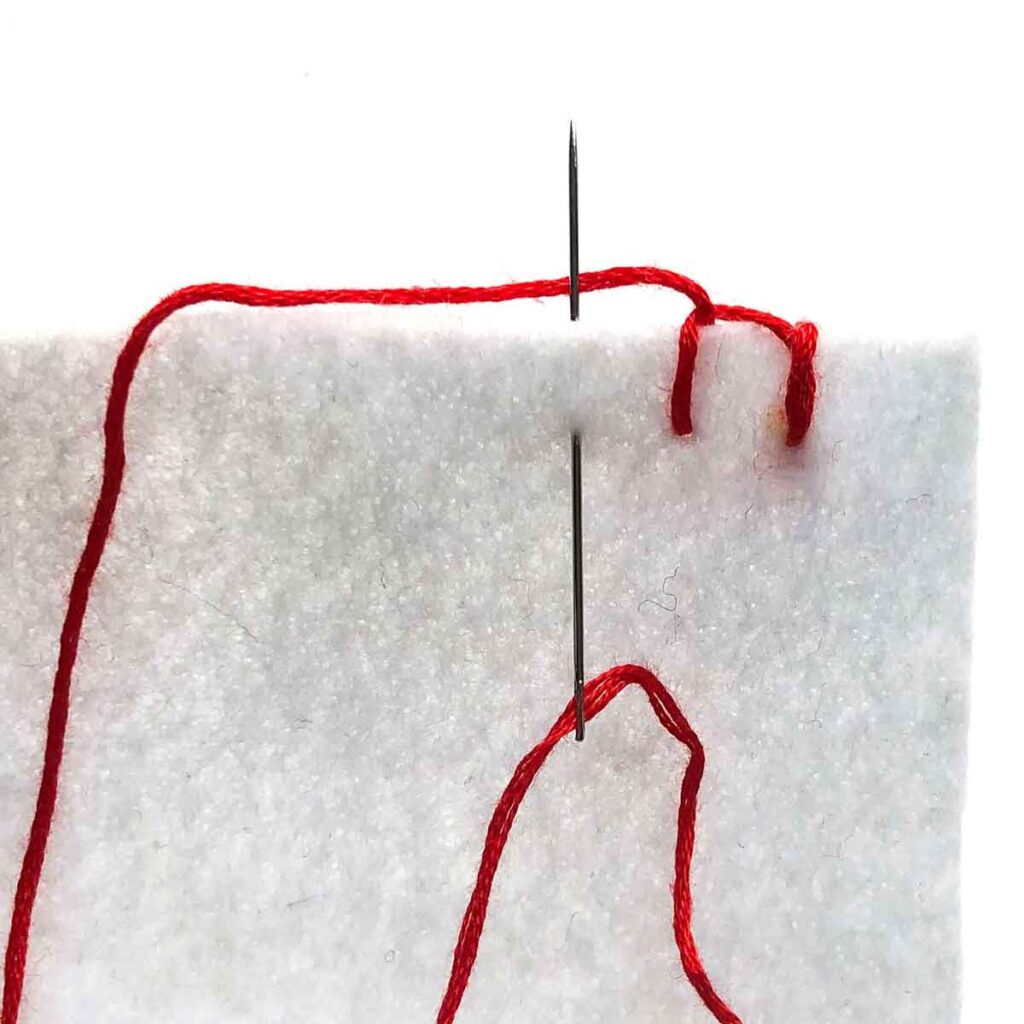
First, take the needle through the next marked point on your fabric, going from front to back.

Top view of needle going through fabric.

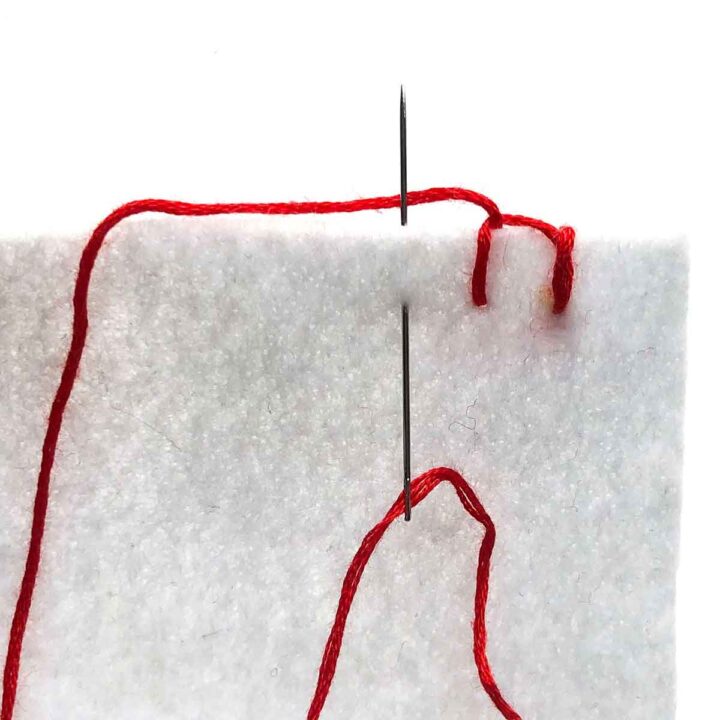
Next, bring the thread behind the needle (blue arrow).

Then, pull thread through.

Next, pull thread all the way through until the stitch is tight.

You have now made your first blanket stitch!

Now repeat making the stitches in the same way.

Continue making blanket stitches until you reach a corner. Follow along the tutorial in the next section to learn how to continue.
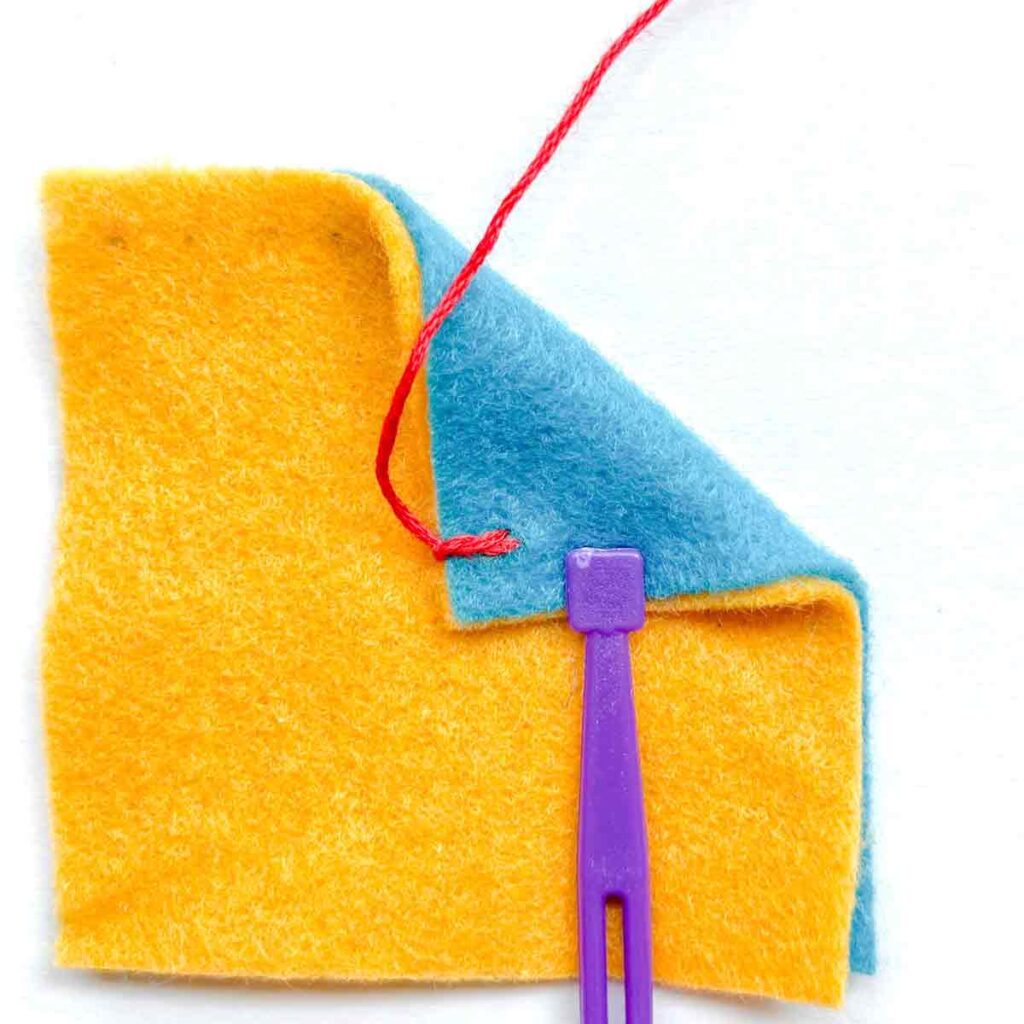
How to Go Around Corners

Once you have made the last blanket stitch before the corner, bring the needle through the same point where your last stitch was (1), front to back.

Next, bring the thread behind the needle (2).

Now pull thread through (3)

You will now end up with a diagonal blanket stitch.

Next, bring needle through the same stitch point again, front to back (4).

Then bring thread behind needle (5).

Finally, pull thread through (6).

Yay! You have now successfully made blanket stitches around the corner.

Side View

Back view of blanket stitch around the corner.
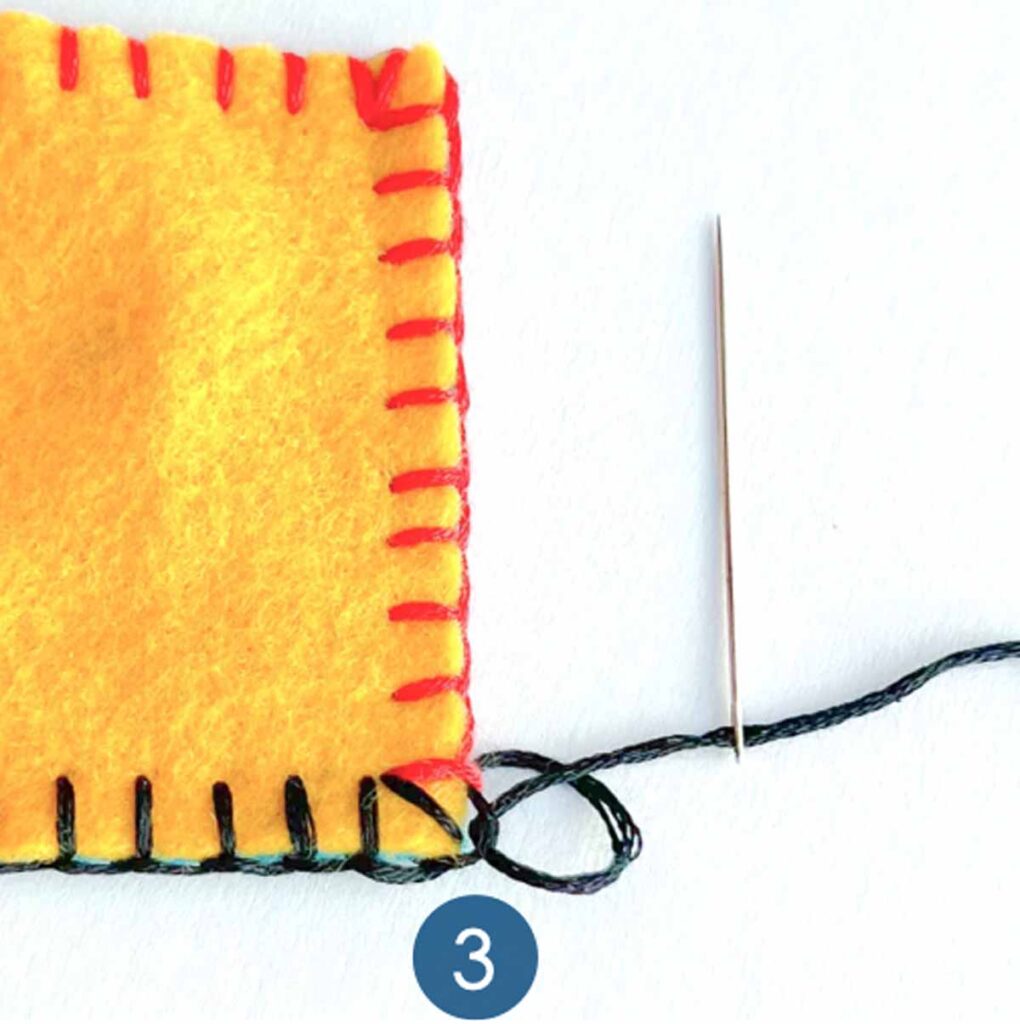
How to Change Threads

Uh oh! We are about to run out of thread! What do we do now?

First, bring the needle through where the next blanket stitch needs to go, front to back. However, this time, only go through top layer of fabric.

Next, pull the thread through.

Then, with your new strand of thread (black), tie a knot around the original thread (red).
NOTE: I am using a different colored thread (black) as my new thread for easier visualization. This way, you can tell which one is the original thread and which one is the new thread. However, for your purposes use the same colored thread.

Next, tighten the knot (doesn’t have to be super duper tight) and slide it close to the front piece of fabric.

Now thread your needle with the new thread (black) and bring it through the second layer of fabric.

Next, bring your needle to the front fabric and loop it under the original thread (red).

You have now made another blanket stitch by joining two pieces of thread.

Next, from the inside of the two fabric pieces, (A) pull the original thread (red) to tighten it (if necessary). Then (B) slide the knot on the black thread close to where the red thread exits the first top fabric. Tighten the knot on the black thread. Then, tuck both the red and black thread ends so it’s hidden in between the fabrics.

Now continue making the blanket stitch as usual.
How to End Blanket Stitch
Yay! Now that we’ve finished blanket stitching our project, it’s time to end our stitch.

First, take your needle and loop it under the initial stitch (1).

Next, pull thread through (2).
Now tie a regular knot around the initial stitch (3).

Next, tie the knot tight.

Next, bring your needle in between the two pieces of fabric and come out a distance away from the top fabric side (4).

Then, pull thread through (5).

Finally, cut off excess thread and you are finished!

Front and back view of finished blanket stitches.
Blanket Stitch Step by Step with Pictures
In this section of the tutorial, we will be going over how to do the blanket stitch on the edge of one piece of fabric.
Many of the steps are exactly the same as doing it on two pieces of fabric. The only differences are for changing threads as well as ending the stitch.
How to Start a Blanket Stitch – One Layer of Fabric
The process of starting a blanket stitch on one piece of fabric is very similar to that on two pieces of fabric, with a few differences.
When starting on one piece of fabric, you bring the needle from back to front so that the knot stays on the back side.
For starting a blanket stitch on two pieces of fabric, you first bring the needle from front to back on the bottom layer of fabric. This way, you can hide the knot on the thread in between the two fabric layers.
NOTE: For practicing purposes, make sure to mark your fabric where the stitches will go like in Preparing to Start.

First, bring the knotted needle from back to front (1).

Second, pull thread all the way through (2).

View of knot on bottom side of fabric.

Next, take a stitch from back to front (3), bringing needle out from same point as in step (2).

Now pull thread through (4).

Then, bring needle from right to left (5), under the stitch you just made.

Now pull your thread all the way through (6) and you have made your initial anchoring stitch for your blanket stitch.
How to Make Blanket Stitch – One Layer of Fabric
The process of making a blanket stitch on one layer of fabric is exactly the same as for two layers of fabric.

First, take a stitch from front to back at the next marked point (1). Second, bring thread so that it’s behind the needle (2).

Third, pull thread through (3). You have just made your first blanket stitch.
Repeat in the same way and take another stitch to the left.

Continue until you have reached the corner. The next section will show you how to blanket stitch around the corners.
Stitching Around Corners – One Layer of Fabric
The process of making a blanket stitch around the corner on 1 layer of fabric is exactly the same as on 2 layers of fabric.

First, bring the needle through the same point where your last stitch was (1), front to back, at a diagonal to the corner.

Second, bring the thread to behind the needle (2).

Next, pull thread through (3).

Fourth, bring needle through the same stitch point again, front to back, right to left (4). Then bring thread to behind the needle (5).

Finally, pull thread through (6). You have now just completed going around the corner with the blanket stitch. Continue making stitches in the same way.
Changing Threads – One Layer of Fabric
The process of changing threads on 1 layer of fabric is slightly different than doing it on 2 layers of fabric. Read on to learn more.

First, bring the needle through from where the next blanket stitch needs to go, front to back, like you are making another blanket stitch (1).

Second, pull the thread through. You can slide the needle off the thread end like I did.

Then, with your new strand of thread (black), tie a knot around the original thread (red).

Next, pull the knot tight (doesn’t have to be super duper tight) and slide it so it’s close to back side of fabric.

Then, use original thread strand (red) and tie it to the continuous end of new thread (black).
NOTE: I am using a different colored thread (black) as my new thread for easier visualization. This way, you can tell which one is the original thread and which one is the new thread. However, for your purposes use the same colored thread.

Next, tighten the knot, and make another knot with the old strand (red).

Now trim off thread ends of both old strand and new strand.

Next, thread the new thread strand (black) with your sewing needle. Then, from the front side of fabric, pass needle under the (partial) blanket stitch of old thread strand (2).

Now pull thread through (3).

You’ve just made another blanket stitch by connecting two strands of thread!

Now continue to make blanket stitch in the same way with the new strand of thread.
How to Finish Blanket Stitch – One Layer of Fabric

Yay! Now that we’ve finished blanket stitching our project, it’s time to end our stitch.

First, take your needle and pass it under the anchoring stitch (1), from right to left.

Second, pull thread through (2).

Third, take another stitch from the same spot as the anchoring stitch (3)

Fourth, pull thread through.

Then, tie a knot around anchor stitch.

Next, pull knot tight.

Now tie a second knot around anchor stitch to reinforce.

Then pull the knot tight and cut off excess thread. Finished!

View of back side of fabric. Finished!
How to Do a Blanket Stitch by Hand
This simple step-by-step tutorial will show you exactly how to sew a blanket stitch by hand, from start to finish!
Materials
- 3" x 3" FELT SQUARES
- EMBROIDERY FLOSS
- HAND SEWING NEEDLE
- SCISSORS
Instructions
- Poke your needle through the back piece of fabric at the same point as where you marked the first dot on the top piece of fabric. In our tutorial, the needle is poked through 1/4” from the top and 1/4” from right edge of fabric.
- Pull your thread all the way through until it stops at the knot.
- Insert your needle from front to pack through the marked dot. Pull thread through.
- Insert needle from right to left through the loop stitch.
- Pull thread through. Your initial anchor stitch is complete!
- Bring the knotted needle from back to front and pull thread all the way through.
- Take a stitch from back to front , bringing needle out from same point as in step 1.
- Pull thread through then bring needle from right to left under the stitch you just made.
- Pull your thread all the way through and you have made your initial anchoring stitch for your blanket stitch.
- Take the needle through the next marked point on your fabric, going from front to back.
- Bring the thread behind the needle, then pull thread through.
- Pull thread all the way through until the stitch is tight.
- First blanket stitch is complete! Continue making blanket stitches in the same way.
- Once you have made the last blanket stitch before the corner, bring the needle through the same point where your last stitch came out from, front to back.
- Bring the thread to behind the needle and pull thread through.
- You will now end up with a diagonal blanket stitch.
- Next, bring needle through the same stitch point again, front to back.
- Bring thread behind needle again and pull thread through. You have now successfully made blanket stitches around the corner.
- Continue making blanket stitches as normal.
- First, bring the needle through where the next blanket stitch needs to go, front to back. However, this time, only go through top layer of fabric.
- Pull the thread through.
- With your new strand of thread, tie a knot around the original thread.
- Pull the knot tight (doesn’t have to be super duper tight) and slide it so it’s close to the front fabric.
- Now thread your needle with the new thread and bring it through the second layer of fabric.
- Then bring your needle to the front fabric and loop it under the original thread like how you make a blanket stitch. Pull thread through. You now have a blanket stitch made with two different strands of fabric!
- Next, from the inside of the two fabric pieces, pull the original thread to tighten it (if necessary).
- Slide the knot on the new thread close to where the original thread exits the top piece of fabric. Tighten the knot on the new thread.
- Tuck both the thread ends so it’s hidden in between the two fabric layers.
- Bring the needle through from where the next blanket stitch needs to go, front to back, like you are making another blanket stitch.
- Pull the thread through. You can slide the needle off the thread.
- With your new strand of thread, tie a knot around the original thread.
- Pull the knot tight (doesn’t have to be super duper tight) and slide it so it’s close to back side of fabric.
- Use original thread strand and tie it to the continuous end of new thread.
- Tighten the knot, and make another knot (double knot) with the old strand.
- Trim off thread ends of both old strand and new strand.
- Thread the new thread strand with your sewing needle.
- From the front side of fabric, pass needle under the (partial) blanket stitch of old thread and pull thread through (just like how your normally make a blanket stitch). You’ve just made another blanket stitch by connecting two strands of thread!
- Take your needle and loop it under the initial stitch. Pull thread through.
- Now tie a regular knot around the initial stitch.
- Bring your needle in between the two pieces of fabric and come out a distance away from the top fabric side.
- Pull thread through. Cut off excess thread and you are finished!
- Take your needle and pass it under the anchoring stitch, from right to left and pull thread through.
- Take another stitch from the same spot as the anchoring stitch and pull thread through.
- Tie a knot around anchor stitch and pull knot tight.
- Tie a second knot around anchor stitch to reinforce.
- Pull the knot tight and cut off excess thread. You are done!
HOW TO START BLANKET STITCH - 2 LAYERS OF FABRIC
HOW TO START BLANKET STITCH - 1 LAYER OF FABRIC
HOW TO MAKE BLANKET STITCH - 1 OR 2 LAYERS OF FABRIC
HOW TO BLANKET STITCH AROUND CORNERS - 1 OR 2 LAYERS OF FABRIC
HOW TO CHANGE THREADS - 2 LAYERS OF FABRIC
HOW TO CHANGE THREADS FOR BLANKET STITCH - ONE LAYER OF FABRIC
HOW TO END BLANKET STITCH - 2 LAYERS OF FABRIC
HOW TO END BLANKET STITCH - 1 LAYER OF FABRIC
Want to learn more hand stitches? Check out the following tutorials:
Excellent instructions! Very clear and easy to follow. The photos were helpful, too. Thank you so much!
You are so welcome! Glad you found it helpful.
so detailed, thank you!
you are so welcome!