How to Make a 20 Minute Clear Drawstring Shoe Bag (Free Pattern in 3 Sizes)
Keep your shoes safely stowed away with this easy drawstring shoe dust bag. Clear vinyl at the bottom of the bag allows you to easily find the pair that you need. The best part? This easy sewing project takes less than 30 minutes to complete and is great for beginners!

Recently a friend came over for some sewing lessons. When I asked her what she wanted to make, she requested a shoe bag for her daughter’s dance shoes. Since the last time she had sewn was in home economy class, she wanted something easy, so we decided on a drawstring bag. And believe me, this drawstring shoe bag is super easy to make!

Since most people in our wealthy western culture own several (if not many) pairs of shoes, I thought it would be nice if the drawstring bag had a little “window” where you can see the shoes. That way, you can easily spot which shoe is in each bag without having to open every single bag! I know this from experience because I can never remember what I put into my dust bags. Every time I always have to open every dust bag to see what’s inside. The clear vinyl bottom of the drawstring shoe bag allows you to easily spot the pair of shoe you need.
Additionally, the bottom of the drawstring shoe bag comes with a gusset so the bag can stand on it’s own. The gusset also adds extra space to the bag for storing bulky shoes or high heels.
What are the Dimensions of the Drawstring Shoe Bag?
The drawstring shoe bag comes in 3 sizes: LARGE, MEDIUM, and SMALL:

- LARGE BAG – good for men’s shoes, medium-high top sneakers, running shoes, high heels, or platforms.
- Measures 10.5″ x 13″ (approximately 26cm x 33 cm)

- MEDIUM BAG – fits flip flops, flats, and low top sneakers
- Measures 10″ x 12″ (approximately 25.4cm x 30.48cm)
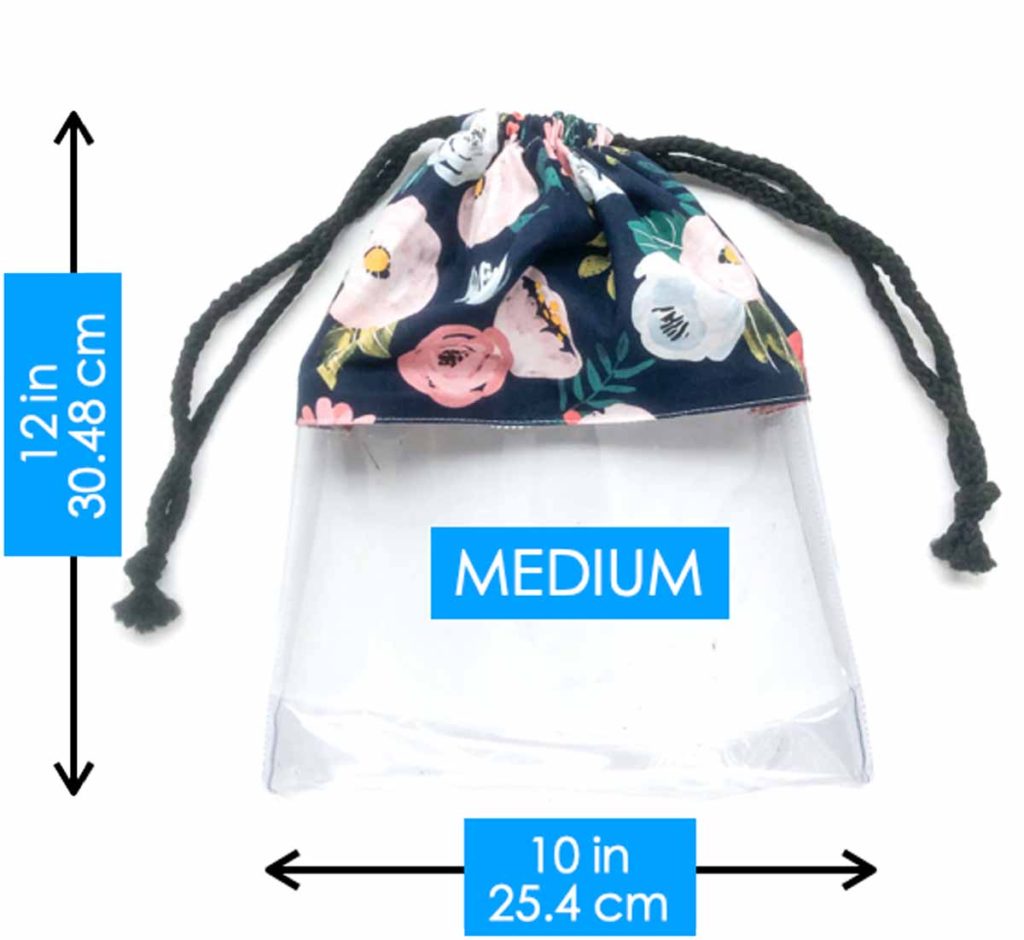
- SMALL BAG is good for storing kid’s shoes.

What Do I Need to Make a Drawstring Shoe Bag?
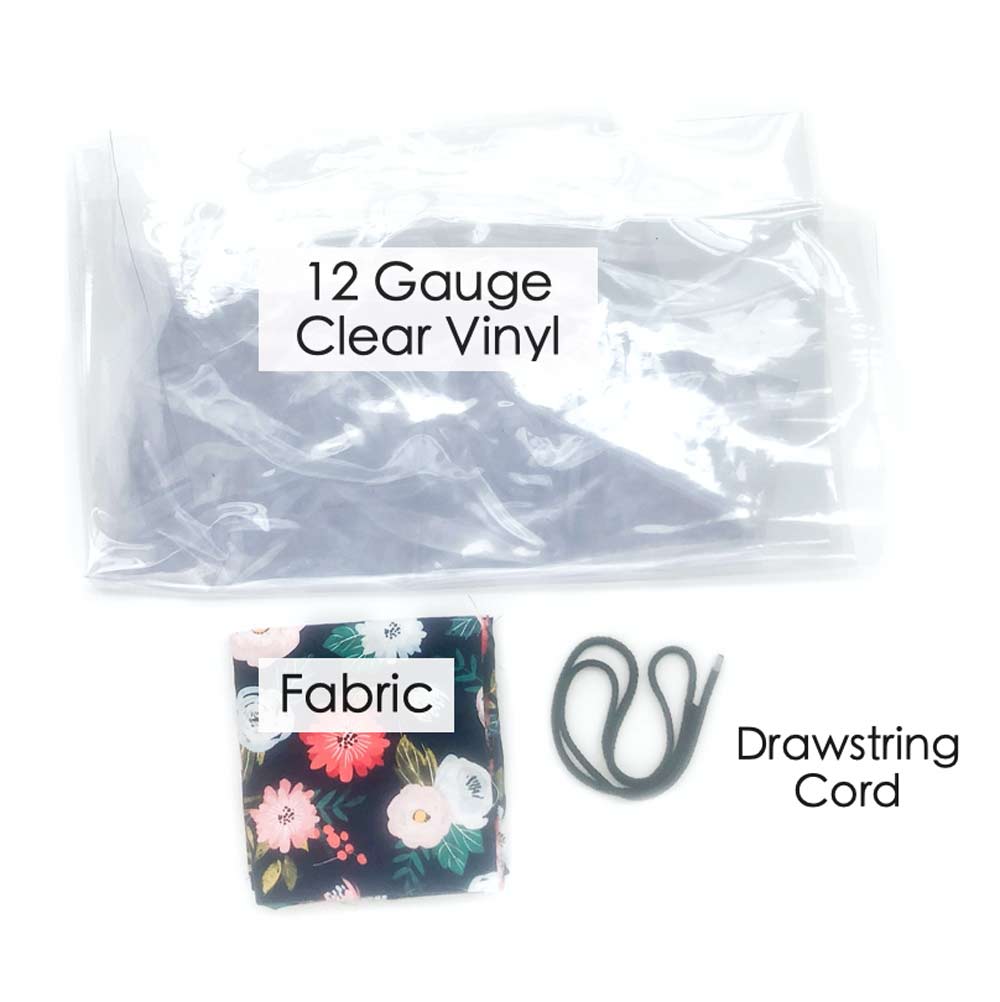
MATERIALS:
- 1/4 yard of Fabric – You can use any that you like. I recommend 100% cotton fabric if you are a beginner since this is the easiest fabric to work with. However, you can use knits as well.
- 1/3 Yard of Clear Vinyl – I used 12 Gauge Clear Vinyl from Joanns. You can also order it on Amazon. I find that the 12 gauge gives the bag some sturdiness but isn’t so thick that it’s hard to sew. It also has just the right amount of thickness so you don’t have to worry that the vinyl will tear with use.
- 5mm/6mm Drawstring Cord – I really like the feel of the 5mm Cotton Cord from Simplicity. However, if you are planning to make these in bulk as gifts, this 6mm Macrame Cord from Amazon is much more economical.

TOOLS:
- Sewing machine with zigzag function
- Serger (optional) – for finishing the raw edge of fabric
- Fabric Scissors – these Ginghers Fabric Shears are my favorite. Alternatively, rotary cutters are also great for this easy project as you will be only making straight line cuts. For more information, see post on Rotary Cutter Vs Scissors
- Pins or Sewing Clips
- Chalk – for marking fabric
- Clear Ruler
- Matching Thread – I recommend using white thread for sewing the vinyl part as it will be less noticeable. Use white or a matching thread to sew the fabric.
DRAWSTRING SHOE BAG: PATTERN
NOTES:
– 0.5″ (1.27cm) seam allowance is included in all pattern measurements
– When cutting the fabric pattern piece, the length (Shorter measurement) is the side that is parallel to selvedge.
– Pattern not to scale

LARGE DRAWSTRING SHOE BAG:
- VINYL – Cut 1 Piece
- 18″ x 11.5″ (45.72 cm x 29.21 cm)
- FABRIC – Cut 2 Pieces
- 11.5″ x 8.5″ (29.21 cm x 21.59 cm)

MEDIUM DRAWSTRING SHOE BAG:
- VINYL – Cut 1 Piece
- 16″ x 11″ (40.64 cm x 27.94 cm)
- FABRIC – Cut 2 Pieces
- 11″ x 8.5″ (27.94 cm x 21.59 cm)

SMALL DRAWSTRING SHOE BAG:
- VINYL – Cut 1 Piece
- 14″ x 10″ (35.56 cm x 25.4 cm)
- FABRIC – Cut 2 Pieces
- 10″ x 8″ (25.4 cm x 20.32 cm)
How to Make A Drawstring Shoe Bag: Step-by-Step Instructions
- Measure and cut out fabric and vinyl pieces according to the pattern measurements. Remember that all pattern measurements already include a 0.5″ (1.27cm) seam allowance
- Finish edges of fabric to prevent fraying. You can either serge, pink, or do a zig-zag stitch.
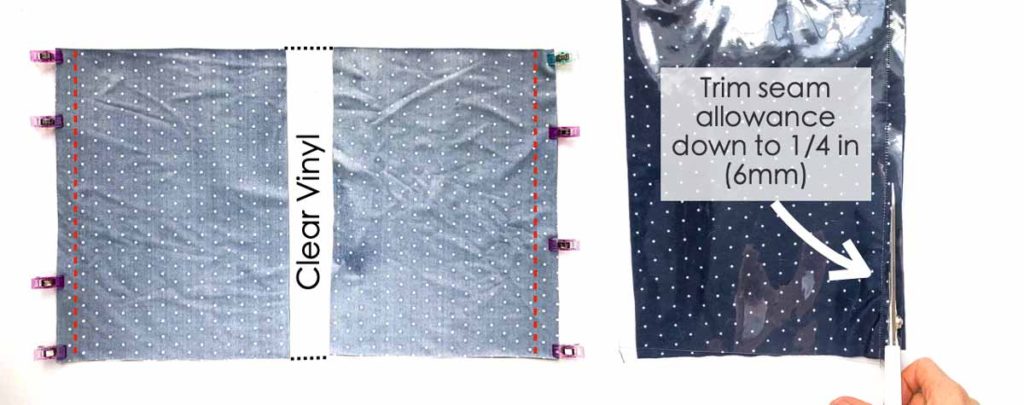
LEFT: Place width of fabric (the longer side) along two shorter ends of clear vinyl, with right side of fabric facing vinyl. Secure with clips and stitch at 1/2”(12mm) seam allowance (red dotted line)
RIGHT: Trim seam allowance down to 1/4”(6mm)

You will end up with a piece with clear vinyl in the middle and two fabrics on either end of the vinyl.

LEFT: Lean seam allowance towards fabric and edge stitch down at 1/8”(3mm) on fabric side
RIGHT: View of edge stitch from wrong side of fabric (TOP) and right side of fabric (bottom)

LEFT: Fold vinyl in half, matching the top edge of fabric together and matching at the seam (where vinyl and fabric is sewn) together.
RIGHT: Use a ruler, and measure 1.5”(3.81cm) up from fold line on vinyl. Use a pen to mark.

LEFT: Fold vinyl up at 1.5” mark
RIGHT: Use binding clips and clip down the fold on left and right side of vinyl.

LEFT: Measure 1.5” (3.81 cm) down from top edge of fabric and make a mark on left and left side of fabric. Make a second mark 2.5” (6.35cm) from top edge of fabric.
RIGHT: View of measurements where marks are made. The space between the yellow marks is where you will leave open when you sew in the next step.
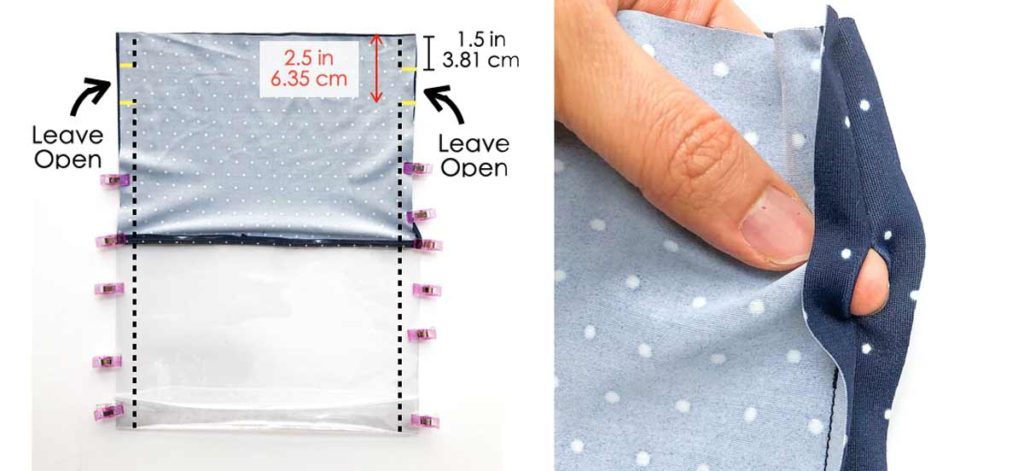
LEFT: Stitch at 1/2” (6mm) seam allowance on left and right sides (black dotted line), leaving the space between yellow marks unstitched. Make sure to back stitch on both sides of the opening so it doesn’t come undone.
RIGHT: View of opening, about 1”(3mm) big. This opening is where you the drawstring will come out from.
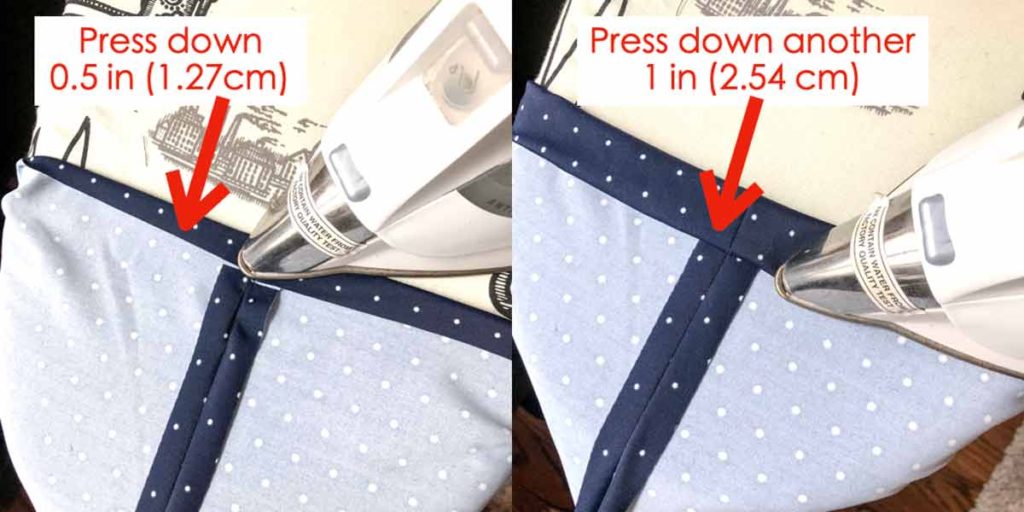
LEFT: From wrong side of fabric, press open the side seams. Then press down top edge 0.5” (1.27cm)
RIGHT: Keeping the 0.5” that was just pressed down, fold fabric down another 1” (2.54 cm) and press down again.
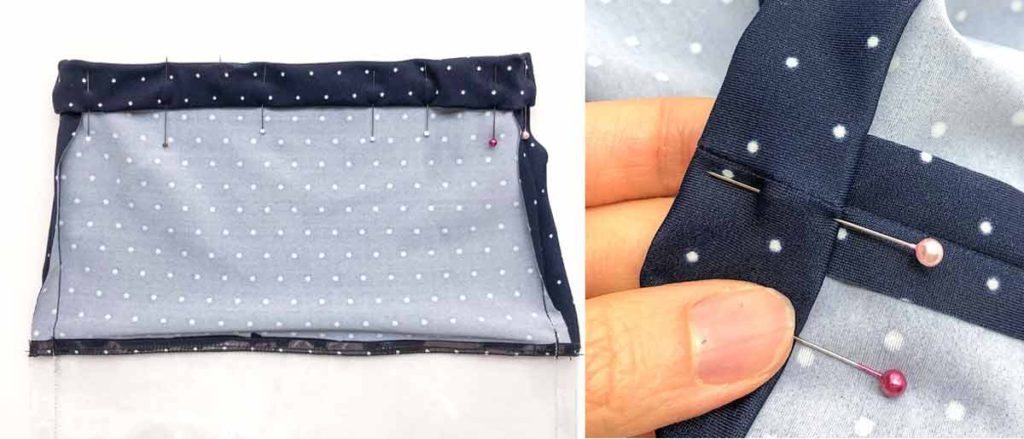
Pin the top folded edge down around entire bag (LEFT), making sure to match at the seams (RIGHT)
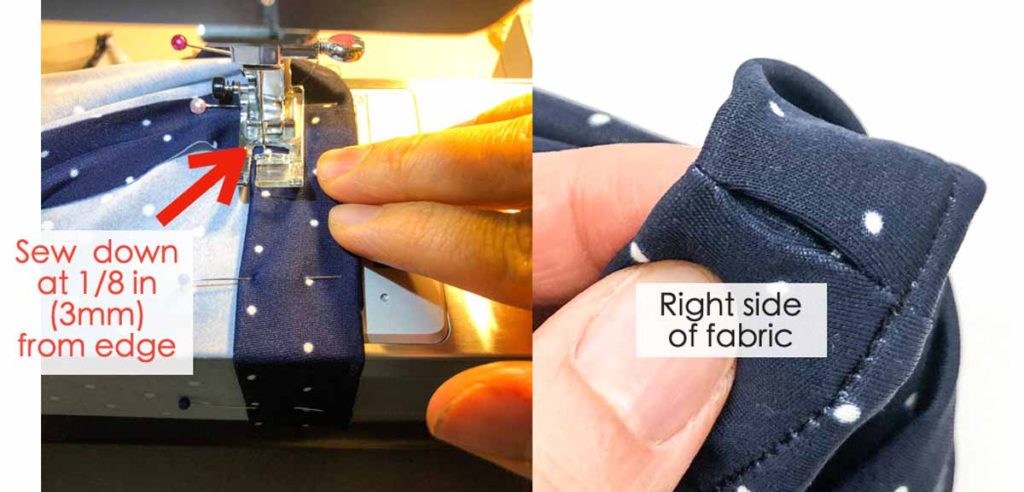
LEFT: Stitch twice folded edge down all around at 1/8” (3mm) from the 0.5”fold.
RIGHT: From the right side of fabric, you will have two openings at the side seams.
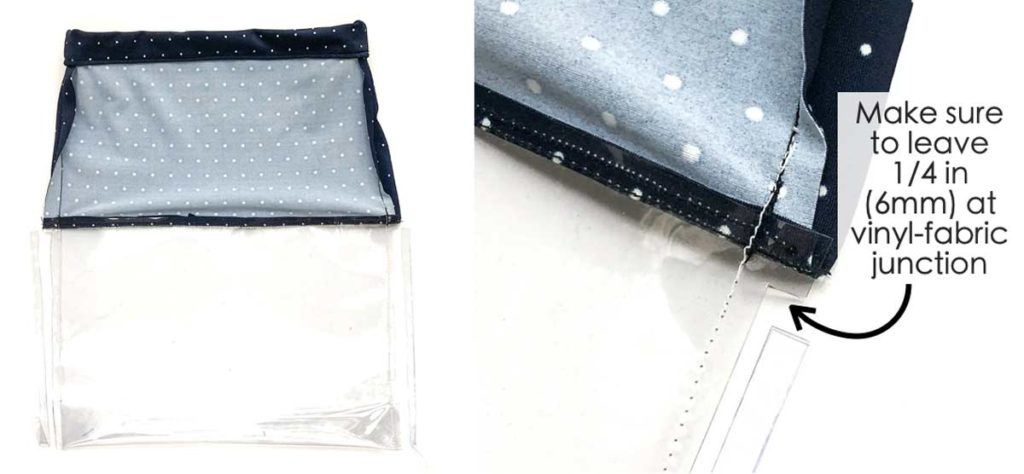
Trim seam allowance on vinyl down to 1/4” (6mm). Make sure to leave 1/4” (6mm) at the vinyl-fabric seam as well.

Turn drawstring bag to right side. The vinyl part of the bag will be harder to turn as the vinyl is stiff and tends to stick to itself. But do it slowly and with patience you’ll be able to turn it to the right side.
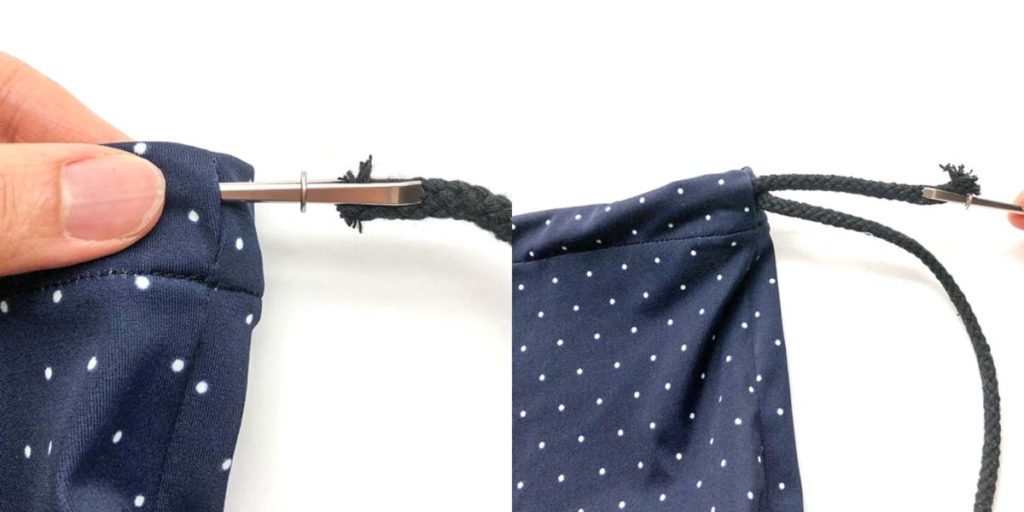
Using a bodkin, thread cord through one opening of drawstring bag, then thread through the other opening.

View of drawstring bag with drawstrings in place. You’re almost done!

TIe a knot at either end of both drawstring

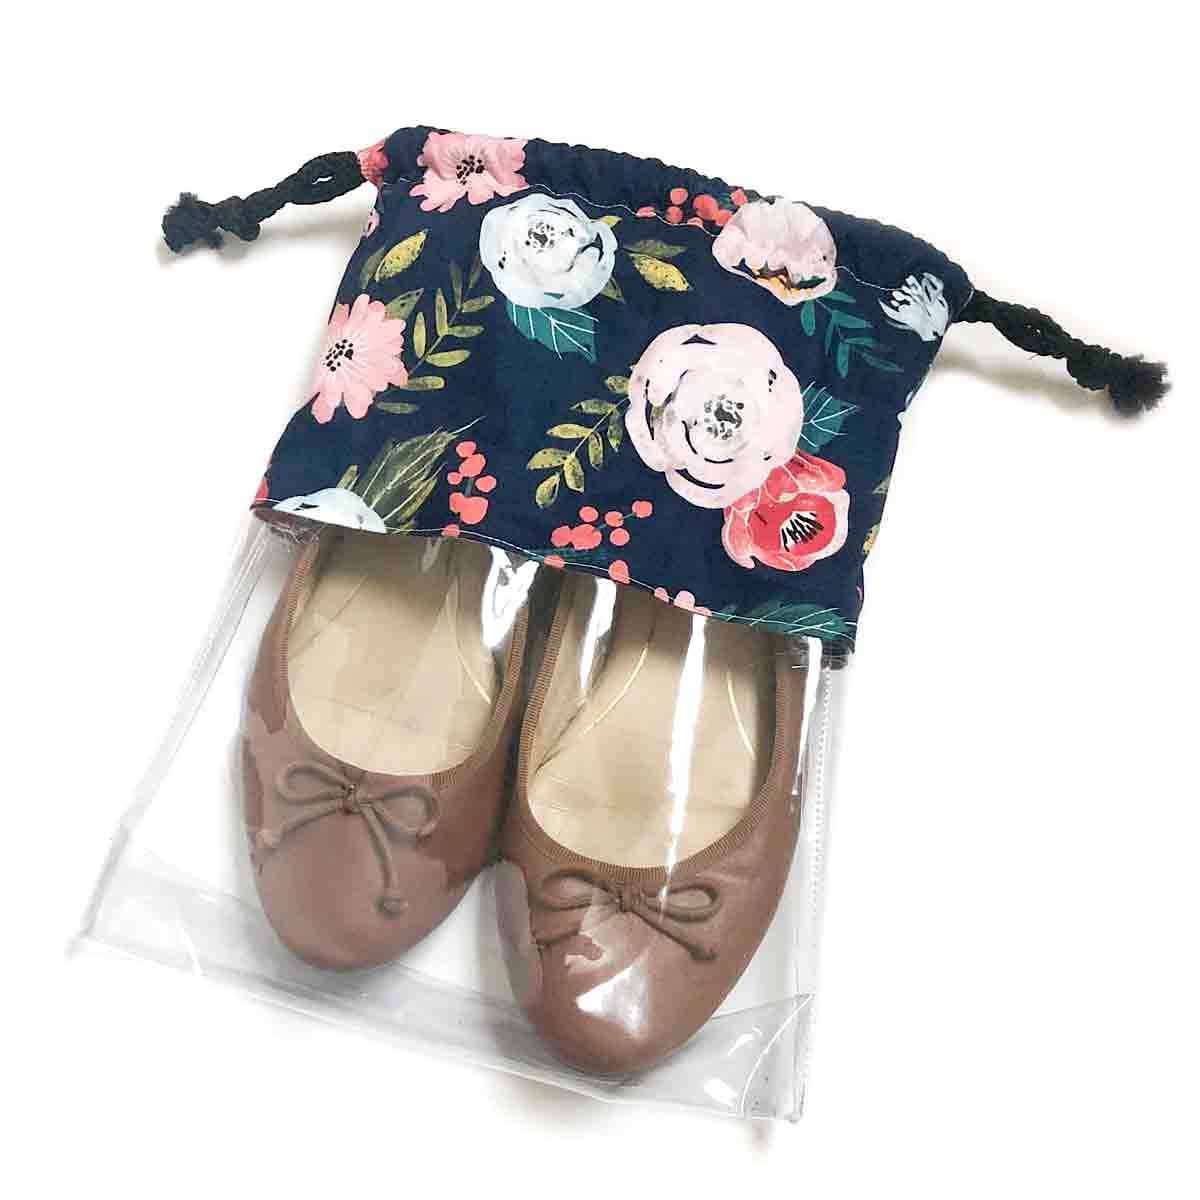
All Finished! Wasn’t that easy? Your drawstring bag is now ready to store shoes, shoes and more shoes!
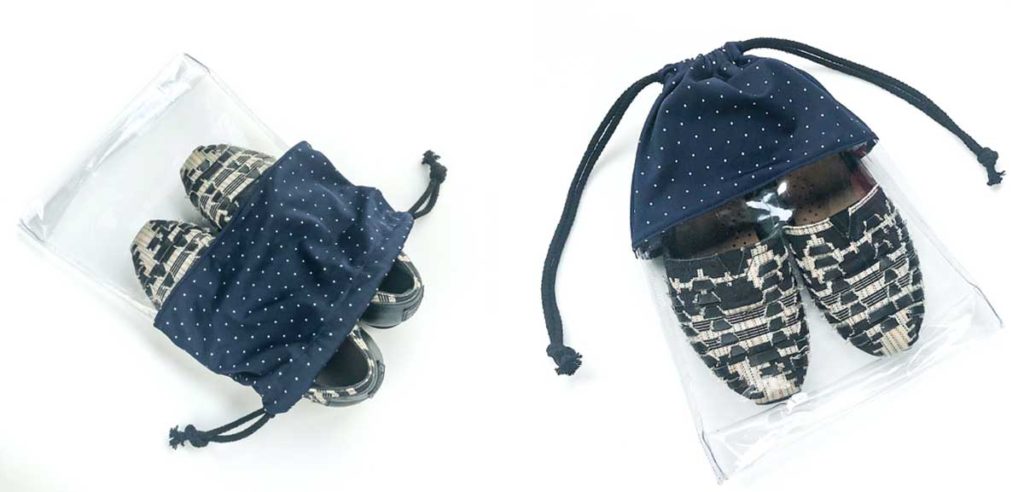

These are so handy for traveling, after school activities, pools, and more! They’re also great for storing an extra set of clothes, hand towels, and other trinkets around the house. Make a dozen for your family and friends. They make such useful gifts, and since they are so quick and easy, I’m sure you won’t want to stop at just making one!
Don’t forget to save this pin for later.

More Easy Sewing Projects You’ll Love:



Thank you for sharing this wonderful tutorial! These bags are perfect for my daughter’s dance shoes, she has 5 different shoe styles and and now she is able to grab the exact one that she needs at the moment!
Hi Karis,
I’m so glad to hear that! And thank you for your kind words! It really keeps motivating me to continue making these tutorials and patterns 🙂
Why isn’t there a PDF to print out the free pattern?
Hi Marcia,
All the dimensions to cut your fabric are listed in the post under “Drawstring Shoe Bag: Pattern”. Hope that helps!
These are so fun & easy to sew up. My favorite type of quick project.
Your directions & photos are great. I’ve made 3 now and can’t wait to make more for gifts.
Hi Kaylene,
Thank you so much for you kind words, and yes these make such useful gifts!