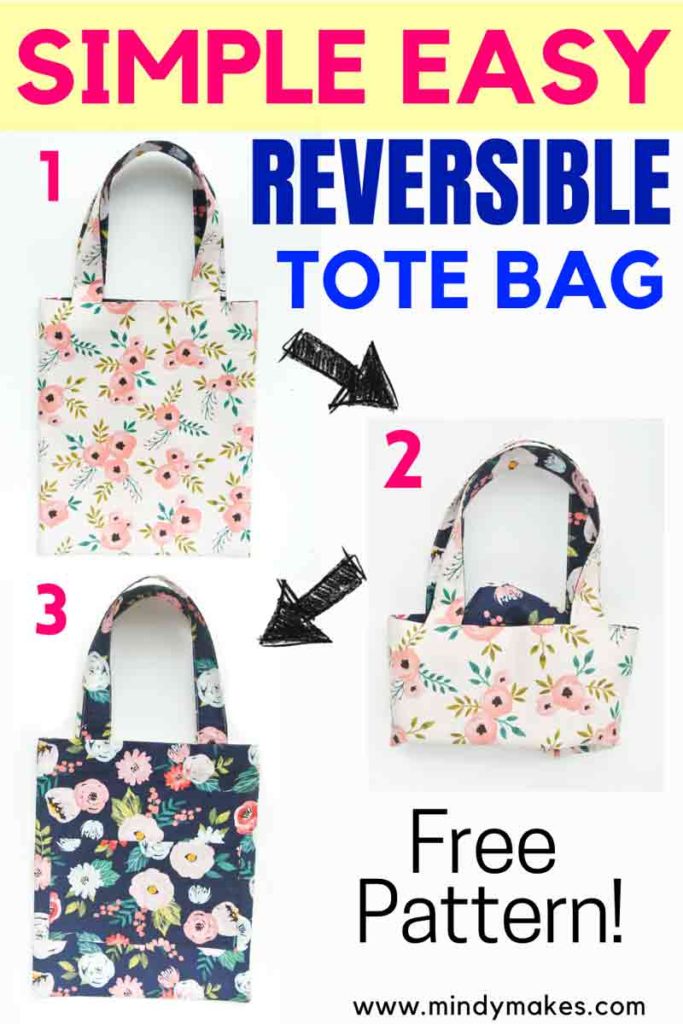
How to Sew a Reversible Tote Bag (Free Pattern)
This post may contain affiliate links. Please read my disclosure policy for details. As an Amazon Associate, I earn from qualifying purchases.
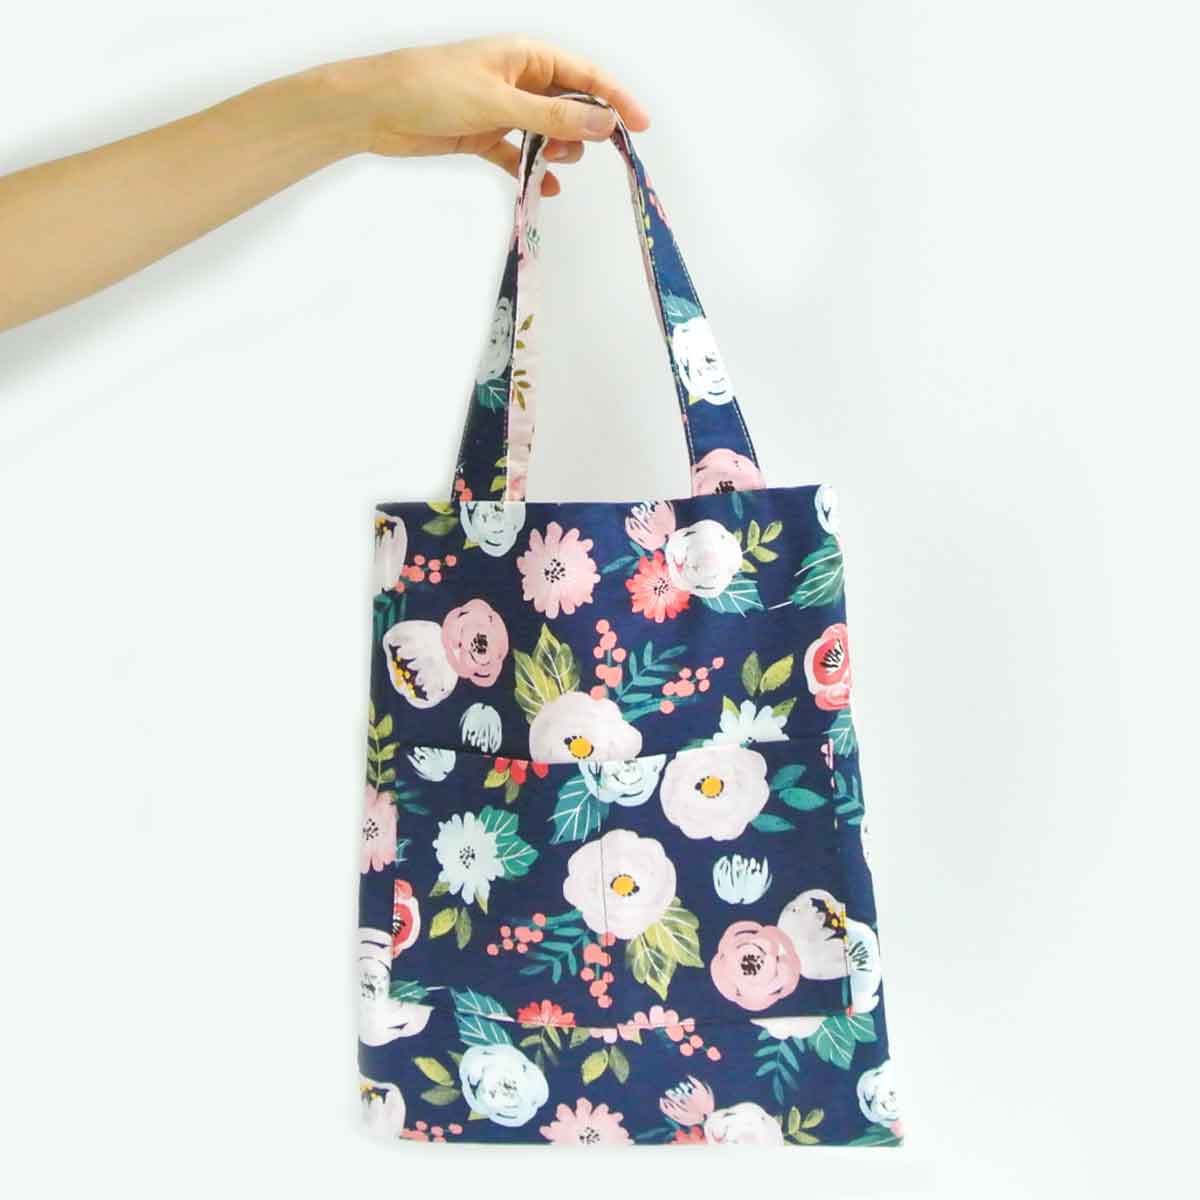
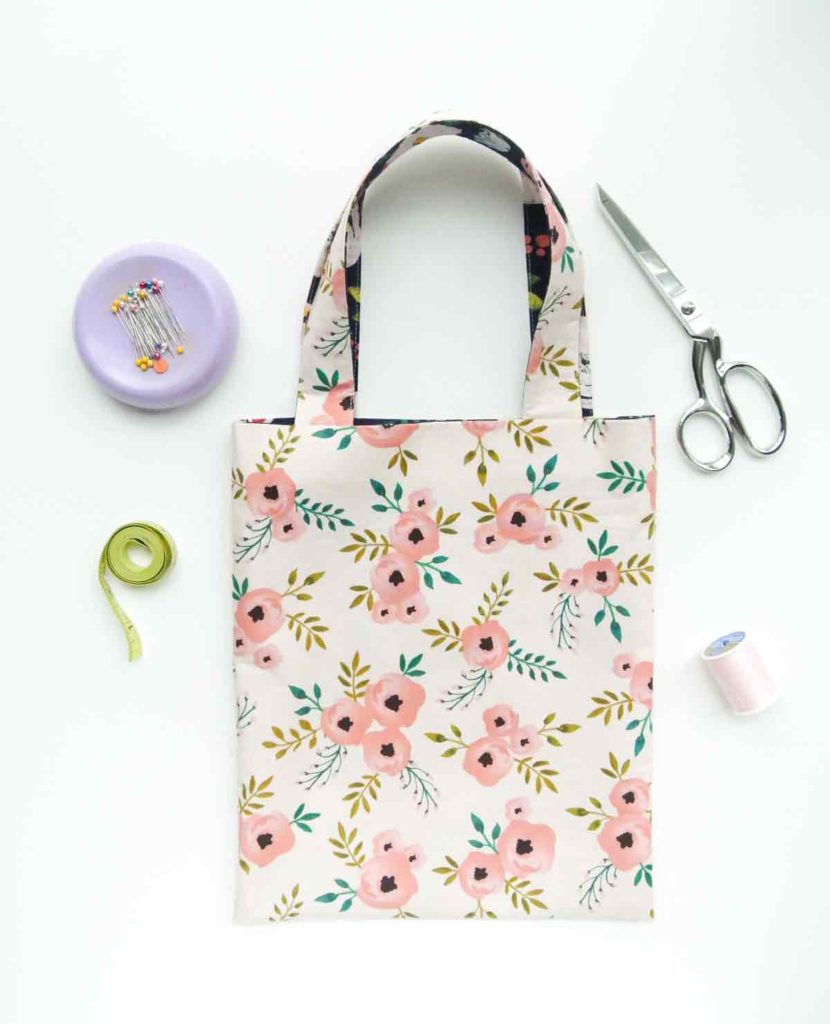
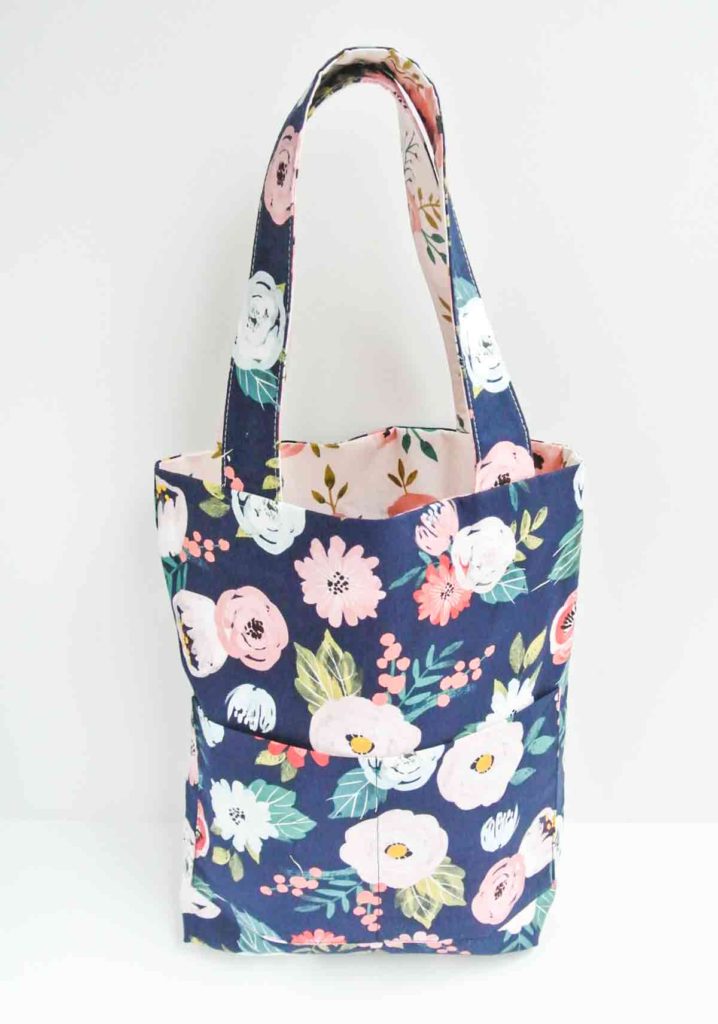
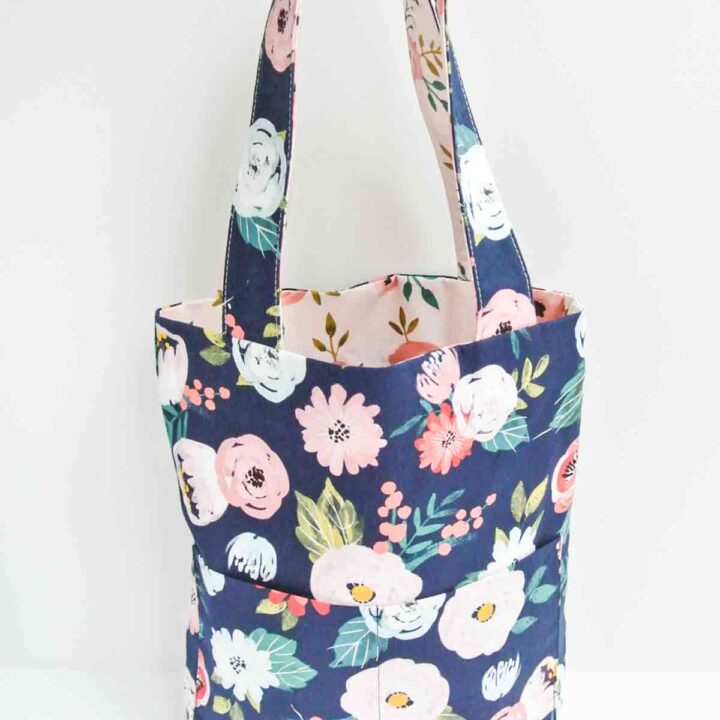
Get ready for the summer with this reversible tote that is so easy to sew! Tote is fully lined and comes with two pocket sleeves for added compartments. Great project for all sewing levels.
What Are the Dimensions of This Tote Bag?
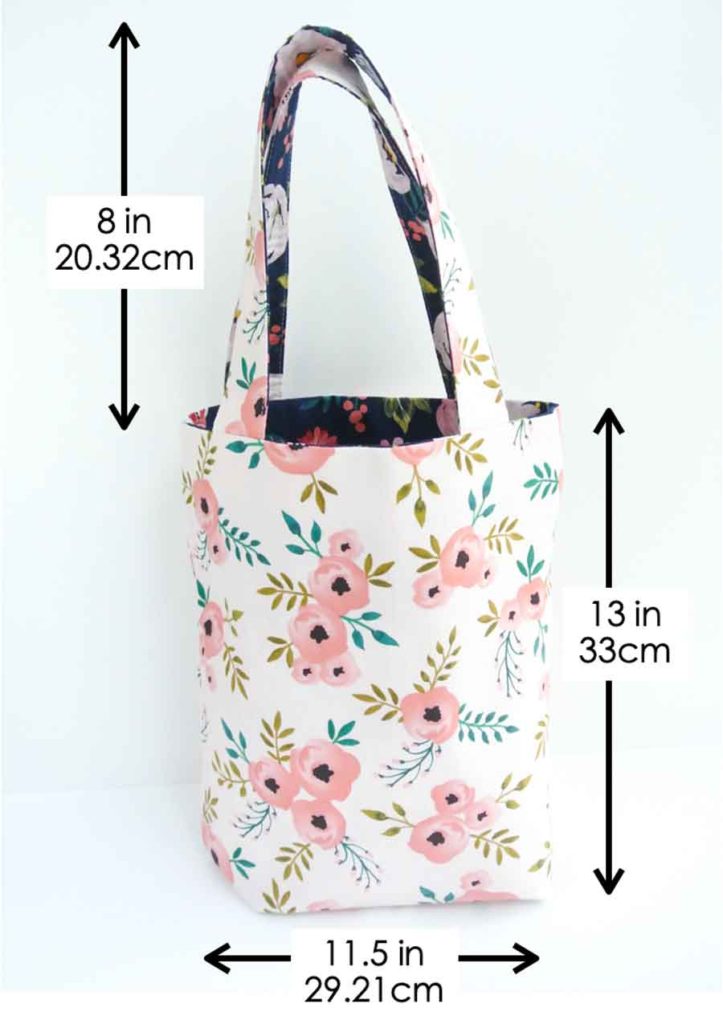
The reversible tote bag is approximately 11.5″ (29.21cm) wide and 13″ (33cm) tall. The straps are about 8″ (20.32cm) when fully extended.
Why Should I Make a Reversible Tote Bag?
Having a reversible tote is like have 2 bags! You can use one side on any given day and switch to the other side for a different look, or because one side matches your outfit for that day more.
Secondly, being reversible means that it’s fully lined. This is wonderful because having a lining just adds so much quality to any sewing project. It makes your tote look well made and expensive.
What Are Other Features of thIS Tote?
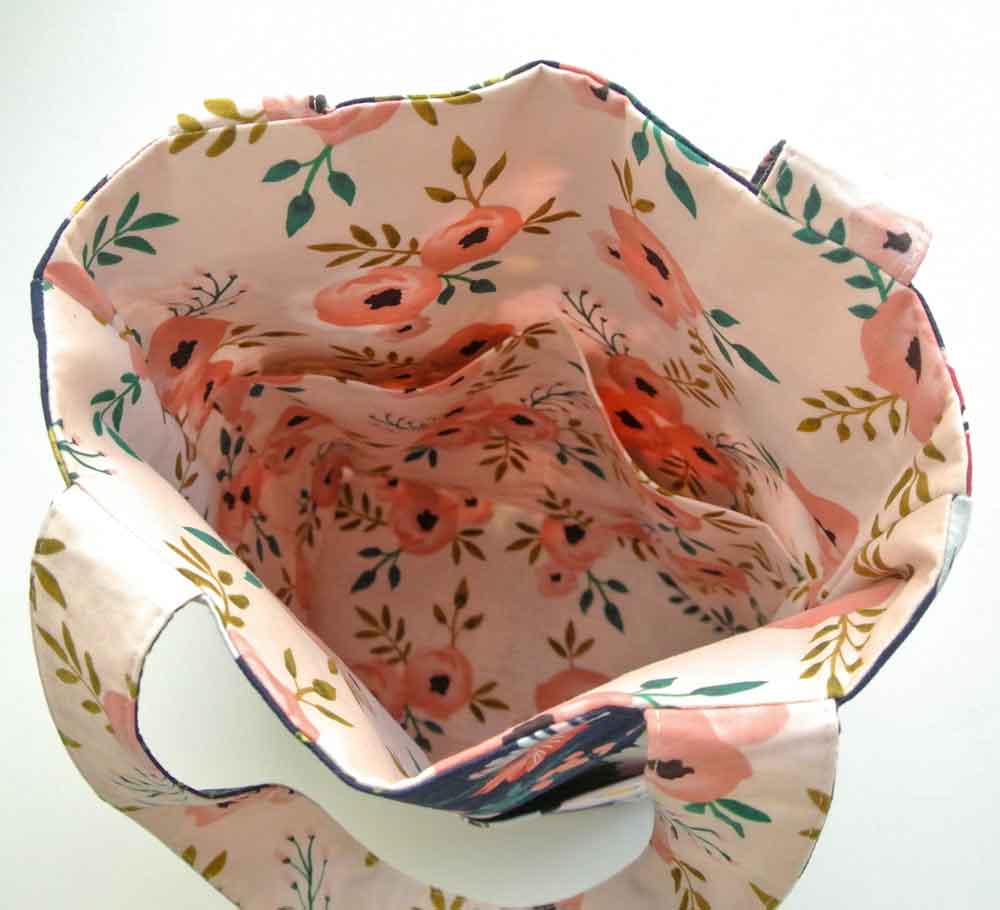
- 4 pocket sleeves – for storing pens, notebooks, phones, and more! While the pockets are completely optional, it really adds usability to your tote and doesn’t take that much extra time to sew. You can also add pocket sleeves to both side of the bag for extra compartments too!
- Interfaced Tote – One side of the reversible tote is interfaced for support. The bag can stand up on its own, even when empty. However, because only one side has is interfaced, it’s still soft enough for you to easily fold up the bag and stow away.
- Interfaced Straps – The straps are fully interfaced (on both sides of the fabric) again for added support. I tend to find bags with stiff handles/straps easier to carry than ones with with the flimsy straps. Also, the interface will help protect the straps from rubbing away or breaking due to overuse.
Who Should Make This BEGINNER SEWING PROJECT?
If you can sew straight lines, you can make this project!
This reversible tote tutorial is tailored for all levels of sewing, including beginners. At the core, the tote pattern is simply a rectangle folded along the length and stitched at the sides.
I would say the most time consuming part is ironing the fusible interfacing to the fabric. You can eliminate this step by using thick canvas fabric if you like. And if you don’t want to sew your own straps, you can also purchase webbing from craft stores or amazon.
Also, tote bags are so useful and make great gifts, so make a bunch and gift them away for holidays and special occasions!
Ready to make a reversible tote? Let’s get started!
What do I need to Make a Reversible Tote Bag?
MATERIALS:
- Fabric – I used 100% cotton print (44” wide*). Be sure to pre-wash, tumble dry, and press out wrinkles
- 2/3 of a yard for one side
- 2/3 of a yard of second side
- Fusible Interfacing – I use Fusible Featherweight Interfacing(Pellon 911FF), which is 60″ (152.4 cm) wide
- 2/3 of a yard**
NOTES:
*If you are using 54” or 60” wide fabric, you will only need 1/2 yard of fabric for each side.
**if you are using 20″ wide interfacing, you will be short 1/2″ (1.27cm). This is ok as the TOTE PIECE has 1/2″ (1.27cm) seam allowance included in the measurements on both sides. When ironing on the interfacing to the TOTE PIECE, just lay it on top with 0.25″ (0.635cm) gap from both sides of TOTE PIECE.
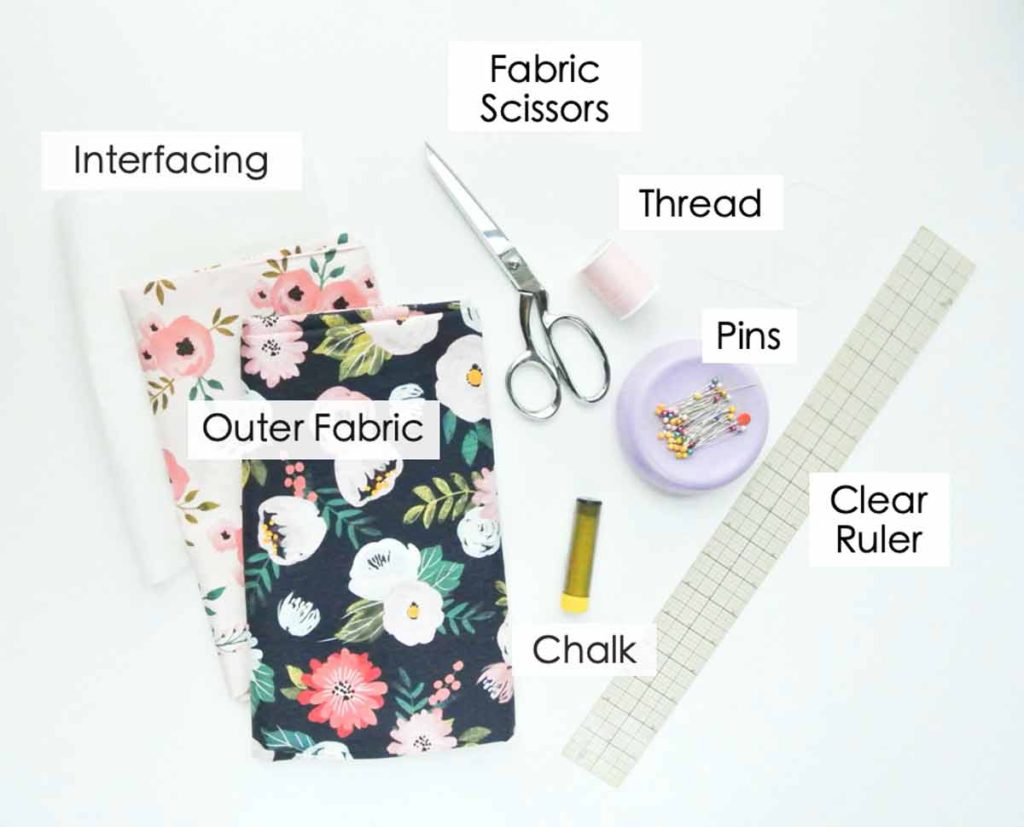
TOOLS:
- Sewing Machine
- Fabric Scissors – these Ginghers Fabric Shears are my favorite. Alternatively, rotary cutters are also great for this easy project as you will be making a lot of straight line cuts. For more information, see Rotary Cutters Vs Scissors: A Beginner’s Guide
- Sewing Pins
- Chalk for marking fabric -I highly recommend Clover Chaco Chalk Liner for marking. It’s thin, marks well, and easy to use!
- Clear Ruler
- Matching Thread and hand sewing needles
- Iron – for pressing
Reversible Tote Bag PATTERN:
To make this reversible tote bag, you will need the following pieces of fabric:
- Fabric #1
- Tote Piece: 12.5” x 33”(31.75cm x 83.82 cm)
- Strap: 4”x 20.5”(10.16 cm x 52.07cm)
- Pocket Piece: 10.5” x 12” (26.67 x 30.48cm)
- Fabric #2
- Tote Piece: 12.5” x 33”(31.75cm x 83.82 cm)
- Strap: 4”x 20.5”(10.16 cm x 52.07cm)
- Pocket Piece: 10.5” x 12” (26.67 x 30.48cm)
In the following tutorial, I will show you how to cut the fabric on fold. Thus, the dimension you will draw on the fabric will be always be half of the longest measurement for each pattern piece listed above.
How to Make Reversible Tote Bag: Step-by-Step Tutorial
CUTTING PATTERN

Fold entire fabric in half along the width of fabric*, right sides together. The wrong side of fabric will be facing up. Make sure the selvedge edge is on the left and right sides of fabric.
With chalk and clear ruler, mark a rectangular piece that measures 4 inch/10.16cm wide. This will be your STRAP PIECE.
Next, draw another rectangle piece that is 12.5 in x 16.5” (31.75cm x 41.91cm). This will be your TOTE PIECE. Cut STRAP PIECE and TOTE PIECE out on fold. Repeat for Exterior Fabric #2.
*Remember, the width of fabric runs from selvedge edge to selvedge edge and the length of fabric runs parallel to selvedge edge. Width of fabric always remains constant.
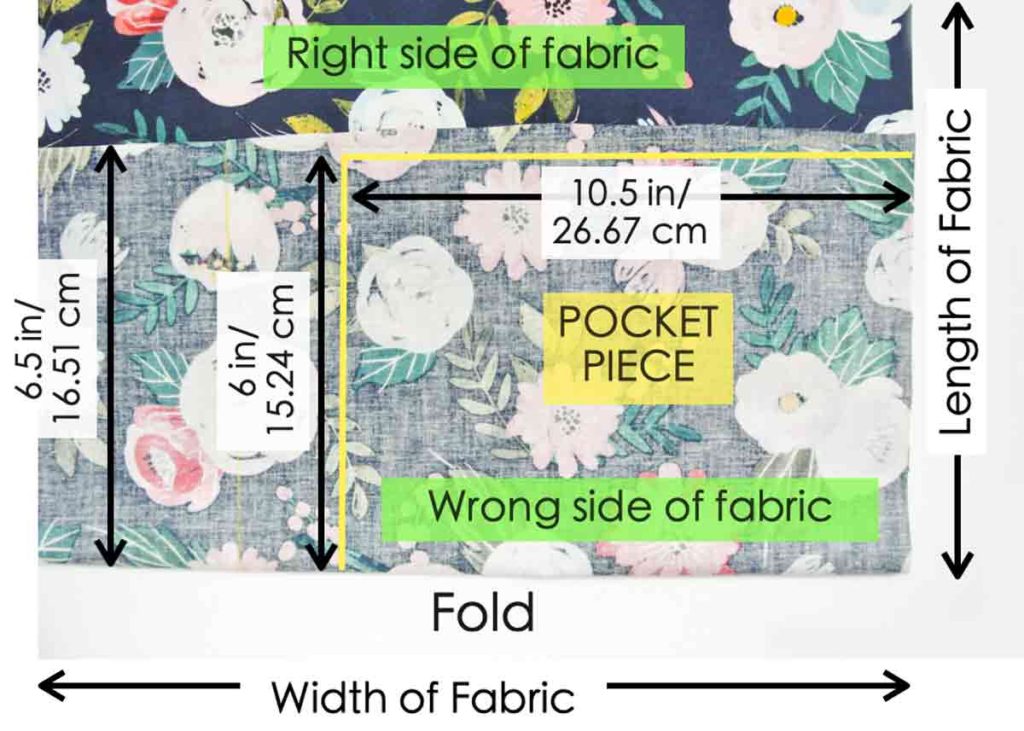
Next, fold along width of fabric about 6.5”(16.51cm) up. Draw a rectangular piece that measures 6”x 10.5” (15.24cm x 26.67cm). This will be your pocket piece. Cut this piece out on fold. Repeat for Exterior Fabric #2
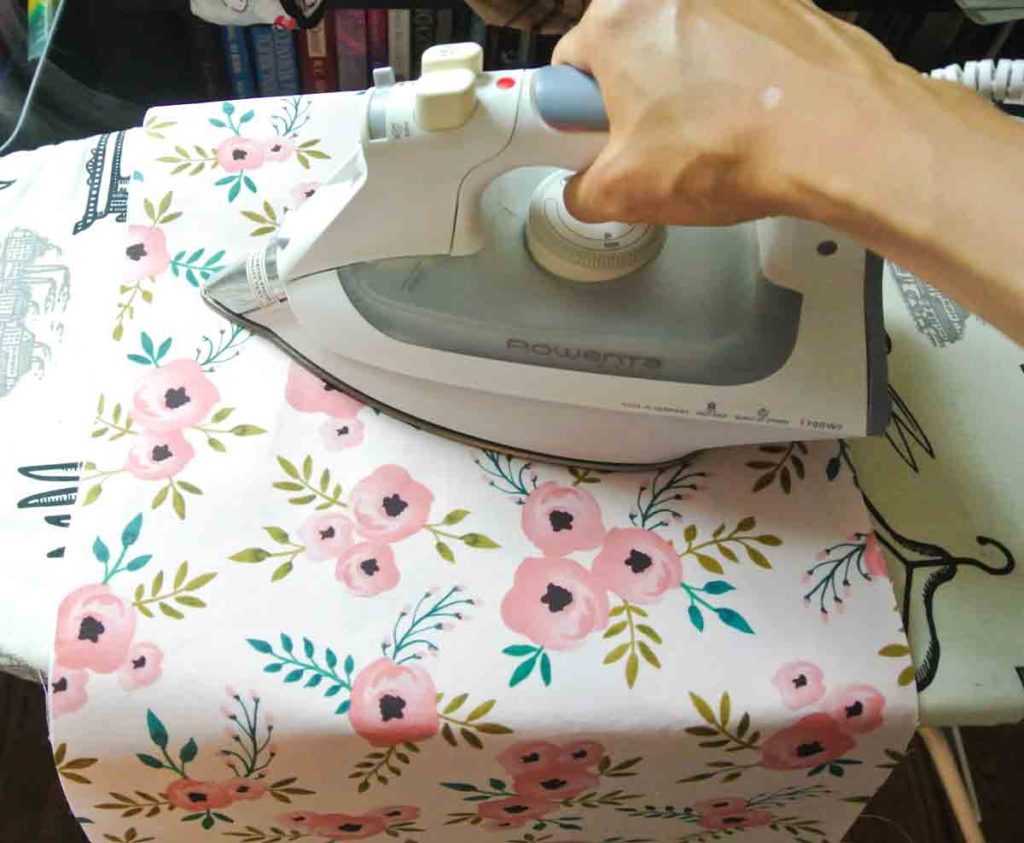
Optional: Apply fusible interfacing to one of the exterior fabrics for added support and stability. This extra step allows the tote to be able to stand up on it’s own and not collapse on itself.
HOW TO MAKE POCKET
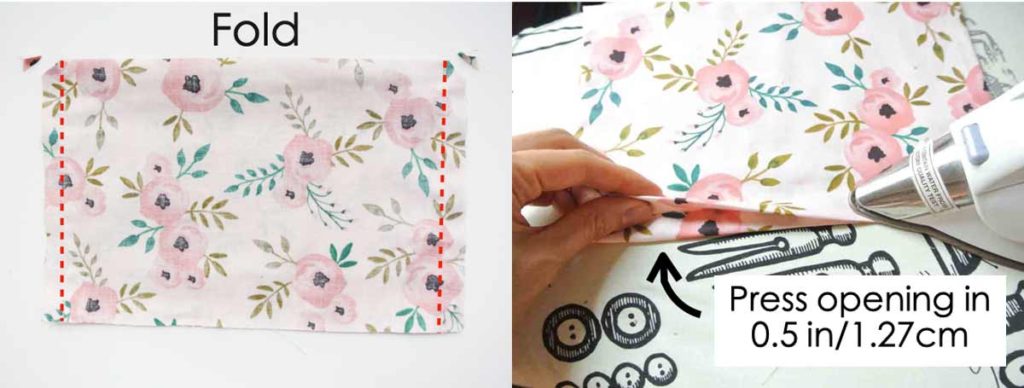
LEFT: With POCKET PIECE folded in half, wrong sides together, sew sides at 1/2”(1.27cm) seam allowance (red dotted line) and clip corners where the fold is.
RIGHT: Turn POCKET PIECE to right side, pushing out the corners. Fold the opening in 1/2”(1.27cm), and press.
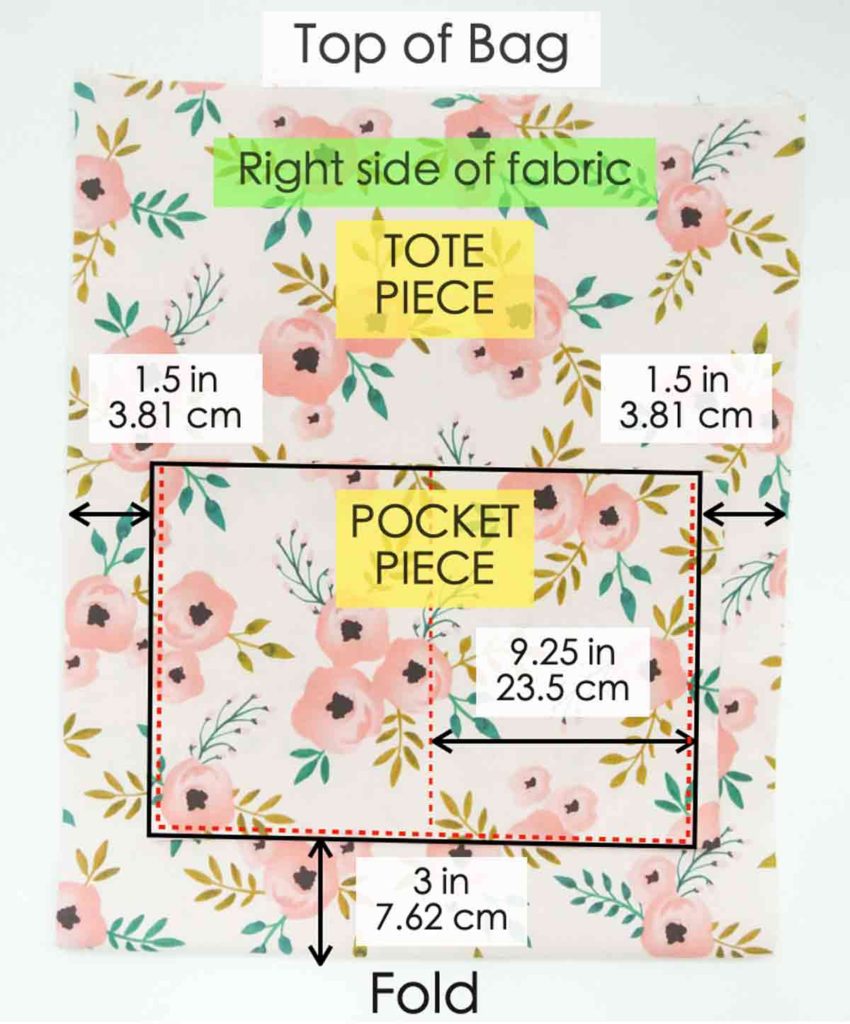
Fold TOTE PIECE in half along fold with right side of fabric up. Place POCKET PIECE on top, 1.5” (3.81cm) from the left and right sides, and 3” (7.62cm) from bottom fold.
Pin and stitch POCKET PIECE in place, 1/4” from edge. Also stitch down at midline to make two pockets. (Red dotted line). Make sure when you are sewing that the TOTE PIECE is not folded in half (you are only sewing POCKET PIECE through one layer of TOTE PIECE)
HOW TO MAKE TOTE STRAPS

Fuse interfacing to STRAP PIECE on fabric #1 and fabric #2. Cut STRAP PIECE in half along its length. You will end up with 4 strap pieces that are 2” (5.08cm) wide and about 24” (61cm) long.
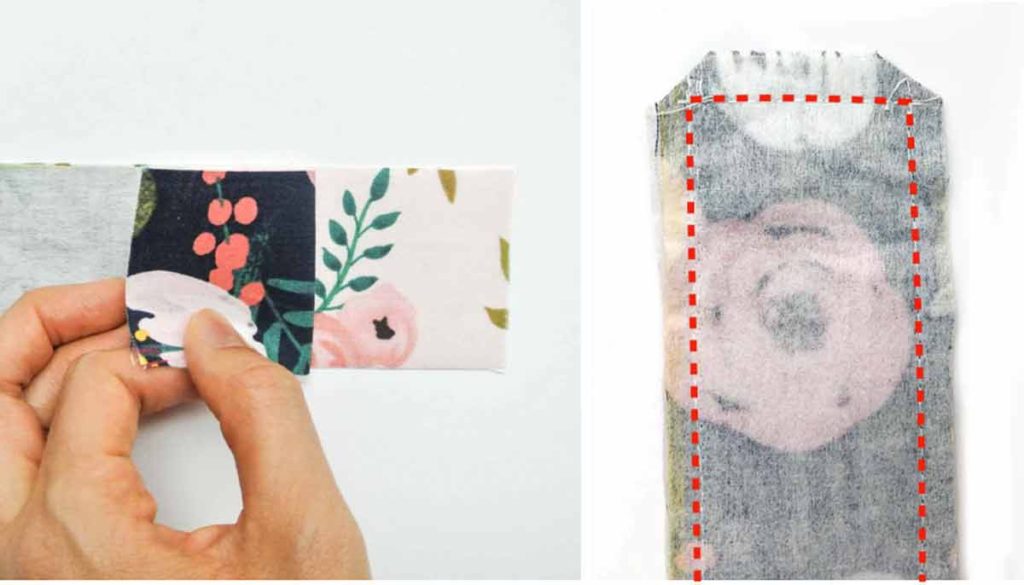
LEFT: Place STRAP PIECE of fabric #1 with STRAP PIECE of fabric #2, right sides together.
RIGHT: Sew at 1/4”(0.635cm) seam allowance and sew one end of the strap closed (red dotted line). Clip corners.
NOTE: You don’t actually need to close one end of the strap. However, I find that it’s easier to invert the strap to the right side by pushing from the closed end with a blunt tool.
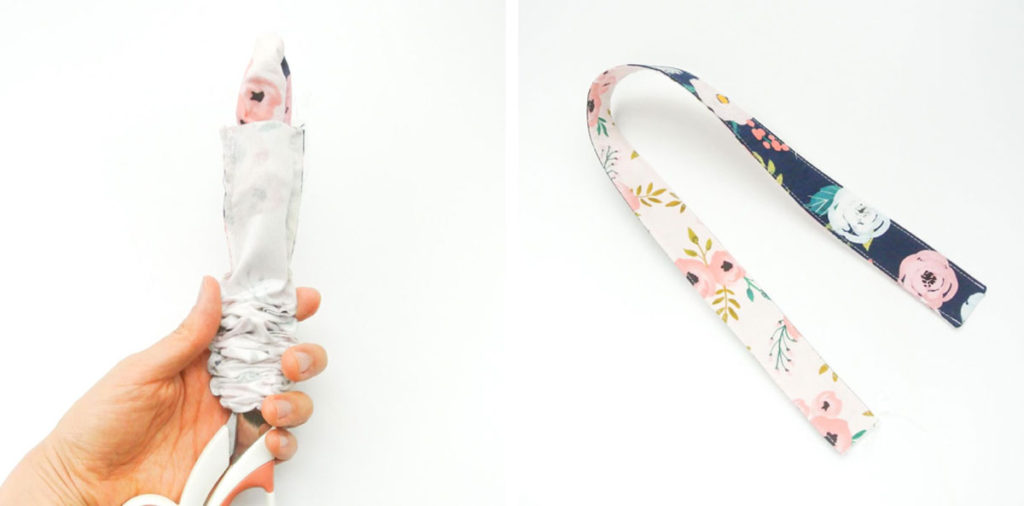
LEFT: Turn straps to right side using a blunt tool (I’m using a blunt pair of scissors)
RIGHT: Iron the strap flat and stitch at 1/4”(6mm) from edge.
SEWING BAG TOGETHER
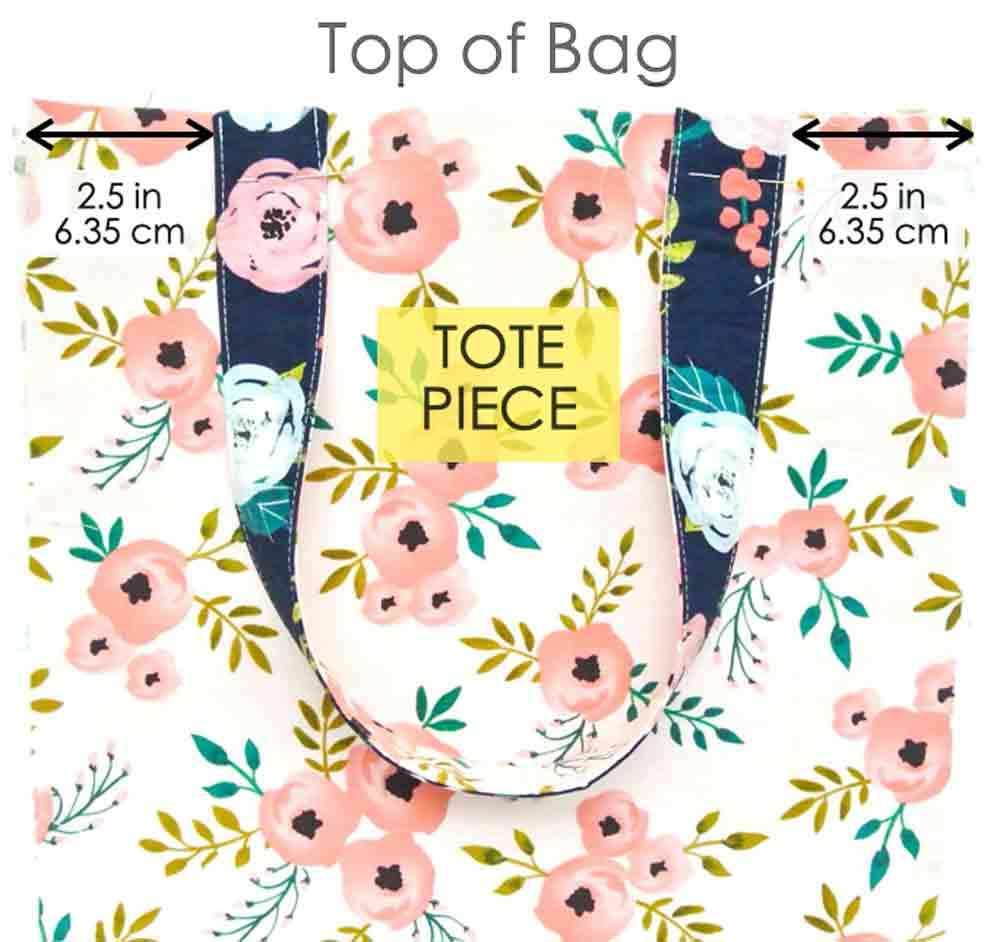
Trim straps down to 20.5” (52 cm) and place ends along top edge of TOTE PIECE with the same fabric pattern facing each other. Pin straps down 2.5”(6.35cm) from edge.

Stitch strap to tote bag by sewing a box that’s a little less than 1.5”(3.81cm) and sew a ‘X’ in between.

Repeat for other strap
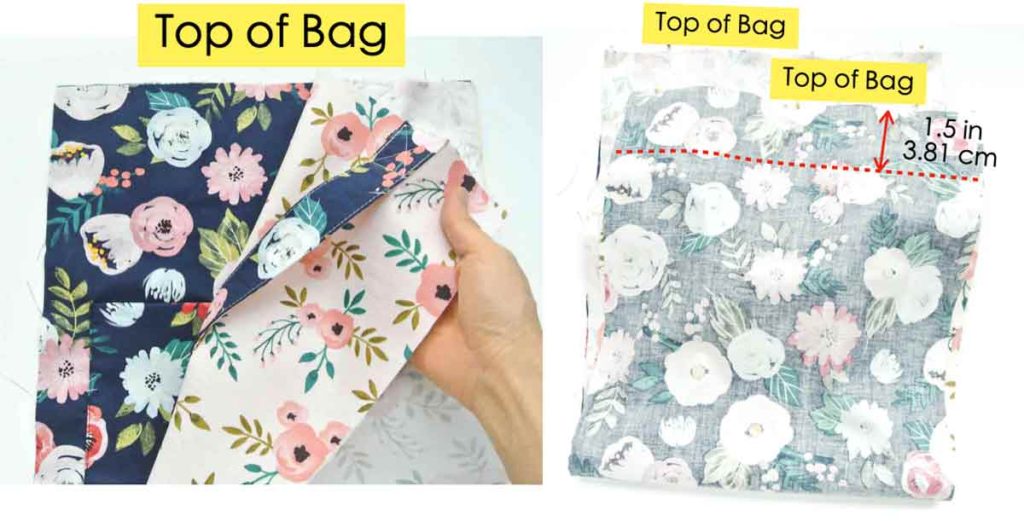
LEFT: Place the two TOTE PIECE together, right sides facing each other (see note below).
RIGHT: Sew TOTE PIECE together at the top of bag at 1.5” (3.81 cm ) seam allowance (red dotted line). Repeat for other side.
NOTE: I recommend placing the two pieces together so that the side of TOTE PIECE 1 with the pocket faces the side without the pocket on TOTE PIECE 2. This way when you do put stuff in the pockets it’s not all heavy only on one side of the tote bag. However, this is completely up to you!

Pull the bag open so that the fabric #1 is facing itself and fabric #2 is facing itself. Press seam open at top of bag.
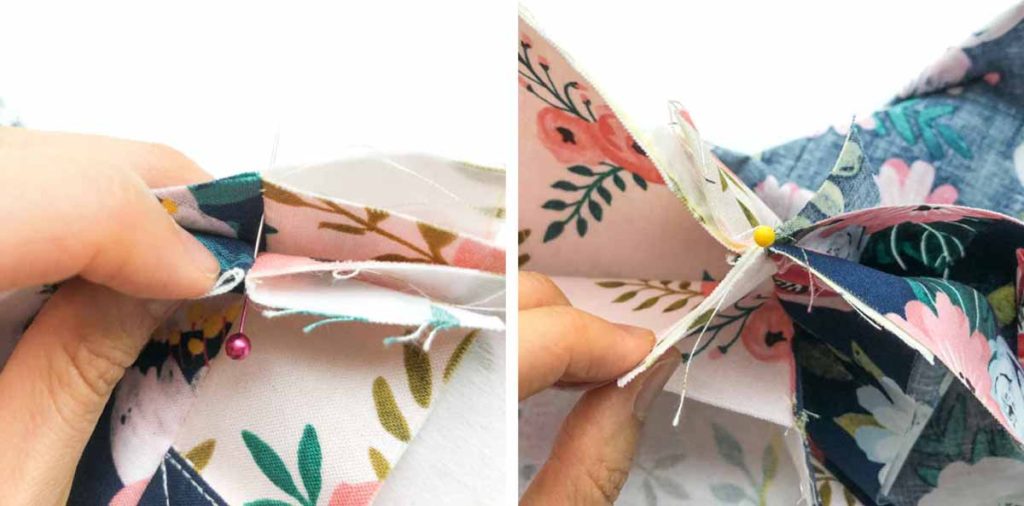
Match seam at top of bag (the junction where fabric #1 is sewn to fabric #2) with a pin.

Sew tote bag together at sides at 1/2” (1.27cm) seam allowance (red dotted line). Make sure to leave an opening about 2-3” (5 – 7cm) wide.

Clip corners at bottom of bag

Turn tote bag to right side through opening and close hole with invisible ladder stitch
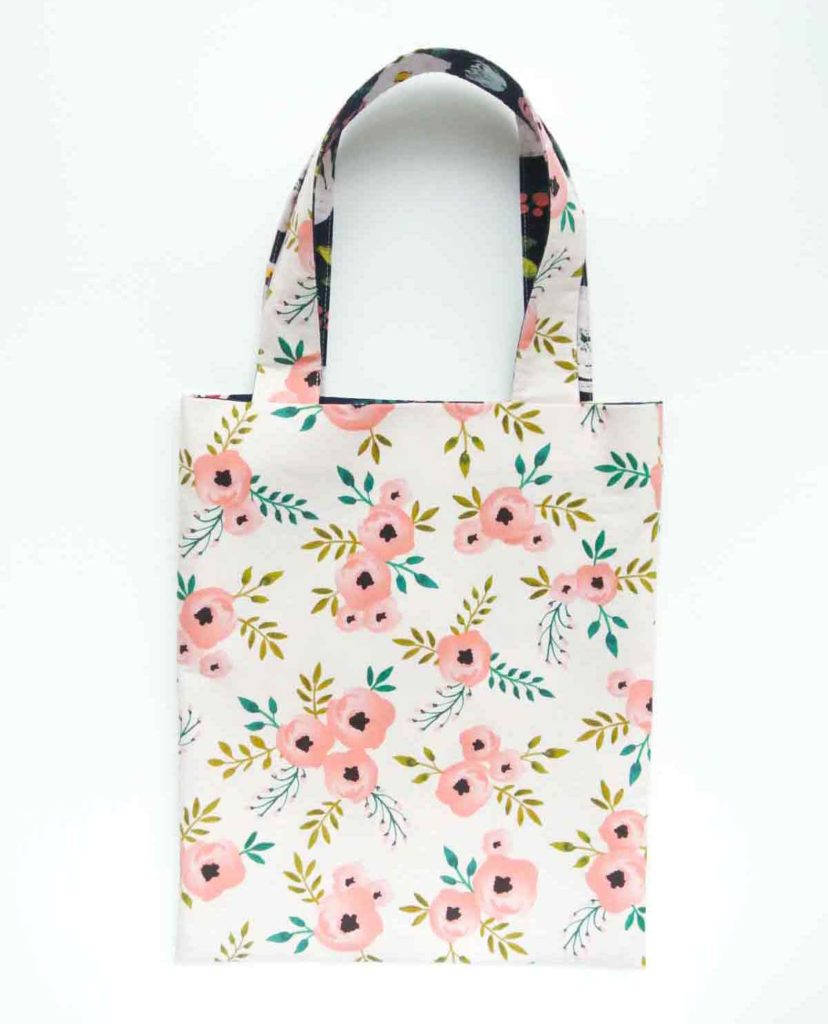
Give your bag a good press and you are done! Whoo hoo! Take a moment to admire this new beauty you just made, yes you! You made it! Now you have TWO brand new bags to carry your belongings around. Isn’t making things just so satisfying? I hope you enjoyed this tutorial. Happy Sewing!
How to Make a Reversible Tote Bag
This reversible tote is fully lined and comes with two pocket sleeves for added compartments. Great project for all sewing levels!
Materials
- 2/3 YARD 44" WIDE FABRIC 1 - for one side (see note 1)
- 2/3 YARD 44" WIDE FABRIC 2 - for second side
- 60" WIDE FUSIBLE INTERFACING - 2/3 Yard (See note 2)
Tools
- SEWING MACHINE
- FABRIC SCISSORS
- SEWING PINS
- CLEAR RULER
- MATCHING THREAD
- HAND SEWING NEEDLES
- IRON - for pressing
Instructions
- Cut out reversible bag pattern pieces on fabric (see note 3)
- (optional) Apply fusible interfacing to one of the exterior fabrics for added
support and stability. This extra step allows the tote to be able to
stand up on it’s own and not collapse on itself.
HOW TO MAKE POCKET
- With POCKET PIECE folded in half, wrong sides together,
sew sides at 1/2”(1.27cm) seam allowance. - Clip corners where the fold is.
- Turn POCKET PIECE to right side, pushing out the corners.
- Fold the opening in 1/2”(1.27cm), and press.
- Fold TOTE PIECE in half along fold with right side of fabric up.
- Place POCKET PIECE on top, 1.5” (3.81cm) from the left and right sides, and 3” (7.62cm) from bottom fold.
- Pin and stitch POCKET PIECE in place, 1/4” from edge. Also stitch down at midline to make two pockets. Make sure when you are sewing that the TOTE PIECE is not folded in half (you are only sewing POCKET PIECE through one layer of TOTE PIECE)
HOW TO MAKE TOTE STRAPS
- Fuse interfacing to STRAP PIECE on fabric #1 and fabric #2.
- Cut STRAP PIECE in half along its length. You will end up with 4 strap pieces that are 2” (5.08cm) wide and about 24” (61cm) long.
- Place STRAP PIECE of fabric #1 with STRAP PIECE of fabric #2, right sides together.
- Sew at 1/4”(0.635cm) seam allowance and sew one end of the strap closed (see note 4).
- Clip corners.
- Turn straps to right side.
- Iron the strap flat and stitch at 1/4”(6mm) from edge.
SEWING BAG TOGETHER
- Trim straps down to 20.5” (52 cm) and place ends along top edge of TOTE PIECE with the same fabric pattern facing each other.
- Pin straps down 2.5”(6.35cm) from edge.
- Stitch strap to tote bag by sewing a box that’s a little less than 1.5”(3.81cm) and sew a ‘X’ in between.
- Repeat for other strap.
- Place the two TOTE PIECE together, right sides facing each other. (see note 5).
- Sew TOTE PIECE together at the top of bag at 1.5” (3.8 cm ) seam allowance.
- Repeat for other side.
- Pull the bag open so that the fabric #1 is facing itself and fabric #2 is facing itself. Press seam open at top of bag.
- Match seam at top of bag (the junction where fabric #1 is sewn to fabric #2) with a pin.
- Sew tote bag together at sides at 1/2” (1.27cm) seam allowance. Make sure to leave an opening about 2-3”(5 - 7cm) wide.
- Clip corners at bottom of bag.
- Turn tote bag to right side through opening and close hole with invisible ladder stitch.
- Give your bag a good press and you are done!
Notes
- If you are using 54” or 60” wide fabric, you will only need 1/2 yard of fabric for each side.
- If you are using 20″ wide interfacing, you will be short 1/2″ (1.27cm). This is ok as the TOTE PIECE has 1/2″ (1.27cm) seam allowance included in the measurements on both sides. When ironing on the interfacing to the TOTE PIECE, just lay it on top with 0.25″ (0.635cm) gap from both sides of TOTE PIECE.
- Reversible Tote Bag Pattern Dimensions:
Cut one of the following pieces out on FABRIC #1 and FABRIC #2
• Tote Piece: 12.5” x 33”(31.75cm x 83.82 cm)
• Strap: 4”x 20.5”(10.16 cm x 52.07cm)
• Pocket Piece: 10.5” x 12” (26.67 x 30.48cm) - You don’t actually need to close one end of the strap. However, I find that it’s easier to invert the strap to the right side by pushing from the closed end with a blunt tool.
- I recommend placing the two two pieces together so that TOTE PIECE 1 with the pocket faces the side without the pocket on TOTE PIECE 2. This way when you do put stuff in the pockets it’s not all heavy only on one side of the tote bag. However, this is completely up to you!