Simple Japanese Knot Bag Pattern (Free PDF)
This post may contain affiliate links. Please read my disclosure policy for details. As an Amazon Associate, I earn from qualifying purchases.
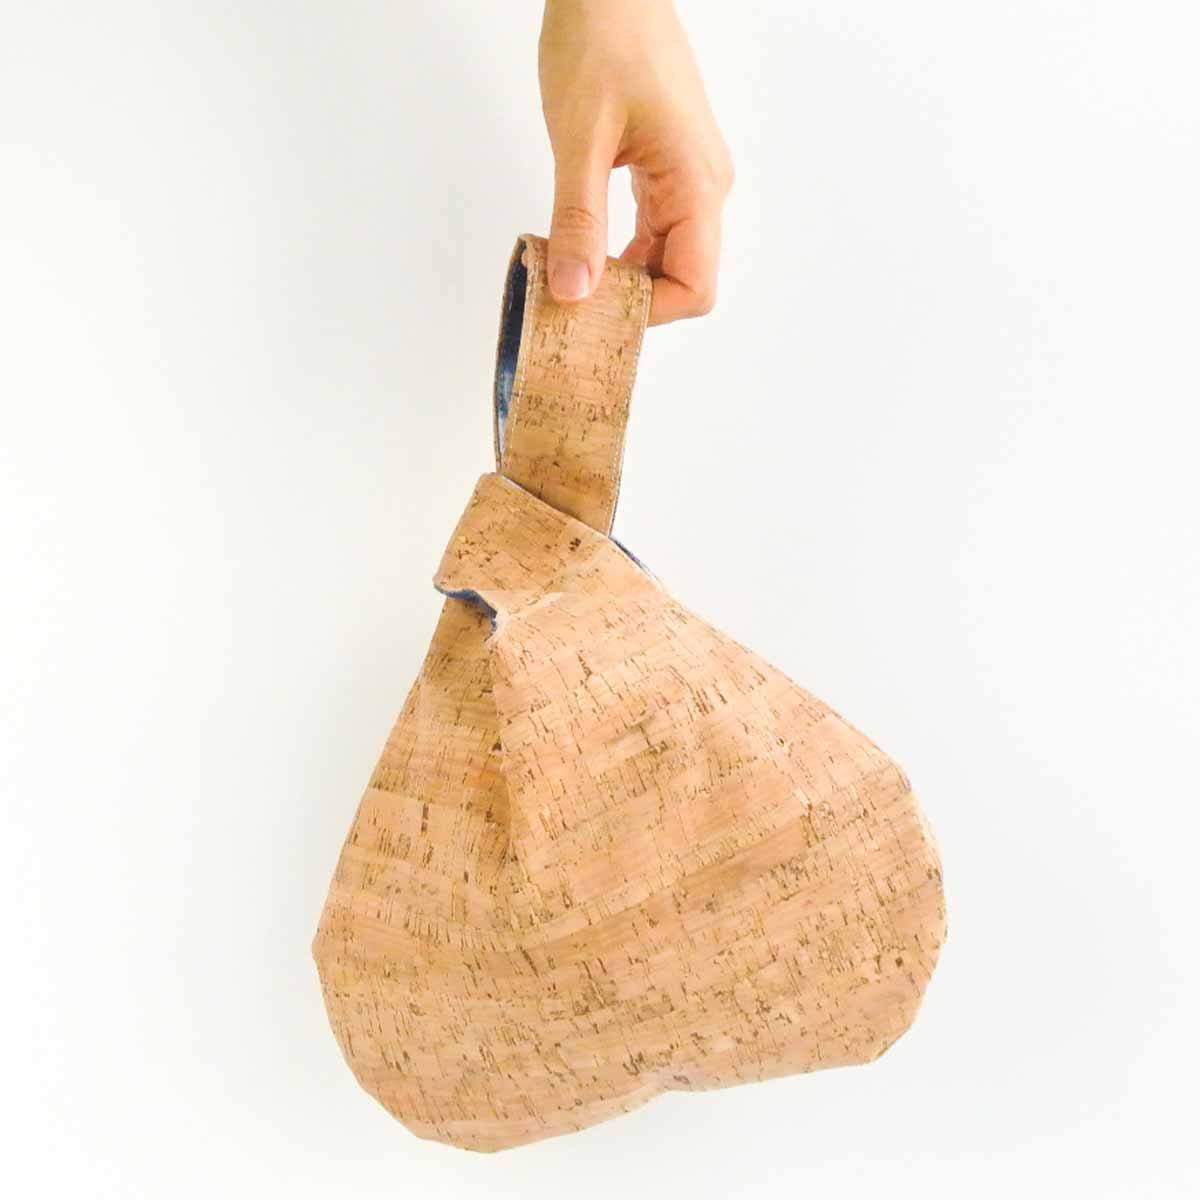
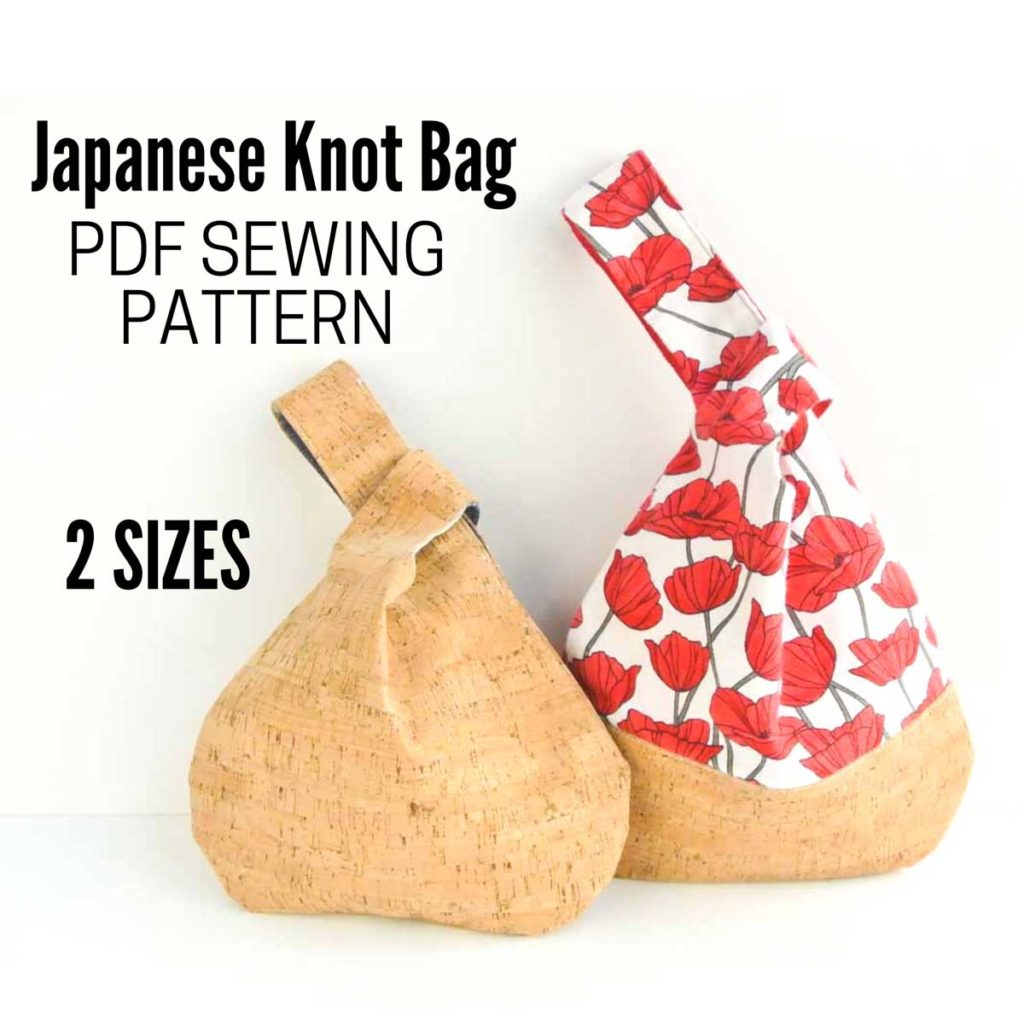
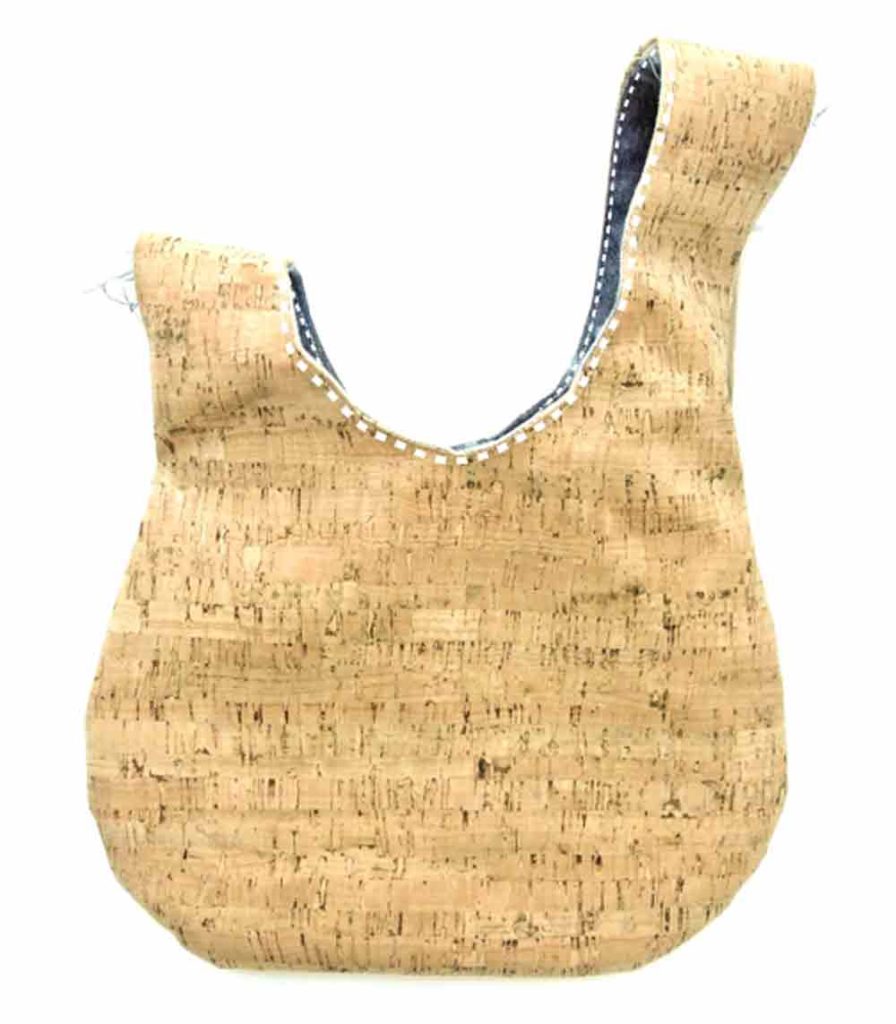
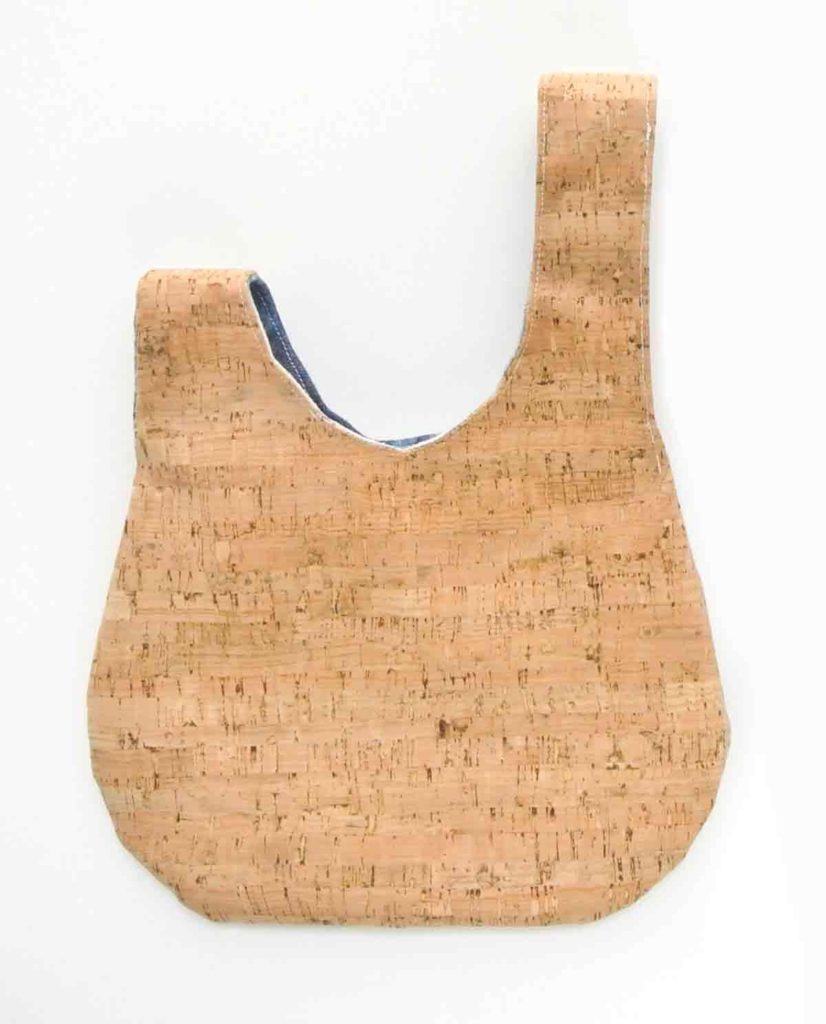
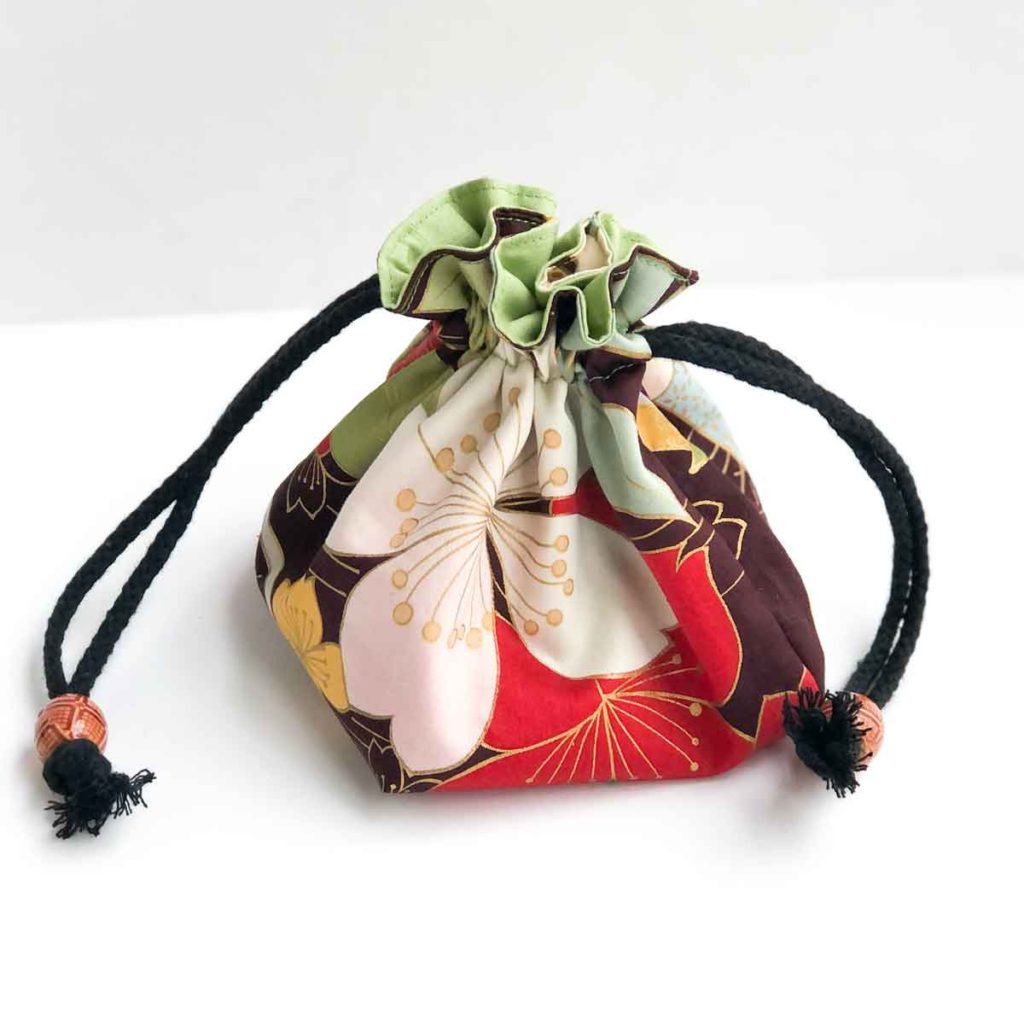
An easy sewing project, the Japanese knot bag is a stylish addition to your wardrobe. Fully lined, this reversible knot bag closes on itself without a zipper to keep your belongings safely stashed away!
I don’t remember where or when I across the Japanese knot bag, but my first impression was “this is such a cool bag!”. I love the fact that it closes on itself without any buttons or zippers.
If you are anything like me, you may have had random things fall out of your purse because you forgot to close it (oops!). The Japanese Knot bag solves that problem, because you can’t carry it without first looping the short handle over the long one.
One day while browsing the local fabric store (one of my favorite things to do), I came across a cork fabric in the upholstery section. DING DING DING! That would make a lovely Japanese Knot bag!
Don’t you just love it when certain fabrics inspire you to sew certain things? It’s like the fabric tells you what you should turn it into, like RIGHT NOW.
Today I will be showing you how to make this cool looking Japanese Knot bag.
What Sewing Level is the Japanese Knot Bag for?
The Japanese Knot bag is an easy sewing project for all levels. However, because of the nature of the pattern, you will need to sew curves. But don’t be discouraged! Just go slowly on the machine. The most challenging curve to sew in this bag is the “J” shape curve between the two handles. If you really don’t feel confident, walk your machine with your hand (by turning the handwheel on the right with your hand) as you go around this area.
Another tip for beginners is to use 100% cotton fabric as this fabric is very easy to work with. If your fabric is a little slippery and light weight, you can also apply fusible interfacing to add a little bit of stiffness. Interfacing also helps prevent the fabric from stretching, which is a common problem when you sewing curves.
While I really loved the look of the natural cork fabric, it was rather difficult to work with because cork doesn’t fold over itself easily. So unless you have some experience with sewing, I would stick with 100% cotton.
What Do You Use a Japanese Knot Bag For?
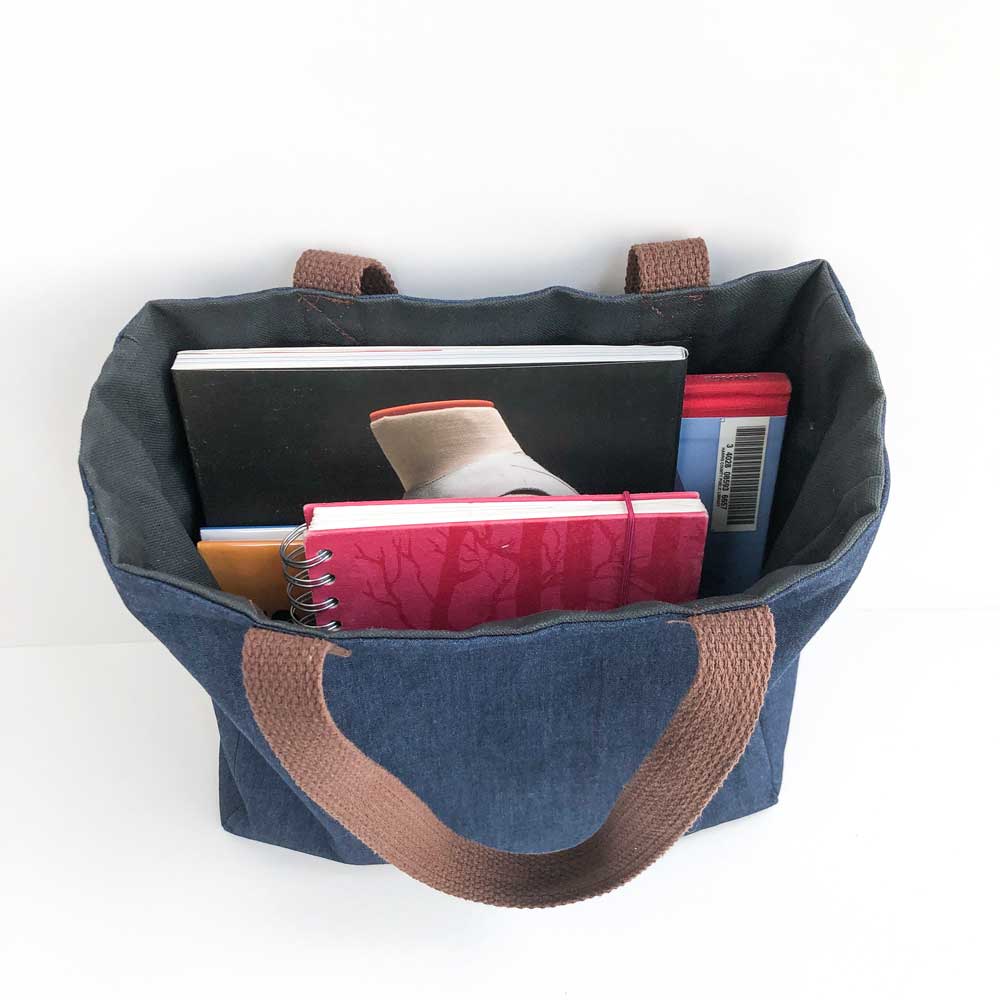
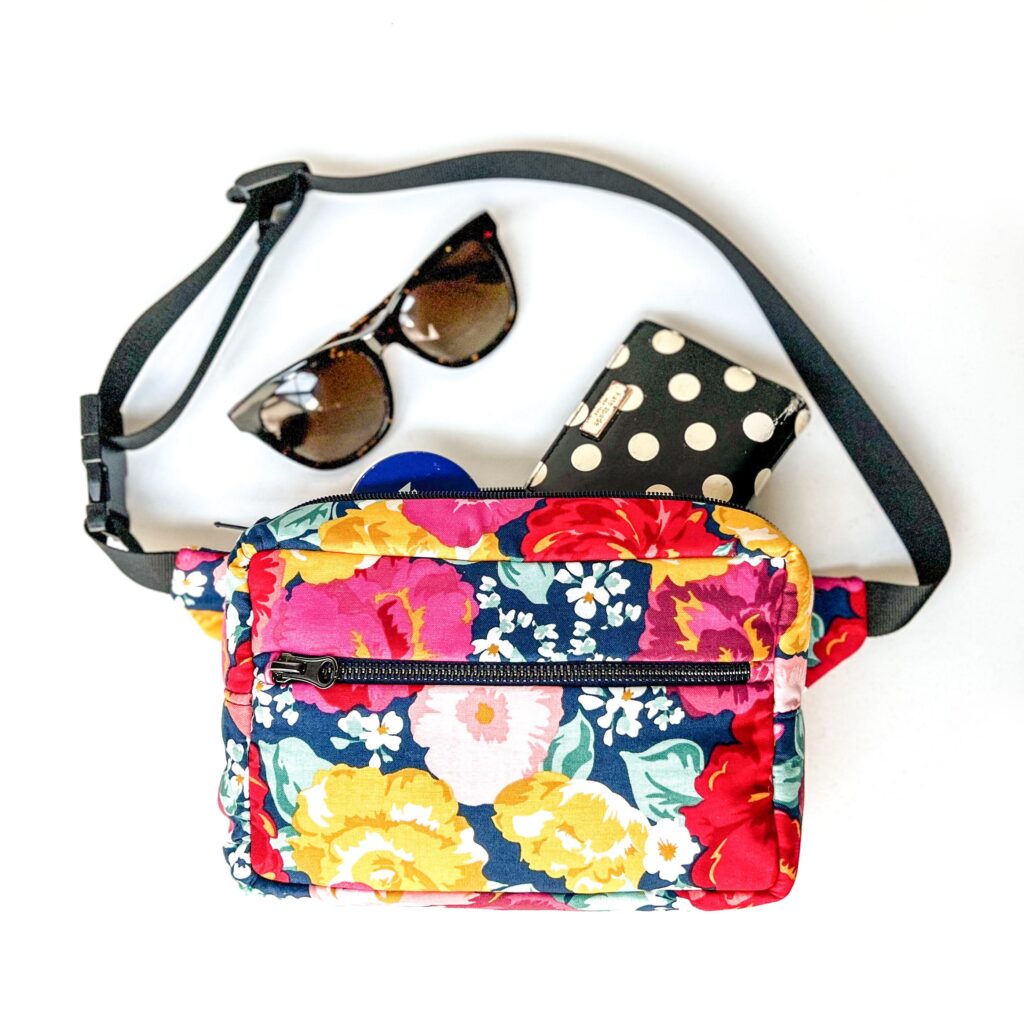
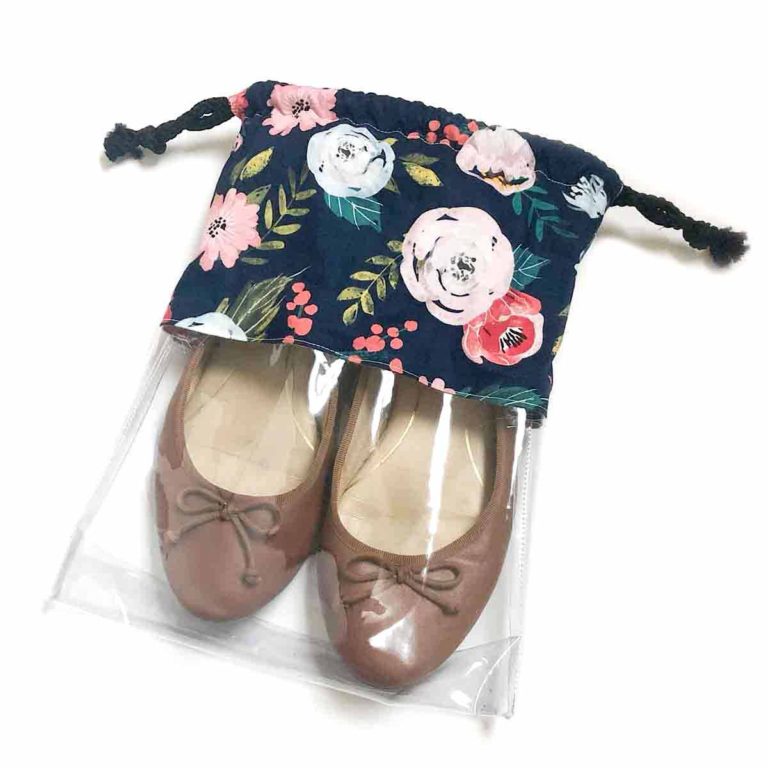
The Japanese knot bag is a multi functional bag that can pretty much hold anything. Uses include (not limited to)
- small grocery items
- personal belongings (keys, phone, wallet, etc.)
- makeup
- extra set of clothing
- kid’s toys
- notepads, books, and pens
- snacks, water bottle, and utensils
- yarn – for knitters
- whatever you like!
What are the Dimensions of THIS SIMPLE JAPANESE BAG?
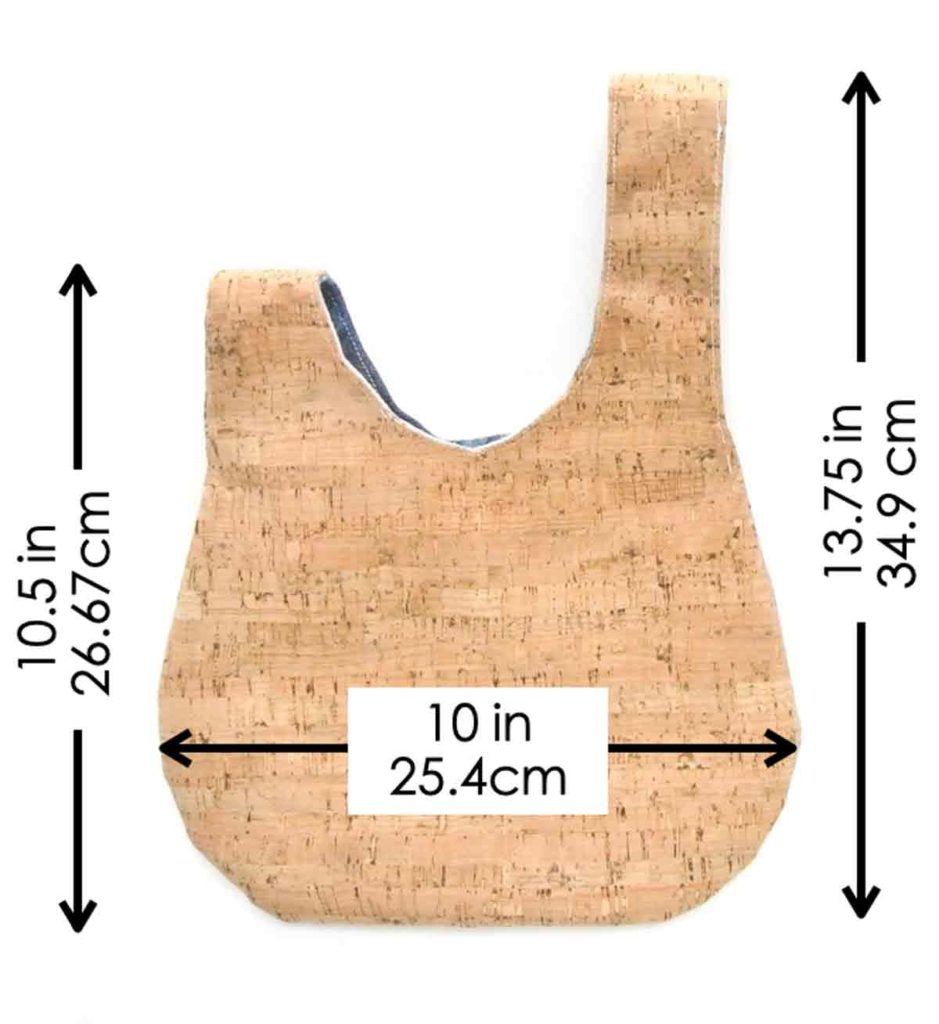
- Height:
- 13.75″ (34.9cm) – from Top of Long Handle Strap to Bottom of Bag
- 10.5″ (26.67cm) – from Top of Short Handle Strap to Bottom of Bag
- Width:
- 10″ (25.4cm) – widest part of bag
How Much Fabric Do I need to Make Japanese Knot Bag?
- Fabric – I recommend using 100% cotton fabric, especially if you consider yourself a beginner (100% cotton fabric is very easy to work with). Canvas or medium weight denim are other good fabrics choices. Suede or vinyl would also work well
- 1/2 yard for one side (Fabric A – I used this natural cork fabric. However, due to the stiffness of the fabric, it was not very easy to work with. I definitely don’t recommend the natural cork if you are a beginner! )
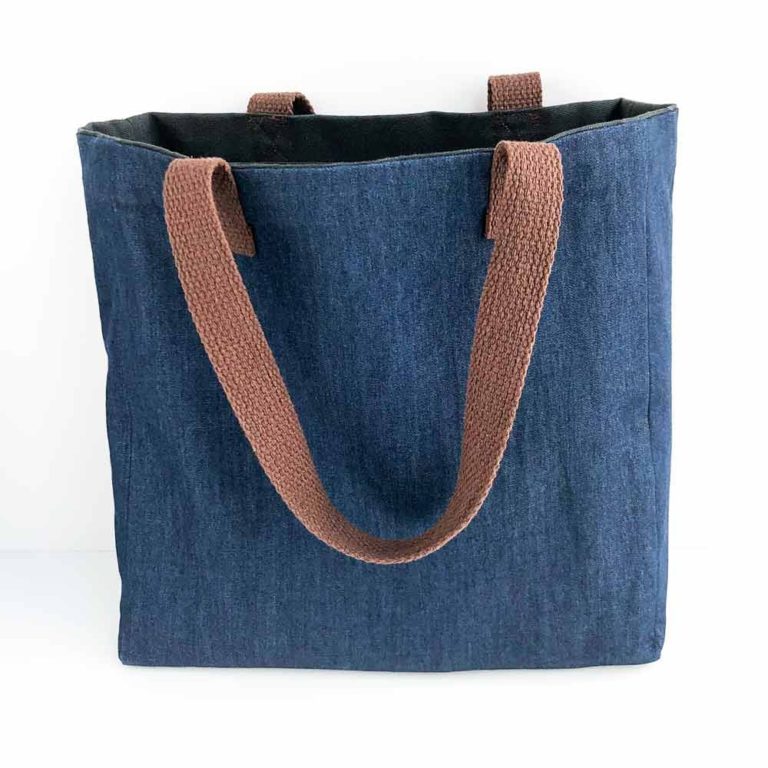
- 1/2 yard of second side (Fabric B – I used a light weight denim)
- Fusible Interfacing – Optional (if you want to add stiffness to the bag) I like using Fusible Featherweight Interfacing(Pellon 911FF)
What Other Tools/Materials Do I need to Make This Simple Knot Bag?
- Sewing machine
- Fabric Scissors – these Ginghers Fabric Shears are my favorite.
- Sewing Pins or Sewing Clips
- Chalk for marking fabric – I highly recommend Clover Chaco Chalk Liner for marking. It’s thin, marks well, and easy to use!
- Clear Ruler
- Matching Thread and hand sewing needles
- Iron for pressing
How to SEW a Japanese Knot Bag
First, grab the Free Japanese Knot Bag Pattern – Available in my Free Resource Library (subscribe to get the password)
The ad-free, printer-friendly PDF version of this step-by-step sewing tutorials is available for purchase in our SHOP. PDF pattern + tutorial also includes size medium and color block pattern not available in our free resource library. Print a copy today to keep next to your sewing machine for easy reference!
If you want the Printable PDF Tutorial (NO ADS) available, you can purchase HERE. This PDF includes:
- Step-by-Step Printable PDF Tutorial
- Japanese Knot Bag Pattern in two sizes (SMALL & MEDIUM) – Free version only includes Small Size
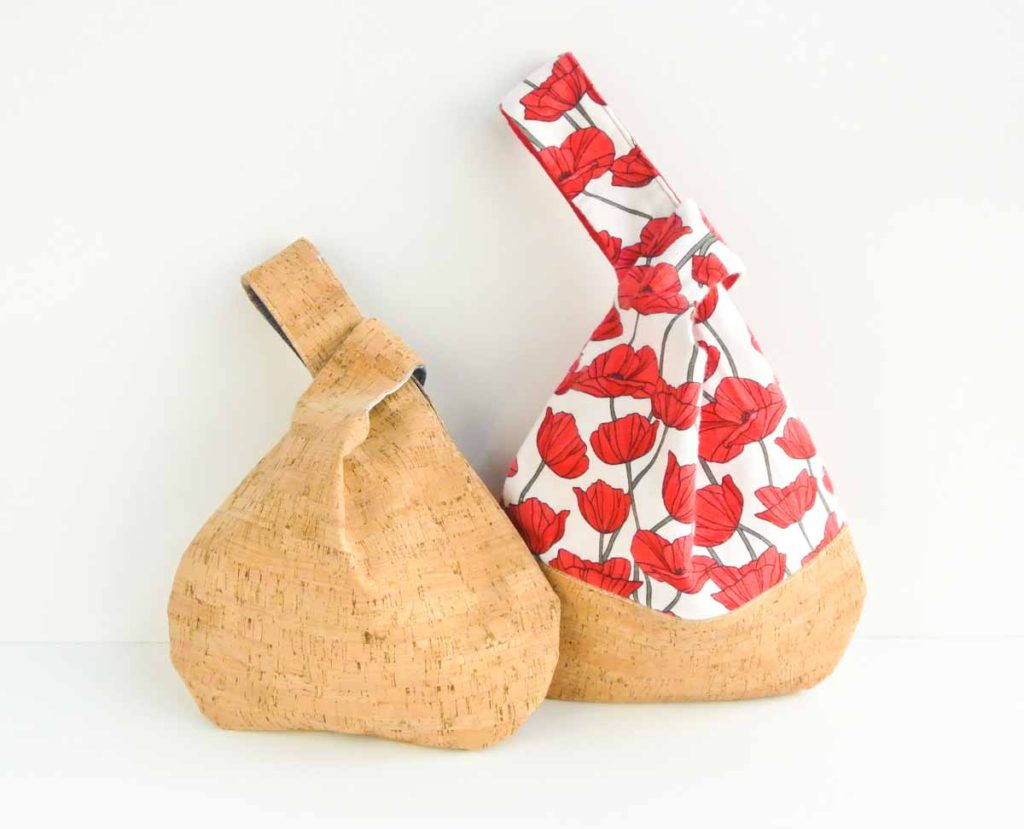
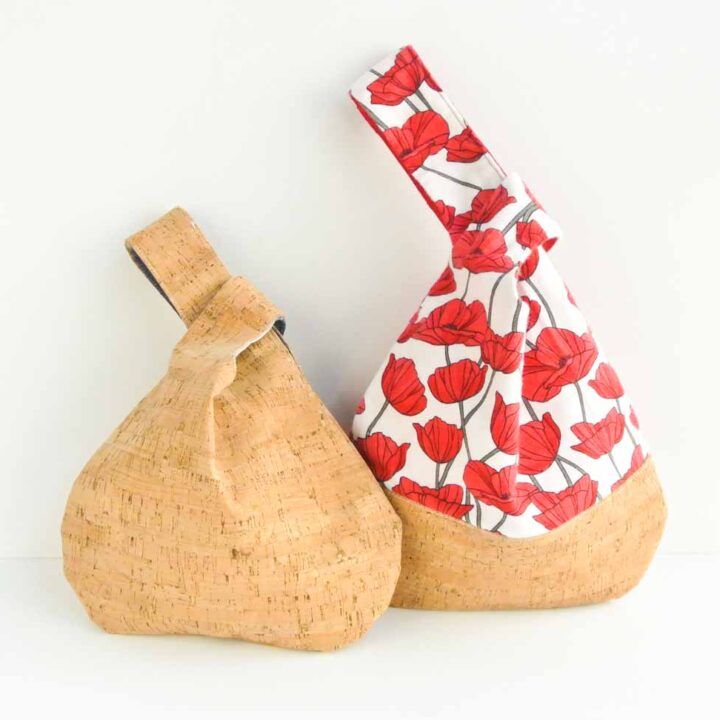
- PDF Pattern to make color-block version (Cork + Poppy Fabric) on the right.
CUTTING JAPANESE KNOT BAG PATTERN
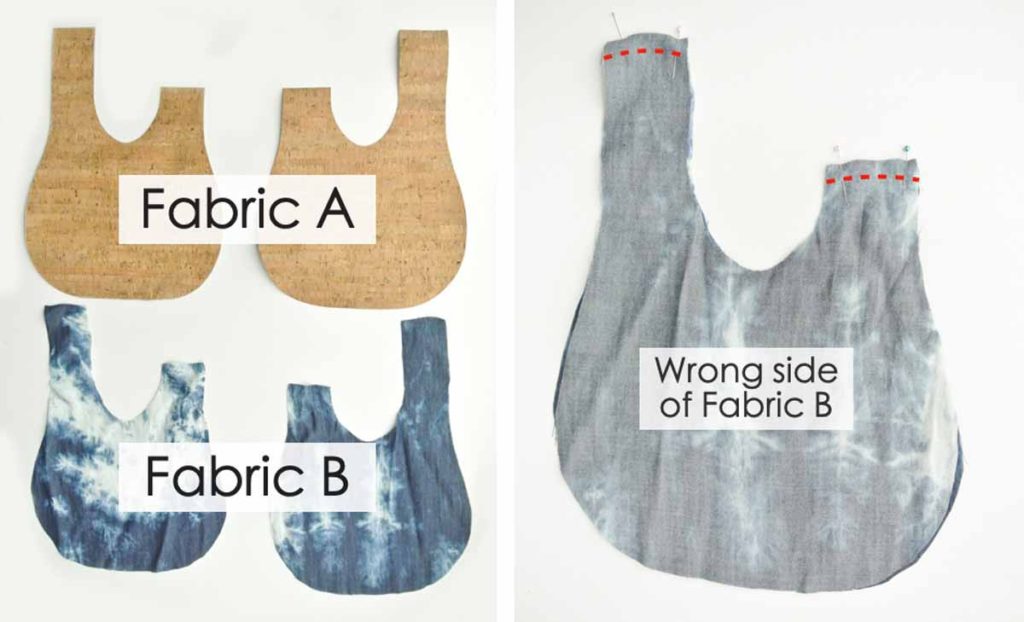
LEFT: Cut out Japanese knot bag pattern on fabric of choice. For this tutorial, the tanned cork board fabric (top) will be called “Fabric A” and the washed out blue denim fabric (bottom) will be called “Fabric B”
RIGHT: Place Fabric B right sides together and stitch the handles together at 3/8”(9.53mm) seam allowance (red dotted line)
SEWING JAPANESE KNOT BAG TOGETHER
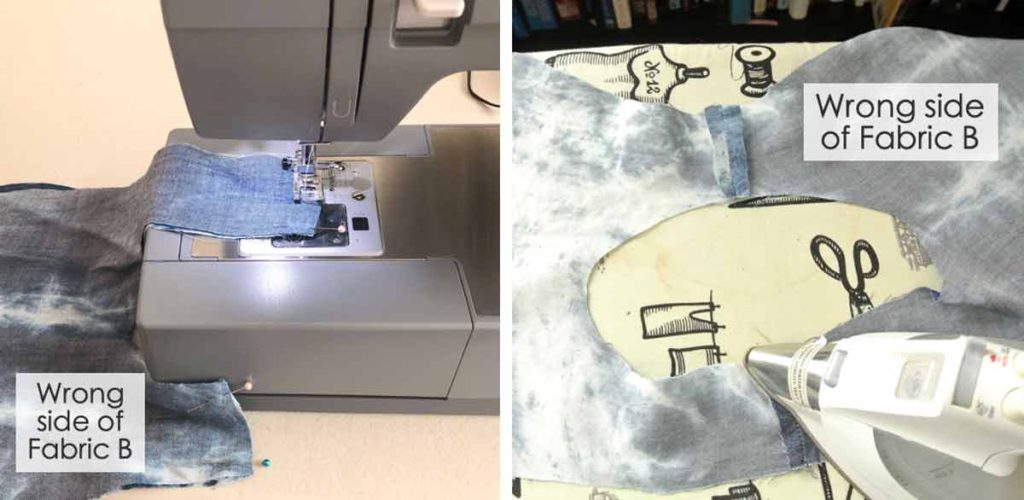
LEFT: Sewing knot bag handle together.
RIGHT: Press open seams with iron. Repeat for Fabric A
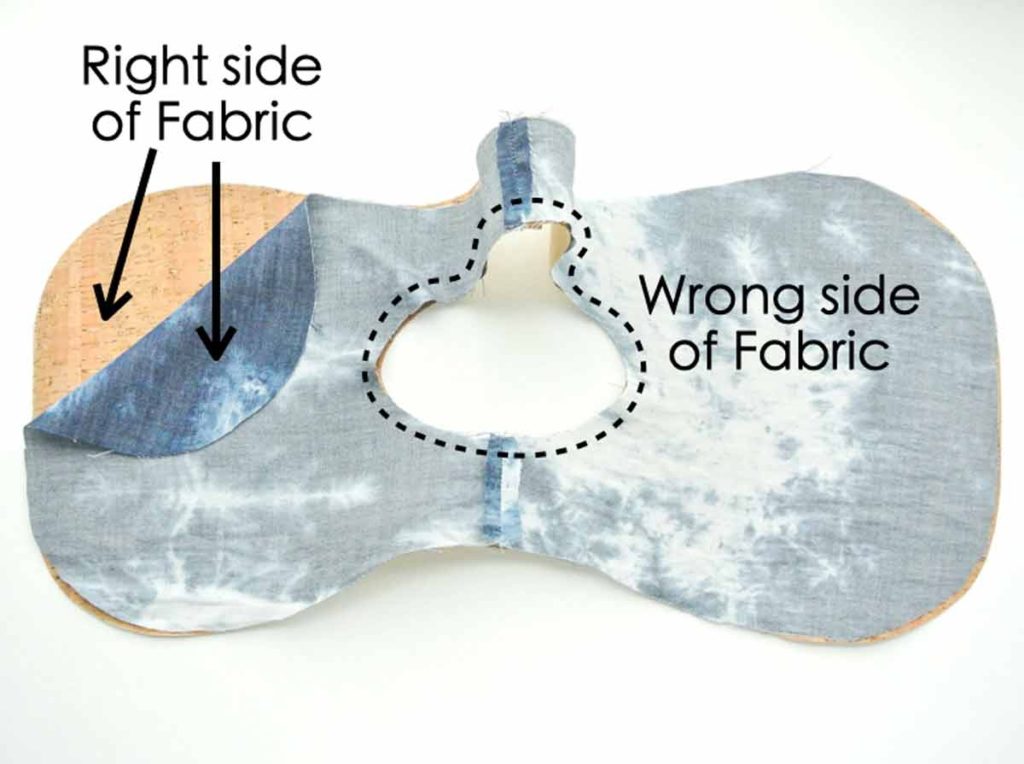
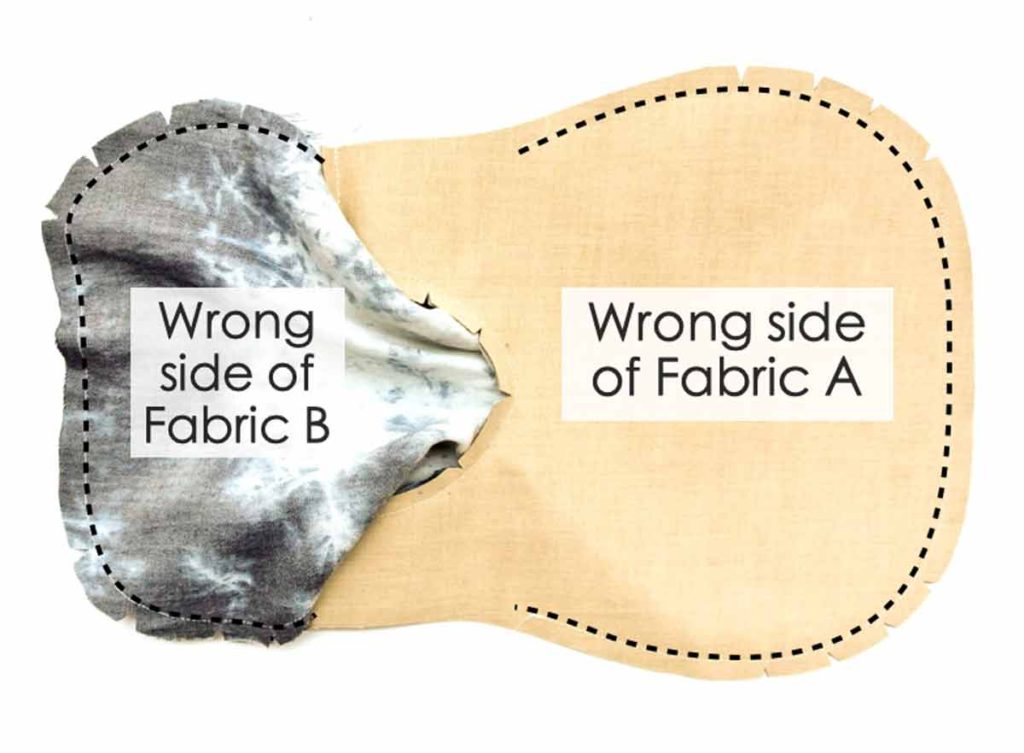
Place right sides of Fabric A and Fabric B together. We will be sewing together the opening between the bag handles, (shown as black dotted lines)
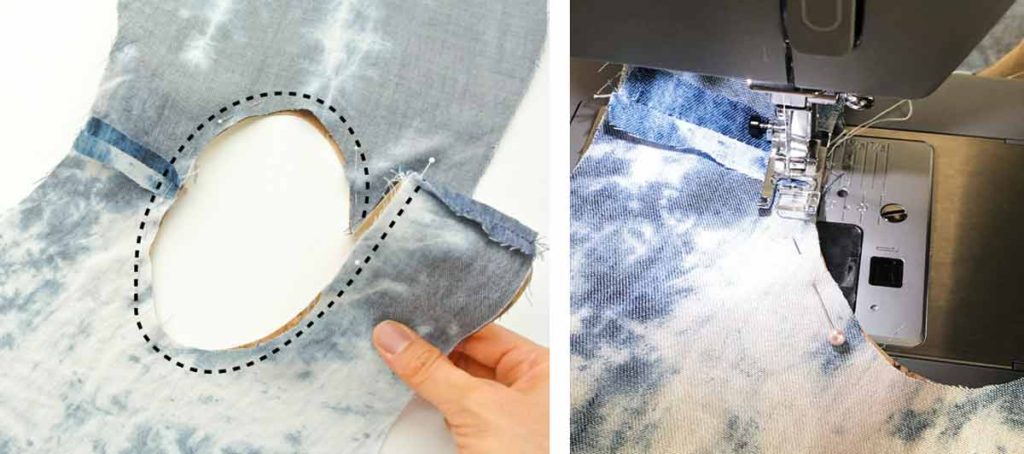
Pin opening between bag handles together and sew at 3/8” (9.53mm) seam allowance (black dotted line)
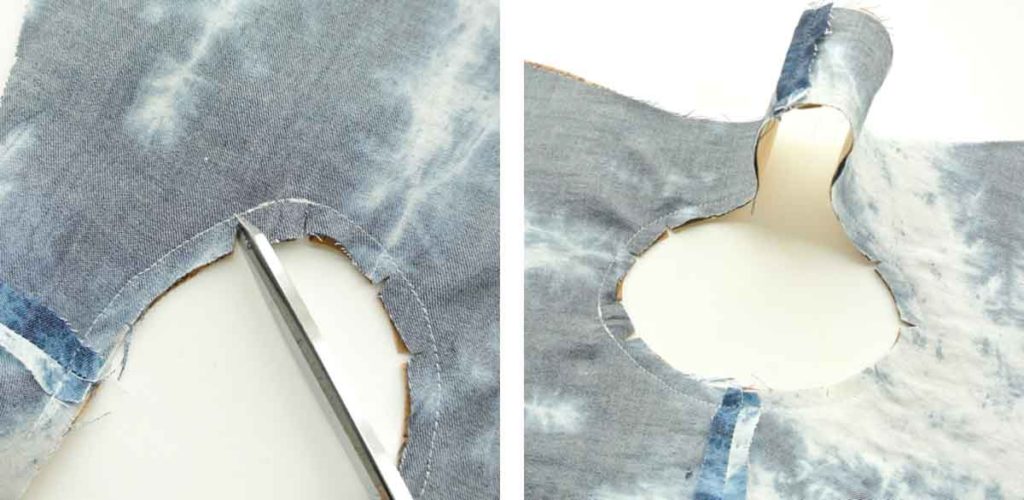
Clip curves
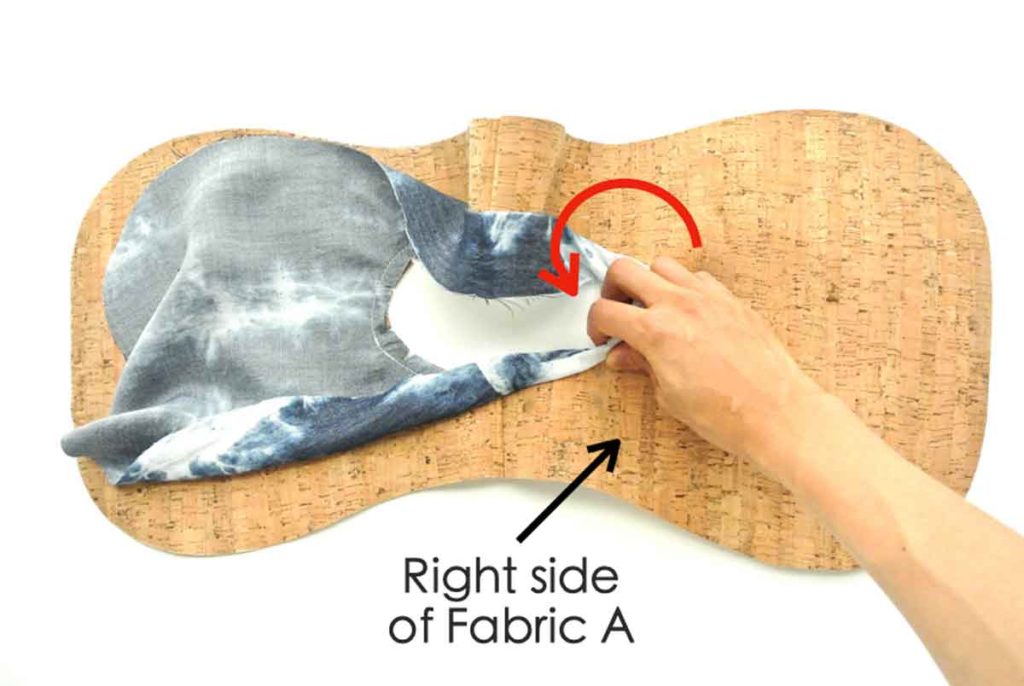
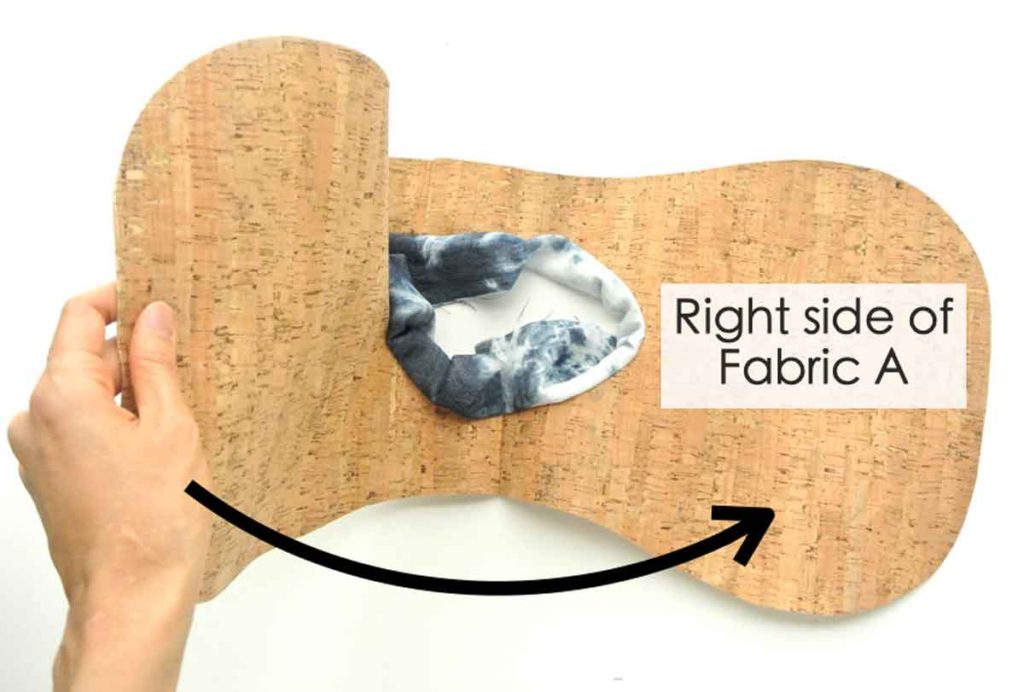
Turn Fabric B in through opening you just sewed so that right side of Fabric A is exposed.
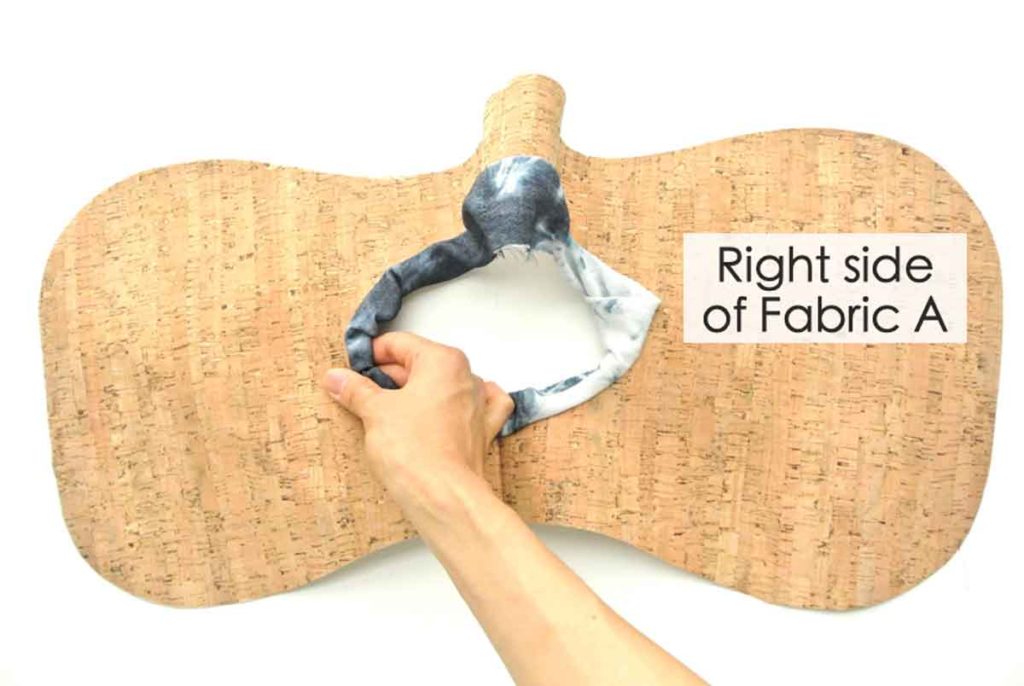
The Wrong side of Fabric A and Fabric B will be facing each other after Fabric B has been turned in.
Match right sides of Fabric A together
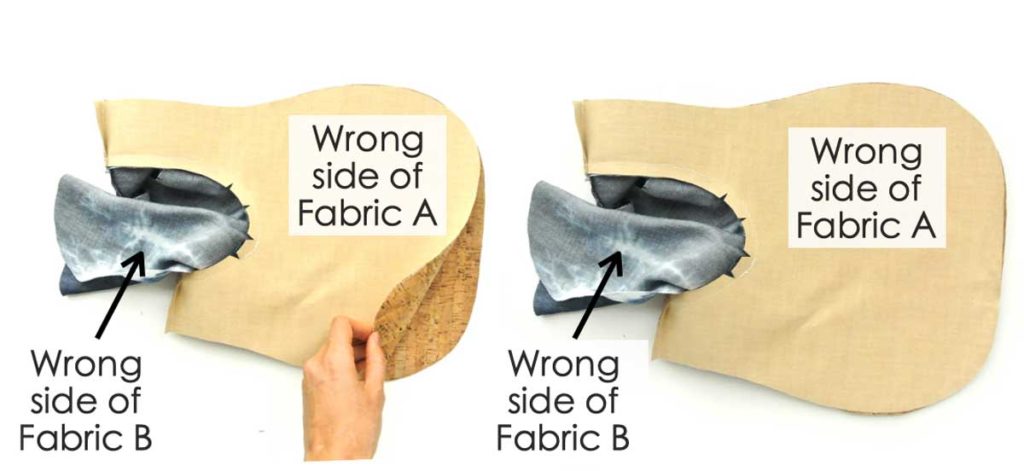
Place the right sides of Fabric A together and the right side of Fabric B matching together
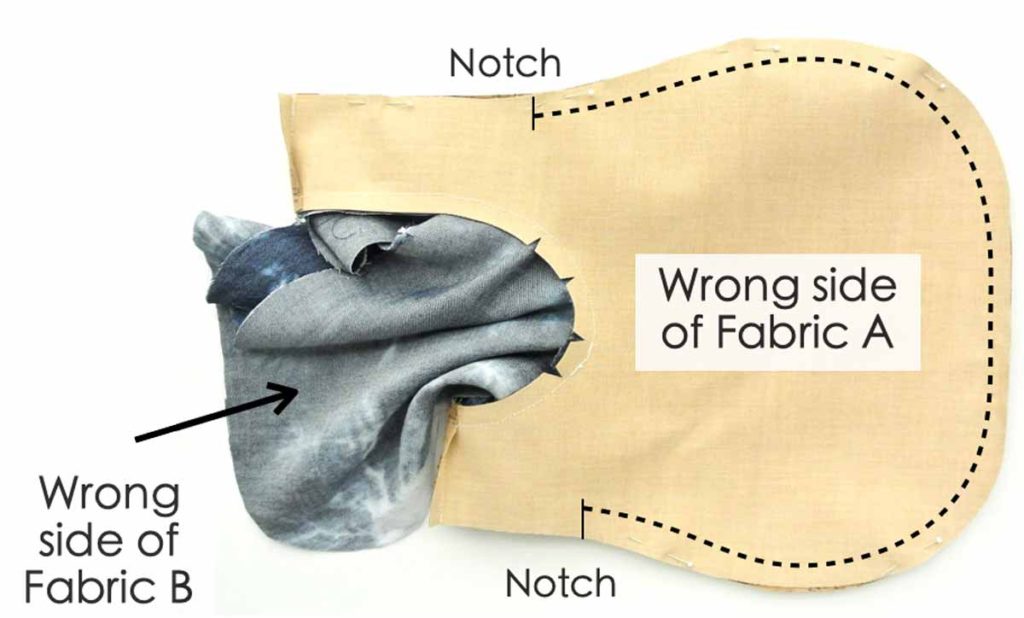
Pin and sew Bag part of Fabric A together from notch to notch. Make sure to back stitch at the notches.

Pull long strap of Fabric A towards middle of bag to reveal long strap of Fabric B
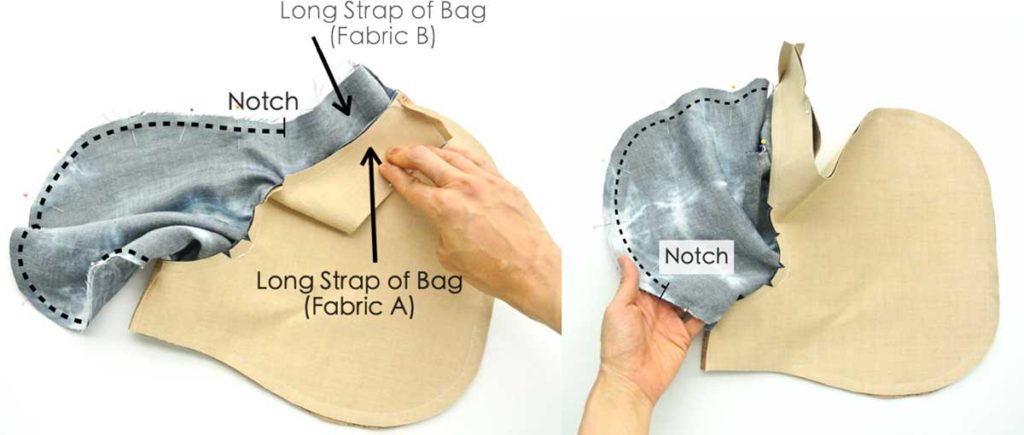
Pin bag of Fabric B right sides together, and sew from notch to notch (Black dotted line) as you did for Fabric A. Make sure to back stitch at the notches
At this point your bag will look like this with an opening on both handles (of Fabric A and Fabric B). Black dotted line indicates where you sewed. Clip curves.
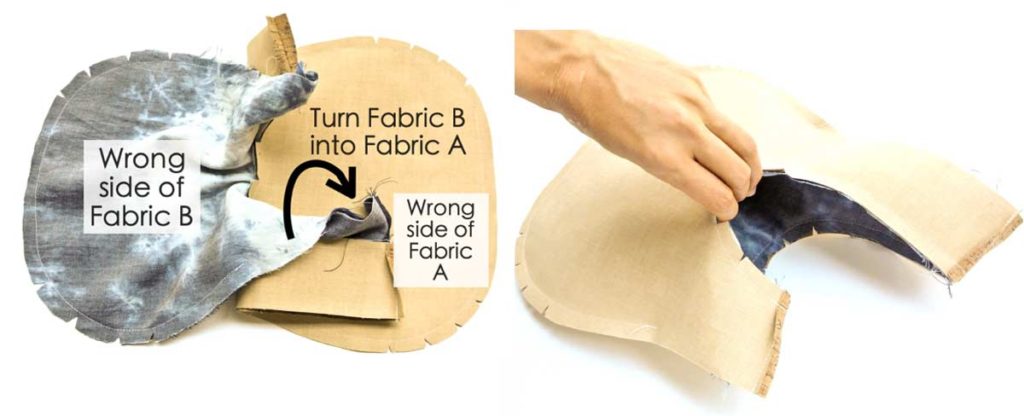
Turn Fabric B into Fabric A through the opening.
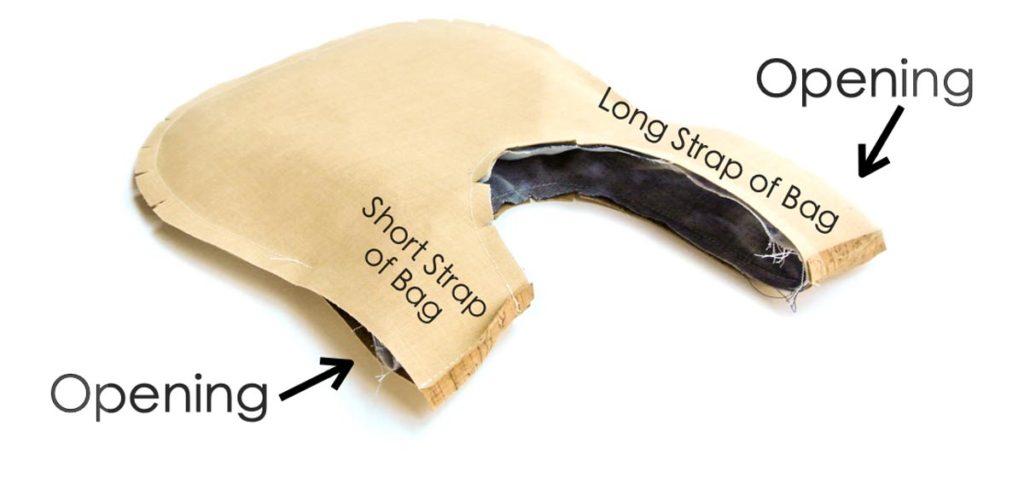
You will now have a bag with two openings: One at the long bag strap and one at the short strap.

Turn Fabric A to right side through opening of long strap and turn Fabric B into Fabric A.
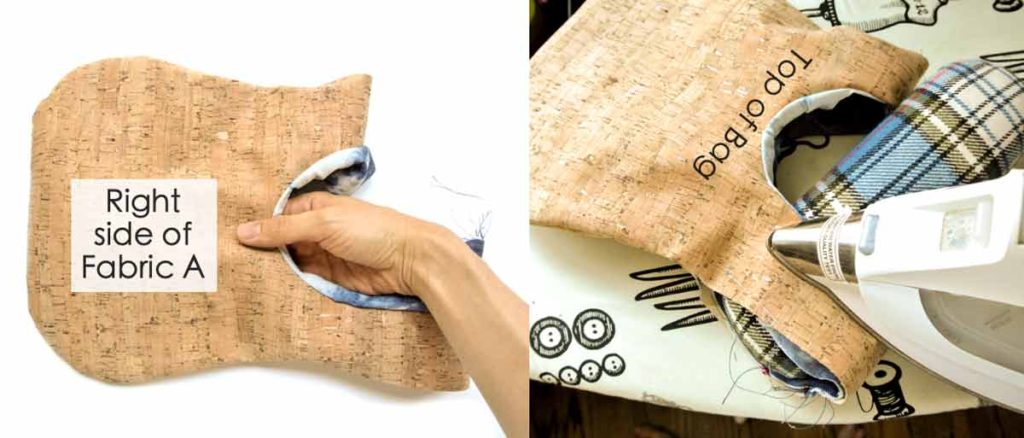
Tuck Fabric B into Fabric A, and press the handle and top of bag
Top stitch bag handle and top of bag with matching thread, 1/8”(3.175mm) from edge (white dotted lines)
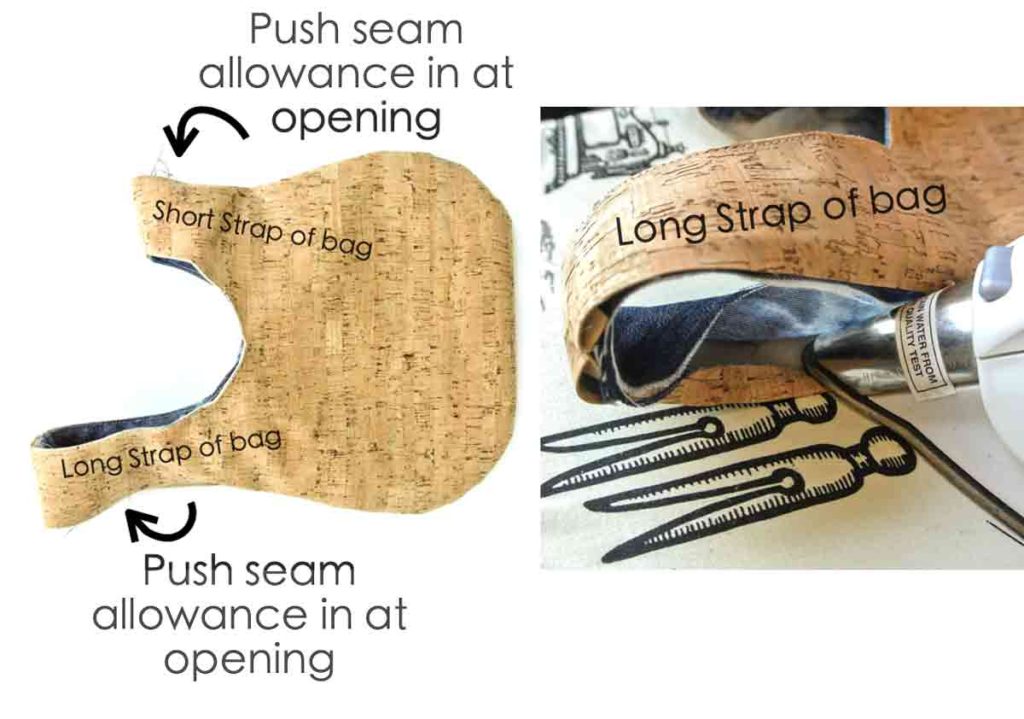
LEFT: Push seam allowance in (3/8”or 9.53mm) at side of bag straps
RIGHT: Press down seam allowance with iron on Fabric A
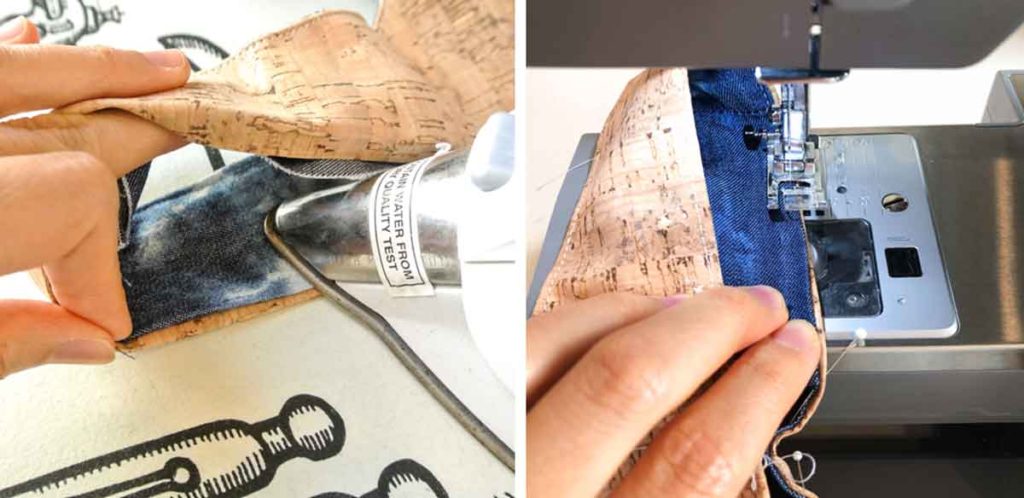
LEFT: Press seam allowance in on Fabric B
RIGHT: Pin and top stitch opening closed, sewing 1/8”(3.175mm) from edge. Alternatively you can close the hole with invisible ladder stitch. if you do not want the stitches to show on top of the bag.
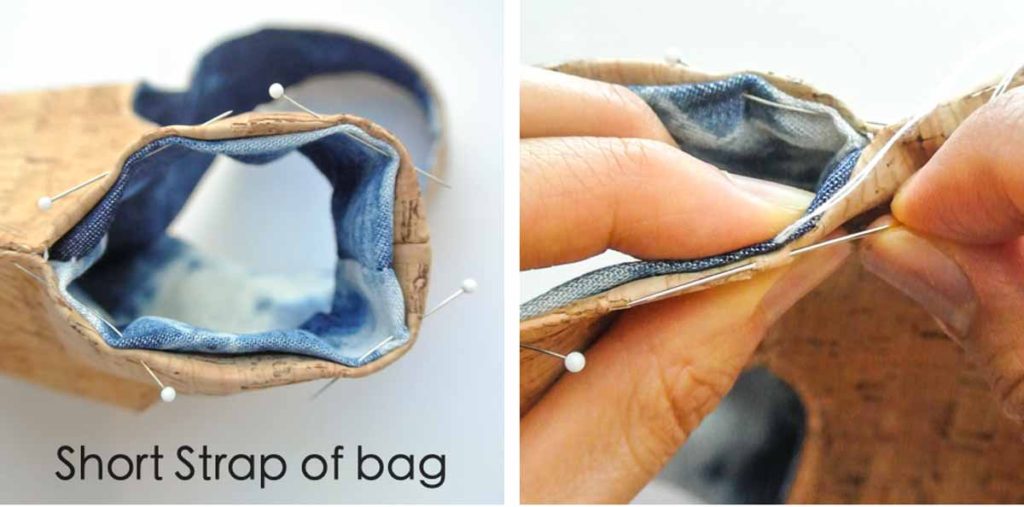
LEFT: Repeat (ironing seam allowance, pinning) on short strap of bag
RIGHT: Close opening by top stitching or using invisible ladder stitch. I find that it’s a lot easier to close the opening by hand on short strap of bag as there isn’t as much room to slide the short strap under the sewing machine to top stitch.
Finished! Wasn’t that simple and easy? Good job! You did it!

Pack up your stuff and close it in with the short handle! All ready to go! I hope you enjoyed this tutorial. Happy Sewing!
DIY Japanese Knot Bag
The Japanese knot bag is a stylish addition to your wardrobe. Fully lined, this reversible knot bag closes on itself without a zipper to keep your belongings safely stashed away!
Materials
- JAPANESE KNOT BAG FREE PATTERN
- 1/2 YARD FOR ONE SIDE - Fabric A (see note 1)
- 1/2 YARD FOR OTHER SIDE - Fabric B (see note 2)
- FUSIBLE INTERFACING (optional) - if you want to add stiffness to the bag
Tools
- SEWING MACHINE
- FABRIC SCISSORS
- SEWING PINS or SEWING CLIPS
- FABRIC CHALK
- CLEAR RULER
- MATCHING THREAD
- HAND SEWING NEEDLES
- IRON - for pressing
Instructions
- Download, print and assemble FREE JAPANESE KNOT BAG PATTERN.
- Cut out pattern on Fabric A and Fabric B.
- Place Fabric B right sides together and stitch the handles together at 3/8” (9.53mm) seam allowance.
- Press open seams with iron. Repeat for Fabric A.
- Place right sides of Fabric A and Fabric B together. We will be sewing together the opening between the bag handles.
- Pin opening between bag handles together and sew at 3/8” (9.53mm) seam allowance.
- Clip curves.
- Turn Fabric B in through opening you just sewed so that right side of Fabric A is exposed.
- The Wrong side of Fabric A and Fabric B will be facing each other after Fabric B has been turned in.
- Match right sides of Fabric A together.
- Place the right sides of Fabric A together and the right side of Fabric B matching together.
- Pin and sew Bag part of Fabric A together from notch to notch. Make sure to back stitch at the notches.
- Pull long strap of Fabric A towards middle of bag to reveal long strap of Fabric B.
- Pin bag of Fabric B right sides together, and sew from notch to notch as you did for Fabric A. Make sure to back stitch at the notches.
- At this point your bag will have an opening on both handles (of Fabric A and Fabric B).
- Clip curves.
- Turn Fabric B into Fabric A through the opening.
- You will now have a bag with two openings: One at the long bag strap and one at the short strap.
- Turn Fabric A to right side through opening of long strap and turn Fabric B into Fabric A.
- Tuck Fabric B into Fabric A, and press the handle and top of bag.
- Top stitch bag handle and top of bag with matching thread, 1/8”(3.175mm) from edge (white dotted lines).
- Push seam allowance in (3/8”or 9.53mm) at side of bag straps
- Press down seam allowance with iron on Fabric A
- Press seam allowance in on Fabric B.
- Pin and top stitch opening closed, sewing 1/8” (3.175mm) from edge. Alternatively you can close the hole with invisible ladder stitch if you do not want the stitches to show on top of the bag.
- Repeat ironing seam allowance and pinning on short strap of bag
- Close opening by top stitching or using invisible ladder stitch (see note 3).
- Finished!
Notes
- I used this natural cork fabric. However, due to the stiffness of the fabric, it was not very easy to work with. I definitely don’t recommend the natural cork if you are a beginner!
- I used a light weight denim.
- I find that it’s a lot easier to close the opening by hand on short strap of bag as there isn’t as much room to slide the short strap under the sewing machine to top stitch.
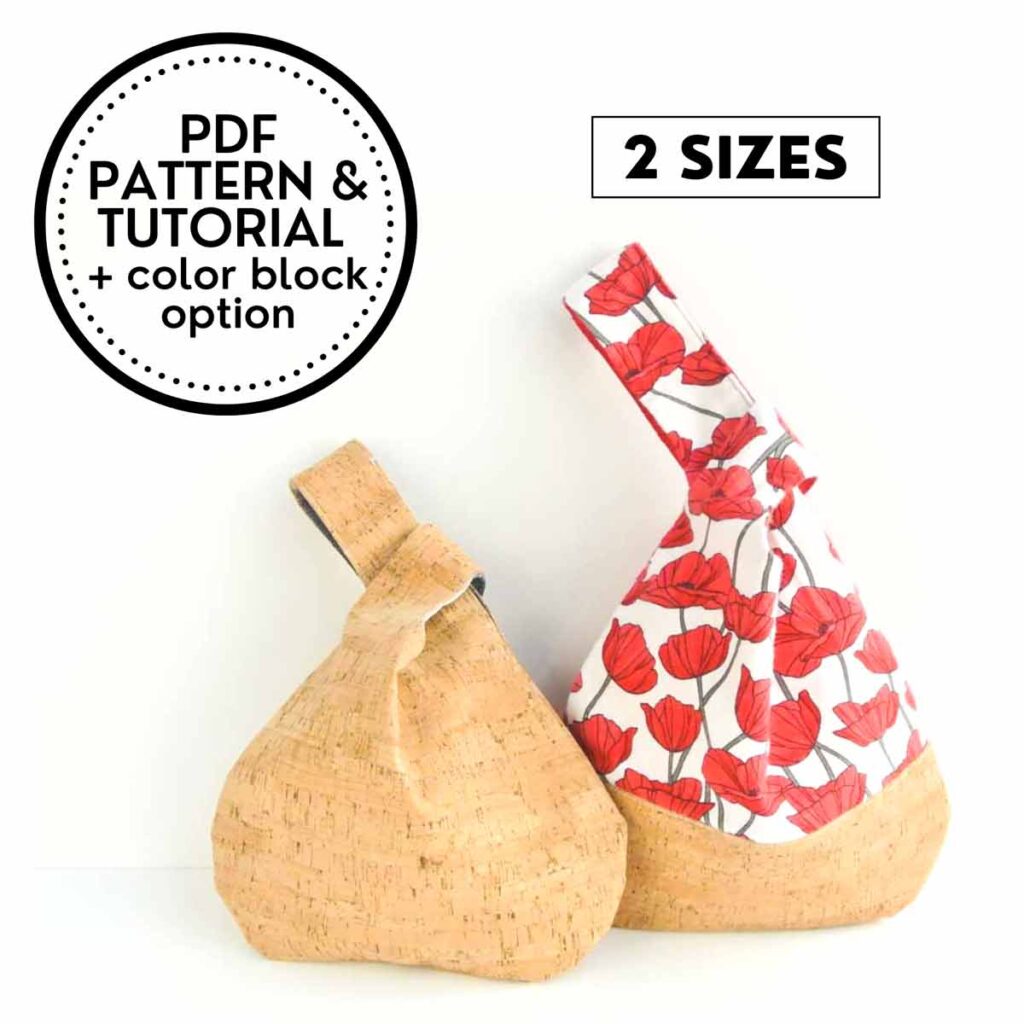
The ad-free, PRINTER-FRIENDLY PDF version of this sewing tutorial with all the step-by-step photos is available for purchase IN OUR SHOP. The sewing tutorial consists of 19 pages of detailed instructions with photos. Additionally, you will receive PDF Pattern of Japanese Knot Bag in SIZE MEDIUM and COLOR BLOCK OPTION (pictured on right). Print a copy today to keep next to your sewing machine for easy reference!


Of all the tutorials I have watched about this bag, yours make the most sense and is easy to understand. Thank you
Hi Dianne,
I’m so glad you found the tutorial helpful!
Muy fácil, práctico y bien explicado, es uno de los modelos que se han convertido en mi favorito
Gracias por compartir esta labor ❤️
These ‘s knot bags look great and would be very useful
Thanks Ann! They are definitely handy and useful!
These are perfect bags for visually impaired individual persons.
Purchased the pattern and your written tutorial is wonderful! I thought I would use stitch witchery to close up the straps instead of ladder stitching it.
Hi Linda,
That is an excellent idea! I’ve actually never used stitch witchery before, will need to try sometime. Thanks for the tip!
stitch witchery, though useful, can be tricky to use especially on handles like this so it captures both sides equally while you iron. It will add stiffness as well, making the handles less ” pliable.”. If I had to opt between stitch witchery which is a straight adhesive tape with no bias and something else, I think I would go with flexible fabric glue instead. I have had the edges of fabric move while ironing which caused the witchery tape to adhere improperly and thus was exposed. it’s very difficult to remove or correct a bodged job with the tape.
Hi, I was trying to subscribe but could not figure out how – I thought I already had but….alas I need your help. Thanks
Hi Ki,
Please refer to this article for more information. Hope that helps!
This was crazy! I kept thinking, over and over, “there’s no way this is right,” and then would be like “AHA! That’s wild!” I don’t think I’d call it “simple and easy,” but your directions were fantastic. Thank you!