Simple Bunny Sewing Pattern (Free Template)
Always wanted to learn how to make a bunny rabbit out of fabric? This easy stuffed bunny sewing pattern and tutorial will teach you exactly how to do that. Step-by-step instructions is great for all sewing levels!

When I was little I LOVED sewing stuffed animals. Probably because I was an only child, stuffed animals kept me company. I kept at least 5 stuffed animals in my bed (a twin) that would sleep with me every night up to early high school!
Many years later, one time during down time at work, I randomly doodled a bunny doll. It’s been on my to-sew-list ever since!
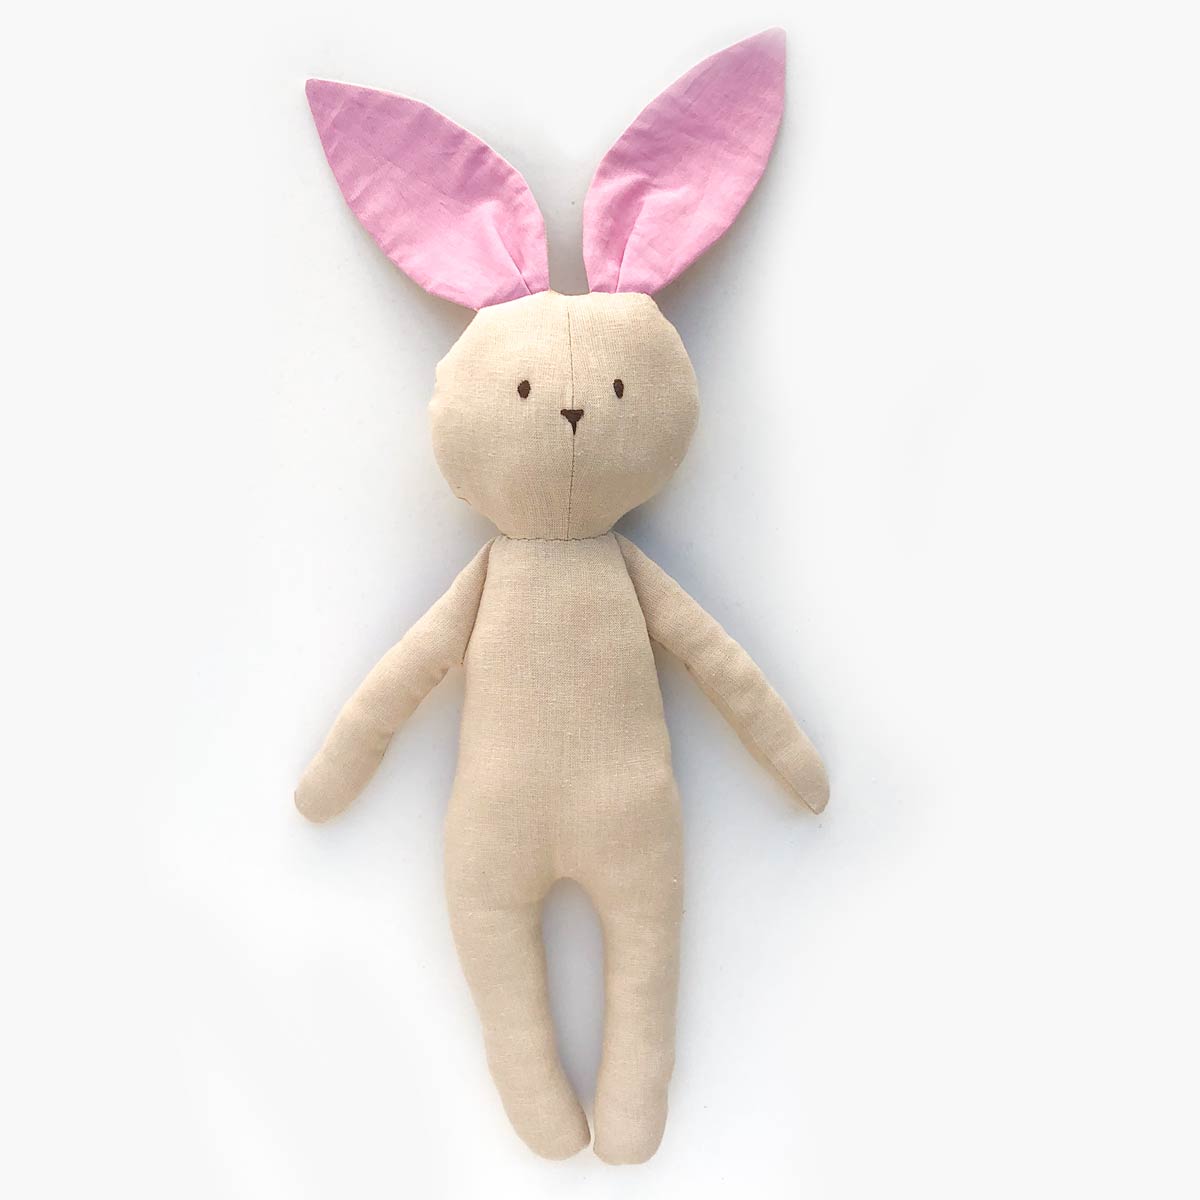
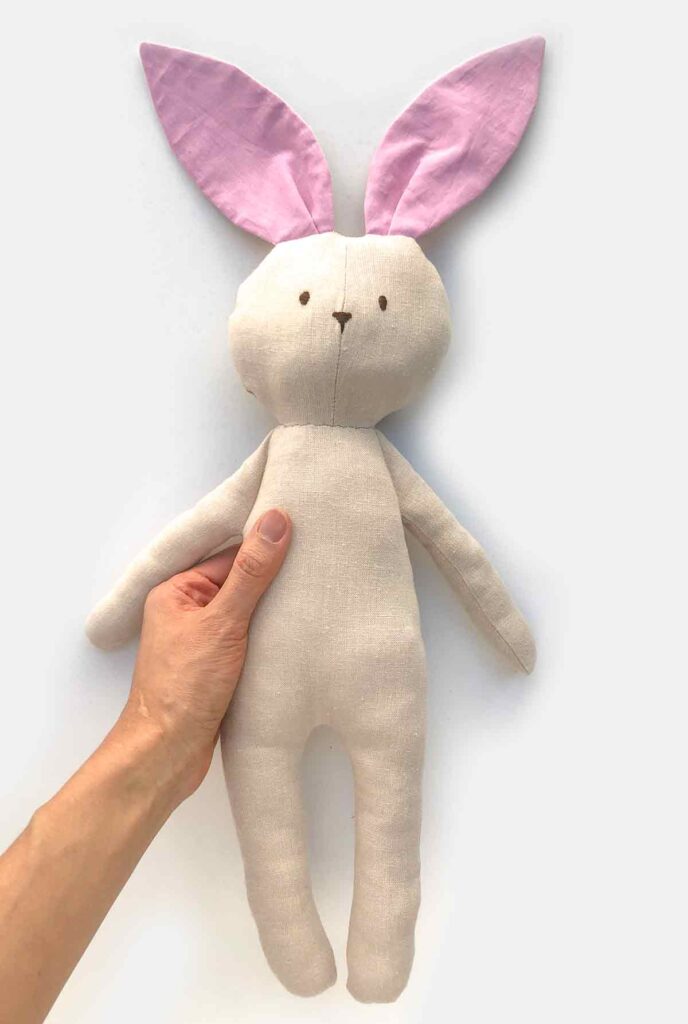
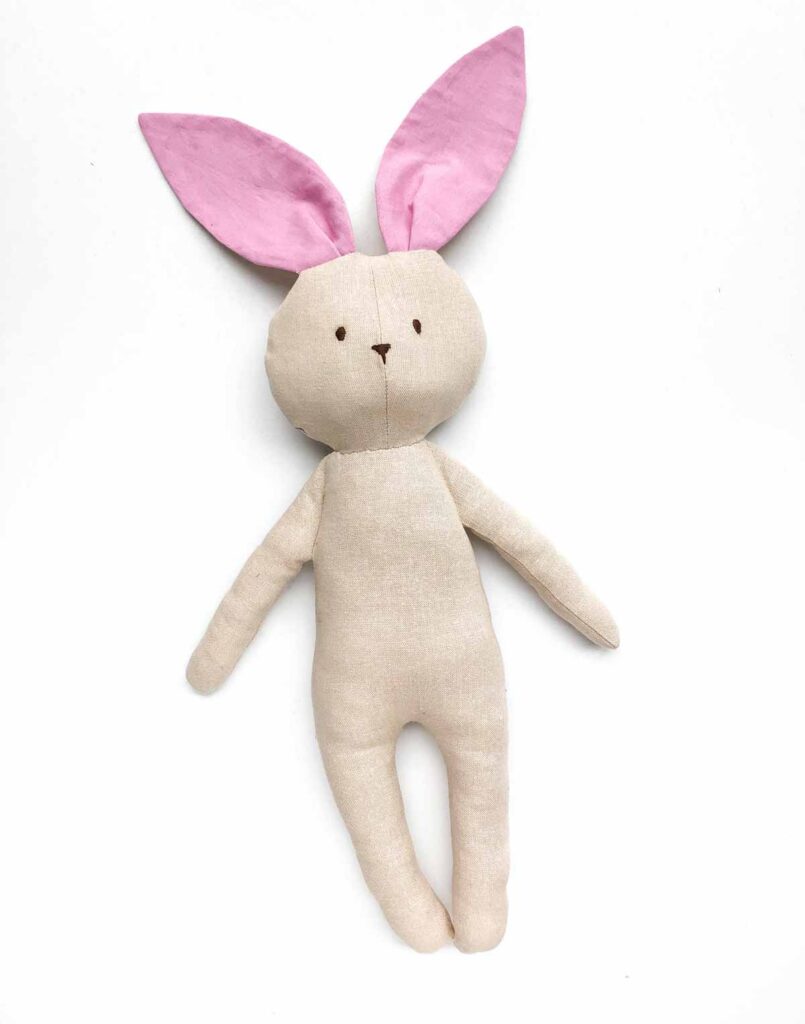
Today…about 10+ years later, I finally got to make a bunny plush pattern and sew it up! Hey, better late than never! The rabbit doll is designed to be long and skinny so that you can put outfits on her. (Did I mention sewing outfits for my dolls was another favorite thing to do as a kid?)
How do you make a simple bunny?
In this tutorial I will show you how to make this easy bunny plush. Even if you consider yourself a beginner, the step-by-step instruction has plenty of details to guide you to success!
First, you will need to download the Free Bunny Sewing Pattern (Available in the MindyMakes Library). Pattern is listed under the section “B” as “Bunny Plush” .
The PDF pattern is easily printable on Letter Size (8.5” x 11”) or A4 paper. In order to make the size you see in the tutorial, you will need to enlarge the pattern. I’ve included a 1 in and 3cm guide on each of the pattern pieces so you know how big to enlarge the pattern. Otherwise, the petite version of this bunny will be equally adorable as well!
The ad-free, printer-friendly PDF version of this step-by-step sewing tutorials is available for purchase in our SHOP. PDF tutorial includes FULL SIZE BUNNY PATTERN, Simply print and use! Additionally, you will receive the PDF pattern for bunny dress and scarf to give miss bunny a little outfit. Print a copy today to keep next to your sewing machine for easy reference!

You can use any fabric and pattern to make bunny’s dress and scarf. The possibilities are endless! In this version, Little Miss Bunny is wearing a one piece dress in denim, accessorized by a floral scarf made with fabric from Rifle Paper Co.
What Are the Dimensions of Stuffed Bunny?
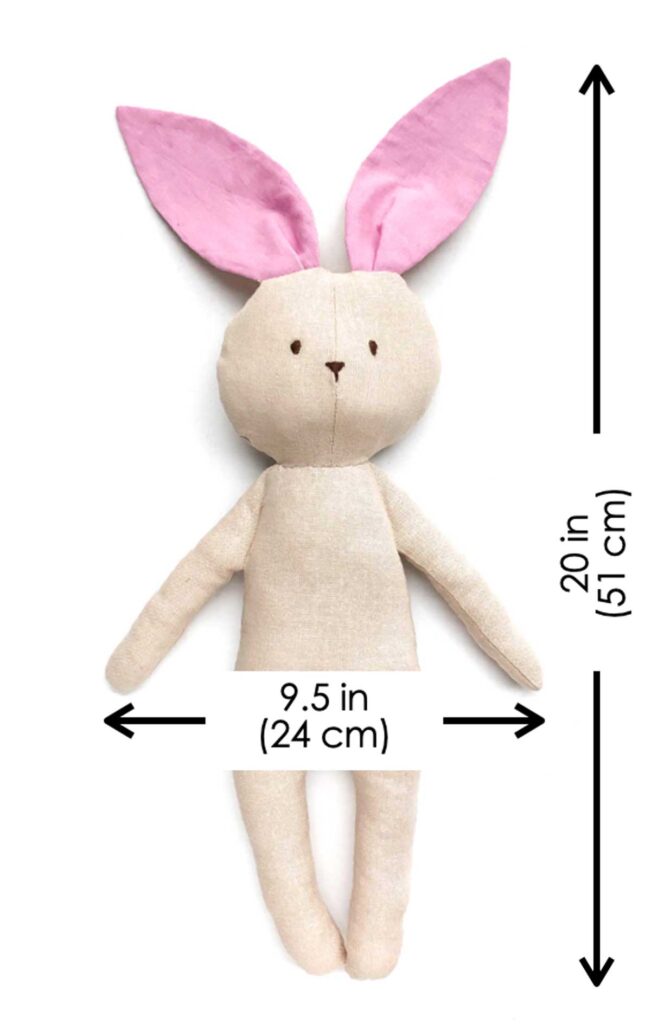
Bunny measures approximated 20″ (51cm) from top of ears to tip of legs and 9.5″ (24cm) wide from arm to arm.
MATERIALS & TOOLS
- BUNNY SEWING PATTERN (Available in the Free MindyMakes Library).
- FABRIC FOR BUNNY – 1/2 Yard (or anything more than 15 inches, 38cm) of fabric. I recommend cotton or linen if you consider yourself a beginner. Otherwise, knits, fleece or cuddly faux fur fabric would be great too
- LINING FOR INSIDE OF BUNNY EARS – 7 inches (18cm) or about 1/4 Yard
- FUSIBLE INTERFACING – if you want to add a little stiffness to the ears
- EMBROIDERY FLOSS – black of brown
- POLYESTER FIBERFILL – I like using Fairfield Crafter’s Choice Dry Polyester Packing Fiberfill. For more discussion about different types of fiberfill, check out How to Sew a Plushie
- SEWING MACHINE
- FABRIC SCISSORS – these Ginghers are my favorite.
- CLEAR RULER – I have the DRITZ See-Through Sewing Ruler
- FABRIC CHALK – These Chaco Liners by Clover are my absolute favorite
- SEWING PINS
- HAND SEWING NEEDLES
- MATCHING THREAD
- STUFFING TOOL – You can purchase a stuffing tool, but a chopstick, blunt scissors or flat screwdriver works great too.
How do you MAKE A BUNNY PLUSH: Easy Step-by-Step Tutorial
Cutting Pattern Pieces
Cut out the following pattern pieces for Bunny Plush:
- ARM PIECE (x4)
- BODY PIECE (x2)
- FACE BACK PIECE (x1)
- FACE FRONT PIECE (x2)
- EAR FRONT PIECE (x2)
- EAR BACK PIECE (x2)
- Optional – EAR FRONT PIECE (x2) on fusible interfacing


Sewing Bunny Ears
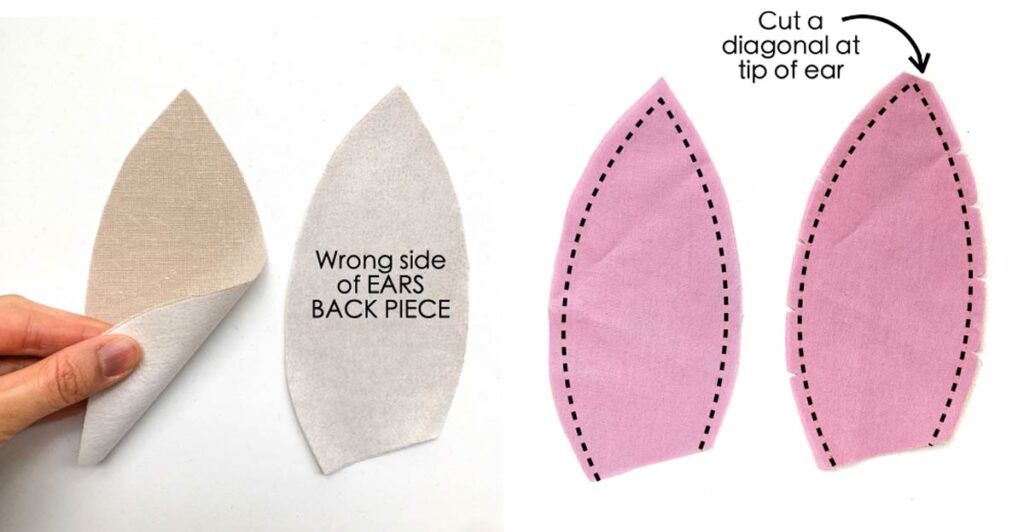
First, apply fusible interfacing (if using) to wrong side of EARS BACK PIECE
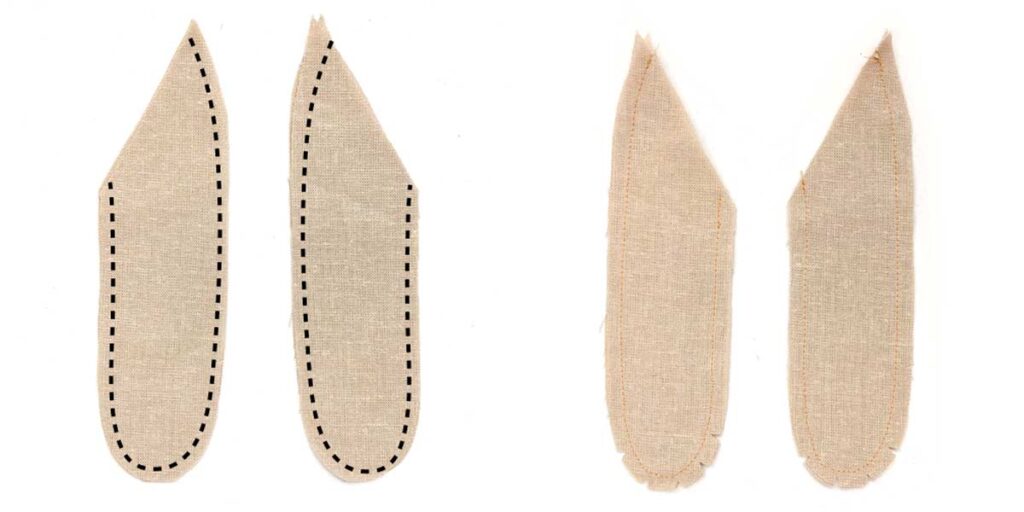
Next, sew EARS FRONT PIECE to EAR BACK PIECE, right sides together at 1/4” (6mm) seam allowance (black dotted lines). Leave bottom open. Clip curves. Cut a diagonal at the tip of the ears.

Finally, turn ears to right side (I’m using a pair of blunt scissors) and press the ears.
RIGHT: View of both ears turned to right side.
Folding Bunny Ears
Orientation of Ears: With the EARS FRONT PIECE facing you, the bottom edge of the ears that slants down will be the inner side of the ear.
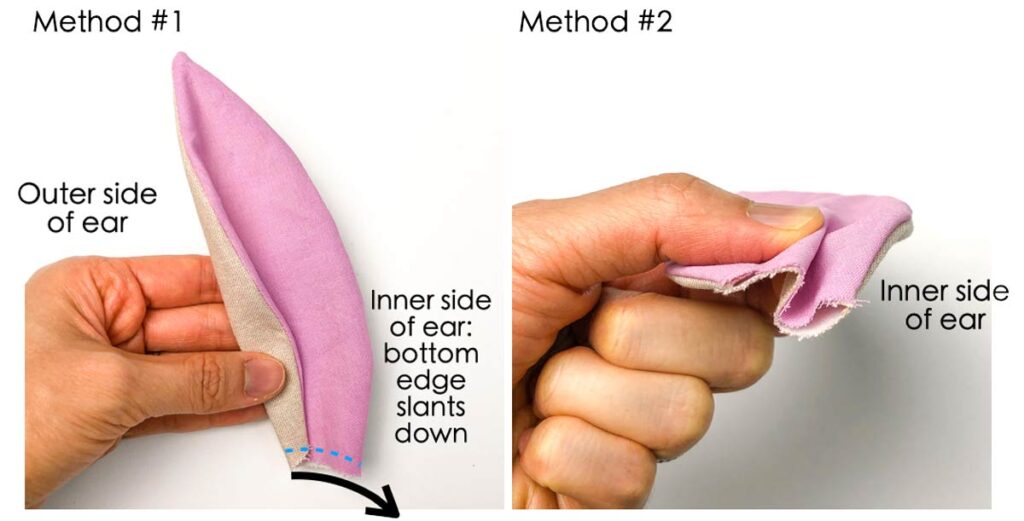
Method #1(LEFT): Fold the Outer side of ear over about 1/3 of the way and machine baste in place (dotted blue line). For more information about basting, check out How to Sew a Basting Stitch: Everything You Need to Know
Method #2 (RIGHT): Make a pleat in the middle of the bunny ears (this is the method I used).

Baste pleats in place (black dotted line).
Sewing Bunny Face

First, sew FACE FRONT PIECE together at midline. Next, use a ironing ham to press the seams open.
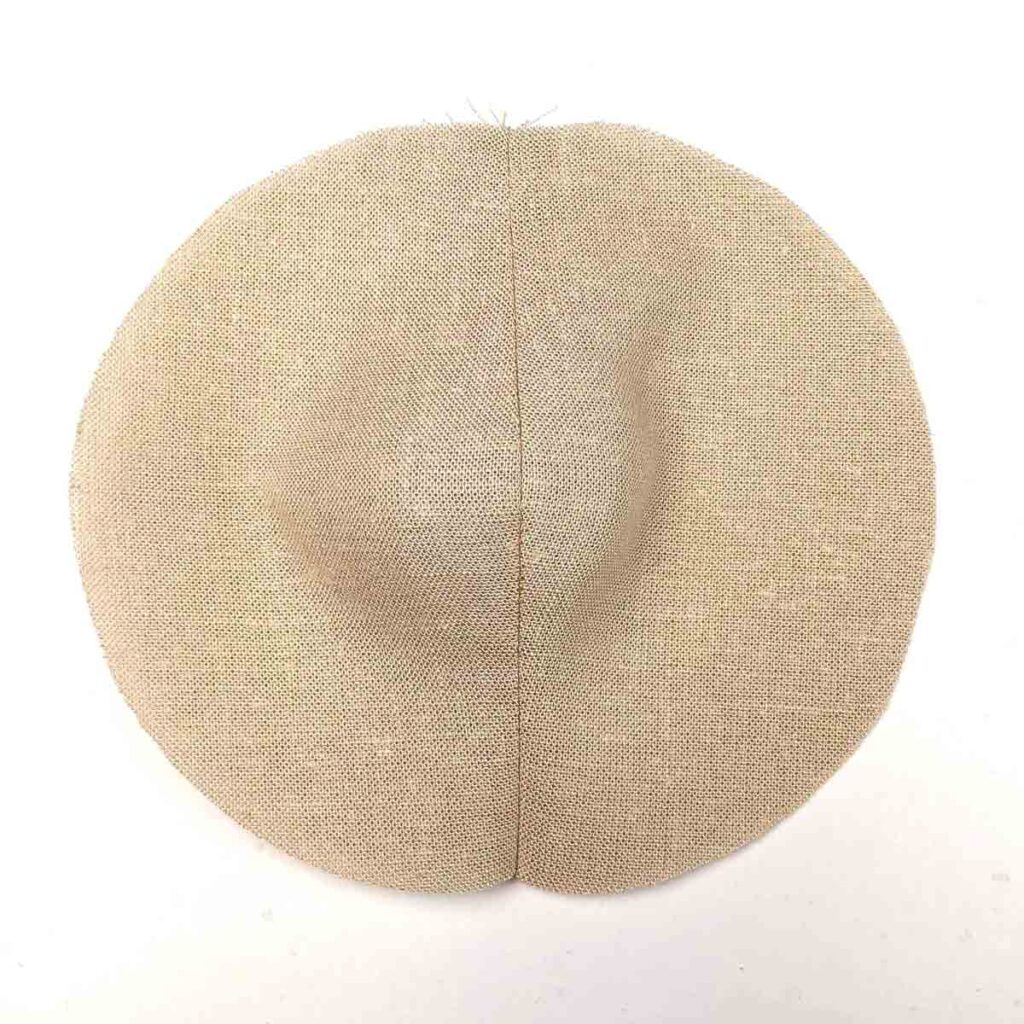
The front of the face will curve up (looks like a small hill) after you finish sewing.
Sewing Bunny Arms
First, place ARMS PIECE right sides together and sew at 1/4” seam allowance (black dotted lines). Next, clip curves (right photo).

LEFT: Turn arms to right side
RIGHT: Fill with fiberfill using a long tool of some sort ( i.e. blunt scissors, chopsticks, etc). In the photo I’m using a flat screwdriver.

LEFT: Fill the arms, leaving about 1/4-1/2”unfilled at the top
MIDDLE: Pin the arm opening closed
RIGHT: Baste the opening closed.
TIP
Make sure to baste the arm opening within the seam allowance (so less than 1/4″ from edge). This is so that later on you won’t see the basting stitch
Sewing Arms to Body

Pin ARMS to the BODY PIECE, one on each side. Be sure to match the opening of the ARMS to the side seam of BODY. Also match top of ARMS to top of BODY. Machine baste the arms in place.
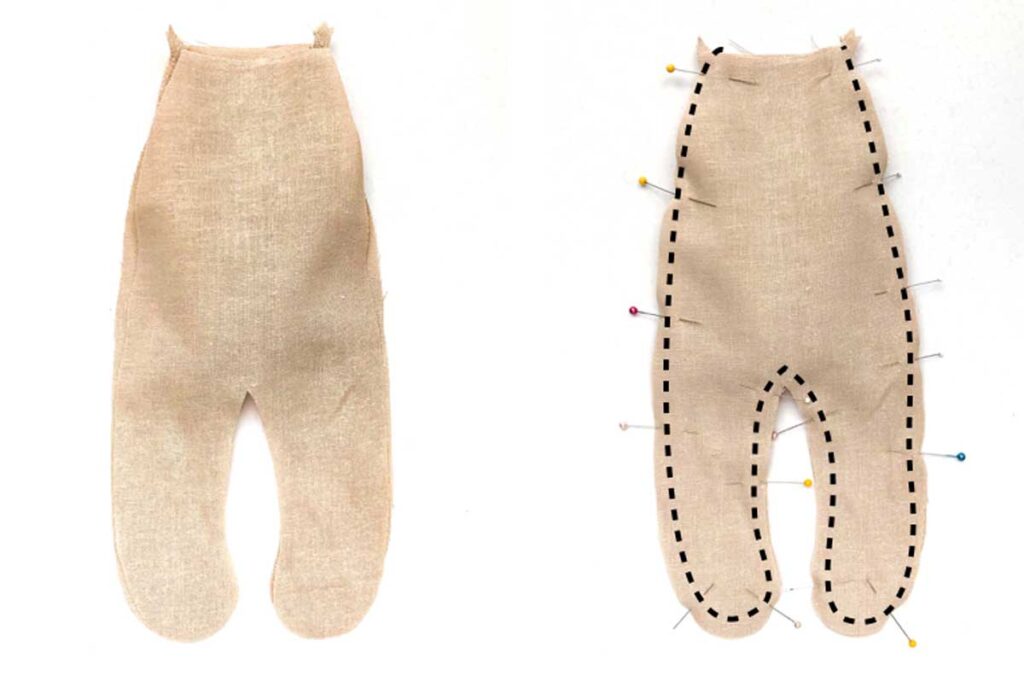
Place the second BODY PIECE over with right sides together. Make sure the two arms are completely tucked inside. Pin and sew (black dotted line), leaving the top edge (neckline) open.
TIPS
When sewing the crotch, make sure to pivot and go slowly. You may need to walk the foot.
Pivot is when you keep the needle in the fabric, lift the pressor foot and turn the fabric. Then lower pressor foot and continue sewing.
Walking the Foot is where you manually use your hand to turn the hand wheel to move the needle up and down without using the foot pedal. This way, you have greater control of your sewing.

Clip curves and turn the body to the right side.
Sewing Ears to Face

First, baste stitch bunny ears to FACE FRONT PIECE, right sides together. The distance between the ears is about 5/8”(16mm), equidistant from the midline seam.
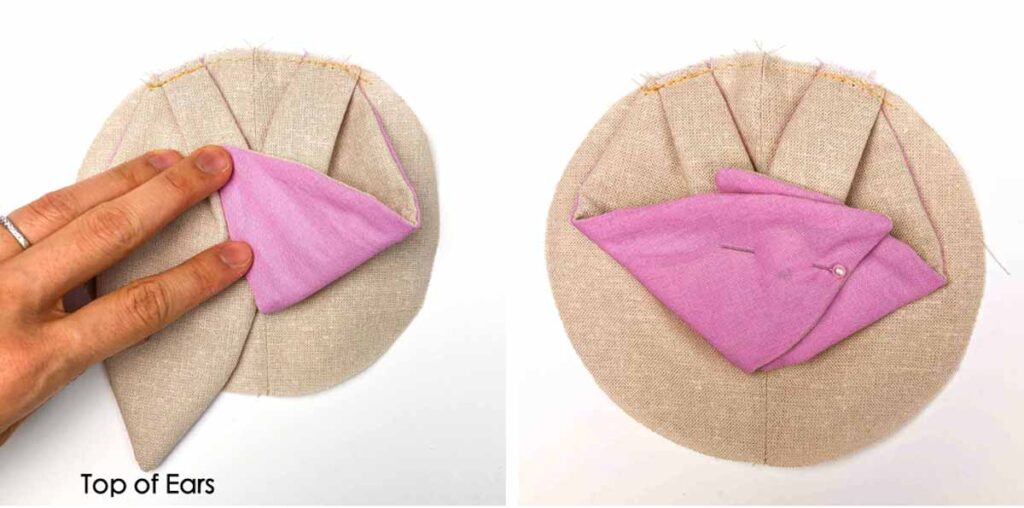
Next, fold the top of the ears up and pin them to FACE FRONT PIECE so that none of the ears stick out past the face.
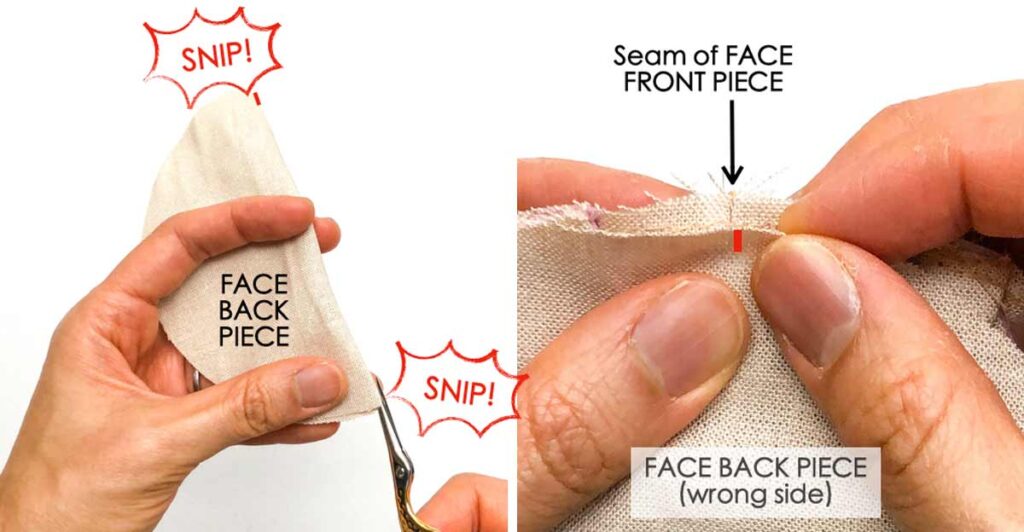
Third, fold FACE BACK PIECE in half and make a small snip on both ends of the snip to mark the midline (small red line).
Now, place the two face pieces right sides together. Match midline of FACE BACK PIECE (that you had just snipped) to seam of FACE FRONT PIECE
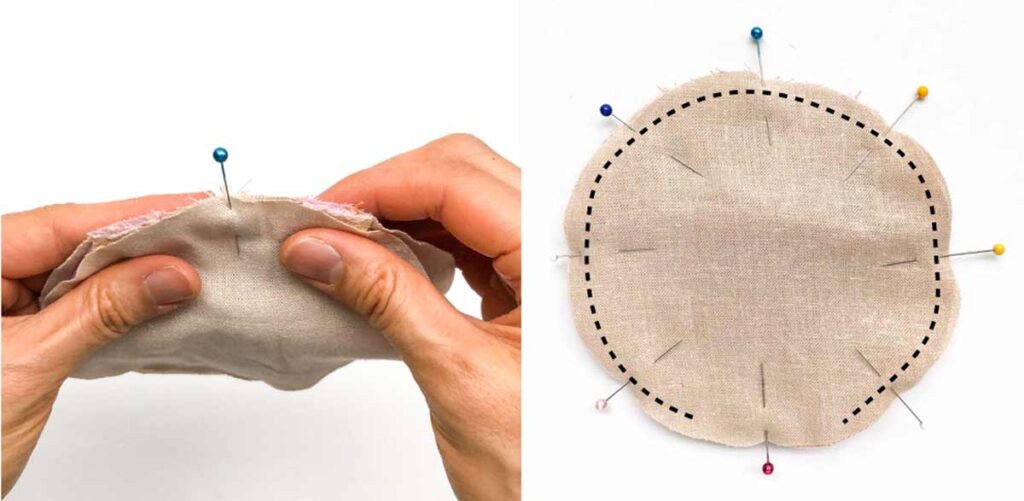
Fifth, pin the midline to the seam at the top and repeat at the bottom of the face.
Finally, match FACE FRONT PIECE and FACE BACK PIECE together and pin. Stitch all around, leaving a 2”opening at the bottom.
NOTE:
The FACE FRONT PIECE is larger than the FACE BACK PIECE, so don’t be alarmed that the two pieces don’t lay nicely flat together (they won’t). Instead, when pinning, focus on matching the midlines and edges together.

Clip curves and turn face to the right side. Stuff the face with fiberfill (RIGHT).
Stuffing Bunny
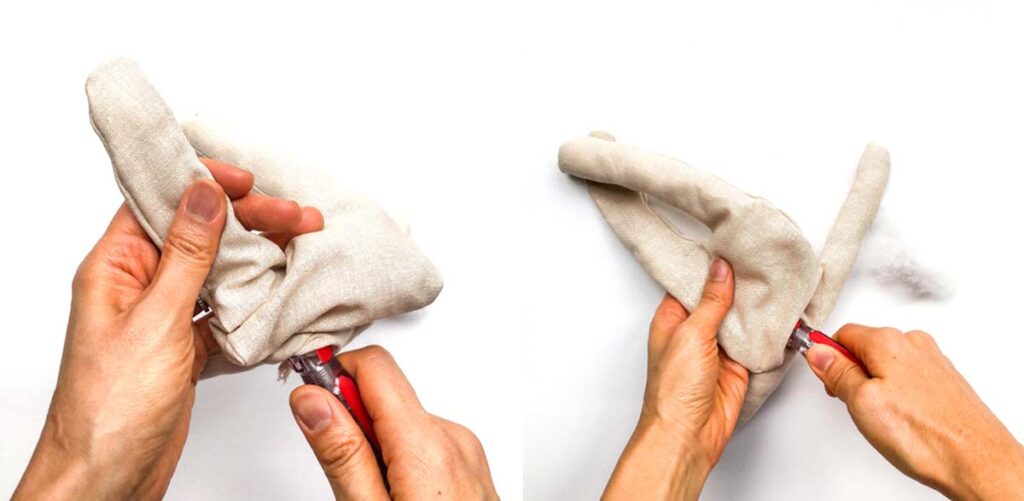
Similar to stuffing the arms, use a long tool and fill the body with fiberfill a little at a time. Start by filling the area farthest away from the opening (bottom of the leg).

LEFT: Fill body all the way to the top.
RIGHT: View of head and body both stuffed, ready to be sewn together.
Sewing Bunny Face
Before we sew the bunny together, we will first need to embroider its face.
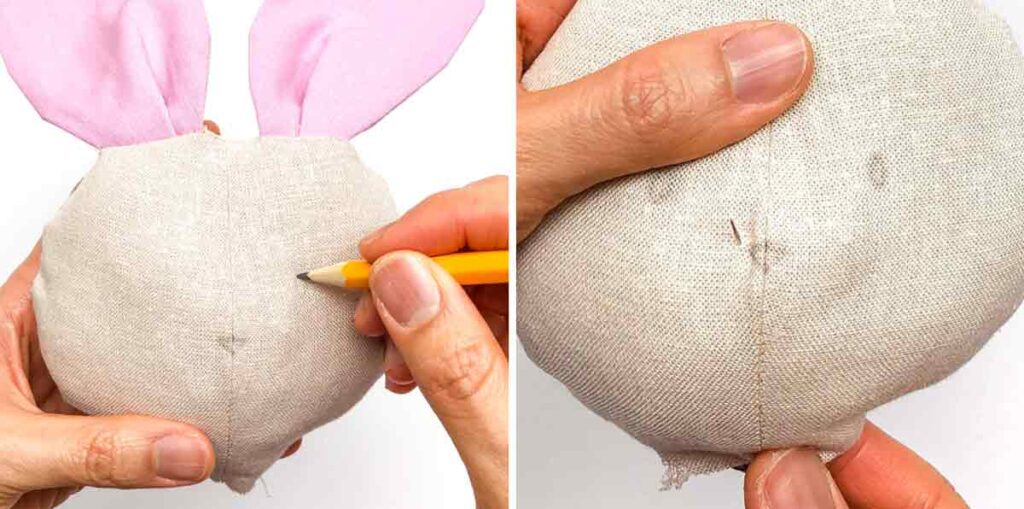
First, pencil in the eyes and nose
Second, thread a needle, tie a knot, and poke it through the left side of the nose as shown in photo. (I’m using two strands of brown embroidery floss)
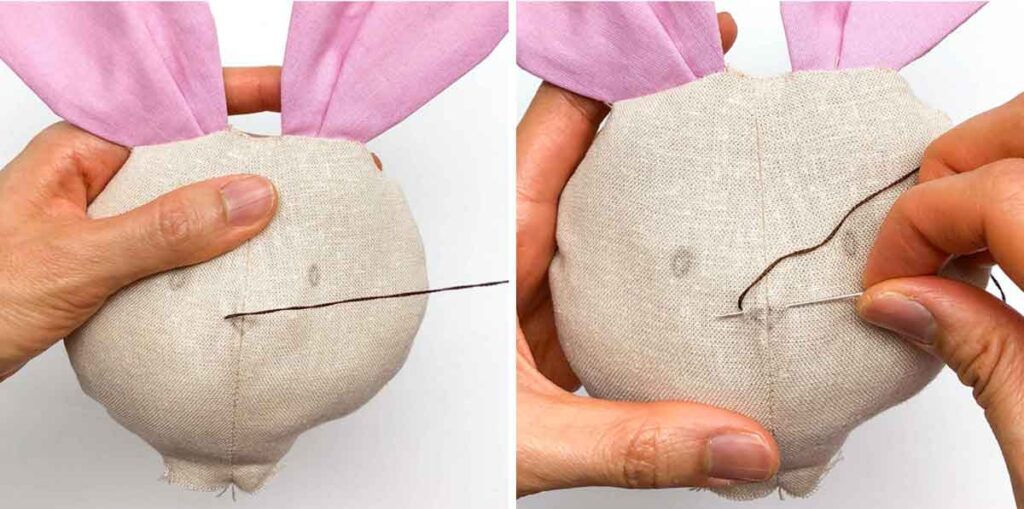
LEFT: Pull the thread out .
RIGHT: Insert needle into the right tip of the nose, and exit on the left side of nose right below where the initial strand of thread came out.

LEFT: Pull the thread out. Be sure not to pull the thread super tight otherwise the fabric between the nose will bunch up and it won’t look nice.
RIGHT: Continue using satin stitch, going from right to left until the nose is formed.

Once the triangular nose is formed, make the little line below the tip of the nose as shown in photo. The little line should go over the midline seam of the bunny.

LEFT: You can make two stitches on the little line to make it more obvious. Then, take the needle and go from the bottom of the line to the bottom of the left eye.
RIGHT: Pull needle out and start stitching the left eye, going from right to left like you previously did for the nose. I turned the bunny head upside down to make the left eye as I find it easier, but you do what is comfortable for you!

LEFT: Continue using the satin stitch until the entire eye is filled in.
RIGHT: Once the left eye is formed, bring the needle out from the bottom of the right eye.

LEFT: Form the right eye by stitching from right to left.
RIGHT: Once the right eye is formed, bring the needle out from the bottom of the bunny head.
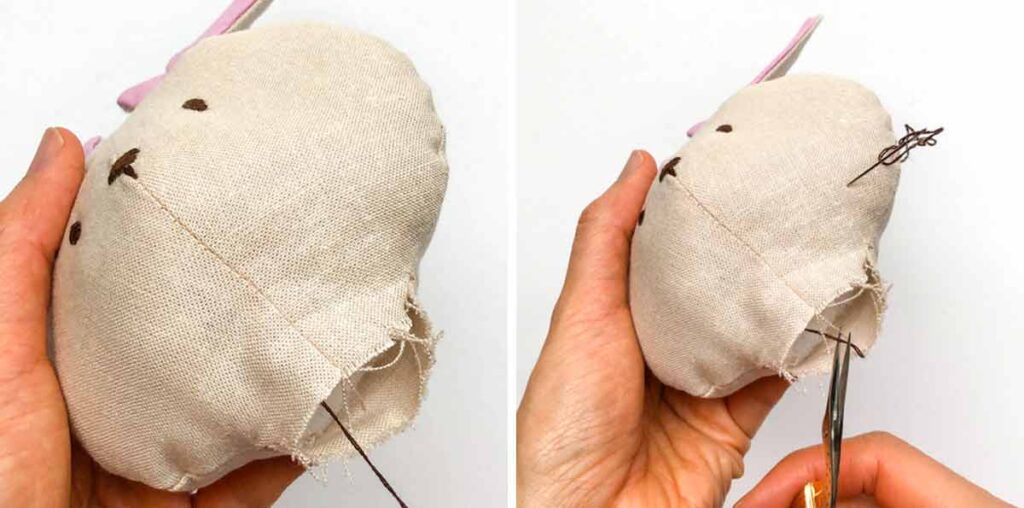
Completely pull the needle out, make a knot as close as you can to the eye and cut off excess thread.
NOTE:
You won’t be able to get the knot right next to the eye and that’s ok. Just tie a knot a slide it as close inside the head as you can.

Tuck the excess thread into the bunny head and your bunny face is done. You can also add eyelashes or whiskers to the face as you please. Designer’s choice!
Sewing Bunny Together
Use a thread that matches the color of the bunny fabric. If you can’t find something that matches exactly, go slightly darker.

LEFT: Tuck in seam allowance at opening of bunny head. Thread a needle, tie a knot and pull it through, starting at the right side seam of the head (front of head is facing you)
RIGHT: Use invisible ladder stitch to sew head to body, going around the front of the head (make sure you also tuck in seam allowance of body)
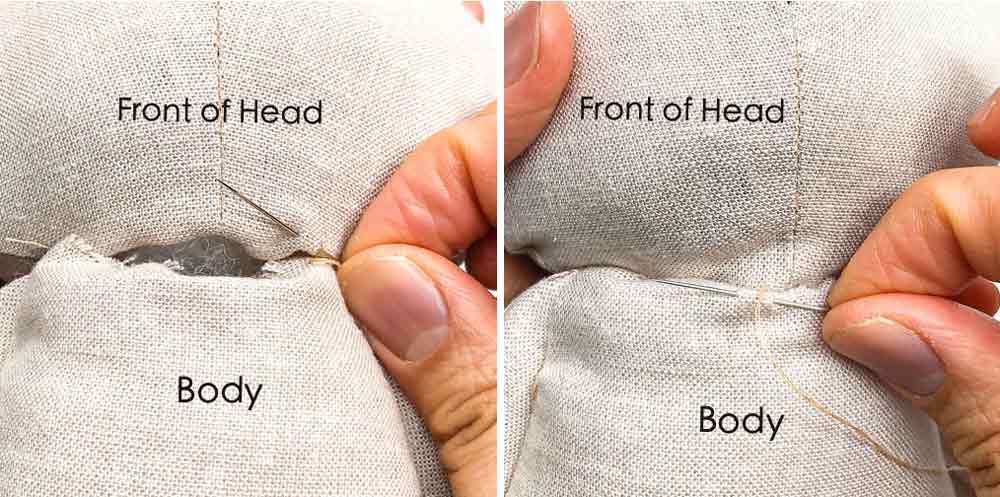
Continue using ladder stitch to sew front of head to body
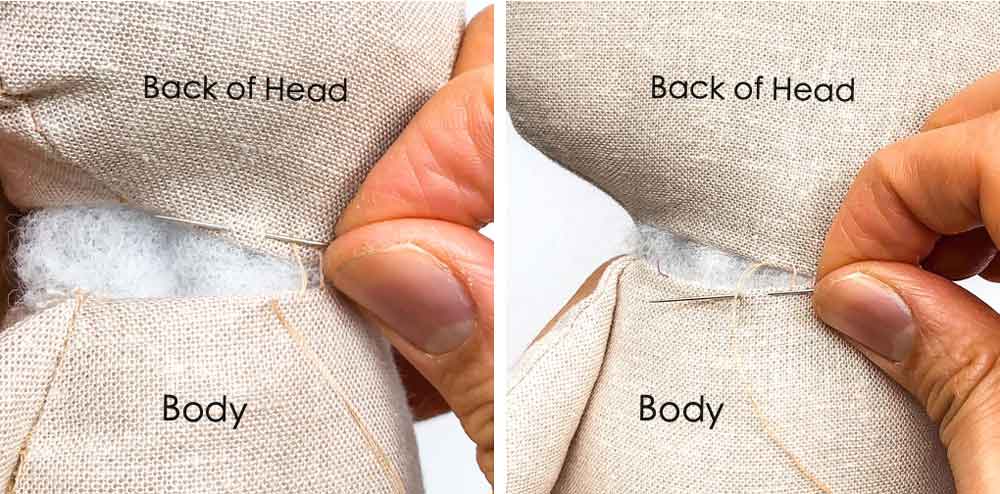
Stitch back of head to body until you end up where you started.
NOTE:
- Stuff more fiberfill into bunny if you feel that it needs more. The neck area should be stiff enough so that the head doesn’t droop.
- You may want to stitch around the entire head twice with the ladder stitch to reinforce the head to the body.
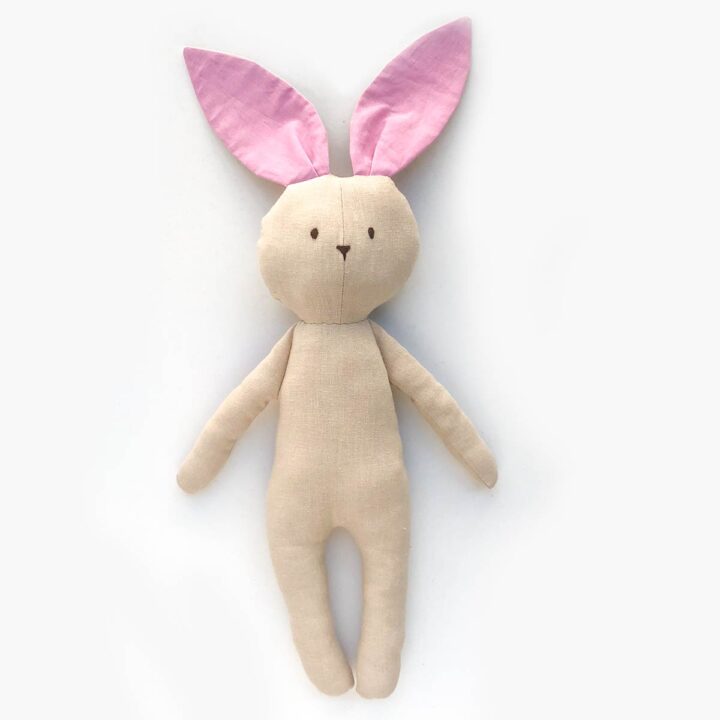
Finished bunny. Congratulations!!! Whoo hoo!! You did it!!!
How to Sew a Simple Bunny
A soft stuffed bunny plush with floppy ears that is sure to delight all bunny lovers.
Materials
- BUNNY SEWING PATTERN
- FABRIC FOR BUNNY – 1/2 Yard
- LINING FOR INSIDE OF BUNNY EARS – 7 inches (18cm) or ~ 1/4 Yard
- FUSIBLE INTERFACING (optional) - if you want to add more stiffness to bunny ears
- EMBROIDERY FLOSS – black or brown
- POLYESTER FIBERFILL
Tools
- SEWING MACHINE
- FABRIC SCISSORS
- CLEAR RULER
- FABRIC CHALK
- SEWING PINS
- HAND SEWING NEEDLES
- MATCHING THREAD
- STUFFING TOOL - otherwise chopstick, blunt scissors or flat screwdriver works great too.
Instructions
- Cut out all pattern pieces on fabric
- Apply fusible interfacing (if using) to wrong side of EARS BACK PIECE
- Sew EARS FRONT PIECE to EAR BACK PIECE, right sides together at 1/4” (6mm) seam allowance, leaving bottom open.
- Clip curves
- Cut a diagonal at the tip of the ears.
- Turn ears to right side and press the ears.
- Fold ears using one of two methods (see notes)*
- Sew FACE FRONT PIECE together at mid line.
- Use a ironing ham to press the seams open.
- Put ARMS PIECE right sides together and sew at 1/4” seam allowance
- Clip curves and turn to the right side.
- Fill arms with fiberfill, leaving about 1/4-1/2”unfilled at the top
- Baste the arm openings closed**
- Pin ARMS to the BODY PIECE, one on each side. Machine baste the arms in place.
- Place the second BODY PIECE over with right sides together. Make sure the two arms are completely tucked inside.
- Pin and sew***, leaving the top edge (neckline) open.
- Clip curves and turn the body to the right side.
- Baste stitch bunny ears to FACE FRONT PIECE, right sides together.
- Fold the top of the ears up and pin them to FACE FRONT PIECE so that none of the ears stick out past the face.
- Mark mid line of FACE BACK PIECE by folding in half and making tiny snips at both ends of fold line.
- Match mid line of FACE BACK PIECE to seam of FACE FRONT PIECE
- Pin and sew****, leaving a 2” opening at the bottom.
- Clip curves and turn face to the right side. Stuff the face with fiberfill.
- Use a long tool and fill the body with fiberfill a little at a time. Start by filling the area farthest away from the opening (bottom of the leg).
- Fill body all the way to the top.
SEWING BUNNY FACE
- Pencil in the eyes and nose
- Use embroidery floss to fill in the triangular nose and oval eyes with satin stitch. Add eyelashes or whiskers if desired.
- Once done, completely pull the needle out through the head opening.
- Make a knot as close as you can to the eye and cut off excess thread.
- Tuck excess thread into the bunny head.
SEWING BUNNY TOGETHER
- Tuck in seam allowance at bottom opening of bunny head.
- Tuck in seam allowance at opening of body (neckline)
- Use matching thread, sew head to body using invisible ladder stitch.
- Add a little more fiberfill if necessary before completely closing the hole.
- Bunny is finished!
Notes
* How to Fold Ears
- Method 1: Fold outer side of ear over about 1/3 of the way and machine baste in place
- Method 2: Make a pleat in the middle of the bunny ears and baste the pleats in place
** Make sure to baste the arm opening within the seam allowance (so less than 1/4" from edge). This is so that later on you won't see the basting stitch
*** When sewing the crotch, make sure to pivot and go slowly. You may need to walk the foot.
Pivot is when you keep the needle in the fabric, lift the presser foot and turn the fabric. Then lower presser foot and continue sewing.
Walking the Foot is where you manually use your hand to turn the hand wheel to move the needle up and down without using the foot pedal. This way, you have greater control of your sewing.
****The FACE FRONT PIECE is larger than the FACE BACK PIECE, so don’t be alarmed that the two pieces don’t lay nicely flat together (they won’t). Instead, when pinning, focus on matching the midlines and
edges together.
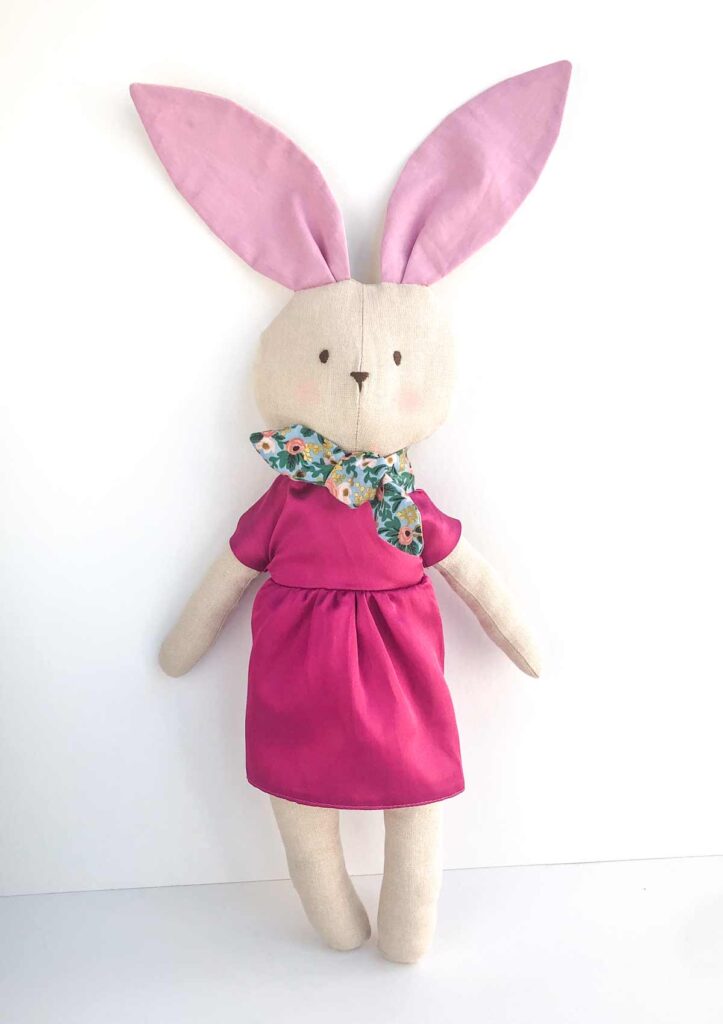
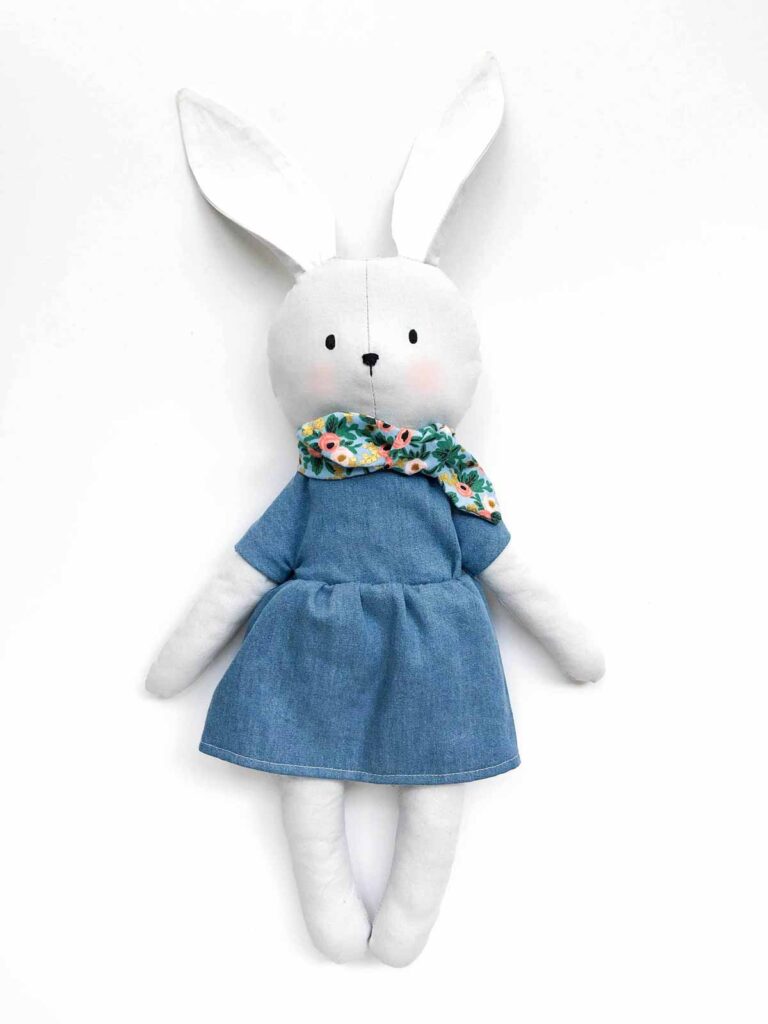
Miss Bunny also loves playing dress up, so be sure to add a dress and scarf to her wardrobe!

The full size, printable version of the bunny Sewing pattern is available for purchase in my Etsy shop. The patterns are full sized and ready to use (no need to enlarge). Bunny Sewing Pattern also includes an ad-free PDF version of this tutorial that is easily printable. This way, you can keep a copy next to you for reference as you sew. Additionally, you will get the pattern and tutorial to make the one piece dress and scarf that Little Miss Bunny is wearing.
More Sewing Projects the Kiddos will Love:
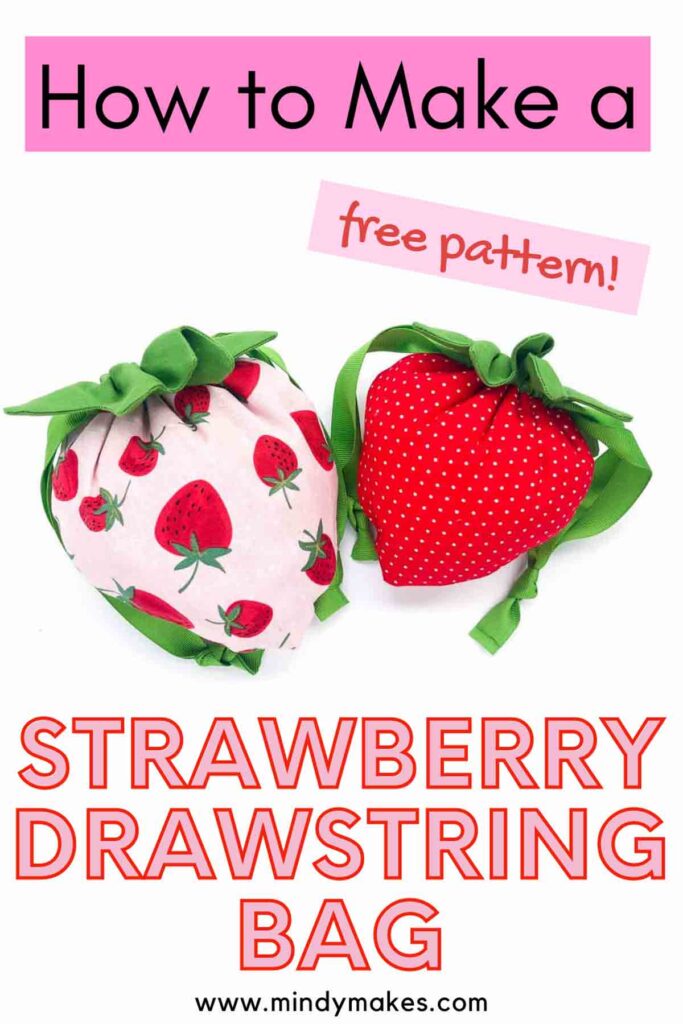
These Strawberry Drawstring bags are perfect for holding treats to gift your friends and family.
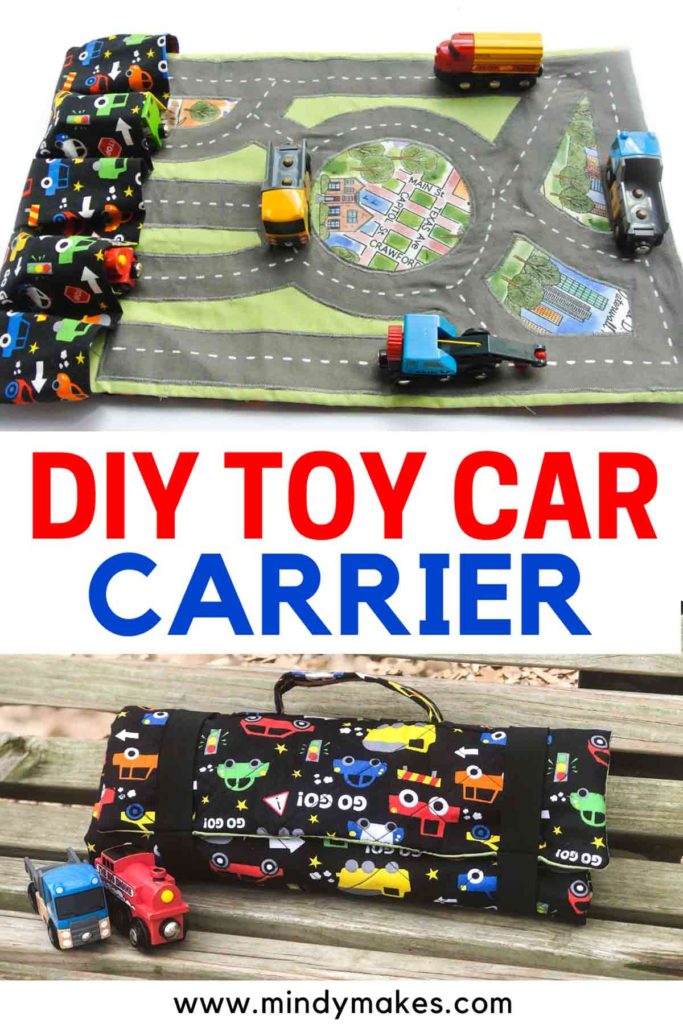
A DIY Toy Car Caddy that stores 5 cars and rolls up for lots of on-the-go fun.
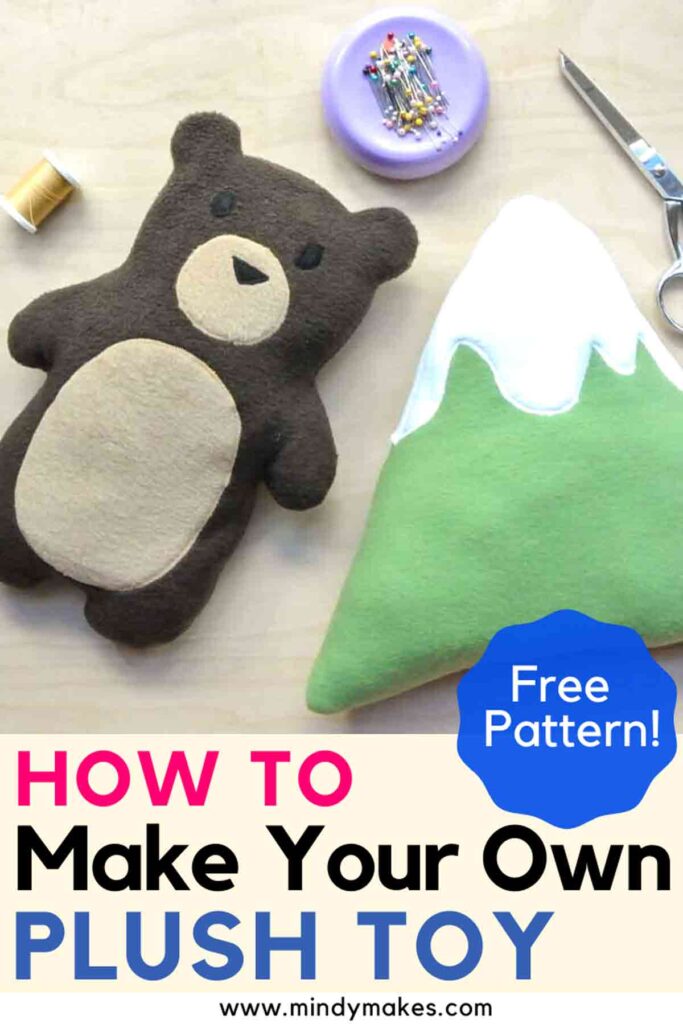
Learn how to design and make your own stuffed plushies.
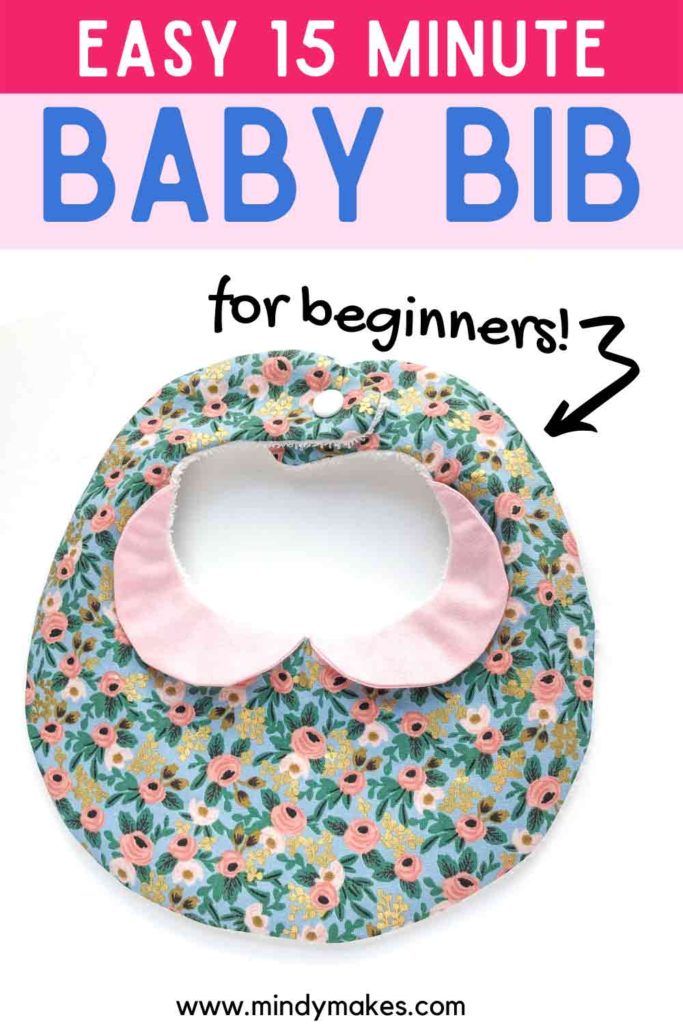
A towel bib to mop up spills and drools that doubles as an fashion accessory.
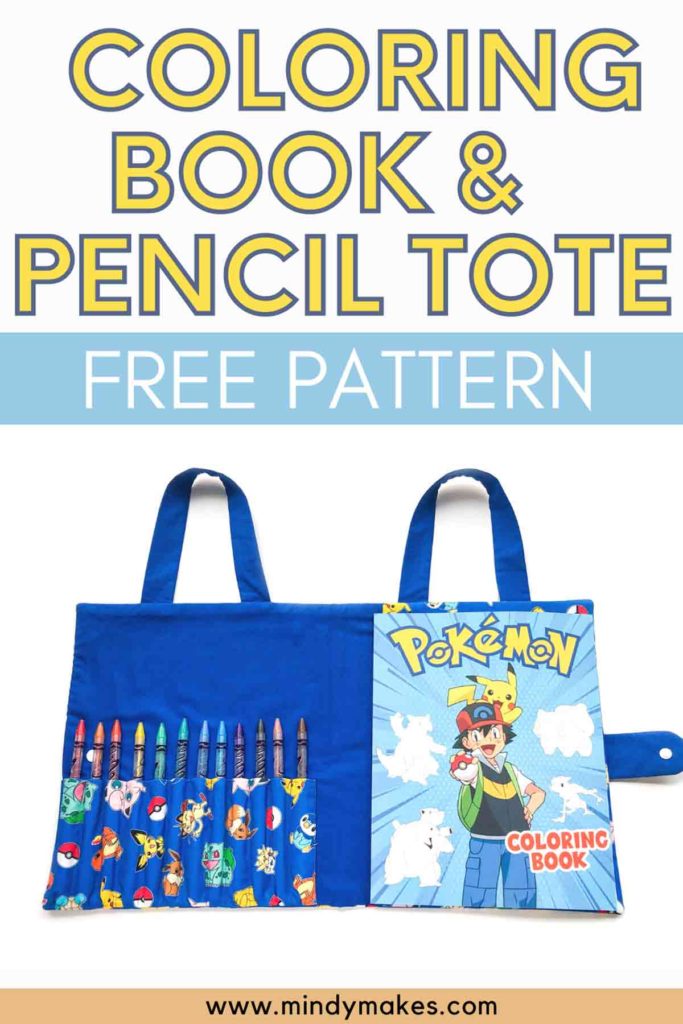
This coloring book and pencil tote is great for quiet play on-the-go..
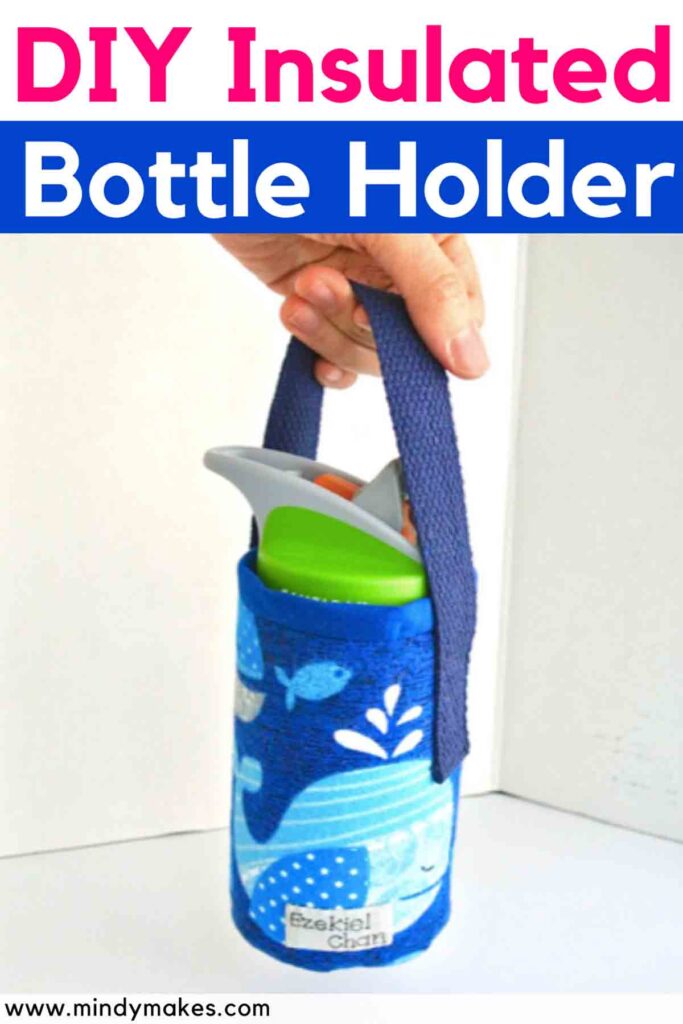
An Insulated Water Bottle holder to keeps drinks cool for the summer.
This simple bunny sewing pattern looks adorable and easy to follow! I can’t wait to try it out with my kids. Thanks for sharing the free template, Mindy!
How do you get the “free” bunny pattern? I’ve read it over and over but none of the links work to get the free pattern stated. It’s really cute. Thanks.
Hi Connie,
This post will show you how to subscribe, enter the library, and grab the free pattern.
I’m so confused on sewing the bunny face! Do you sew the face BEFORE you put the stuffing in?
Hi Bethany,
Yes that’s correct! Sew the face first before stuffing it.
Love the bunny
How do you get the pattern
Thank you
Hi Rebecca,
Check out this step-by-step tutorial how to download: https://mindymakes.com/how-to-download-pdf-files-from-the-mindymakes-library/