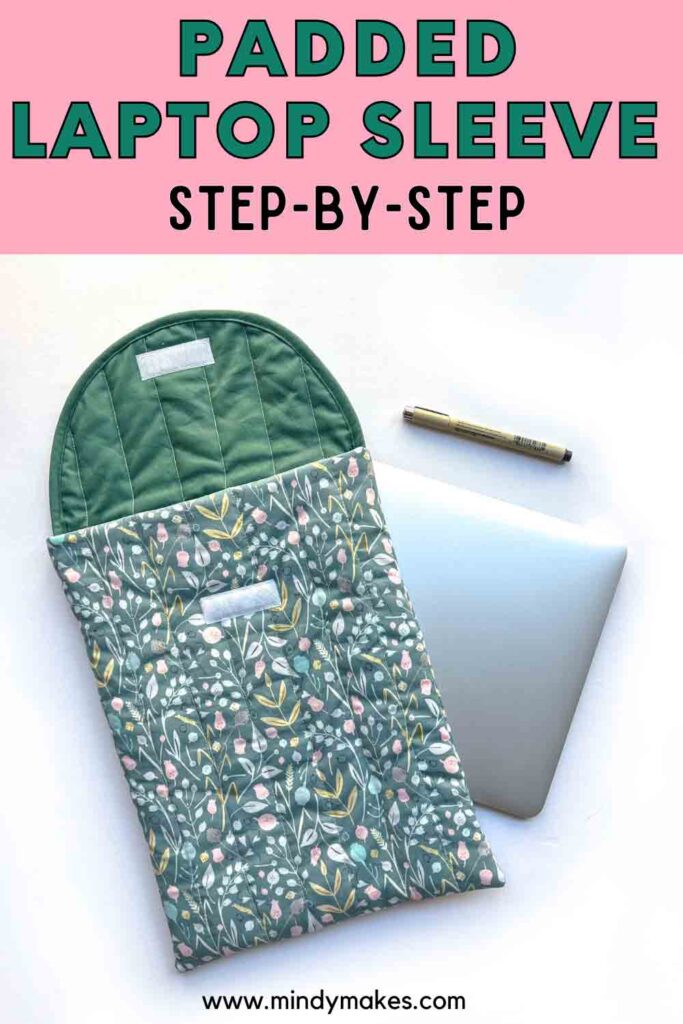
How to Make a Easy DIY Laptop Sleeve (Free Pattern)
This simple padded DIY laptop sleeve will keep your device safely stowed away on the go!
This post may contain affiliate links. Please read my disclosure policy for details. As an Amazon Associate, I earn from qualifying purchases.
Always wondered, “how do you make a homemade laptop sleeve”? Today, I will be showing you exactly that, step-by-step, to keep your laptop safely tucked away.
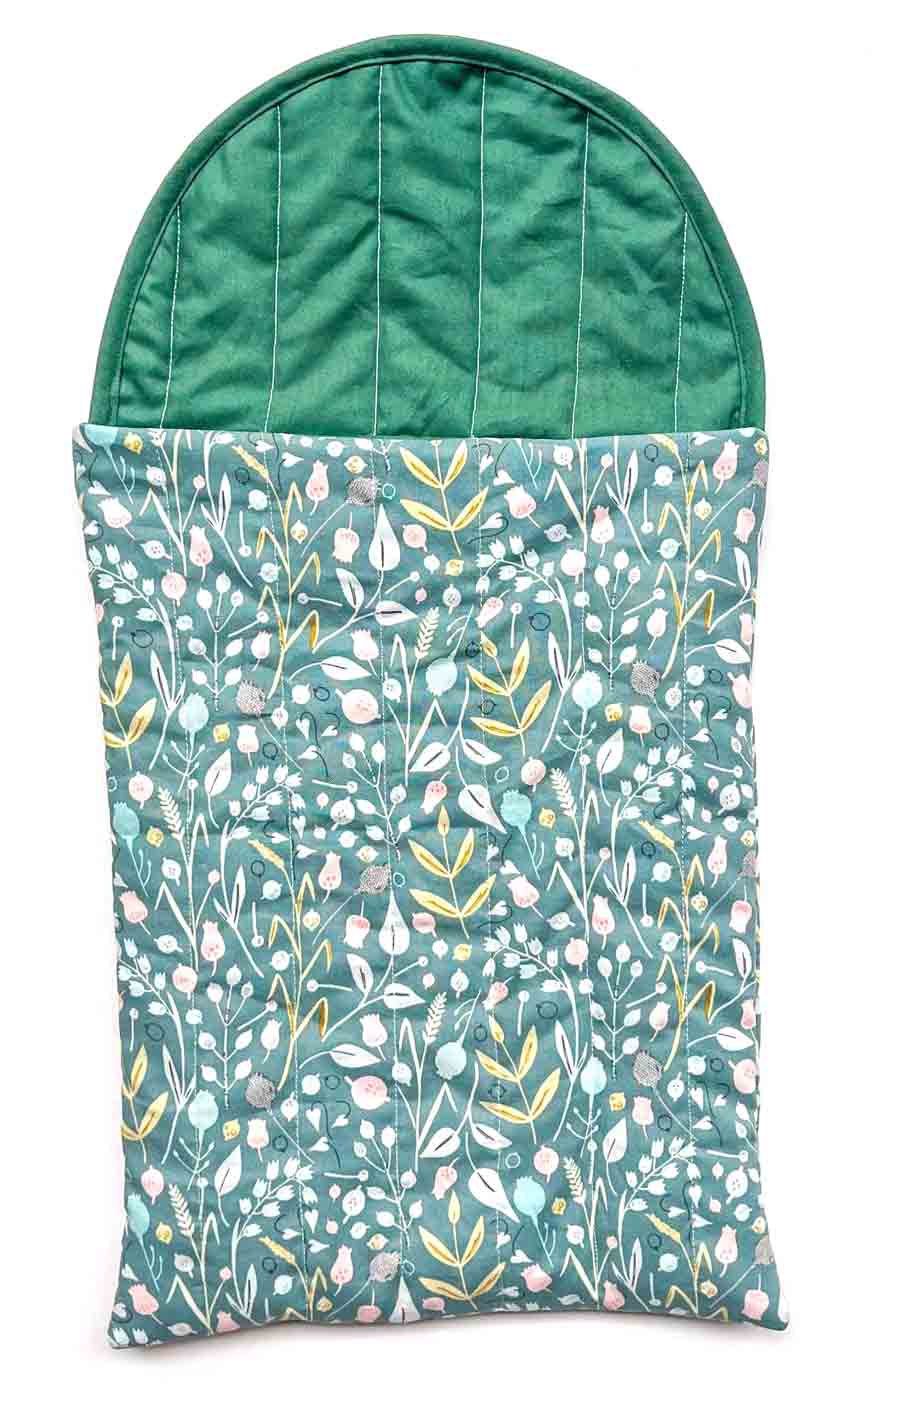
First, this simple diy padded laptop sleeve is quilted with batting on the front and back side. Then, there is an envelope flap on top with velcro closure so your laptop stays put.
The laptop sleeve is fully lined on the inside for easy storage and removal of your device.
Dimensions of DIY Padded Laptop Sleeve
Please note that dimensions are approximate and your final project may differ slightly from the dimensions listed below.

To start, diy laptop sleeve measures approximately 10.5” (26.67 cm) across and 13.5 in (34.3 cm) in length. Width of sleeve is approximately 0.75”(1.9cm).
What Size Sleeve Do I Need For My Laptop?
This padded laptop sleeve will comfortably fit a laptop or tablet measuring up to 14″ (35.56 cm). Please note that 14″ refers to the device screen size, measured diagonally.
How Much Fabric Do I Need For a Laptop Case?
To make a easy diy padded laptop sleeve, you will need 1/2 yard (.45 M) of exterior fabric and 1/2 yard (.45 M) of lining. This will give you enough fabric to cut out both the front and back piece, as well as the flap piece.
What Fabric Is Used for Laptop Sleeve?
You can choose from a variety of fabrics to make your diy padded laptop sleeve. To start, 100% cotton is a great choice.
First, 100% cotton is easy to sew and work with (perfect for beginners!). Next, 100% cotton comes in an endless array of colors and prints. This way, you can pair your colors and prints to make a beautiful diy laptop sleeve that suits your taste!
Nylon Ripstop Fabric is also another good fabric choice for a homemade laptop sleeve. This durable fabric is constructed in a way to prevent tearing and ripping.
Furthermore, nylon Ripstop fabric is either water-repellent or waterproof, depending on the type you choose. This is perfect for protecting your laptop from accidental water or drink spills!
Additional good options include canvas, wool, neoprene, denim, anti-pill fleece and more! As a general rule, any strong and sturdy fabrics will be a good choice.
Finally, I would stay away from extremely thin fabrics (i.e. chiffon), fabric that is too slippery (i.e. silk – difficult to work with), and fabric that pills (i.e. craft felt, blizzard fleece).
Laptop Sleeve DIY
To make a DIY laptop sleeve, you will need the following materials and supplies:
Materials:
- EXTERIOR FABRIC (beginners, use cotton) – 1/2 Yard (0.45 M)
- LINING FABRIC – 1/2 Yard (0.45 M)
- EXTRA LOFT BATTING
- SEW ON VELCRO – 3/4”wide
- BIAS BINDING – You can use premade, but I highly recommend making your own. For this project I am using 18mm homemade bias tape.
- BASTING ADHESIVE
Tools:
- SEWING MACHINE
- WALKING FOOT WITH GUIDE BAR
- FABRIC SHEARS – I love my Ginghers Fabric Scissors! I’ve had it for over 10 years and it is still going strong!
- CLEAR RULER – I have the Dritz See Through Sewing Ruler 2 x 18 inch
- CHALK – I really like the Clover Chaco Chalk Liner for marking. It’s thin thin, marks well, and easy to use!
- POINT TURNER – optional, but very useful to push out the ears and bag.
- SEWING PINS or SEWING CLIPS.
- POINT TURNER – optional, but very handy for all types of sewing projects!
- MATCHING THREAD
- IRON – I love my Rowenta Iron with a retractable cord for easy storage
Laptop Sleeve Pattern
NOTE: All measurements include 1/2″ (1.27cm) seam allowance unless otherwise noted.

In order to make a DIY padded laptop sleeve, you will first need to cut out the following pieces:
- BODY PIECE EXTERIOR (X2) – Each piece measuring 11.5″ x 15″ (29.21 cm x 38.1cm).
- BODY PIECE LINING (X2) – Each piece measuring 11.5″ x 15″ (29.21 cm x 38.1cm).
- BODY PIECE BATTING (X2) – Doesn’t have to be exactly just cut it out slightly bigger than BODY PIECE fabric.
- FLAP PIECE EXTERIOR (X1) – Scroll to bottom of post for pattern.
- FLAP PIECE LINING (X1) – Scroll to bottom of post for pattern.
- FLAP PIECE BATTING (X1) – Scroll to bottom of post for pattern.
How to Make a Laptop Sleeve
Prepping Your Fabric

First, spray wrong side of EXTERIOR PIECE with basting adhesive.
NOTE: I recommend spraying over something disposable under a well ventilated area. I’m spraying under my kitchen vented hood over a paper grocery bag.

Second, stick it onto the batting piece. Repeat on other side of EXTERIOR PIECE.

Next, spray wrong side of FLAP PIECE LINING and stick it onto the batting.

Third, spray wrong side of FLAP PIECE EXTERIOR.

Then stick it to the other side of batting.

Your FLAP PIECE BATTING will now have two pieces of fabric stuck on, one on the front and one on the back.

Finally, trim excess batting from BODY PIECE EXTERIOR. Repeat on other piece.
Quilting Your Fabric

First, Fold BODY PIECE EXTERIOR in half, right sides together, and make a small snip on the fold to mark the midline. Be sure to snip both sides of fold.

Second, on batting side, mark the midline with fabric chalk.

Then mark 2 lines, 0.75” (1.9 cm) away on either side of midline.

Next, repeat making marks on FLAP PIECE. These markings are guidelines for sewing quilt lines in the next step.

Now use a walking foot to quilt the batting to the fabric following the marked stitch lines.

Then use Guide Bar on walking foot to make the rest of quilt lines, spaced 1.5” (3.81 cm) apart. Do this for the FLAP PIECE and both BODY PIECES.

Your fabric pieces are now quilted! The quilt lines are highlighted in red for better visualization.
How to Sew Bias Binding
Watch the video tutorial on how to bias bind raw edge of fabric. Then, follow along the step-by-step tutorial as you sew!
First unfold right side of bias tape.
Second, match edge to FLAP PIECE EXTERIOR, right sides together.

Third, pin bias tape to FLAP PIECE.

Go around entire curve.
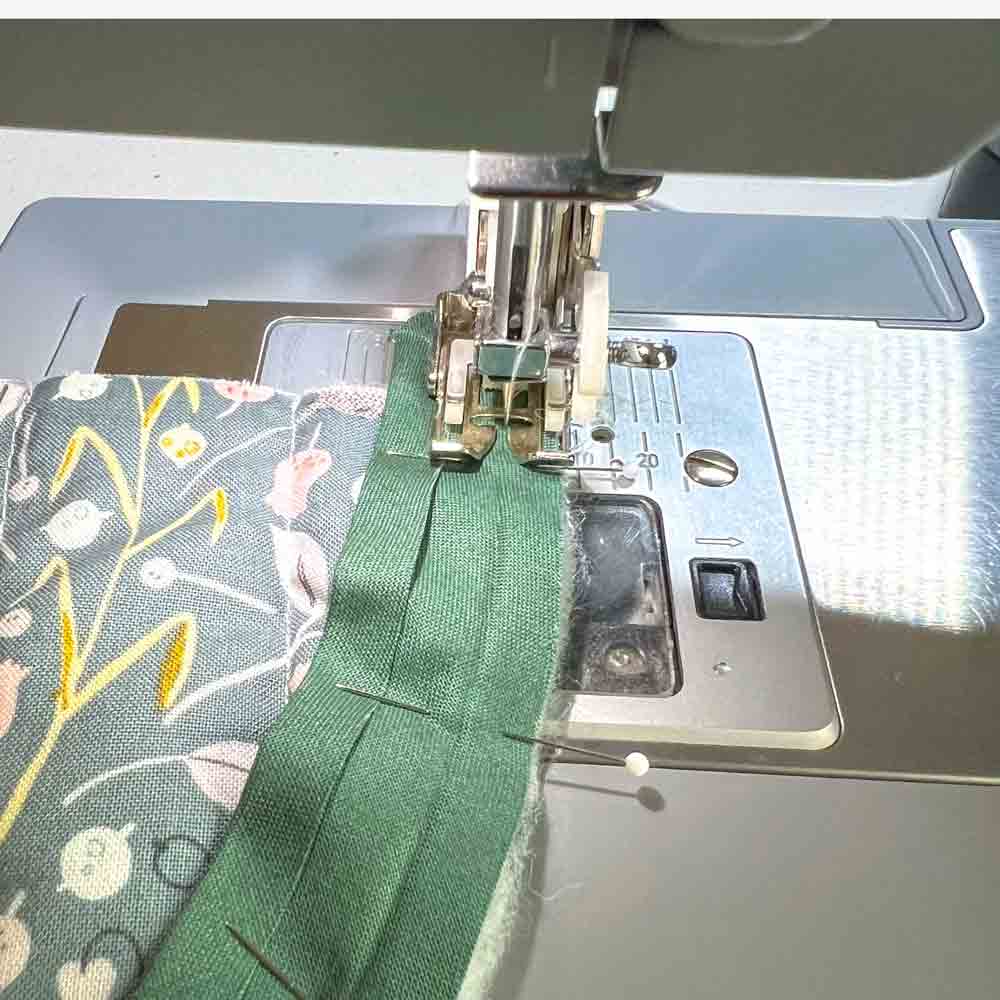
Next, sew bias tape to FLAP PIECE along fold line of bias tape (approx. ⅜ in or 9.5mm)

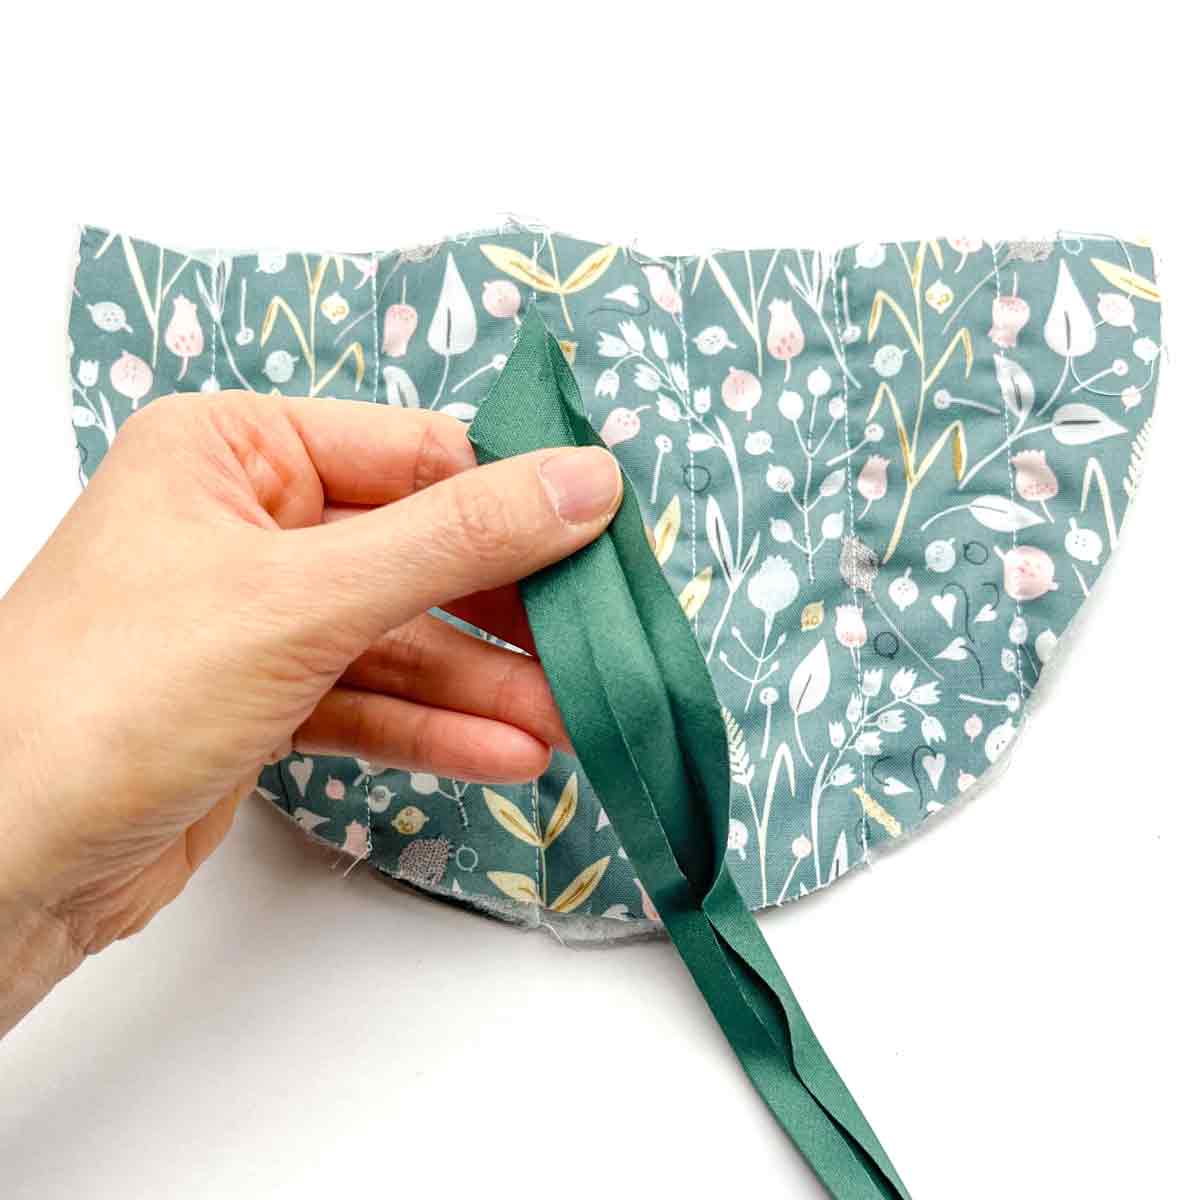
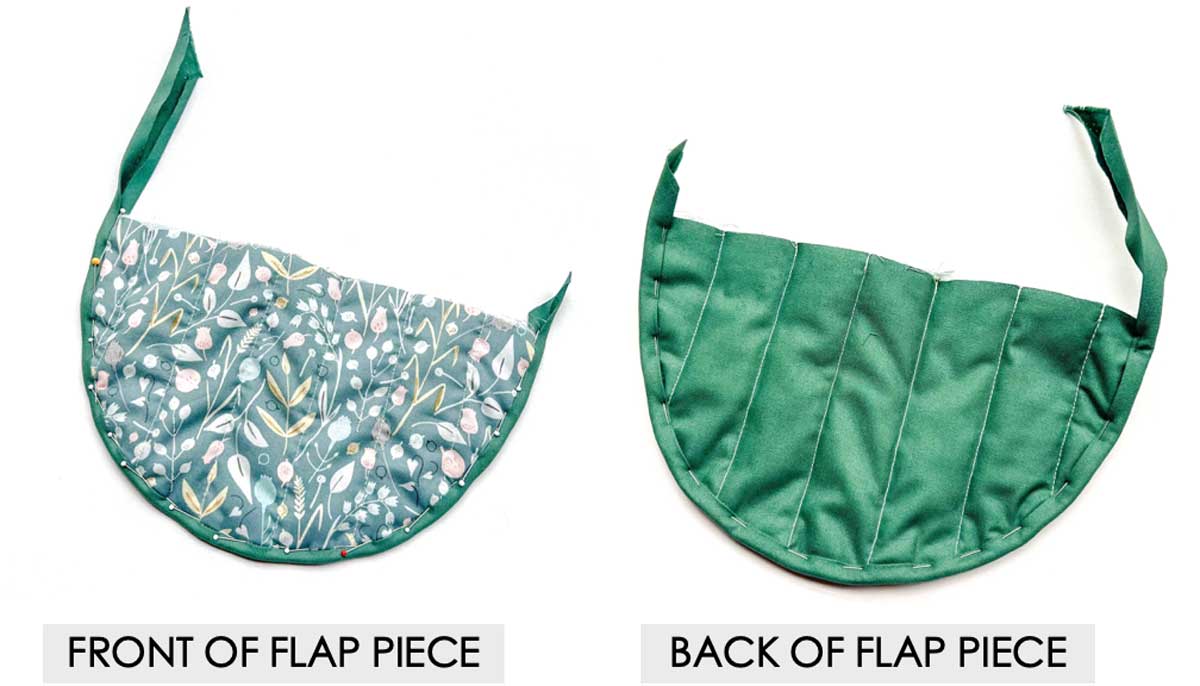
Now, your flap piece will look something like the photo (front and back view). In the next step, we are going to fold the bias binding from the front to the back so that it covers the stitch line on the back.
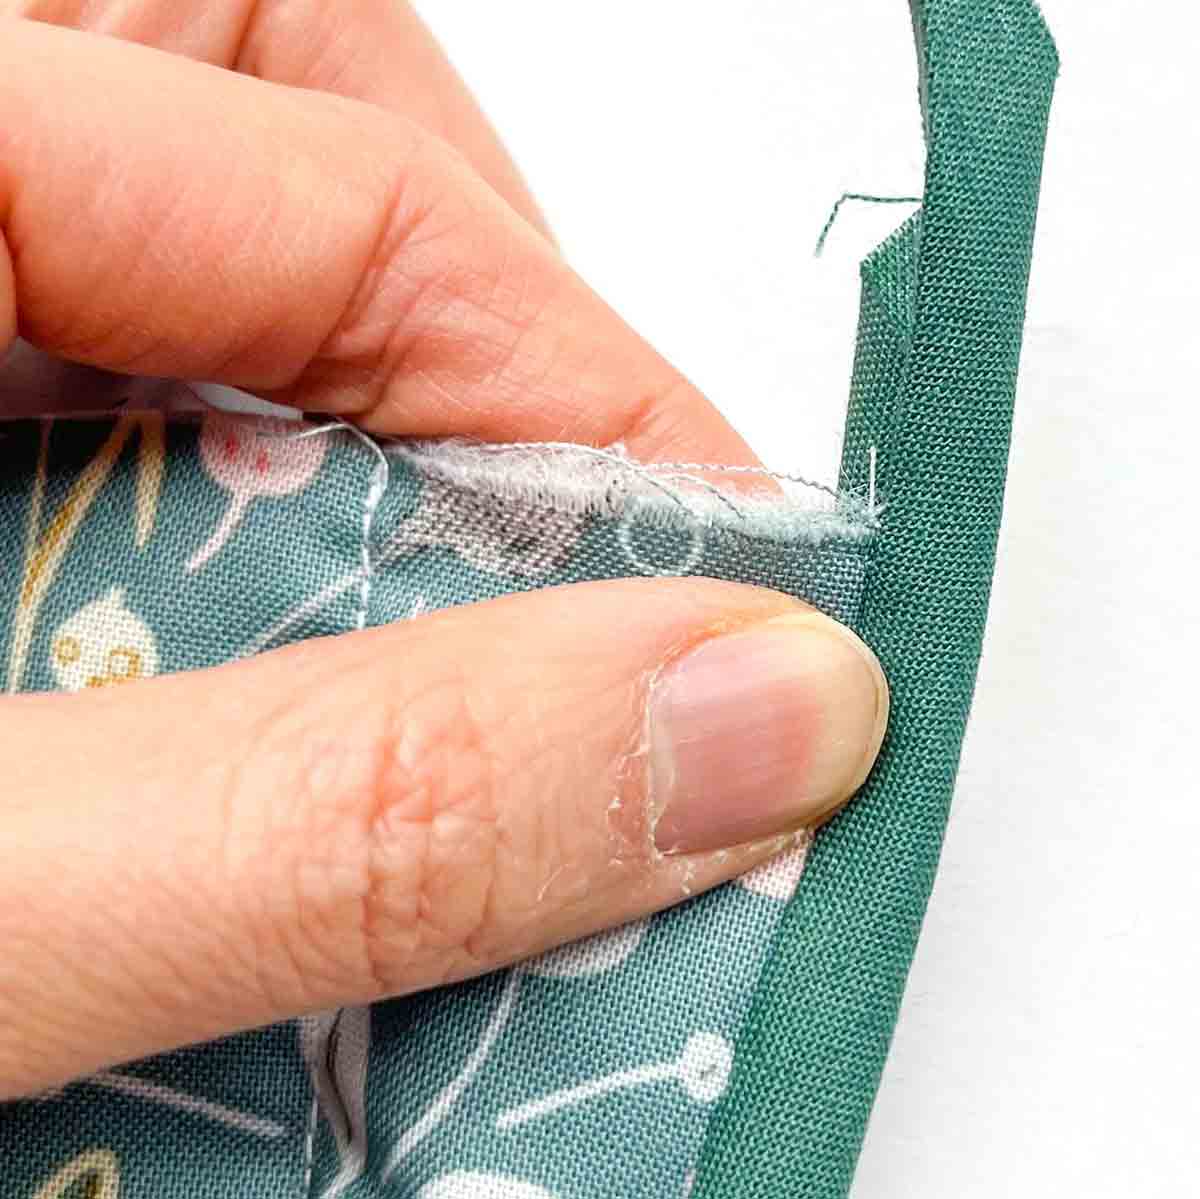
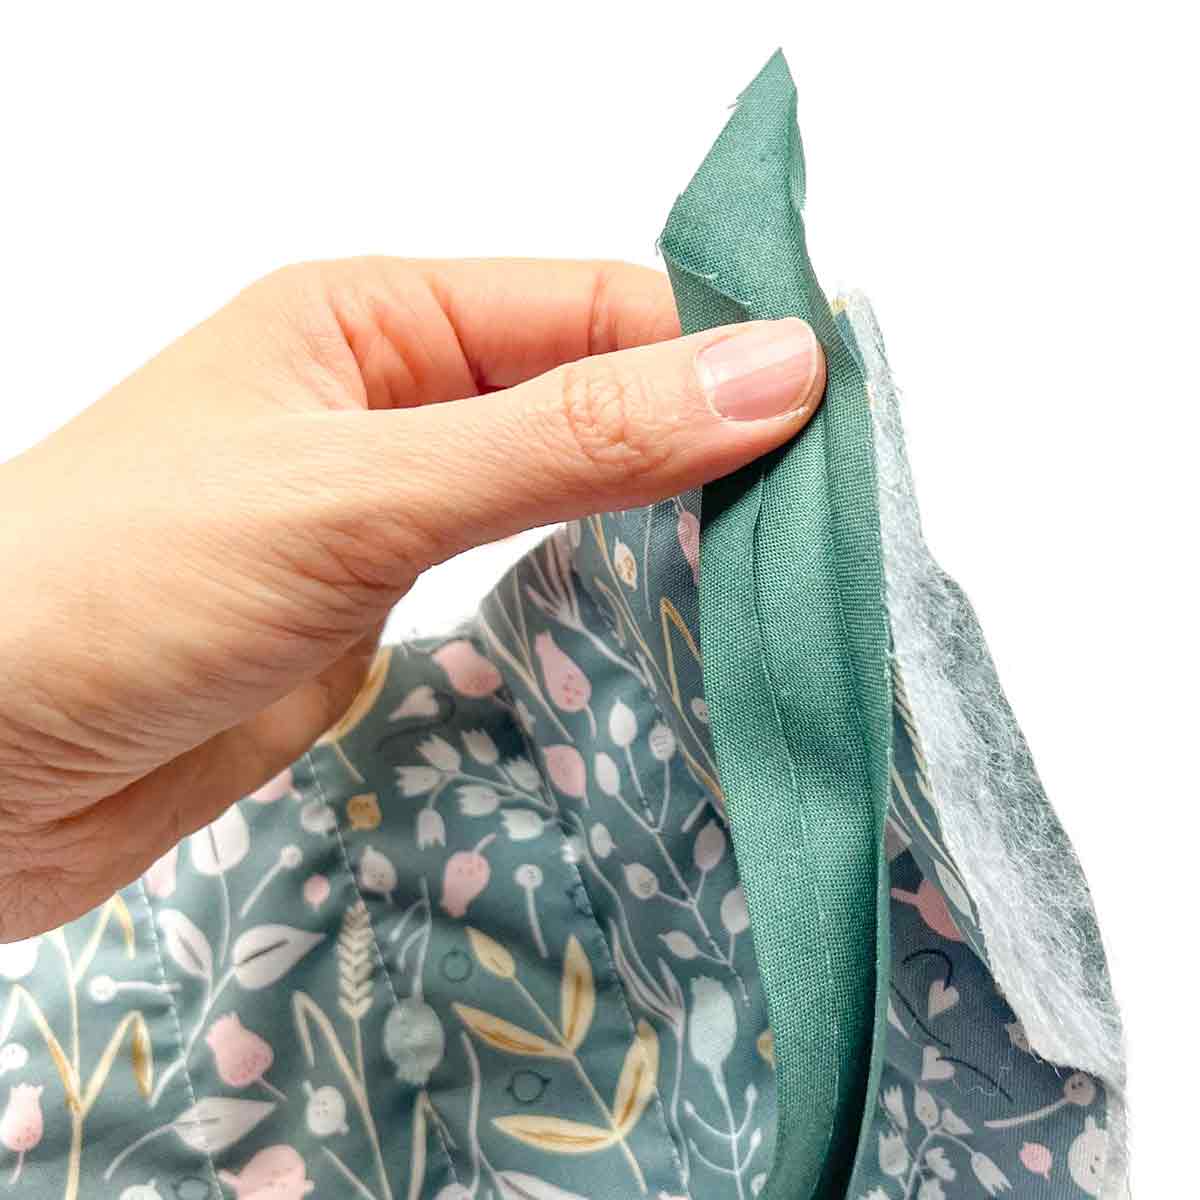
First, fold bias binding over seam allowance to the back (lining side).

Second, pin bias binding in place from the front side.

See how from the back side (lining side), the bias tape covers the stitch line.
Then repeat this process around entire curve. Note how on the back side the stitch line is entirely covered by the binding.

Now from the right side, stitch in the ditch, removing the pins as you go.
NOTE: Go slowly and be patient as you stitch in the ditch. This will ensure that your bias binding comes out nice and neat.

View of finished bias binding from the back.

See how the stitch line is completely covered up by the binding.

Trim off excess bias tape at the top.
Sewing Laptop Sleeve Together
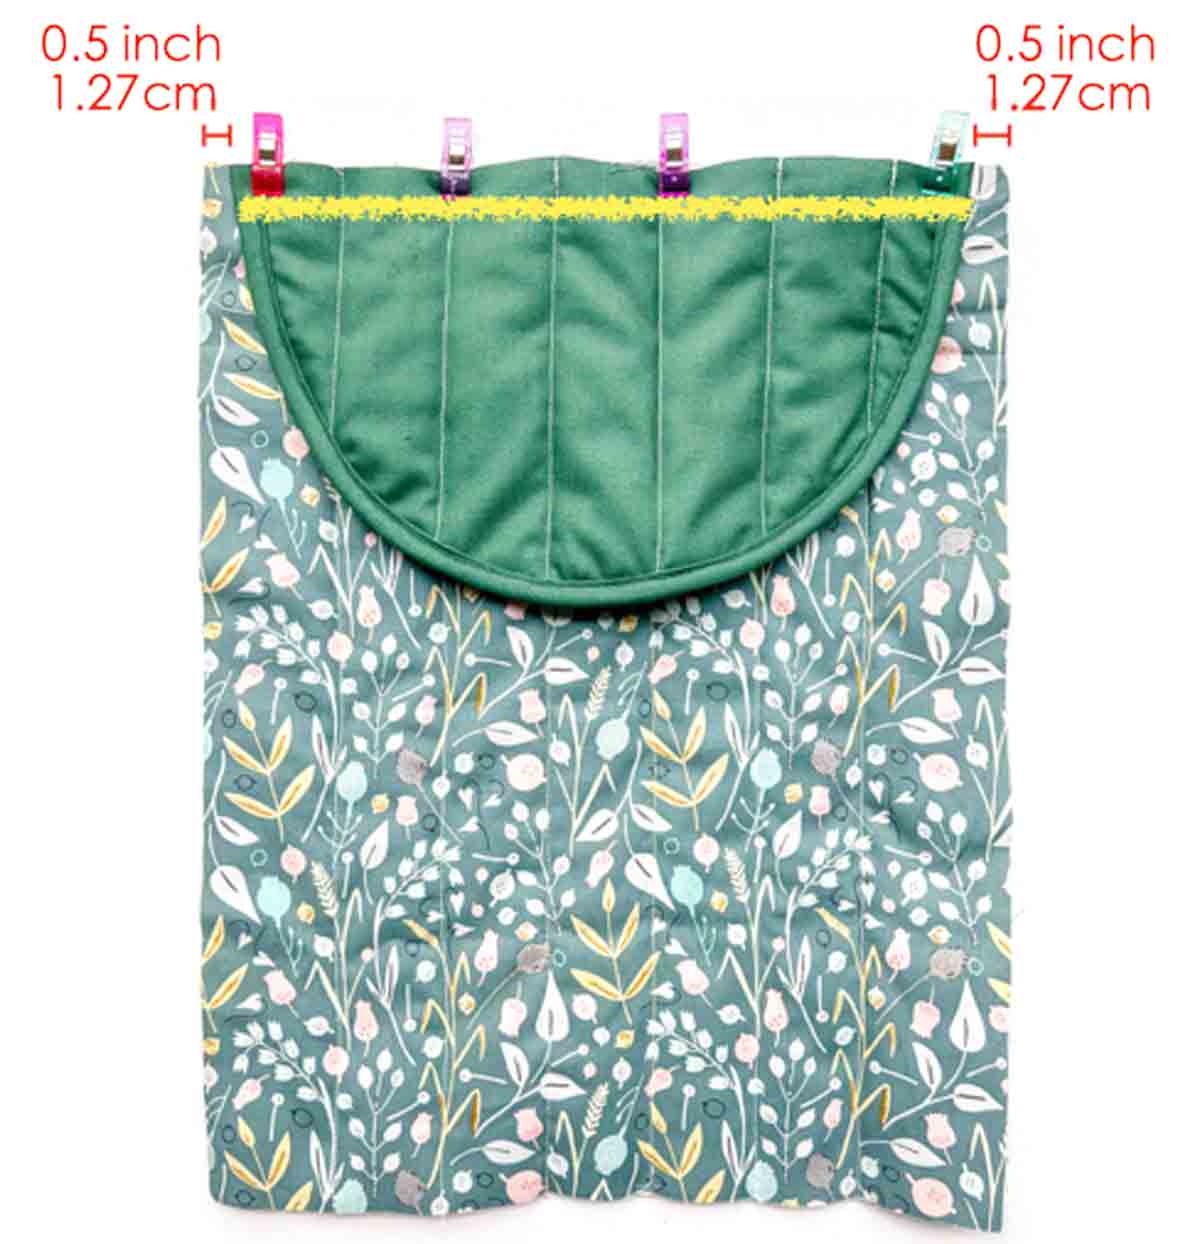
First, place FLAP PIECE and BODY PIECE – EXTERIOR right sides together, 1/2” (1.27cm) from edge. Hold in place with pins or clips and machine baste together (yellow line).
Second, place BODY PIECE – LINING over, right sides together
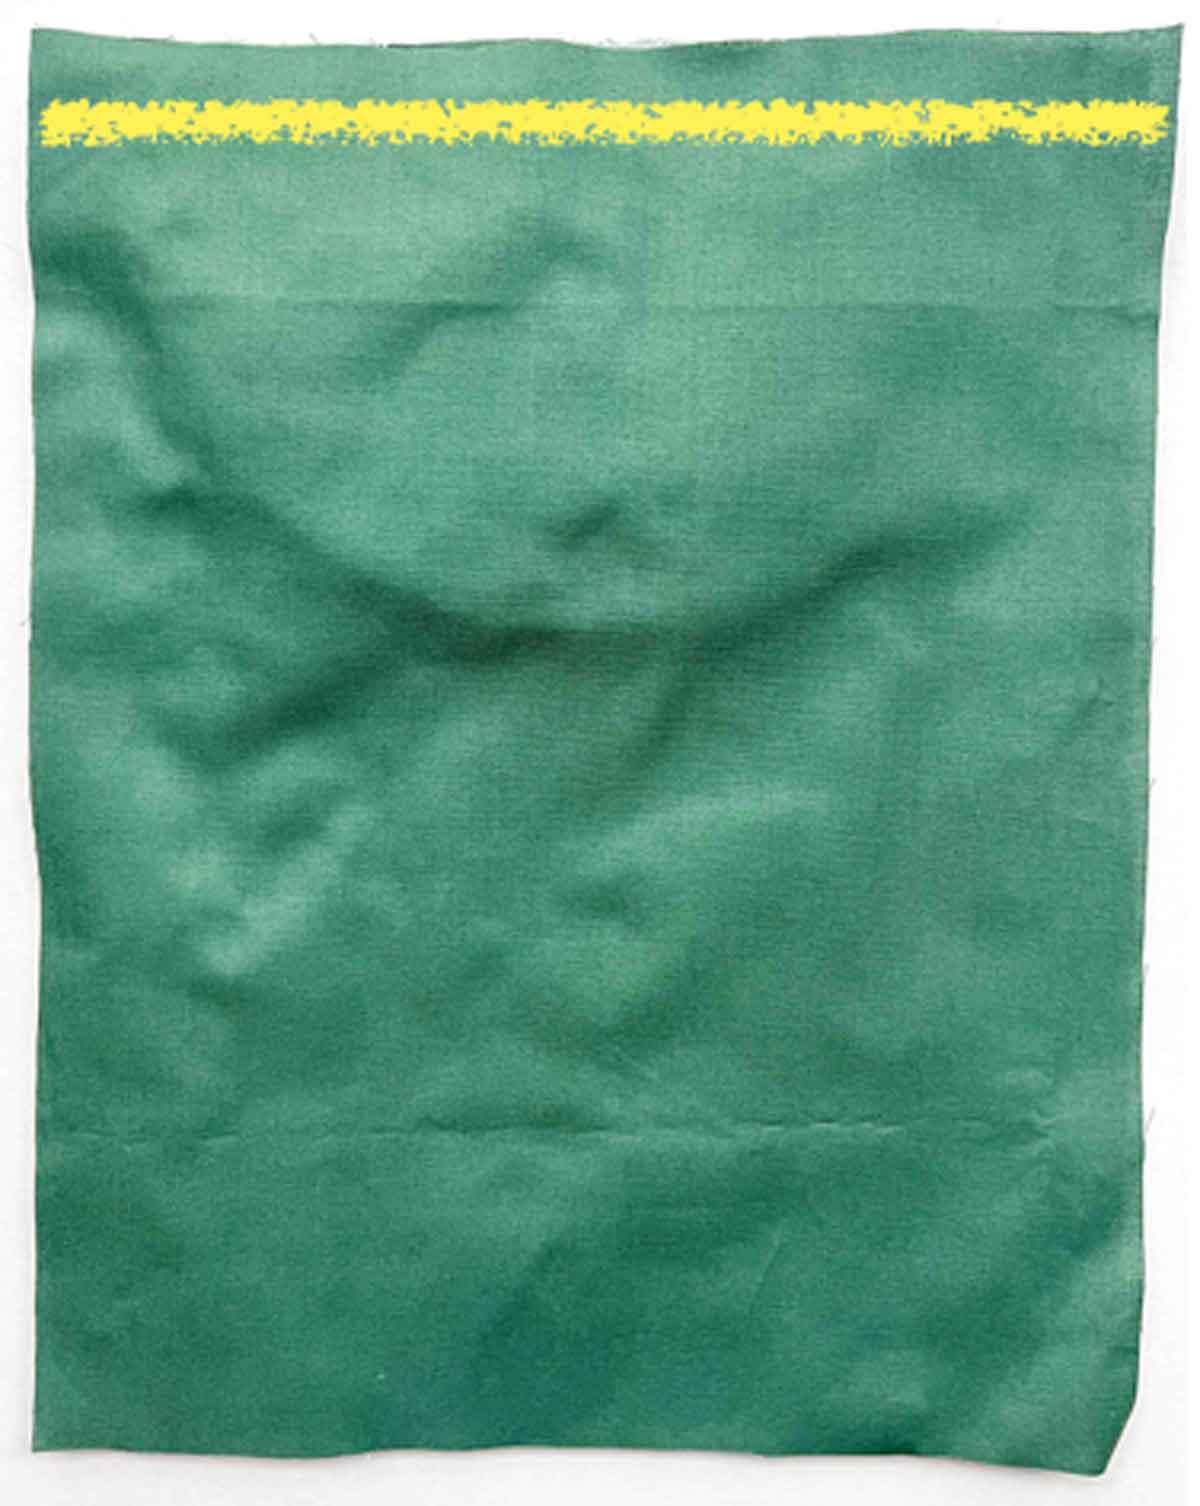
Third, hold in place with pins/clips and sew at 1/2” (1.27cm) seam allowance (yellow line).

Next, trim seam allowance down to 1/4” (6mm).

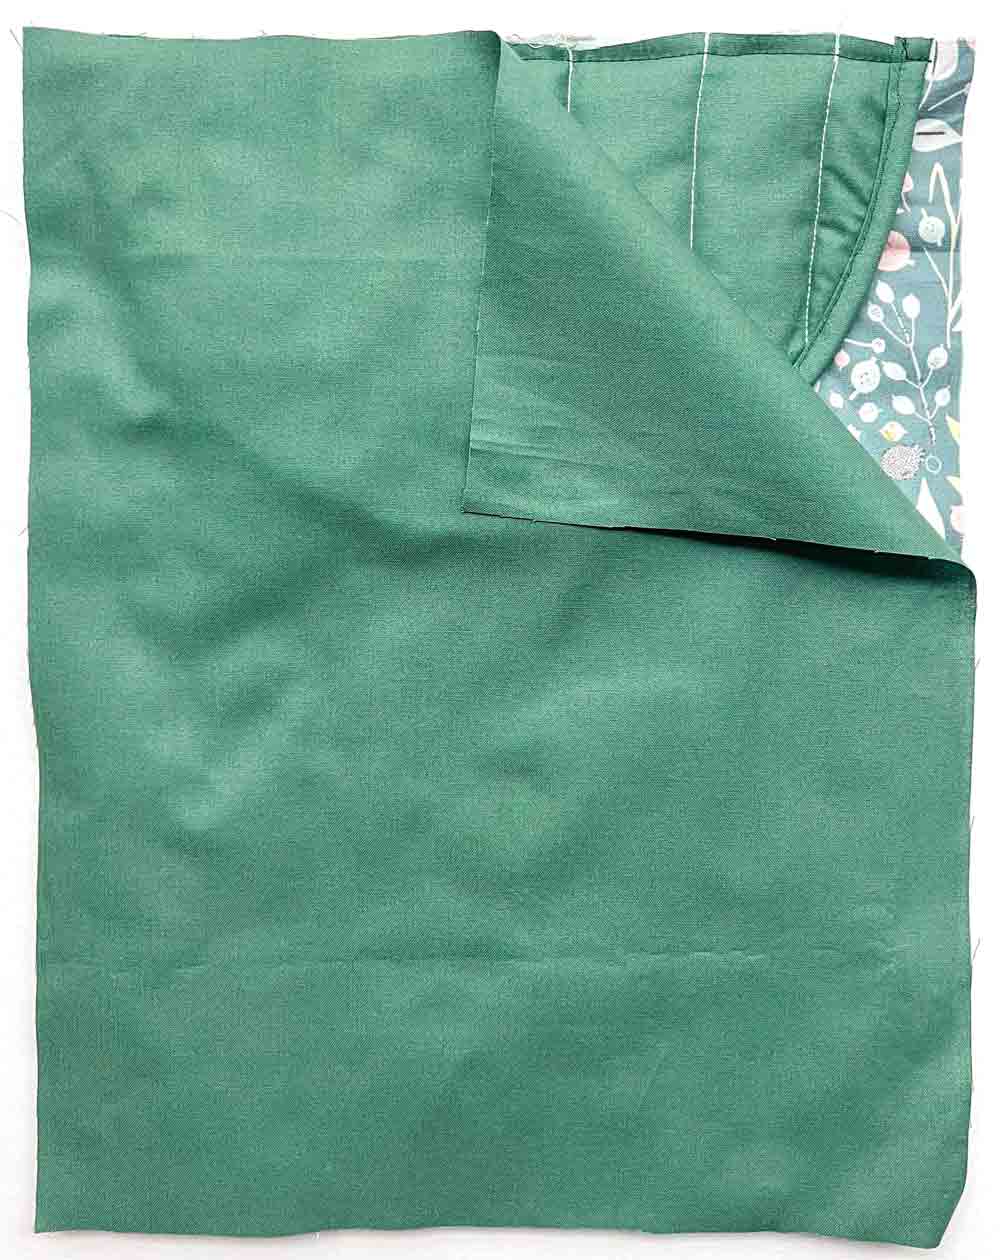
Then repeat on other side. You will end up with 2 fabric pieces like the photo. We will refer to the piece with the flap as “BACK PIECE” and the one without the flap as “FRONT PIECE”.

Next, place FRONT PIECE and BACK PIECE right sides together, lining with lining and exterior fabric with exterior fabric.

Then hold in place with pins/clips. Sew together at 1/2” (1.27cm) seam allowance, with ~3” (7.62cm) opening at the bottom of lining. Back stitch at both ends of opening.

Next, clip corners and trim seam allowance down to 1/4”(6mm).

Now turn laptop pouch to right side through opening on lining.

Then use a point turner to push out all the corners.
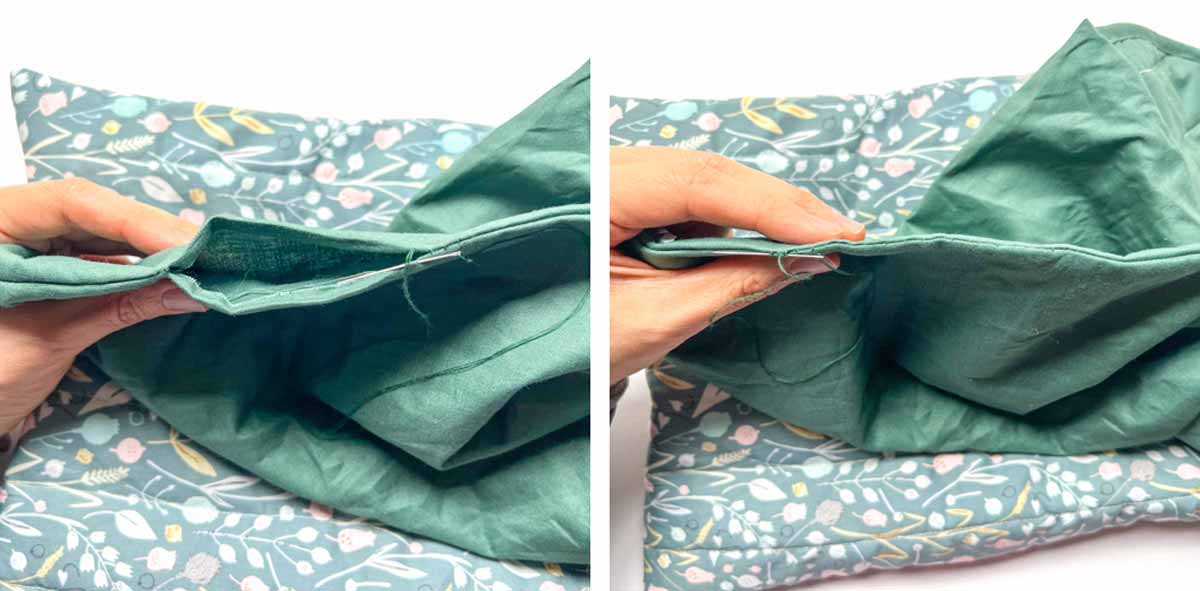
Now close opening with invisible ladder stitch.
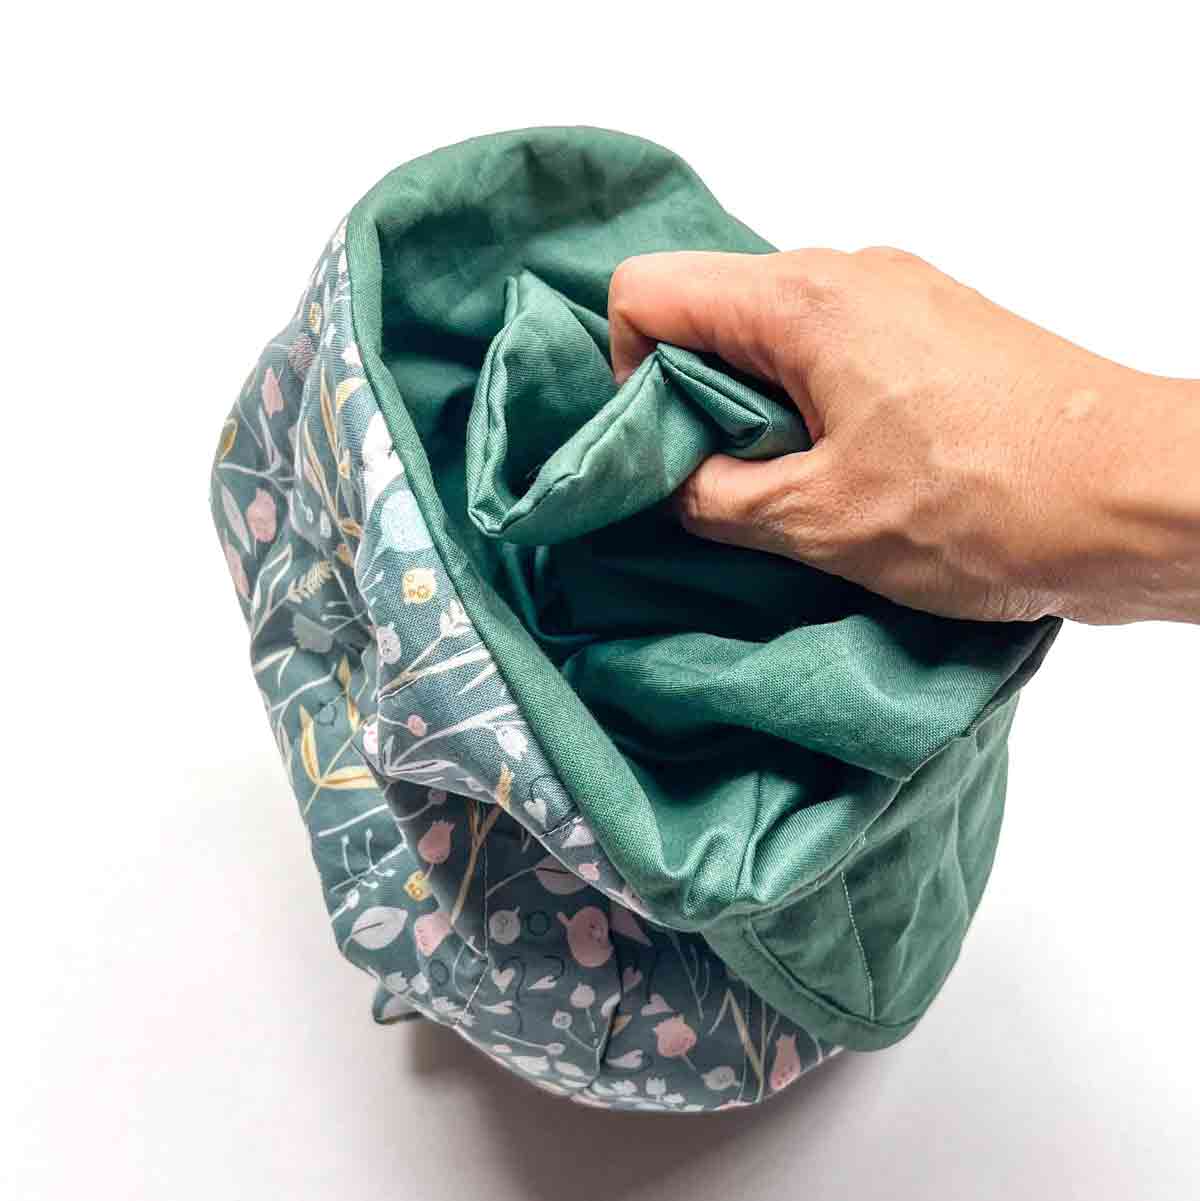
Then push lining into pouch.
Almost done!
Sewing Velcro On
In this final section we will be sewing the velcro on. Before we start, make sure to cut 2 pieces of velcro (1 Velcro hook, and 1 Velcro Loop) each 2.5” (6.35cm) long.
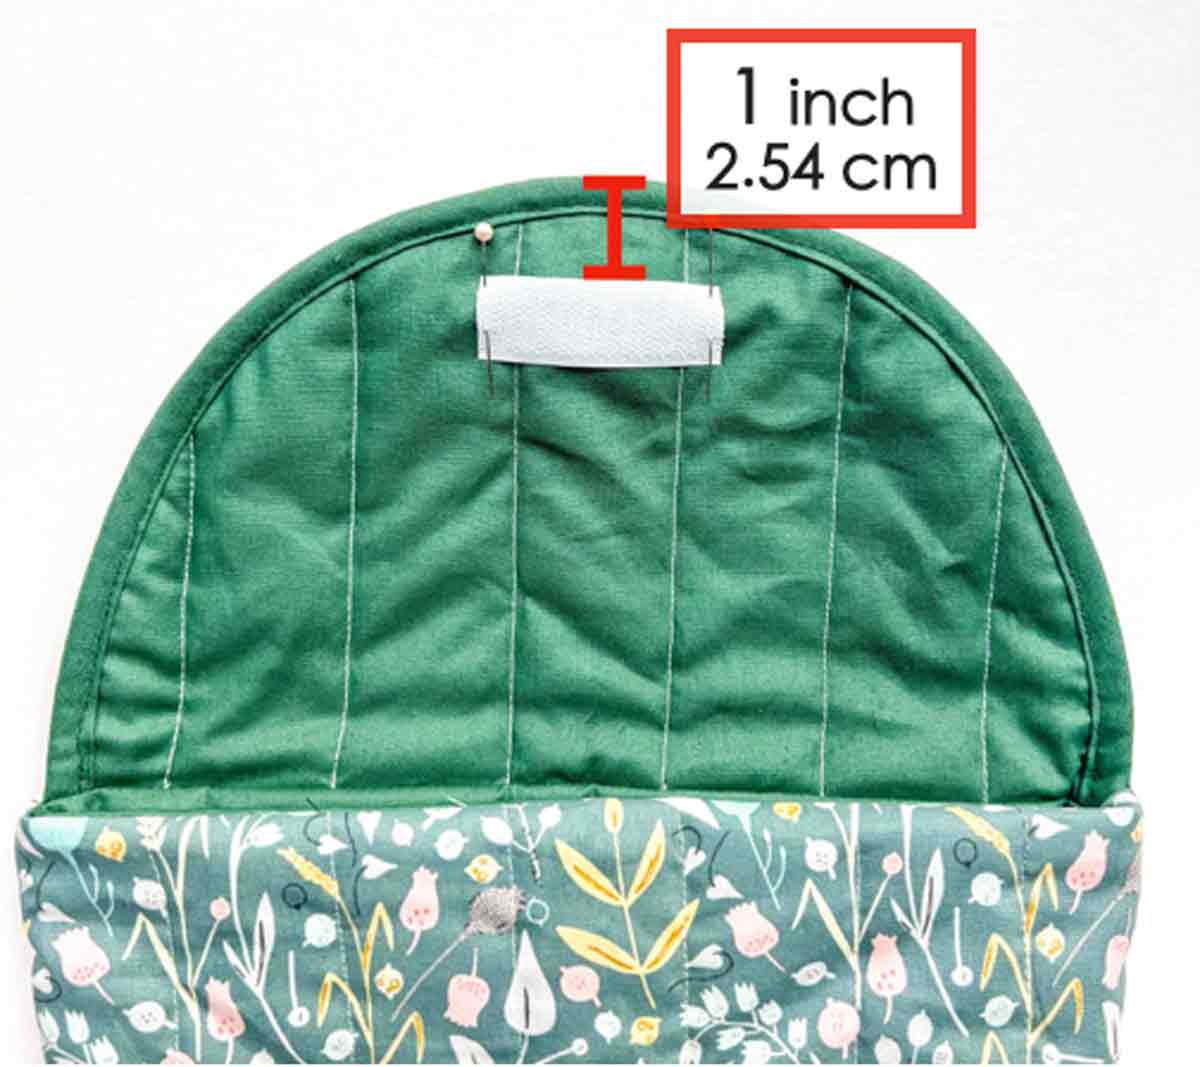
First, sew velcro (hook side) onto lining side of FLAP, approximately 1” (2.54 cm) from top, and centered.
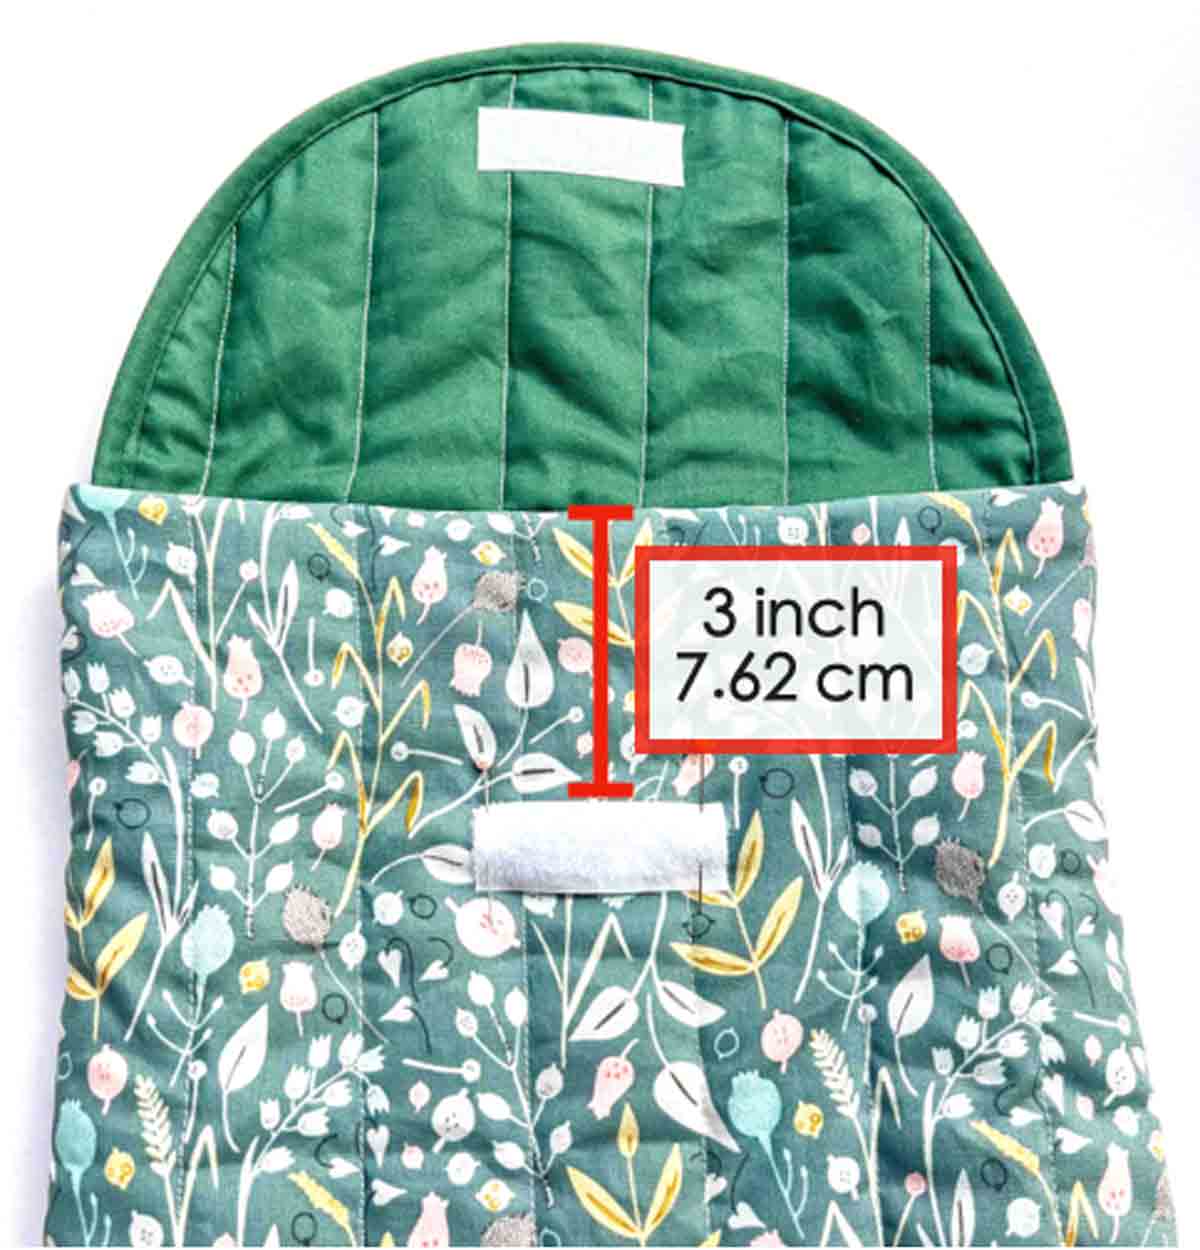
Next, sew velcro (loop side) onto front side of pouch, approximately Your puffy laptop sleeve is complete! Yay! from top edge, and centered.

Your puffy laptop sleeve is complete! Yay!
FREE Sewing Pattern for Laptop Sleeve
To get a copy of the FREE Puffy Laptop Sleeve Flap PDF Pattern, subscribe to the MindyMakes Email List to receive the password for the Mindy Makes Free Resource Library. The Laptop Sleeve Flap Pattern is listed under section ‘L’ of the library as “Laptop Sleeve Flap Pattern”.
Once you click “submit”, the password will show up on the next page. You will also receive a welcome email with the password in case you forget.
Please allow up to an hour for the welcome email to fly through cyberspace and travel into your inbox. If you still don’t receive the email, make sure to check your junk or spam folders and add my email to your safe list!
Need more help? Be sure to check out this step-by-step guide that shows you exactly how to get the password, enter the library, and download the PDF.
PDF Laptop Sleeve Sewing Pattern & Tutorial
The ad-free printer friendly version of the sewing tutorial is available in OUR SHOP.
This PDF is equipped with 23 pages of color tutorial with step-by-step photos and detailed instruction. That way, you can print a copy and keep it by your sewing table for easy reference!

Additionally, you will get the sewing pattern and tutorial to make the following:
- 16″ Laptop Sleeve
- Large Tablet Sleeve (fits Ipad, Kindle Scribe)
- Small Tablet Sleeve (fits Ipad mini, Kindle Paperwhite, Kindle Colorsoft)
DIY Laptop Sleeve
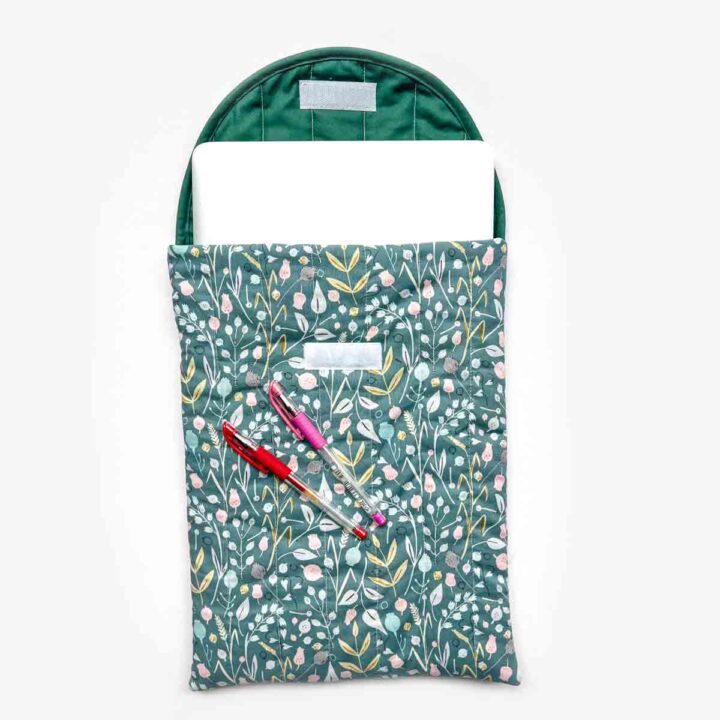
A quilted laptop sleeve is padded and stuffed to protect your beloved device on the go!
Materials
- EXTERIOR FABRIC - 1/2 YARD (0.45 M)
- LINING FABRIC - 1/2 YARD (0.45 M)
- EXTRA LOFT BATTING
- 3/4" WIDE SEW ON VELCRO
- HOMEMADE 18MM BIAS BINDING
- BASTING ADHESIVE
Tools
Instructions
- Spray wrong side of EXTERIOR PIECE with basting adhesive and stick it onto the batting piece. Repeat on other side of EXTERIOR PIECE (see note 1).
- Spray wrong side of FLAP PIECE LINING and stick it onto the batting.
- Next, spray wrong side of FLAP PIECE EXTERIOR and stick it to the other side of batting. Your FLAP PIECE BATTING will now have two pieces of fabric stuck on, one on the front and one on the back.
- Trim excess batting from BODY PIECE EXTERIOR. Repeat on other piece.
- Fold BODY PIECE EXTERIOR in half, right sides together, and make a small snip on the fold to mark the midline. Be sure to snip both sides of fold.
- On batting side, mark the midline with fabric chalk.
- Mark 2 lines, 0.75” (1.9 cm) away on either side of midline.
- Repeat making marks on FLAP PIECE. These markings are guidelines for sewing quilt lines in the next step.
- Use a walking foot to quilt the batting to the fabric following the marked stitch lines.
- Use Guide Bar to make the rest of quilt lines, spaced 1.5" (3.81 cm) apart. Do this for the FLAP PIECE and both BODY PIECES.
- Unfold right side of bias tape and match edge to FLAP PIECE EXTERIOR, right sides together.
- Pin bias tape to FLAP PIECE, going around entire curve.
- Sew bias tape to FLAP PIECE along fold line of bias tape (approx. ⅜ in or 9.5mm).
- Fold bias binding over seam allowance to the back (lining side).
- Pin bias binding in place from the front side. Make sure that from the back side (lining side), the bias tape covers the stitch line.
- Repeat this process around entire curve.
- From the right side, stitch in the ditch, removing the pins as you go (See note 2).
- Trim off excess bias tape at the top.
- Place FLAP PIECE and BODY PIECE - EXTERIOR right sides together, 1/2” (1.27 cm) from edge.
- Hold in place with pins or clips and machine baste together.
- Place BODY PIECE - LINING over, right sides together.
- Hold in place with pins/clips and sew at 1/2” (1.27cm) seam allowance.
- Trim seam allowance down to 1/4”(6mm). Repeat on other side.
- You will end up with 2 fabric pieces. The piece with the flap will be referred to as “BACK PIECE” and the one without the flap as “FRONT PIECE”.
- Place FRONT PIECE and BACK PIECE right sides together, lining with lining and exterior fabric with exterior fabric.
- Hold in place with pins/clips. Sew together at 1/2” (1.27cm) seam allowance, leaving an approximately 3” (7.62cm) opening at the bottom of lining. Back stitch at both ends of opening.
- Clip corners and trim seam allowance down to 1/4” (6mm).
- Turn laptop pouch to right side through opening on lining.
- Use a point turner to push out all the corners.
- Close opening with invisible ladder stitch.
- Push lining into pouch. Almost done!
- Cut 2 pieces of Velcro (1 Velcro hook, and 1 Velcro Loop) each 2.5” (6.35cm) long.
- Sew Velcro (hook side) onto lining side of FLAP, approximately 1” (2.54 cm) from top, and centered.
- Sew Velcro (loop side) onto front side of pouch, approximately 3” (7.62 cm) from top edge, and centered.
- Puffy laptop sleeve is complete!
Prepping Fabric & Sewing Quilt Lines
Quilting Your Fabric
How to Bias Bind the Flap Piece
Sewing Bag Altogether
Sewing Velcro On
Notes
NOTE 1: I recommend spraying over something disposable under a well ventilated area. I’m spraying under my kitchen vented hood over a paper grocery bag.
NOTE 2: Go slowly and be patient as you stitch in the ditch. This will ensure your bias binding to come out nice.