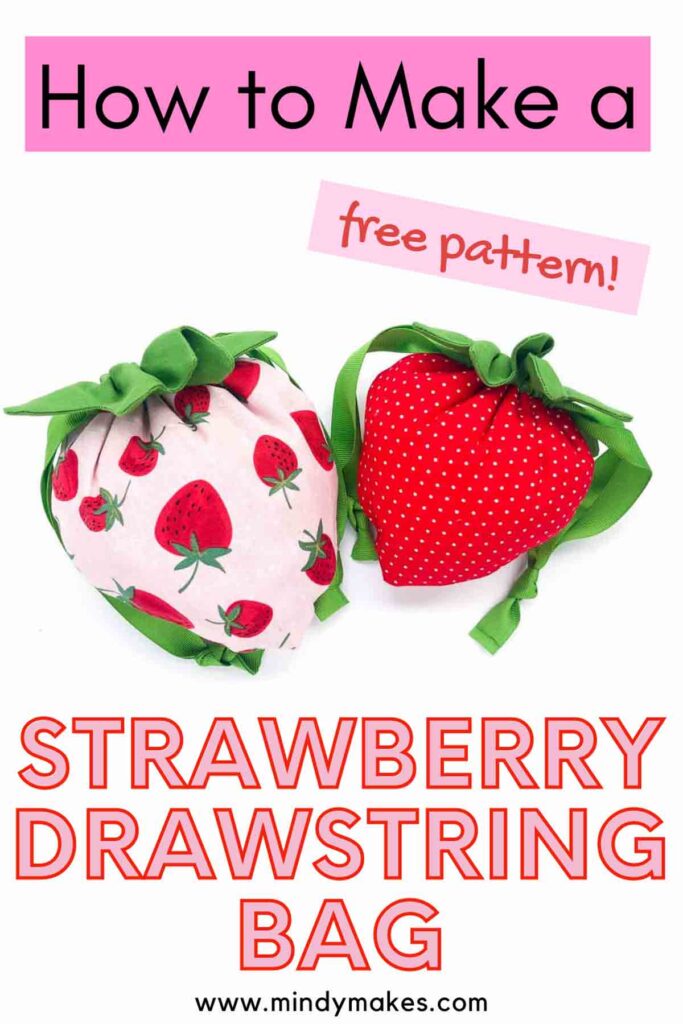
The Cutest Little Strawberry Drawstring Bag (Free Pattern)
This adorable strawberry drawstring bag is perfect as treat bags for Valentine’s day, birthday parties, and more! Follow the easy step-by-step tutorial to learn how to make one. Your family and friends will be delighted to receive treats packaged in such cute little pouch!
I love making little treat backs filled with yummy snacks to give away to neighbors and friends! Over the holidays, I sewed a bunch of Drawstring Gift Bags and filled them with furikake snack mix to give away. It was so much fun!
Since Valentine’s day is just around the corner, I wanted to sew some more gift bags to hold little treats to give away. With strawberry bon bons in mind, I was inspired to create this drawstring strawberry treat bag.
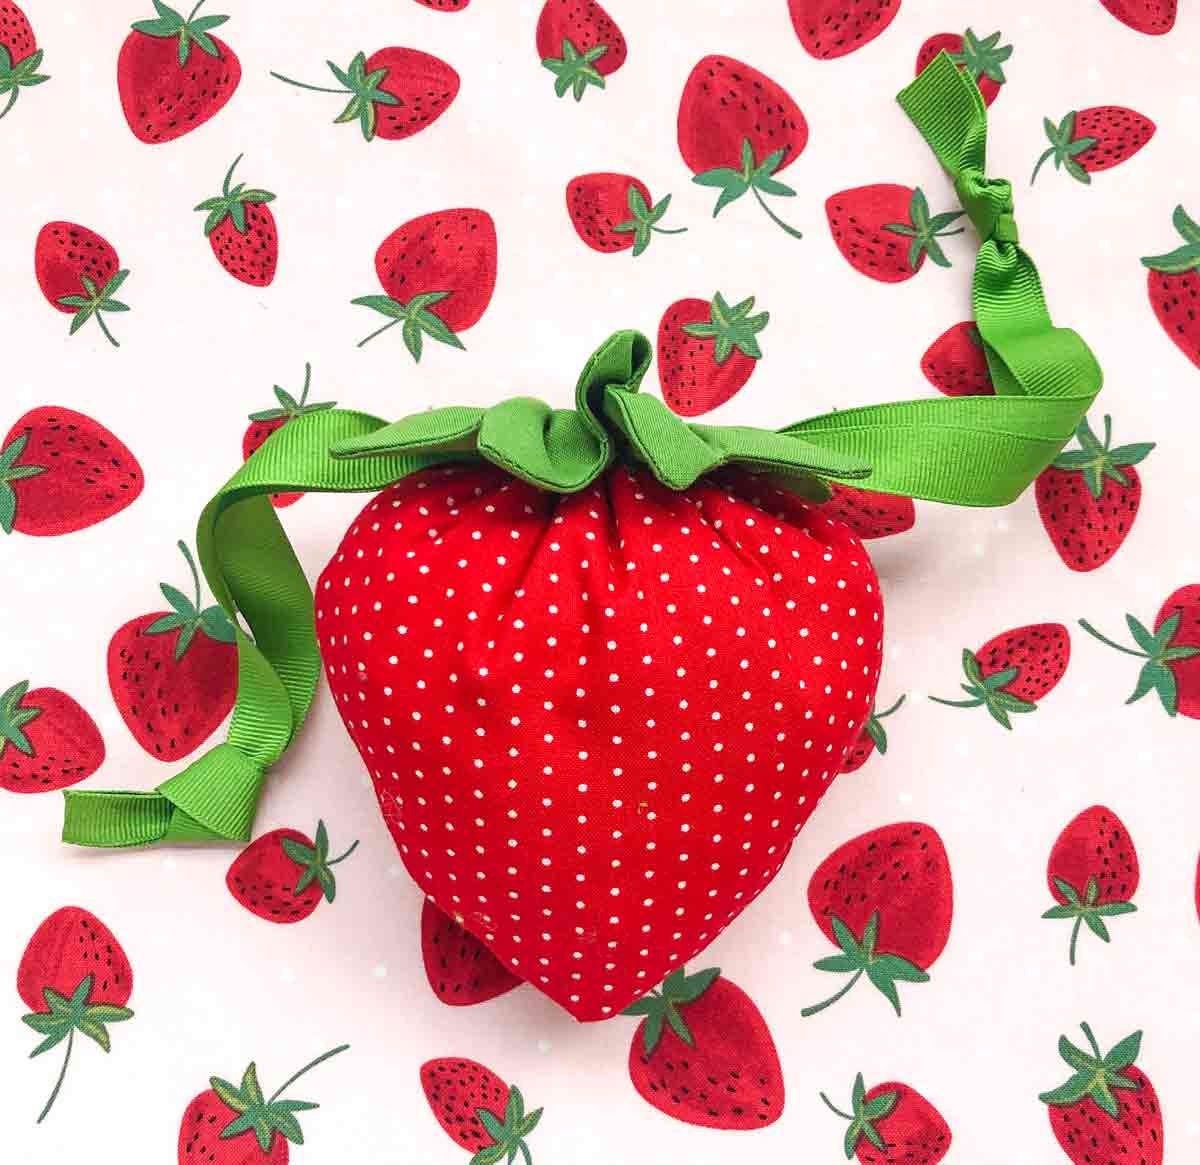
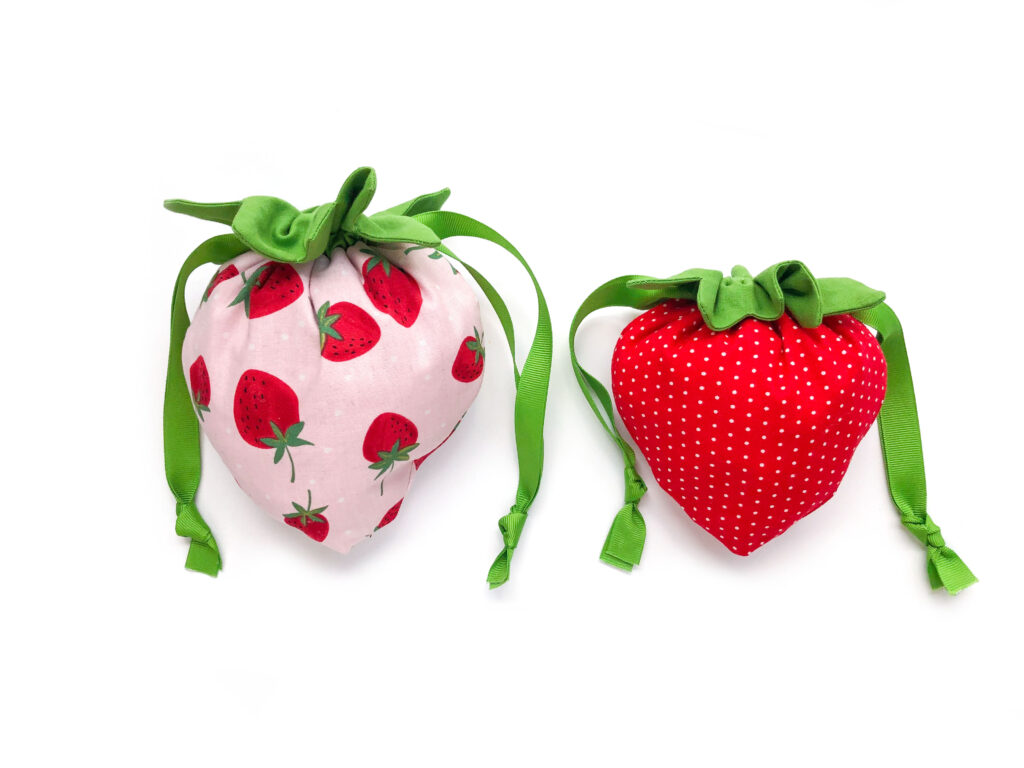
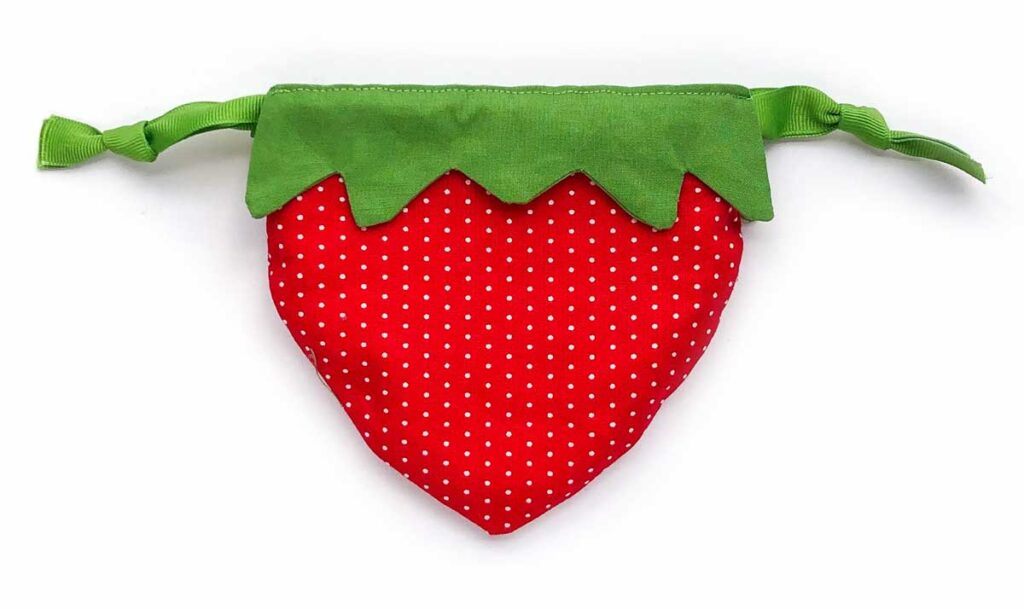
Isn’t this little strawberry treat bag super adorable? It has a wide opening at the top, giving easy access to treats and snacks. Once you fill it up and close it, the bag is designed to look like a strawberry.
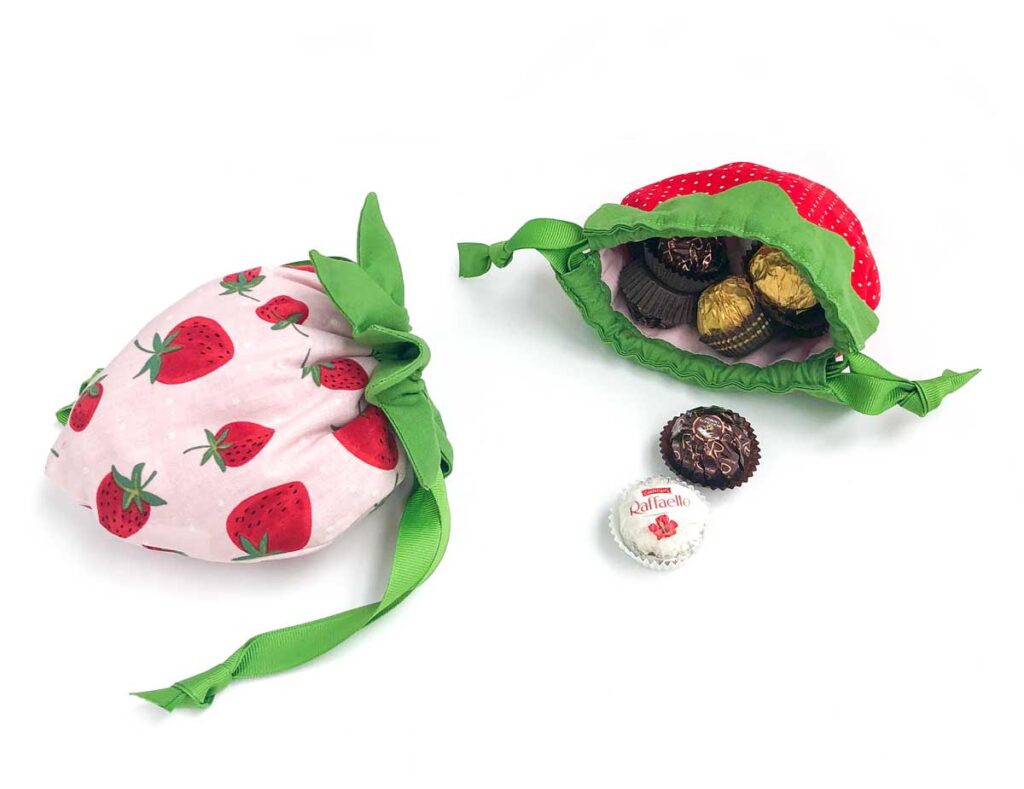
You can use this bag to fill it up with all types of of chocolates, candies and treats!
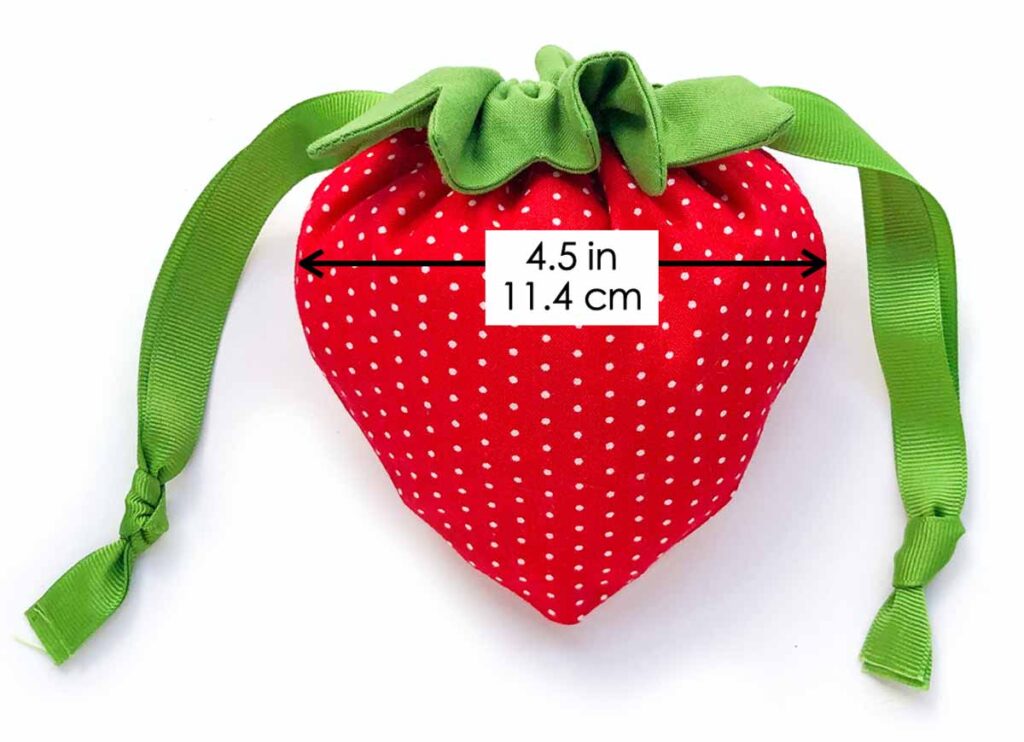
how big is the strawberry bag?
The small size bag measure 5.5″ (14cm) wide at the top when the bag is open and 5.25″ (13.3 cm) tall.

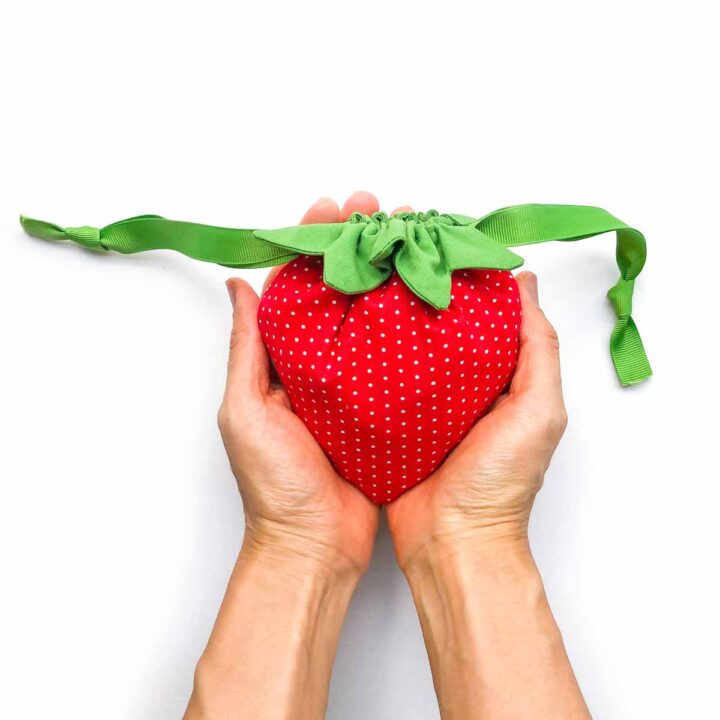
When the bag is closed, it measures 4.5″ (11.4 cm) at the widest part.
Details of Strawberry Drawstring Treat Bag
This strawberry treat bag is fully lined and has two leaf accents, one on the front and one on the back. Secondly, the bag has a wide opening with a pointy bottom so that it looks like a strawberry once closed.
The bag can be washed and reused many times! If you notice that the bag gets a little wrinkly out of the wash, just give it a good press and it’ll be as good as new!
Strawberry Treat Bag Pattern

To get the free pattern for the small sized treat bag, simply subscribe to our email list and you will receive the password to the MindyMakes Free Resource library. The pattern is listed under the letter ‘S’ as “Strawberry Drawstring Bag”
The ad-free, printer-friendly PDF version of this step-by-step sewing tutorial is available for purchase in our SHOP. PDF tutorial also includes additional pattern for large strawberry drawstring bag. Print a copy today to keep next to your sewing machine for easy reference!
The Large strawberry treat bag pattern is available for purchase in my etsy shop. PDF pattern includes the ad-free version of the step-by-step tutorial so you can easily print it out and refer back to it as you sew.
Is this Project Good for Beginners?
Absolutely! Just because this bag is fully lined doesn’t mean it’s too hard for beginners. I show you exactly how to sew the lining and the exterior together at the same time in the step-by-step-tutorial.
Additionally, to make things easier, use grosgrain ribbon as the drawstrings. Ribbon is easy to find and comes in all colors, making it ideal to match the leaf color. However, you can also use cords or bias tape folded on itself and sewn together as the drawstring.
Supplies for Making This Easy Sewing Project
- Strawberry Drawstring Bag Small Pattern (Available in my free resource library.) – Get the password when you subscribe. I promise no spam! Just occasional updates about new projects.
- Exterior Fabric – 1/4 Yard of Cotton Print Fabric.
- Lining Fabric – 1/4 Yard of Cotton Fabric.
- Solid Green Cotton Fabric – 1/8 yard, for drawstring channel and leaf.
- Sewing machine
- Fabric Scissors – these Ginghers are my favorite.
- Bodkin – alternatively, can also use safety pins
- Pins
- 5/8″ (15mm) wide Grosgrain ribbon – I used Offray Brand in Color Kiwi
- Matching Thread
drawstring Strawberry Bag Pattern Pieces
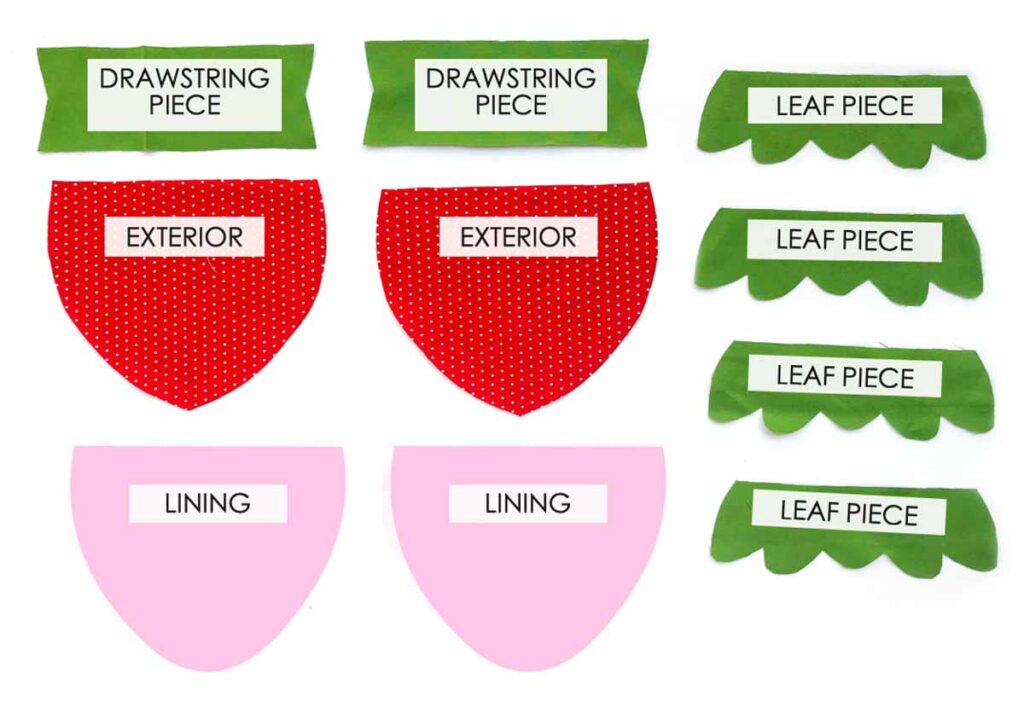
To make this pouch, first grab the Strawberry Drawstring Bag Pattern (Available in my free resource library). Then cut out the pattern pieces in the appropriate fabric. You will end up with the following fabric pieces.
- Drawstring Piece (x2)
- Exterior (x2)
- Lining (x2)
- Leaf Piece (x4)
Step-By-Step: How Do You Make A Strawberry drawstring Bag
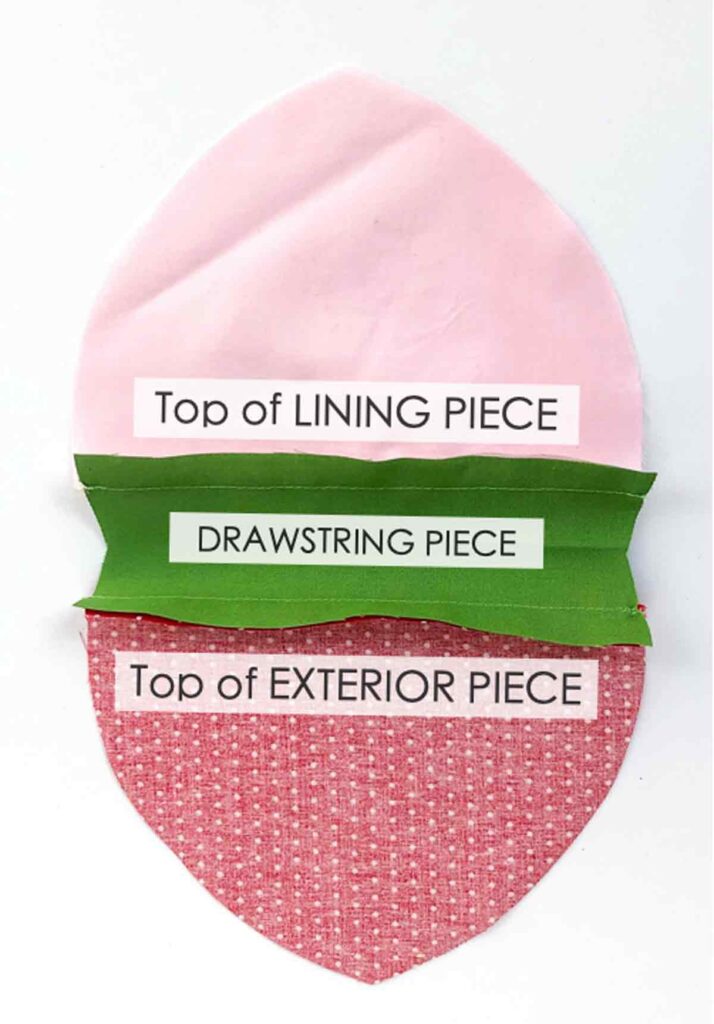
First, match top of LINING and top of DRAWSTRING PIECE, right sides together, and sew at 1/2” (1.27cm) seam allowance.
Next, match top of EXTERIOR PIECE and bottom of DRAWSTRING PIECE, right sides together. Sew at 1/2” (1.27cm) seam allowance.
Repeat exact steps for other side.
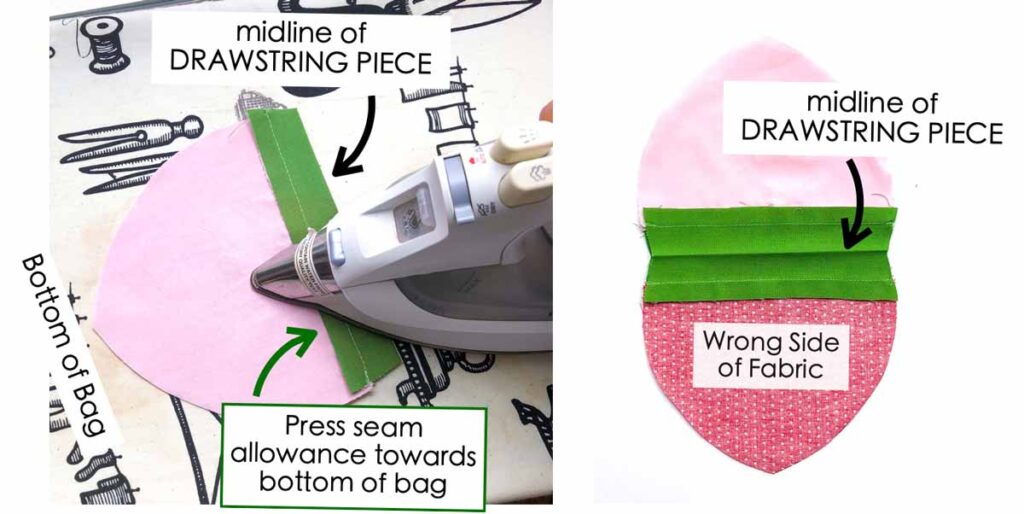
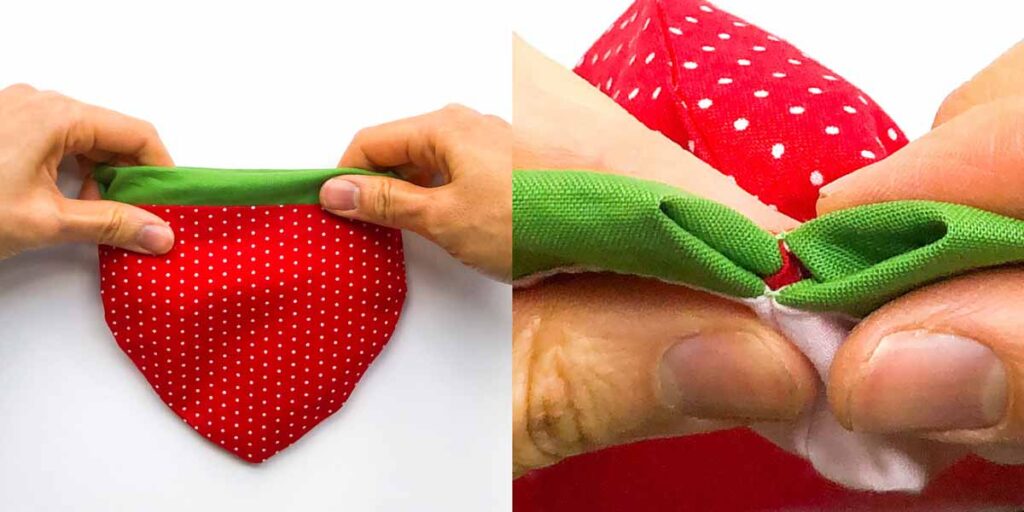
Fold the strawberry pouch in half along DRAWSTRING PIECE so the LINING PIECE matches EXTERIOR PIECE. Press to make a crease at the midline of DRAWSTRING PIECE. Also make sure to press the seam allowance down (towards bottom of bag)
Repeat for other side.
Place the two strawberry pouch pieces right sides together. Match the sides at the junction where DRAWSTRING PIECE meets EXTERIOR PIECE. Use a pin to hold the two pieces in place.
Also match the sides at the junction where DRAWSTRING PIECE meets LINING PIECE.

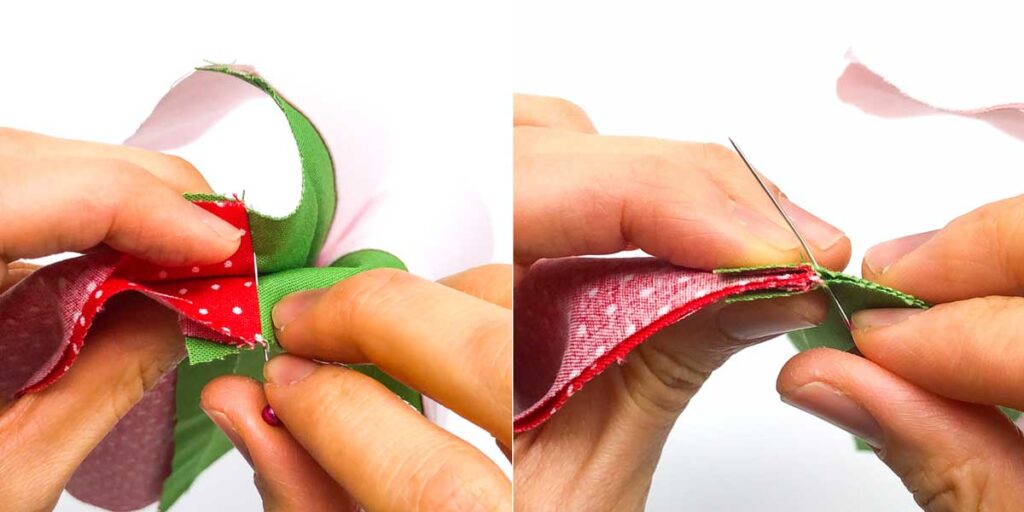
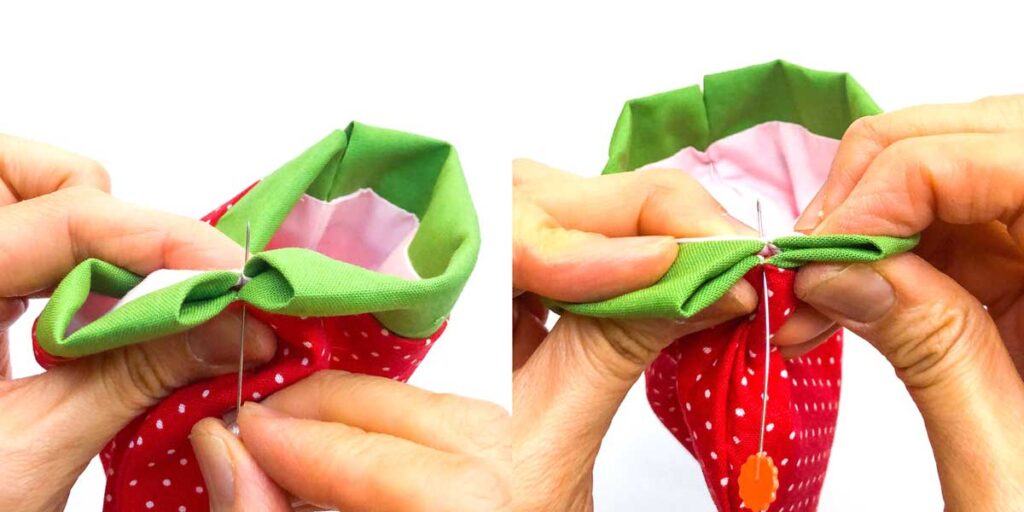
LEFT: Pin Strawberry pouch pieces all around. Make sure you match front and back piece exactly at point A and B (junction between DRAWSTRING PIECE and LINING PIECE). Match front and back piece exactly at Point C and D (junction between DRAWSTRING PIECE and EXTERIOR PIECE)
RIGHT: Sew pouch together, going from point A to B, leaving a 2”(5cm) opening on lining (black dotted line). Then sew from point C to D without leaving any opening (white dotted line). Make sure to back stitch at all the points (A, B, C, D). Clip curves
Note: The two DRAWSTRING PIECES will not be sewn to each other.
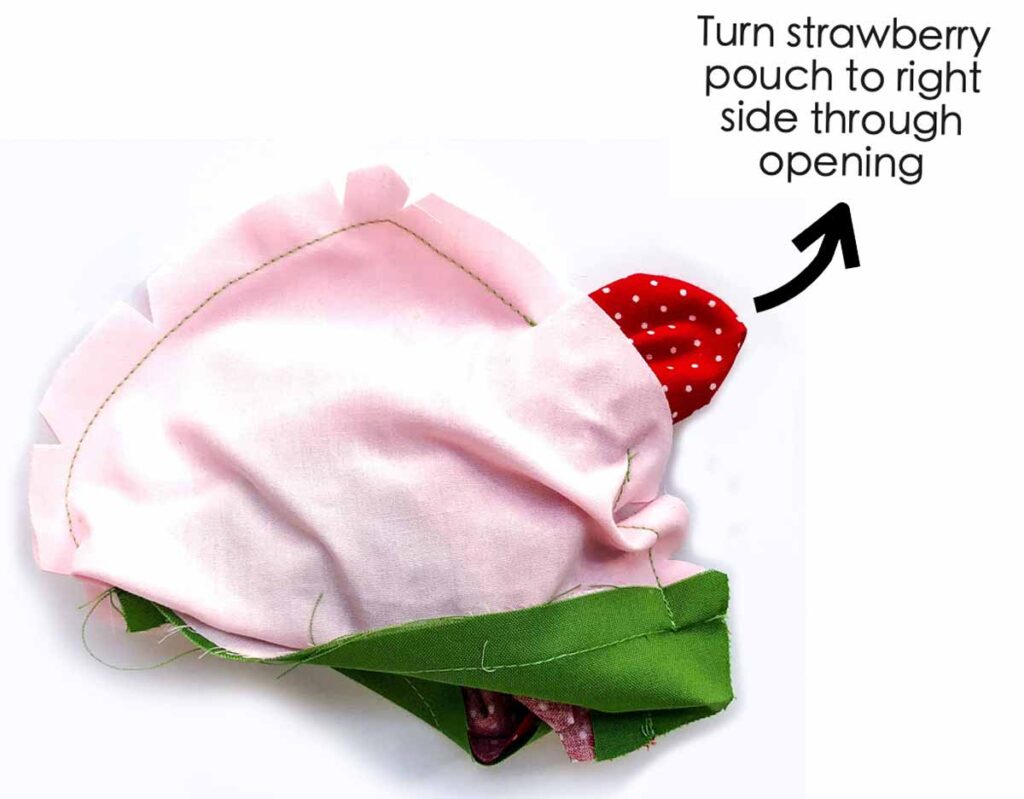
Turn pouch to ride side through opening.
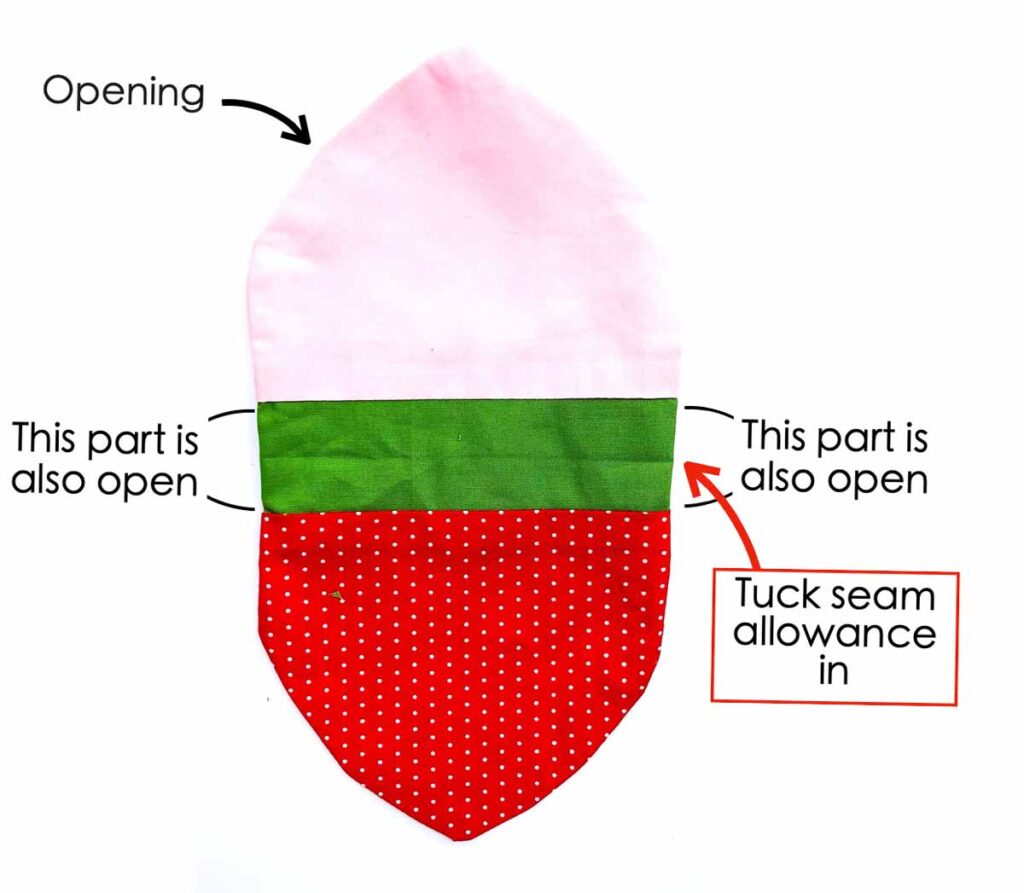
Press strawberry pouch, making sure to tuck in seam allowance at side of DRAWSTRING PIECE
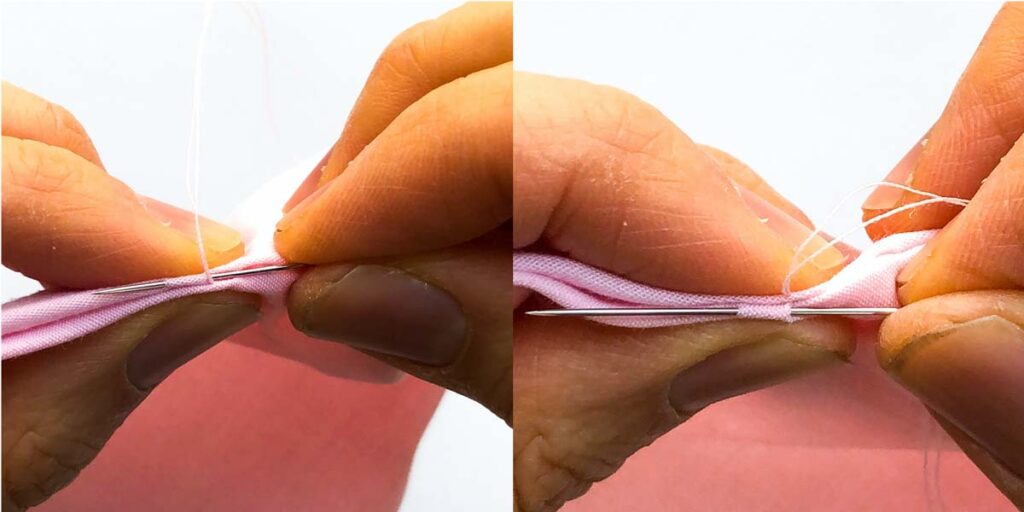
Close opening on lining using Invisible ladder Stitch. To learn more, check out this post on How to do the Ladder Stitch.
Sewing Drawstring Channel of Strawberry Bag
LEFT: First, tuck LINING into strawberry pouch, folding at the midline
RIGHT: Next, make sure the seams of the opening at the DRAWSTRING PIECES are folded in
Next, we will create the drawstring channel. To do this, you will need to sew a stitch all around the folded drawstring piece. First, match side seams of strawberry pouch together, then pin at the seams.
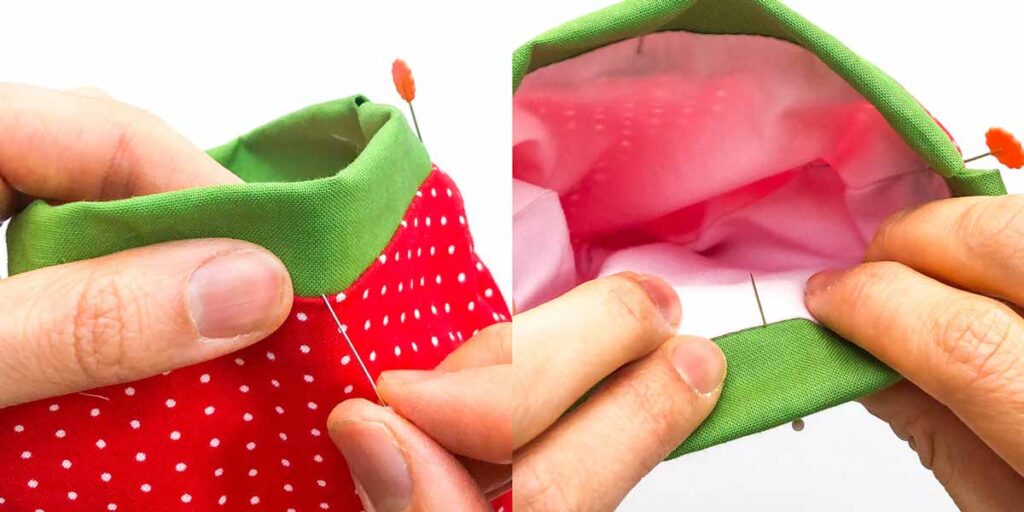
Second, pin all around drawstring channel (green fabric), matching front to back with pins. Alternatively, baste the drawstring channel.
It’s important to match the drawstring channel exactly at the front and back. Otherwise, as you sew the channel, some of your stitches may end up on the lining and this won’t look very nice.
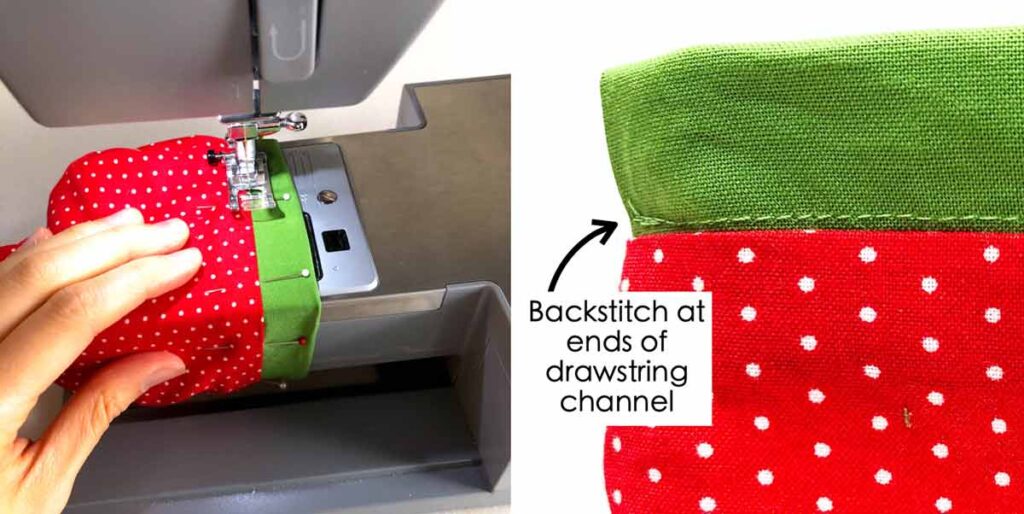
Remove extension table on sewing machine and slide the pouch opening into your machine. Make a stitch about 1/8”(3mm) from edge of drawstring channel all around the pouch. Be sure to backstitch at the end of the channel.
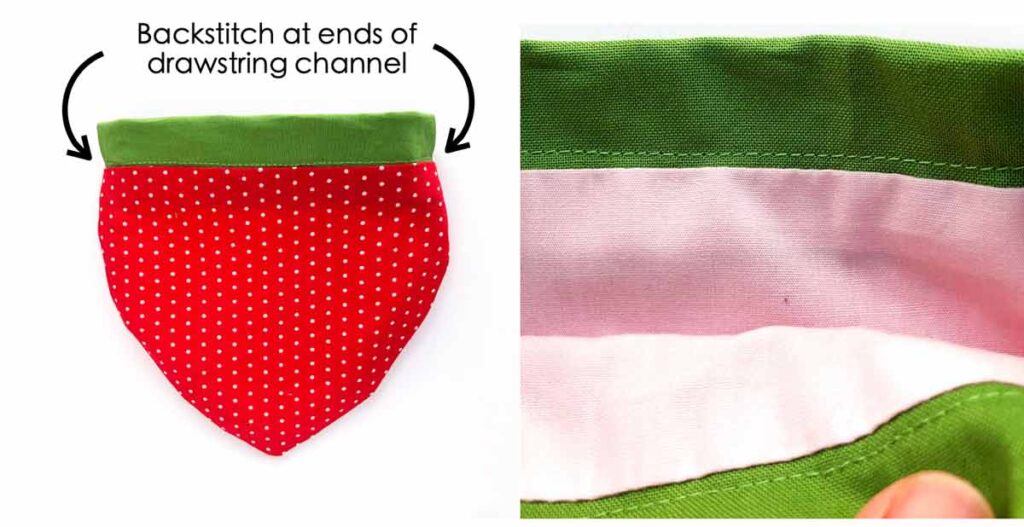
LEFT: Strawberry pouch finished, front view.
RIGHT: Stitching on interior of bag. Note that all the stitching is on the drawstring channel (green fabric), not on the lining. This is why it is important to pin/baste the drawstring channel in place before sewing it.
Sewing Strawberry Leaves
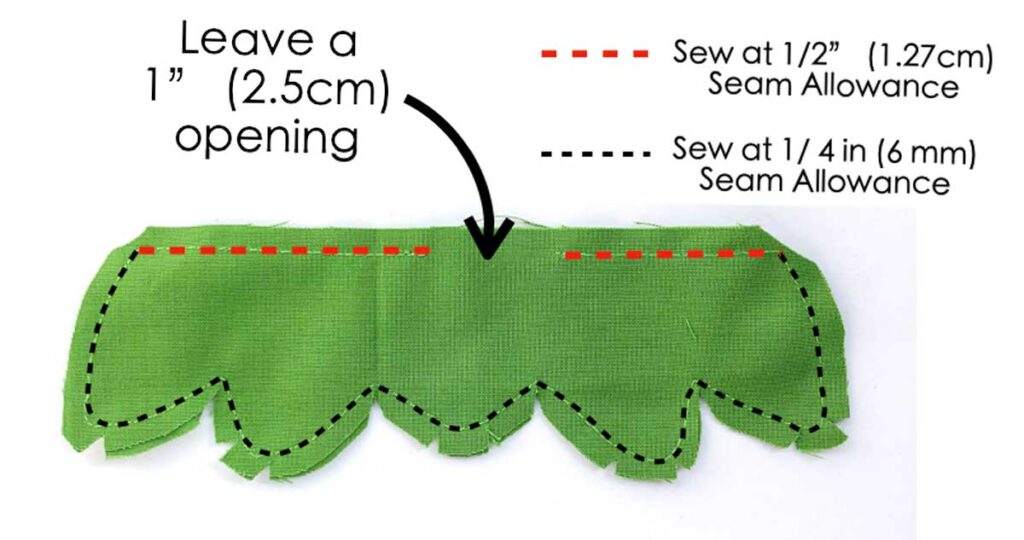
Place two LEAF PIECES right sides together, and sew at 1/4”(6.35mm) seam allowance along the side and bottom (black dotted line). Sew the top of the leaf at 1/2″ (1.27cm) seam allowance and leave a 1”(2.5cm) opening at the top of the leaf as indicated in photo. Clip at sharp angles and curves (see note).
I notched (cut a triangle) the the sharp angles and curves so it’s more obvious to see from the photo where you should clip. But you just need to clip (cut a straight line) unless you are using thick fabric.
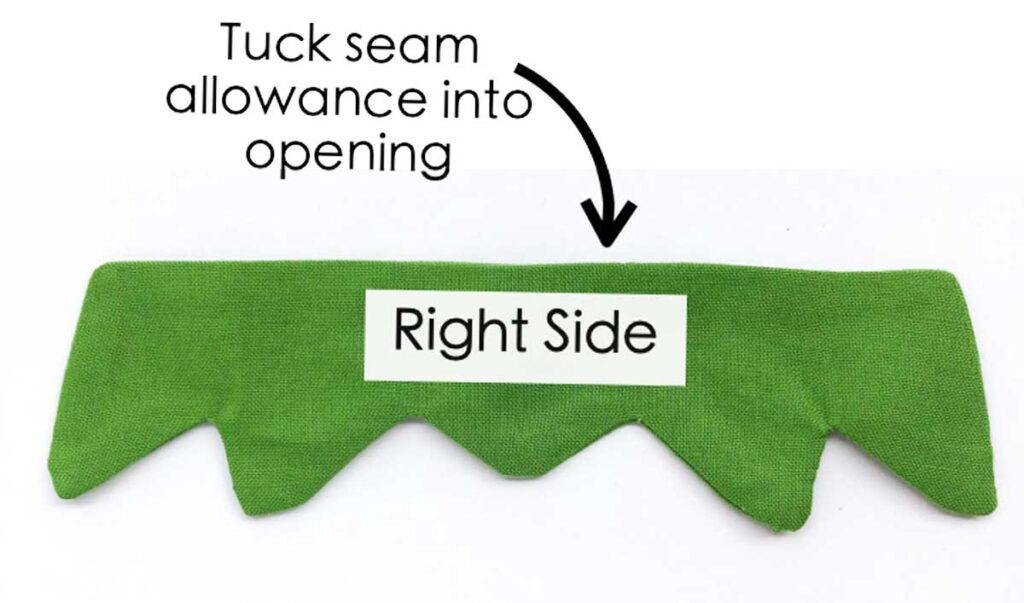
Next, turn LEAF PIECE to right side through opening. Tuck seam allowance of opening into the wrong side of leaf and press everything down.
Note:

Press leaf flat, making sure the seam allowance of opening is tucked in.
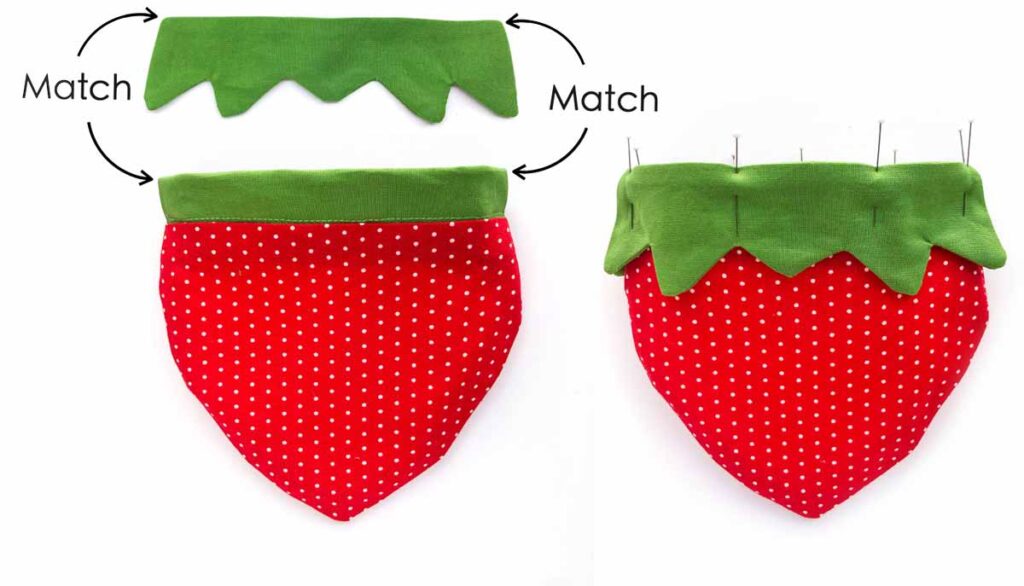
Now it’s time to sew the leaves to the strawberry pouch! Line the upper corners of leaves to upper corners of strawberry pouch. Pin together.

Another view of the leaf matching the strawberry pouch at the upper corners. Stitch together at 1/8”(3mm) from edge of leaf. Don’t forget to back stitch at the ends to reinforce the stitches.
How to Thread Drawstring
Note: For the small sized drawstring bag, you will need to cut 2 pieces of ribbon approximately 22″ (56cm) each.
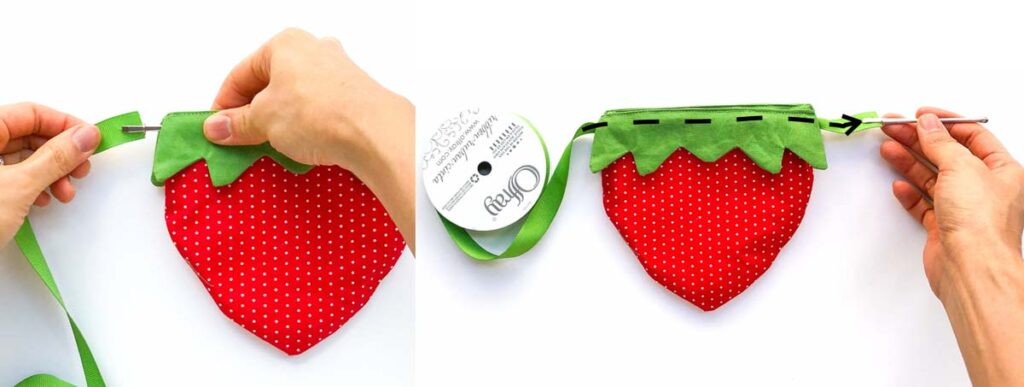
To thread the drawstring, first use a bodkin to clip one end of the ribbon. Thread bodkin through front drawstring channel following black dotted arrow.
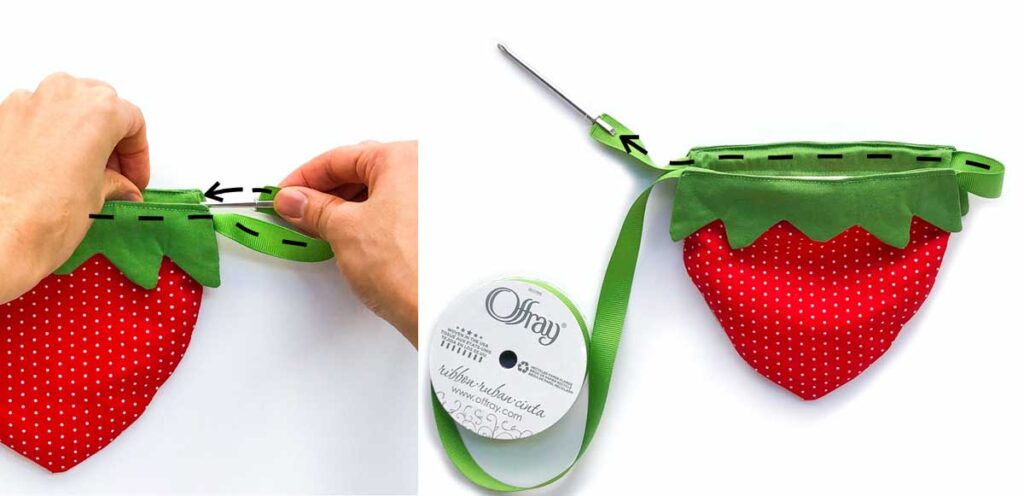
Next, thread bodkin through back drawstring channel, following black dotted arrow. Your thread will go in and come out on the same side of the pouch (left side in photo).
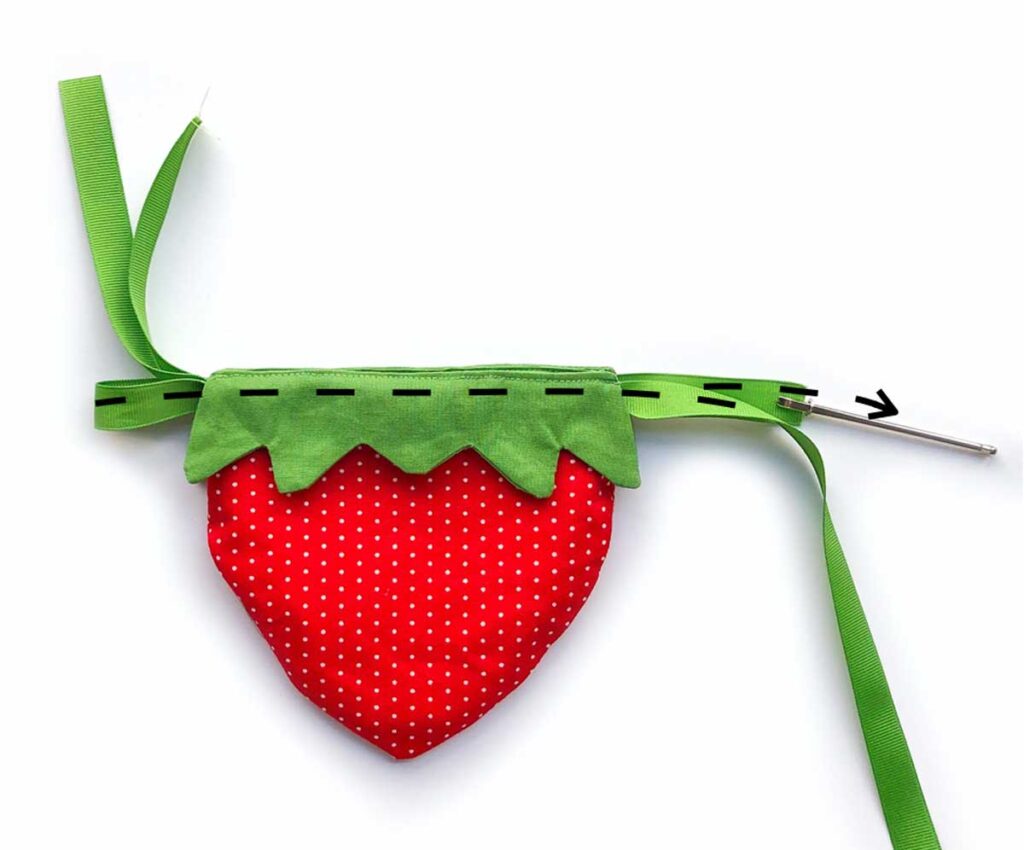
Repeat the threading process from the other side. This time, thread the ribbon in from the right side of the pouch all the way around come out on the right side again.
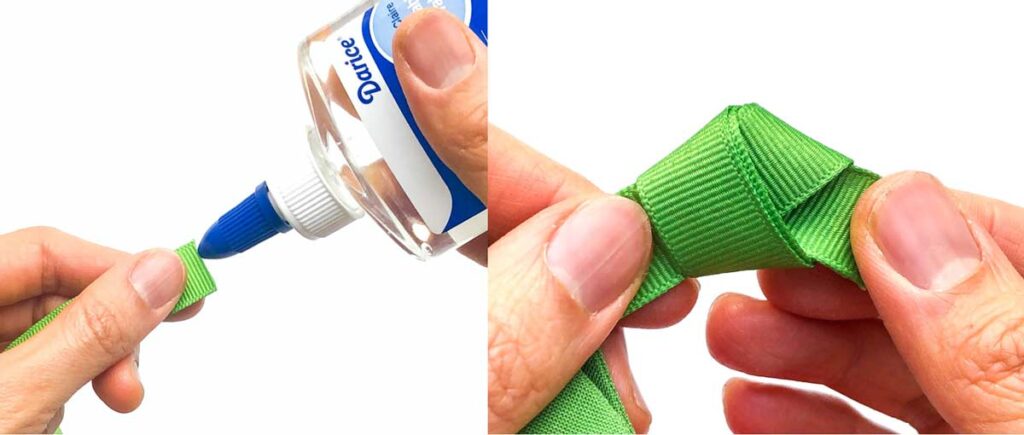
Apply clear glue at the ends of the ribbon to prevent fraying. Tie a knot at the end of both ribbons.
Finished!
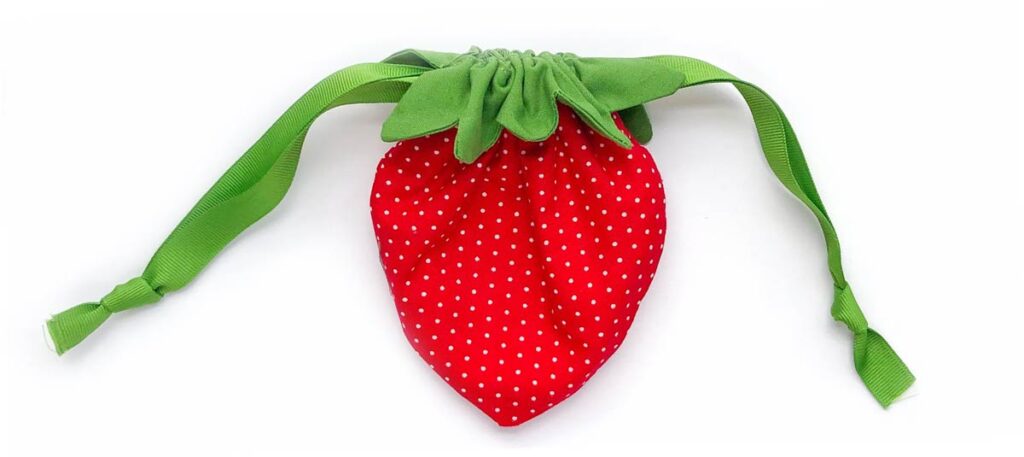
Cinch it up to look like a strawberry!
The strawberry pouches look even better when filled with scrumptious treats!
I hope you enjoyed this sewing tutorial. These cute little strawberry drawstring pouches make me so delighted. Happy Sewing!
How to Sew a Strawberry Drawstring Bag
This adorable little drawstring bag is fully lined and cinches up to look like a strawberry. The cutest gift bag to hold chocolates, candies, and other treats. Great sewing project even if you consider yourself a beginner!
Materials
- Strawberry Drawstring Bag Pattern
- EXTERIOR FABRIC – 1/4 Yard of Cotton Print Fabric.
- LINING FABRIC – 1/4 Yard of Cotton Fabric.
- SOLID GREEN COTTON FABRIC– 1/8 yard, for drawstring channel and leaf.
- 5/8" (15mm) WIDE GREEN GROSGRAIN RIBBON - for drawstring. I used Offray Brand in Color Kiwi
Tools
- Sewing machine
- Fabric Scissors
- Bodkin
- Pins
- Matching Thread
Instructions
- Cut out all pattern pieces on fabric
SEWING STRAWBERRY POUCH
- Match top of LINING and top of DRAWSTRING PIECE, right sides together, and sew at 1/2” (1.27cm) seam allowance.
- Match top of EXTERIOR PIECE and bottom of DRAWSTRING PIECE, right sides together. Sew at 1/2” (1.27cm) seam allowance.
- Repeat on other side
- Fold strawberry pouch in half along DRAWSTRING PIECE so the LINING PIECE matches EXTERIOR PIECE. Press to make a crease at the mid line of DRAWSTRING PIECE.
- Also make sure to press the seam allowance down (towards bottom of bag)
- Repeat on other side
- Place the two strawberry pouch pieces right sides together. Match the sides at the junction where DRAWSTRING PIECE meets EXTERIOR PIECE. Use a pin to hold the two pieces in place.
- Match the sides at the junction where DRAWSTRING PIECE meets LINING PIECE.
- Pin Strawberry pouch pieces all around*
- Sew pouch together, leaving the drawstring pieces un-sewn. Make sure to leave a 2”(5cm) opening on lining.
- Back stitch at all ends. Clip curves
- Turn pouch to ride side through lining opening.
- Press strawberry pouch, making sure to tuck in seam allowance at side of DRAWSTRING PIECE.
- Close opening on lining using Invisible ladder Stitch.
SEWING DRAWSTRING CHANNEL
- Tuck LINING into strawberry pouch, folding at the mid line.
- Make sure the seams of the opening at the DRAWSTRING PIECES are folded in.
- Match side seams of strawberry pouch together, then pin at the seams.
- Pin all around drawstring channel (green fabric), matching front to back with pins. Alternatively, baste the drawstring channel.
- Remove extension table on sewing machine and slide the pouch opening into your machine.
- Make a stitch about 1/8”(3mm) from edge of drawstring channel all around the pouch. Be sure to back stitch at the end of the channel.
HOW TO SEW STRAWBERRY LEAVES
- Place two LEAF PIECES wrong sides together, and sew at 1/4”(6.35mm) seam allowance along the side and bottom.
- Sew the top of the leaf at 1/2" (1.27cm) seam allowance and leave a 1” (2.5cm) opening at the top of the leaf .
- Clip at sharp angles and curves.
- Turn LEAF PIECE to right side through opening. Tuck seam allowance of opening into the wrong side of leaf and press everything down.
- Press leaf flat, making sure the seam allowance of opening is tucked in.
FINISHING IT UP
- Sew leaves to the strawberry pouch by lining the upper corners of leaves to upper corners of strawberry pouch. Pin together.
- Stitch together at 1/8”(3mm) from edge of leaf, back stitching at the ends.
- (For small size Bag) Cut 2 pieces of ribbon approximately 22" (56cm) each. Apply clear glue at the ends of the ribbon to prevent fraying.
- Thread drawstring through pouch, tie a knot and you are done!
Notes
* Make sure you match front and back piece exactly at the junction between DRAWSTRING PIECE and LINING PIECE.
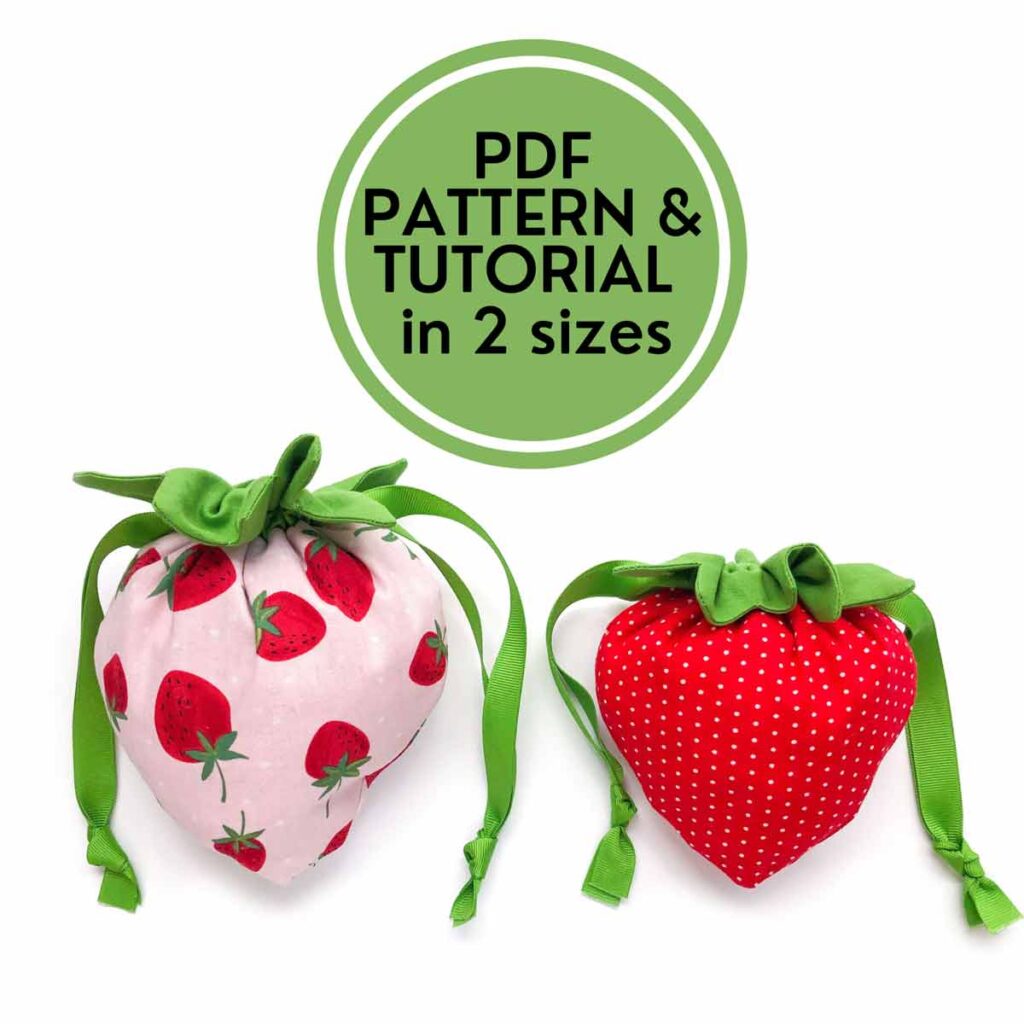
The ad-free, PRINTER-FRIENDLY PDF version of this sewing tutorial with all the step-by-step photos is available for purchase IN OUR SHOP. The sewing tutorial consists of 17 pages of detailed instructions with photos. Additionally, you will also receive PDF Pattern of the large size strawberry drawstring bag (pictured on left). Print a copy today to keep next to your sewing machine for easy reference.
More Fun Sewing Projects You Will Love:
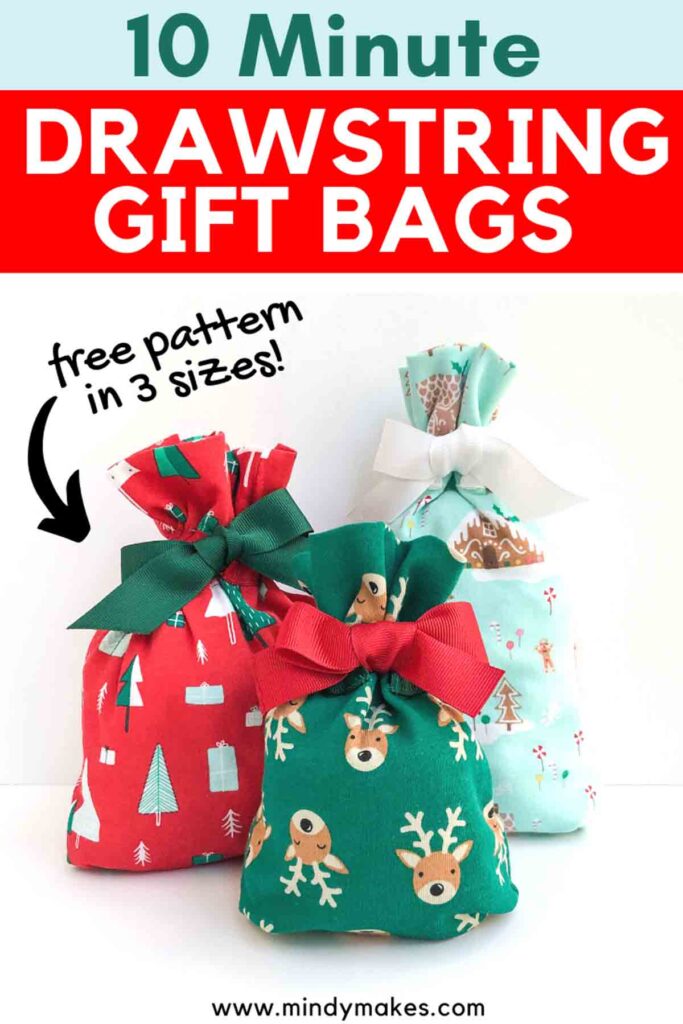
Reusable fabric drawstring gift bags with a gusset add a special touch to gift giving.
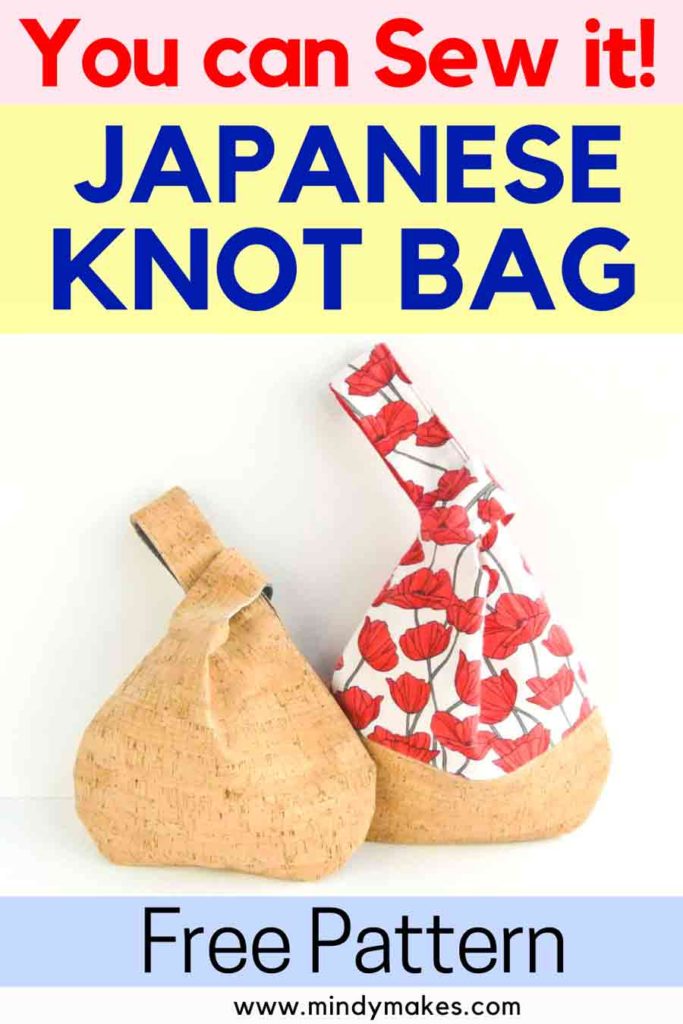
The Japanese knot bag is a super chic accessory.
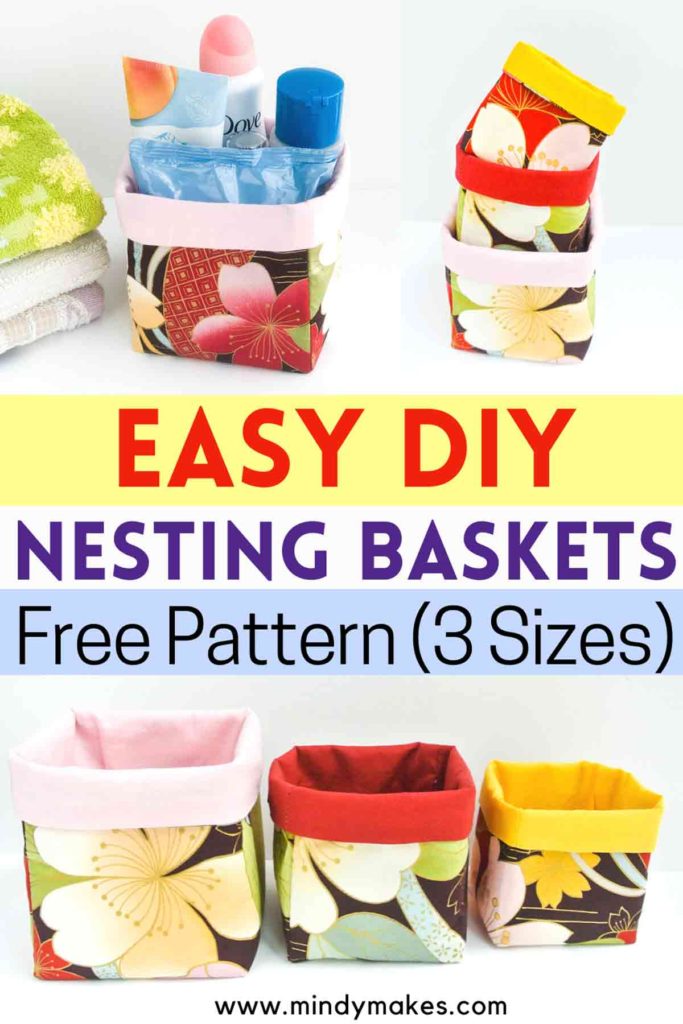
Organize your desk, drawers, and cabinets with these handy fabric bins.

This flat bottom, lined drawstring bag stands up on its own. Great for holding dice, trinkets, and more

This fully lined tote bag is all you need on the go.
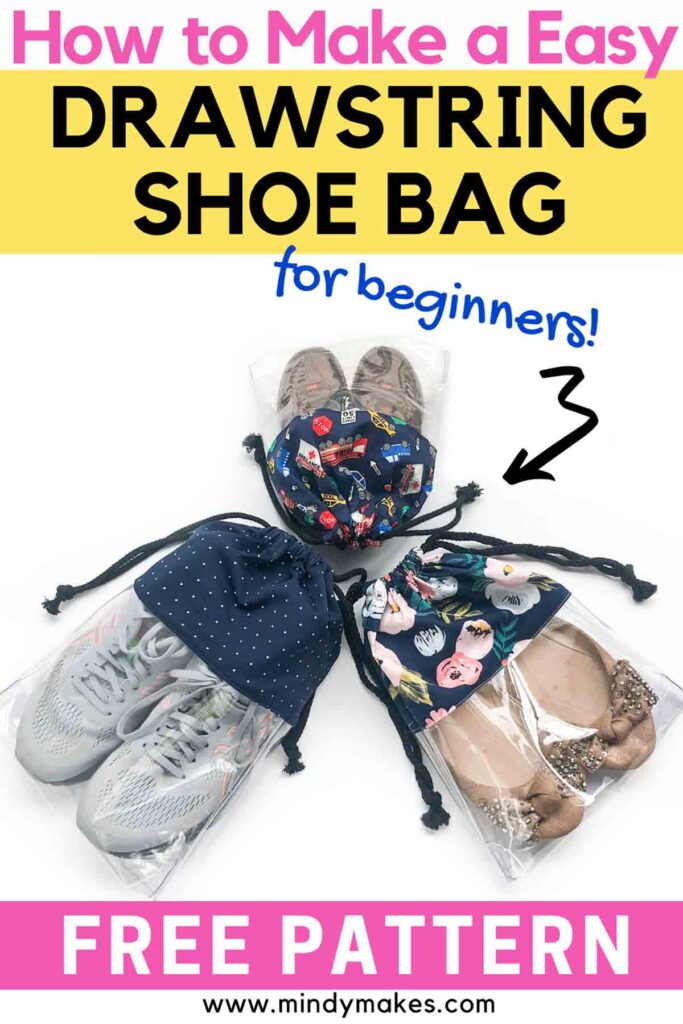
A no fuss drawstring shoe bag with clear vinyl to keep those shoes protected and organized.

4/5 Stars
A quick, fun, little project! The only issues I found were that the leaf pieces are not symmetrical and not wide enough to touch the edges of the drawstring channel when you go to attach them. I had to extend the leaf pattern piece width-wise about 2mm on each side to make it fit correctly.
By the way, there’s an error in the instructions where it says to place the two leaf pieces wrong sides together when it should be the right sides together.
Bonus tips for other readers: if you press open the bag seams and trim the seam allowance by half before turning it right side out it makes the bag way less bulky. I also found it unnecessary to leave an opening in the lining to turn it right side out, you can just turn it through the drawstring channel opening. Lastly, I used 3/8″ ribbon instead of the 5/8″ as it seemed to fit better and I used pinking shears on the ends instead of glue.
Thanks for sharing this pattern! Looking forward to trying more of them.