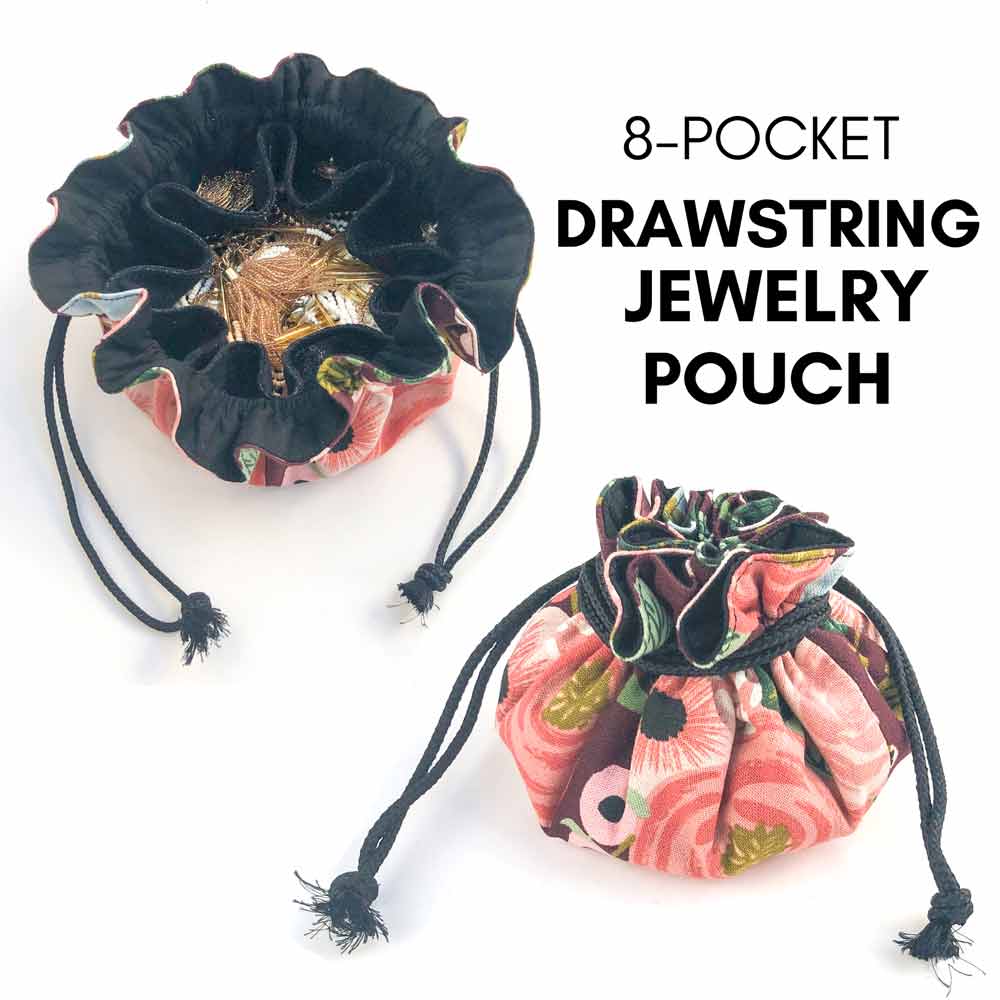
Simple Easy Drawstring Jewelry Pouch with 8-Pockets (Free Pattern)
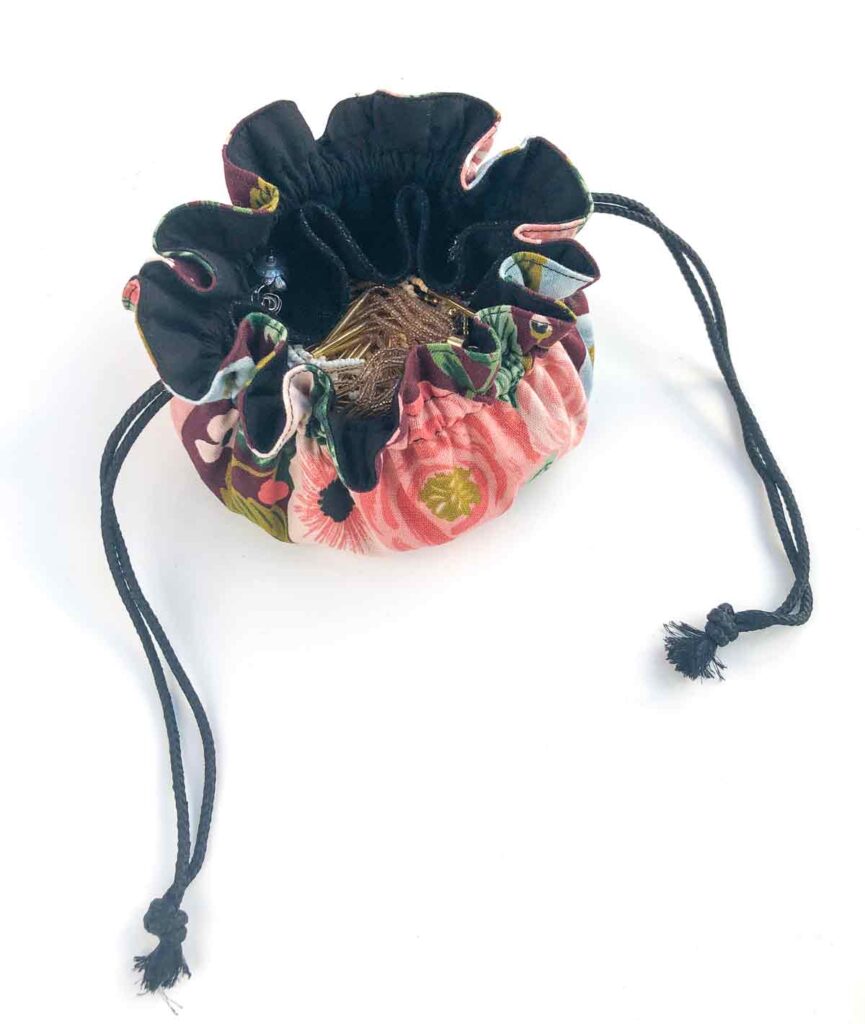
This simple Drawstring Jewelry Pouch with 8 pockets will keep your treasured pieces safe and organized on-the-go. Step-by-step tutorial with free pattern is perfect for all sewing levels.

Always wondered “How Do You make a Drawstring Jewelry bag?” Well look no further! Today I will be showing you how to make this cute little jewelry pouch that is super duper useful! Once you make one, you are going to want to make a bunch for all your jewelry-loving friends
DIY FABRIC Jewelry organizer
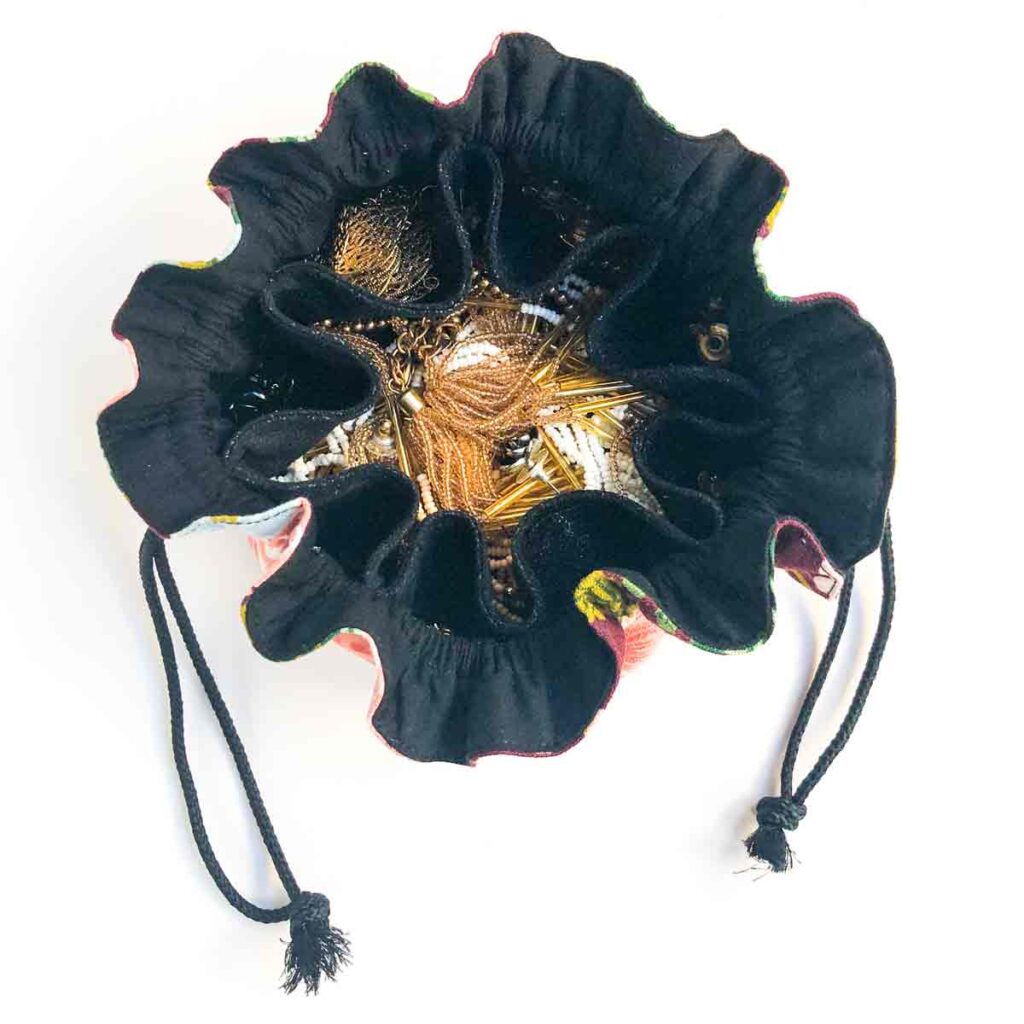
First, there are 8 pockets inside this jewelry pouch. These are are perfect for storing rings, earrings, bracelets, and other small necklaces. Next, there’s a larger compartment in the center that is excellent for chunky necklaces.
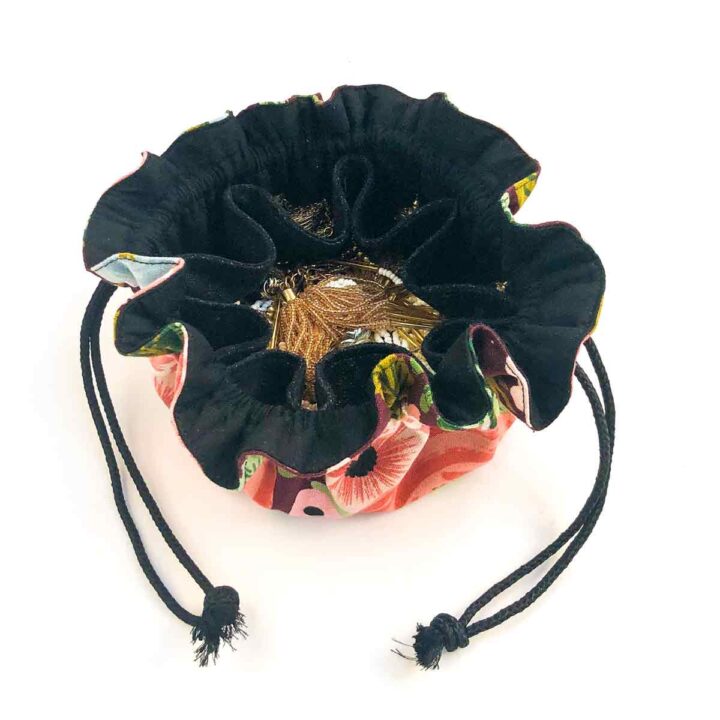
One thing I love about this jewelry pouch it serves as a jewelry containers with dividers when you partially open it up. This allows you to easily see all your jewelry and grab whatever you need on the fly.
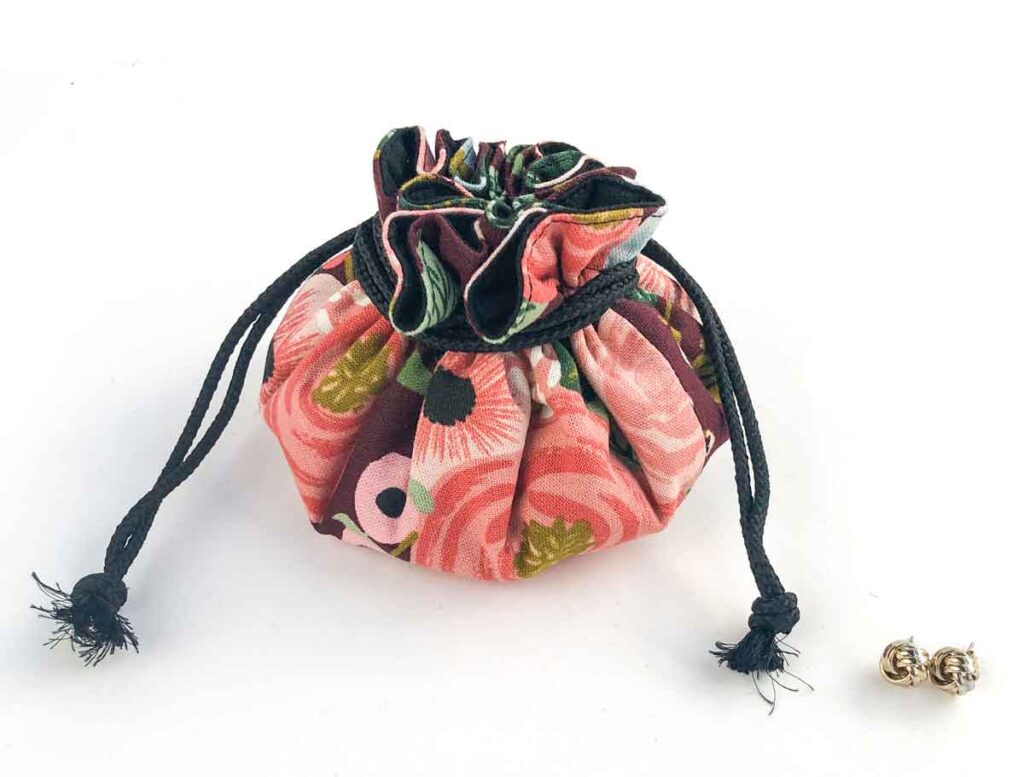
Finally, the fabric jewelry organizer easily closes up with two drawstrings to prevent all your treasured pieces from accidentally falling out and getting dirtied or lost.
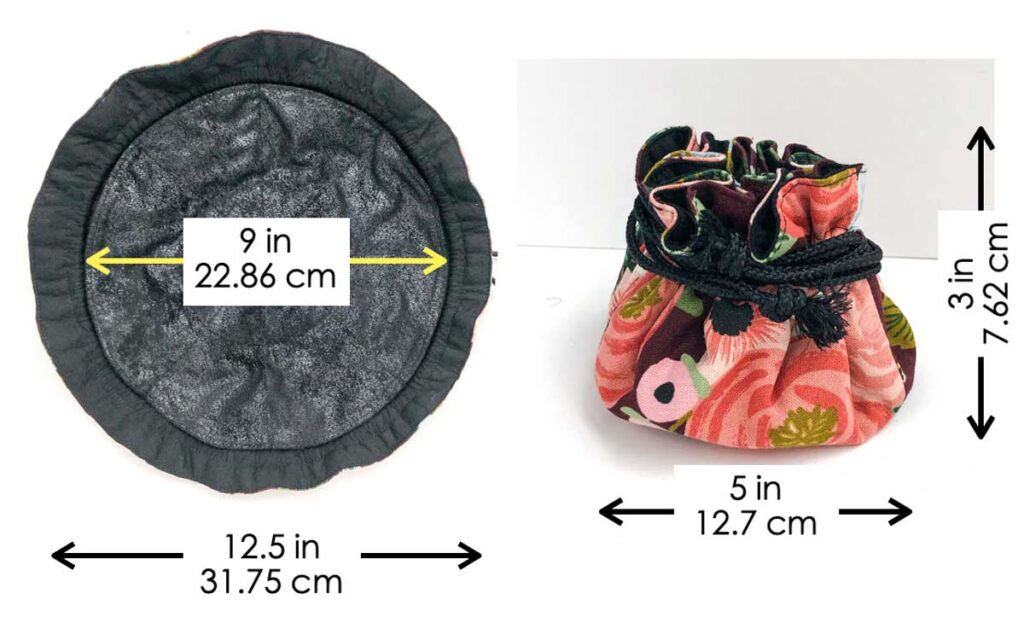
DRAWSTRING JEWELRY POUCH DIMENSIONS:
The fabric jewelry organizer measures 12.5″ (31.75cm) wide when fully opened and laying flat. The circular pocket measures 9″ (22.86cm) in diameter .
When the bag is closed up, it has a circular base that measures 5″ (12.7cm) in diameter, and is approximately 3″ (7.62cm) tall.
JEWELRY POUCH Pattern
To get the free pattern for the drawstring jewelry pouch, simply subscribe to our email list and you will receive the password to the MindyMakes Free Resource library. The pattern is listed under the letter ‘J’ as “Jewelry Bag”
Please note that the pattern for this pouch does not consist of two different sized circles (like a lot of other tutorials I’ve seen). While that method works perfectly fine, I prefer not to have to cut holes into my fabric to thread the drawstring, or to make buttonholes. Follow the step-by-step tutorial below and you will have two drawstring openings once you are finished!
MATERIALS & TOOLS
- JEWELRY POUCH PATTERN – Available in the MindyMakes free resource library. – Get the password when you subscribe. I promise no spam!
- EXTERIOR FABRIC – 1/2 Yard (or anything more than 15 inches, 38cm) of fabric
- LINING FABRIC – 1/2 yard (or anything more than 14 inches, 36cm) of fabric.
- POCKET FABRIC – 1/3 yard (or anything more than 10 inches, 26cm) of fabric.
- CORD – Choose something that’s smaller than 1/4”(6mm) in diameter.
- SEWING MACHINE
- FABRIC SCISSORS – these Ginghers are my favorite.
- BODKIN – alternatively, can also use safety pins
- CLEAR RULER – I have the DRITZ See-Through Sewing Ruler
- FABRIC CHALK – These Chaco Liners by Clover are my absolute favorite
- SEWING PINS
- MATCHING THREAD
How do you make a travel jewelry organizer?
Ready to get started? Follow along this step-by-step tutorial to make your very 8 pocket jewelry pouch!

The ad-free printer friendly version of this tutorial is available for purchase in my Etsy shop. This way, you can print a copy and keep it next to you as you sew for quick and easy reference. Additionally, the tutorial also includes the Drawstring Jewelry Bag Pattern in 2 sizes, Small and Medium.
Assembling Paper Pattern
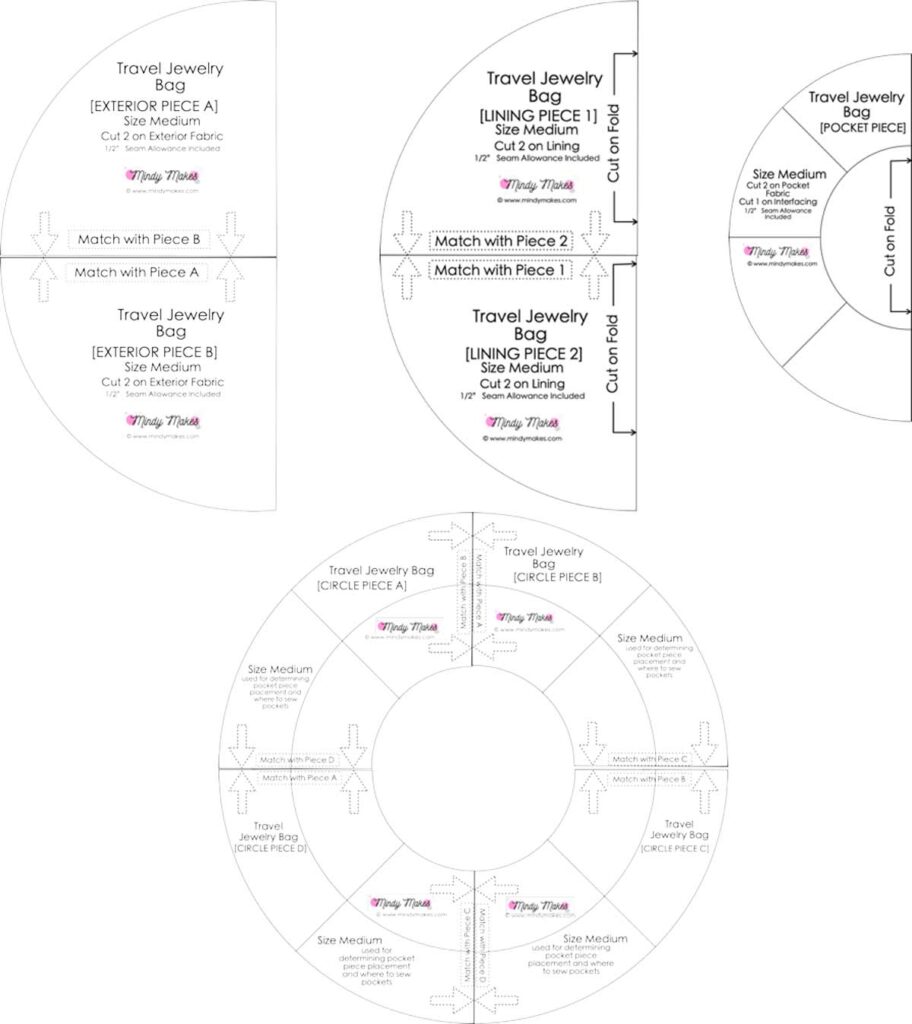
First, print and cut out paper pattern and assemble as needed, following instructions on the pattern. You will have 4 Pattern Pieces:
- EXTERIOR PIECE
- LINING PIECE
- POCKET PIECE
- CIRCLE PIECE
Cutting Pattern Pieces
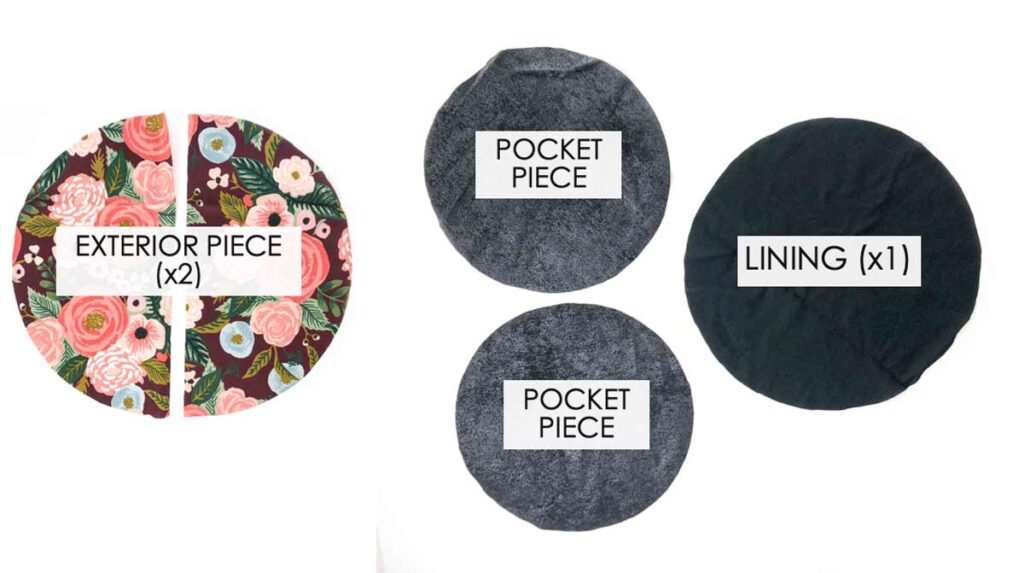
Cut out patterns on fabric. You will have the following pieces:
- EXTERIOR PIECE (x2)
- POCKET PIECE (x2)
- LINING PIECE (x1)
Note:
- If you use a light weight cotton for the POCKET PIECE, I recommend adding interfacing to one (or both) pieces for extra stability.
- Make sure to cut LINING PIECE on fold so you get a circle from the semi-circle paper pattern.
Sewing Pocket Piece
Before sewing the two POCKET PIECES together, you can cut a hole in one of the pieces first. This helps to facilitate turning to the right side later. Since the side with the hole will be sewn down to the bottom of the drawstring jewelry pouch, you won’t even know it’s there. However, if the thought of cutting a hole in the fabric really bothers you, just sew the two POCKET PIECES together and leave an opening to turn to the right side.
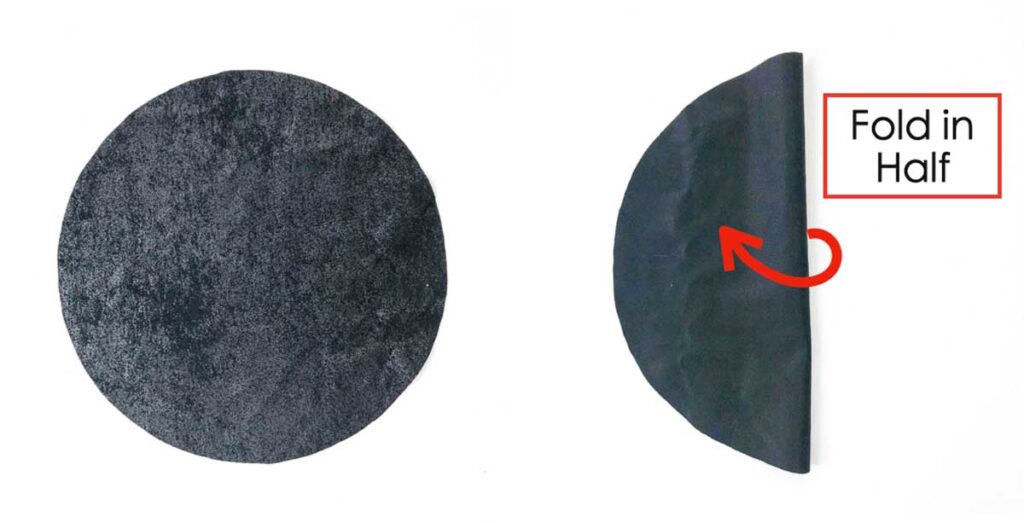
First, take one of POCKET PIECE and fold it in half.
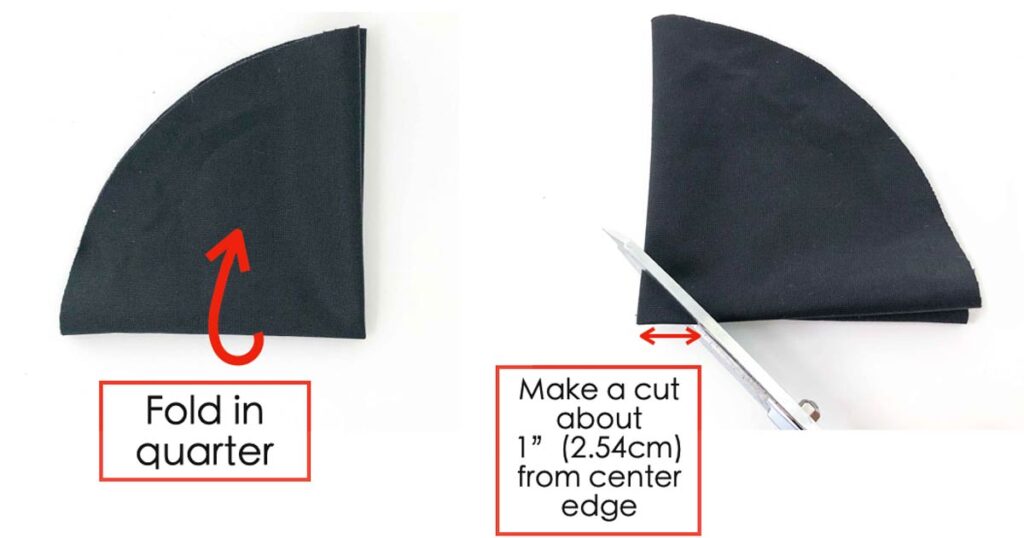
Next, fold in a quarter. Now use a scissor and make a cut about 1” (2.54cm) from center edge.
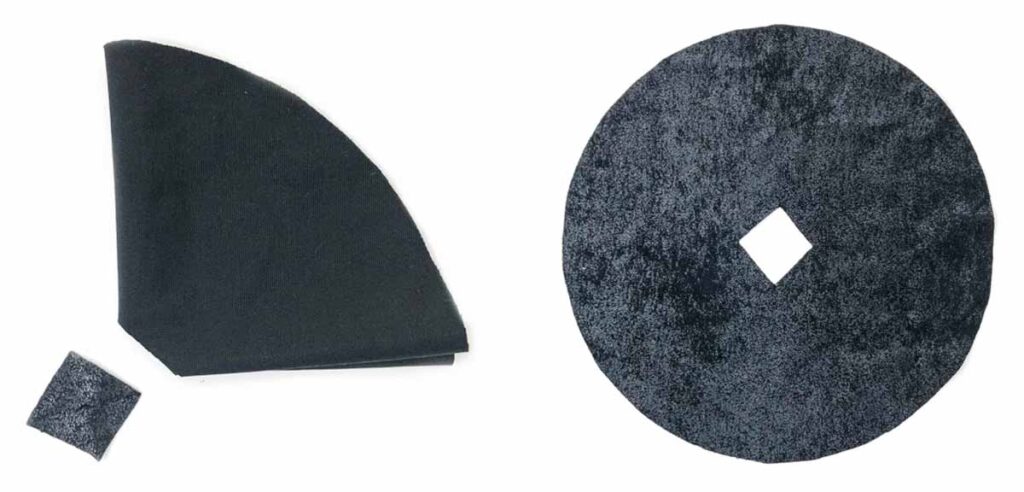
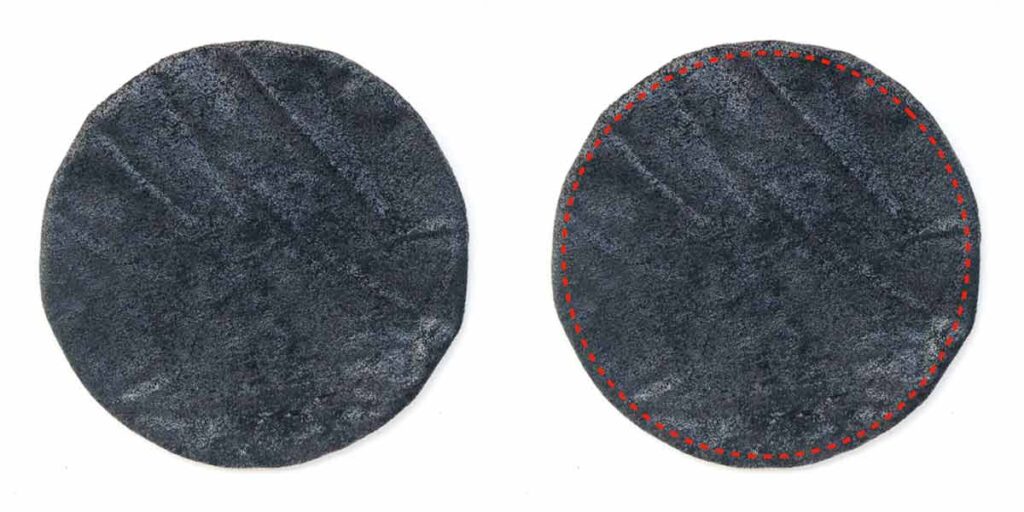
You will end up cutting off a square about 1”x 1”. Unfold the POCKET PIECE and you will have a little hole in the middle of the circle (RIGHT PHOTO).
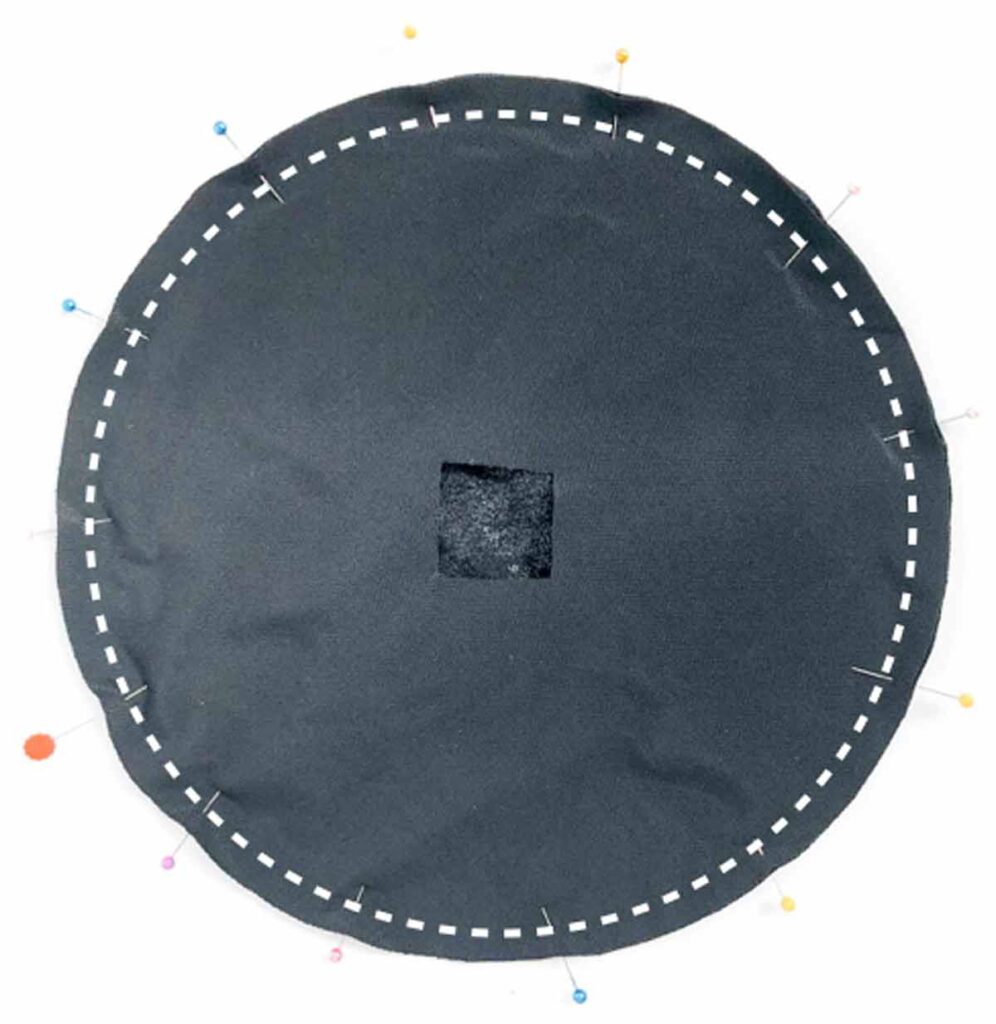
Now put the two POCKET PIECES together, pin, and stitch at 1/2”(1.27cm) seam allowance.
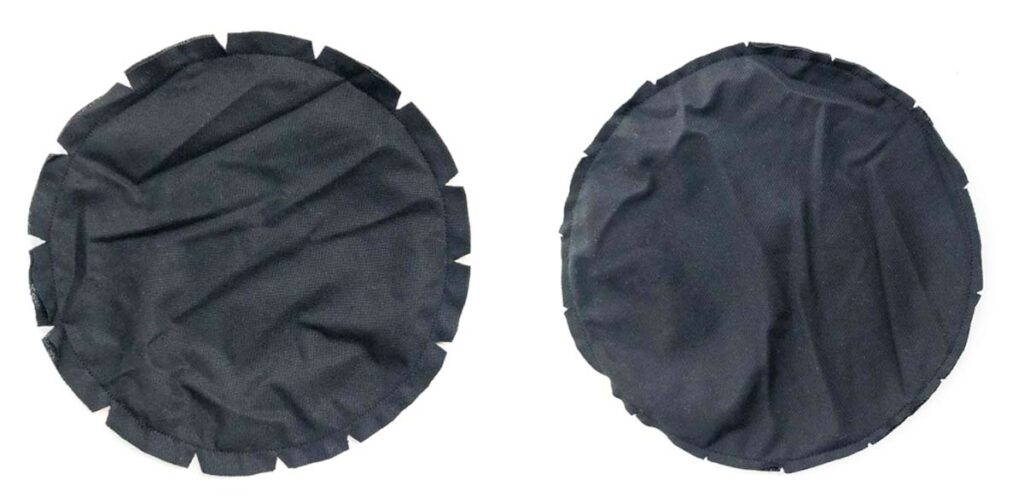
Clip curve and trim seam allowance down to 1/4”(6mm)
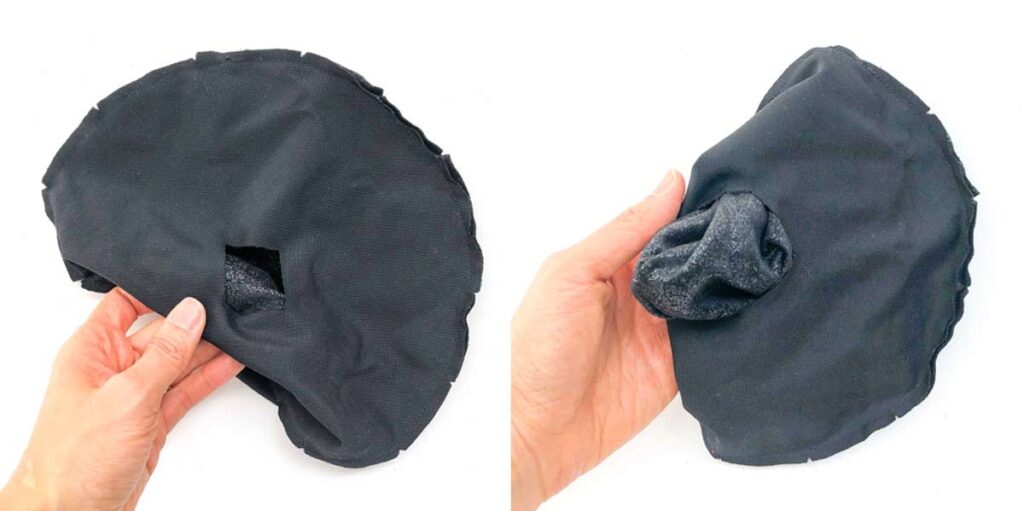
Turn POCKET PIECE to right side through square hole in the middle.
LEFT: View of POCKET PIECE turned to right side.
RIGHT: Give POCKET PIECE a good press, and top stitch at 1/8”(3mm) from edge, as indicated by red dotted line.
Sewing Pocket Piece to Bag
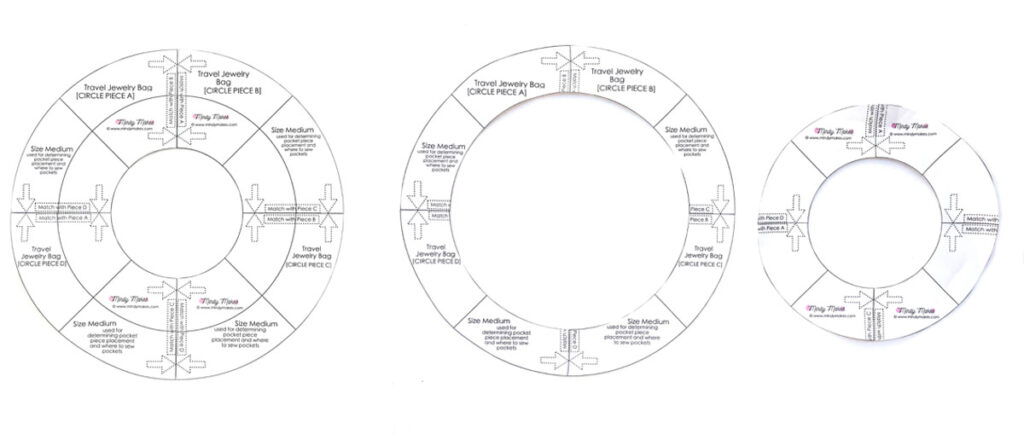
Cut CIRCLE PIECE into two pieces, an OUTER CIRCLE and an INNER CIRCLE. Make sure the inside of the inner circle is also cut out.
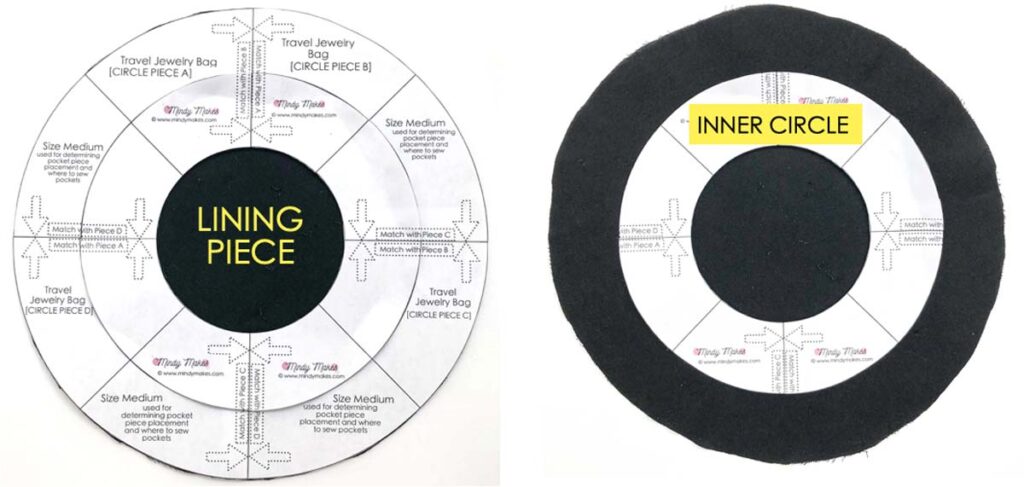
Place the two circles over LINING PIECE. Remove OUTER CIRCLE, making sure not to move the INNER CIRCLE.
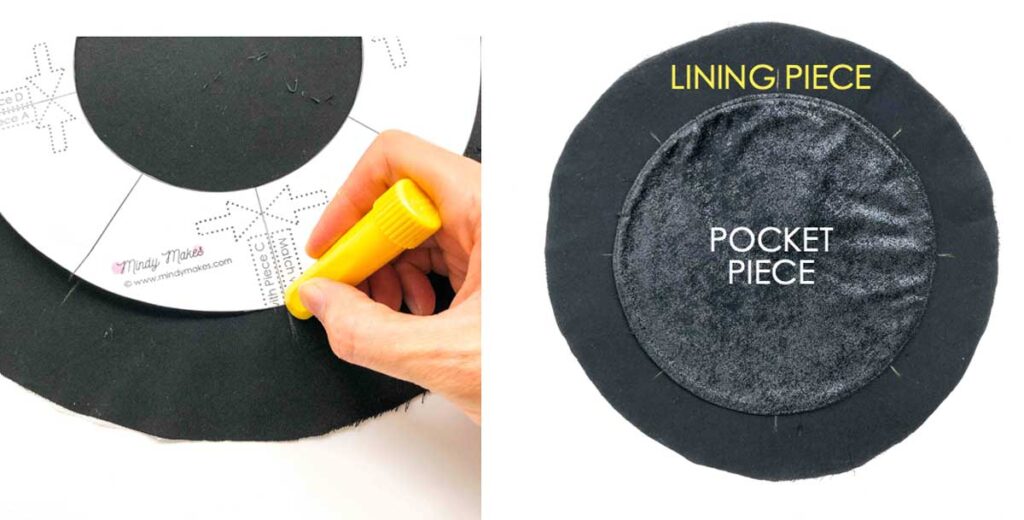
Next, use chalk to mark small notches on the outside of INNER CIRCLE onto LINING. Then, place POCKET PIECE over LINING PIECE, using chalk lines as a placement guide. The chalk markings also help you know where to sew your lines on POCKET PIECE to create each pocket.
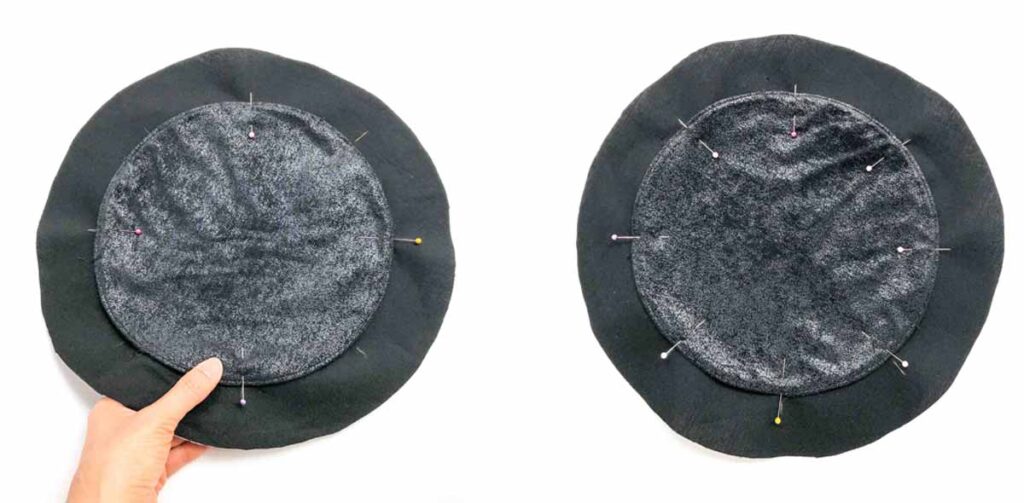
Now use pins to pin POCKET PIECE to LINING. Pin at the marked lines. The pins will serve as a guide for where to sew the lines to form pockets.
Note: Place the pins along the sewing line (the ones on opposite ends of POCKET PIECE) so they point in the same direction (tip of pin faces head of pin). Or, just follow the direction of where the pins are pointing according to the photo on the right. This makes it easy to remove the pins as you sew.
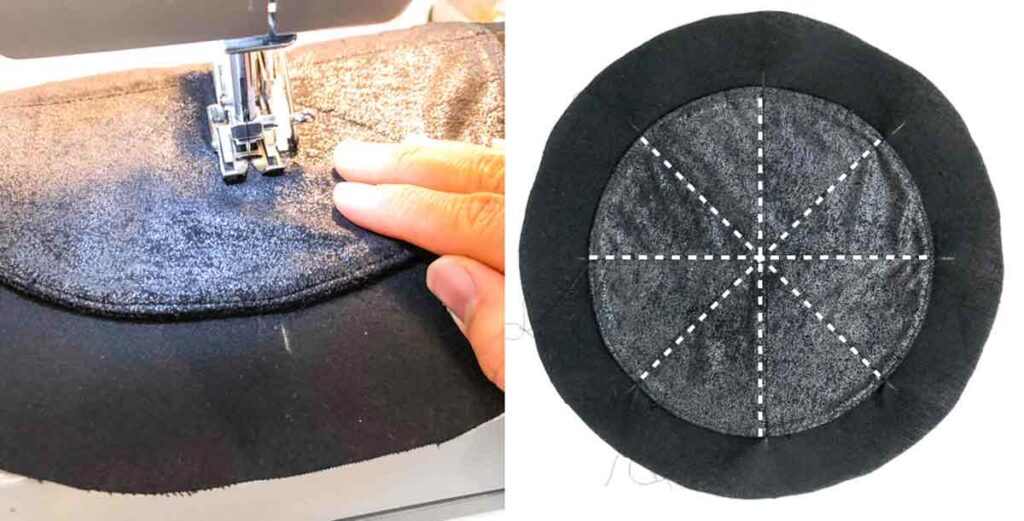
Sew POCKET PIECE to LINING, making 4 straight stitches (white dotted line) across the circular POCKET PIECE. Start sewing on the side where the pin points away from you (so start sewing at the tip of the pin, not the head). That way, you can easily remove the pin as you sew.
Note:
- Make sure to back stitch several times at either end of the straight sewing line for extra reinforcement. The ends of the straight stitch creates the pocket opening, which goes through lots of tugs and pulls when you remove and put stuff in. Therefore, it is very important to back stitch.
- If you don’t feel confident about sewing straight lines just by eyeballing, you can use fabric chalk to mark faint lines over POCKET PIECE first. Alternatively, thread baste the lines if you are worried that the chalk may leave a mark on your fabric. For more information about thread basting, check out How to Sew a Basting Stitch
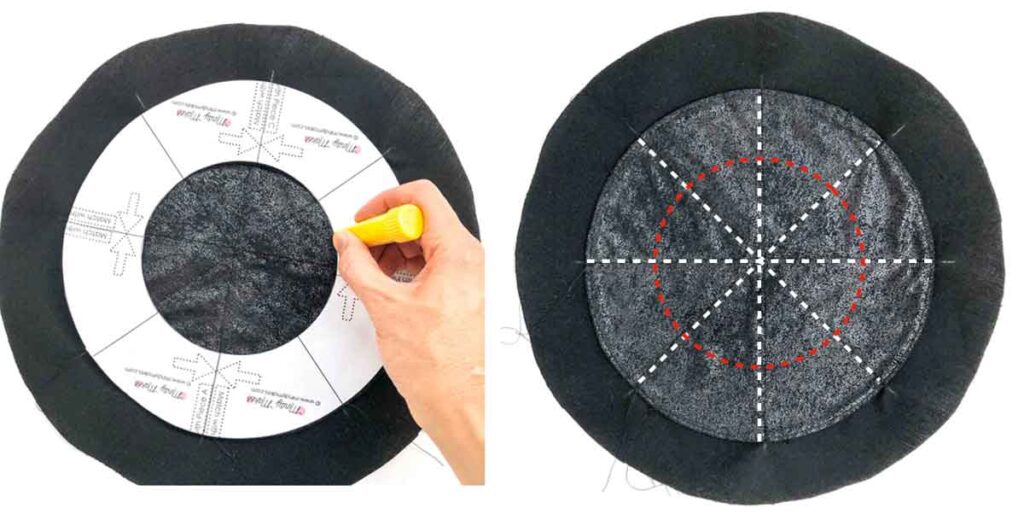
Place INNER CIRCLE pattern piece back over POCKET PIECE and trace the circle in the middle. Alternatively, thread baste the circle onto the POCKET PIECE if you are worried about leaving a mark on your fabric. Stitch the marked circle (red dotted line).
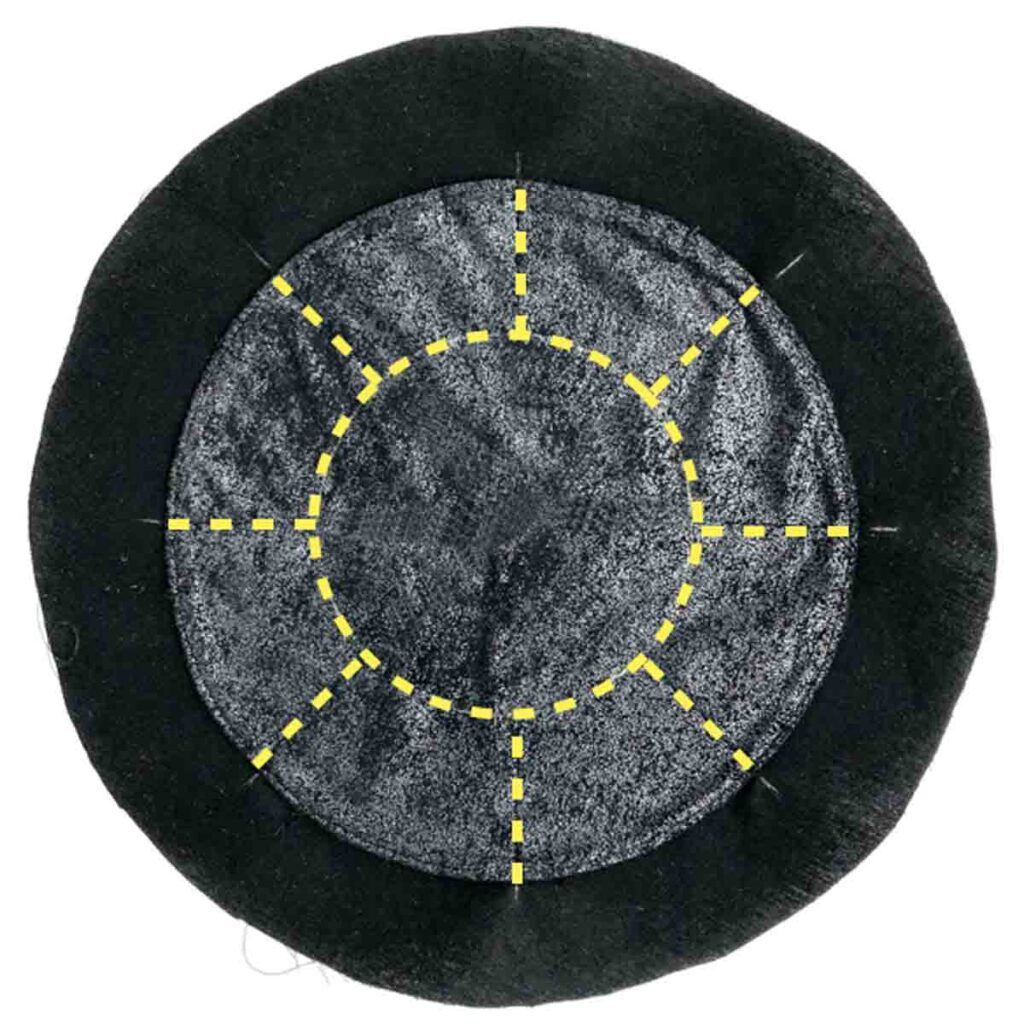
You can also sew the POCKET PIECE onto the LINING as shown in the photo above. This way you won’t have the “wheel spoke” stitching inside the circle. This is designer’s choice and completely up to you!
Sewing Exterior Piece
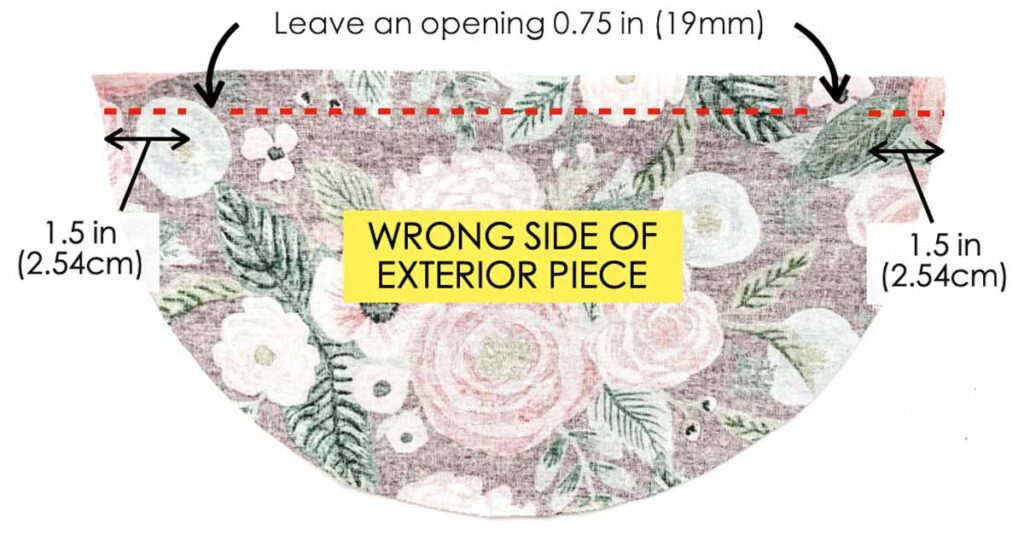
Place EXTERIOR PIECE wrong sides together and sew the straight edge at 1/2” (1.27cm) seam allowance, following the diagram above. You want to leave a 0.75”(19mm) opening that is 1.5”(2.54cm) from both ends of EXTERIOR PIECE.
Note:
- Make sure to back stitch on both ends of the opening.
- This opening is where the drawstring thread will go in and out of later on.

Press seams open.
Sewing Jewelry Bag Together
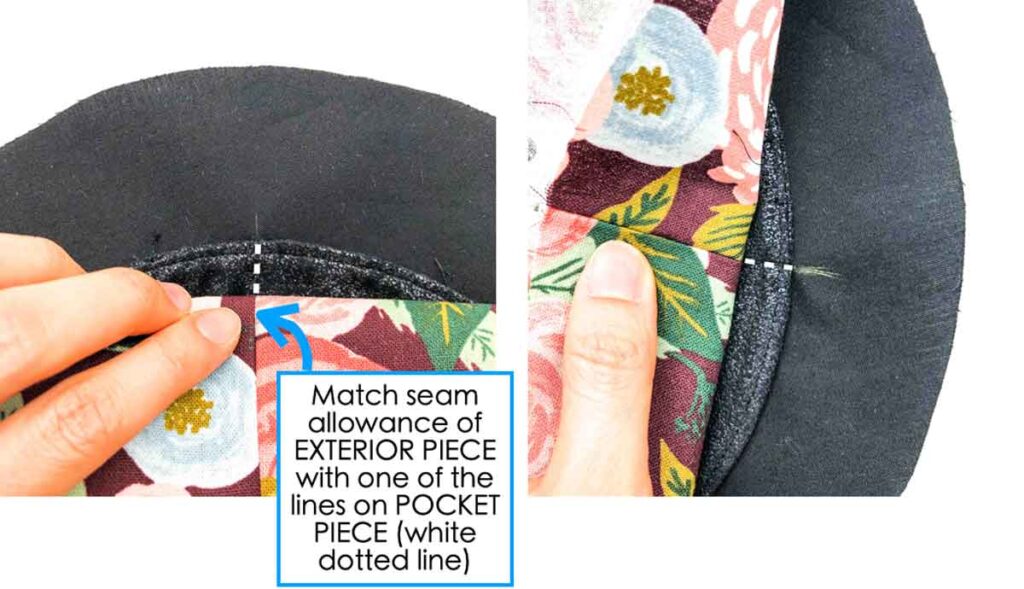
Match seam allowance of EXTERIOR PIECE to one of the stitched lines (doesn’t matter which one) on the POCKET PIECE. Right photo show another view.
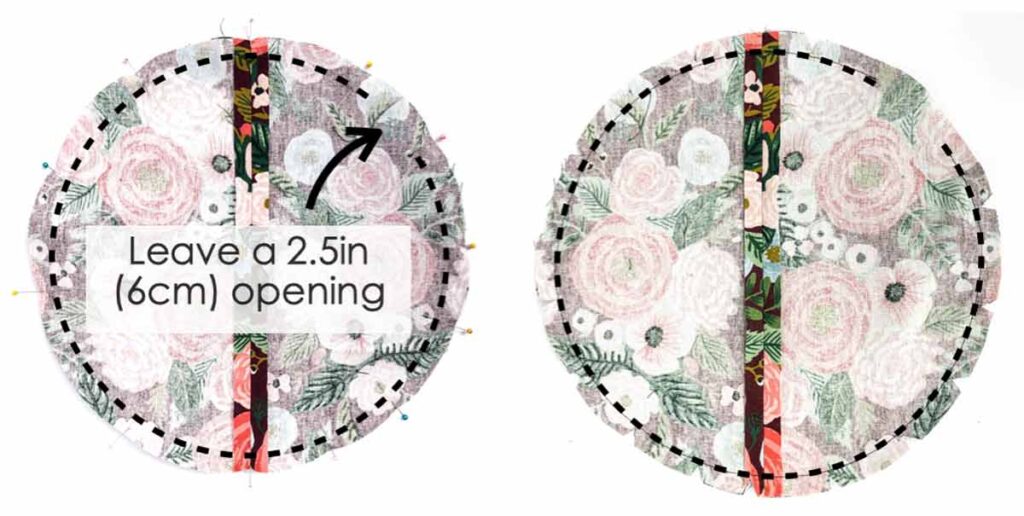
LEFT: Pin EXTERIOR PIECE to LINING PIECE and stitch at 1/2”(1.27cm) seam allowance. Leave an opening about 2.5” (6cm) on the side of the circle. Be sure to back stitch on both ends of opening.
RIGHT: Clip curves.
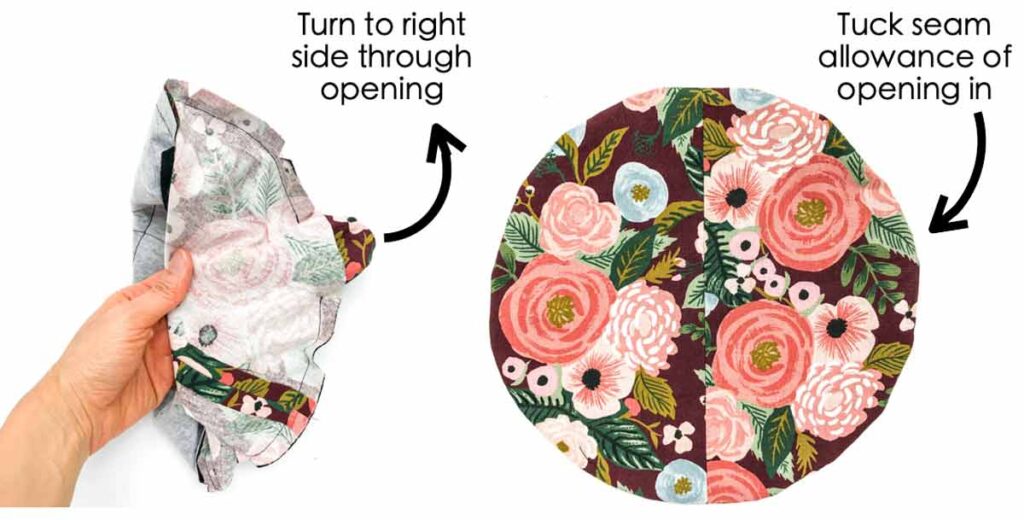
LEFT: Turn jewelry bag to right side through opening
RIGHT: Tuck the seam allowance of opening into bag
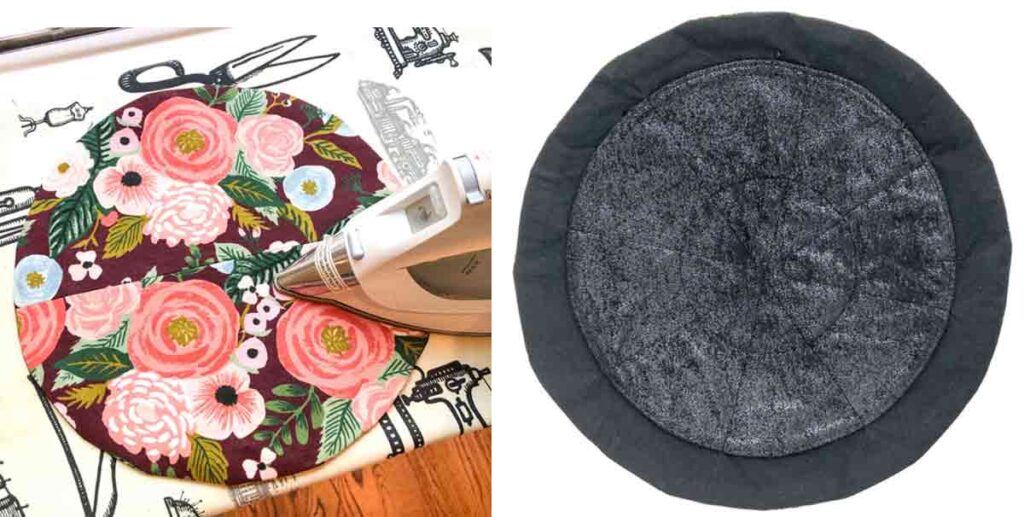
LEFT: Give the bag a good press
RIGHT: Inside of jewelry bag
Sewing Drawstring Channel
To make the drawstring channel, we will be making 3 stitches around the bag on the LINING + EXTERIOR PIECE.

First, top stitch 1/8” (3mm) from edge of bag. (blue dotted line)
Next, make a stitch 1”(2.5cm) from edge (red dotted line).
Finally, make a stitch (yellow dotted line) right outside of POCKET PIECE
Note: The red dotted line and the yellow dotted line creates the drawstring channel. The width of the drawstring channel should be about 0.75”(19mm)
How to Thread Drawstring

First, insert bodkin into the drawstring opening (on the outside of the bag)on one of the side seams.
Next, continue to thread the drawstring through as follows:
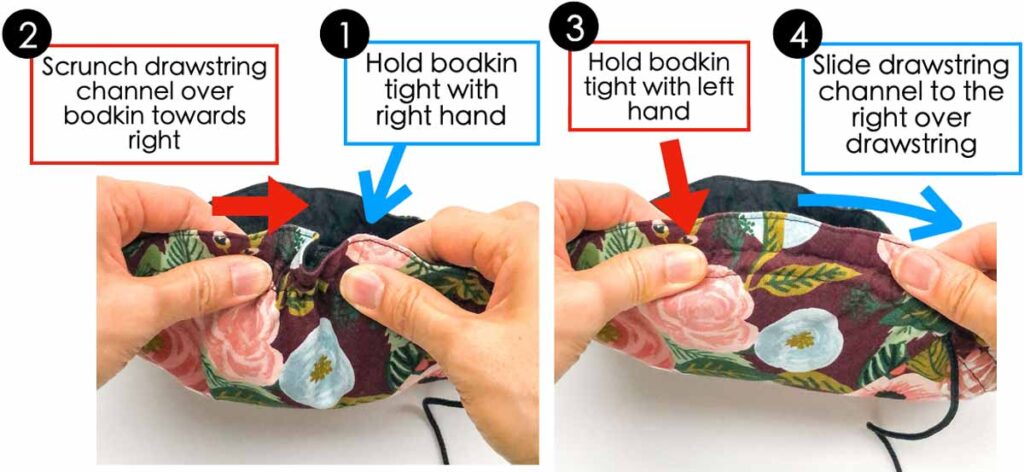
Holding bodkin tight with right hand (1), use your left hand to push the drawstring channel over the bodkin (2) towards right hand.
(3) Hold the bodkin tight with left hand and pull the bunched up fabric to the right over drawstring with your right hand. (4)
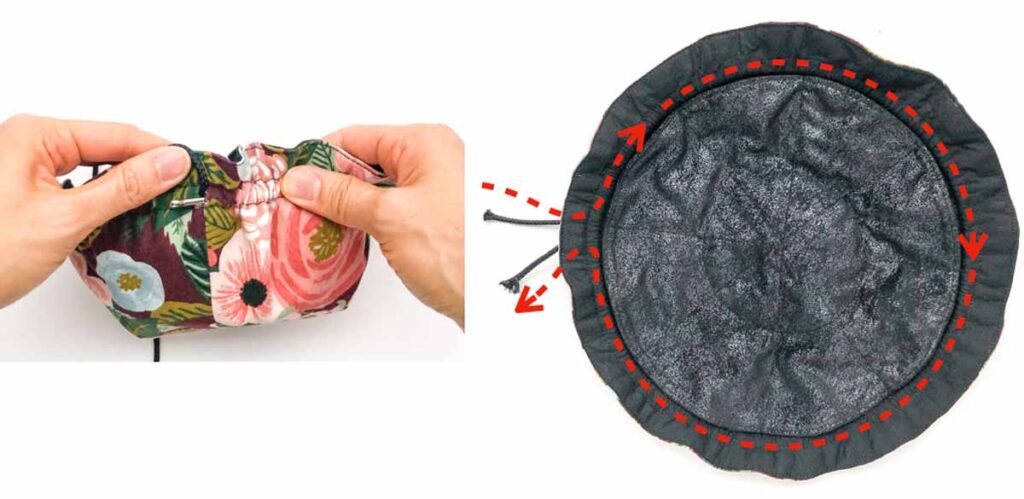
Repeat this process around the entire bag until the bodkin comes out on the same side as where the drawstring entered. Right photo shows how the drawstring enters and exits the bag.
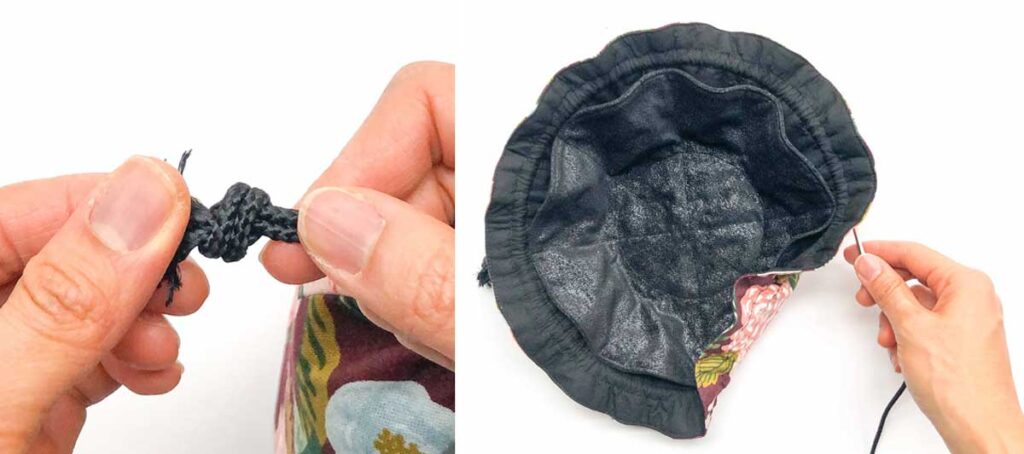
LEFT: Tie a knot at the end of the drawstring
RIGHT: Insert second drawstring from other side seam of bag.
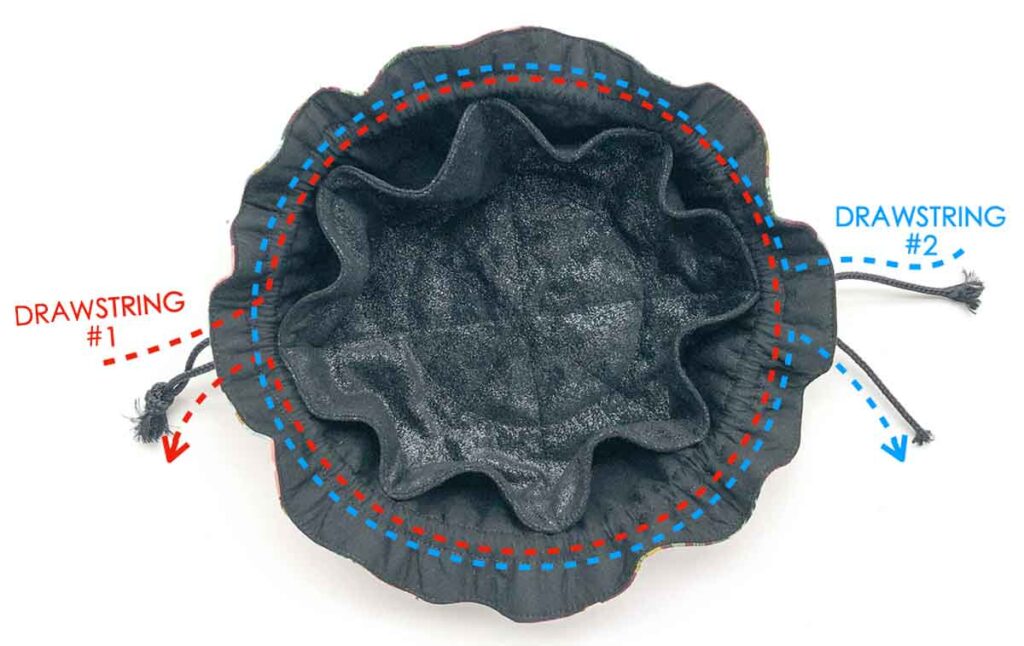
Diagram shows how to thread the two drawstrings.
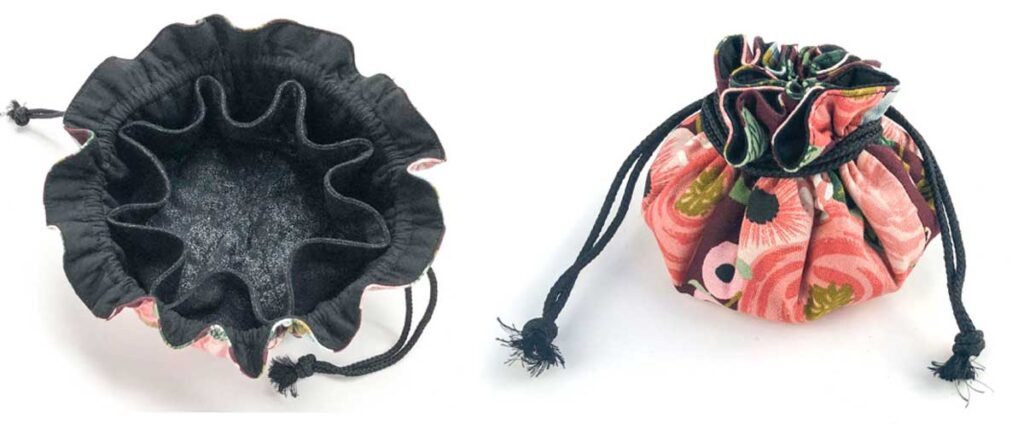
Tie a knot on the other drawstring and you are finished! Congratulations! You just made your very own drawstring jewelry pouch. These are great as Mother’s Day Gifts, birthday gifts, and more!
How to Sew a Drawstring Jewelry Pouch
This 8 pocket drawstring jewelry bag is the perfect place for keeping all all your jewelry safe and organized whether you are traveling or on-the-go.
Materials
- JEWELRY POUCH PATTERN
- EXTERIOR FABRIC - 1/2 Yard
- LINING FABRIC - 1/2 yard
- POCKET FABRIC - 1/3 yard
- DRAWSTRING CORD - something that’s smaller than 1/4”(6mm) in diameter.
Tools
- SEWING MACHINE
- FABRIC SCISSORS
- BODKIN - alternatively, can also use safety pins
- CLEAR RULER
- FABRIC CHALK
- SEWING PINS
- MATCHING THREAD
Instructions
- Print and cut out paper pattern and assemble as needed, following instructions on the pattern.
- Cut out patterns on fabric, and interfacing* if using.
- Fuse interfacing to pocket piece, if using.
- Cut a 1" x 1" square opening in the middle of one of the POCKET PIECE. (See photo tutorial for exact instructions). This opening is so you can turn the pocket piece to right side later on.
- Put the two POCKET PIECES together, pin, and stitch at 1/2”(1.27cm) seam allowance.
- Clip curve and trim seam allowance down to 1/4”(6mm)
- Turn POCKET PIECE to right side through square hole in the middle.
- Give POCKET PIECE a good press, and top stitch at 1/8”(3mm) from edge,
- Cut paper pattern CIRCLE PIECE into two pieces, an OUTER CIRCLE and an INNER CIRCLE. Make sure the inside of the inner circle is also cut out.
- Place the two circles over LINING PIECE. Remove OUTER CIRCLE, making sure not to move the INNER CIRCLE.
- Use chalk to mark small notches on the outside of INNER CIRCLE onto LINING.
- Place POCKET PIECE over LINING PIECE, using chalk lines as a placement guide.
- Use pins to pin POCKET PIECE to LINING. Pin** at the marked lines. The pins will serve as a guide for where to sew the lines to form pockets.
- Sew POCKET PIECE to LINING, making 4 straight stitches across the circular POCKET PIECE. Start sewing on the side where the tip of the pin is pointing away from you. That way, you can easily remove the pin as you sew.***
- Place INNER CIRCLE paper pattern back over POCKET PIECE and trace the circle in the middle. Alternatively, thread baste the circle onto the POCKET PIECE if you are worried about leaving a mark on your fabric. Stitch the marked circle.
- Place EXTERIOR PIECE wrong sides together and sew the straight edge at 1/2” (1.27cm) seam allowance.Make sure to leave a 0.75”(19mm) opening that is 1.5”(2.54cm) from both ends of EXTERIOR PIECE.
- Back stitch at both ends of opening. This opening is for the drawstring cord to go in and out .
- Press open seams
- Match seam allowance of EXTERIOR PIECE to one of the stitched lines (doesn’t matter which one) on the POCKET PIECE.
- Pin EXTERIOR PIECE to LINING PIECE and stitch at 1/2”(1.27cm) seam allowance. Leave an opening about 2.5” (6cm) on the side of the circle. Back stitch on both ends of opening.
- Turn jewelry bag to right side through opening
- Tuck the seam allowance of opening into bag.
- Give the bag a good press
- First,top stitch 1/8” (3mm) from edge of bag.
- Next, make a stitch 1”(2.5cm) from edge.
- Finally, make a stitch right outside of POCKET PIECE.
- The stitch lines in step 2 and 3 create the drawstring channel. The width of the drawstring channel should be about 0.75”(19mm)
- Thread the drawstring through the opening of drawstring channel, one through each opening. Tie a knot on both ends and you are done!
SEWING POCKET PIECE
SEWING POCKET PIECE TO BAG
SEWING EXTERIOR PIECE
SEWING JEWELRY BAG TOGETHER
SEWING DRAWSTRING CHANNEL
Notes
* If you use a light weight cotton for the POCKET PIECE, I recommend adding interfacing to one (or both) pieces for extra stability.
** Place the pins along the sewing line so they point in the same direction. Put another way, place the pins (that are on opposite sides of the circle )so the pins point in the same direction.
***Make sure to back stitch several times at either end of the straight sewing line for extra reinforcement. The ends of the straight stitch creates the pocket opening, which goes through lots of tugs and pulls when you remove and put stuff in. Therefore, it is very important to back stitch.
Recommended Products
As an Amazon Associate and member of other affiliate programs, I earn from qualifying purchases.

More Fun Sewing Projects You Will Love:

This flat bottom, lined drawstring bag stands up on its own. Great for holding dice, trinkets, and more
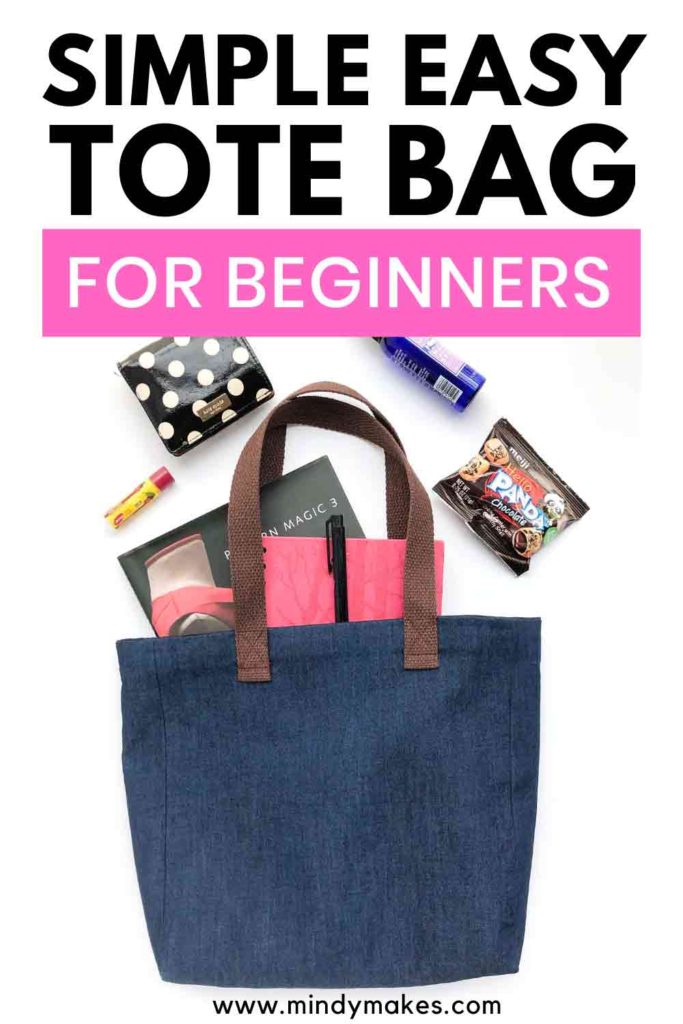
This fully lined tote bag is all you need on the go.
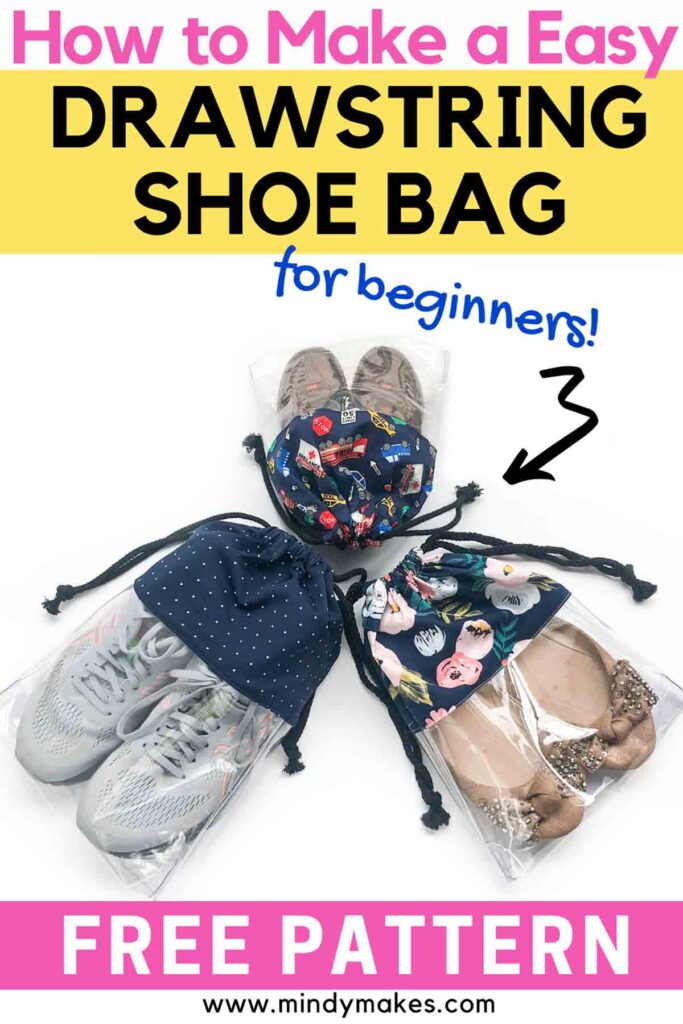
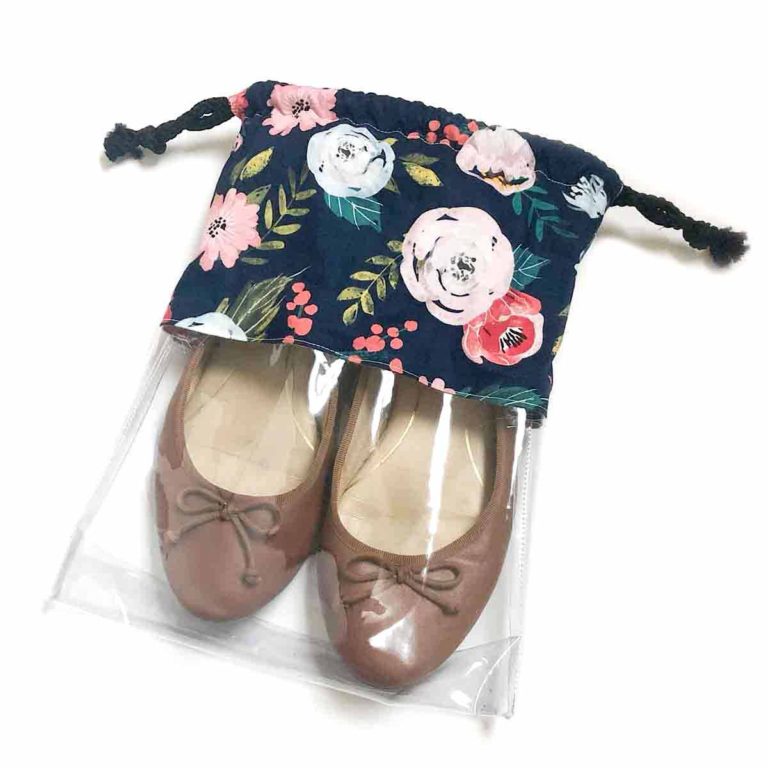
A no fuss drawstring shoe bag with clear vinyl to keep those shoes protected and organized.
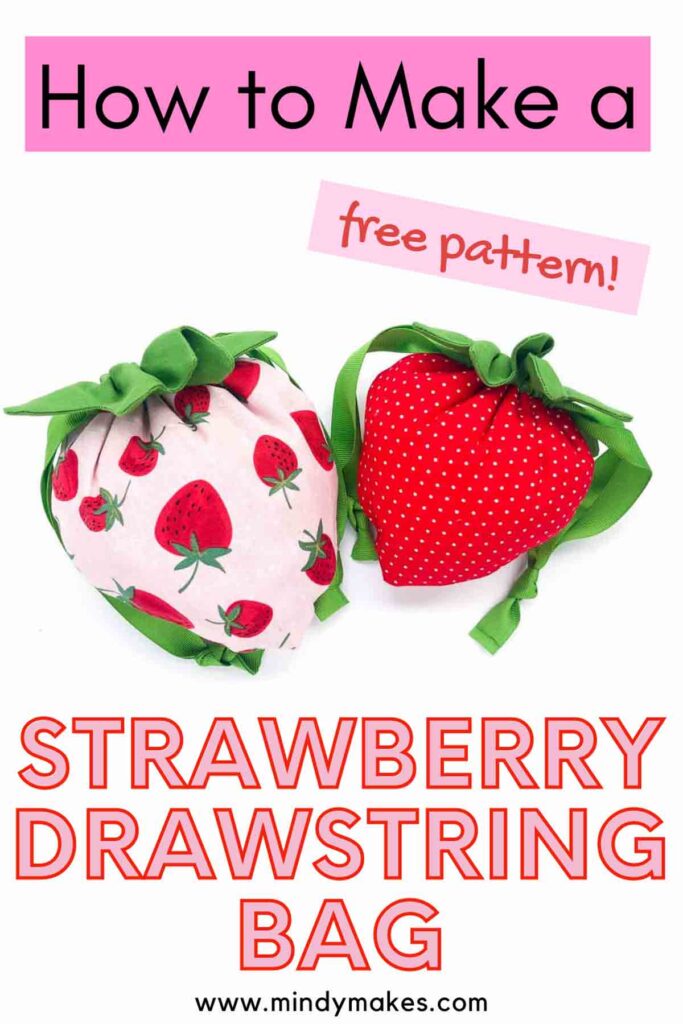
These Strawberry Drawstring bags are perfect for holding treats to gift your friends and family.
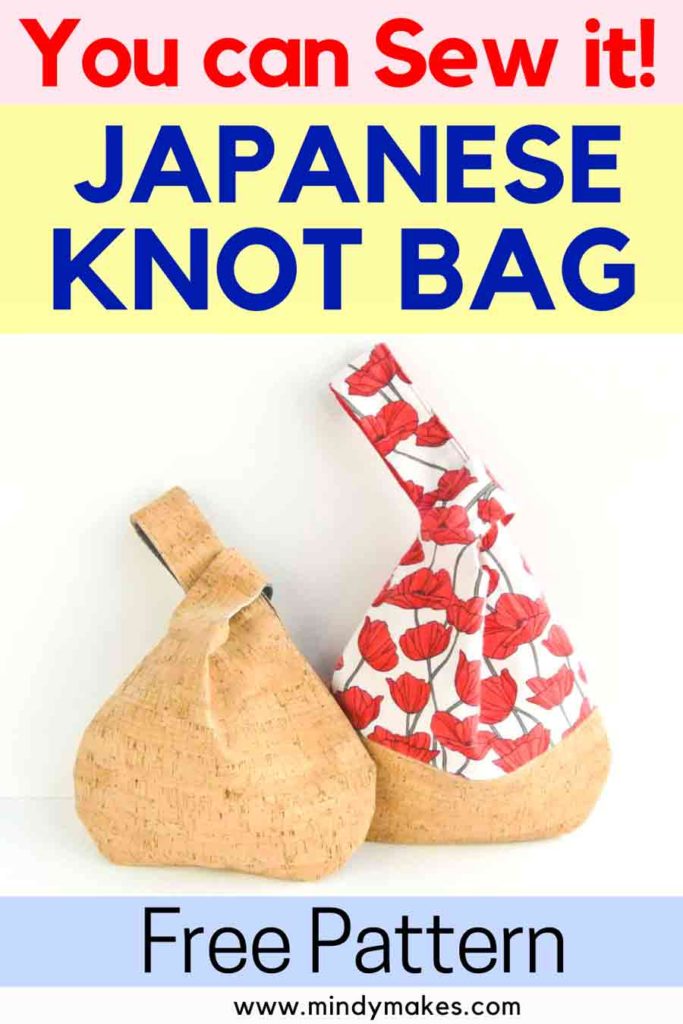
The Japanese knot bag is a super chic accessory.
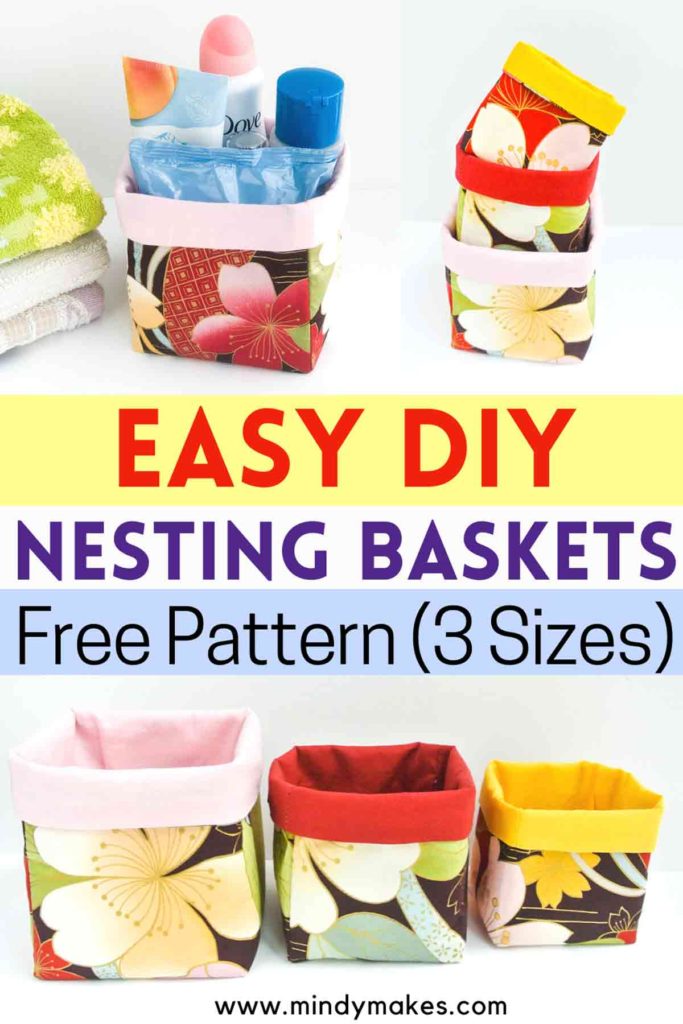
Organize your desk, drawers, and cabinets with these handy fabric bins.


I love the draw-string jewelry pouch.
Barbara Quinn/[email protected]
Thank you so much Barbara!
Just made several for gifts, they were a big hit!
What a clever idea for a jewelry pouch! Thanks for the tutorial.